All Quarantine Zone symptoms and how to identify the infected
These are the symptoms in Quarantine Zone you need to look for, and how to add new symptoms using the Laboratory
Weekly digests, tales from the communities you love, and more
You are now subscribed
Your newsletter sign-up was successful
Want to add more newsletters?
If you can identify all of the Quarantine Zone symptoms then you'll have the best chance of keeping your camp safe, by spotting the tell-tale signs of infection and (to the best of your ability) only providing shelter to survivors who don't carry the deadly virus. This is no easy task, as more signs are added on a daily basis along with fresh tools to help you keep up with the disease's mutations. To get the upper hand against the infected, here are all of the symptoms in Quarantine Zone and how to research new ones using the Laboratory.
Did you figure out who the Quarantine Zone skeleton guy was, or discover all of the Quarantine Zone Ask Your Mom poems locations around the camp?
What symptoms to look for in Quarantine Zone
The list of symptoms you can use to diagnose the incoming survivors will grow over time, with some added as you progress and unlock fresh tools, while for others you'll have to send a survivor exhibiting that symptom to the Laboratory to officially identify and add it to the system. Below is a full list of Quarantine Zone symptoms for you to cross-reference with:
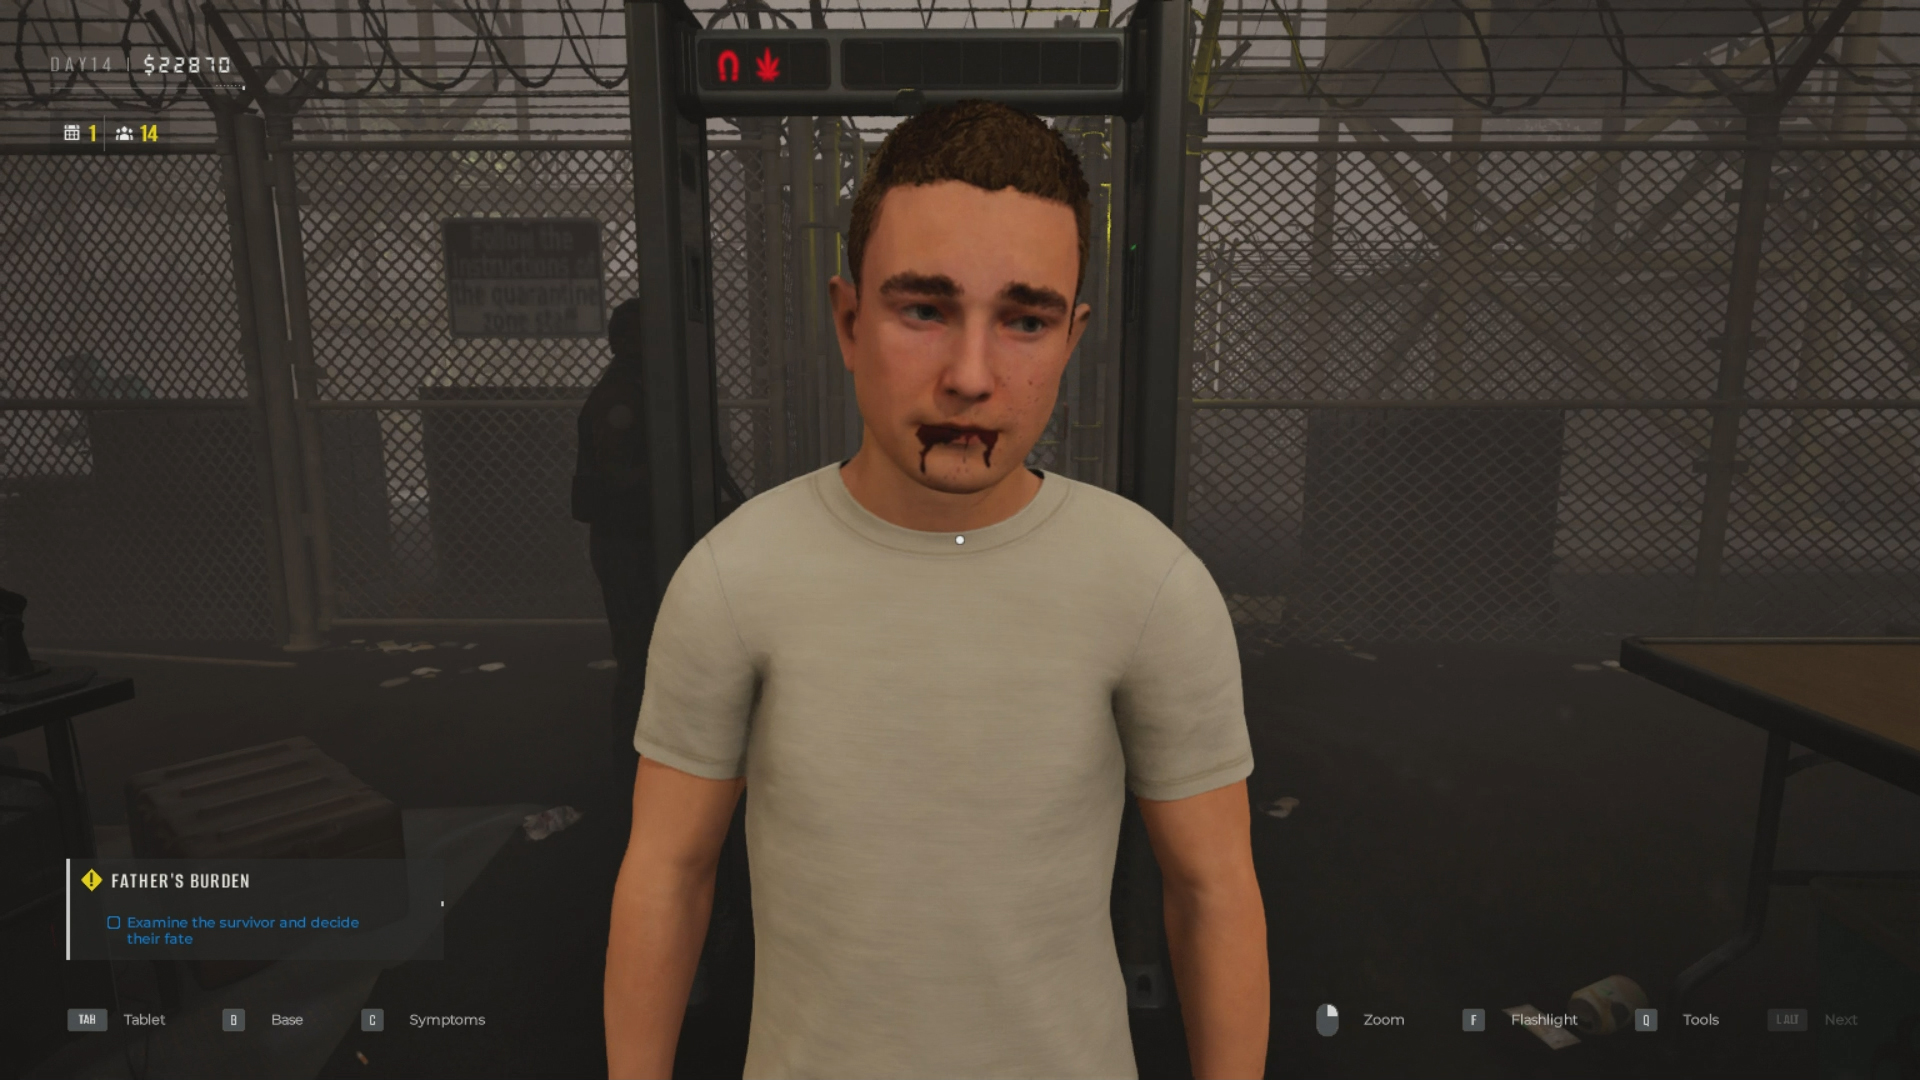
Appearance - Face (Visual)
- Nosebleed (Safe) - blood coming from the nostrils
- Aggression (Quarantine) - looks angry, says rude things
- Mouth Bleeding (Quarantine) - blood running down from lower lip
- Eye Pus (Infected) - small amount of green pus in the corner of an eye [Laboratory unlock]
- Nose Pus (Infected) - some green pus coming from a nostril [Laboratory unlock]
NB a slack jaw is not an official symptom but is usually indicative that something else is wrong
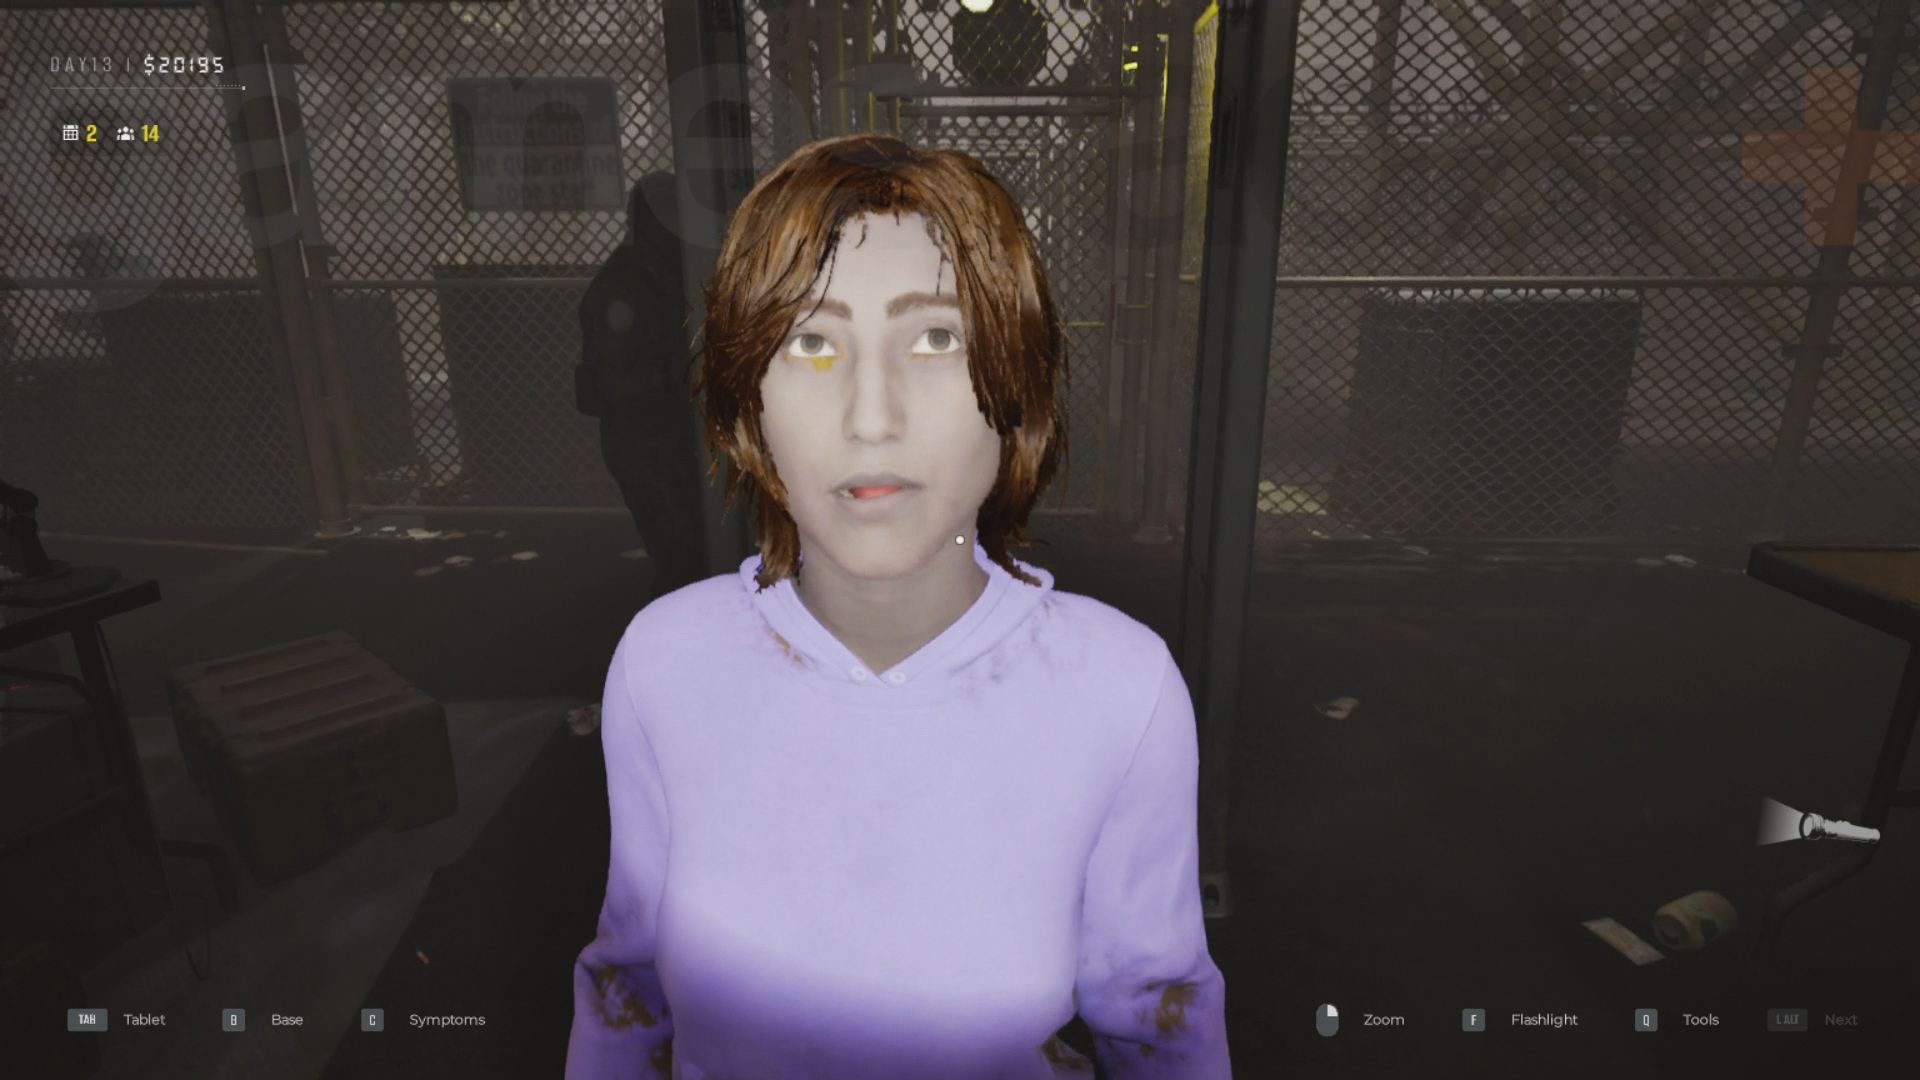
Appearance - Eyes (Visual, later Matioscope)
- Yellow Eyes (Safe) - whites of eyes are yellow, Matioscope shows inner eye is yellow
- Conjunctivitis (Quarantine) - edges of eyes are red, Matioscope shows no changes internally
- Red Eyes (Infected) - whites of eyes are bright red, Matioscope shows inner eye is red
Appearance - Skin Color (Visual, later Scanner)
- Red Skin (Safe) - face or cheeks are reddened or blush
- Pale Skin (Quarantine) - entire skin appears gray and washed out
- Green Skin (Infected) - entire skin appears green or yellow
NB you can compare a survivor's current appearance with their ID photo for changes
Appearance - Skin Markings (Visual, later Scanner)
- Bruises (Safe) - areas of green/blue/yellow blotches
- Freckles (Safe) - small specks covering the cheeks and nose
- Herpes (Safe) - small darkened red/brown blotches with no spots [Laboratory unlock]
- Red Bruise (Quarantine) - deep red blotches
- Skin Cuts (Quarantine) - lightly marked area with scratch marks on top
- Skin Rash (Quarantine) - reddened area covered in spots [Laboratory unlock]
- Bite Mark (Infected) - dark red human teeth marks
- Necrosis (Infected) - black splotches
Thermopulsometer
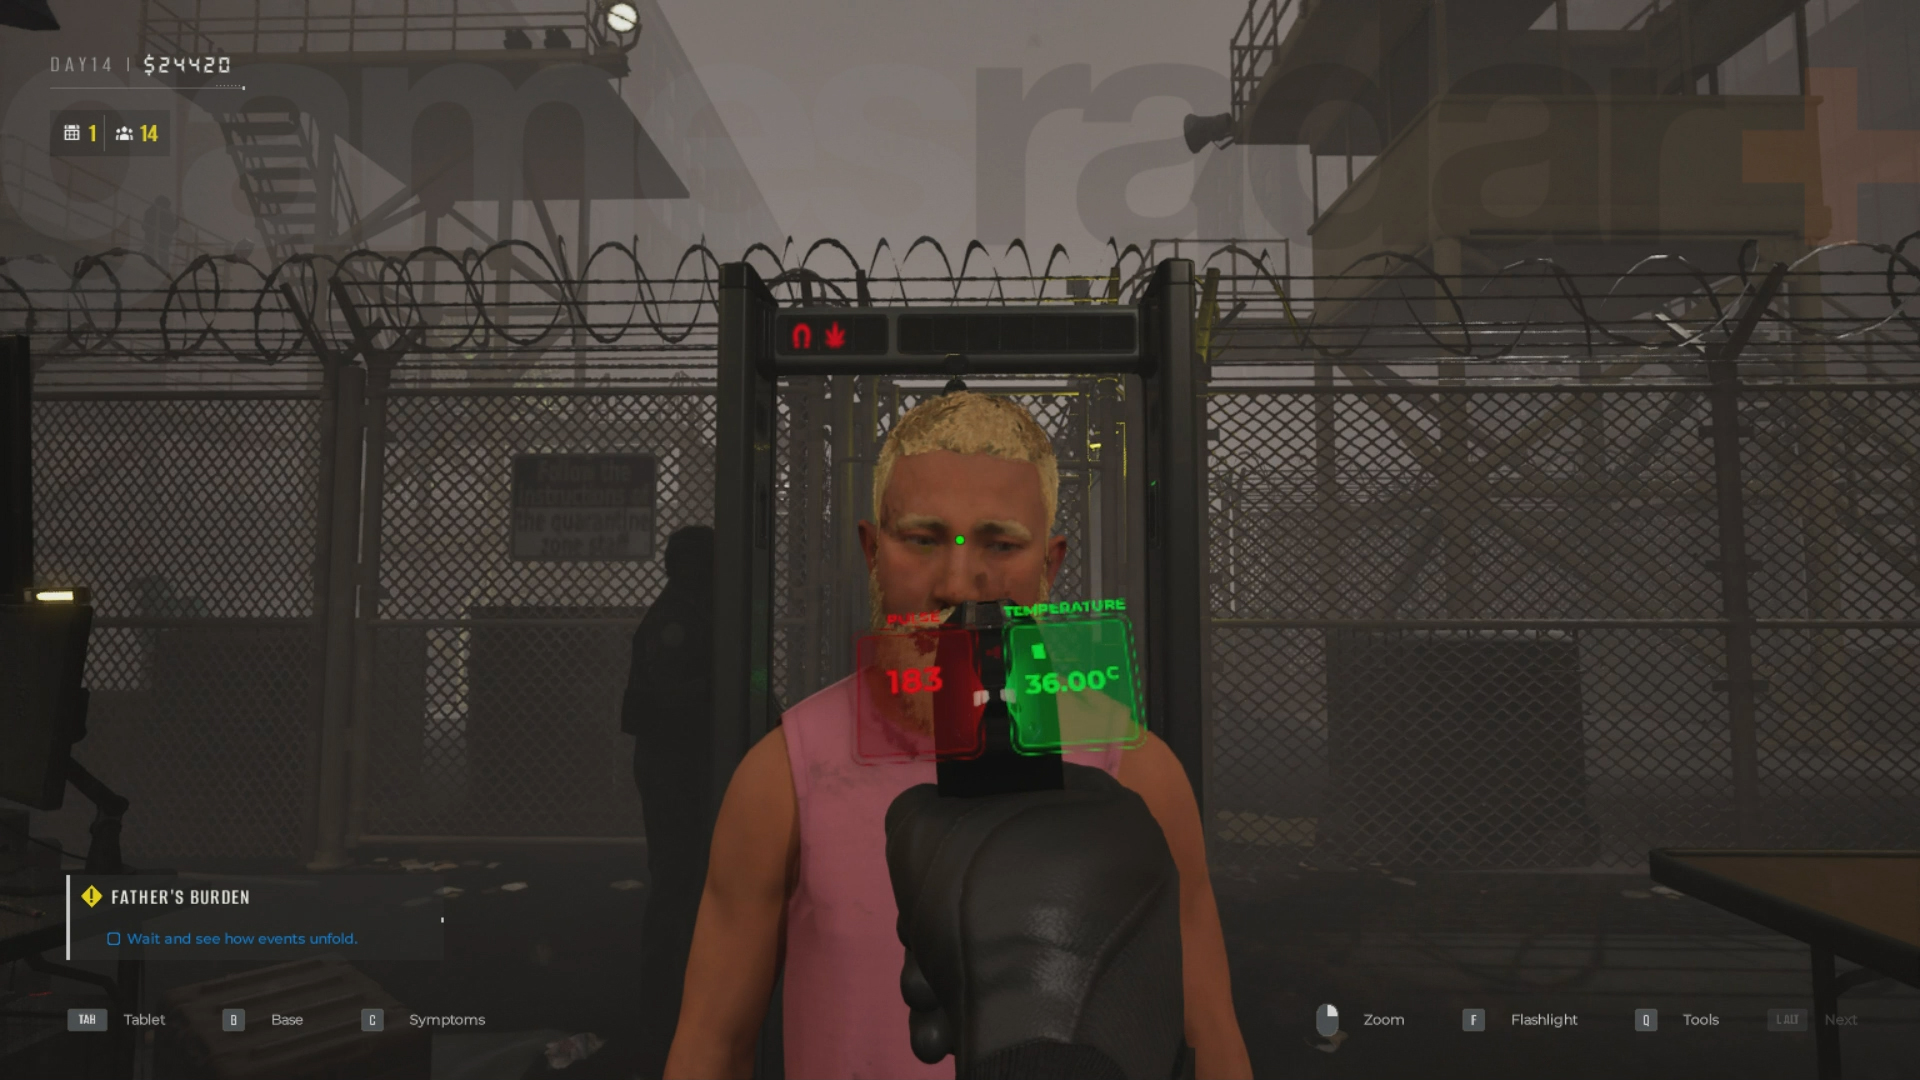
- Elevated Pulse (Quarantine) - pulse reads between 120-180 BPM
- Elevated Temp (Quarantine) - temperature reads between 37.0°C-41.0°C
- Extreme Pulse (Infected) - pulse reads over 180 BPM
- High Temp (Infected) - temperature reads above 41.0°C
NB give temperature time to increase and settle at a final reading
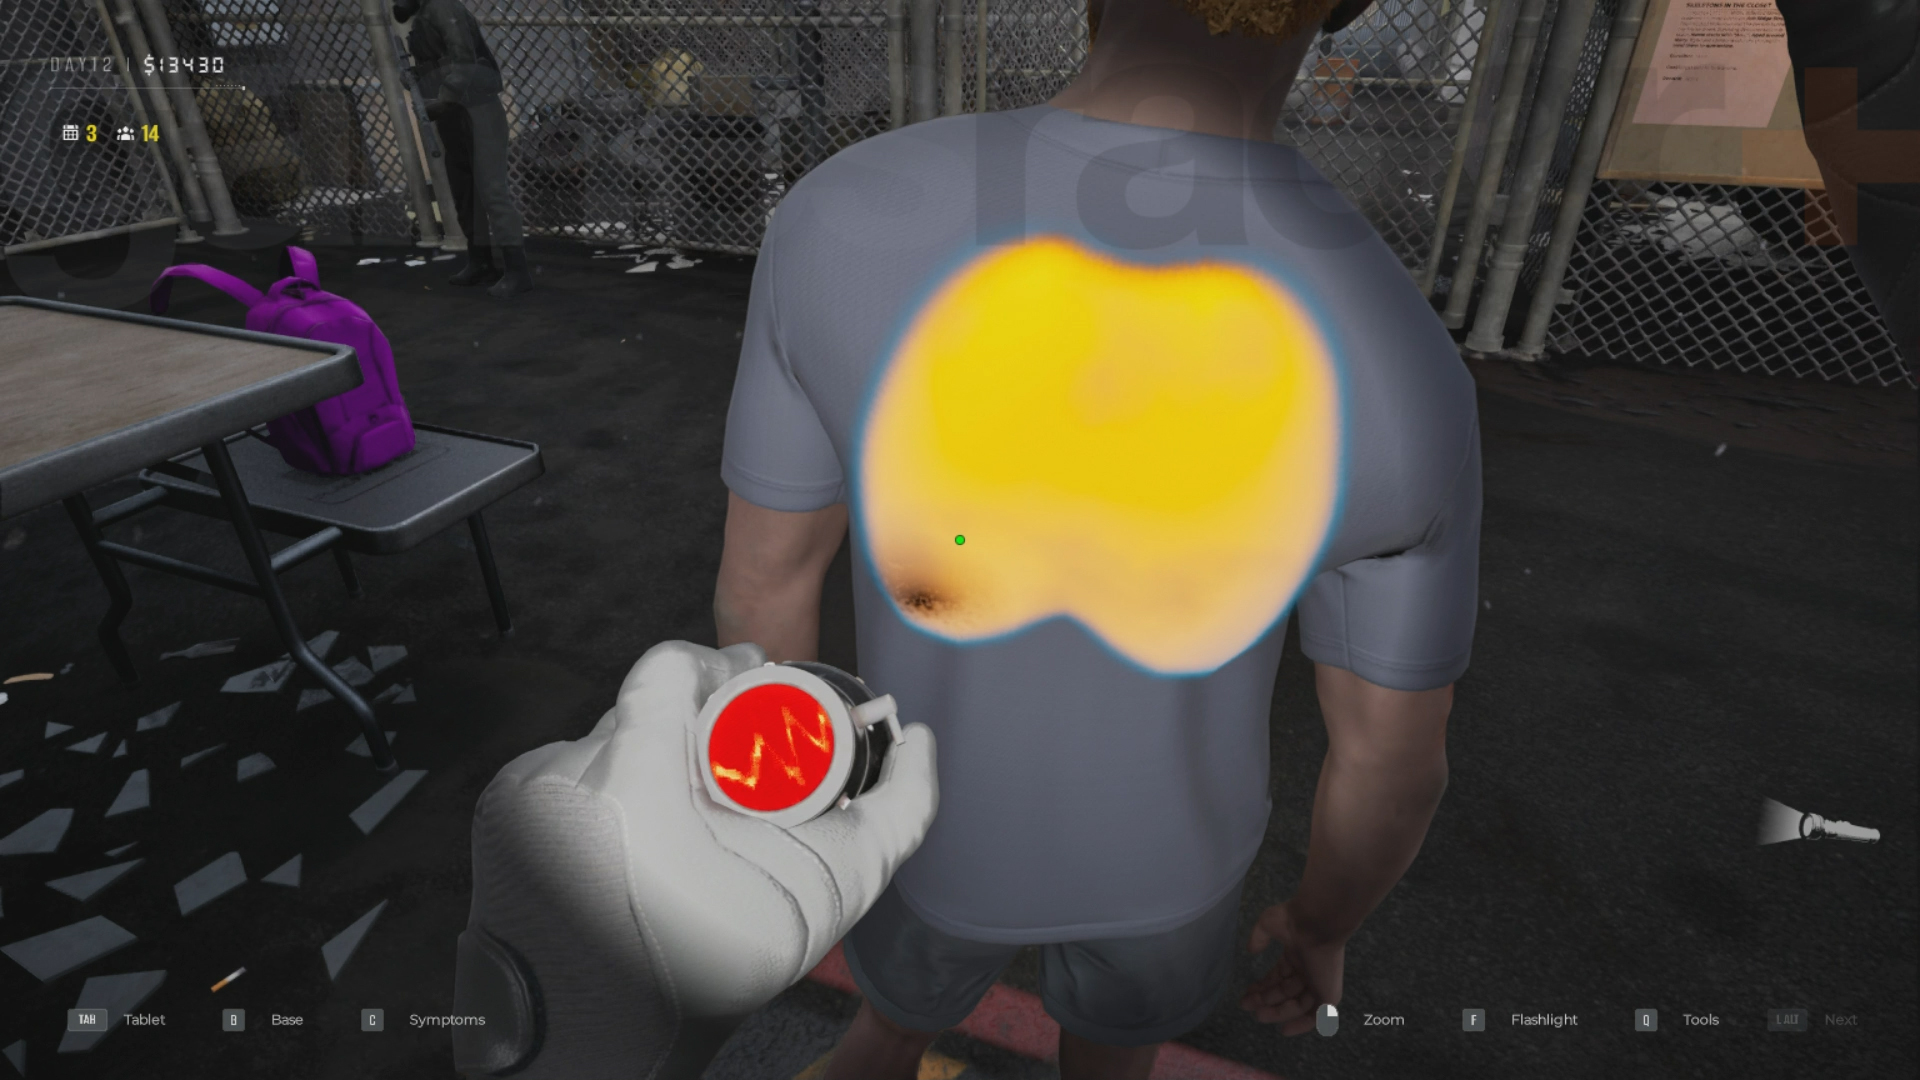
Stethoscope
- Sickly Breath (Safe) - only a light wheeze when breathing
- Nonspecific Respiration (Quarantine) - heavy wheeze when breathing with a little gurgle [Laboratory unlock]
- Infected Breath (Infected) - a deep zombie-like growl [Laboratory unlock]
NB you only need to focus on black spots on the lungs, and the Stethoscope upgrade with a color-coded display greatly simplifies this diagnosis
Objects
- Baggage (Safe) - survivor has a bag with them
- Weapon (Safe) - you found and removed any Quarantine Zone contraband
- Internal Contraband (Safe) - you found internal contraband using the X-Ray tool, tag so Charlie can remove
- Contaminated Baggage (Infected) - you found any zombie parts, don't confiscate them and send the survivor to Liquidation
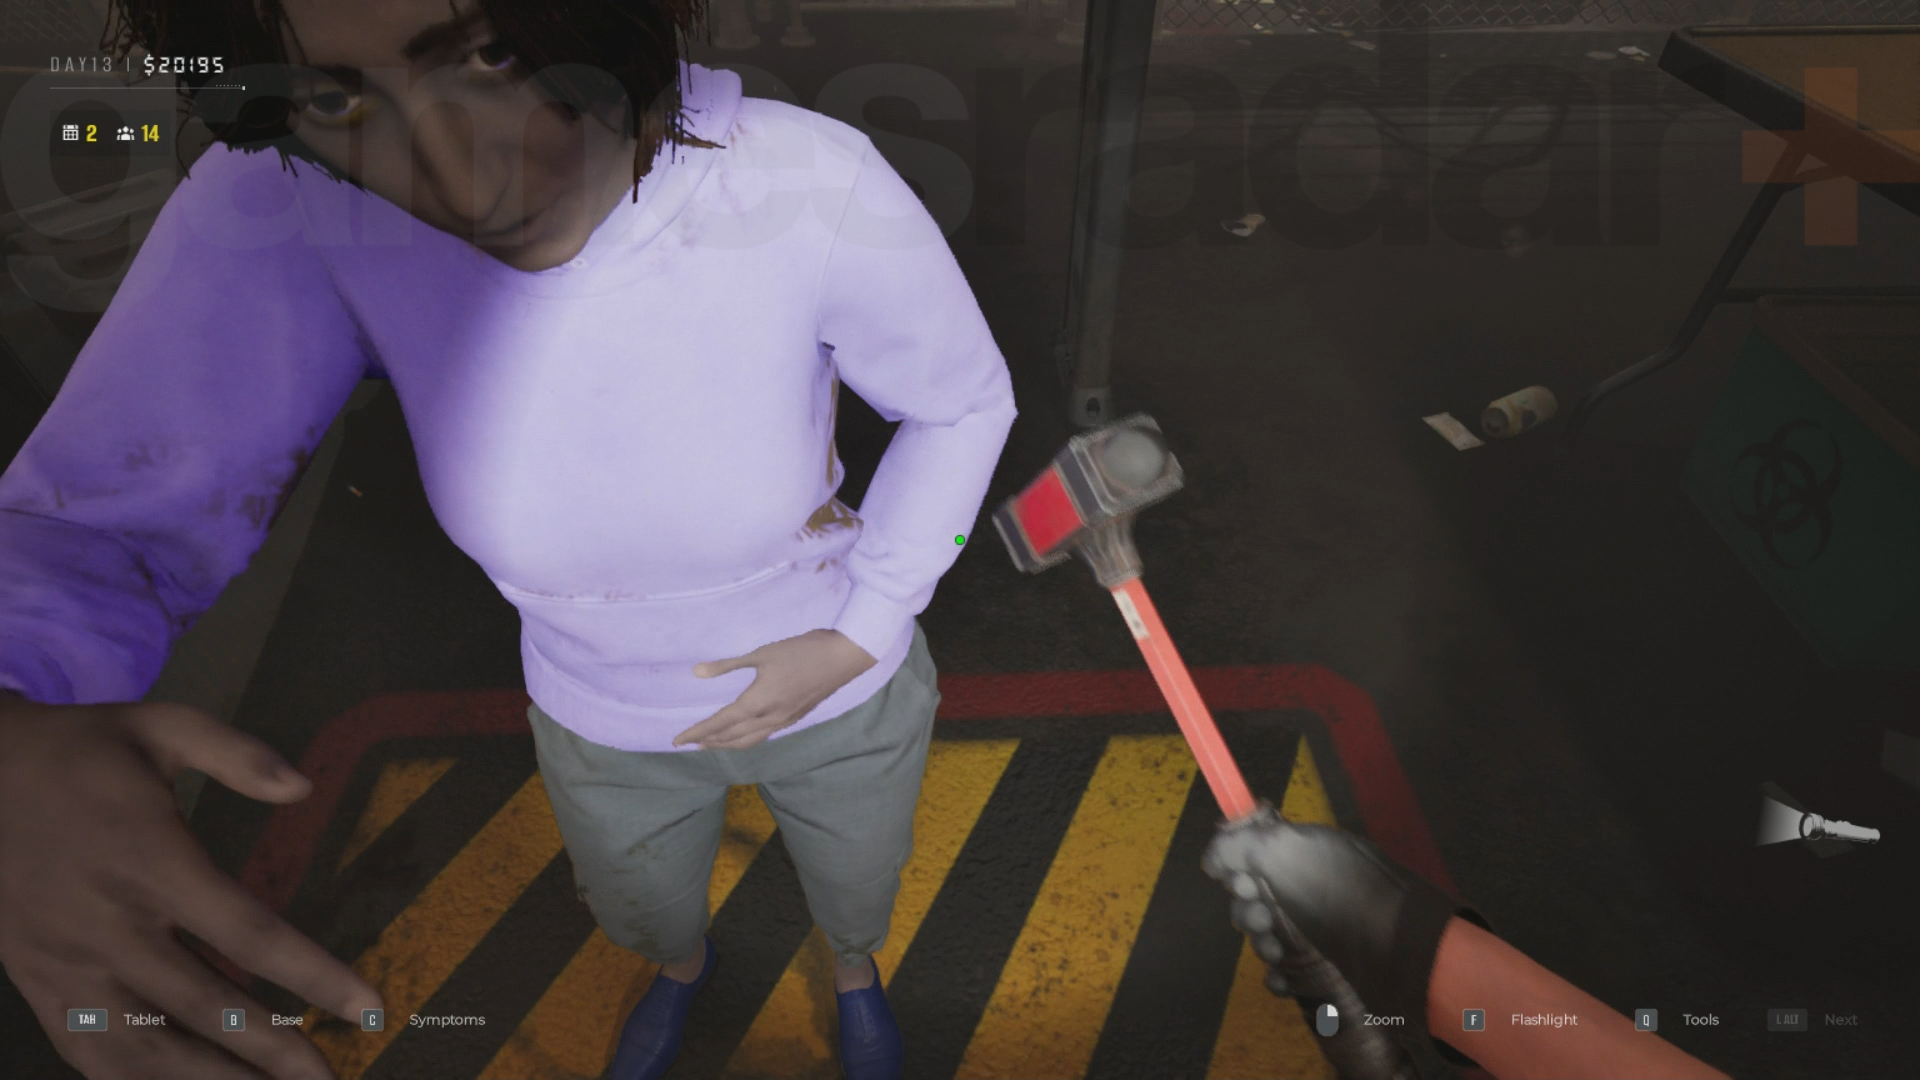
Hammer
- Absent Reflex (Safe) - limb barely moves when hit, doesn't swing back
- Hyperaggressive Reflex (Quarantine) - survivor strikes you in response to being hit
- Crossed Reflex (Infected) - opposite limb reacts to hit
Matioscope
- Adenoviral Body (Safe) - a green/orange ball with long knobs that sometimes pulses
- Ocular Helminth (Safe) - a small see-through worm wiggling in a straight line
- Ocular Spicular Bacterium (Safe) - a pink/orange tube with protruding branches that sometimes twirls
- Thread Cluster (Safe) - a bunch of white threads that stay still
- Chromatic Staphylococcus (Quarantine) - a dash of green/yellow gloop that moves in waves
- Phage Complex (Quarantine) - a cylinder with small legs floating in a straight line
- Corneal Infiltrate (Infected) - a dark green ball with small brown knobs
- Necrotic Plume (Infected) - a dark dash of black that's often in the shape of a diamond
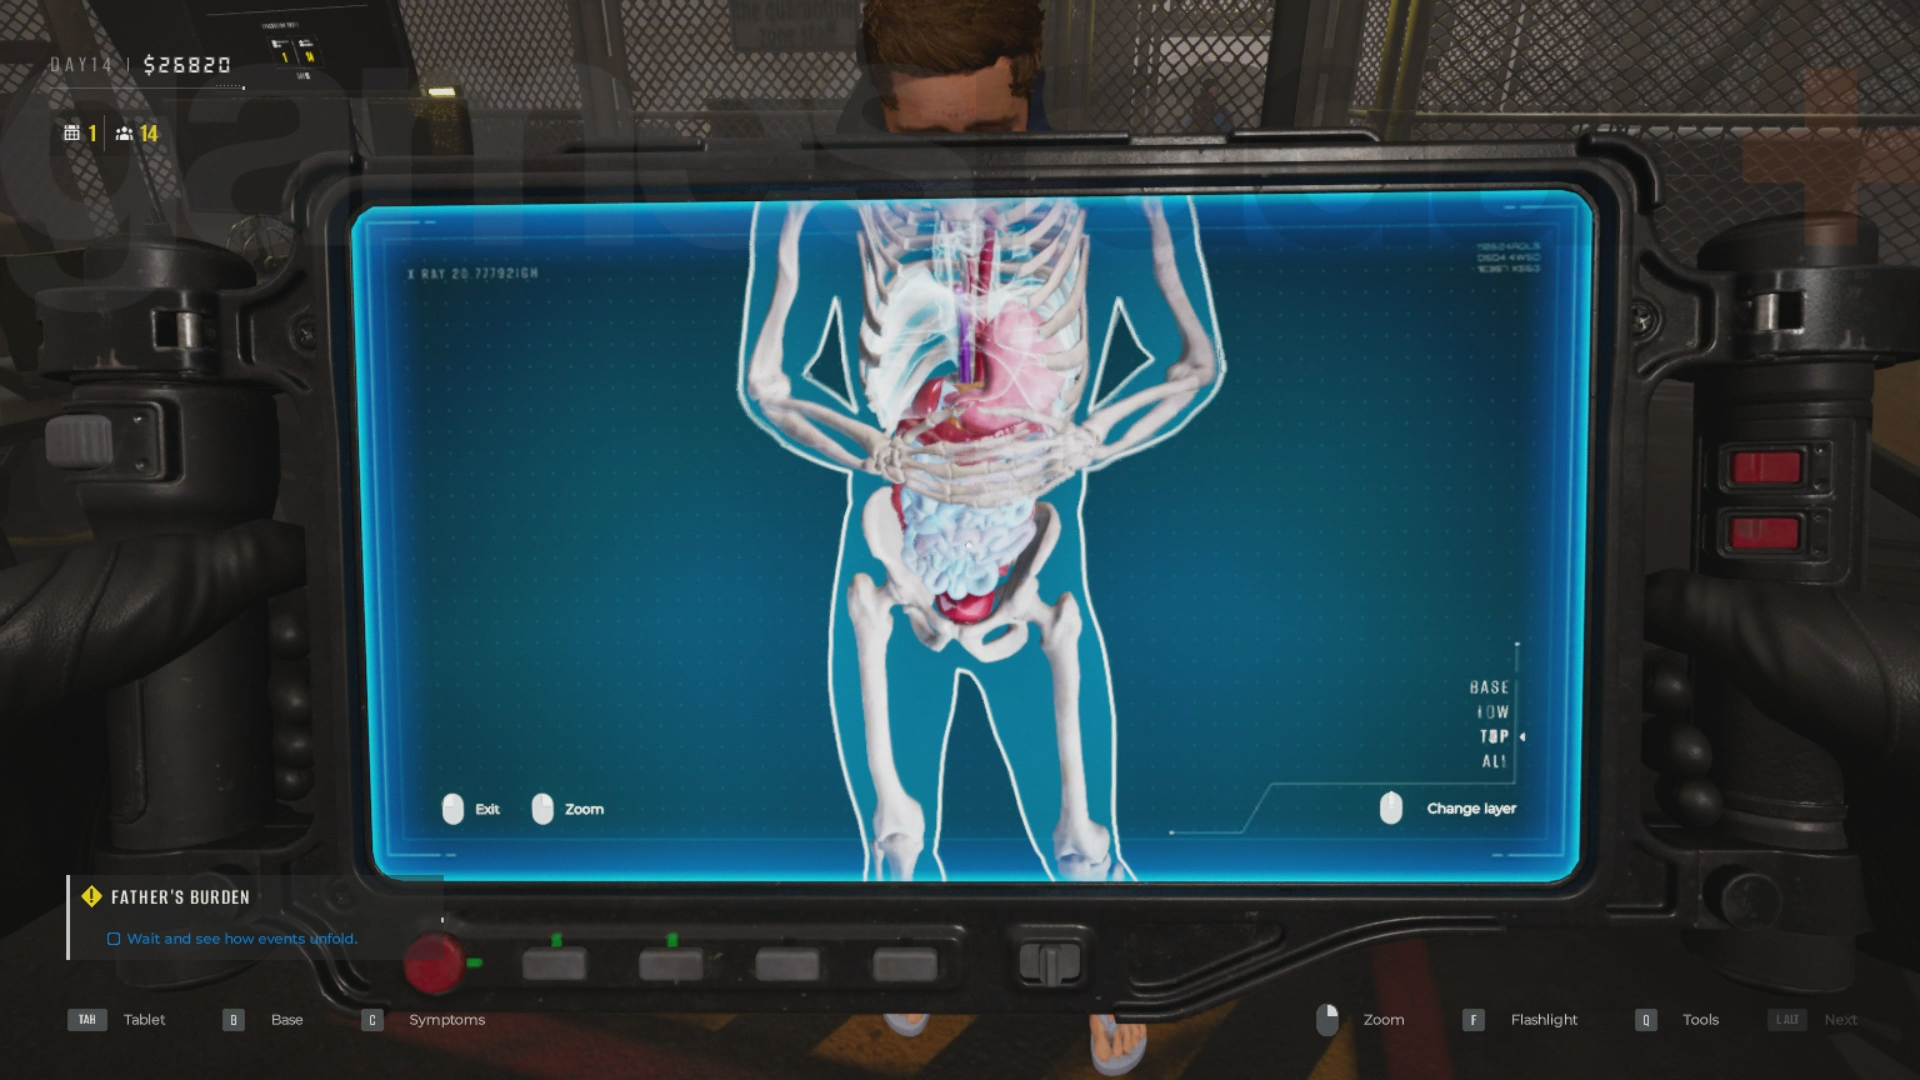
X-Ray
- Fatty Hepatosis (Safe) - Organ is covered in yellow blotches [Laboratory unlock]
- Internal Bleeding (Safe) - Organ has red patches and is covered in sores
- Color Differences (Quarantine) - Organ is purple or pink/purple [Laboratory unlock]
- Moldy Organ (Infected) - Organ is light blue [Laboratory unlock]
- Organ Necrosis (Infected) - Organ is covered in black blotches [Laboratory unlock]
UV
- UV Vapor (Safe) - a green haze appears around parts of the survivor, possibly with flies buzzing around
- UV Contraband (Infected) - a green glowing spot appears on any backpack item, do not confiscate
- UV Symptom (Infected) - a infected symptom that can't be seen naturally but glows green under UV, such as a bite or pus
How to add new symptoms in Quarantine Zone with the Laboratory
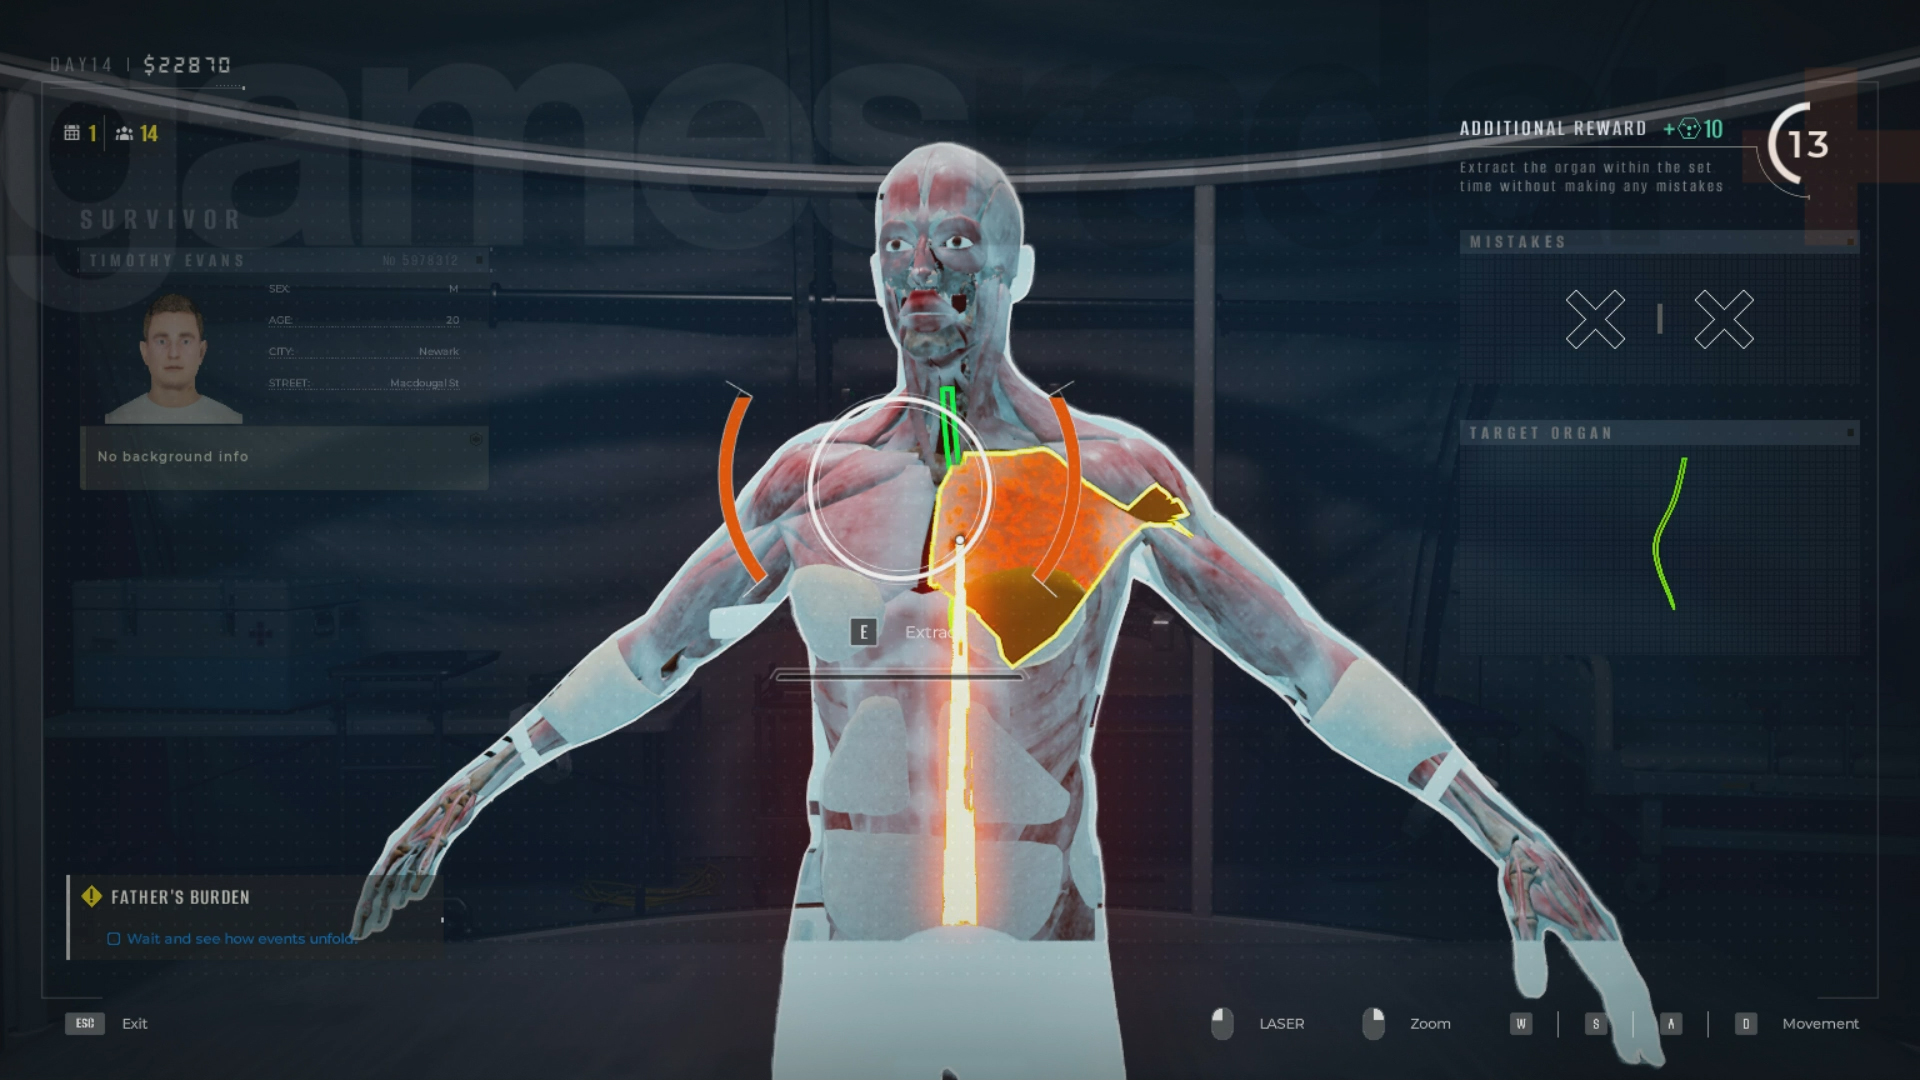
If a survivor presents themselves for inspection at the checkpoint and they are exhibiting one of the symptoms listed above that you haven't identified yet, you can send them to the Laboratory to study it. Head to the lab yourself and interact with the computer on the desk to start the procedure, which involves moving a laser around to burn off redundant organs and reach the one you need to analyse.
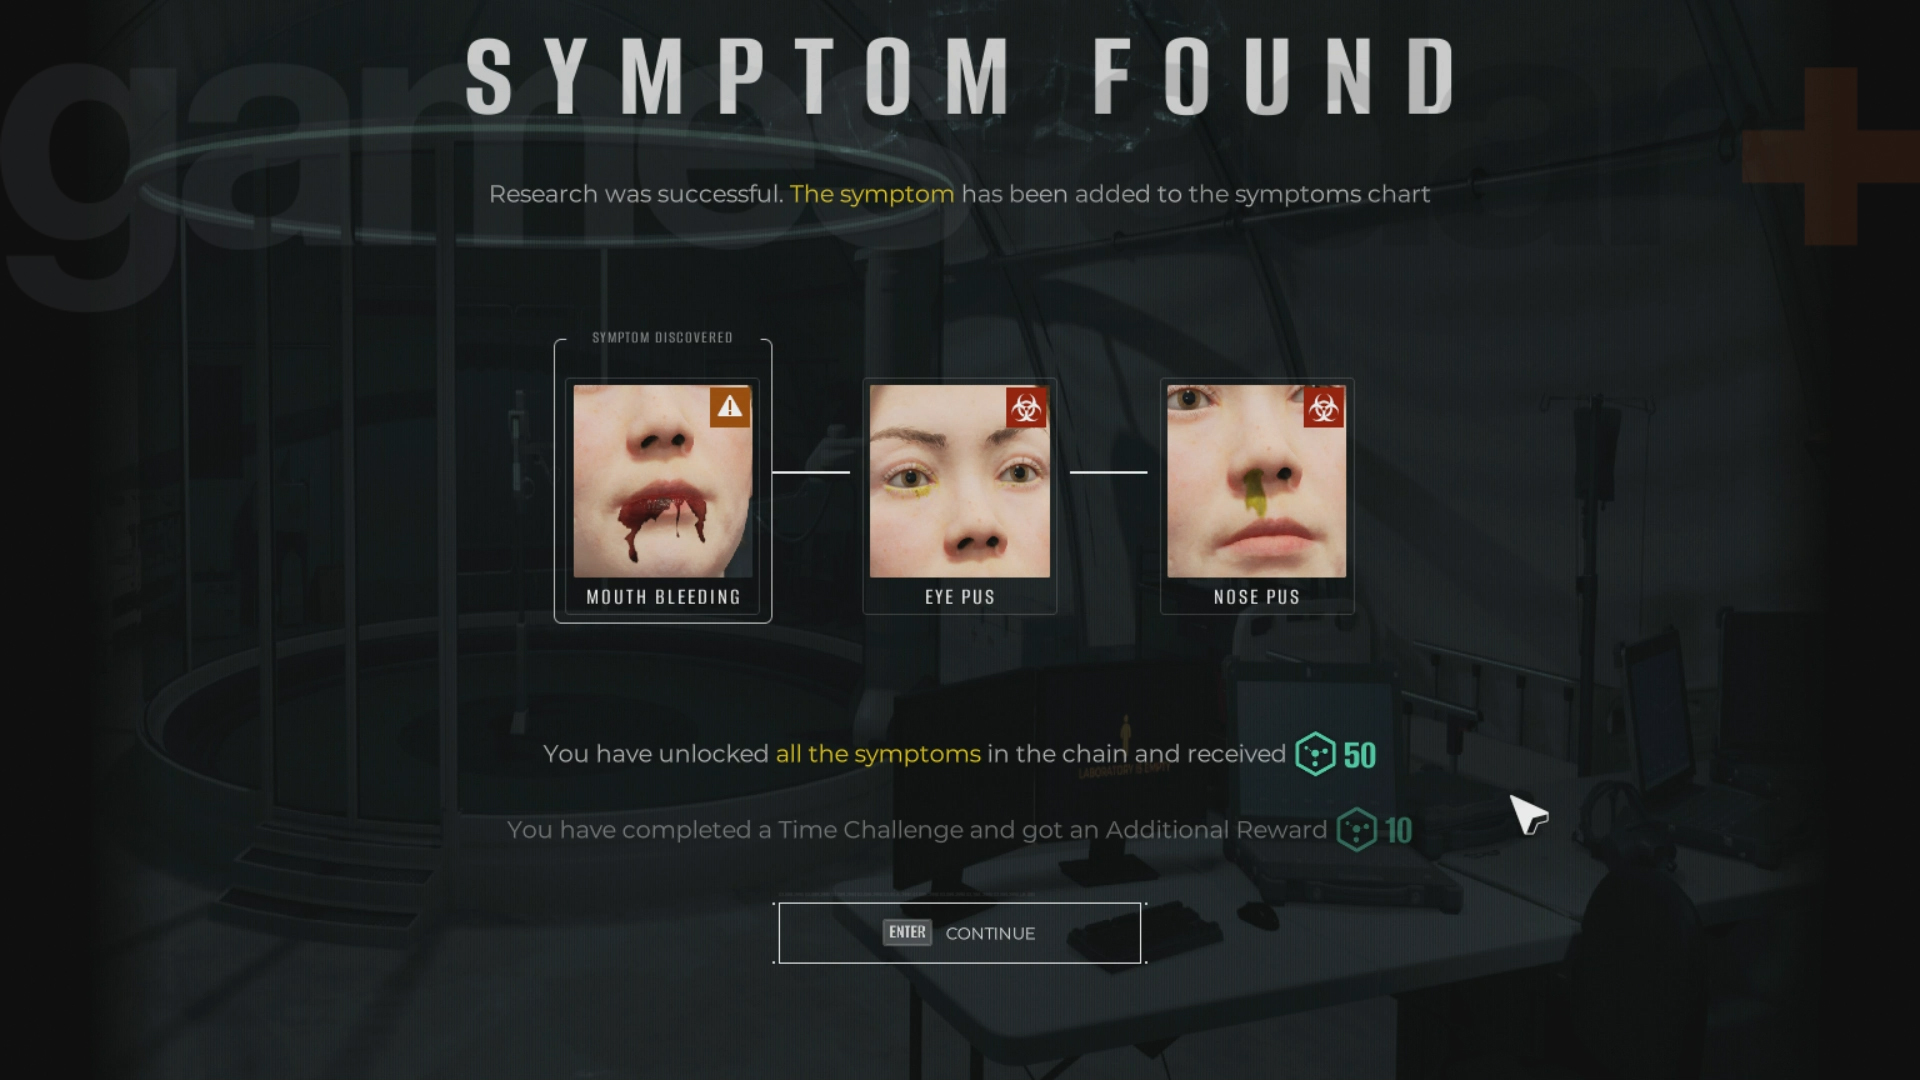
Make sure you only destroy organs marked in orange and not red, otherwise you risk failing the procedure, and if you are able to target the green organ then hold E to extract it before the time limit runs out you'll receive bonus science points. Turn around to grab the organ and drop it in the extractor, then take the blood sample and deposit it into the analyzer. If a new symptom was present in the survivor, it will be added to your list for future use.
© GamesRadar+. Not to be reproduced without permission.
Weekly digests, tales from the communities you love, and more

Iain originally joined Future in 2012 to write guides for CVG, PSM3, and Xbox World, before moving on to join GamesRadar in 2013 as Guides Editor. His words have also appeared in OPM, OXM, PC Gamer, GamesMaster, and SFX. He is better known to many as ‘Mr Trophy’, due to his slightly unhealthy obsession with amassing intangible PlayStation silverware, and he now has over 1,000 Platinum pots weighing down the shelves of his virtual award cabinet. He does not care for Xbox Achievements.
You must confirm your public display name before commenting
Please logout and then login again, you will then be prompted to enter your display name.


