FIFA 20 formations: the 7 best set-ups for your Ultimate Team
Rack up the victories both online and off with our FIFA 20 formations guide
It's endgame time in Ultimate Team, making FIFA 20 formations a critical factor in Division Rivals or weekend league wins. Most of the FIFA 20 community now has a meta team, so you need to find subtle ways to score an advantage over human opponents – and the tactical set-ups below enable you to do just that. Career mode and offline-only players are catered for too. Get your Matalan coat on, take a dugout seat, and enjoy your FIFA 20 formations guide.
4-2-3-1 narrow
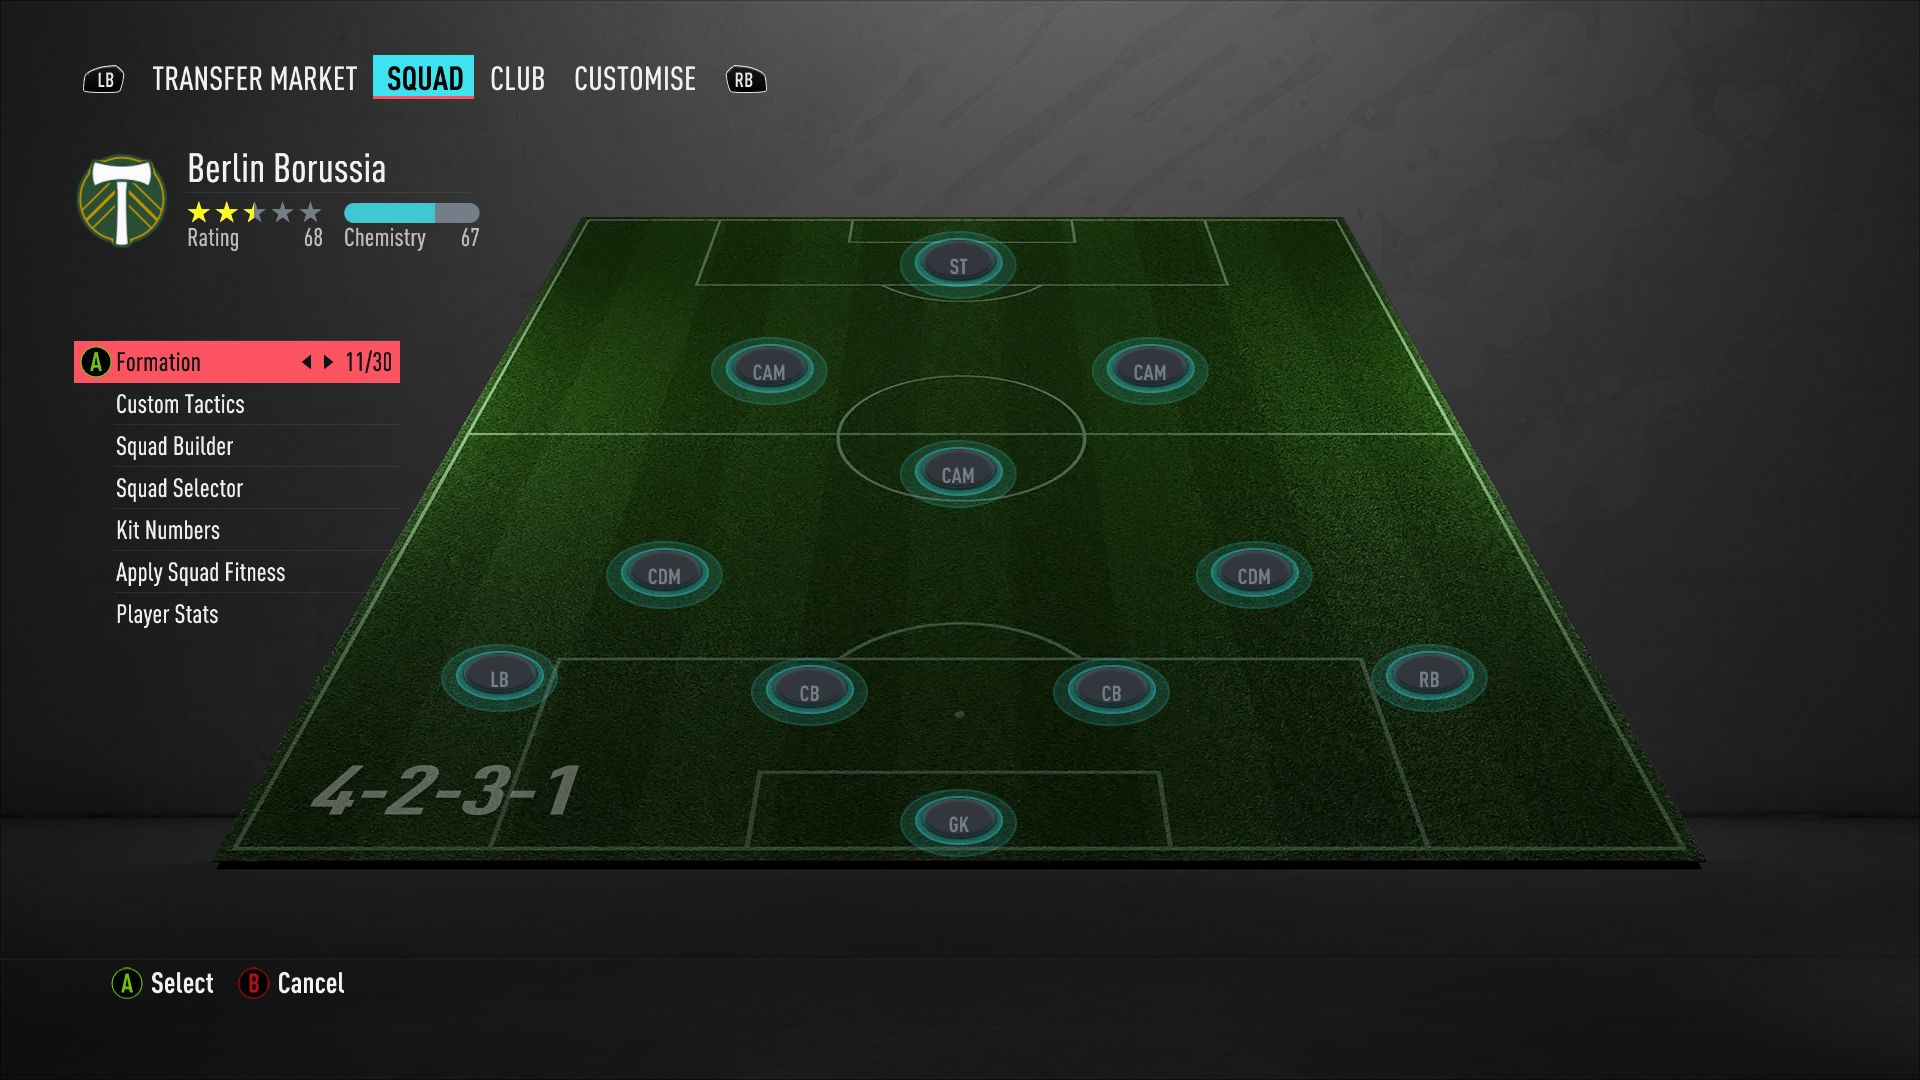
The perennial FIFA favorite is more useful than ever this year: defending in FIFA 20 is difficult, so having two CDMs to protect your back line is invaluable. Generally, you want to tell them to ‘Cover centre’ in player instructions, and tell your full backs to ‘Stay back while attacking’ to take care of the wings. If, however, you want your left and right backs to join the attack, tell your CDMs to cover the wings, and pick a pair of mobile midfielders.
The 4-2-3-1 Wide variant arguably makes better use of FIFA 20’s emphasis on pace down the flanks, but we like how the two attacking midfielders find space in 4-2-3-1 Narrow. They sometimes drift out wide, but they also find gaps in the channel between the CBs and full backs, as well as dropping back into the space between midfield and defence. Pick fast, agile players here, and a clinical centre forward who can finish the chances they create.
4-1-2-1-2 Narrow (but also try Wide)
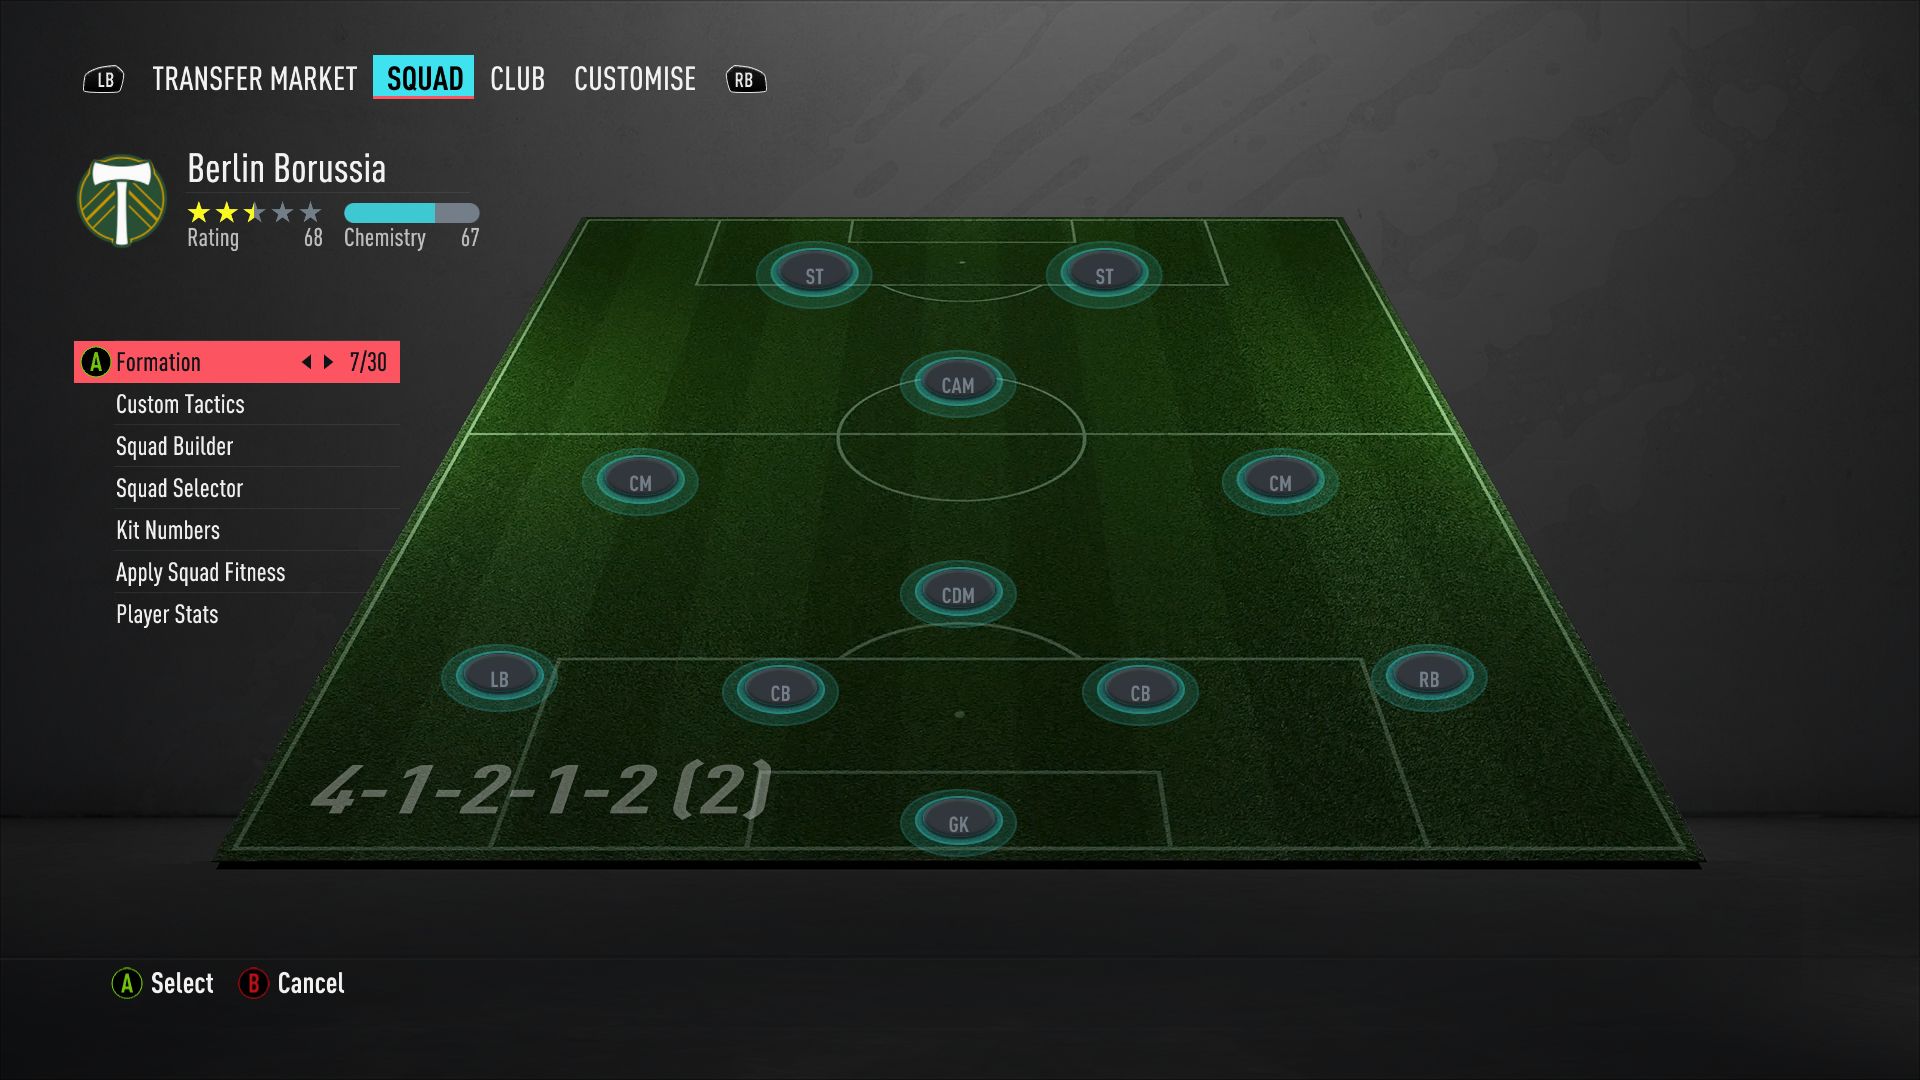
Another old FIFA favorite is still strong in FIFA 20. With four midfielders in the central third of the pitch, this is a good way of controlling the game and dominating possession. Make sure those two wider central midfielders are strong defensively and have decent work rate, because they sometimes need to drift wide to pick up wingers.
Going forward, the key is the CAM: you want a creative player with high passing stats so they can play in your strikers. We’d suggest having at least one pacey forward and telling them to ‘Get in behind’ in player instructions. Look for through balls along the ground or over the top.
4-4-2
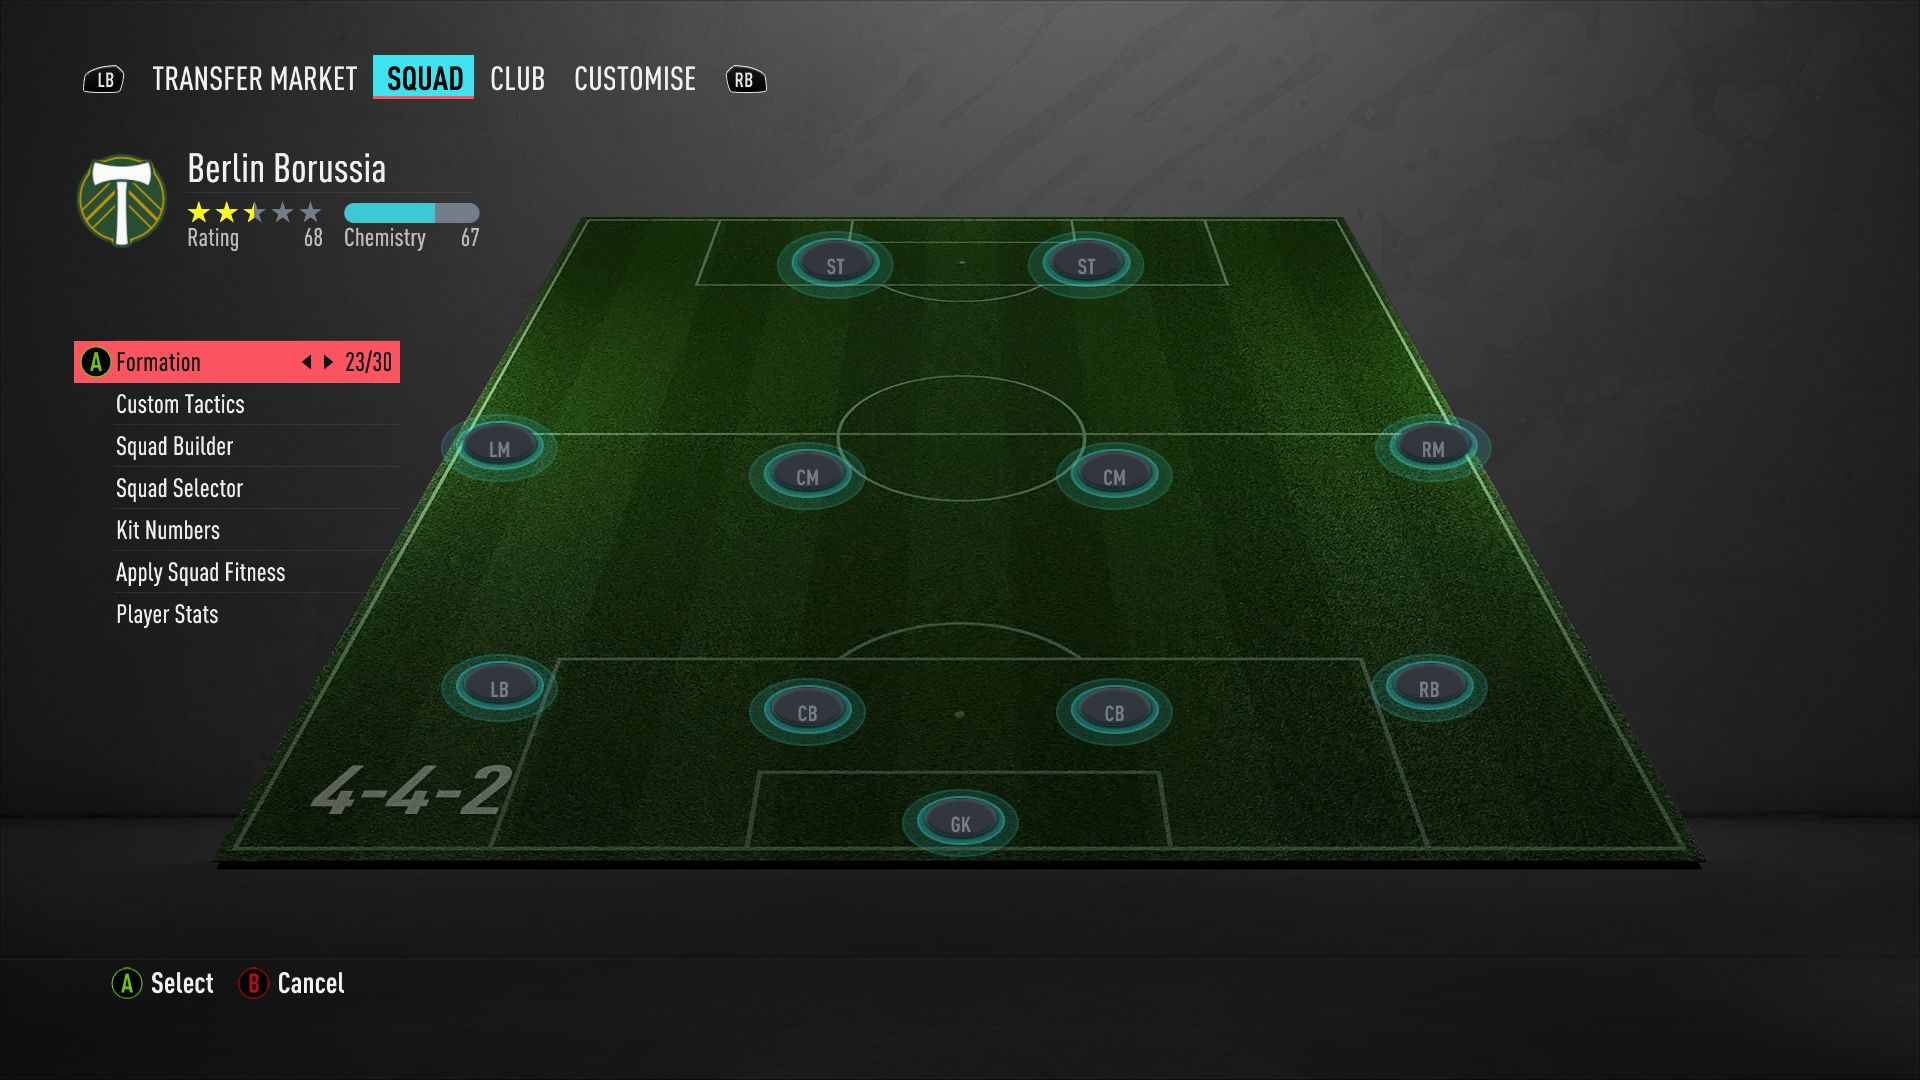
4-4-2 is back, baby! Football’s old faithful is a viable option in FIFA 20, with those four midfielders giving you options both through the middle and down the wings. It works best if you’ve got midfielders who give their all on both ends: ideally, you want true box-to-box CMs who cover your CBs when needed, and then dash forward as a central threat. If you have CMs that are only strong at one end of the pitch, look elsewhere.
Setting one striker to a ‘False 9’ is not a bad option if you need the extra link up play, but ‘Get in behind’ is again effective here. With four midfielders potentially playing through balls, a pacey striker has plenty to feed on.
4-2-2-2
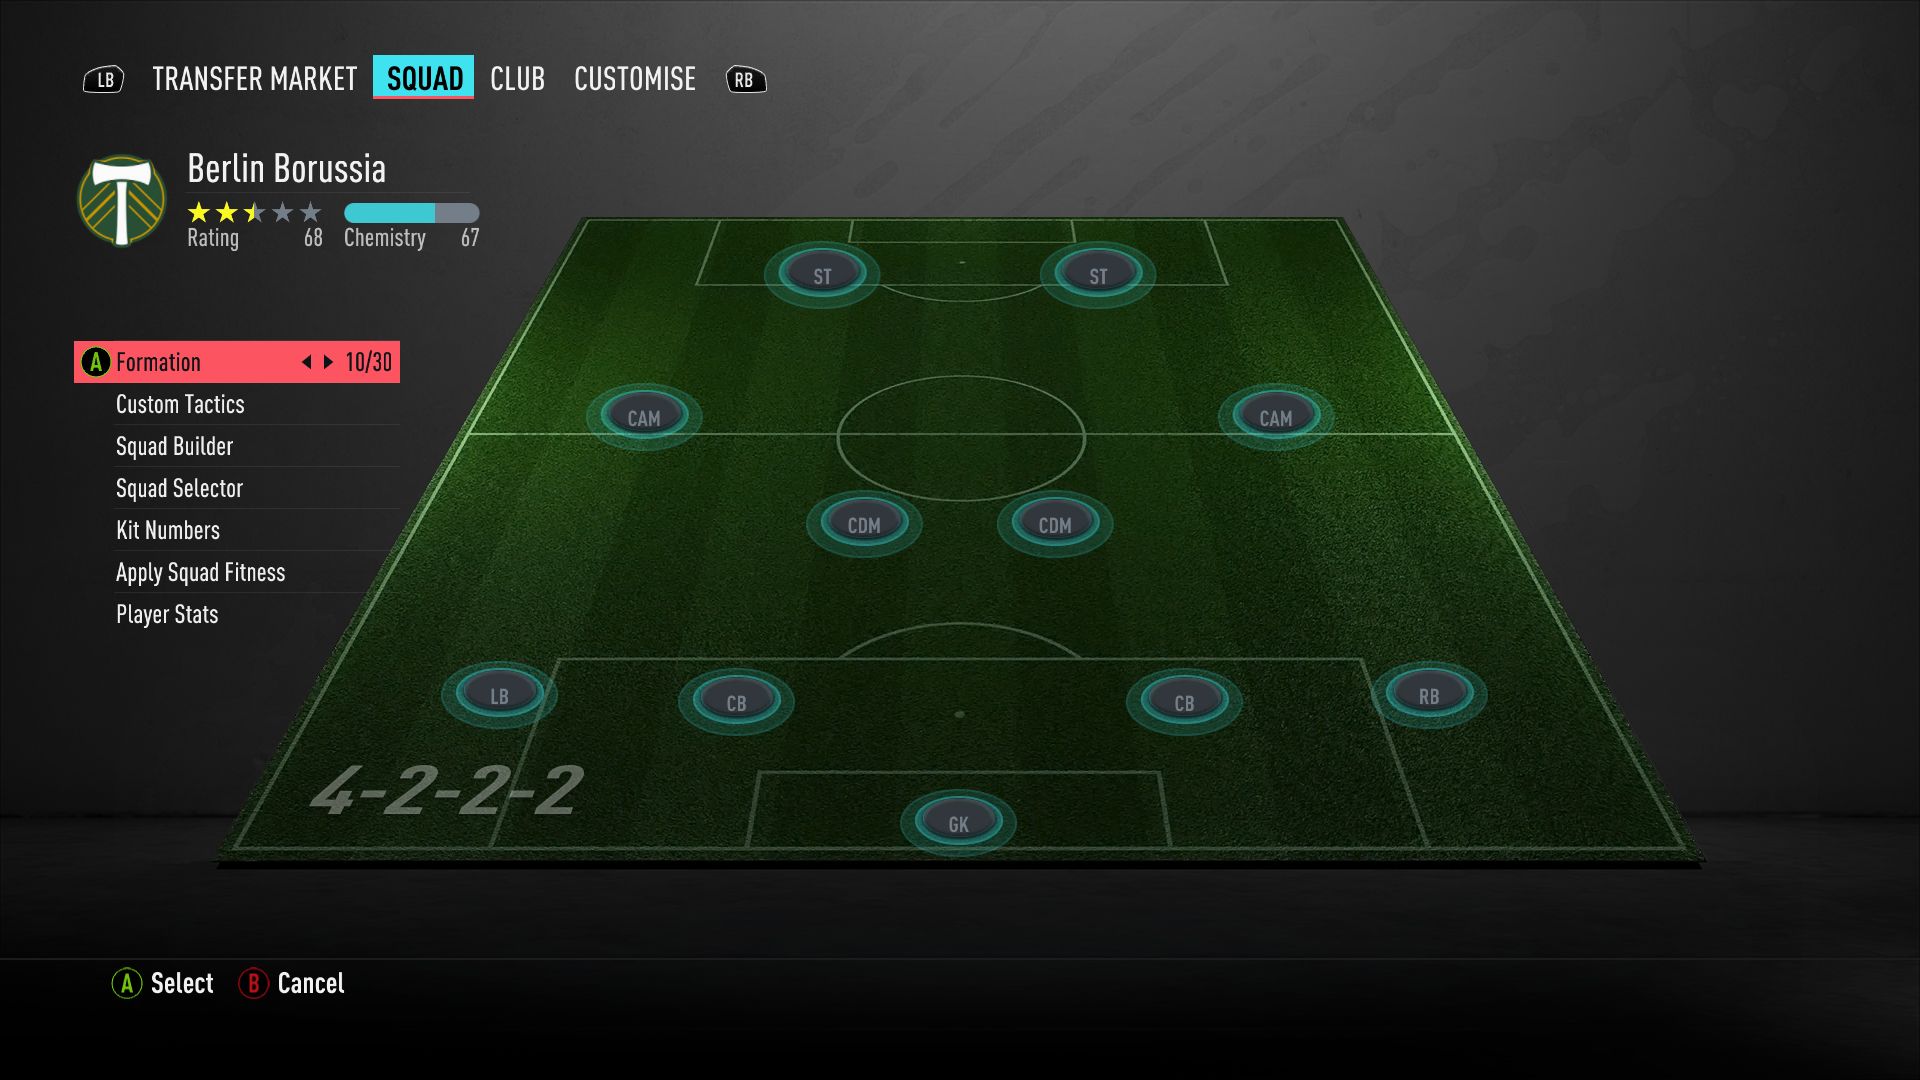
The 4-2-2-2 is perhaps the most balanced formation you can use in FIFA 20 right now, especially in Ultimate Team. Having two CDMs shields your back four but you’ve also, effectively, got four attacking players, and that can play havoc with your opponent’s defence. Again, use those CDMs wisely, telling them to cover the centre if you want your full backs to stay back, or to cover the wings if you want full backs to bomb forward.
The two key positions in attack are those wide attacking midfielders. They need to be able to link play between your CDMs and strikers, as well as provide a wide option for your full backs. For that reason, consider giving them both a free role in player instructions. We’ve also found success telling one — the faster one, ideally —to drift out wide. If you can play in a fast winger in FIFA 20, nobody can catch them.
4-3-3 Defend

Notice a pattern emerging here? The best FIFA 20 formations strike a balance between defensive solidity, usually via CDMs, and pace on the break. In that regard, 4-3-3 Defend looks ideal — with the caveat that you need a very good CM to make it work. They’re the link for the majority of your attacks, receiving the ball from your CDMs and pinging it out wide. You could give them a free role in player instructions, because they pop up in different areas, but it can be a bit unpredictable, so we prefer leaving them in the centre as a reliable outlet.
Needless to say those wingers should be agile and that striker should be a lethal finisher. We tend not to use ‘Get in behind’ with this one because, effectively, you’ve only got four players going forward, and if your striker is always running away from the ball you might be short of options. In fact, a creative striker can fit well in this line-up, slipping through balls through to your onrushing wingers. If you’re not creating enough chances, flip to the 4-3-3 Flat, which is another good all-rounder.
3-5-2
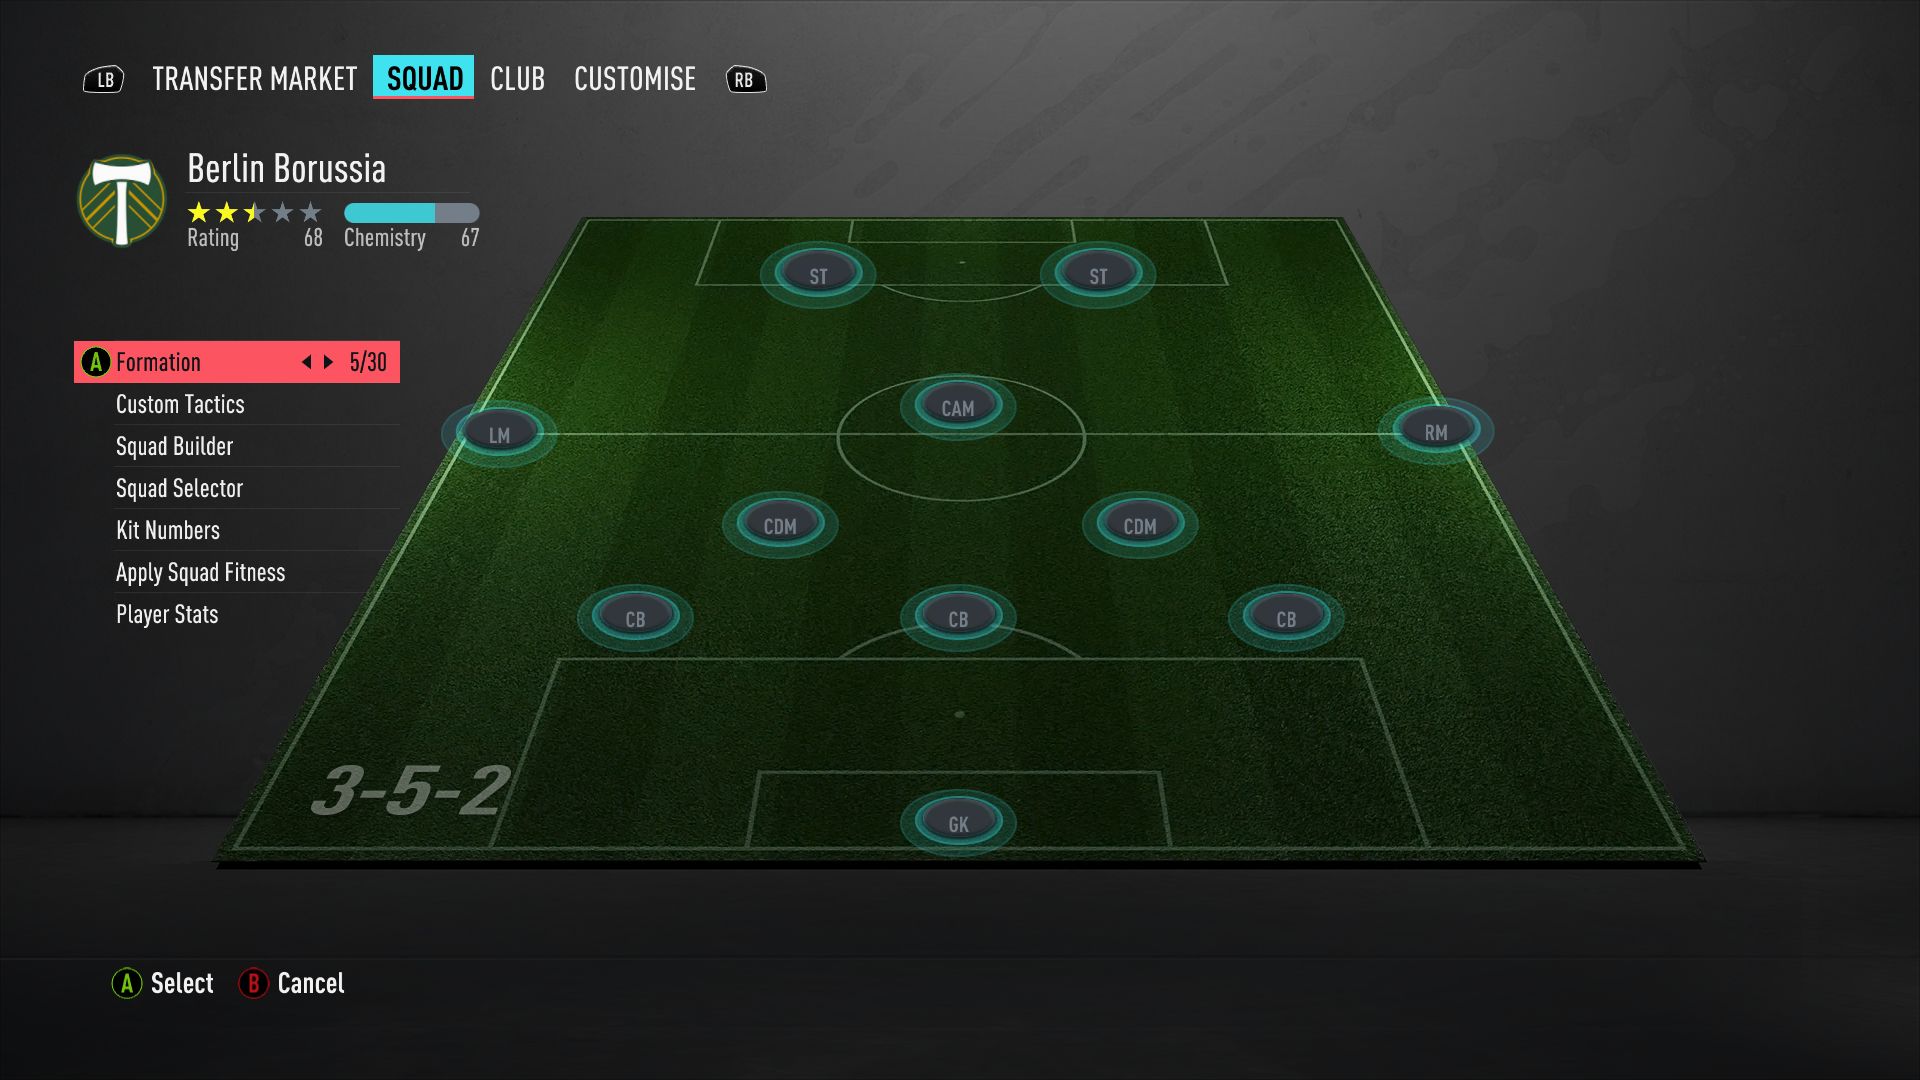
Yes, it’s three at the back, but if used correctly this formation is defensively sound. The two CDMs can slot in alongside your CBs if needed — if you’re getting caught out, you can specifically tell them to do that in player instructions — while wingers with high defensive work rates track back on the flanks. The central CB might look like the focal point of the team, but arguably the defenders either side are more important, because they have to cover both the centre and the wings. Go for quick defenders in these positions, if you can.
Going forward, your CAM pulls the strings. Pick someone with good passing who can feed your two strikers. Fast wingers can be devastating here, especially on the counter attack: having a winger, a CAM and two strikers going up against a depleted back line can be lethal. Telling strikers to ‘Get in behind’ is once again a good bet.
4-3-3 Attack
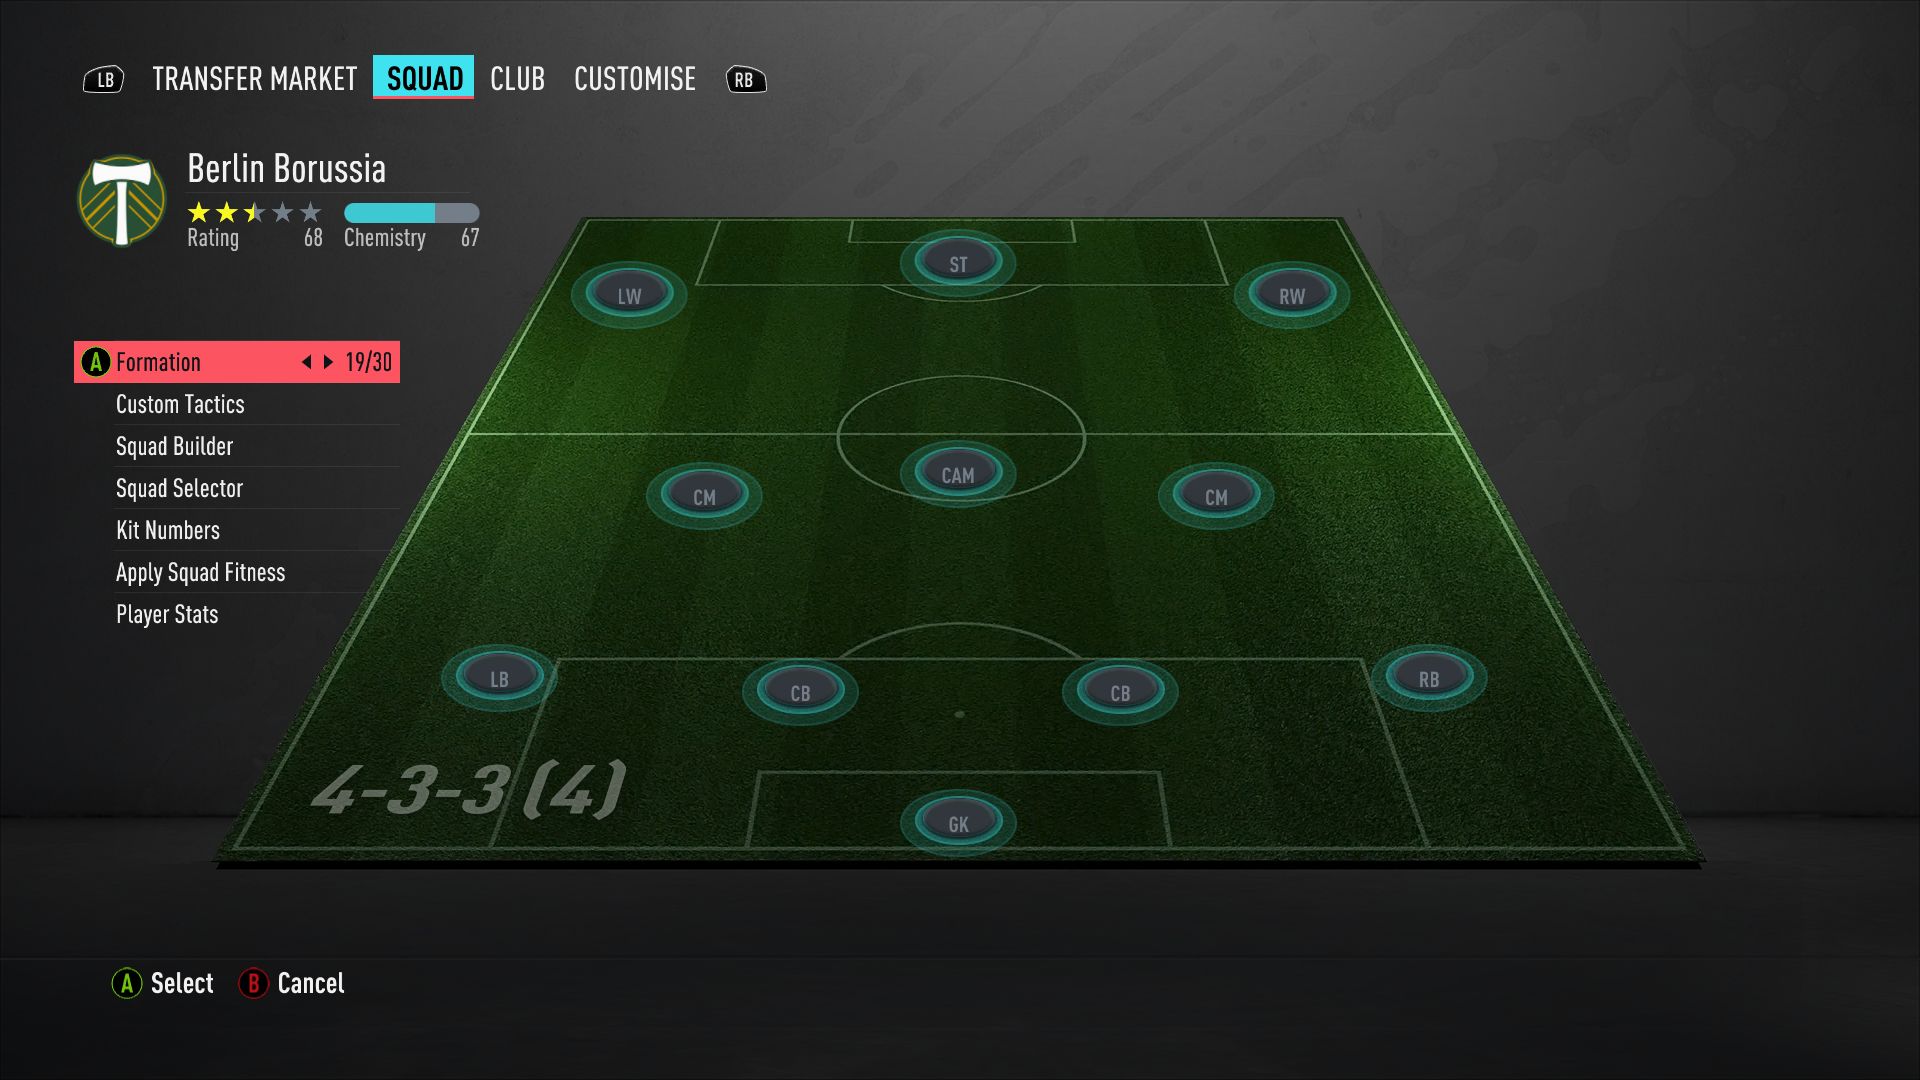
This is our favourite formation to use against the CPU: it can highlight all those flashy attackers you’ve picked up on the transfer market, and gives you endless ways to score goals. Against weaker opposition you’re able to keep the ball and create all kinds of chances, and your midfielders naturally burst into the box to get on the end of crosses.
It can leave you exposed at the back, so we wouldn’t recommend it against higher-rated teams, particularly if they have pace in midfield. That’s the main reason we won’t use it as often online, where other players generally opt for agile wingers who expose your lack of defensive cover. Against the CPU, though, it’s a lot of fun.
FIFA 20 review | FIFA 20 tips | FIFA 20 Volta tips | FIFA 20 Career Mode | FIFA 20 Pro Clubs tips | FIFA 20 patch notes | FIFA 20 ratings | FIFA 20 formations | FIFA 20 best teams | FIFA 20 icons | FIFA 20 Ones To Watch | FIFA 20 TOTW | FIFA 20 squad battles | FIFA 20 stadiums | FIFA 20 kits | FIFA 20 chemistry styles | FIFA 20 coins | FIFA 20 celebrations | FIFA 20 wonderkids | FIFA 20 loyalty glitch | FIFA 20 SBC solutions | FIFA 20 UCL cards | FIFA 20 web app tips | FIFA 20 vs PES 2020 comparison | FIFA 20 mods | FIFA 20 Skill moves
Weekly digests, tales from the communities you love, and more


