War Front strategy guide - Allied campaign
Liberate Europe with our complete Allied mission walkthrough
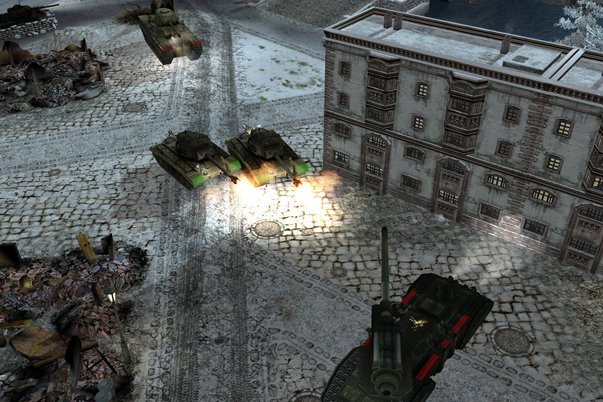
At the start of the mission, cross over the bridge located southeast of your base and begin your attack with the Force Shield Generator protecting you and an Engineer accompanying you. Even though you’re under the protective umbrella of the Force Shield Generator, be sure you have Bofors in the group — every bomb and bullet that hits the Shield weakens it a bit. Destroy the Soviet Bunker and build a Pillbox where it stood (you might have to knock down a building with tank fire to clear a space), then order the Engineer to build a Weapon Factory near the Pillboxes location. A smart move here is to have the Engineer throw up Pillboxes, AA Turrets, and AT Turrets around this Weapon Factory; the Soviets are sure to target it, and you don’t want to have to “babysit” it with the units you’re using to slam into the Soviet base.
Use the armored units from this Factory to reinforce the “covered juggernaut” of Core Units and Force Shield Generator as it pushes east into the main base area. Focus your fire first on buildings and vehicles that are threats (especially MG and AT Bunkers), then on Propaganda Towers and War Factories. If your units do take some damage, use Lynch’s Quick Repair skill to bring them back to strength. In just a few minutes you’ll have cleaned out everything except a few Aggregators — and found a new Scrapyard to exploit. Northeast of your new, secondary base area is a bridge that crosses back over the river; just north of it is a bank. Send MG Infantry with the Capture Building skill here to seize it and add even more Resources to your war chest.
Article continues belowIf you pause the game and assess the situation at this point, you’ll see why we’ve recommended this strategy: you now have three Scrapyards, a Drop Zone, and a Bank under your control. If you had instead chosen to advance north at the beginning of the game and simply threw up defenses to protect you from the southeast Soviet Base, you would have only two Scrapyards for Resources. Oh, you might have seized a Bank or even both of them, but trust us: if you capture those buildings early in this mission, you will unleash a tidal wave of Soviet armor and infantry that not only reclaim the Banks, but keep on toward your primary base.
After capturing the Bank at the eastern edge of the map, position your Core Units and a Force Shield Generator on the south side of the bridge near the bank. This will force any heavy Soviet units to cross the bridge to engage you, but leave you close enough to the bank to protect it from capture. The only real problem you’ll face here for a while will be Katyushas: their extremely long range means they can drop rockets on the protective shield and still be out of range of our Pershings. Use M40s to return the favor to the Katyushas, and if necessary send a Pershing or two (along with Lynch) out from under the shield to deal with any enemies the M40s can’t reach (but be sure to return them to the safety net once they’re done!). Also, remember to build a Headquarters or two at this secondary base, allowing you to construct even more Force Shield Generators (one per Headquarters). And this open area is a good place to build several Airports, so long as you protect them with liberal construction of AA and AT Turrets and Pilllboxes.
One thing those defensive installations won’t help you with are those powerful Moving Giant Turrets. When you hear a massive explosion and see your buildings start to crumble but there’s no enemy in sight, you know those gargantuan weapons are at work. Fortunately, their shells leave a trail of smoke as the head for a target, and you can trace it back to find where the Turret is located. Track these down relentlessly the moment you find them, or they’ll be a constant hindrance in your effort to bring the battle to an end.

Weekly digests, tales from the communities you love, and more

 Join The Community


