All Silksong Mask Shard locations
Mask Shards in Hollow Knight Silksong are how you increase your health, and there's 20 of them to find
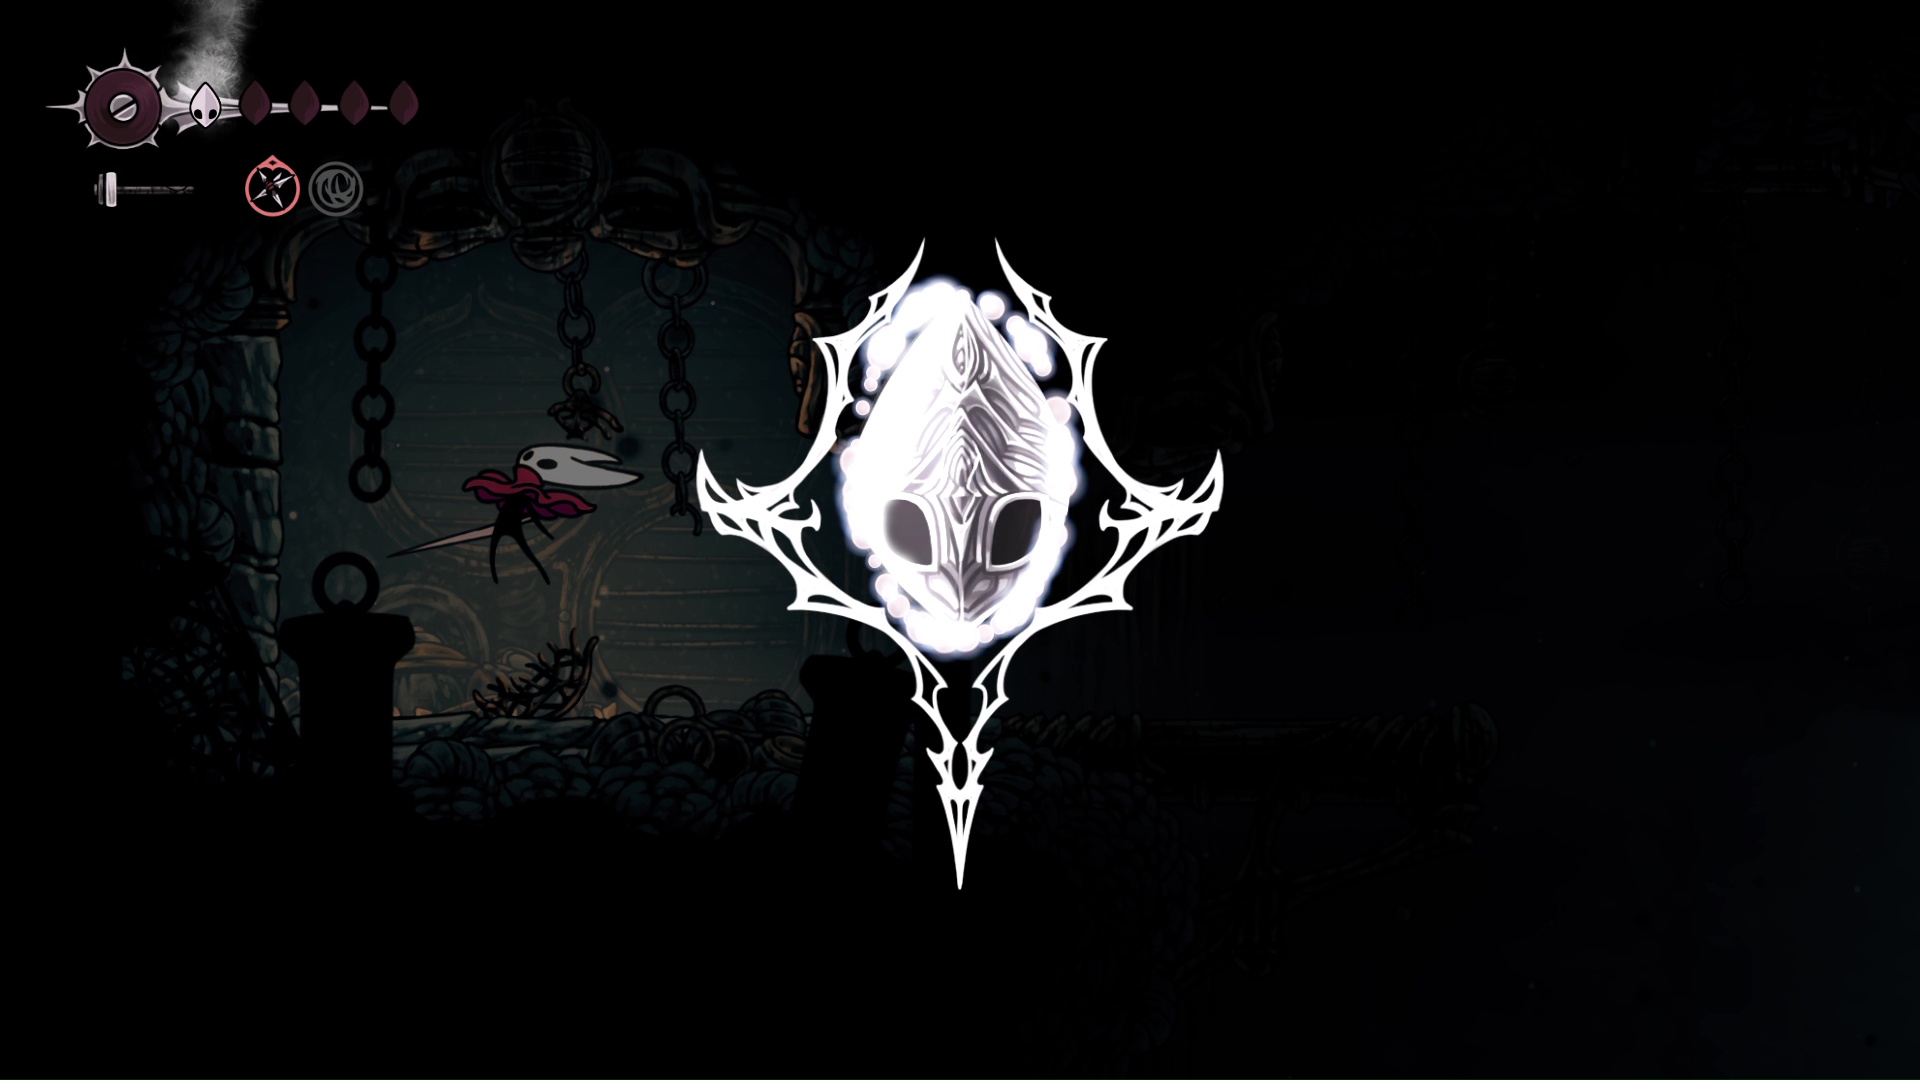
Silksong Mask Shards are items used to increase your max health, with 20 Mask Shards located across the entire map. Considering that you need to find four Mask Shards to increase your health by a single unit in Hollow Knight Silksong, that means if you can find them all, you can boost your health by five, and effectively double your life bar. If you're feeling pretty squishy in Silksong, here's all the Mask Shard locations, as well as what abilities and how far you need to progress to get them.
All Mask Shards in Silksong and how to find them
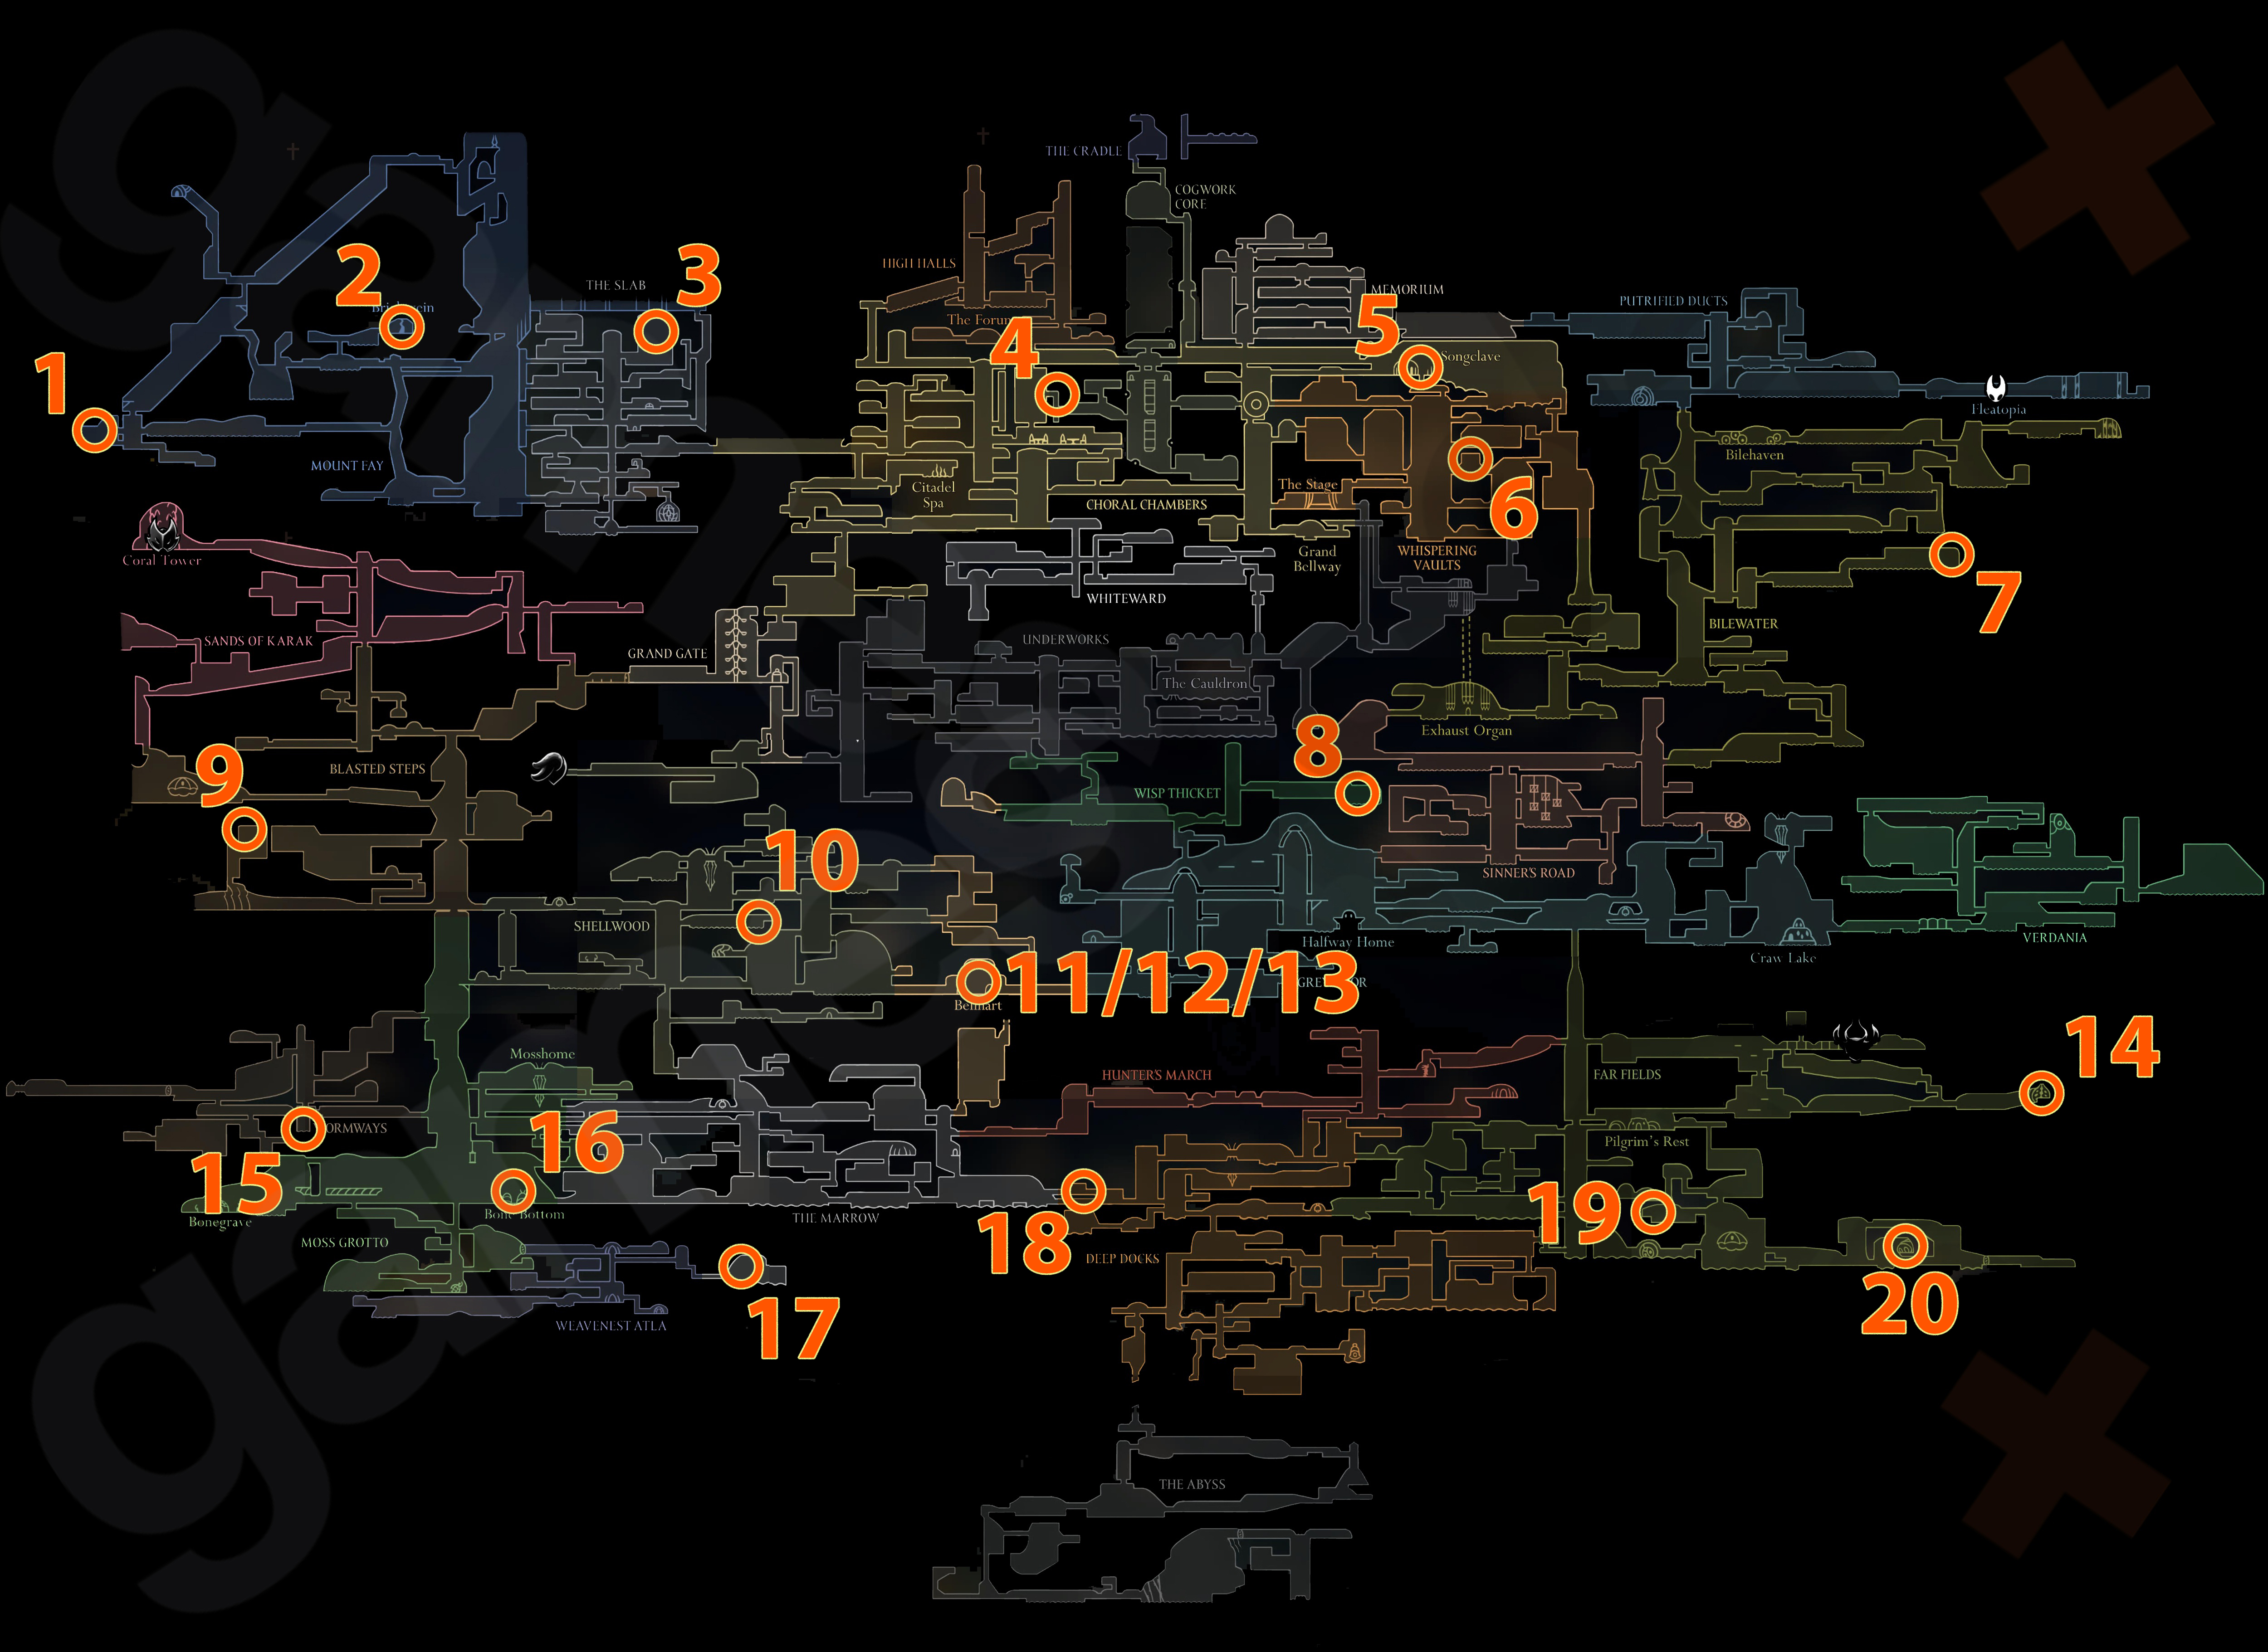
Use the map and table below to find every Mask Shard in Silksong! We've also marked what Act you'll have to have reached, and what Silksong abilities you'll need.
- Mount Fay (Act 2: Requires Double Jump). At the far left of the region is a dead end room with a hollow pillar in the ceiling. Jump into it and wall-jump up to reach the Mask Shard.
- Mount Fay (Act 3: Requires Super Jump). Yes, you'll need to reach Silksong Act 3 for some of these. Super Jumping up into a corridor allows you to go right into the Brightvein room. Complete a platforming challenge up this room and there'll be a Mask Shard at the very top.
- The Slab (Act 2). If you can get the Silksong Apostate Key, you can access this room in the Slab. Bounce up to the top of the room to reach this Mask Shard.
- Cogwork Core (Act 2). After slaying the Cogwork Dancers, there's a gauntlet of enemies Southwest of them for you to fight. Push through and you'll reach a corridor that leads into the Choral Chambers, with the Mask Shard waiting.
- Songclave (Act 2: Requires completion of "The Wandering Merchant" wish). After Jubliana is brought back to Songclave, she'll sell you a Mask Shard for 750 Rosaries.
- Whispering Vaults (Act 2). Breaking through the wall and moving a crate will allow you to reach a Mask Shard in this sideroom.
- Bilewater (Act 2: Requires Double Jump). This long hallway is full of poison water with enemies diving out to kill you. If you can get through this hall, you'll make it to a Mask Shard at the end.
- Wisp Thicket (Act 2: Requires Double Jump). This optional area, accessed via Greymoor, has a platforming challenge where enemies spit fire at you in the East room. Make it to the end for a Mask Shard.
- Blasted Steps (Act 2: Requires Double Jump). Use the raised step at the right and then careful platforming to reach this hidden room in the ceiling (you'll need both your Harpoon and Double Jump). Then there's a room full of crawling bugs you need to bounce around before you make it to the Mask Shard.
- Shellwood (Act 1: Requires Glide). Going right from the fast travel station should help you find a pogo platforming challenge with the Mask waiting for you.
- Bellhart (Act 2). There's three Masks you can get from Wishes in the Silksong Bellhart regions. After slaying the Cogwork Dancers and the Silksong Savage Beastfly in Hunter's March, you'll get a quest to kill a second Beastfly back in Far Fields, where you fought the Fourth Chorus. Kill it to get a Mask Shard as a reward.
- Bellhart (Act 3). Return to Bellhart in Act 3 to get a new Wish from the notice board: "Dark Hearts". Slay 12 Void Masses around the game to get a Mask Shard. They're not hard to find – they're clumps of enemies wrapped in darkness, stuck to the walls that fire projectiles at you.
- Bellhart (Act 3: Requires Super Jump). A reward for completing "The Hidden Hunter" wish in Bellhart, though you'll need to reveal the Northeast corner of Far Fields first. Head to the junction West of Sprintmaster Swift and you'll find the tracks needed to hunt down Gurr the Outcast, the target of this mission.
- Far Fields (Act 3: Requires Super Jump). The NPC Sprintmaster Swift will challenge you to races, which you can win if you equip the Flea Brew and Silkspeed Anklets. Win three races and he'll give you a Mask Shard.
- Wormways (Act 1: Requires Swift Step). Heading into Mosshome, you can leap over into the Wormways. Once you're in, a destructible wall at the bottom of the central pillar will allow you to access a Shard.
- Mossy Bottom (Act 1). Purchased from the Bone Bottom merchant for 300 Rosaries. If you've reached Act 3, it'll be sold instead by Grindle in the Silksong Blasted Steps region.
- Weavenest Alta (Act 1: Requires Needolin and Wall Jump). Opening the door to Weavenest Alta with the Needolin lets you access this area. Hit the power cells to trigger the elevator, then once you take it down, climb back up the elevator shaft and head right. A platforming challenge stands between you and the hidden Mask Shard.
- Deep Docks (Act 1: Requires Wall Jump). Though you'll see this one very early, you can only get it once you have the Cling Grip. Go left into The Marrow and wall jump to the upper access point back into Deep Docks. There'll be a gauntlet of enemies, but if you can win, you'll get the Mask Shard.
- Far Fields (Act 1: Requires Glide). Riding the air currents up into this room near the Seamstress will take you somewhere filled with explosives. Set them off to crack open the floor and reveal a Mask Shard.
- Far Fields (Act 2: Requires Harpoon). Though this one is technically doable with the Harpoon, we definitely recommend getting the double jump to make it easier. Climb rings up to this little house, and break through the floor to drop down into a lava-filled room where you have to fight off enemies without touching the ground. At that point, the lava starts rising, requiring you to rapidly platform up to the top without getting roasted. If you can make it, an air current will propel you to a Mask Shard.
Ultimately most players won't get anywhere near finding all twenty Mask Shards, but it's certainly possible for those who make it to the final act and are willing to put the work in!
Want more help? Find out the full Silksong map here, or discover the most hidden boss of all, the Silksong Watcher at the Edge, at our guide here!
© Gamesradar+. Not to be reproduced without permission.
Weekly digests, tales from the communities you love, and more

Joel Franey is a writer, journalist, podcaster and raconteur with a Masters from Sussex University, none of which has actually equipped him for anything in real life. As a result he chooses to spend most of his time playing video games, reading old books and ingesting chemically-risky levels of caffeine. He is a firm believer that the vast majority of games would be improved by adding a grappling hook, and if they already have one, they should probably add another just to be safe. You can find old work of his at USgamer, Gfinity, Eurogamer and more besides.
You must confirm your public display name before commenting
Please logout and then login again, you will then be prompted to enter your display name.
