


The new Warzone 2 Ashika Island map is a smaller map for DMZ and the returning Resurgence mode that releases with the Warzone 2 Season 2 update on February 15. Ashika Island - also known as the Isle of Sea Lions - is a fictional land mass off the coast of Japan and features a good variety of landmarks and Points of Interest (POIs) - you can battle rival squads in an ancient castle, a shipwreck, and a small coastal village, as well as the craggy hills and cliffs between. Here's everything you need to know about the Warzone 2 Ashika Island map and when it launches.
New Warzone 2 map release time
The new Warzone 2 map releases at 9am PST/12pm EST/5pm GMT/6pm CET on February 15. This is also when the new Warzone update for Season 2 goes live.

Warzone 2 Ashika Island map features

Try out some of the new Warzone 2 Season 2 weapons while you explore Ashika Island
Ashika Island is the new Warzone 2 map coming with the Season 2 update and is made for the Resurgence battle royale game mode focused around faster gunplay with respawning allowed. It will also serve as a DMZ mode map too, so not only will you be able to shoot at each other, you can turn your wrath to the AI enemies on Ashika Island too! It's smaller map as a result, but still packs in a lot of features, from underground waterways, to a unique dog tag mechanic that offers players more in-match rewards. Here are all the details:

- Ashika Island will be smaller than the standard Warzone 2 map - closer to Rebirth Island in scale, but still around 30% larger than previous smaller maps.
- There will be seven major POIs and lots of lesser locations and landmarks between them.
- The Call of Duty: Vanguard/World at War "Castle" multiplayer map is one of those points of interest, now renamed "Tsuki Castle."
- Though not visible on the map, there's an Underground Waterway that links several locations beneath the island itself, and even includes a submarine base.
- Unique 'Restore Honor' feature causes players to drop a dog tag after their first death in a Resurgence or Battle Royale match. If you or a squadmate recovers the dog tag, you'll get Cash and a single UAV ping, revealing nearby enemies and Supply Boxes.
- Later in Season 2, Ashika Island will be getting Redeploy Drones that allow players to ascend and parachute to get around the map. These drones can reposition themselves as new circles appear, but they can also be shot down with lock-on missiles.
- This Ashika Island is fictional and is off the Japanese coast. Ashika translates to "Sea Lion". We don't know if that's even slightly relevant, but it's certainly interesting…?

All Ashika Island points of interest
Ashika island has seven named POIs and you can read the full list is below. We've gone through all the special locations, buildings and other relevant info within those areas too, so you can expect to be prepared for first few Resurgence matches:
- Tsuki Castle
- Town Center
- Beach Club
- Shipwreck
- Oganikku Farms
- Residential
- Port Ashika
- Underground Waterway (not shown on map)
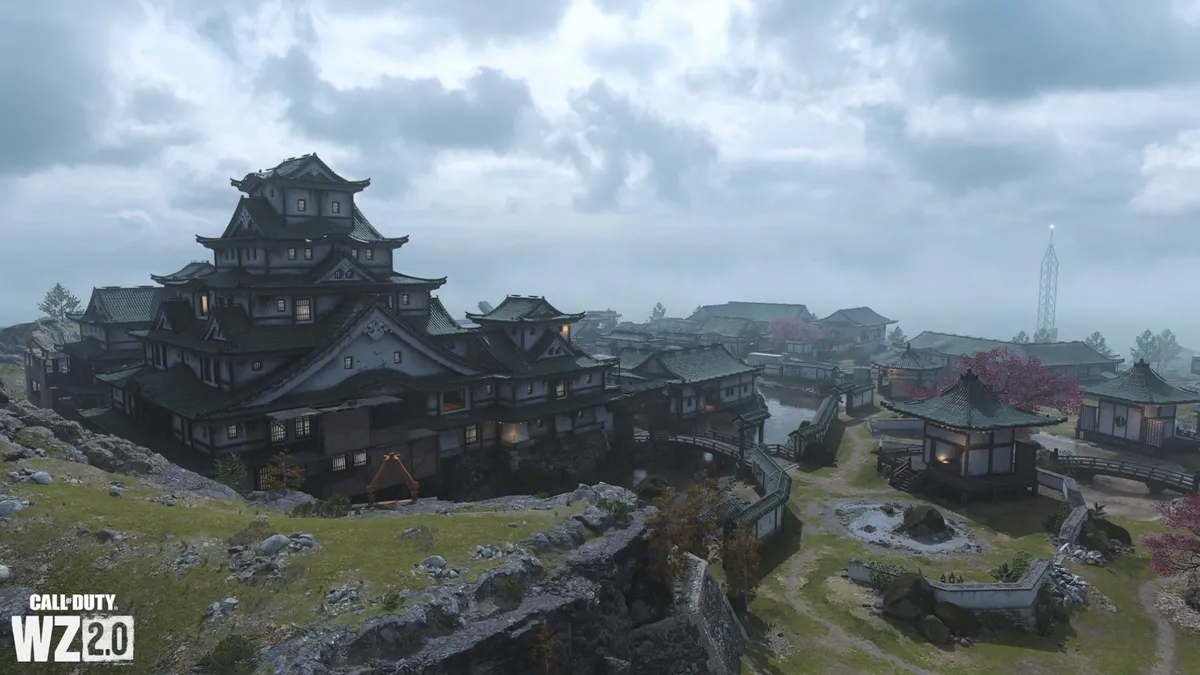
Tsuki Castle

The biggest building on the island has actually several key locations around it, a mix of modern and historic layouts modelled off the original map from Call of Duty: World at War and Vanguard.
- Main Stronghold - The central building looks huge, with an adjacent courtyard and several minor structures orbiting it. Those inside will probably thrive with SMGs and Shotguns, but those trying to take it might need longer range gear. The sheer size of the stronghold also makes it clear that trying to take the whole thing isn't really feasible - pick a corner and stick with it.
- Northwest Battlements and SAM Batteries - A mixture of cover makes this look like a good spot from which to assault the Castle, though it offers little chance for snipers. Those pressing the offensive will find spots of cover to dart between well enough.
- North Museum Grounds - A mixture of smaller buildings offer more defensive options than perhaps the castle, though sniping safely looks like it'll be limited to windows - the rooftops offer almost no cover at all.
- Southeast Gardens - Like in the castle map, these open gardens offer little cover and will likely be decided by rapid, medium-range skirmishes, while hoping those in the buildings nearby don't decide to take pot shots.
- Waterways and Submarine Base - The underground waterways beneath the island can be accessed from Tsuki Castle, with a whole submarine base that seems to have a mix of long sightlines and verticality, while also serving as a link to other areas of the island.
Town Center

This urban hub on Ashika's west coast is more compact and close-quarters overall, though a few open spaces linking key sections can shake things up. It's by far the busiest and most varied location on the island, so we'll go through them here:
- North Sea Wall - Even the devs seem wary about recommending this ocean barrier, as "hiding potential is limited unless you enjoy lurking just under the water’s surface." Call it a high-risk/high-reward option for those who don't want to get in many scrapes.
- Ferry Terminal - The jetty and adjacent complex provides several strongholds, with a mix of short and medium sightlines.
- Tourist Center Building - A study little area to claim that offers decent vantage points to survey the ground nearby. It'll be close-range combat inside, but snipers and marksmen should flourish on the roof.
- Event Center Building - Larger and less easily defended is this structure, though it also offers solid sightlines for rooftop assassins.
- Gas Station - Just like the gas stations in other modes, this serves as a point to refuel and repair. We don't recommend hanging around though, especially at this crossroads location.
- Science Center - Near the waterways is this U-Shaped Structure that could serve as a good initial drop point, though with so many ins-and-outs, including rappel points, holding it for a while might be a struggle. Still, parachuting off it gives you a sweep of options on where to drop.
- River Channel and Bridges - One of the entrances to the underground waterways is here, but otherwise the long sightlines and lack of cover make this a risky location for all involved.
- South Sea Wall and Floating Gas Station - A place to repair and refuel boats, with an ocean barrier that provides the same challenges and chances as the North Wall.
- Market District and Hotel - Pure urban fighting, with tall buildings and compact markets alike. Close and medium range will have the edge here, and ambushes will thrive.
- Gas Station - A second refuel and repair point for cars, and again - not somewhere we recommend hanging around for longer than you need.
- Town Hall - A very large building complex where short range will thrive, though the abundant glass means outsiders can get chances to shoot at those exploring within. You should also be wary that those on the hills adjacent can aim down at you.
Beach Club

The Island's Southwestern point is predominantly occupied by this wealthy complex of structures and tourist hotspots, which we'll go through here.
- Aquarium - No fish to be found in here, but this big blue building is clearly going to favour short-range fights, with a few open halls that speak to the more medium-range Assault Rifle users.
- Beach Club and Bath House - The main attraction is a mixture of small huts, tents and attractions around a central building, which is clearly going to offer the best chance of survival for those holding the area down.
- Beach and Observation Point - The coast offers little chance for cover, so be worried about snipers in the observation point itself, and don't stick around if you can help it - crosshairs will be lining up from the better locations around you.
- Demolition Site - A mostly wrecked concrete building past the club seems like the only defensible position in the wilderness around it, with a few options for cover. Looks like a decent spot to pause and recuperate, but might be hard to hold long-term.
Shipwreck

This carnage on the East coast is the result of two boats crashing and spilling cargo all over the beach. Oops.
- Beached Cargo Tanker (North) - The two shipwrecked boats are identical, but this one has more open sightlines around it, making it easier to defend from approaching players.
- Beached Cargo Tanker (South) - The Southern tanker is next to all the cargo crates, making it easier to take, contrarily - not to mention the large hole in its hull.
- Containers - The Containers have been stacked and arranged somewhat to provide a close-quarters dream - which is to say, a mimicry of the layout of the Shipwreck map! So those who specialise in SMGs will clean up nicely if they can lure people in.
- Clifftop Demolition - Another building on the cliffs is halfway through being smashed, but it's a good spot to fire down at the Tankers or just hole up away from enemies.
- Lookout Point and Gas Station - One of the three lookout towers is here, where snipers make themselves incredibly obvious in return for great opportunities to fire back, and a small refuel/repair point that looks a little more viable to defend than the others.
Oganikku Farms

Greenhouses, warehouses, and some old shoreline defences make up Ashika Island's Northwest point.
- Lookout and Ruins - One of three climbable radio towers is here, as well as small stone ruins and debris piles. Looks like close and middling firefights will be prevalent here, with little chance for a high advantage beyond the tower itself.
- North Beach - The northern beach is sandy and open with little cover available. Longer range fights and warfare will prevail here, as well as simple speed - the quick draw will decide a lot on these open spaces.
- Greenhouses - Expect mid-range conflicts and a focus on claiming buildings, as these warehouses and structures provide the clear advantage.
Residential

North of the Castle, this area is largely apartments and essential living services like power plants and water treatment facilities, and each building offers its own challenges, with open spaces serving as danger zones between them.
- Apartments - A two building apartment complex with rappel lines serves as a chance for up-close fighting within, or sniping on top - though the nearby cliffs mean that others can take shots even at those on the roof, so don't get complacent.
- Power Plant - This large, singular facility actually seems like a great sniping option - the roof is flat with plenty of cover, and there's no clear height advantages around it. Cover your entrances with mines or allies, and you could do very well here.
- Water Treatment Facility - Linked by a tunnel to the Power Plant, and serving as an entrance to the Underground Waterways, this facility is composed of small buildings that could each be cleared by a couple of well-placed grenades. Stay mobile while in this area.
- Residential District - These smaller houses will be easier to defend and fly under the radar than larger buildings, though players will probably blitz through them in order. Could be a good area for those playing quieter and more defensively, especially with Tsuki Castle nearby.
Port Ashika

This industrial and military port on Ashika's Southeast edge seems to focus on in-building fighting, with shorter sightlines overall.
- Humpback Bridge - Linking the Beach Club and the Port, this bridge offers very little cover for those on it, but is built in such a way that it'd be difficult to spot those beneath, and may be the best option for those moving between POIs.
- Dockside and Warehouses - Map design at its most "Call of Duty", this mix of smaller buildings and open spaces will favour medium-range fighting, and there's also another lookout point, for snipers who are feeling especially brave.
- Canal, River Channel and Control - The Harbour is one of the Waterway entrances, and the closest one to the Submarine Base. Bridges, as ever, are a risky crossing point, and those on the buildings nearby should watch them for chances to pick at opponents.
- Ashika Bay and Floating Gas Station - A floating refuel and repair point at the mouth to the Waterway is an obvious stopping point for those in boats, but practically the whole port has the opportunity to fire at you, so don't take long.
- Gas Station - If you're on the road, there's a gas station right next to the canal entrance - though it might be one of the least defensible locations we've ever seen, with only a few tanks for cover.
- Mechanics' Yards and Oil Vats - The Industrial Northeast section looks hard to defend, with open spaces and not much cover but for a few buildings, and staying alive here for long will be a challenge. Settle on the medium range and try to claim one of the warehouses, is our advice.
- Rocky Bluffs - The cliffs besides the Port offer good sniping opportunities, though you'll have to move around to get a range of visibility. Make sure you have somebody watching your back if you're determined to get some distant headshots.
Underground Waterway


Want to know what's launch in Season 2 and coming up later? Check out the Warzone 2 Season 2 roadmap
The Underground Waterway and Submarine Base beneath Tsuki Castle is a whole section of Ashika not even visible on the map, but it has major entrances for watercraft and players at the Port, Town Center, Residential and Tsuki Castle itself - and possibly more, smaller entrances that have yet to be uncovered.
Locations like this usually tend to be high-risk/high-reward, especially when the gas comes in, and force confrontation one way or another. There are only two directions you can go in a tunnel, after all.
We also expect to see other, smaller entrances across the map. It looks like those three paths would converge roughly beneath Tsuki Castle, for one thing, and providing multiple avenues of escape is a common thread in Warzone's level and map design.

