We're just over two months into the game's life cycle, and our very first Division 2 raid guide is finally here with the launch of Operation Dark Hours. Players are whisked over to the Ronald Reagon National airport in Washington D.C. to repel the Black Tusk forces, and it is not easy. Every stage of this raid in The Division 2 will require optimised builds and clear communication from all team members. If you fancy yourselves as skilled enough to take down the Division 2 raid, read on for our complete Division 2 raid guide for a complete walkthrough to complete Operation Dark Hours.
How to start the Division 2 raid

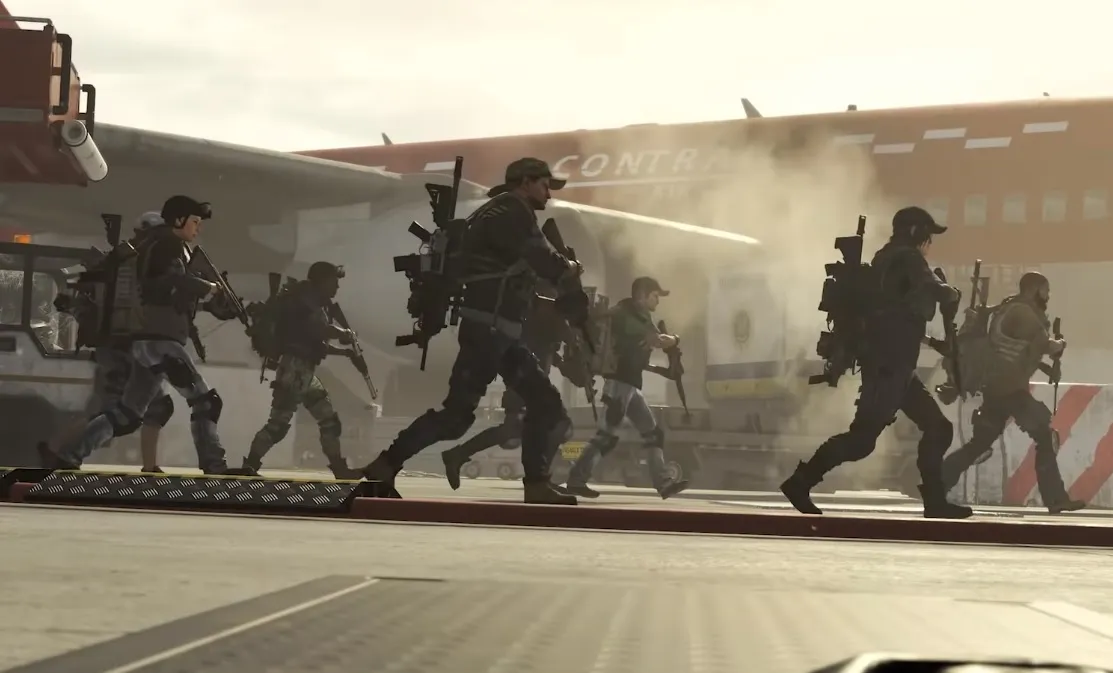
If you're new to Division 2 raids - as all of us are at this point - you'll first need to know how to start the raid. You'll need to a team of eight players in total, and we'd strongly recommend using voice chat to communicate every step of the way. If you don't have a group of players already, you can visit the official subreddit to find some other players in a similar boat.
When you've got a full team of eight, head to the front of the White House and up to the helipad. Talk with the pilot and you'll be able to select Operation Dark Hours, at which point you'll be whisked off to near the airport where you can get started with the raid.
Division 2 raid guide: Boomer

Your first objective will be to reach the tarmac. Run into the underground tunnel in front of you and when you reach the end, ascend up the rappel and clear all the enemies in the area, including the warhounds that spawn toward the end. When this is done, enter the door to the collapsed jet bridge and follow it to the end, where you'll enter a food court with Kerman Coffee in the middle.
This is the setting for the first boss fight against Max "Boomer" Bailey but first, you need to destroy the signal source by shooting the four electronic nodes. When these are down and you've eliminated the standard enemies, Boomer will show his face.
For a complete guide on how to defeat this tough boss, you can find that here in our Division 2 Boomer guide. The basic gist of things is this though: you need to shoot his backpack with the two miniguns to make him kneel, at which point everyone must shoot him in the head. When he stands up again, destroy the green panel on his front to stop him from self-healing. While this is going on, keep an eye on the terminals in the middle and the electronic nodes to stop him from becoming immune.
Division 2 Chatterbox SMG Exotic guide | Division 2 Merciless Rifle Exotic guide | Division 2 Liberty Pistol Exotic guide | Division 2 Sweet DreamsShotgun Exotic guide | Division 2 Pestilence LMG Exotic guide | Division 2 Nemesis Sniper Exotic guide
Division 2 raid guide: Dizzy, Ricochet, and Weasel

After Boomer is defeated, interact with and enter the metal shutters that open. Run through the airport, past the signs to baggage claim until you reach a door that says authorised personnel only. Open it and keep running down the tunnel, cross the bridge, go through a few more doors and you'll arrive in a control room. Interact with the laptop on the desk, resupply, then you need to split your group into two teams of four. One group needs to go through the A doors, while the other group goes through the B doors. Don't worry if it's not a perfect split with four each - you can ascend back up the rope after going through the doors to reach the other side.
Both sides are symmetrical and have three monitors attached to the side of the plane in the middle, segregating the room. On one side of the plane, one of the monitors will be green - front, middle, or back, when referring to the end of the plane they're closest - and both groups need to interact with the same monitor simultaneously so make sure communication is key here. If done correctly, two bosses will spawn, one for each group: Ben "Dizzy" Carter and Carl "Ricochet" Dawson.
While these two bosses aren't particularly hard to take down individually, there's some other mechanics at play here. You'll notice some purple gas filling the room; this gives everyone a Choking Weapon Debuff which reduces the amount of damage your bullets deal. You want to turn this gas orange by interacting with the monitors in the same way you did to spawn the bosses. When the gas is orange, it gives everyone an Armor Breaker Debuff which increases the damage you deal to the bosses.
As soon as you kill either Dizzy or Ricochet, the section of the plane with the monitors will rise up out of reach and Oliver "Weasel" Gordon will spawn. This is where it gets really tough, so try to ensure you kill both Dizzy and Ricochet at the same time. If you manage it, you can focus solely on Weasel. With the monitors inaccessible, the gas will start to cycle. When it turns purple, take cover and avoid taking any damage at all, then when it's orange, pump as much lead into Weasel as you can.
Division 2 raid guide: Buddy & Lucy

When you've finally killed Weasel, force open the elevator, ascend up the rope and cross the wingspan of the plane. Head outside and jump down into the courtyard where you'll find a bunch more Black Tusk enemies to kill. Keep pushing through the quarantined areas, killing all the Black Tusk you find, then climb the escalators and go through the metal shutter that should open automatically. Follow the objective markers until you find Buddy and Lucy.
Buddy and Lucy are two Black Tusk warhounds; Buddy is a healer while Lucy has serious DPS. You'll notice there's two extra lines across both of their health bars. This is the overcharge window. You essentially need to deplete both of their health bars at a steady pace, ensuring neither one leaves the overcharge window. If overcharge is activated - don't worry, ISAC will warn you before it happens - two players need to rush to the middle of the area and interact with the two laptops. Fail to do this and both Buddy's and Lucy's health will rocket back up to maximum. Don't worry if you're struggling - we'll have a more detailed guide to this fight up shortly.
Division 2 raid guide: DDP-52 Razorback

When you eventually take down Buddy & Lucy, you're left with one more objective: Destroy the DDP-52 Razorback. Follow the objective marker until you head outside, where you're introduced to a lot of different mechanics. Initially, you're going to want to split the eight players into four teams of two because there's four SAM turrets to destroy, one in each corner. Have one player from each pair destroy the panel on the SAM turrets while the other waits inside the ring on the floor, near the red and white barricades. Eventually, these rings will turn green when all four SAM turrets have been disabled.
When the rings turn green, look at the Razorback in the middle and you'll be able to see two glowing red vents. Shoot at them until the vents pop off, but during this, four players absolutely must remain inside the green circles until the battery tower has fully extended. When the vents are open, throw a standard grenade into each of them and they should both turn green and cause the Razorback to extend the battery tower. During this phase, drones will start swarming out of the Razorback however, so make sure you're focused on taking them down.

Move to the front of the Razorback - where the open window you dropped down from is - and you'll be able to see some circuitry on the two wings that have now extended. Shoot at and destroy these to expose the battery itself - if the Razorback shuts up shop, you'll need to stand in the rings and grenade the vents again. Shoot at the now-exposed batteries until it fires a barrage of rockets at your whole team at around the halfway mark. Since there's two batteries to destroy, you'll have to take cover from a minimum of four rocket barrages.
During this phase however, Heavy Minigun Elite enemies will spawn near the SAM sites and start interacting with them to try and completely wipe your progress. When this is happening, a siren will start blaring so make sure you switch your focus immediately. As the Razorback becomes more damaged, two elites will spawn so be on your guard.
When you deplete the Razorback's health all the way, the final phase of the fight will start. In your original pairs, dash back to your respective SAM turrets and destroy the hand scanners on the back of the turrets that the elites were trying to interact with to wipe your progress. However, they're only able to be shot in ascending order, so the team at the first SAM turret has to destroy it straight away, followed by the second, etc.
When all four hand scanners are destroyed, congratulations! You've completed the raid, the toughest challenge in The Division 2 yet.
Division 2 tips | Best Division 2 skills | Best Division 2 perks | Division 2 Hyena Key locations | Division 2 Dark Zone Keys | How to level up fast in The Division 2 | Division 2 masks | Division 2 Ivory Keys | Division 2 Dark Zone guide | How to unlock the Dark Zone in The Division 2 | Division 2 crafting guide | Division 2 specializations | How to unlock specializations in The Division 2 | Division 2 dyes | Division 2 mods | Division 2 map | Division 2 printer filament | Division 2 bounties | Division 2 builds | Division 2 Snitch Cards | Division 2 hidden side missions | Division 2 Exotics | Division 2 endgame
Congratulations to MarcoStyle and the POG clan on being the first to beat Operation Dark Hours, and thanks to Streamer House (who were second) for their outline on how to complete the raid.


