Cyberpunk 2077 The Information walkthrough and mission guide
Get ready to braindance and find the clues you need for the Cyberpunk relic

When you reach the Cyberpunk 2077 The Information mission, you're tasked with searching through a Braindance with Judy to find the Relic. This can be quite a tedious task though, as you must scrub through the timeline identifying clues, and the area you need to search is big, and Adam Smasher is a constant threat. There are also security devices to find, and thermal clues to scan (once you know what those are).
Here we can show you how to find everything that matters in the Braindance, including the Relic itself. Read on for a breakdown of where to find what you need in the Cyberpunk 2077 The Information mission.
Cyberpunk 2077 The Information objectives
- Examine the brain dance in Analysis Mode to find the Relic
- Scan the apartment's security systems (optional)
- Watch the whole recording from Evelyn's point of view (optional)
- Scan for thermal clues to find the relic
Examine the brain dance in Analysis Mode to find the Relic
The first two objectives form the bulk of the investigation. You can't actually scan for thermal clues until you know that's a thing so work though the objectives until you have the option to scan the thermal layer.
The security systems can seem tricky if you don't pay attention right at the start, especially as you won't know how much you need to scan until you've scanned it. You can actually grab four things almost immediately which is part of the problem as they're easy to pass by - several key items appear in the first few seconds and there's actually a lot to miss before you've even realized you've started.
Here's where to find the apartment security systems:
Time to scan / layer - 0m10s / Visual
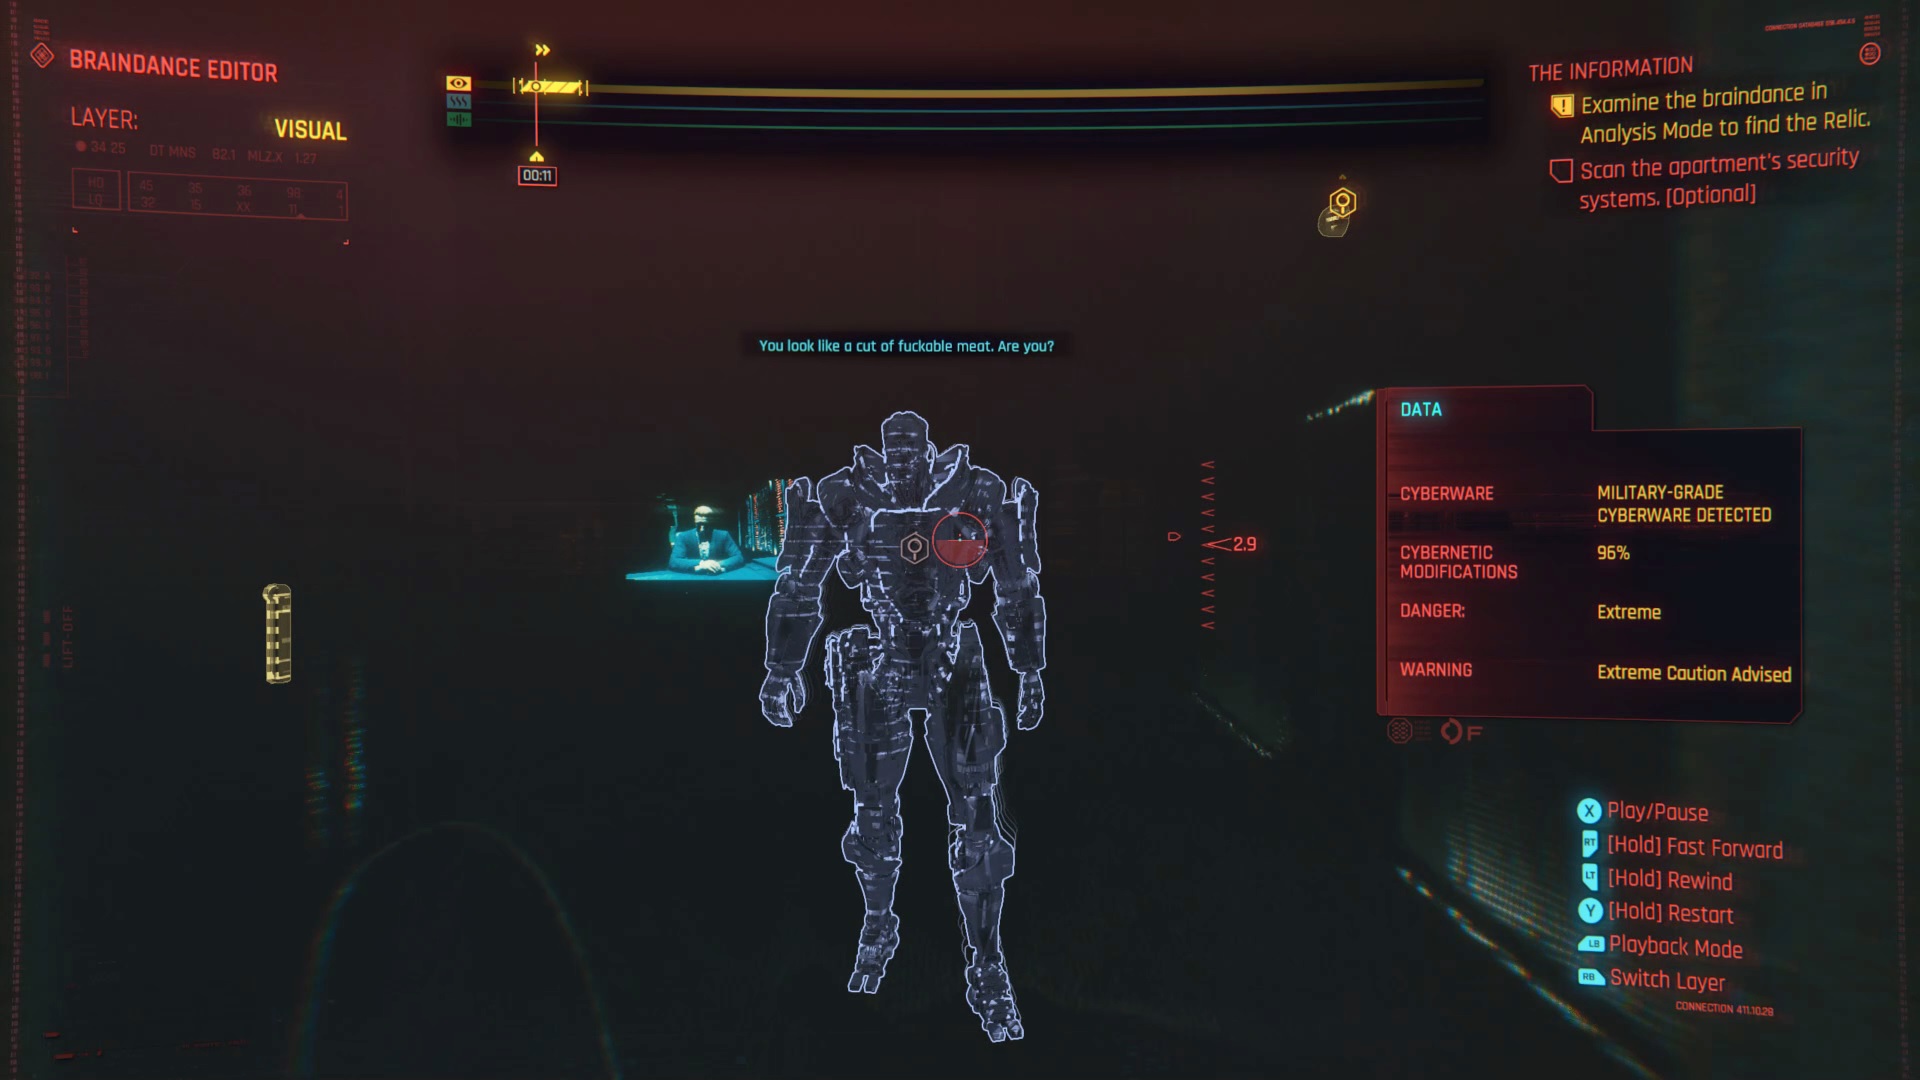
- Military-grade cyberware - you can't really miss the giant cyborg guard so scan him as soon as you see him.
- Motion sensor camera - this is on the wall, up and to the right just outside the lift entrance.
- Alarm System - this is on the wall just to the right and left of the lift as you come out. Scanning either counts.
0m22s / Visual
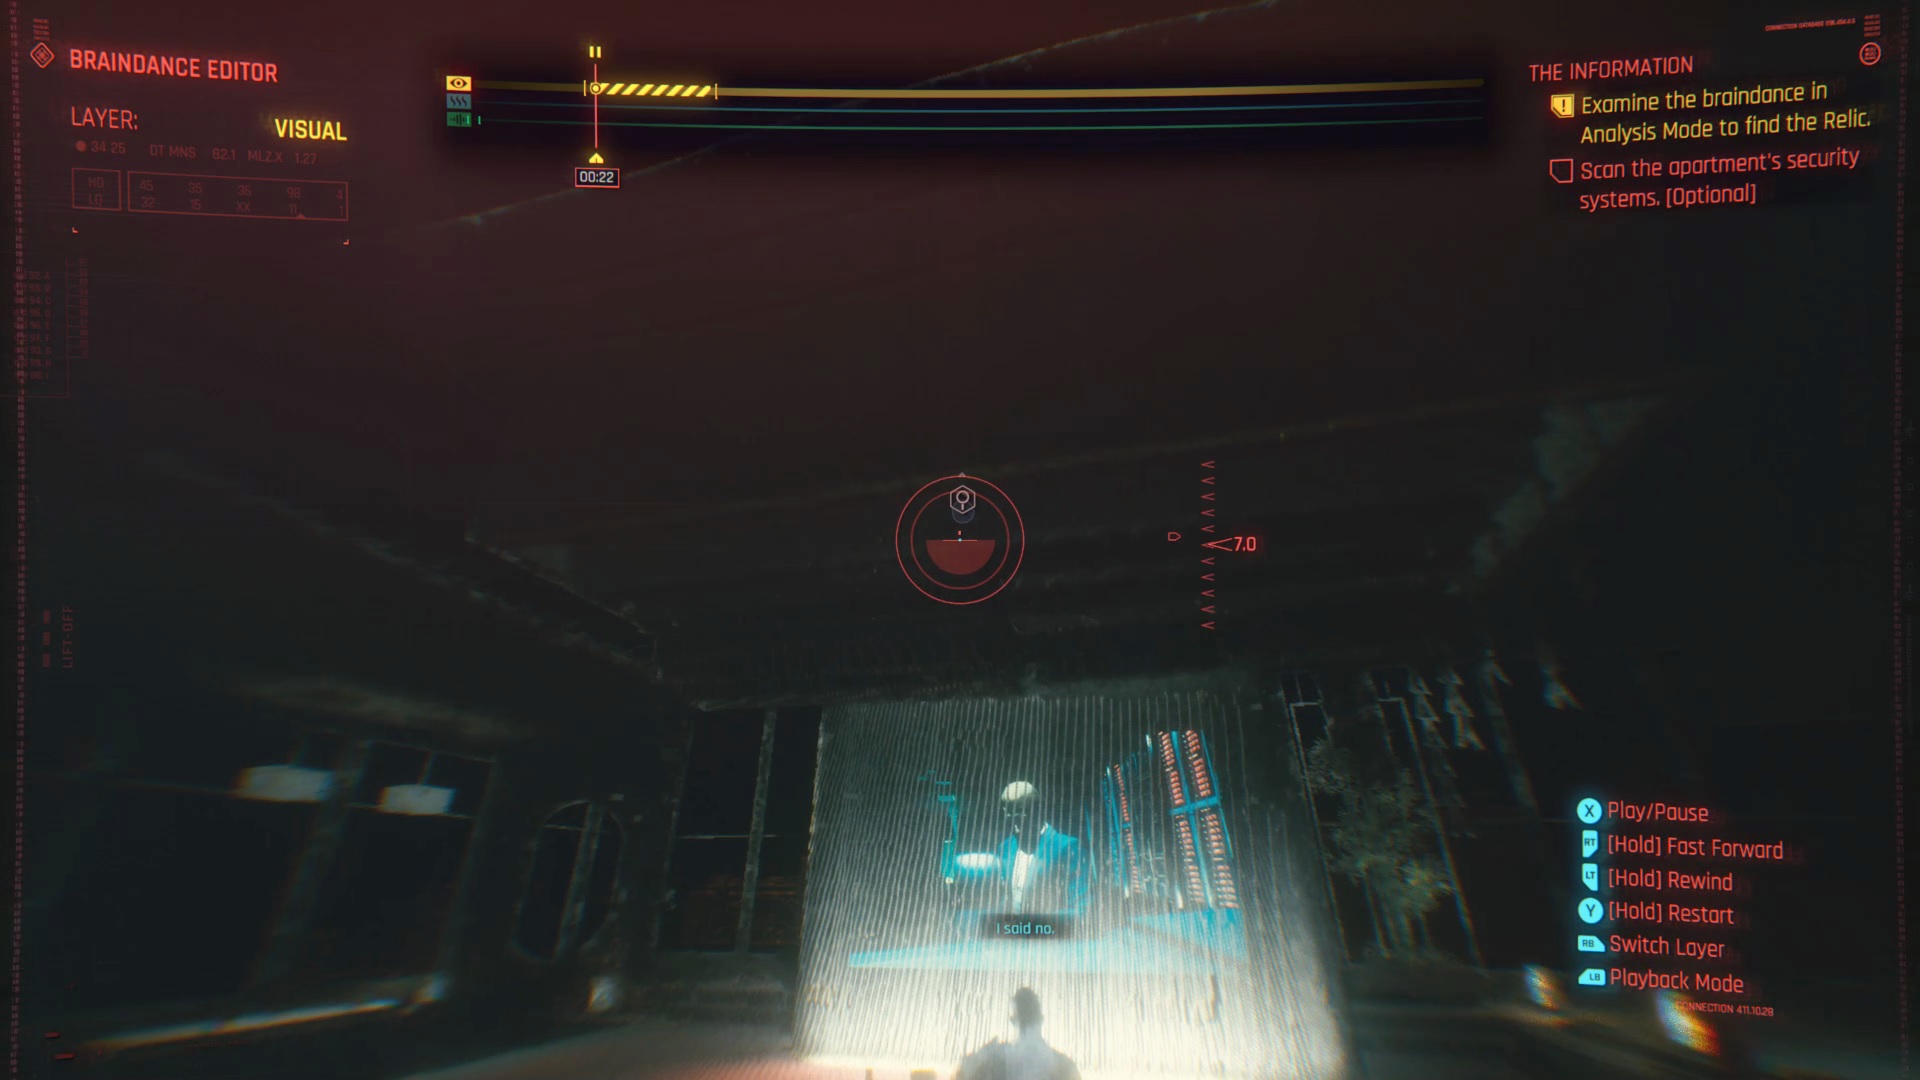
- Motion Sensor Camera - there's another motion sensor camera on the ceiling just in front of the giant TV.
0m30s / Audio
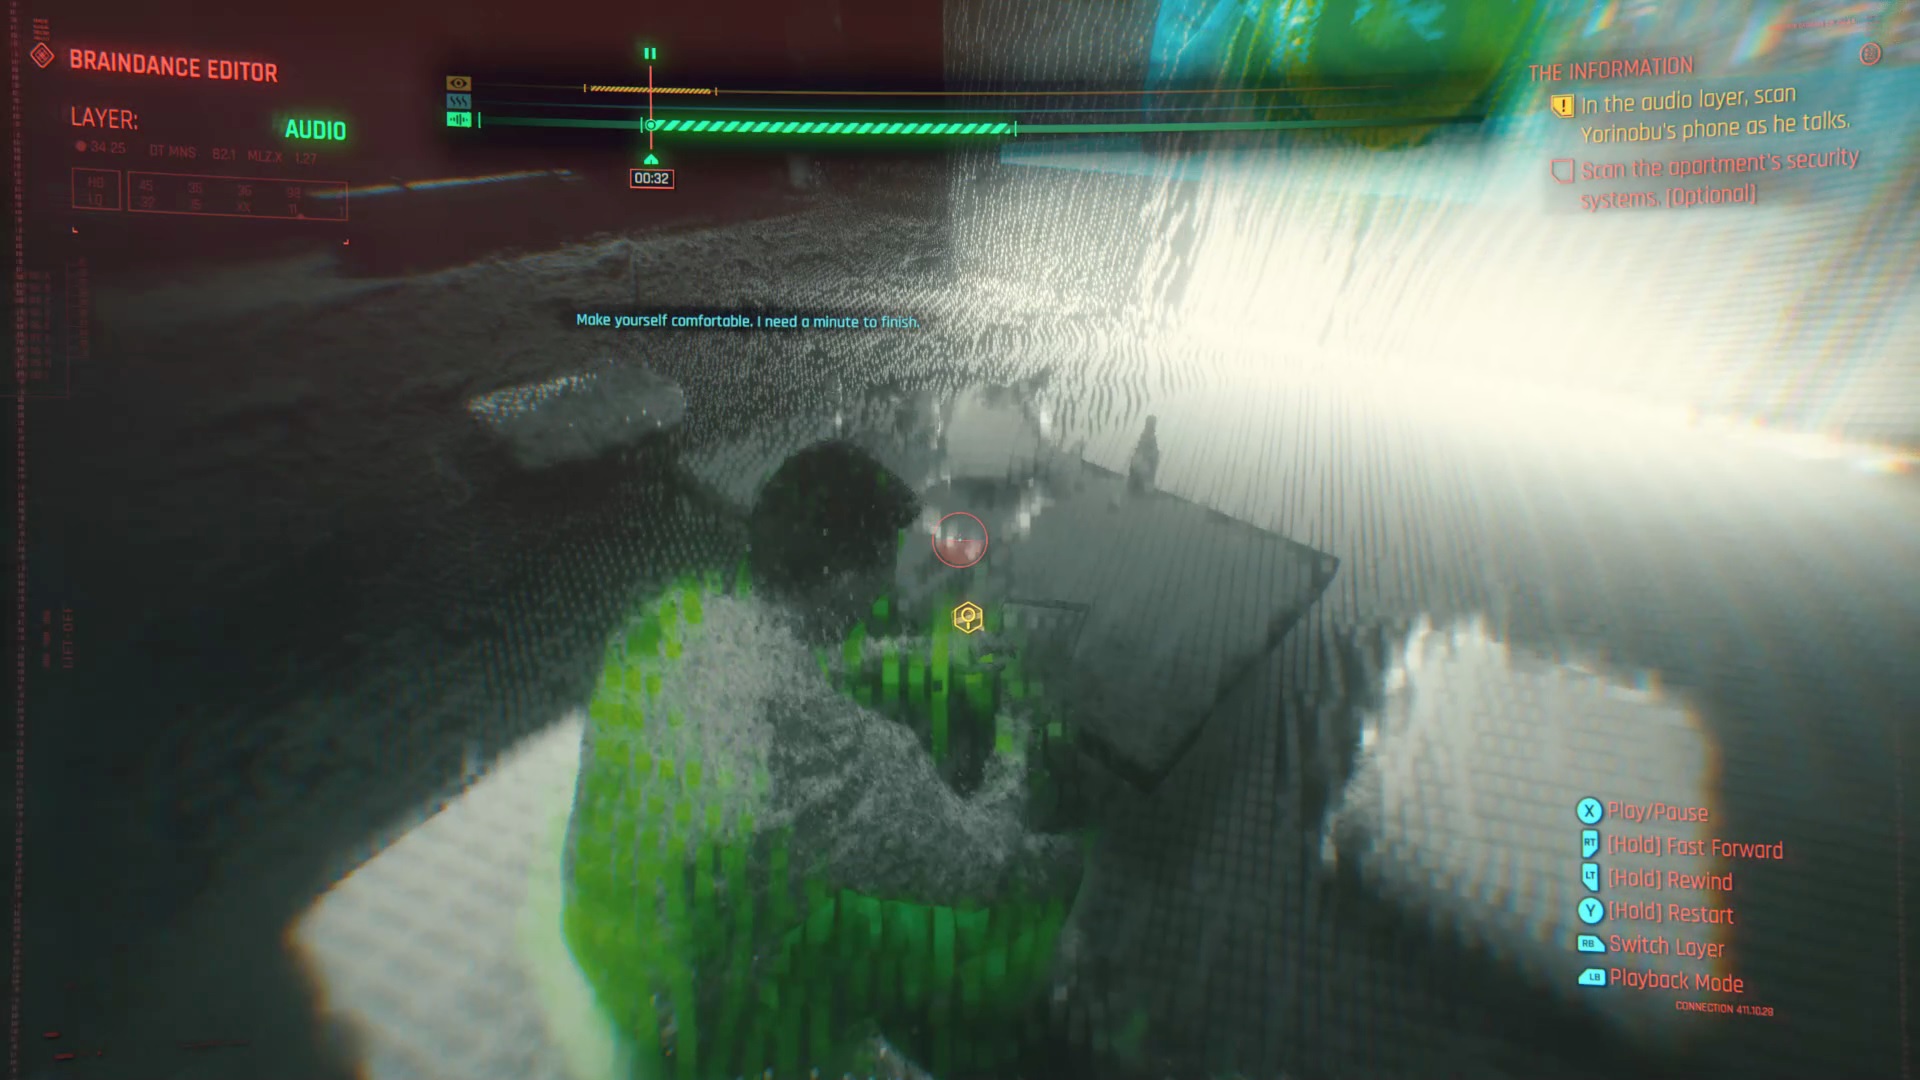
Yorinobu's phone conversation - At the 30 second mark you'll be asked to listen in on Yorinobu's phone conversation in the audio layer so you can't really miss it. You can also scan the TV as an audio source to hear about cooling and ventilation. When the conversation's over, at about 1m30s, you'll be asked to find and scan the datapad for more relic storage. This can be tricky because while you can see the pad almost the whole time, it's only actually switched on right at the end of the recording. Keep working through the recording grabbing other things until you get there.
2m05s / Visual
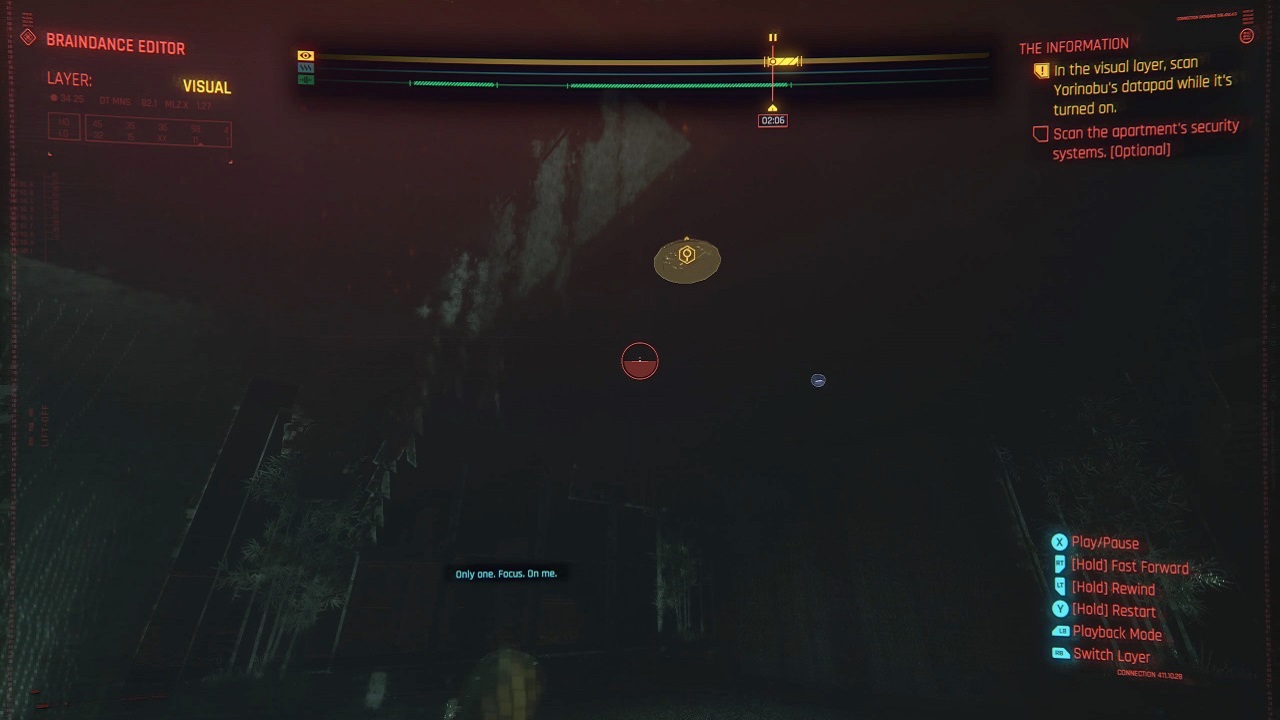
- Turret and camera - Around two minutes in to Braindance you'll be able to look up to the ceiling to the right of the TV where you can see an automated turret and camera you can scan.
2m45s / Visual
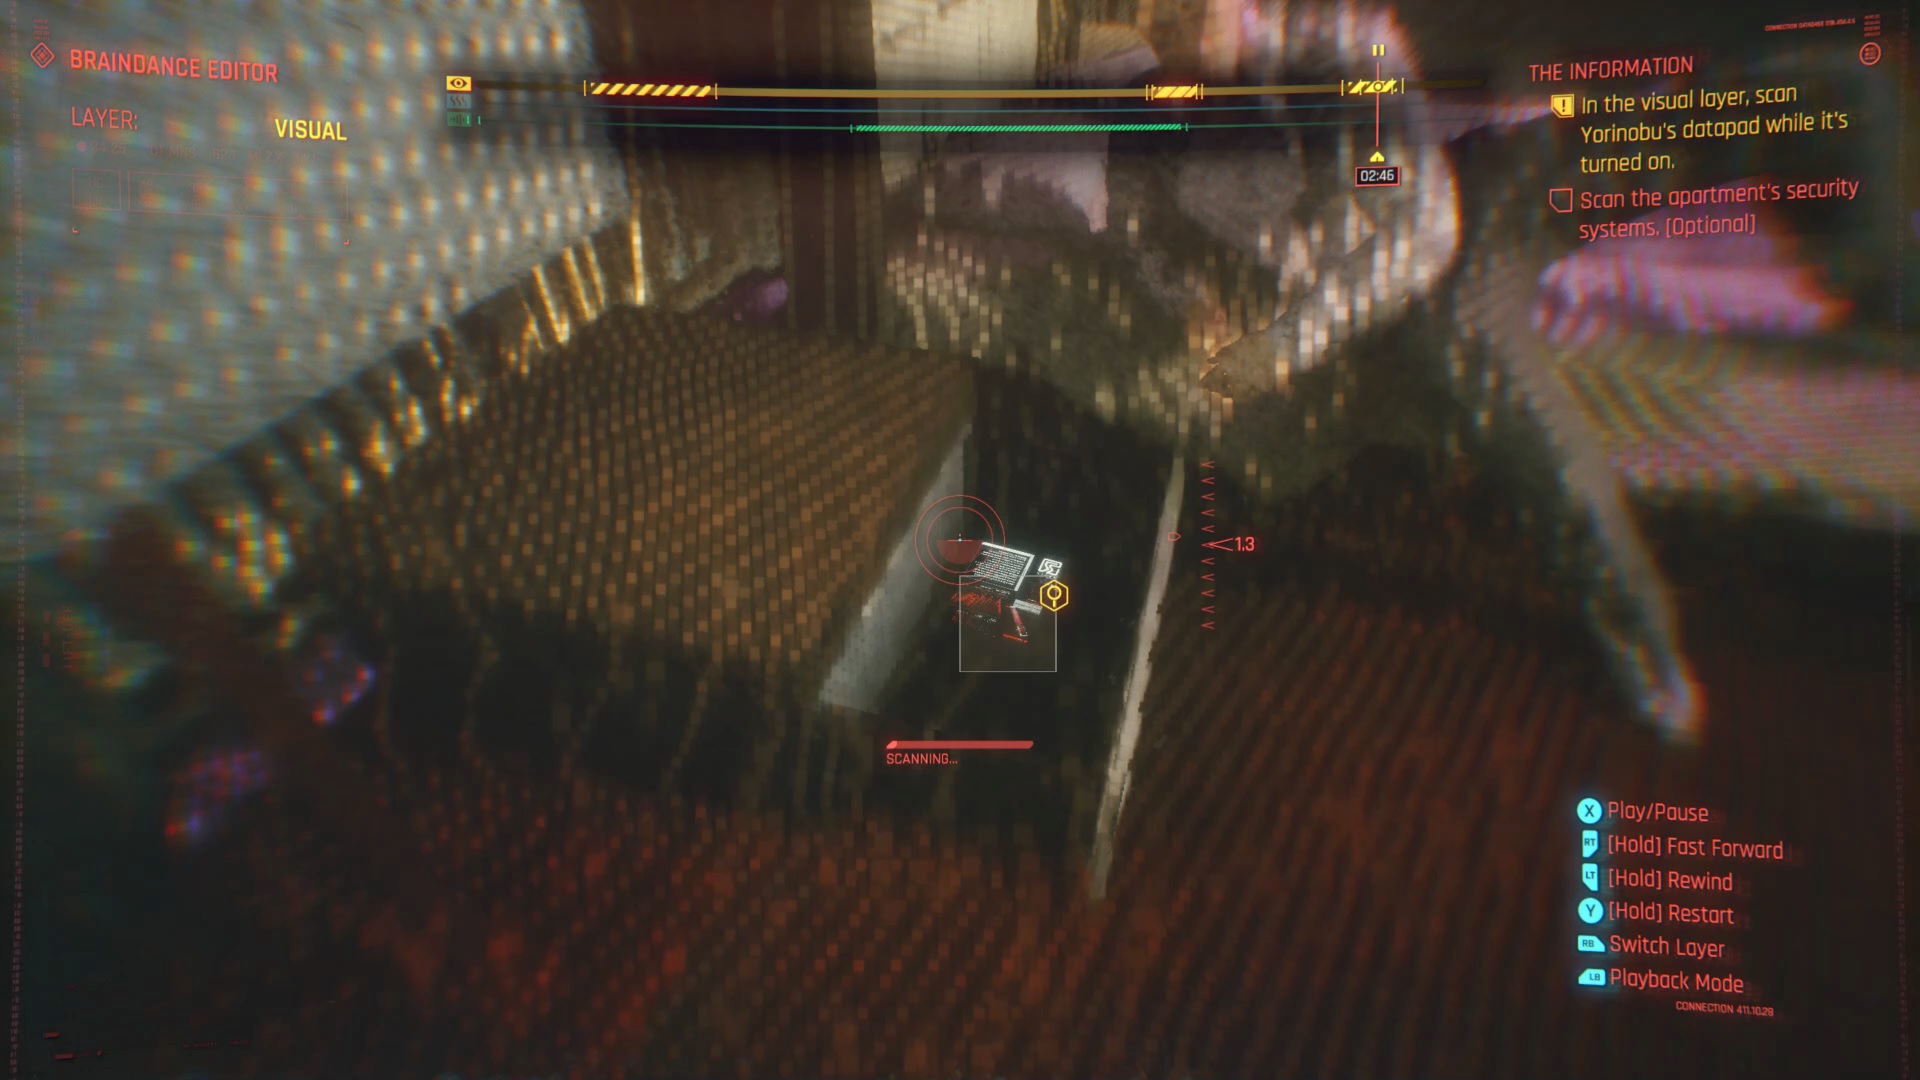
- Datapad - Almost at the end of the recording, when Yorinobu gets to the bed, you'll be able to scan the datapad while it's still switched just as he puts it away.
- Gun - There's a loaded gun on a chest at the end of the bed you can also scan while grabbing the datapad.
Scan for thermal clues to find the relic
Once you've reached the end of the recording and scanned the datapad you'll open up the thermal layer and be able to re-run the brain dance to find the heat signature for the Relic storage. There's a range of things to scan that will all be made to stand out by some blue gas that indicates 'cold'.
Assuming you'll be working backwards from the point the Thermal layer is unlocked we'll go through all the things you can find in reverse chronological order. You can scan all the objects here if you want but it's the Hidden Safe that you want.
2m40s
Air conditioning vent - As soon you unlock the Thermal scan you'll be able to scan an air conditioning vent on the wall.
1m30s-1m56s
Champagne and ice bucket - you can find and scan this in the middle of the timeline when people are around the coffee table. It's obviously not what you need though.
1m00s
Fridge - around the one minute mark you can scan the fridge where Evelyn gets a drink, again though, not what you want.
0m40-0m46s
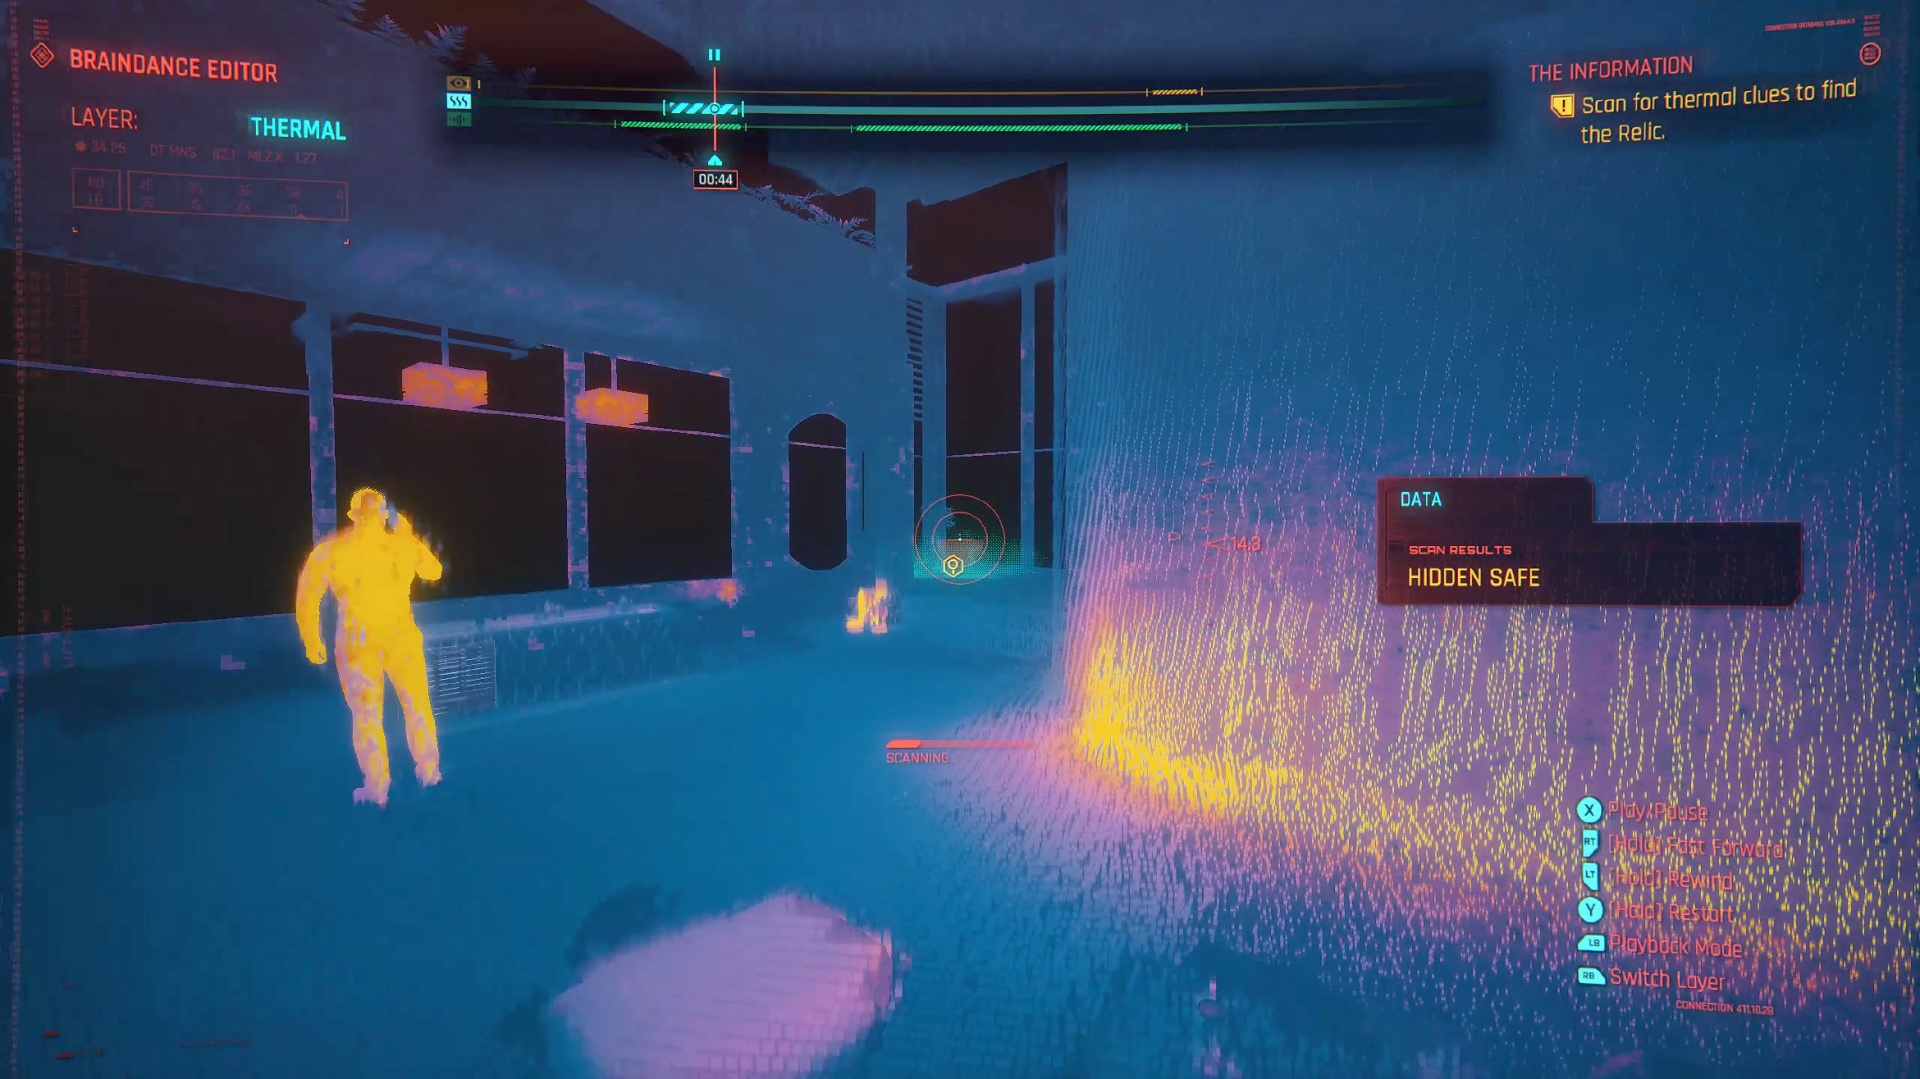
Hidden Safe - Right at the start of the recording, when Yorinobu and Evelyn are walking to the bar to fix a drink, you'll get a brief window where you can scan a hidden safe on the floor in the far corner of the room. That's what you need and scanning this will let you leave the Braindance if you want, even if you haven't completed the optional tasks.
Cyberpunk 2077 The Pickup | How to free brick in Cyberpunk 2077 | Should you cut Dex out in Cyberpunk 2077? | Cyberpunk 2077 Happy Together | Cyberpunk 2077 The Gig | Cyberpunk 2077 Human Nature | Should you punch Fingers in Cyberpunk 2077? | Cyberpunk 2077 Angel or Skye | Cyberpunk 2077 interrogate Woodman | Cyberpunk 2077 Delamain core | Where to find Grimes in Cyberpunk 2077 | Cyberpunk 2077 NetWatch Agent | Cyberpunk 2077 Brigitte chip decision | Cyberpunk 2077 Disasterpiece | Cyberpunk 2077 kill Grayson | Cyberpunk 2077 tarot cards | Cyberpunk 2077 Hideo Kojima cameo
Weekly digests, tales from the communities you love, and more

I'm GamesRadar's Managing Editor for guides, which means I run GamesRadar's guides and tips content. I also write reviews, previews and features, largely about horror, action adventure, FPS and open world games. I previously worked on Kotaku, and the Official PlayStation Magazine and website.

