


Once docked, head towards the building and wait for the cutscene to play out. Then move on, getting an item from some drawers on the right by the 'Silence' noticeboard before heading through the door, and then through another door by the windows where you'll see the map in front of you. Behind you'll find an Emergency Relief Crate, or ERC, that you won't have a key for yet.
Leave the room via the partially-opened door into a corridor with a body hanging ahead of you. Head towards the body and, when you can, turn left to find a Lost Letters - Dominion note on a bench next to another body.

Turn right from the bench, look for another large Silence notice and go through the door next to it. You'll see a creature run away, which is a problem for another time . Read the blackboard for the "Manifesto" Note and open the cupboard for an item.
Go back out and follow the room left to reach the Restroom, go in and then through the red lit hole in the wall. You'll be attacked by an enemy, so kill them and then grab an item from the drawer at the back of the room, before you head out the other door into the main library annex.
There's an item in a drawer by the Gas Can. In the far right corner near the ramp up you'll find a door you can unbolt for shortcut back to the way in, while on a desk to the right just before the ramp you'll find the "Internal Memorandum" note and an item in a nearby cupboard.

Head up the ramp and follow the path to the back of the room where you'll find a handle you can turn. You'll be jumped by the creature you saw earlier and dropped back down to the floor below and attacked by more enemies. Now's a good time to use that Gas Can to take out multiple enemies at one.
Once the area is cleared go up the ramp again where you might be attacked by any leftovers. When everything is dead head to the back to find an item in some drawers. Now turn the second handle in the new area you've uncovered, and then turn the first wheel again to access the path you've just cleared to the Restricted Section.
Go inside the Restricted Section and take the impossible to miss glowing red evil book to trigger a cutscene. Once that's done you'll hear some screaming and get a new objective.
Find the Source of the Noise
Push the drawers aside to open a new door and keep going past some red painted doors until you reach a lit, partially open door. Go through to trigger a cutscene and meet Corentin.
Save the Woman at the Devil's Reef Hotel


ERC crates nearly always have useful items like weapon or inventory upgrades so you should always try and open on once you have the ERC Pen to do so. You'll nearly always find the crate early on in an area, and then it's just a matter of time to find the key.
Head past Corentin to find a Safe Room and an "ERC User Manual" note nearby with an ERC Activator Pen, which acts as a key. Unlock the other door and head back to the ERC Crates with the pen (now you have it) to get the Voss Compensator, which will make fully-focused shots slow enemies. It's probably best to deal with some of enemies you'll encounter now or they can easily bunch up on you.
Once you have the part, head back to the safe room and out the other exit to Corentin's boat, grabbing the item in a yellow box by the stairs.
The path on the boat looks like it diverges, but it's just a square, so either direction will eventually take you to a Church and the sub-objective to Open the Floodgate just beyond it.
Open the Floodgate

Dock at the church and grab the item in the yellow box immediately on your left and the Night Ore near the body right in front of you. When the time comes this is how you recharge the Nightshade Mask you took at the start, which can revive you when you die. There's also "A Balm for Flash and Relic" note that explains the ore.
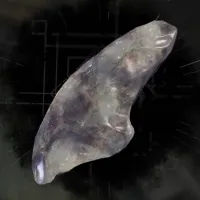
Head to the Church, avoiding the traps so that A) they don't hurt you and B) you can use them on enemies later.
Go past the white door when you reach it, as it's locked. If you take the left turn you'll find an Obelisk to note for later. Head right instead where you'll find a flooded area.

Take the left turn in the water and you'll find a "Stained Note" that mentions a Trident and a Dagger, plus an item in a yellow box.
Take the turn to the right and you'll go past a locked Graveyard Gate and find your way to a statue covered in red vines, where you'll find the Church Key near a body. There are a lot of enemies here, so use the traps and the Gas Can to help take them out. There are also two yellow item boxes near the Statue with items in, and a Star Locked Door you can't do anything with yet.
Take the Church Key to the white door. Inside you'll find the a "Call Upon Believers" note on the altar, and "Origins of the Redemption Church" note at the back near a ladder. There's also an item in the cupboard in the corner and, up the ladder, you'll find a Radio you can listen to and another Star Door.

Dream Essence is essentially XP, giving you upgrade points you can use to unlock talents. The main way you'll get it is from joining up investigations, which is why it's important to hoover up every note you can find. You'll also get it as rewards here and there for puzzles.
Now head into the Safe Room, where you'll find the "Look for Dream Essence!" note and some Dream Essence you can now use to upgrade Talents at the Talent Table. You can only equip one for now, so I'd recommend either Carapace of the Damned to reduce damage, or Profane Reload to reload quicker.
Head out the other door into a new area. Get the item in a yellow box on the coffins, then head past the big statue to the Gate Lever. However, the Gate Lever has a combination lock on it and there's a "Floodgate Lock" note by a body explaining the combination is the year of the bell.
The Floodgate Lock combination

The Floodgate lock can be opened with the code 1672.
The "Floodgate" Lock note explains the combination is the year of the bell, and while the "Origins of the Redemption Church" note you found earlier says the church was founded in 1667, the "Report on the Bell" note you'll find later says 'it took another half decade to craft and install the bell'. This gives you the combination 1672.
You can open the gate now, but there's a lot more to do at the Church before you go, DON'T LEAVE YET.
Grab the Star Key on the body and the item in the yellow box. Leave and you'll be attacked by a couple of enemies.
Use the Star Key to open the Star Door above the ladder in the church, where you'll find and take the Trident and a "Report on the Bell" note that says 'it took another half decade to craft and install the bell. This finally gives you the Floodgate Lock combination: 1672, as I mentioned earlier.

Link the "Origins of the Redemption Church" note to the "Floodgate Lock" note and the "Report on the Bell" note in Investigations to complete it and get an upgrade point.
Go into the Safe Room, out the other side and around the corner where you'll find a "Lost Letters - The Conduit" note and an item near a red vine-covered wall. Follow the building around past an open window, where you'll be jumped by two enemies. Deal with them and you'll have opened up a shortcut back to the Obelisk. There's also an item in a yellow box. Now go back to the window you can climb in where you'll find a "Notes on the Path" note, an ERC pen and you can also unlock the door for a shortcut back to the Church.

Now go back to the Star lock in the Graveyard and open it to get the ERC crate for an inventory upgrade, grab the Printing Plate C for later, and a First Vision Note and a "Letter to Boss" note.
Go to Investigations to link the "The First Vision" note with the "A Call Upon Believers" note and the "Notes on the Path" note for an upgrade point. An enemy will appear when you leave but you can run past and get back to the church and the Obelisk.
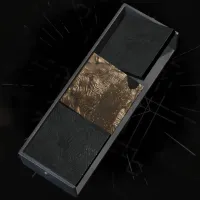
How to solve the Obelisk puzzle at the church

This is the Obelisk puzzle solution, showing all the correct symbols. This comes from using the "Call Upon Believers" note which lists gods 'from the depth to the heights', while the First Vision note lists their symbols, giving you this:
- Cthylla: Splayed Womb
- Gyrh: Spearhead
- Tsog-Nar: Crooked Cross
- Yig: Serpent Form
With that info you need to rotate the Obelisk symbols to display these symbols in order starting from the bottom (the depths) and moving to the top (the heights).
When you get it right the Obelisk will start crackling and lightening will keep striking every few seconds, so get out the way. Each time the lightning hits, one of the Trident tips will light up, so wait for that while dodging or dealing with the enemies as you do. When all three tips are lit, grab the Trident between blasts to end the process.
Take this charged Trident back to the room you found it in and place it back on the stand. This will transport you to another dimension where you'll find the church full of statues worshipping a star-shaped god. Head to the altar, picking up the Dagger on the way, and place it in the altar slot. This will take you down to a basement where you'll have a small boss fight. When that's over there will be two pieces of Dream Essence on the alter when you go back up.
Now you can use the Floodgate combination 1672 to open the gate if you haven't already. You'll be attacked but you can just dodge past everyone and get back to the boat. Follow the water until you reach a whale and the new objective 'Move the Whale'.

