Outriders Big Iron - how to find the weapon parts for a guaranteed legendary gun
Where to find the weapon parts in the Outriders Big Iron quest

The Outriders Big Iron quest seems fairly straightforward at first, but it seems to be throwing a curveball for many players when looking for the three weapon parts. The waypoint marker to navigate through the quest tends to bug out during this Outriders mission, so if you're looking for a fix and want to find the weapon parts, you've come to the right place. Here's a complere Outriders Big Iron quest guide to get yourself a guaranteed legendary weapon.
Outriders best class | Outriders legendary weapons | Outriders legendary armor | Best Outriders weapon mods | Best Outriders armor mods | Outriders length | Outriders crossplay | Outriders level cap | Outriders expeditions | Outriders Legacy | Outriders Big Iron | Outriders Yagak | Outriders Forgotten Chapel | Outriders cheats | Outriders hide helmet | Outriders Game Pass
Outriders Big Iron weapon parts locations
If you're struggling to find all three weapon parts in the Outriders Big Iron quest, we can help. They aren't marked individually on your map and the navigation system in Outriders is notoriously difficult to use, so it's easy to get lost. The three images below are of each weapon part, along with the descriptions of how to find each one.
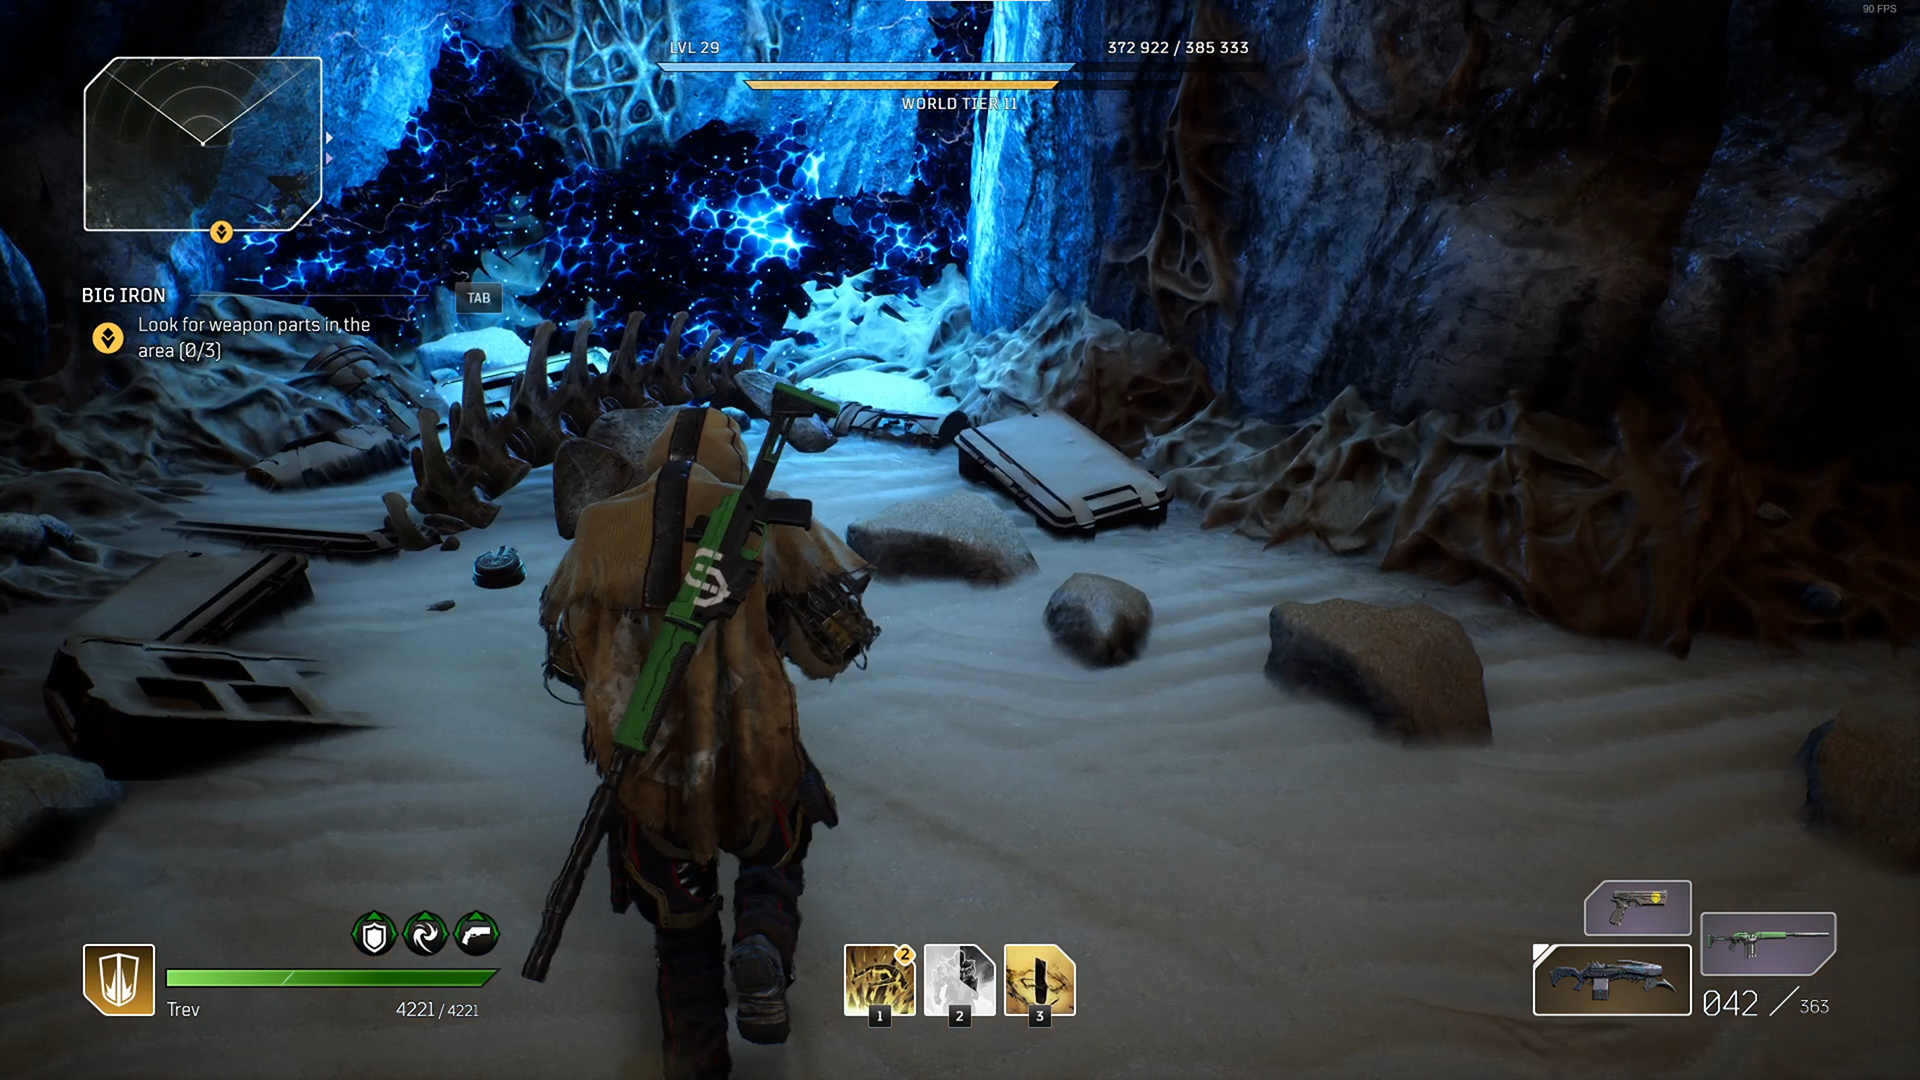
Once you enter the Big Iron mission area, kill the horde of incoming Perforos then hug the left-hand side of the wall and enter the cave below the blue sparkly rocks. Kill more Perforos inside then exit out of the other side, by the reddish-pink tree. Kill the next wave of Perforos, then cross over to the cave opposite. You'll find the first weapon part by some crates and bones at the back, next to more blue sparkly rocks.
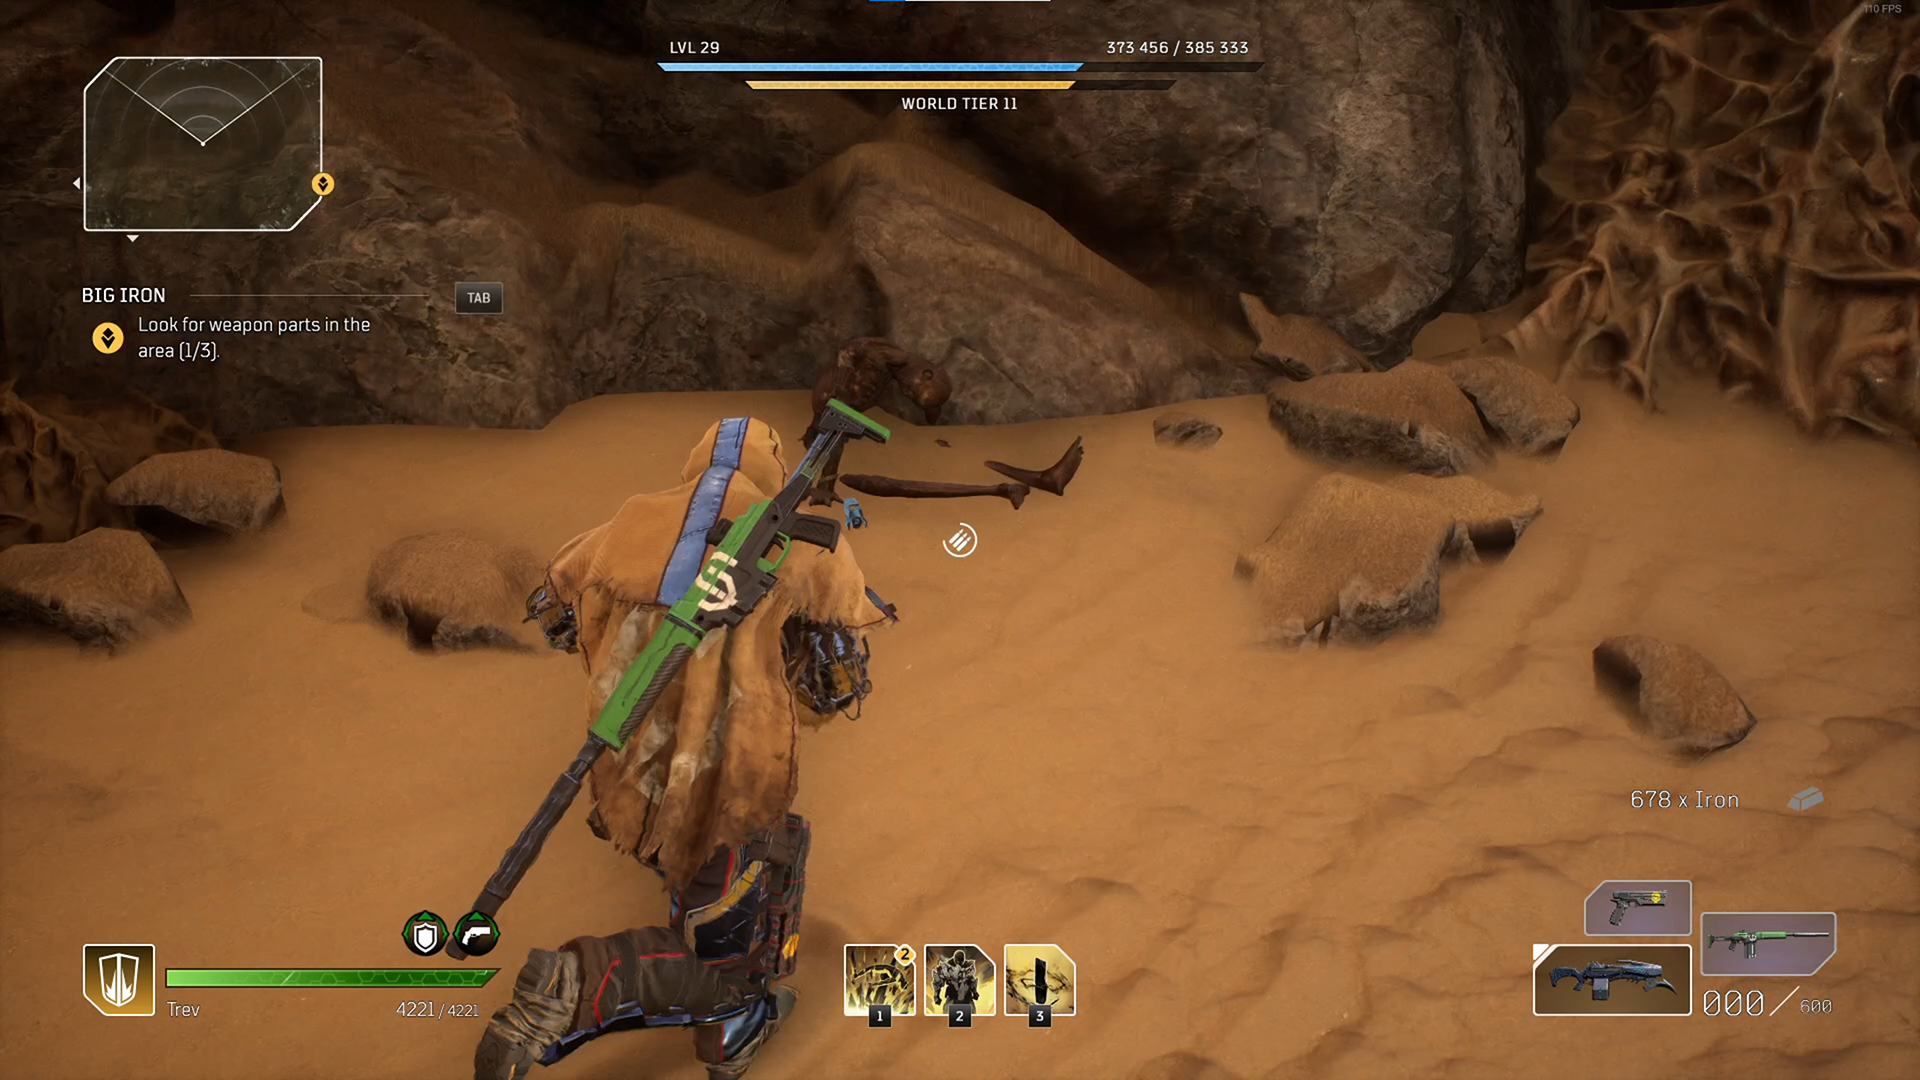
For the second weapon part, run on through the area until you go through a narrow section with two rocks close to each other. Kill the next wave of enemies that spawn– Calloused Maulers, a Strix or two, and a Wasteland Behemoth this time – then keep following the path forward. Hug the right-hand side of the area and enter the first cave on your right, beneath some more blue sparkly rocks. The second weapon part is at the back, next to a corpse.
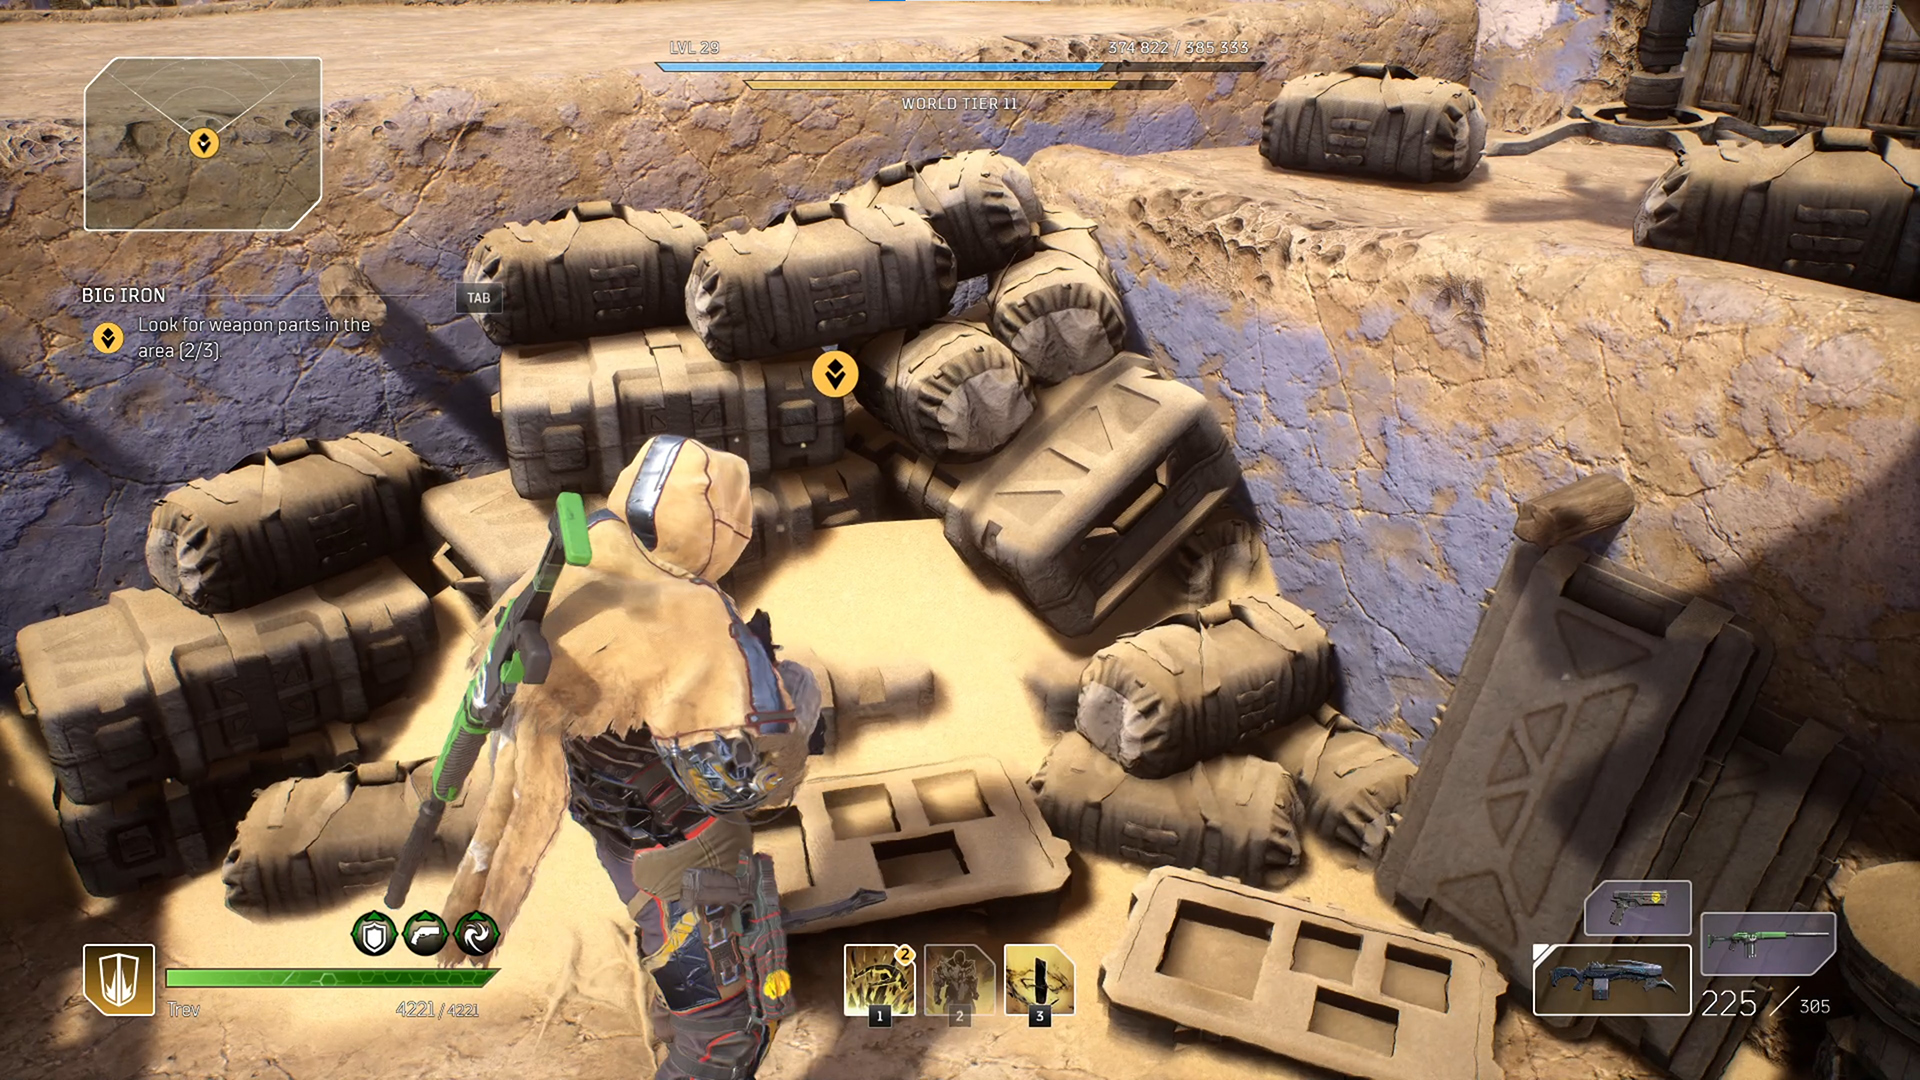
Keep running forward until you pass through a wide-open wooden gate. There'll be a lot of humanoid enemies to kill here, so fight through them, then kick open the next, smaller wooden gate. Deal with the next set of enemies in the village including a Vanquisher Warlord, then head to the back of the village, near where a Hunter will have been trying to snipe you. To the left at the top of the stairs will be the final weapon part, by some very sandy crates.
Outriders Big Iron missing quest markers
Unfortunately, the Outriders Big Iron quest is one that suffers from the poor navigational system in the game. Sometimes the quest marker bugs out – heading back to the lobby then jumping back into the game, or returning to the area you just came from to check you have no outstanding objectives or alarms to deal with can fix it. You can still progress and complete the Big Iron quest though, just make sure you pick up all the weapon parts and return to Channa for a guaranteed legendary weapon at the end.
Weekly digests, tales from the communities you love, and more
Give me a game and I will write every "how to" I possibly can or die trying. When I'm not knee-deep in a game to write guides on, you'll find me hurtling round the track in F1, flinging balls on my phone in Pokemon Go, pretending to know what I'm doing in Football Manager, or clicking on heads in Valorant.
