12 hidden mechanics No Man's Sky never tells you about
Navigate the final frontier like a pro with our guide to all the secret tricks you never knew about No Man's Sky
For all of the game's focus on Travellers getting their boots on the ground, it’s really a case of freeballing it once you’ve cleared the relatively smooth tutorial as there are plenty of No Man’s Sky’s hidden mechanics which aren't touched. Feeling a bit rudderless now that you’ve been left to your own devices in the vast reaches of No Man's Sky space? We break down some hidden mechanics in No Man’s Sky that will make your galactic adventures a lot easier once you’re acquainted with them.
1. Switch between perspectives on the go
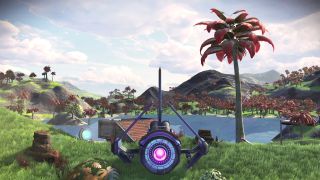
Next has finally added the third-person perspective as a playable feature in No Man's Sky, but what you might not know is that you can easily switch between first and third person in-game, without ever going into the main menu. Just press up on the D-pad to access your quick menu, and select Utilities to find the option to toggle between the two perspectives on the go, regardless of whether you're on foot, or piloting a space ship ten thousand feet above the ground.
2. Edit your camera filters

No Man's Sky has had a photo mode for some time, and it's a pretty good one too, letting you float around wherever you want in real time. When you select the camera tool from the quick menu, however, there's no UI to speak of, which implies a lack of customization tools. Hit the Square/X button while in the Photo Mode, however, and you'll suddenly be met with a whole bunch of options for making your pics look as Insta-worthy as possible.
3. Upload your discoveries
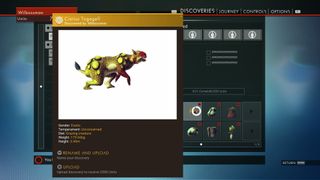
First, make sure you've crafted the Analysis Visor, which lets you scan your surroundings and zoom in on points of interest. After scanning any planets, flora, or fauna, hit Options and go to the Discoveries page then hold the upload over any item marked with a red dot to send it off in exchange for units. You can either do this on a case-by-case basis, or hit "Upload all" near the bottom of the menu to get it all done at once. The "Records" and percentage completion section in the middle of the right hand side relates to the individual wildlife species on the planet, and you'll receive a massive units bonus if you can scan them all then upload your 100% collection.
4. Feed the animals
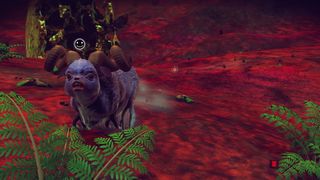
You can feed certain wildlife by approaching them and supplying the prompted element. This will make them happy and if you follow the magnifying glass prompt when it appears they'll give you items in return - either by leading you to them, digging them up, or otherwise 'producing' them. Not all of them will respond in this way, however, so don't get too close to the dangerous looking ones.
5. Keep your mining laser cool

When harvesting elements with your mining laser, fire it until the bar is full and flashes red then release it briefly before firing again. Doing this will instantly reset the temperature to minimum, meaning you don't have to wait for it to cool down and can maintain a steady stream of materials being collected.
6. Learn alien languages

After examining Monoliths and Knowledge Stones to learn new words in alien languages, those words will be filled in when accessing terminals and during dialogue with aliens from that race. As your standing increases with certain races, you will also get the option to request dialect help for a small offering of materials when speaking to aliens. Try and work out what's being said using the words you understand, as this can help you pick the correct response if you're given a choice of options. If you have a relic relating to that race, transfer it to your Exosuit inventory as you may be given the option to trade it for a gift, which is usually a blueprint for an upgrade.
7. Take off for free
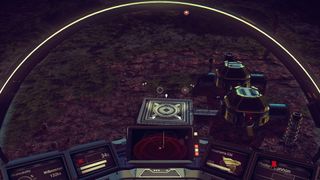
When flying over a planet in your Starship, if you see an Outpost with a landing pad outside then aim for it and hit Square/X when a reticule appears around it (or you're over the top of it) to automatically land on the pad. When you next take off you'll receive a boost from the pad, so won't expend any Launch Thruster fuel to get going again.
8. Fast travel on foot
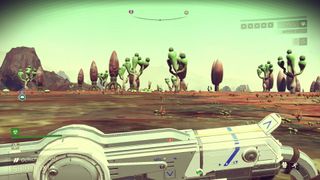
While you explore a planet on foot, you can travel much faster by performing a melee hit then immediately boosting with your jetpack and using the burst of momentum to propel yourself forwards. This is much faster than the standard sprinting option, though for covering larger distances it's always best to return to your Starship.
9. Manage your inventory
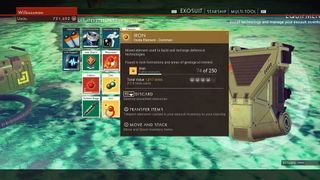
If you have a red icon in the bottom right of the screen, this means your inventory is full and you won't be able to pick up any new items. You can stack identical elements up to their maximum capacity per slot, but some non-element items can't be stacked and take up a slot each. If you're close enough to your Starship you can transfer items between inventories by holding Triangle/Y, and if you have a matching element onboard then it will stack automatically - bear in mind the the maximum capacity per slot is larger on your Starship, making it more efficient to store elements there. If you're desperate for extra space you can always discard items by holding R3/RS, ideally common elements that can be easily replaced.
10. Find Drop Pods and upgrade your Exosuit
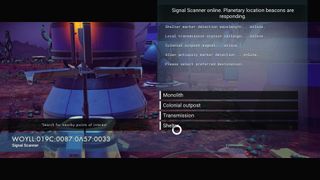
Interact with one of the laser beam emitting Signal Scanners found near structures on planets, by using a Bypass Chip which is very cheap to construct, then choose to scan for a Shelter. This will often lead you to a nearby Drop Pod, where you can buy an extra inventory slot for your Exosuit. You can use several Bypass Chips in a row to rack up a number of markers on your map, including multiple instances of the same type of location, then go off and explore them all without having to return to the mast to scan for more.
11. Watch for Sentinels
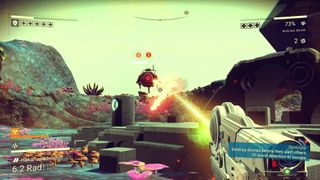
On your HUD in the top right corner, the 5 boxes represent the level of Sentinel interest in you if they are attacking. Should they come after you, either take them out as quickly as possible or hide from their view (represented by their markers changing into eyeballs), as otherwise the interest level will continue to rise and more powerful Sentinels will be sent in to attack.
12. Get your Atlas Passes

You can unlock your first No Man's Sky Atlas Pass by following and progressing the Atlas Path storyline, triggered at the start of the game - don't worry if you decided to ignore the glowing red orb though, as you'll be guided down an alternate path which also yields an Atlas Pass. Once armed with the blueprint, you can craft passes that give you access to locked rooms in Outposts and Space Stations, containing inventory upgrades and useful items.
No Man's Sky tips | No Man's Sky cheats | How to make money fast in No Man's Sky | No Man's Sky How to Save | No Man's Sky storage | No Man's Sky free freighter | No Man's Sky multiplayer | No Man's Sky Antimatter | No Man's Sky Chromatic Metal | No Man's Sky Technology Modules | Best No Man's Sky bases | Best No Man's Sky mods
Sign up to the GamesRadar+ Newsletter
Weekly digests, tales from the communities you love, and more

I'm GamesRadar's Managing Editor for guides, which means I run GamesRadar's guides and tips content. I also write reviews, previews and features, largely about horror, action adventure, FPS and open world games. I previously worked on Kotaku, and the Official PlayStation Magazine and website.
