Central Tower
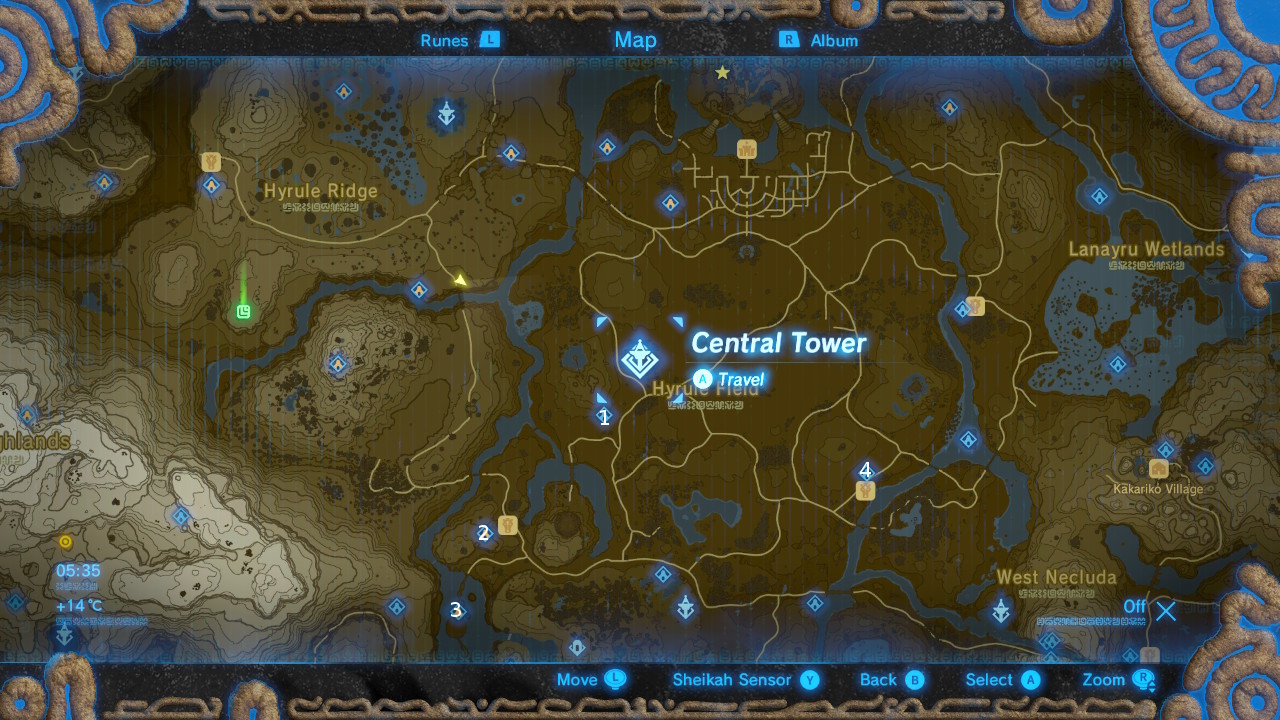
#1 - Kaam Ya'Tak Shrine
This shrine is out in the open, to the southwest of Central Tower.
There's a large ball dangling in front of some doors. Use Magnesis to pull the smaller ball in the tube back and release it to send the large ball attached to the end hurtling into the doors to open them.
There are spiked balls rolling across the corridor beyond so run through in the gap, or use Stasis to freeze them so that you can walk by.
Take care of the Guardian Scouts in the next room then destroy the platform with the boulder on to have it roll down and open the next set of doors for you. If you don't have anything to ignite the platform, a bomb will work wonders. Open the chest and head into the next area.
Open the chest to the left as you go through the doors. Follow the corridor until you reach two Guardian Scouts. Eliminate them and continue onward through the corridor but be wary of the stone section just after the Guardian Scouts as it'll tip down as soon as you step on it. Freeze it with Stasis to get safely across.
Interact with the terminal and use the gyroscopic controls to knock the boulder with the hammer. It can be a bit fiddly but you'll get there. The boulder will have knocked open the doors, so head through and grab the next chest on your way.
In this next room, you need to destroy the wooden platform the boulder is on to send it rolling down the ramp. There's another stone platform in here that will tip when you walk on it, so get yourself across, step on the floor switch, and freeze the platform in place to get the boulder to open the next door.
To get the timing down, you need to step on the floor switch as the boulder hits the bottom of the ramp and have the stone platform be frozen when the boulder reaches it.
In the next area, step on the floor switch to lower the bars, cast Stasis on the hammer, and knock the bejesus out of it so that it shoots off and opens the doors.
Blow up the wall behind you to get another chest, then head through the newly opened doors.
Stand on the patterned floor segment which is actually a launcher and hit the crystal. Don't glide to the altar just yet. As you make your descent, you'll see a final chest behind some bars, but accessible via a ledge to the side. Land here. open the chest, then use the launcher again to get to the altar.
#2 - Rota Ooh Shrine
The shrine overlooks Outskirt Stable.
Hit the crystal on the right by whatever means is most convenient. A bomb will arrows and wear-and-tear on weapons. This will reveal and orb, and over on teh left side of the room, a passage to a chest containing a key.
Move the orb near the shrine entrance and hit the crystal again to reset the room. Use the key on the locked door, pick up the orb, and toss it into the tray on the right. You can throw it in quite easily from the left side of the tray.
Activate the crystal again to flip the tray and tip the orb onto its pedestal which will activate the small launcher.
Stand on the launcher and glide over to the chest on the ledge opposite.
Return to the launcher and use your box and arrow to hit the crystal and turn the platform while you're airborne to create a path to the altar.
#3 - Dah Kaso Shrine
This shrine is underneath the Digdogg Suspension Bridge, between the two islands.
There's a Guardian Scout II waiting inside with a 375 HP and one standard melee weapon.
#4 - Wahgo Katta Shrine
You'll find this shrine to the north of Riverside Stable.
Scale the side of the cube stack to reach the chest.
Now use Magnesis to stack them next to the platform that has a flat metal panel on it. Use Magnesis to pick up the panel and pop it on the floor.
Re-stack the cubes close to the altar platform and use the panel to form a bridge to the altar.
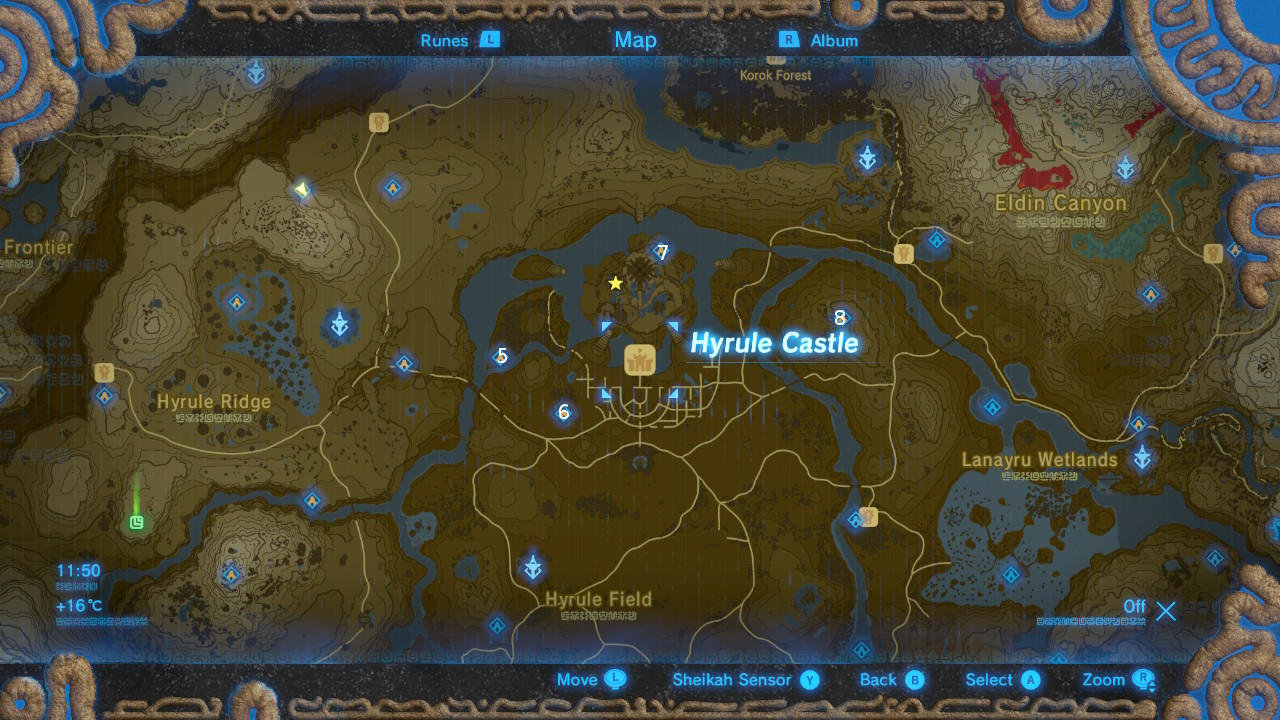
#5 - Noya Neha Shrine

This shrine is in a cave on the west side of the island that's northeast of Carok Bridge and directly west of the castle.

Burn the brambles and blow up the rocks to gain access to it.
Inside awaits a pupper.
I'm kidding. There's a Guardian Scout II in there with 375 HP and one standard melee weapon.
#6 - Katah Chuki Shrine

This shrine is to the west of Hyrule Castle, southeast of the Quarry Ruins.
There's a Guardian Scout II inside with 375 HP and one standard melee weapon.
#7 - Saas Ko'Sah Shrine
This shrine is in Hyrule Castle's Docks.

To get eyes on the docks, get around to the northwest side of the castle on mainland, where the green pin is. You'll be able to spot the moat entering a large cave to the left of the docks. That's where we want to go.

You should be able to get in and avoid any Guardian encounters. Make your way to the top of the stairs, taking out any enemies you bump into on the way.

There's a large brazier at the top. Light it by your preferred means to make the shrine appear.
There's a Guardian Scout IV inside with 3000 HP and three '++' melee weapons.
#8 - Namika Ozz Shrine

You'll find the shrine in one of the large circular formations in Crenel Hills, to the east of Hyrule Castle.

It's the one on the right as you follow the path that leads to them.
There's a Guardian Scout III inside with 1500 HP and two '+' melee weapons.
Jump to Section: