Dark Souls 3 boss guide - how to defeat every top tier enemy
Take down every Dark Souls 3 boss with our complete walkthrough guide
Weekly digests, tales from the communities you love, and more
You are now subscribed
Your newsletter sign-up was successful
Want to add more newsletters?
Join the club
Get full access to premium articles, exclusive features and a growing list of member rewards.
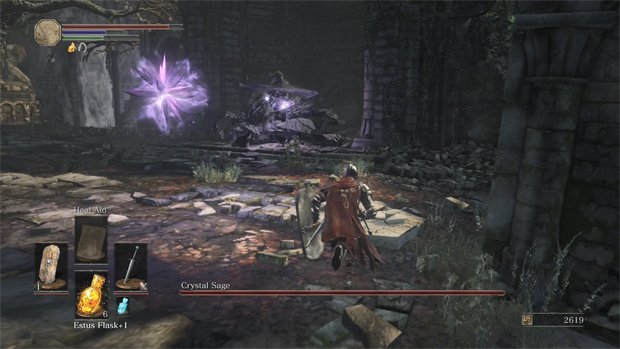
Crystal Sage
If you were expecting a witch in the woods, you found it. Lording over the Road of Sacrifices is the Crystal Sage.

The Crystal Sage casts many of the same spells you can learn yourself, so avoiding them isn’t tough. The large homing crystal moves slowly, so simply keep moving to avoid it. The Sage may also cast faster-moving magic arrows and bursts, and you’ll need to roll to avoid either of these. The boss arena itself is littered with pillars, so you can always hang behind these if you need cover. However, many spells can be avoided if you simply stay close to the Sage. After enough damage, she’ll teleport away, creating crystals along the ground; stay clear of these.
When her health hits 50%, the Sage will spawn clones of herself. These go down with just one hit, so quickly take them out and focus on your real target. She’ll create more with each teleportation.
The Crystal Sage does heavy magic damage, but only if you aren’t moving fast enough to avoid her spells. Don’t get too greedy with your attacks, and you’ll be OK.
Jump to Boss:
Iudex Gundyr
Vordt of the Boreal Valley
Curse-Rotted Greatwood (Optional)
Crystal Sage
Abyss Watchers
Deacons of the Deep
High Lord Wolnir
Old Demon King (Optional)
Pontiff Sulyvahn
Yhorm the Giant
Aldrich, Devourer of Gods
Dancer of the Boreal Valley
Oceiros, the Consumed King (Optional)
Champion Gundyr (Optional)
Dragonslayer Armour
Lothric, Younger Prince
Ancient Wyvern (Optional)
Nameless King (Optional)
Soul of Cinder
Weekly digests, tales from the communities you love, and more

Tony lives in Maryland, where he writes about those good old-fashioned video games for GamesRadar+. His words have also appeared on GameSpot and G4, but he currently works for Framework Video, and runs Dungeons and Dragons streams.
 Join The Community


