Kingdoms of Amalur: Re-Reckoning factions guide
Learn what it takes to join the five Kingdoms of Amalur: Re-Reckoning factions and why you should
Kingdoms of Amalur: Re-Reckoning House of Ballads Faction
This faction is pretty non-specific, but the twist of fate card awarded at the end rewards Faeblade users. Travel to the House of Ballads found in Odarath, found at the northwestern corner of the eastern section. Enter, and speak with Hallam the White about a vacancy in the house. Tell him you want to fill the seat, and he’ll give you a quest.

Song of Sir Sagrell
This is a straightforward quest to kill the Grave Thresh. Head to Gorguath, a cavernous tree just south of the House of Ballads. Upon entering, speak to the other pledges, then start hunting down the three Heartvines (they’ll be displayed on your map).
Once you’ve taken care of all three vines, head back to the central area and take out the Grave Thresh. After you defeat it, head northeast towards Sir Sagrell’s ring. Before grabbing it, though, know that two more Threshes will attack once you loot the ring.
This is a tough battle, so we recommend having your fate meter full. Doing so turns the difficulty into a non-issue. If you don’t have the fate, be prepared to roll a lot to avoid projectiles and turn the battle into a series of hit & run attacks. Remember, Threshs are vulnerable to fire.
Loot the corpses, then return to Hallam the White.
Ballad of Bloody Bones
After speaking to Hallam to end “Song of Sir Sagrell” and kick of this new quest, go to the Oratory in the southern part of Ettinmere and speak to King Wencen.
Wencen will point you towards Uduath, a dungeon in the northernmost part of Ettinmere. Once inside, you can find Farrara fighting a trio of sprites. Kill off the baddies and speak to Farrara. You’ll then need to go around the dungeon and open 5 prison cells.
After freeing the prisoners, speak to Bloody Bones. Be ready for a fight unless you have a high persuasion skill.
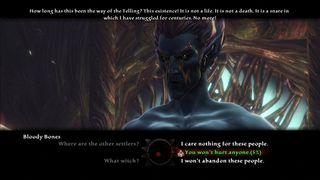
Bloody Bones will throw a lot of fire and lightning magic at you, and you’ll have to deal with a handful of sprites. Take out the sprites first, then focus on Bones to wrap up the battle. Afterwards, revive Farrara with the potion you were given. Leave and return to Wencen, who will give you your next quest.
Two Knights and a Troll
Kick things off by finding the Ballads Library and speaking to Tenhwa. Tenhwa will need you to go to Sunder Caverns, which lies east of the library.
You need to locate and collect the 5 Fae Cairns. One is just south of the entrance to Sunder Caverns, and the rest are inside. They are all marked on your map. After doing so, return to Tenhwa.
Speak to Tenhwa, then use the nearby echo stone to listen to all 5 parts of the ballad. Go back to Tenwha and select “You are human, now go.” Any other choice will earn you a cursing. Return to King Wencen. You’ll find him missing, and have to speak to Hallam the White to get your next quest.
What Lies Beneath
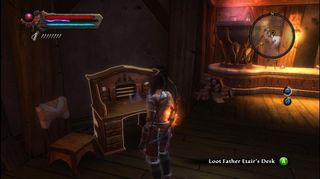
St. Eadric’s Mission can be found in the westernmost part of The Sidhe. Once check upstairs, you’ll then be required to speak to the monk outside. After that, you’ll need to search Etair’s study. Loot his desk key from the chest upstairs in order to gain access to his desk on the first floor. You can pick the lock if your skill is high enough. Loot the desk, then descend the well outside.
Underground, you’ll have to find four crystals. Beware of the many traps in this area. If your detect skill isn’t high enough for the traps to display on the map, you’ll have to use your eyes. Check for trip wires, bear traps, and arrow traps. Once you have all the crystals, return to Hallam the White to get your next quest.
The Champion
Head northeast from the House of Ballads to find a wall of thorns. Once there you’ll have to fight for the armor that opens the wall. Equip the full House of Ballads armor set and walk towards the wall of thorns.
You can now venture past this blockade and into the area known as Windemere. Not only is the beneficial for the task at hand, but you can find more Summer’s End Lorestones in this area.
Once you get to the gorge, you discover you’ll need to find Sir Elswin’s corpse to proceed. Find the nearby jump point on the map to reach the objective marker. Revive Elswin with the potion you were given, then kill him after the conversation. You’ll now be able to cross the gorge, but prepare for a similar battle when you do.
Inside Summer’s End, speak to the Maid of Windemere to begin the final quest for this faction.
Cursed Kingdom
Enter the nearby Chantry and speak to the chancellor. He’ll tell you that you need to find some invisible crystals. Use the whistle you picked up during “What Lies Beneath” to find them in the surrounding area.
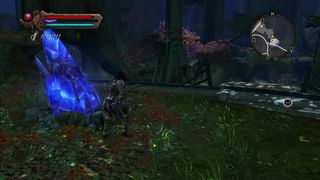
Blowing the whistle makes the blue crystals appear for a short period. When they are visible, destroy them. Note that once you destroy the fifth crystal every creature in the area will turn hostile immediately. Go back to speak to Sagrell and follow his instructions to gain access to the castle.
The Hero and the Maid
It is up to you to search the castle and free those being held captive. They are all marked on your map, so start dungeon crawling.Unfortunately everyone except for the king is hostile. The court members will have a posse of weaker enemies with them when they attacks, so just remember to keep moving, use wide-area attacks, and take out the weakest foes first.
The castle is also full of dangers that aren’t as apparent; beware of piranha plant-like traps. Avoid the slime-green water when you can, for it saps your health, though the effect disappears when you exit the water.
When you finally get to the maid, she will start to fight you after a short conversation. Manually save before talking to her, because...
There is an exploit here: if you quickly speak to her again before attacking (the window is very small, so just start mashing A before the initial conversation ends), you will have the option of avoiding the fight altogether.
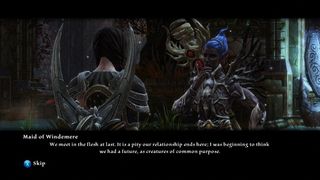
Should you choose to fight, we definitely suggest having a full fate meter. She will summon more and more beasts to her side throughout the fight. As such, it’s best to take her out as quickly as possible. She is easily stunned by normal attacks, so hack away while doing your best to avoid the lesser beings’ attacks. If you do let up on her, beware of her charged-up purple projectile attack. This does massive damage, but can be dodged with the proper timing.
At the end of the battle, you will be given the choice (again, if you tried the exploit) to kill her and rule alone or let her live and rule with her.
Killing the maid nets you a lot of gold and experience, but other than that, we didn’t find anything of real value on her corpse. So, if you are having trouble with this fight, we recommend the above exploit.
You get the same twist of fate card and achievement/trophy regardless of your choice:

Choose a faction:
- Warsworn Faction
- Travelers Faction
- Scholia Arcana Faction
- House of Sorrows Faction
- House of Ballads Faction
Sign up to the GamesRadar+ Newsletter
Weekly digests, tales from the communities you love, and more

Iain originally joined Future in 2012 to write guides for CVG, PSM3, and Xbox World, before moving on to join GamesRadar in 2013 as Guides Editor. His words have also appeared in OPM, OXM, PC Gamer, GamesMaster, and SFX. He is better known to many as ‘Mr Trophy’, due to his slightly unhealthy obsession with amassing intangible PlayStation silverware, and he now has over 500 Platinum pots weighing down the shelves of his virtual award cabinet. He does not care for Xbox Achievements.
