All Zelda Tears of the Kingdom Sage's Will locations
Where to find all the Sage's Will collectables for upgrading your Sage followers in TOTK
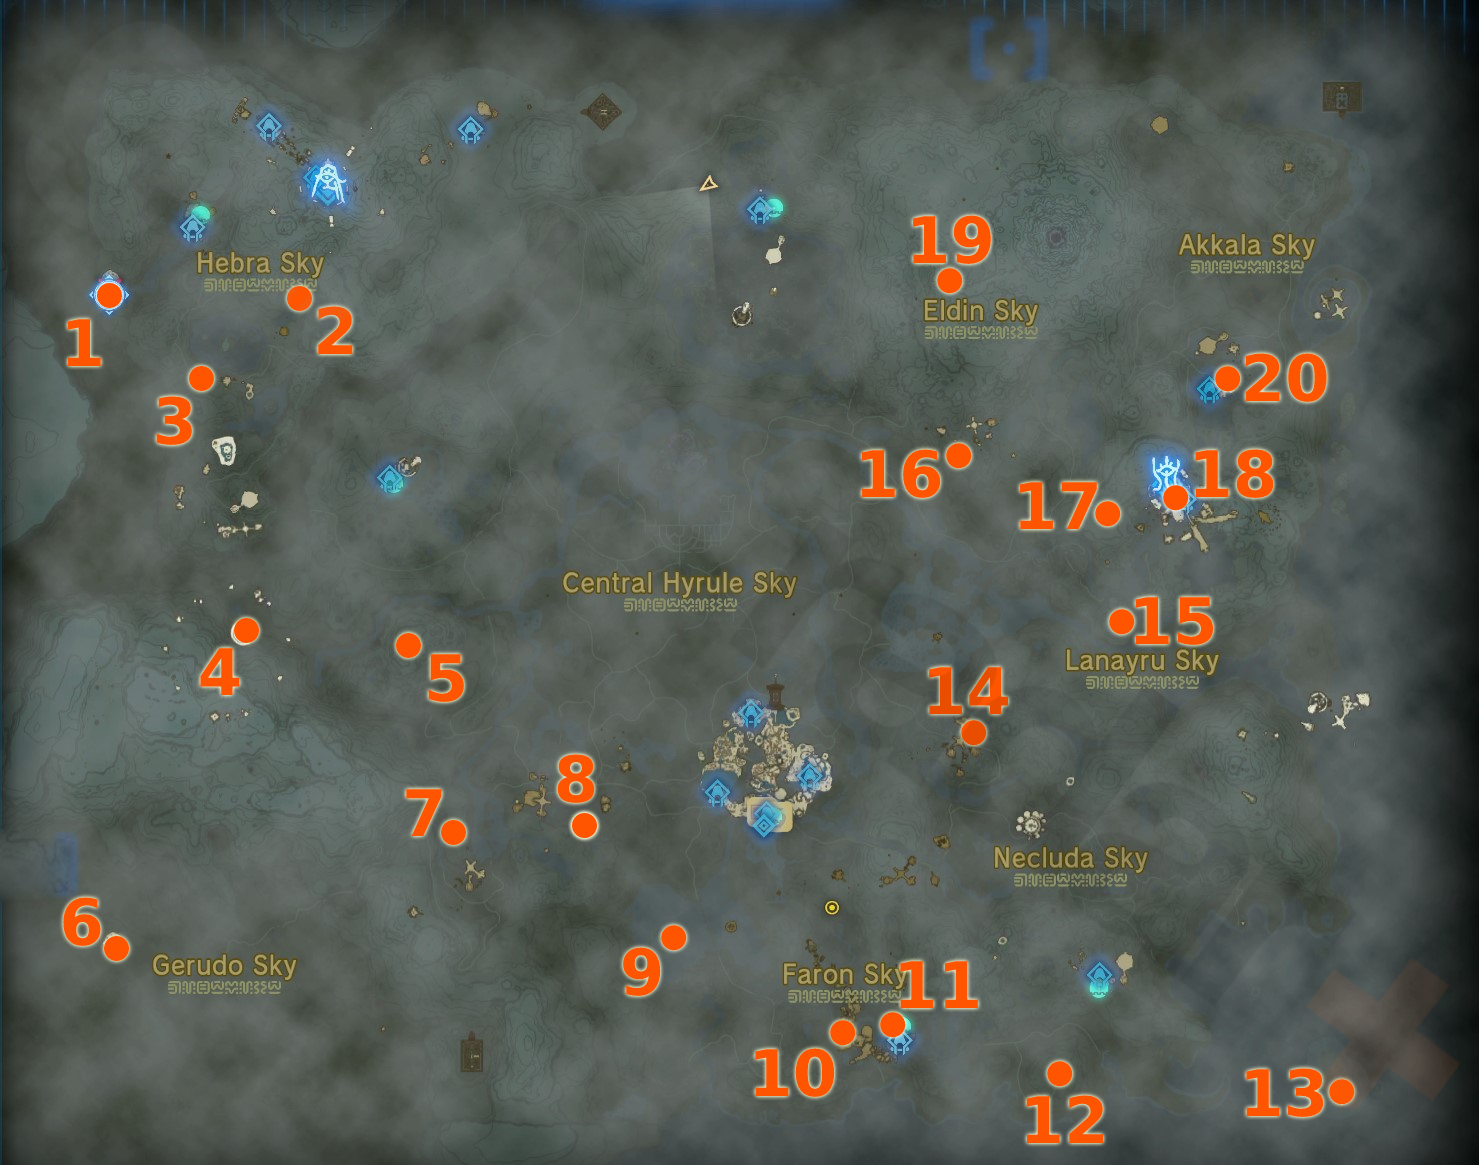
- Sage's Wills locations map
- 1. West Hebra Sky Archipelago
- 2. South Hebra Sky Archipelago
- 3. North Tabantha Sky Archipelago
- 4. Starview Island / North Gerudo Sky Archipelago
- 5. West Hyrule Sky Archipelago
- 6. Gerudo Sky
- 7. East Gerudo Sky Archipelago
- 8. South Hyrule Sky Archipelago
- 9. Faron Sky Archipelago
- 10. West Thunderhead Isles
- 11. East Thunderhead Isles
- 12. South Necluda Sky Archipelago
- 13. Southeast Necluda Sky / Eventide Isle
- 14. North Necluda Sky Archipelago
- 15. Lanayru Sky Archipelago
- 16. South Eldin Sky Archipelago
- 17. North Lanayru Sky Archipelago
- 18. Wellspring Island / Water Temple
- 19. Eldin Sky Archipelago
- 20. Sokkala Sky Archipelago
The Zelda Tears of the Kingdom Sage's Wills locations are spread across the Sky Islands, each one being a special (and very rare) collectible that you can use to great effect, powering up the Sages who follow you around after completing their respective questlines: meaning Sidon, Yunobo, Riju, Tulin and Minoru can all have become better characters! Before that can happen though, you'll need to find the Sage's Wills collectables spread around. You only need four per Sage for their upgrade, and there's exactly enough for everybody to get one, though it's far harder than it sounds - you'll have to fight the hardest bosses in the game for a full collection, and multiple times!
Fortunately, if you want all the Sage's Wills we've got all their locations below, including answers to every puzzle and guides to every boss. If you want to enhance your sages to their utmost, here's how to find every Sage's Will location in The Legend of Zelda Tears of the Kingdom.
All Sage's Wills locations in Zelda Tears of the Kingdom
- West Hebra Sky Archipelago Sage's Will (coordinates -4470, 2169, 1253)
- South Hebra Sky Archipelago Sage's Will (coordinates -3075, 2150, 0648)
- North Tabantha Sky Archipelago Sage's Will (coordinates -3780, 1572, 1237)
- Starview Island/North Gerudo Sky Archipelago Sage's Will (coordinates -3459, -0271, 1937)
- West Hyrule Sky Archipelago Sage's Will (coordinates -2296, -0414, 0894)
- Gerudo Sky Sage's Will (coordinates -4447, -2730, 1419)
- East Gerudo Sky Archipelago Sage's Will (coordinates -1958, -1811, 1140)
- South Hyrule Sky Archipelago Sage's Will (coordinates -0952, -1735, 1006)
- Faron Sky Archipelago Sage's Will (coordinates -0332, -2586, 0894)
- West Thunderhead Isles Sage's Will (coordinates 0966, -3306, 0846)
- East Thunderhead Isles Sage's Will (coordinates 1309, -3210, 0459)
- South Necluda Sky Archipelago Sage's Will (coordinates 2556, -3600, 0894)
- Southeast Necluda Sky/Eventide Isle Sage's Will (coordinates 4652, -3827, 1065)
- North Necluda Sky Archipelago Sage's Will (coordinates 1934, -1063, 0961)
- Lanayru Sky Archipelago Sage's Will (coordinates 3015, -0257, 0894)
- South Eldin Sky Archipelago Sage's Will (coordinates 1781, 0981, 1226)
- North Lanayru Sky Archipelago Sage's Will (coordinates 2911, 0525, 0929)]
- Wellspring Island/Water Temple Sage's Will (coordinates 3383, 0638, 1290)
- Eldin Sky Archipelago Sage's Will (coordinates 1768, 2268, 0827)
- Sokkala Sky Archipelago Sage's Will (coordinates 3810, 1580, 1144)
The actual method for obtaining each Sage's Will varies depending on each one - some are the reward for completing boss fights, others are done for completing puzzles, and some are simply out of the way, but otherwise completely accessible. We'll go over each of them below - just click on the link at the side to leap to the one you want for a specific location and puzzle solution, if there is one!
How to use Sage's Will in Zelda Tears of the Kingdom
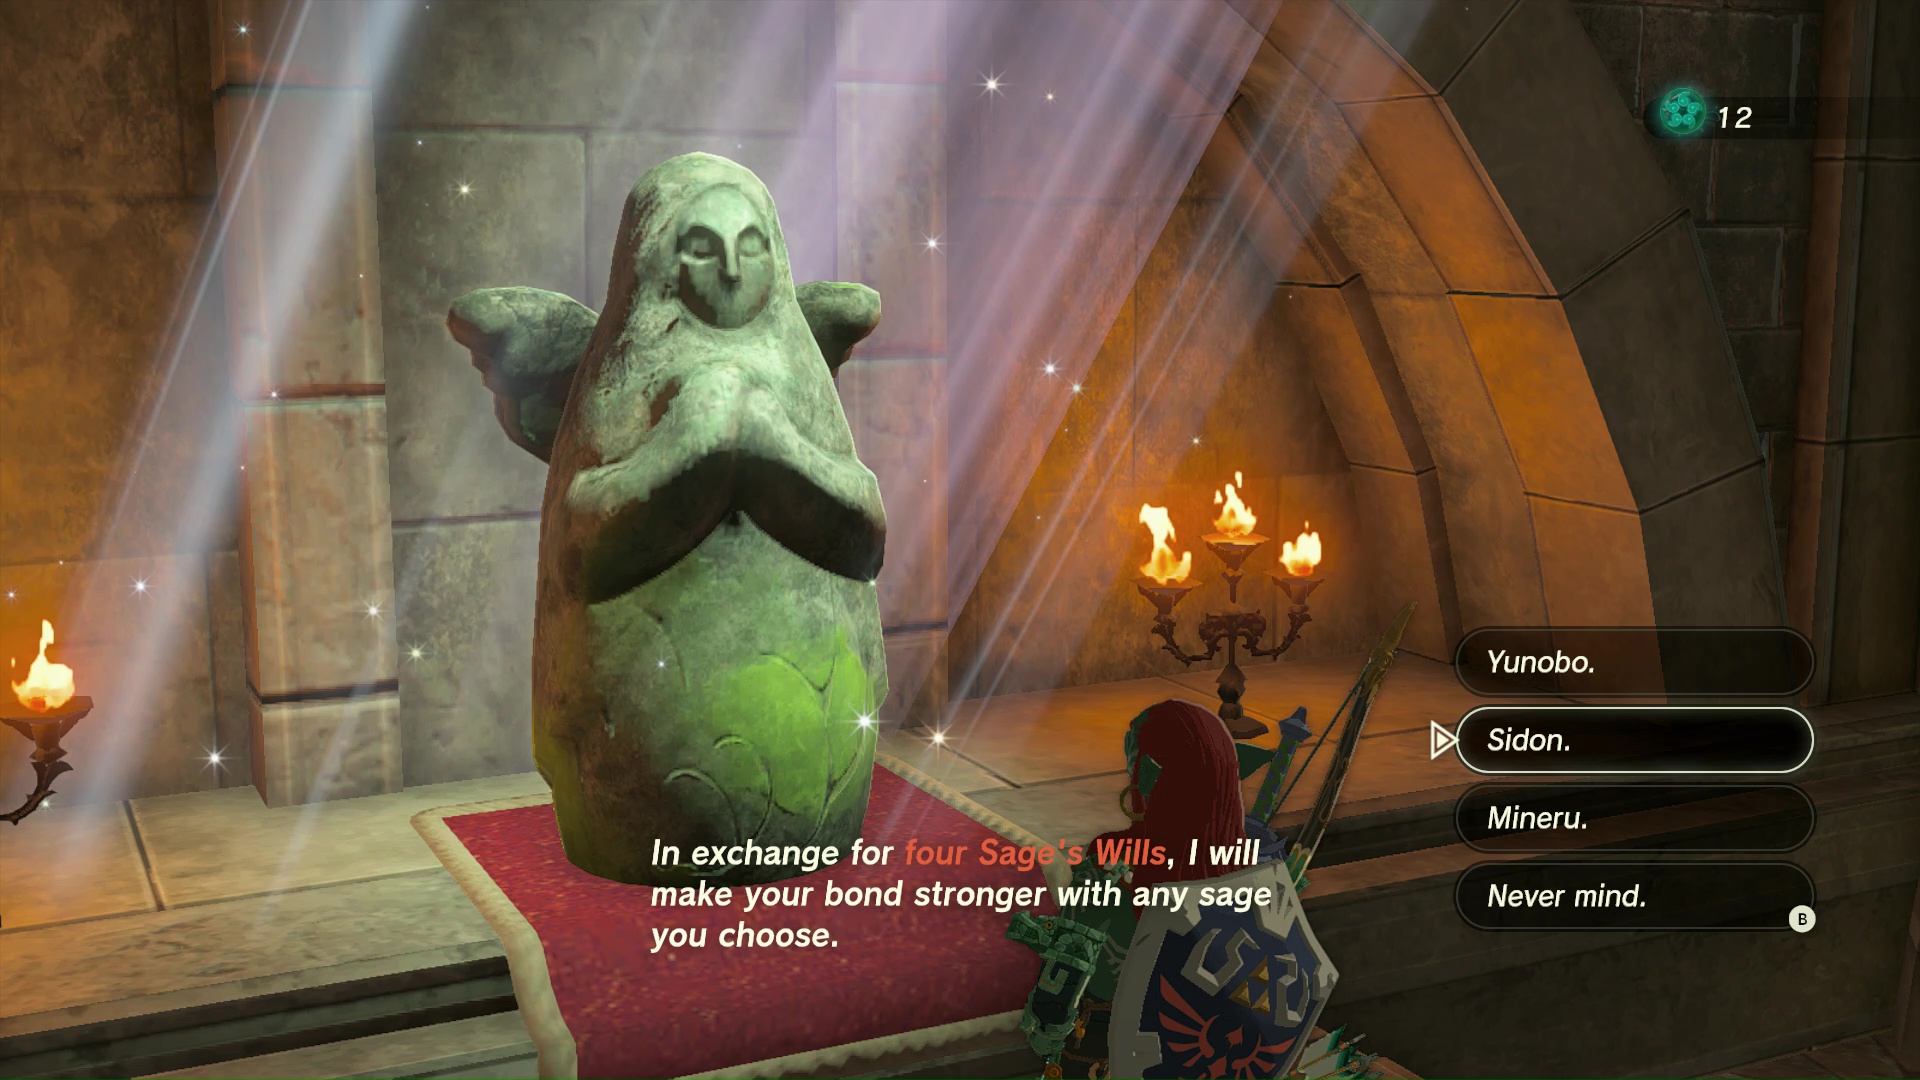
To use the Sage's Will in The Legend of Zelda Tears of the Kingdom, you can do the following to upgrade your Sage companions' spirit powers:
- Collect at least four Sage's Will collectables.
- Head to any Goddess Statue you'd normally use to upgrade Hearts or Stamina.
- If you have four or more Sage's Wills, the Goddess will ask you if you want to use them to upgrade a follower.
- Select the follower to upgrade to give them a permanent buff.
You can only upgrade a follower Sage once, but it's worth it. The enhanced version of the ally NPC effectively does increased damage with all attacks they do - though it won't affect cooldowns or how their triggered abilities work, sadly. Still, considering how much they're with you, that upgrade will definitely pay for itself over time.
Who should you upgrade with the Sage's Will first?
If you're wondering which Sage to upgrade first with your Sage's Wills, we suggest Tulin the Rito. Being a hyper-accurate archer, Tulin's attacks simply land a lot more often than the other Sages, who have to get into melee range before they can do anything - so by the time they've landed just one shot, Tulin has probably landed several already. Obviously you should upgrade all your followers, but considering that might take a while, might as well buff the birdboy first.
1. West Hebra Sky Archipelago Sage's Will location
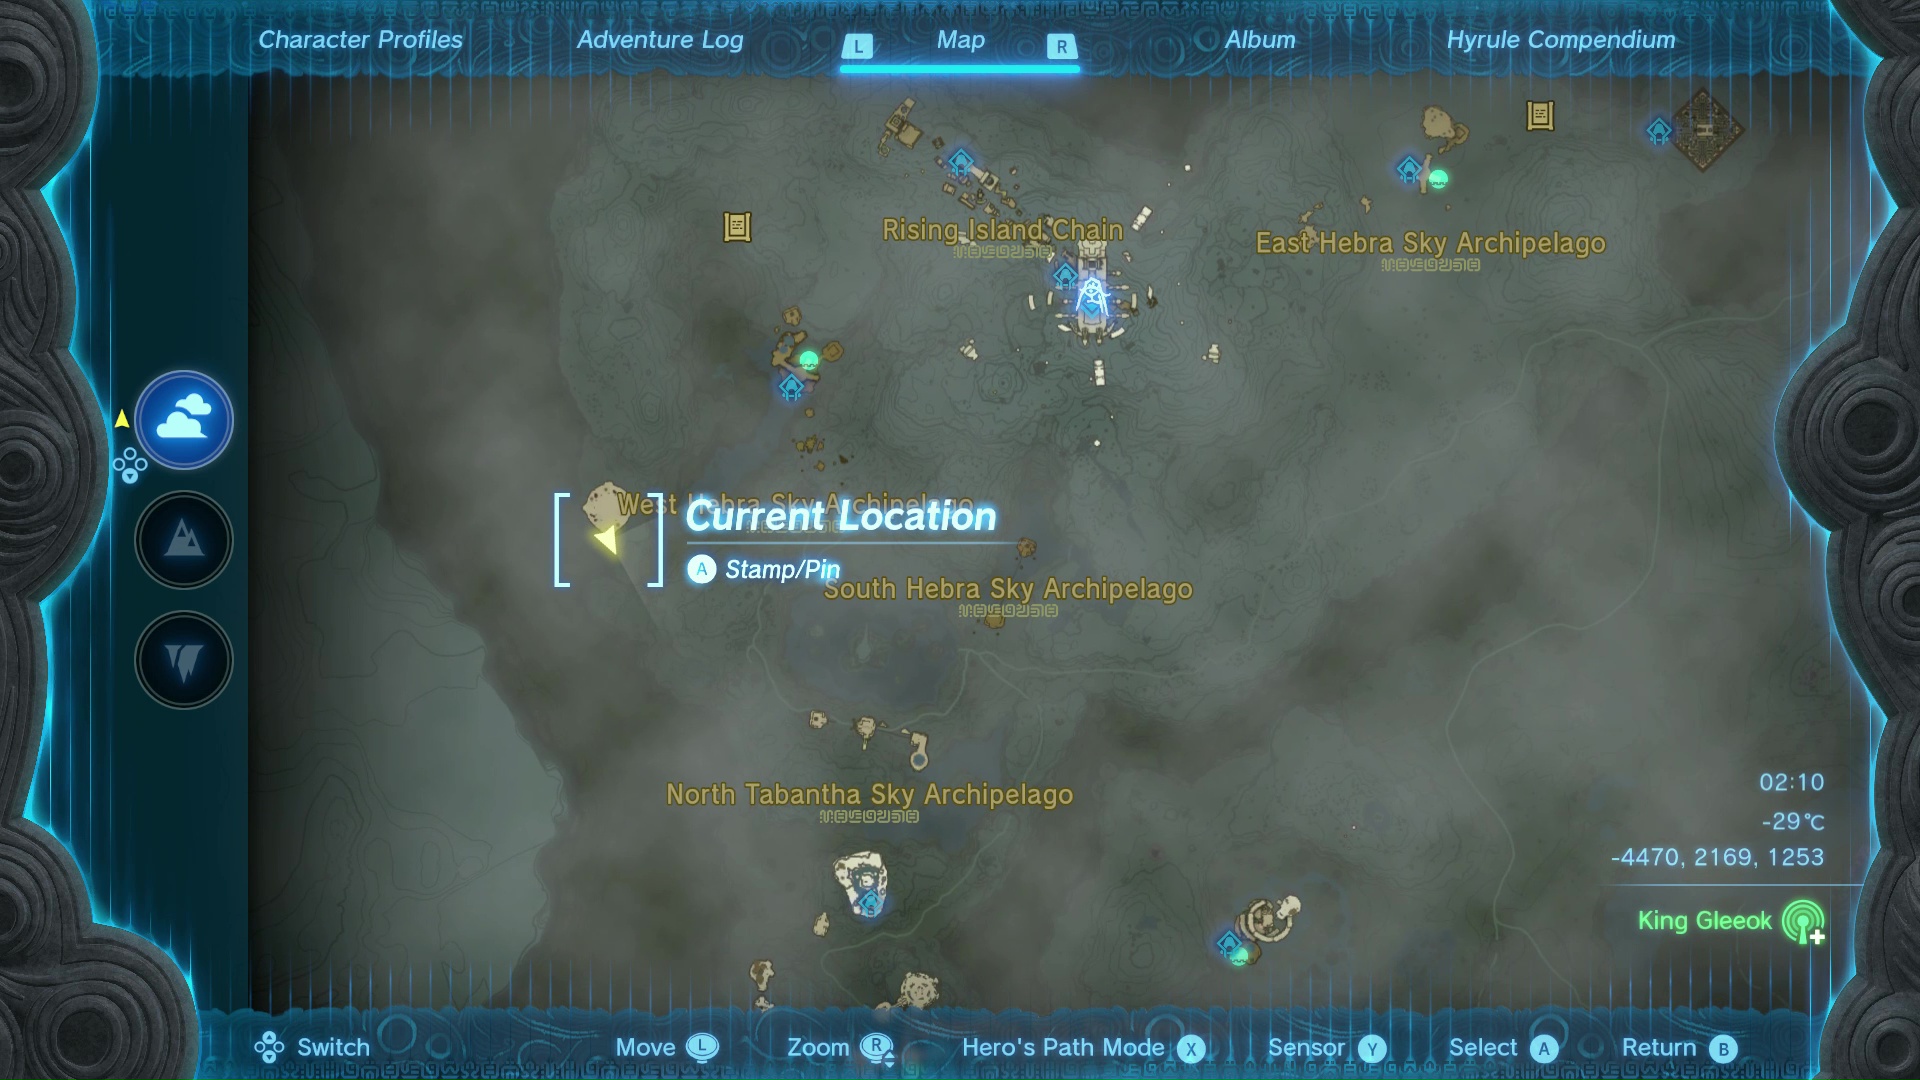
- (coordinates -4470, 2169, 1253)
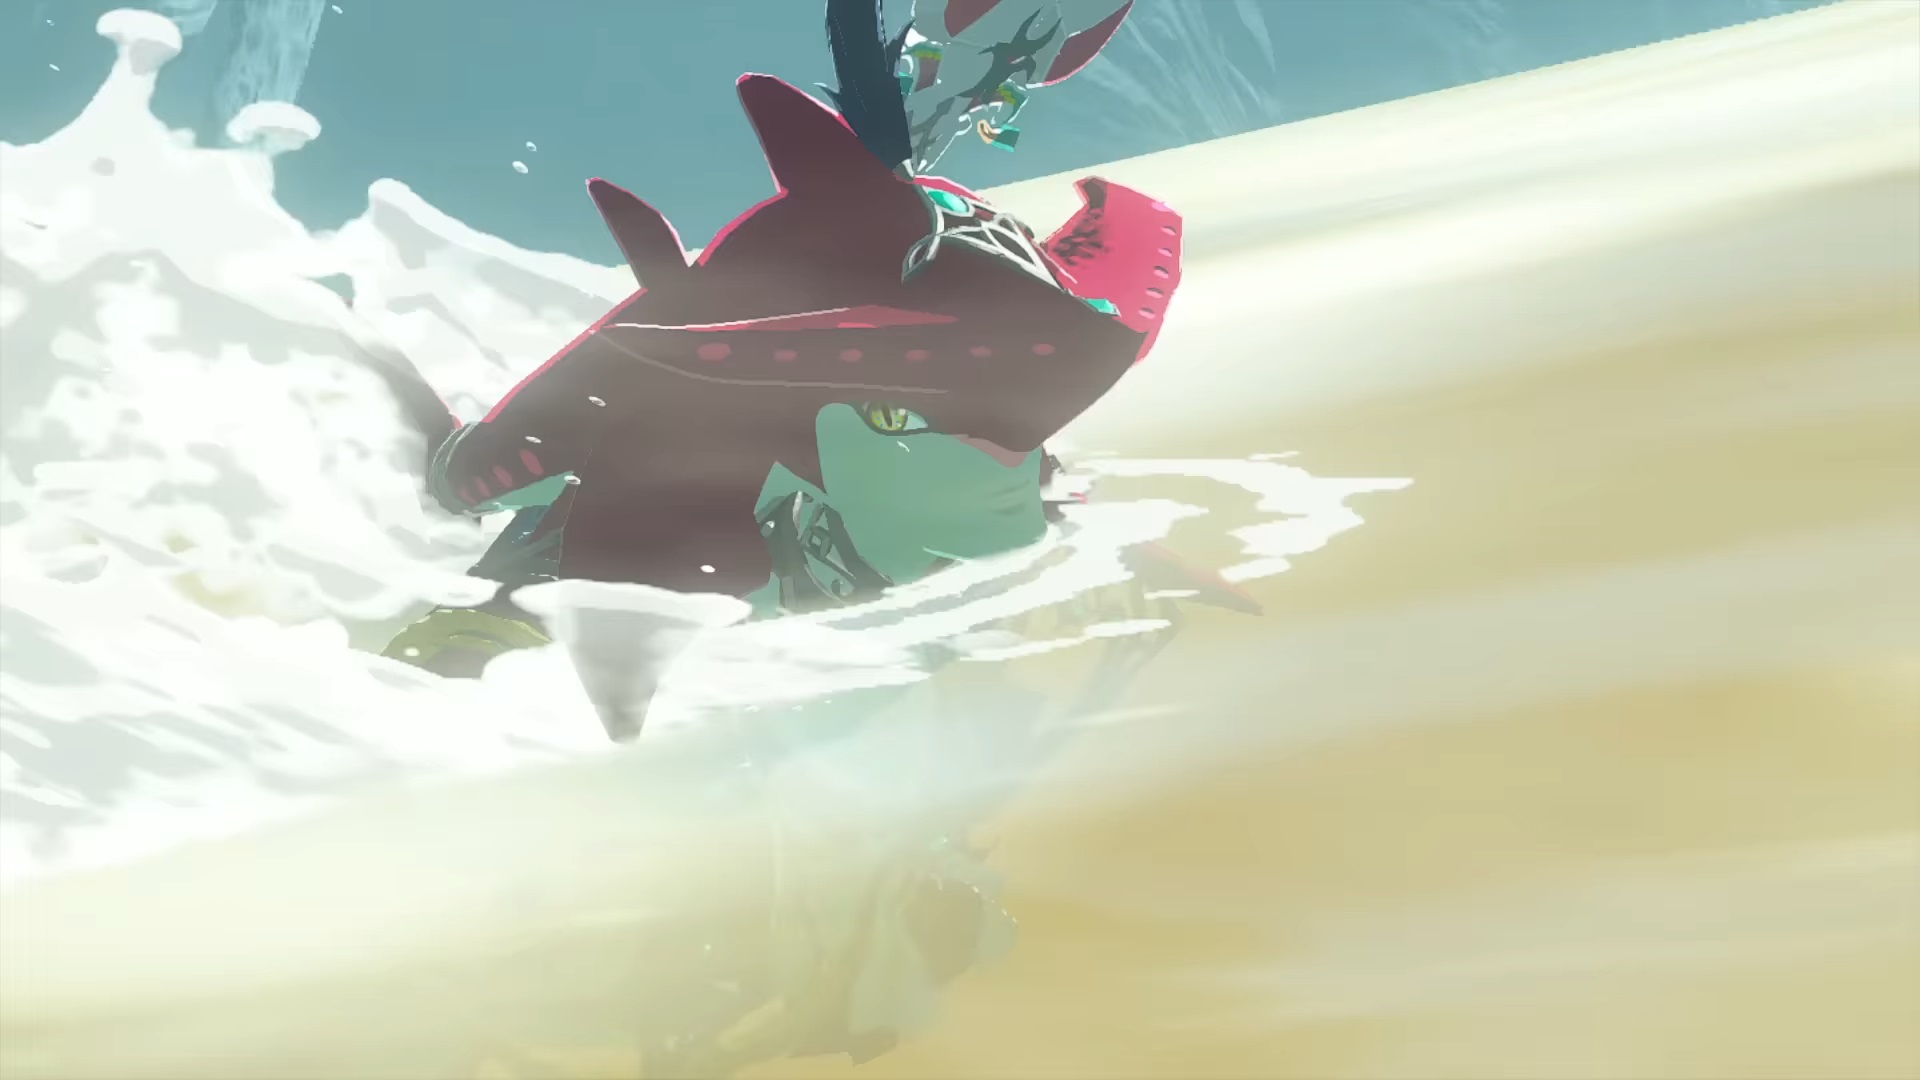
This Sage's Will is one of several guarded by powerful boss fights - and one of three that are guarded by the deadly King Gleeok. Kept in a chest at the side of the arena, you have to kill the King Gleeok to unlock it, so if you understandably need help with that, we recommend making use of our Zelda Tears of the Kingdom King Gleeok guide.
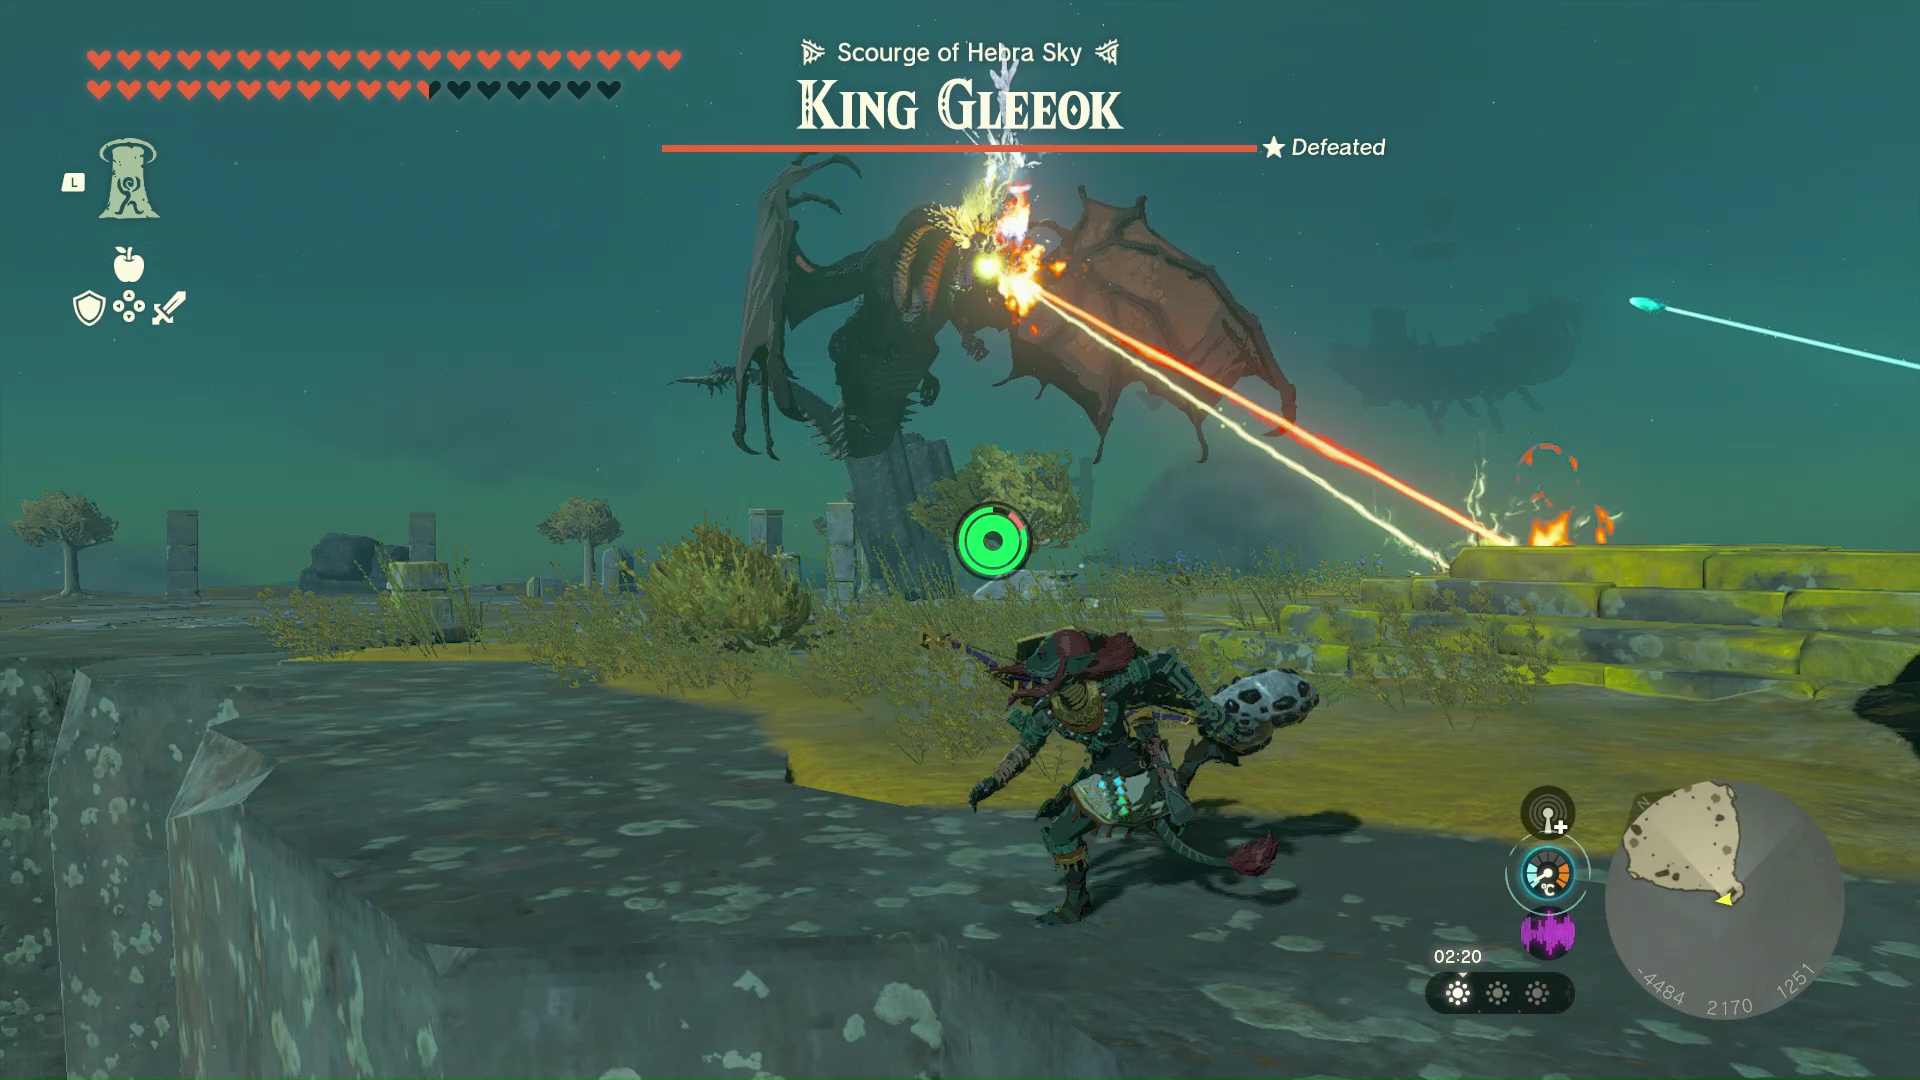
It's also important to know that this arena is A) very high up, almost certainly requiring a vehicle to reach it, and B), incredibly cold, so you need to be ready to deal with those pesky Zelda Tears of the Kingdom cold weather mechanics and stay warm with food and specific clothing while you're up there.
2. South Hebra Sky Archipelago Sage's Will location
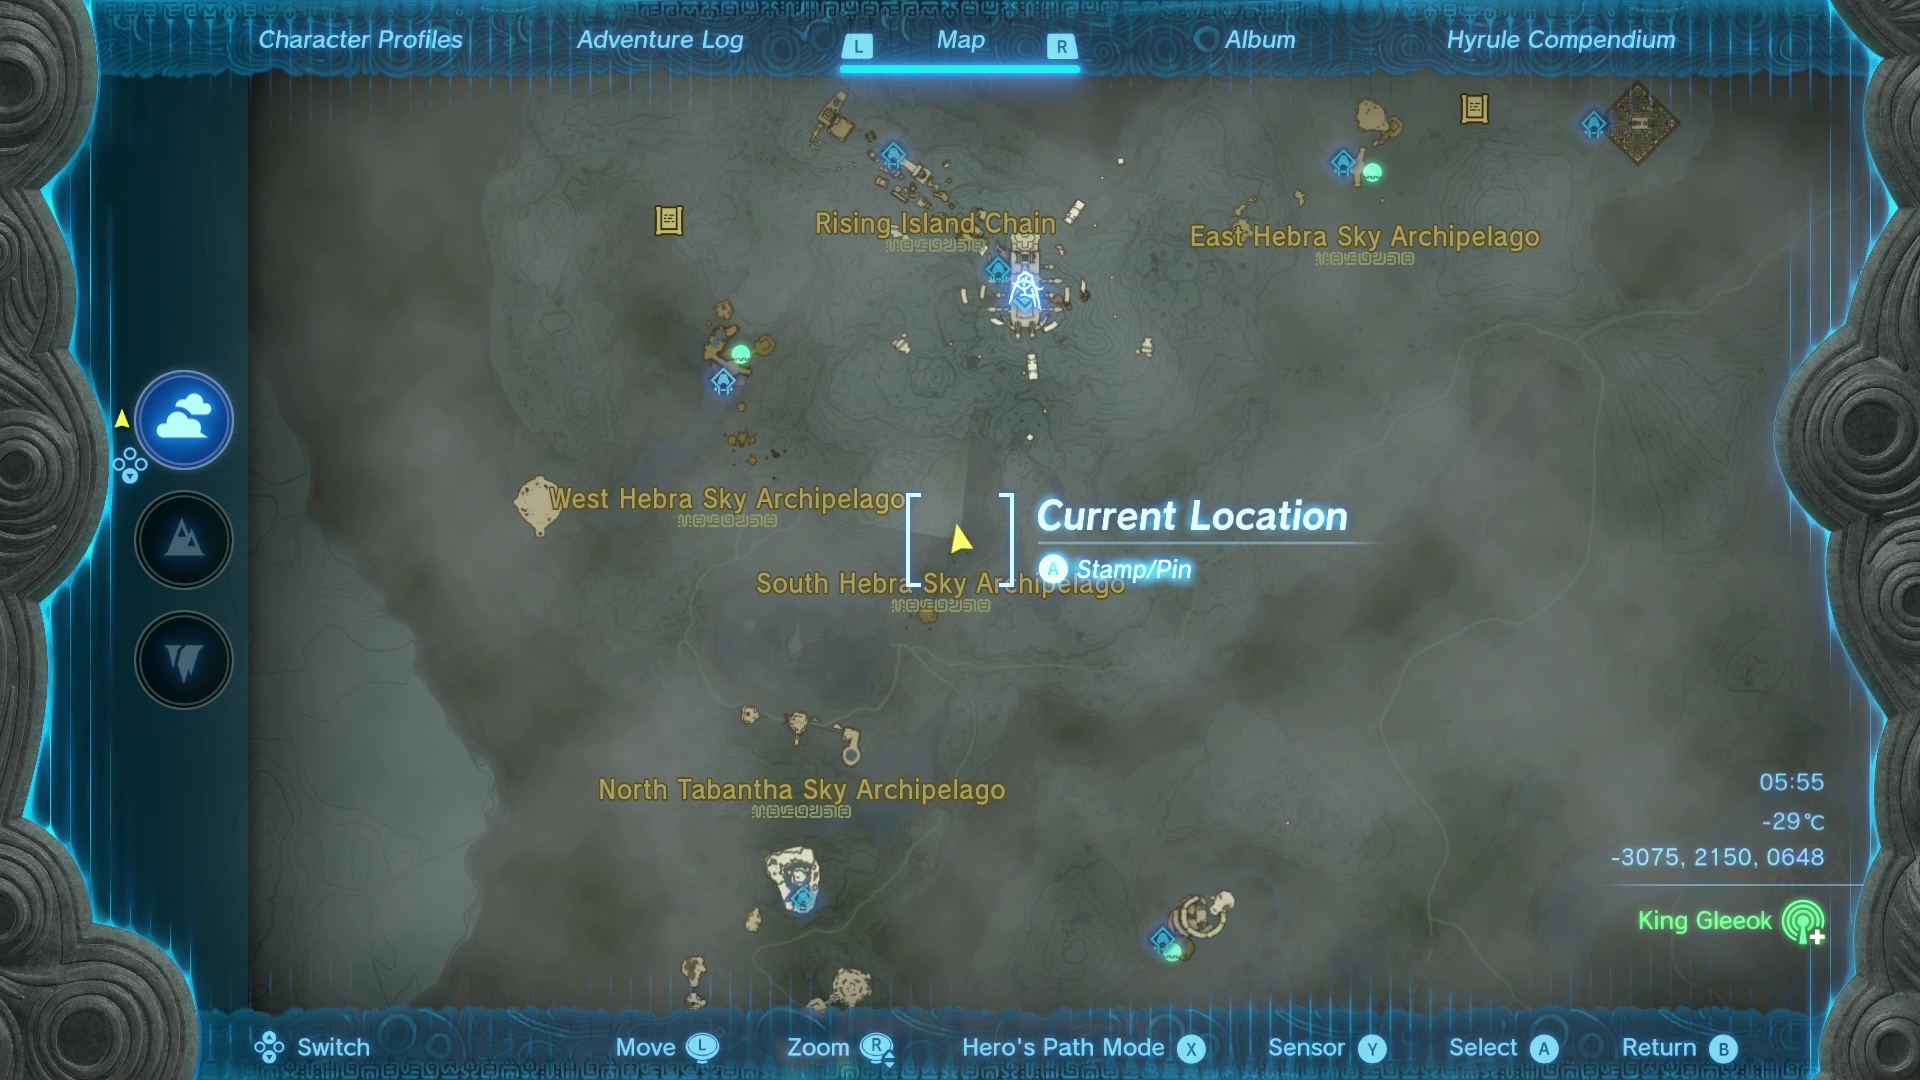
- (coordinates -3075, 2150, 0648)
The Sage's Will is at the Northernmost (and higher up) of two islands connected by an ascending rail. Use the Rospro Pass Skyview Tower to launch yourself up into the sky, then you should be able to reach the lower one with the paraglider.
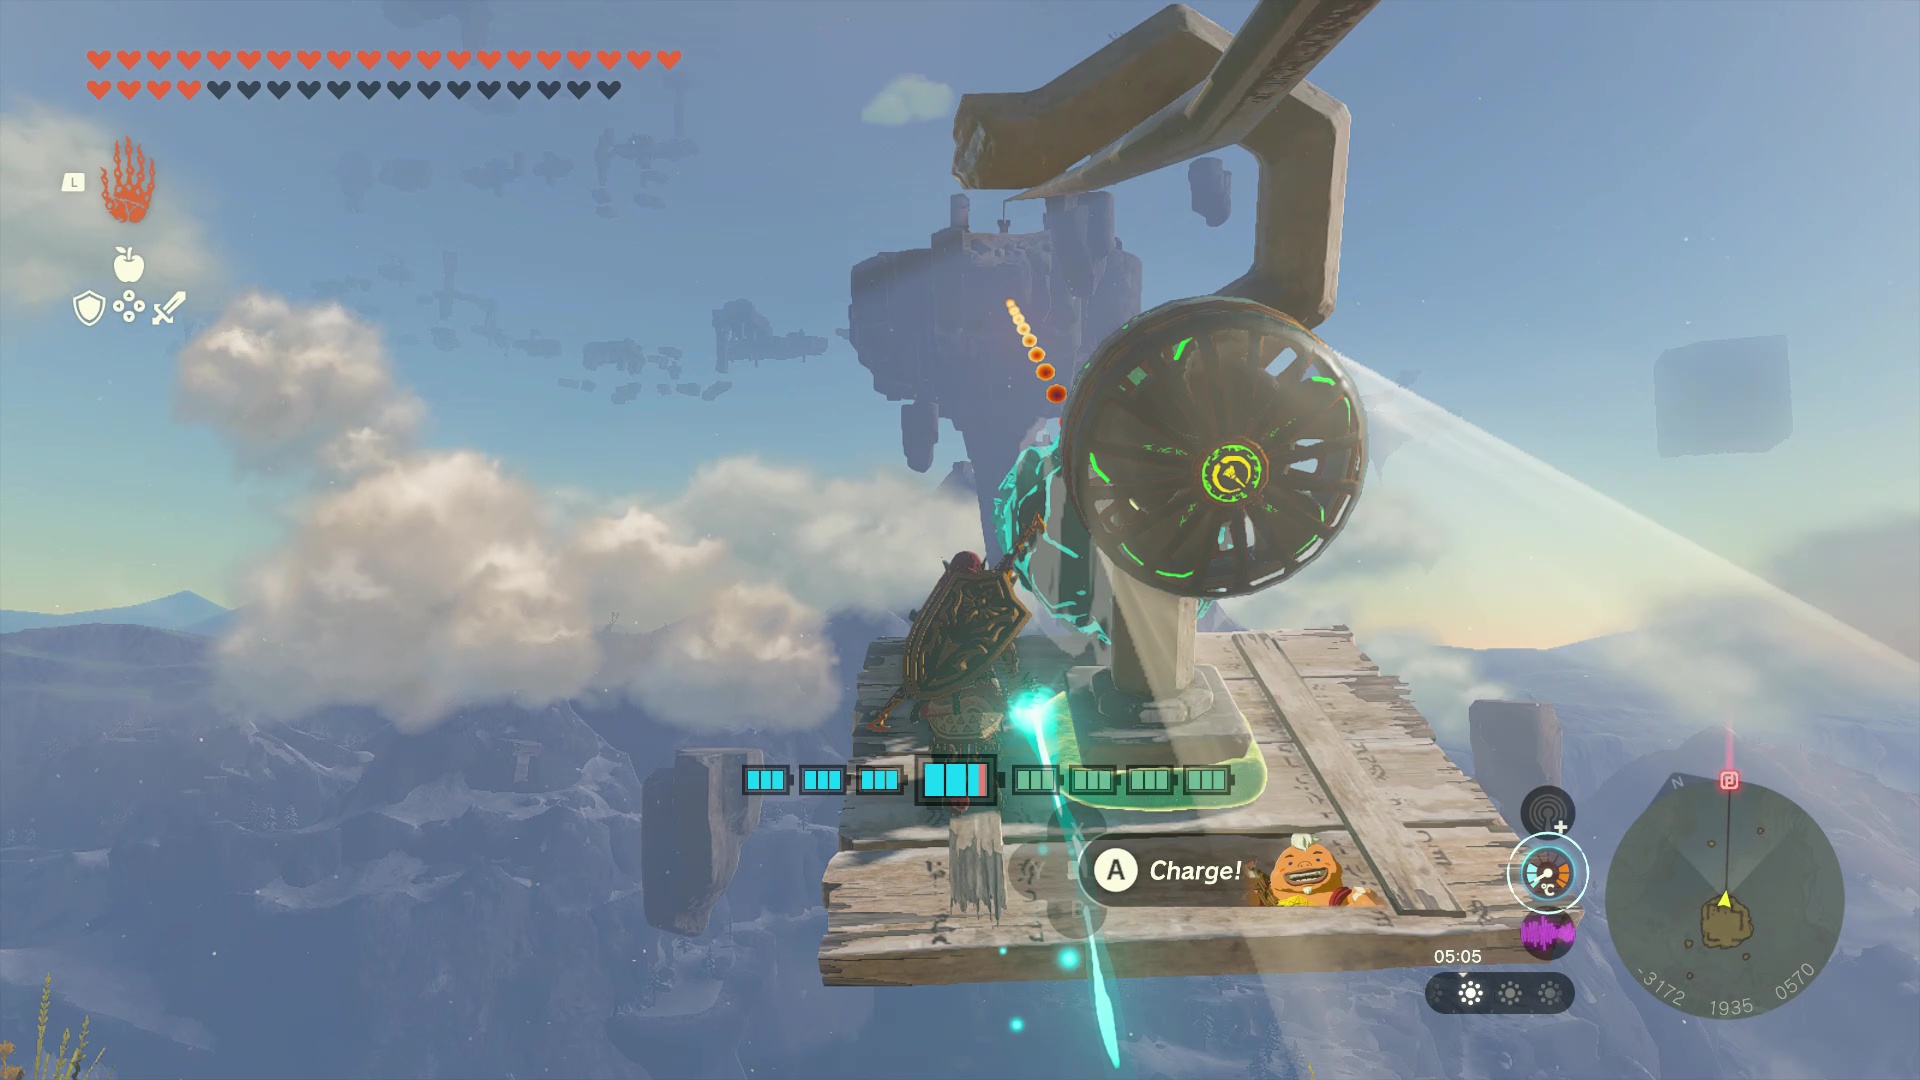
At the South island you'll find the materials to allow you to build a simple moving platform with a fan to push you up along the rail to the higher island, where the chest with the Sage's Will is kept ahead of you. Keep in mind that being in the Hebra region, it's still really, really cold here - bring warming clothes and snacks.
3. North Tabantha Sky Archipelago Sage's Will location
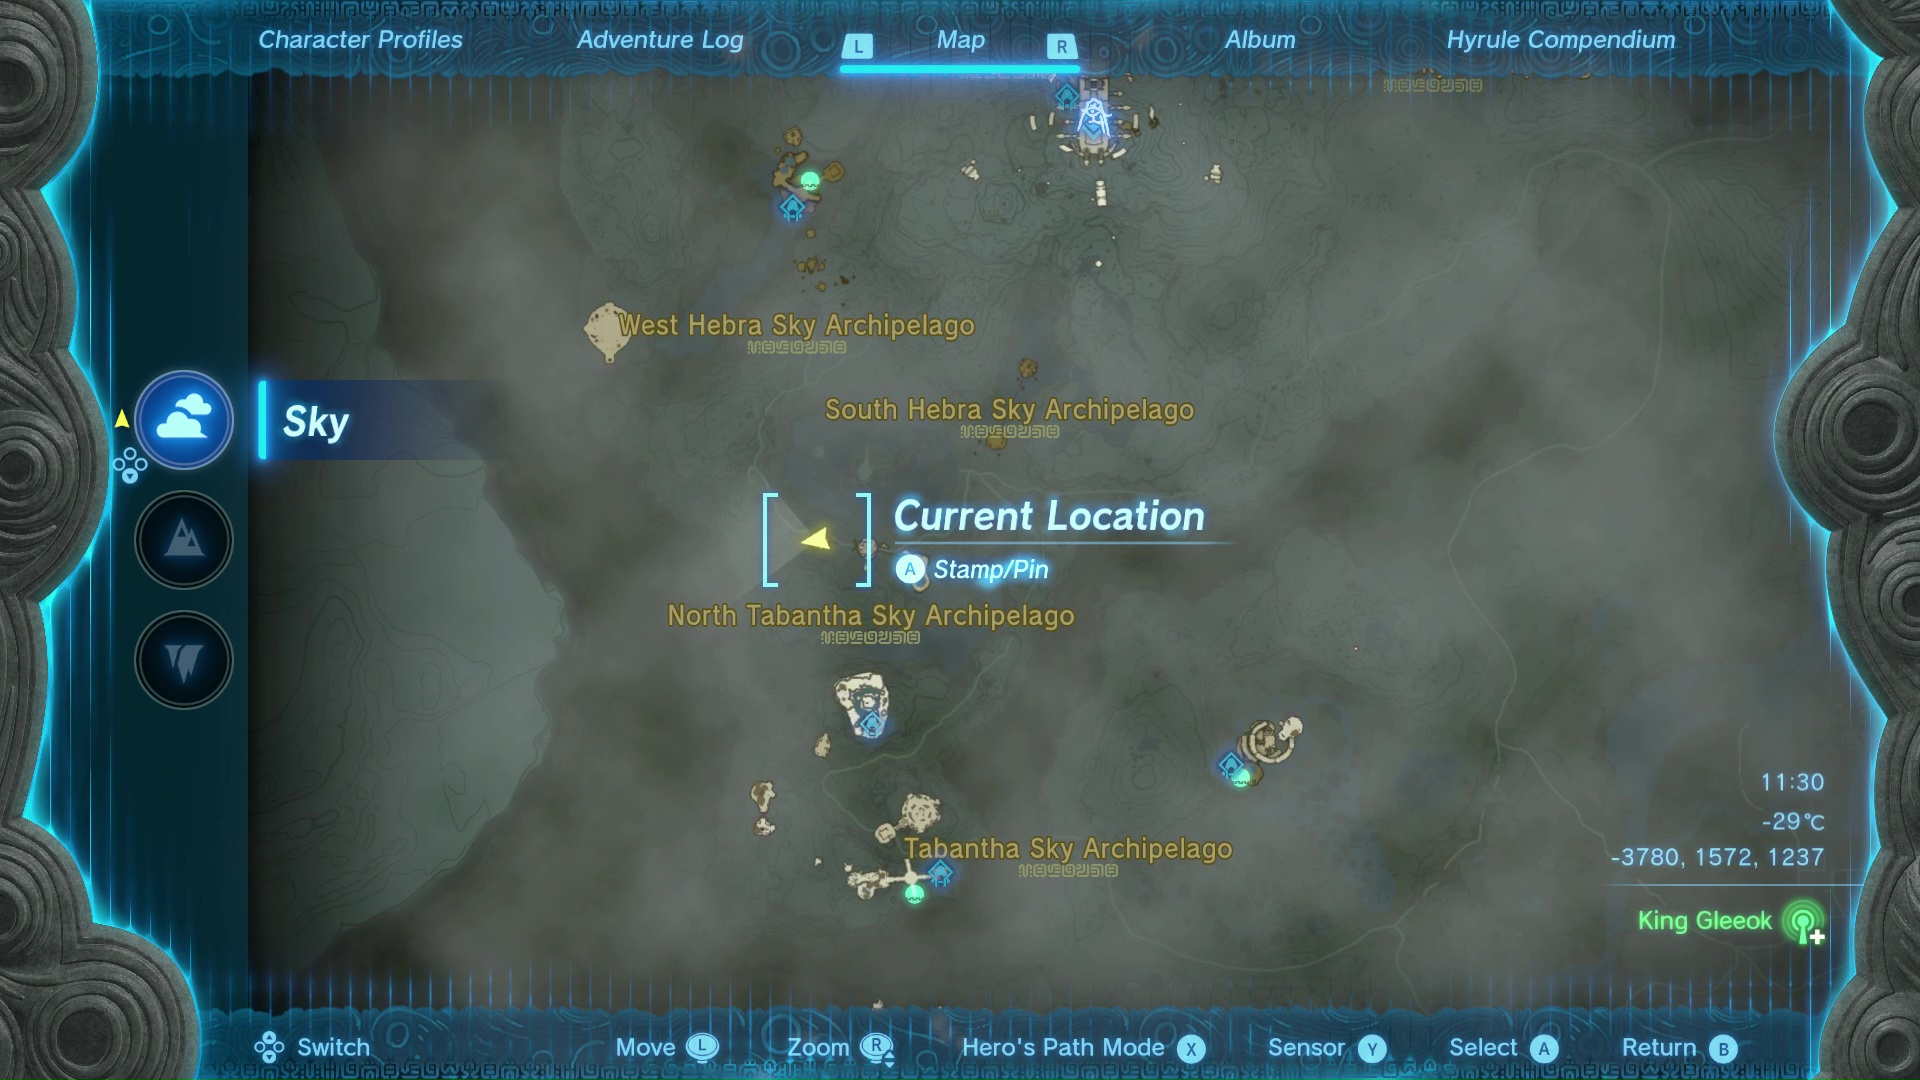
- (coordinates -3780, 1572, 1237)
The next Sage's Will is at the Western island in this very high archipelago of three islands, so we suggest using the Zora Armor to climb the waterfall up to the Eastern island connected to it. Again, Hebra region is cold, so be prepared.
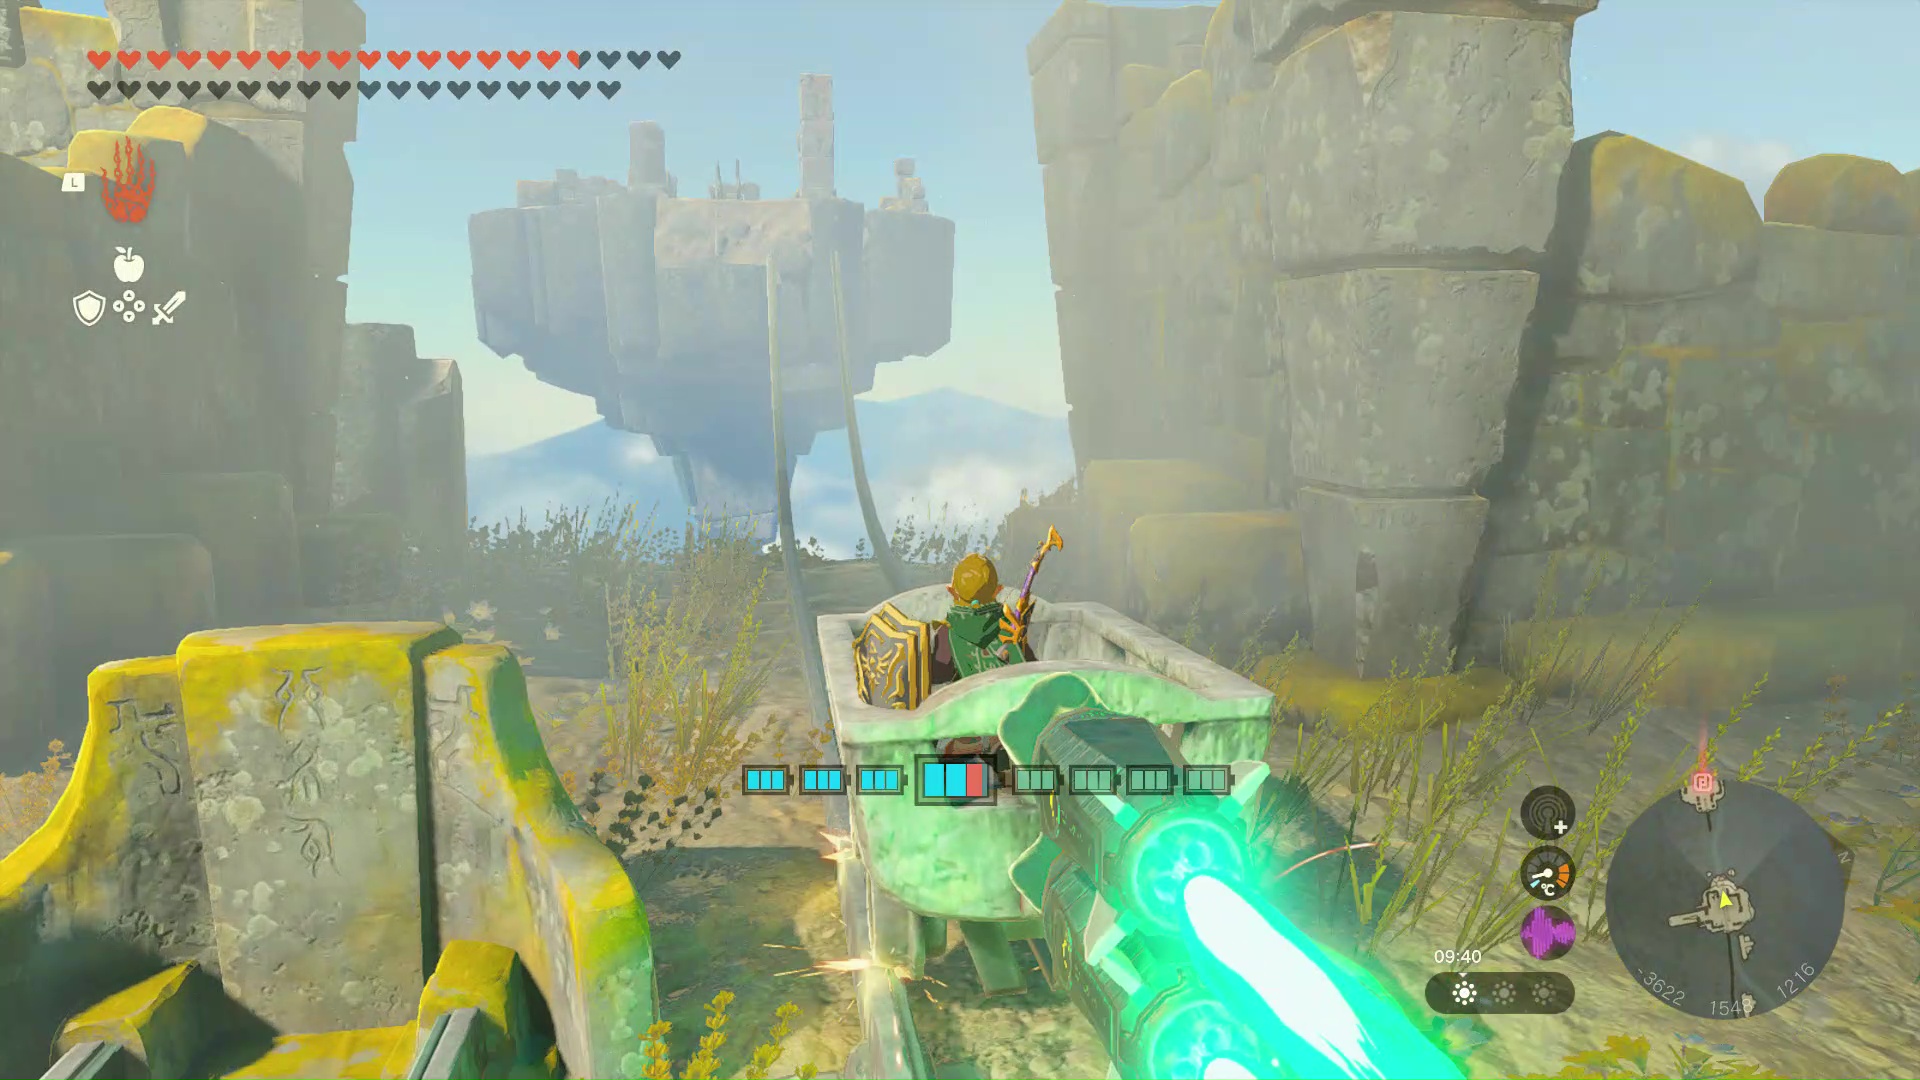
From there, use a Minecart and rockets to propel yourself across the connecting rails to the middle one, then again to launch your cart over the gap to the final island. The Sage's Will is in a chest just ahead of you.
4. Starview Island / North Gerudo Sky Archipelago Sage's Will location
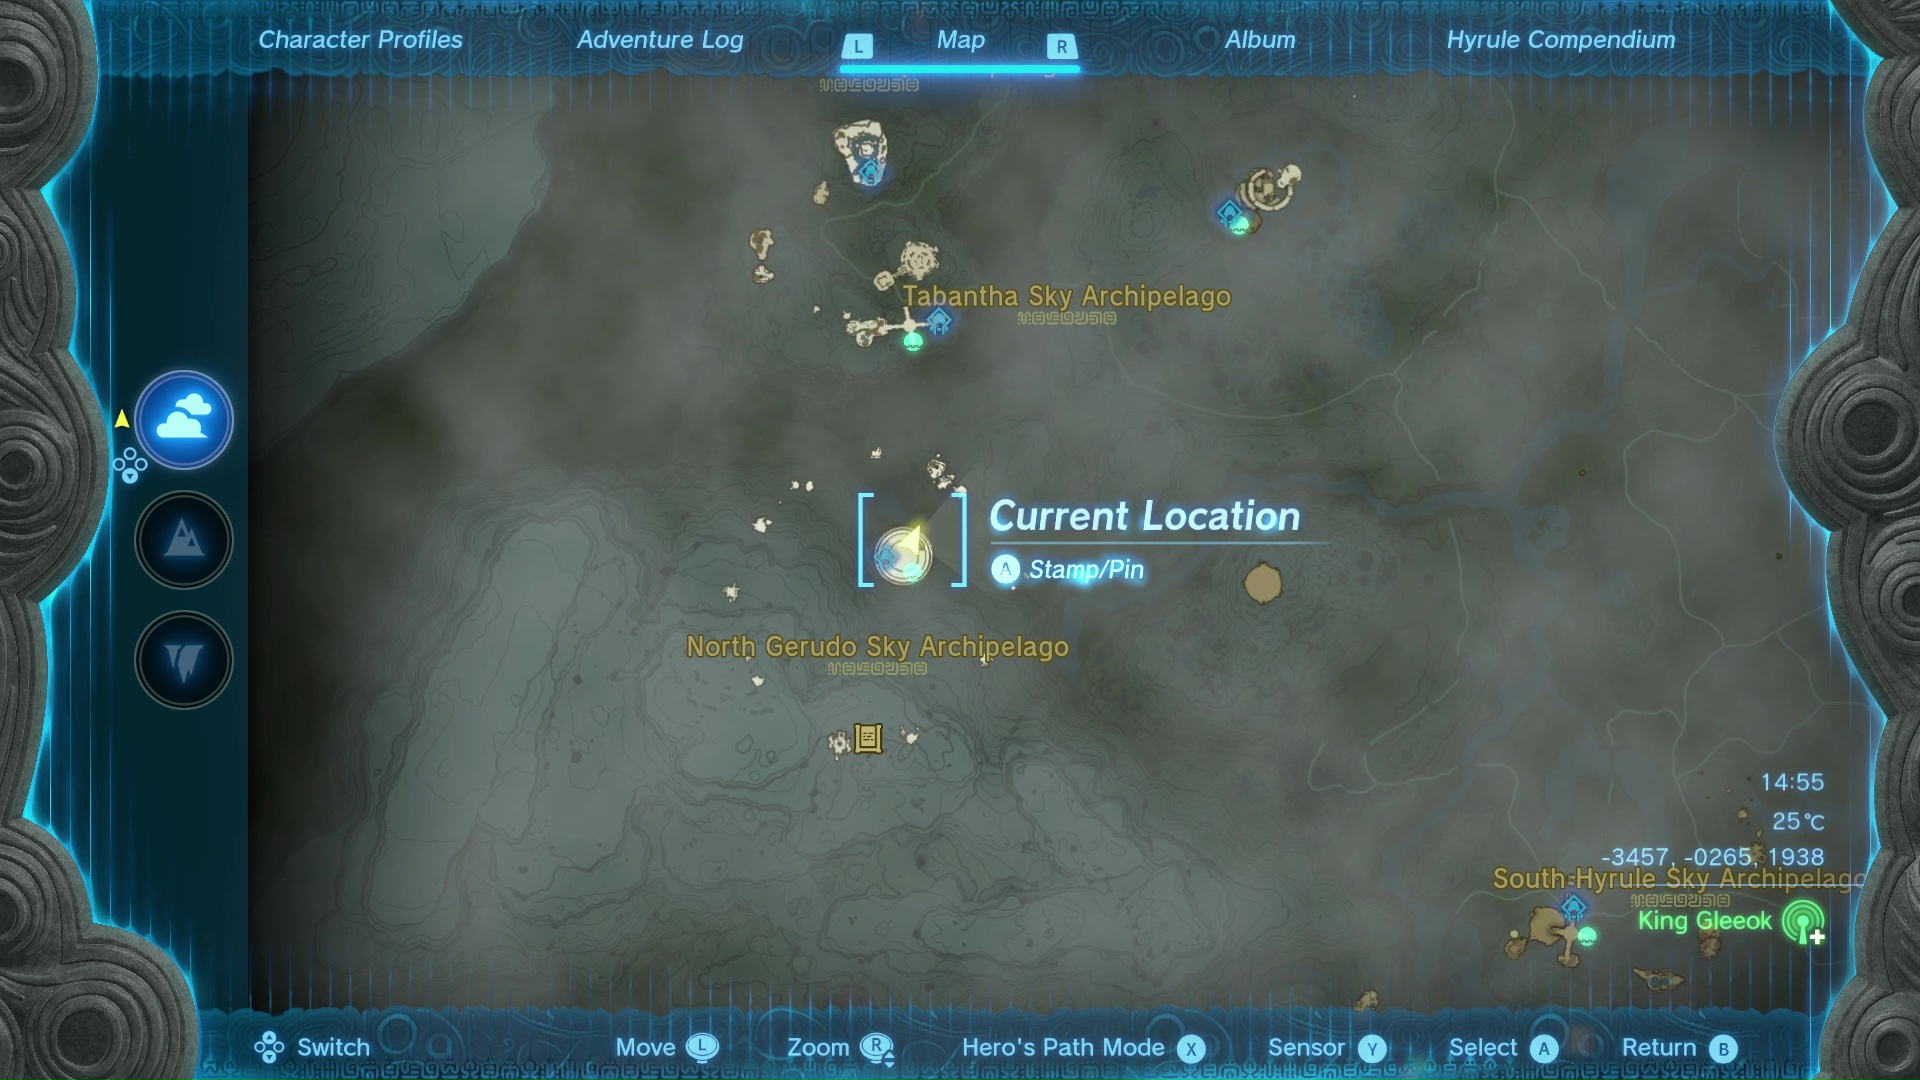
- (coordinates -3459, -0271, 1937)
This next Sage's Will is inside Starview Island, the huge circular orb floating in the middle of the North Gerudo Sky Archipelago. However, though it's relatively easy to glide inside through the hole on the exterior, once you're in Starview Island you need to solve a puzzle.
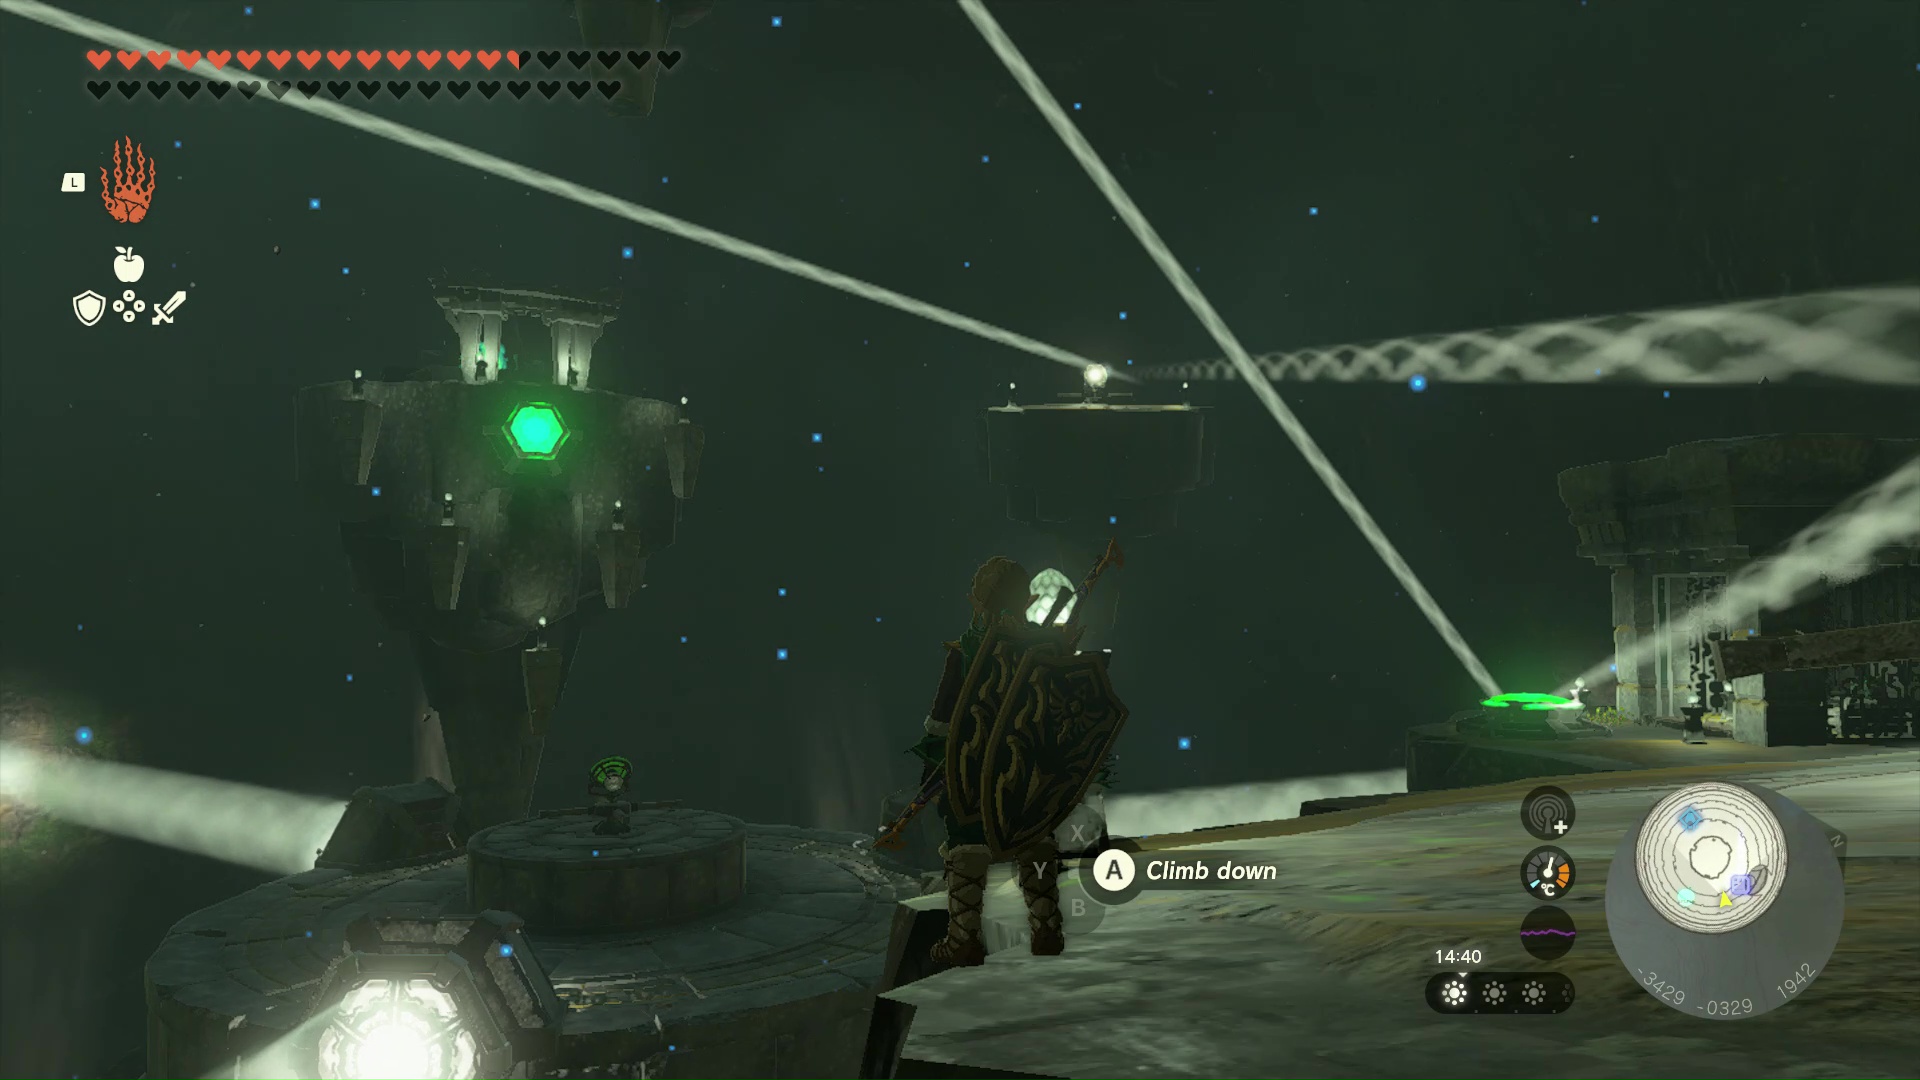
The key here is to redirect the light beams by spinning the mirrors, but there's two solutions. One reveals a Shrine, the other opens the cage next to the entrance, which has the chest with the Sage's Will inside. Bounce the lights to match the solution shown in the image above, and the cage will open up to allow you inside.
5. West Hyrule Sky Archipelago Sage's Will location
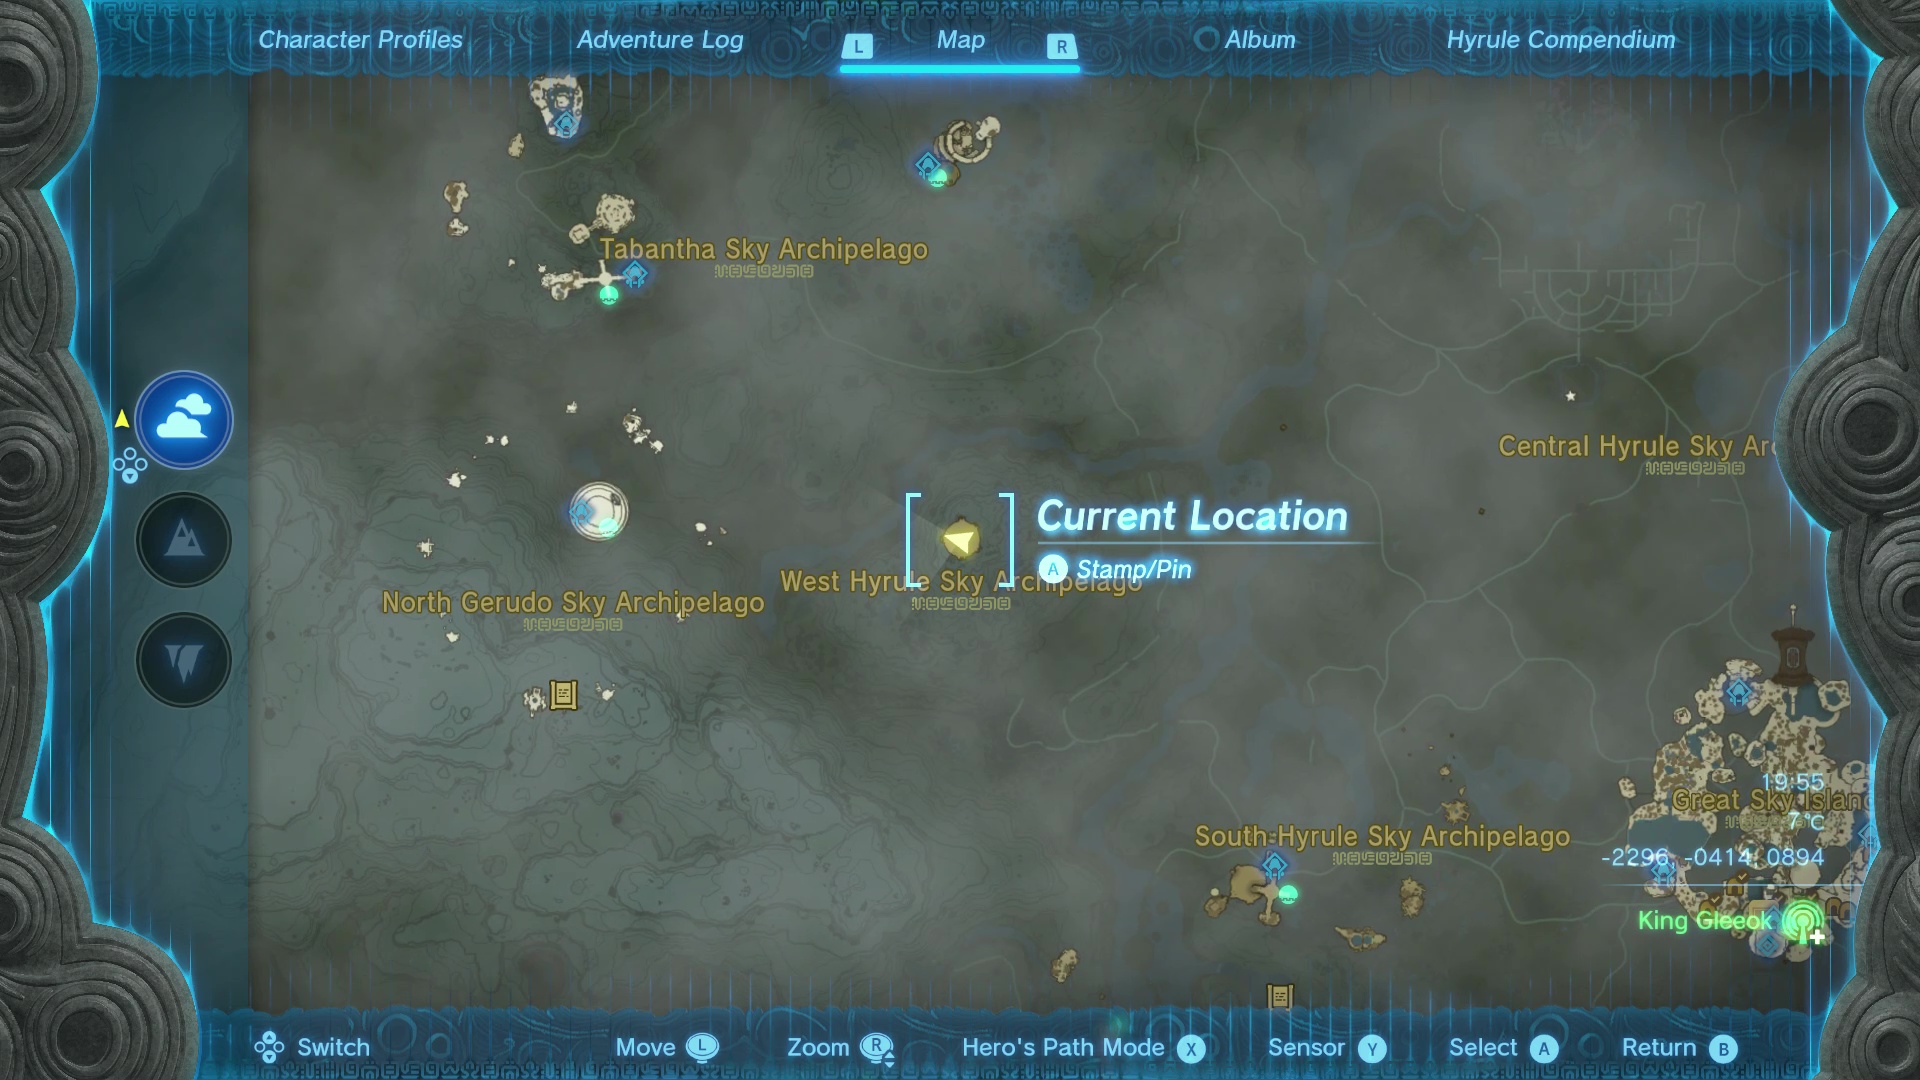
- (coordinates -2296, -0414, 0894)
This Sage's Will is simply in a chest that's glued to the side of a giant Flux Construct III, but you don't even need to kill it. Hitting the weak point (the glowing cube) can cause the Construct to briefly fall to pieces, including the chest. That's your moment to run in and grab the Sage's Will - then it's up to you if you want to finish the fight or glide away to safety.
6. Gerudo Sky Sage's Will location
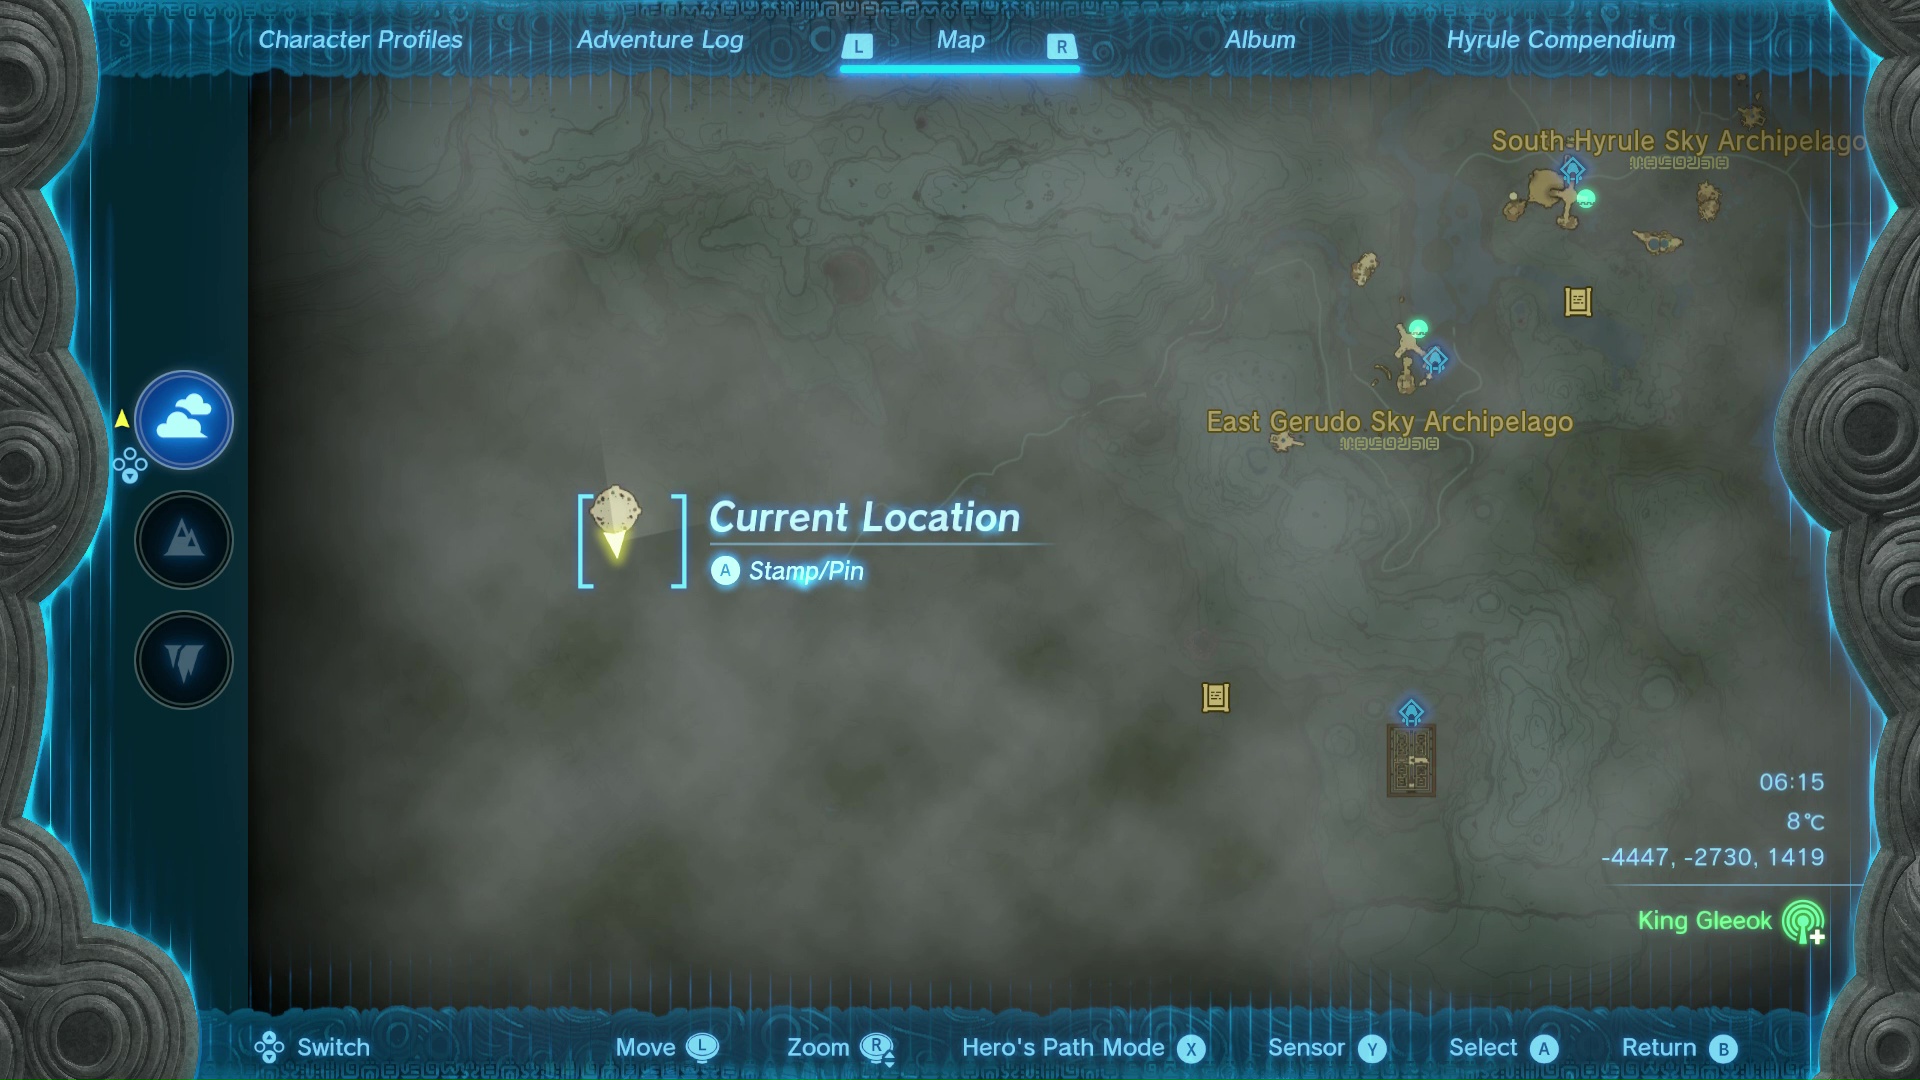
- (coordinates -4447, -2730, 1419)
This Sage's Will is the reward for another King Gleeok boss fight, and it's just like the first one, with a minor exception. Again, it's super high up and you'll need a vehicle to get up there, but unlike the one in the Hebra region, the desert environment means it'll either be freezing cold or boiling hot, depending on the time of day. Otherwise the principle is the same - kill the Gleeok and the chest at the side of the arena with the Sage's Will inside will unlock.
7. East Gerudo Sky Archipelago Sage's Will location
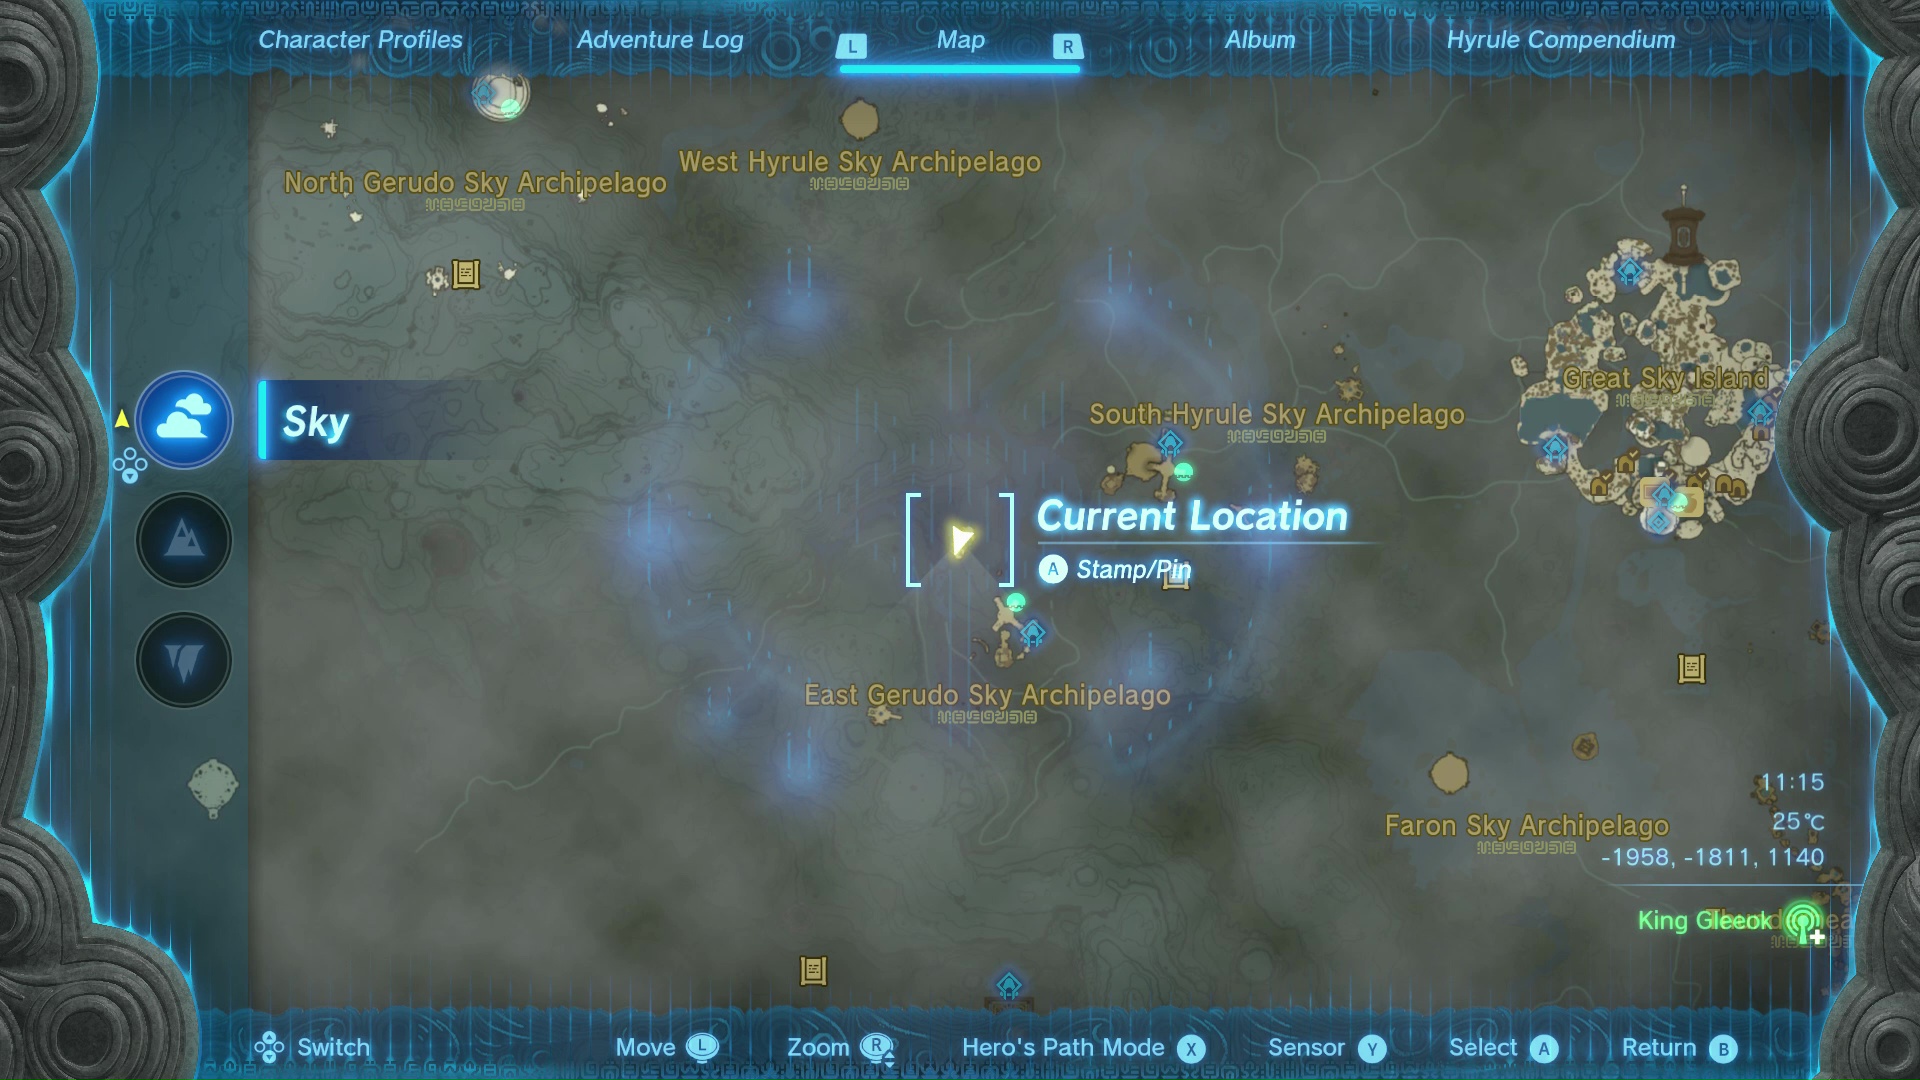
- (coordinates -1958, -1811, 1140)
Another puzzle for this Sage's Will, in the Northernmost island in the East Gerudo Sky Archipelago cluster. Using the launcher in the central archipelago to fire yourself towards it, you'll notice a hole in the side of the island - it's actually built in three layers!
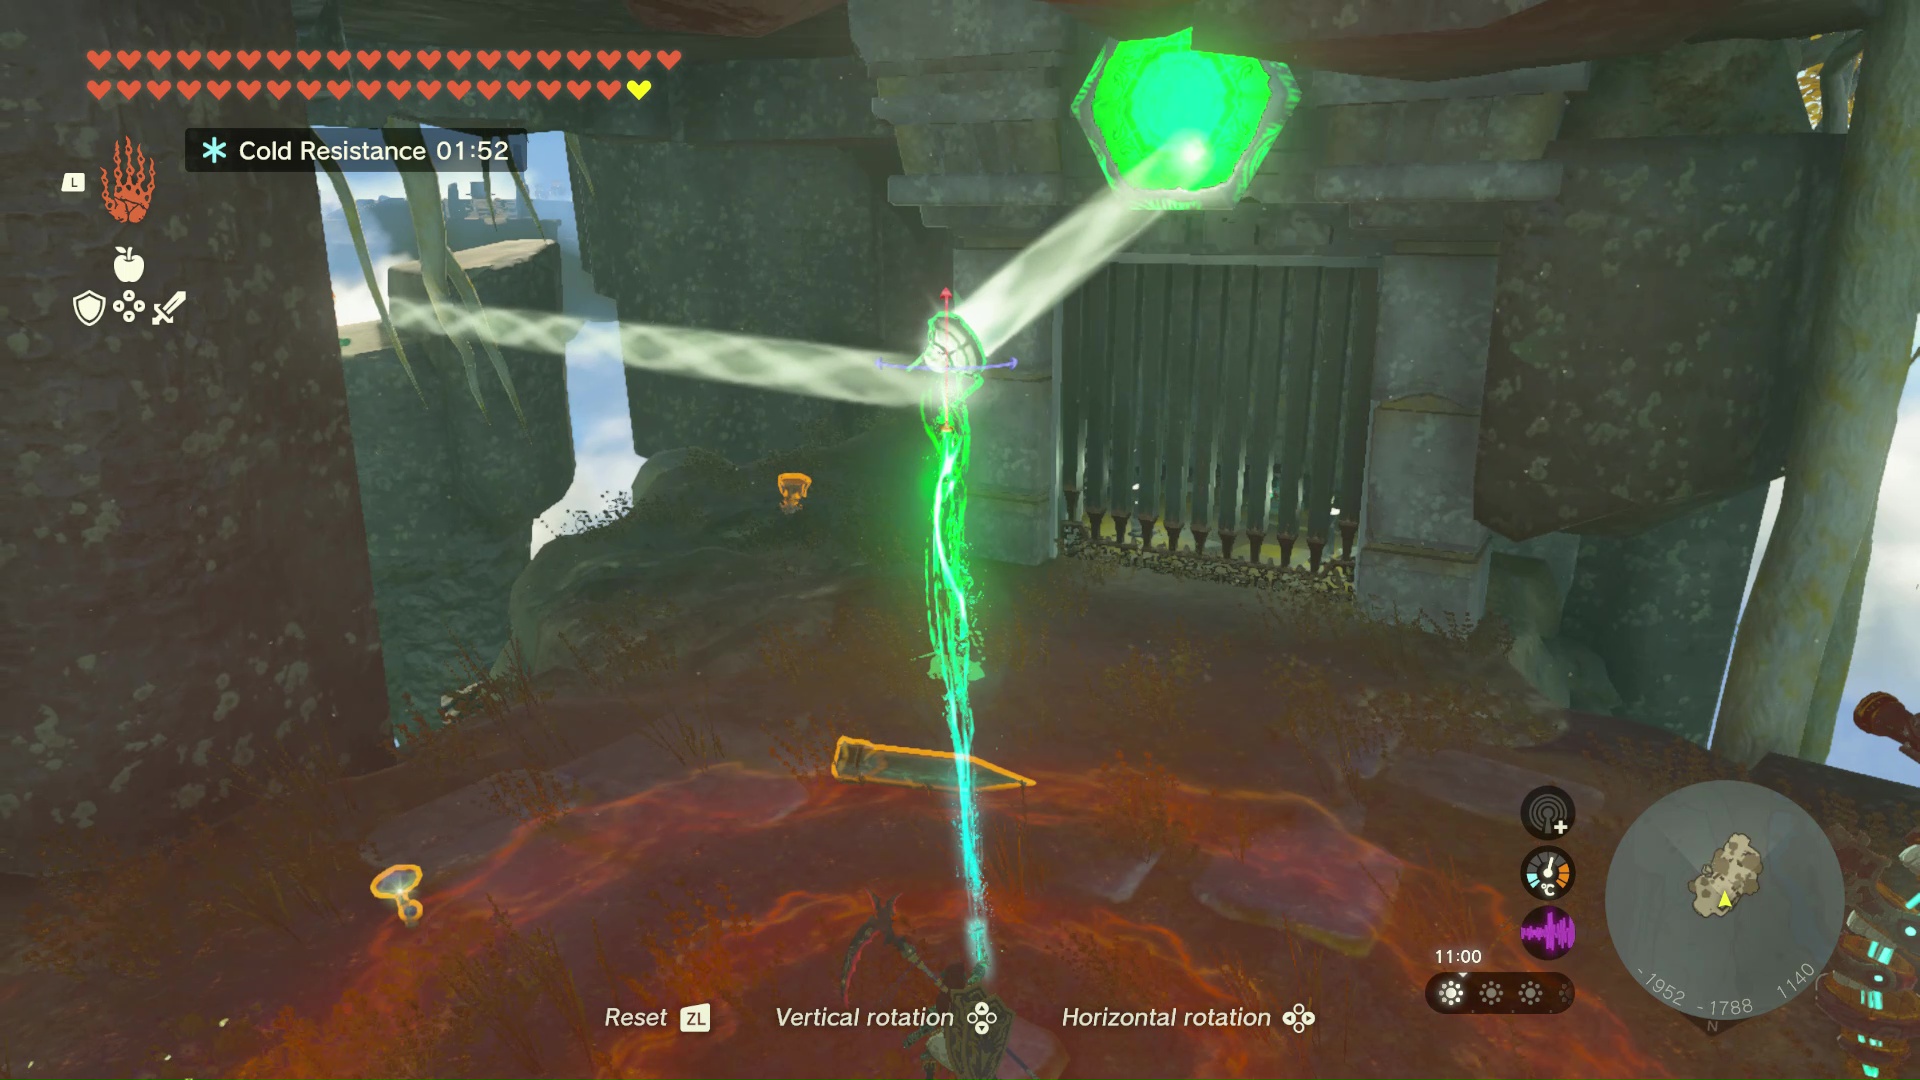
The Sage's Will is in a cage in the lower layer, and you need to redirect light onto the yellow hexagon above it to open it up. The middle layer above you is full of stakes and mirrors to use - put a mirror in the sunlight to fire a beam into the lower layer, then one more to angle it into the receiver, as shown above.
8. South Hyrule Sky Archipelago Sage's Will location
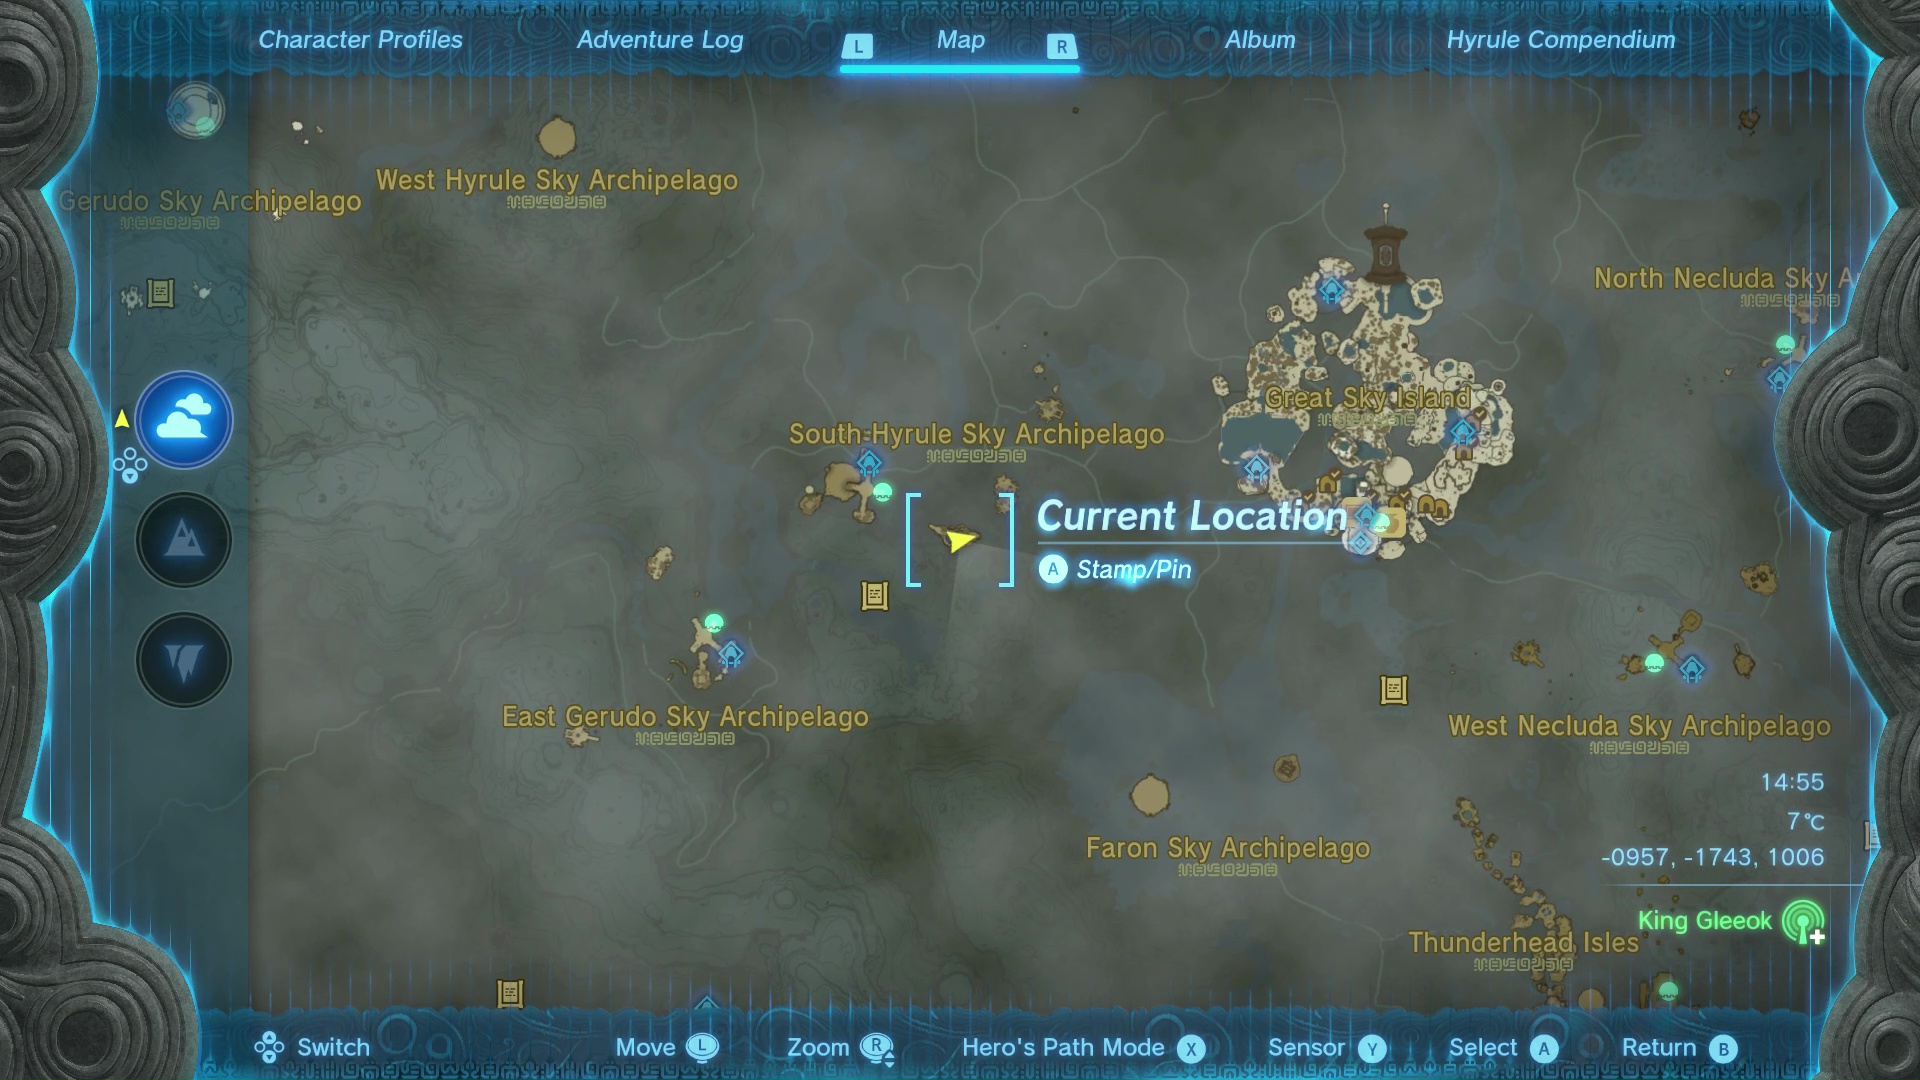
- (coordinates -0952, -1735, 1006)
This Sage's Will chest is underwater in the lower of two connected pools, and can't be reached until you empty the pool itself. That's not easy though - though there's a stone gate you can use to release the water, it falls closed again the moment you release Ultrahand, and the pool constantly refills.
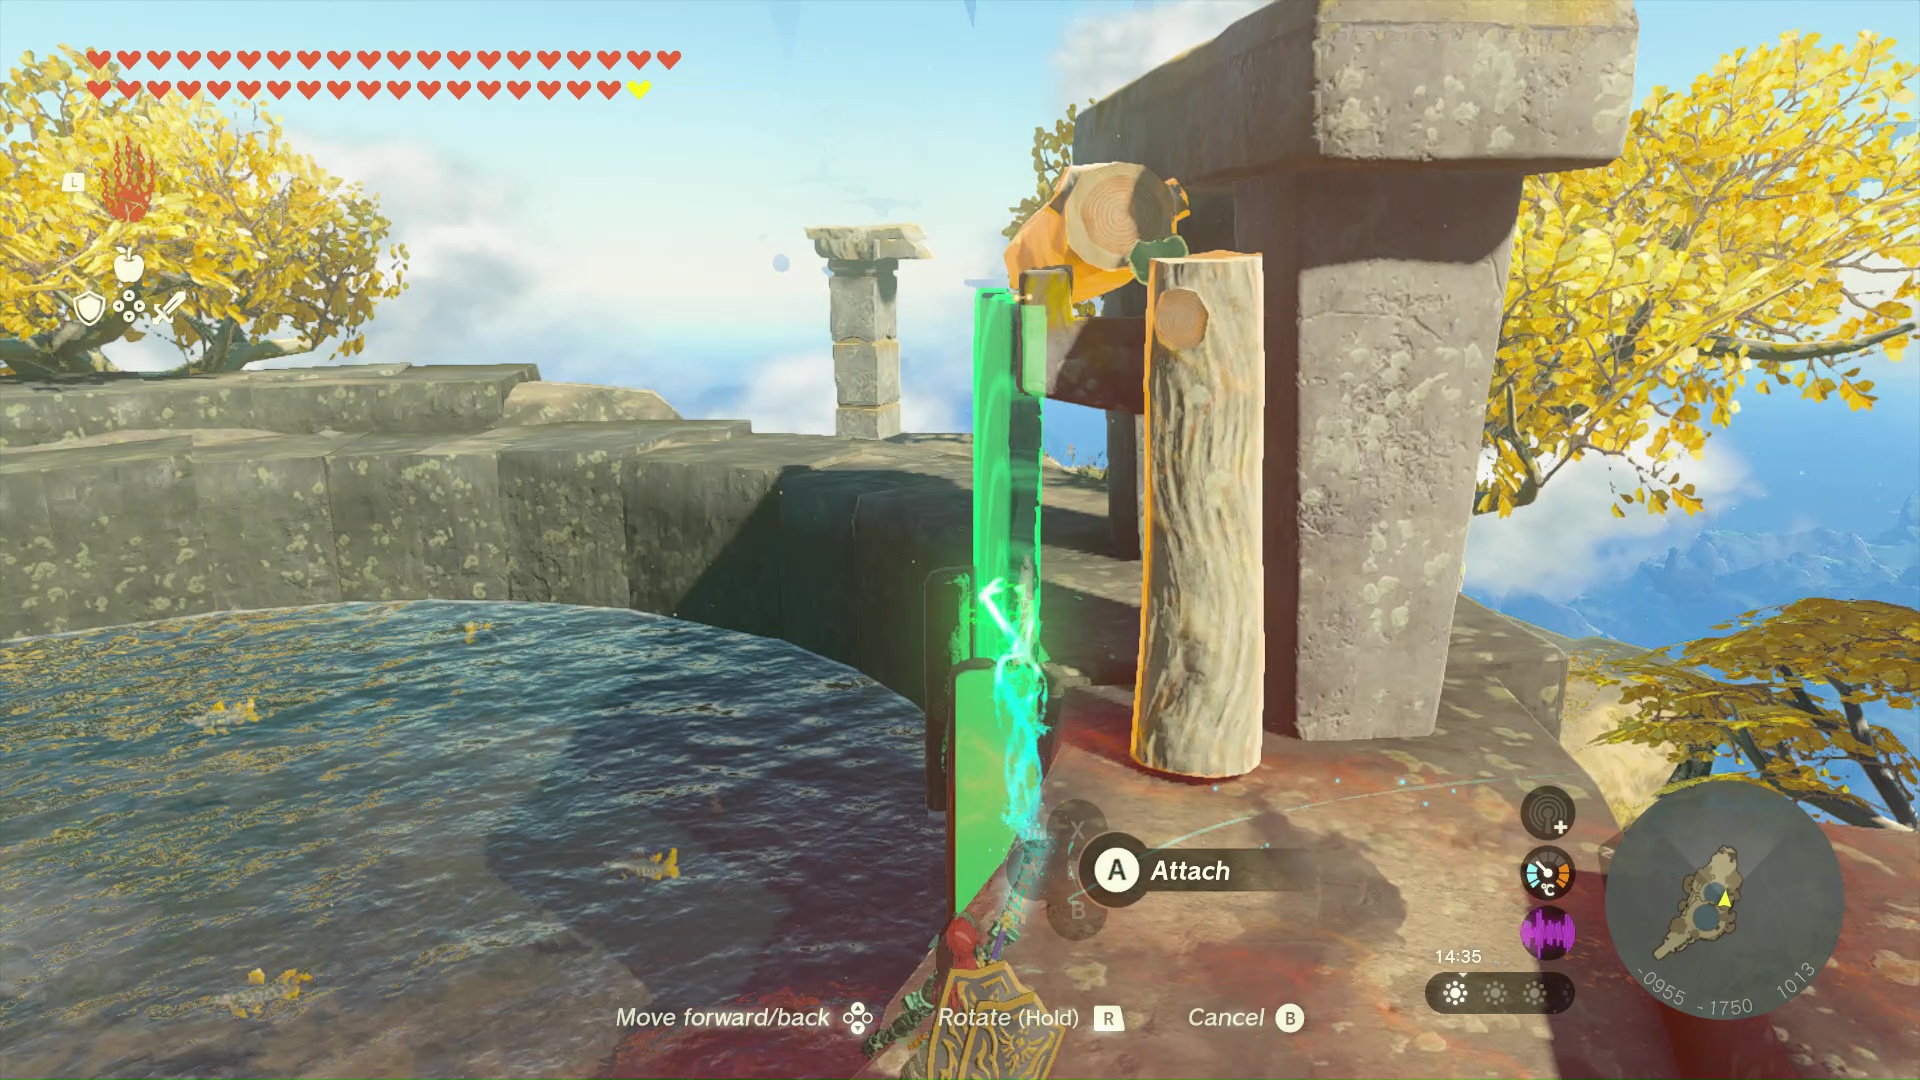
Ultrahand is the solution, as are the logs scattered around the island. Use the set-up shown above to hold the gate open, and the water will filter out until it's ankle-level. From there you can jump in and grab the chest, as well as the stranded fish lying around.
9. Faron Sky Archipelago Sage's Will location
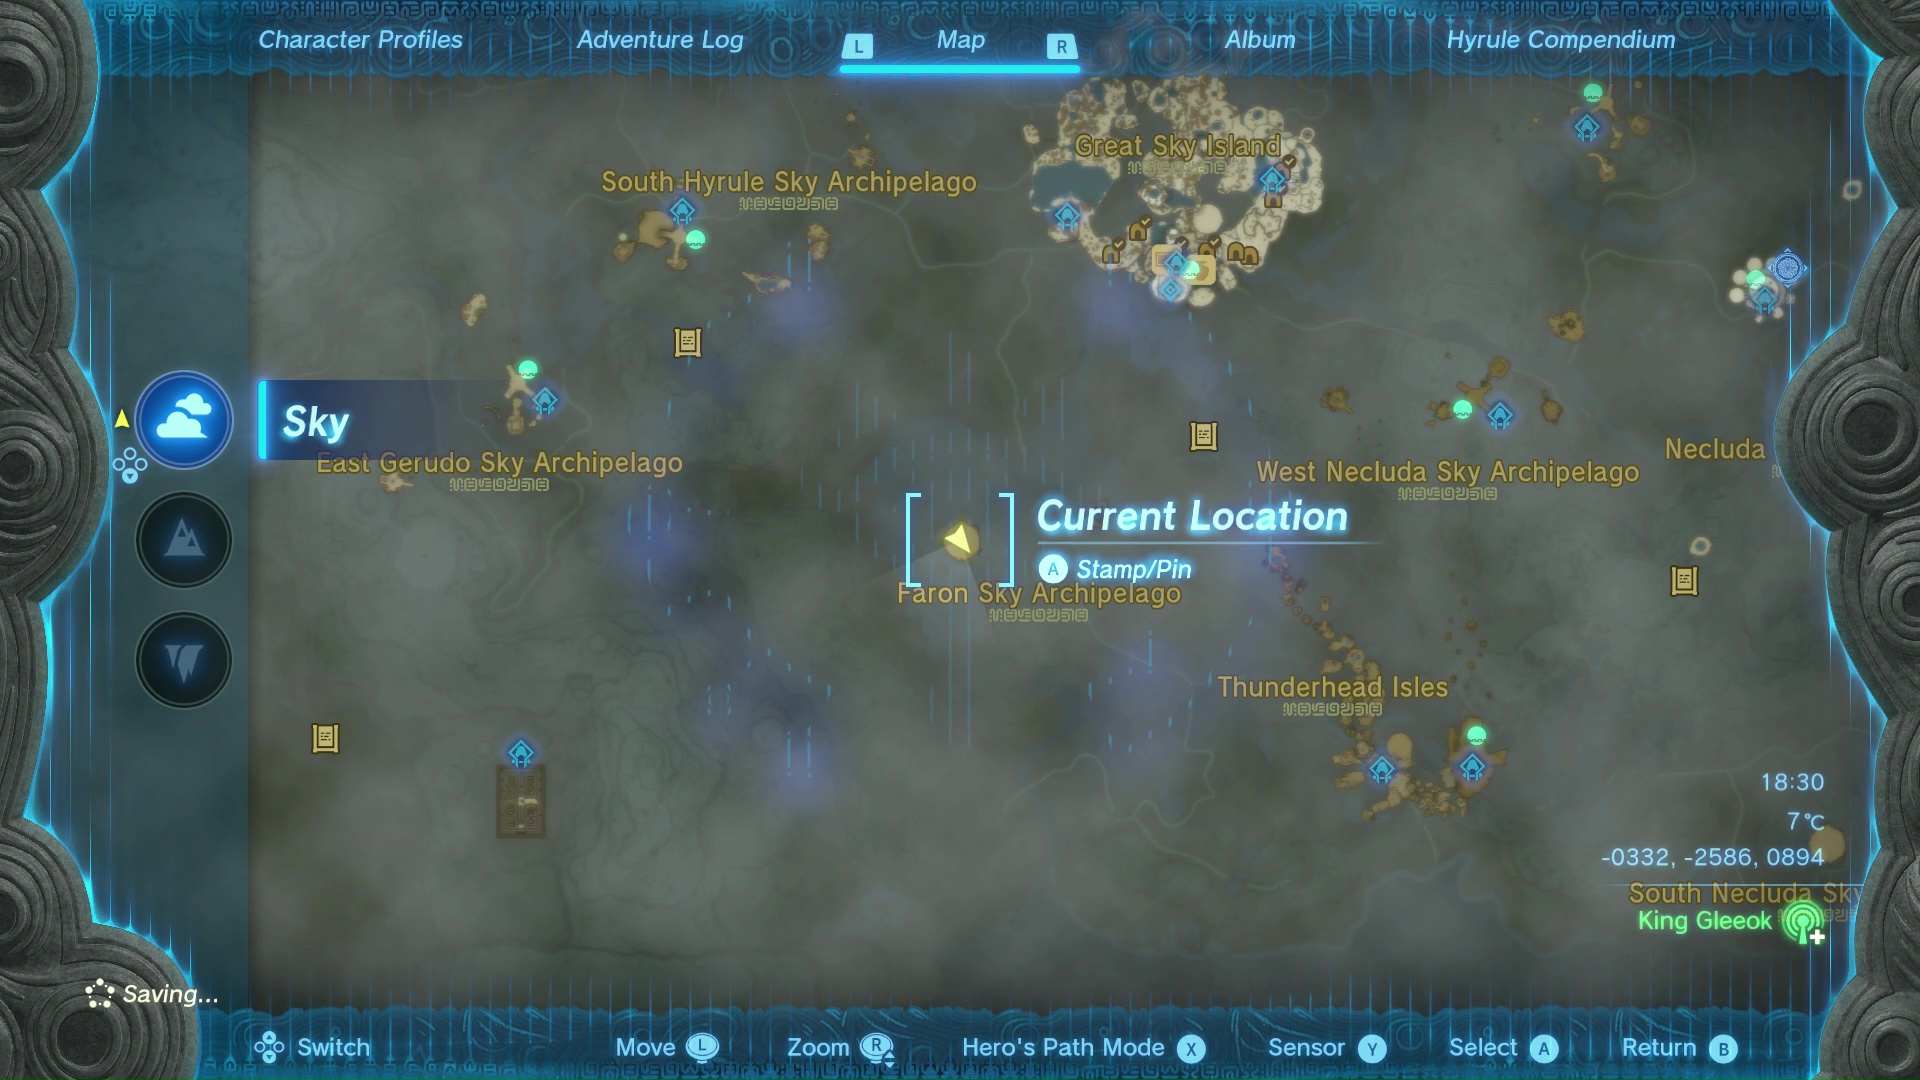
- (coordinates -0332, -2586, 0894)
This Sage's Will is just like the fifth one - inside a chest attached to the exterior of a Flux Construct III, this time in the Faron Sky Archipelago in a high arena that'll probably require a vehicle to reach.
Once you're up there, again, it's up to you whether you want to rip the chest off the side of the Construct with Ultrahand, smash it pieces by hitting the weak spot, or commit to properly destroying the boss fight. Either way, you can get the Sage's Will.
10. West Thunderhead Isles Sage's Will location
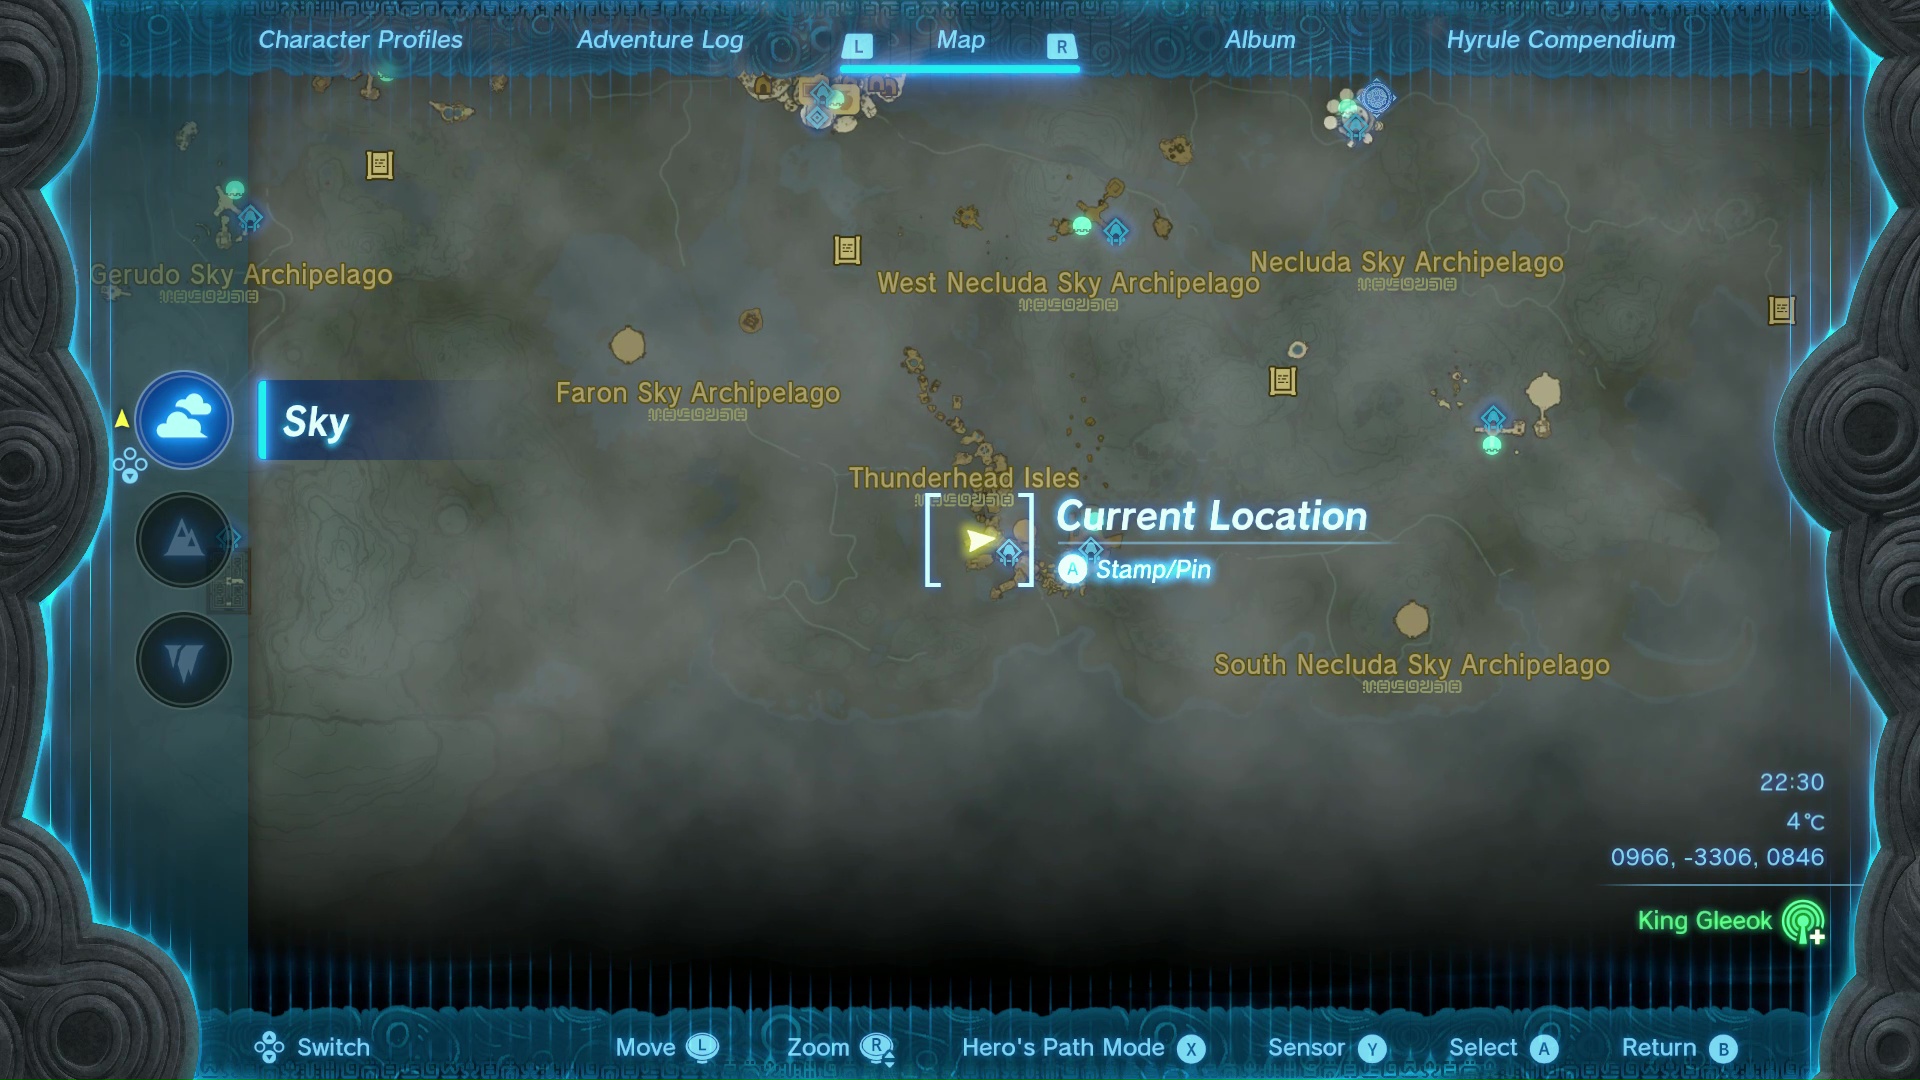
- (coordinates 0966, -3306, 0846)
This is one of two Sage's Wills hidden in Thunderhead Isles, a region that won't be visible until you get at least part of the way through the questline to find the Fifth Sage's location in Zelda Tears of the Kingdom.
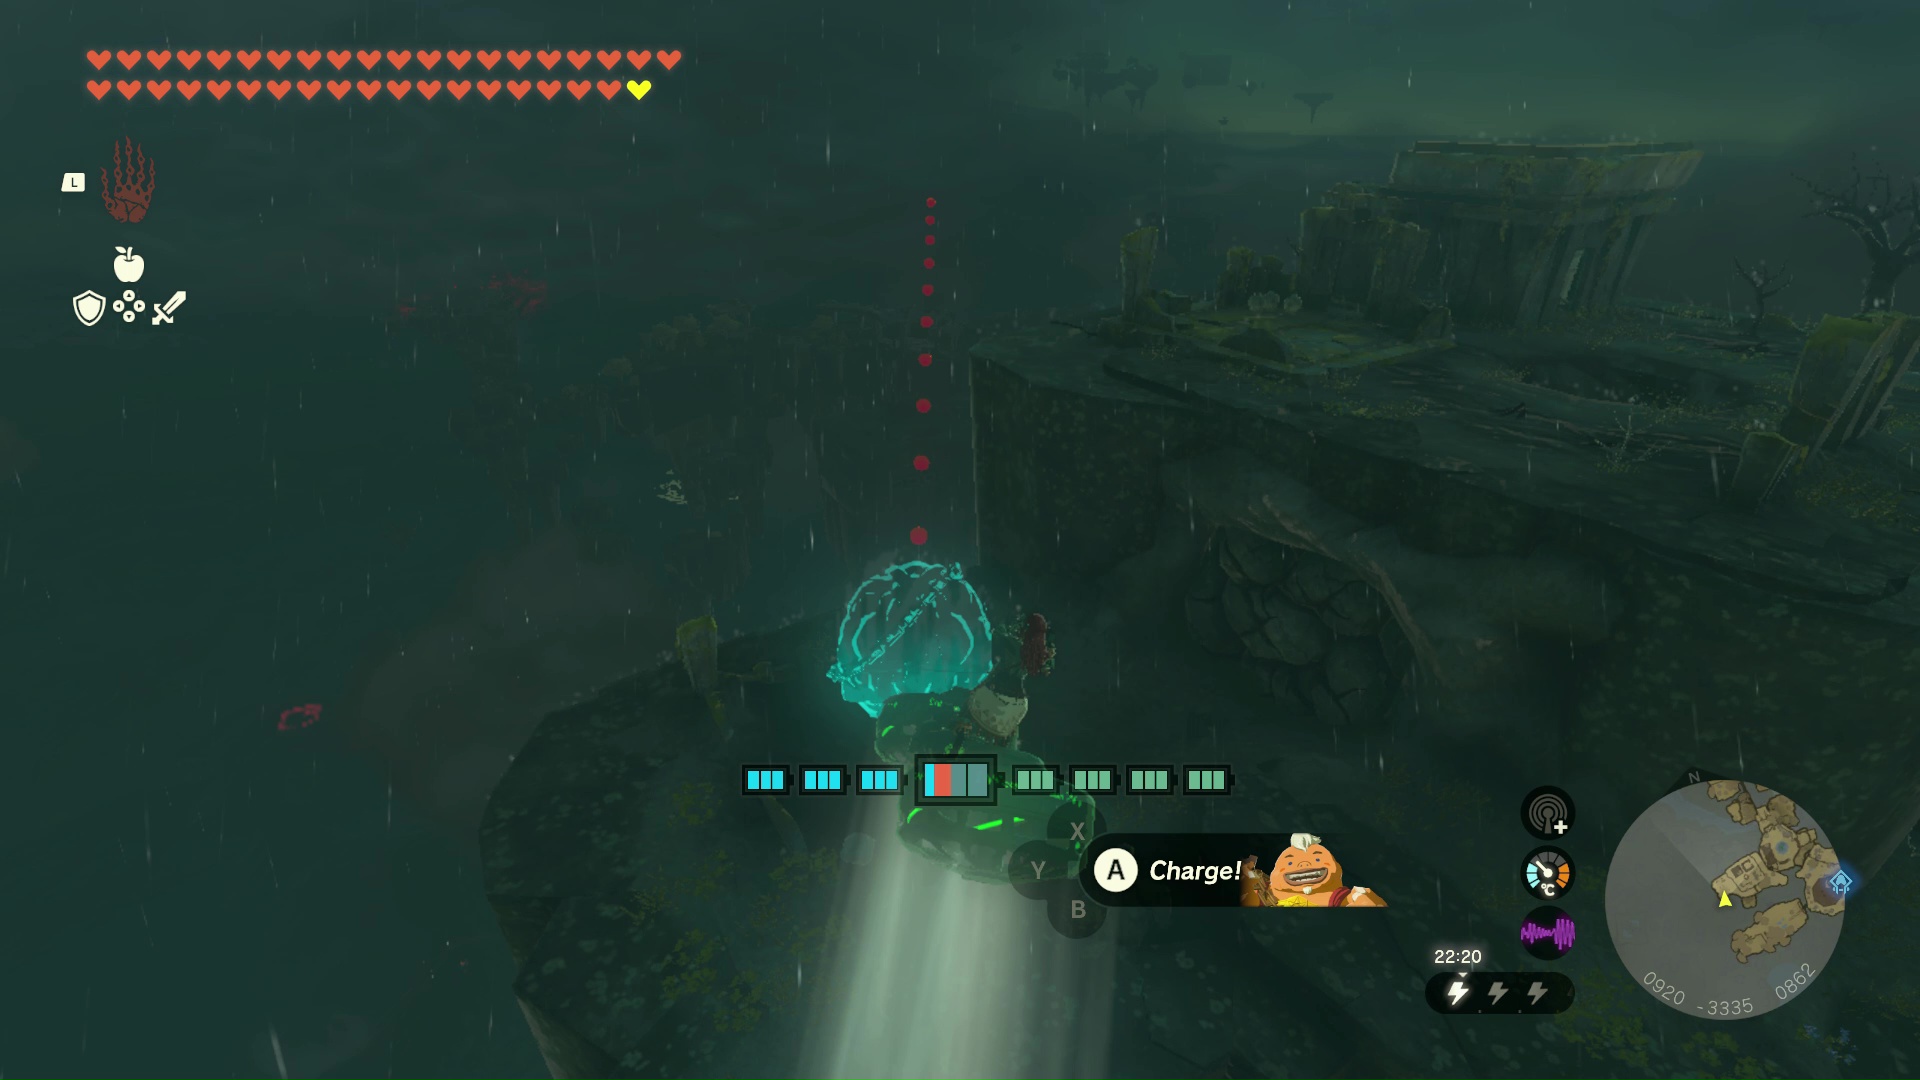
Once you're up there, head to the very top of the island section marked above, either through climbing or vehicles. There you'll see some breakable stone walls that, when blown up with a bomb, hammer or Yunobo, allow you to enter a room with a Stone Like - and a chest with the Sage's Will.
11. East Thunderhead Isles Sage's Will location
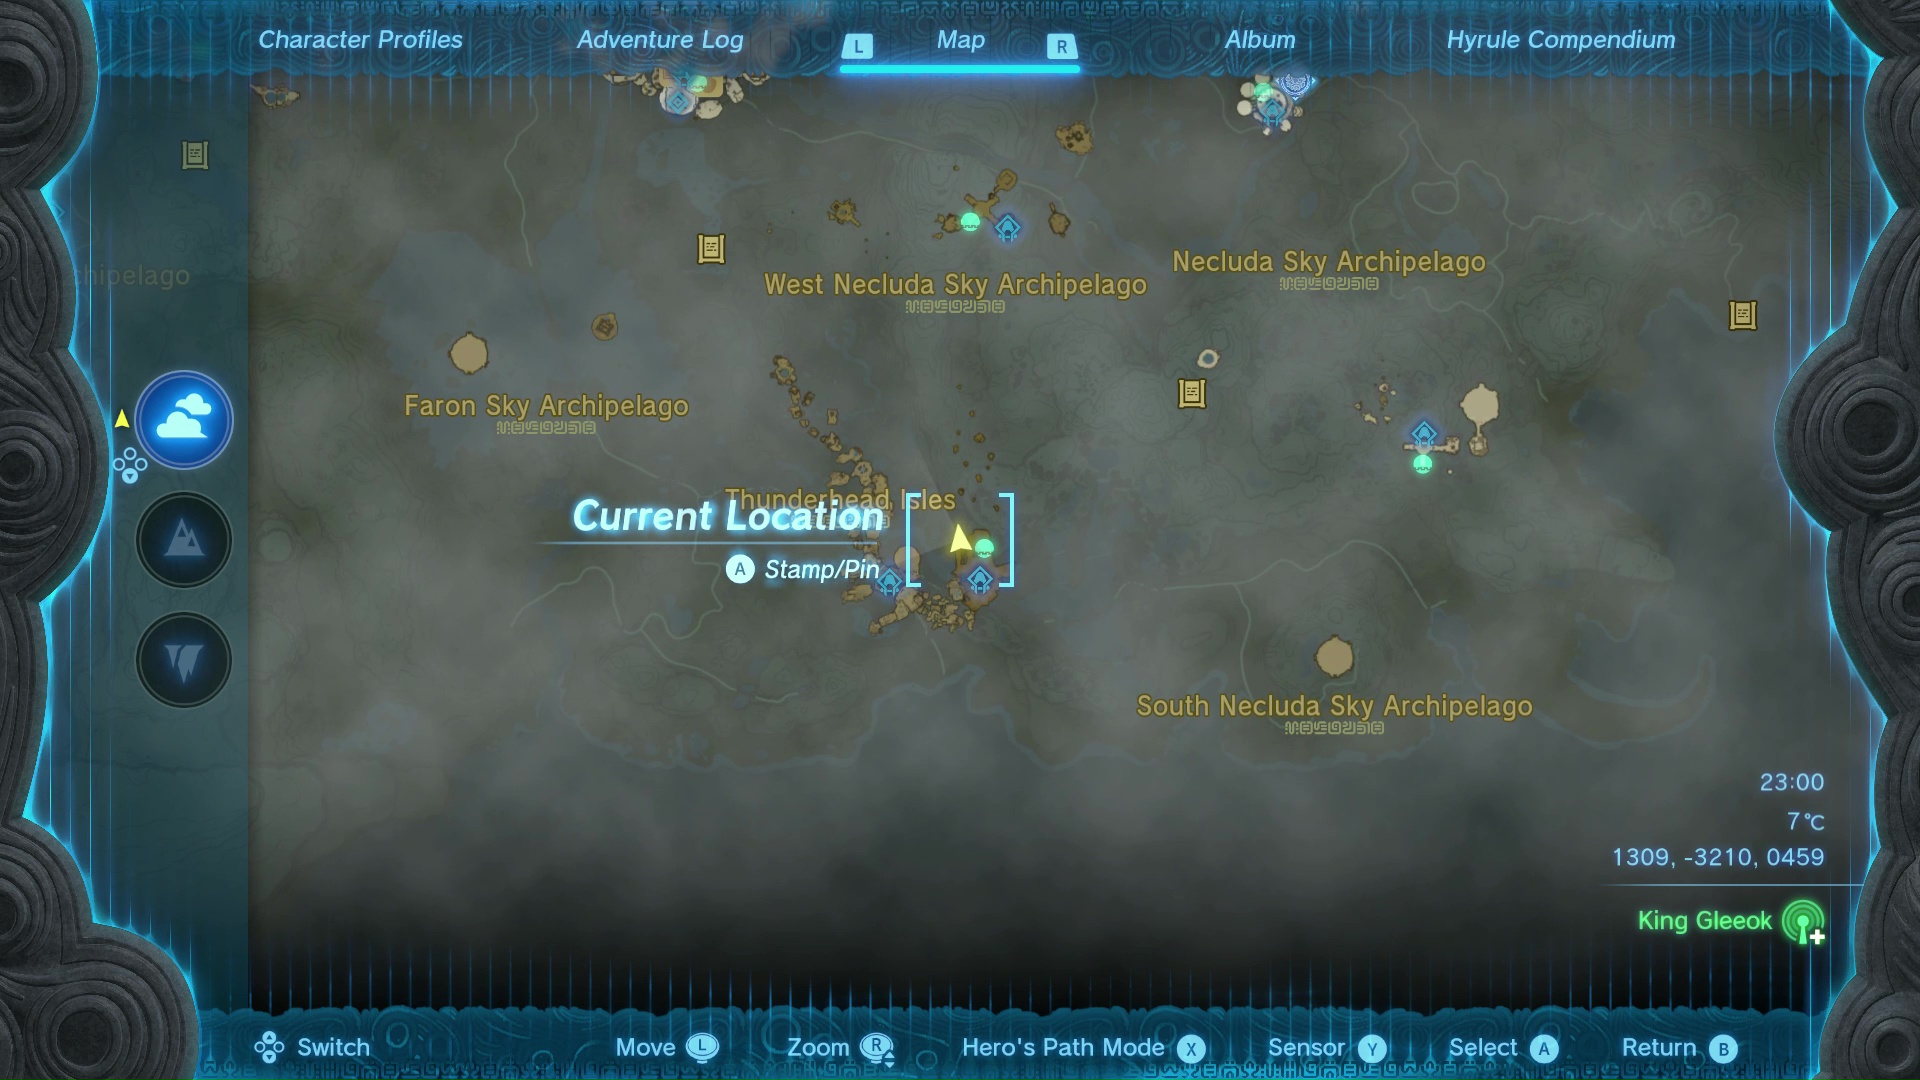
- (coordinates 1309, -3210, 0459)
This one is far easier to get - follow the natural route through to the end of the Thunderhead Isle, and on your left will be a Goddess Statue you can pray to for Stamina and Health, as per usual. Using Ascend next to the statue will allow you to rise up through to the roof of the temple - from there look North to see the chest at the end of an outcropping.
12. South Necluda Sky Archipelago Sage's Will location
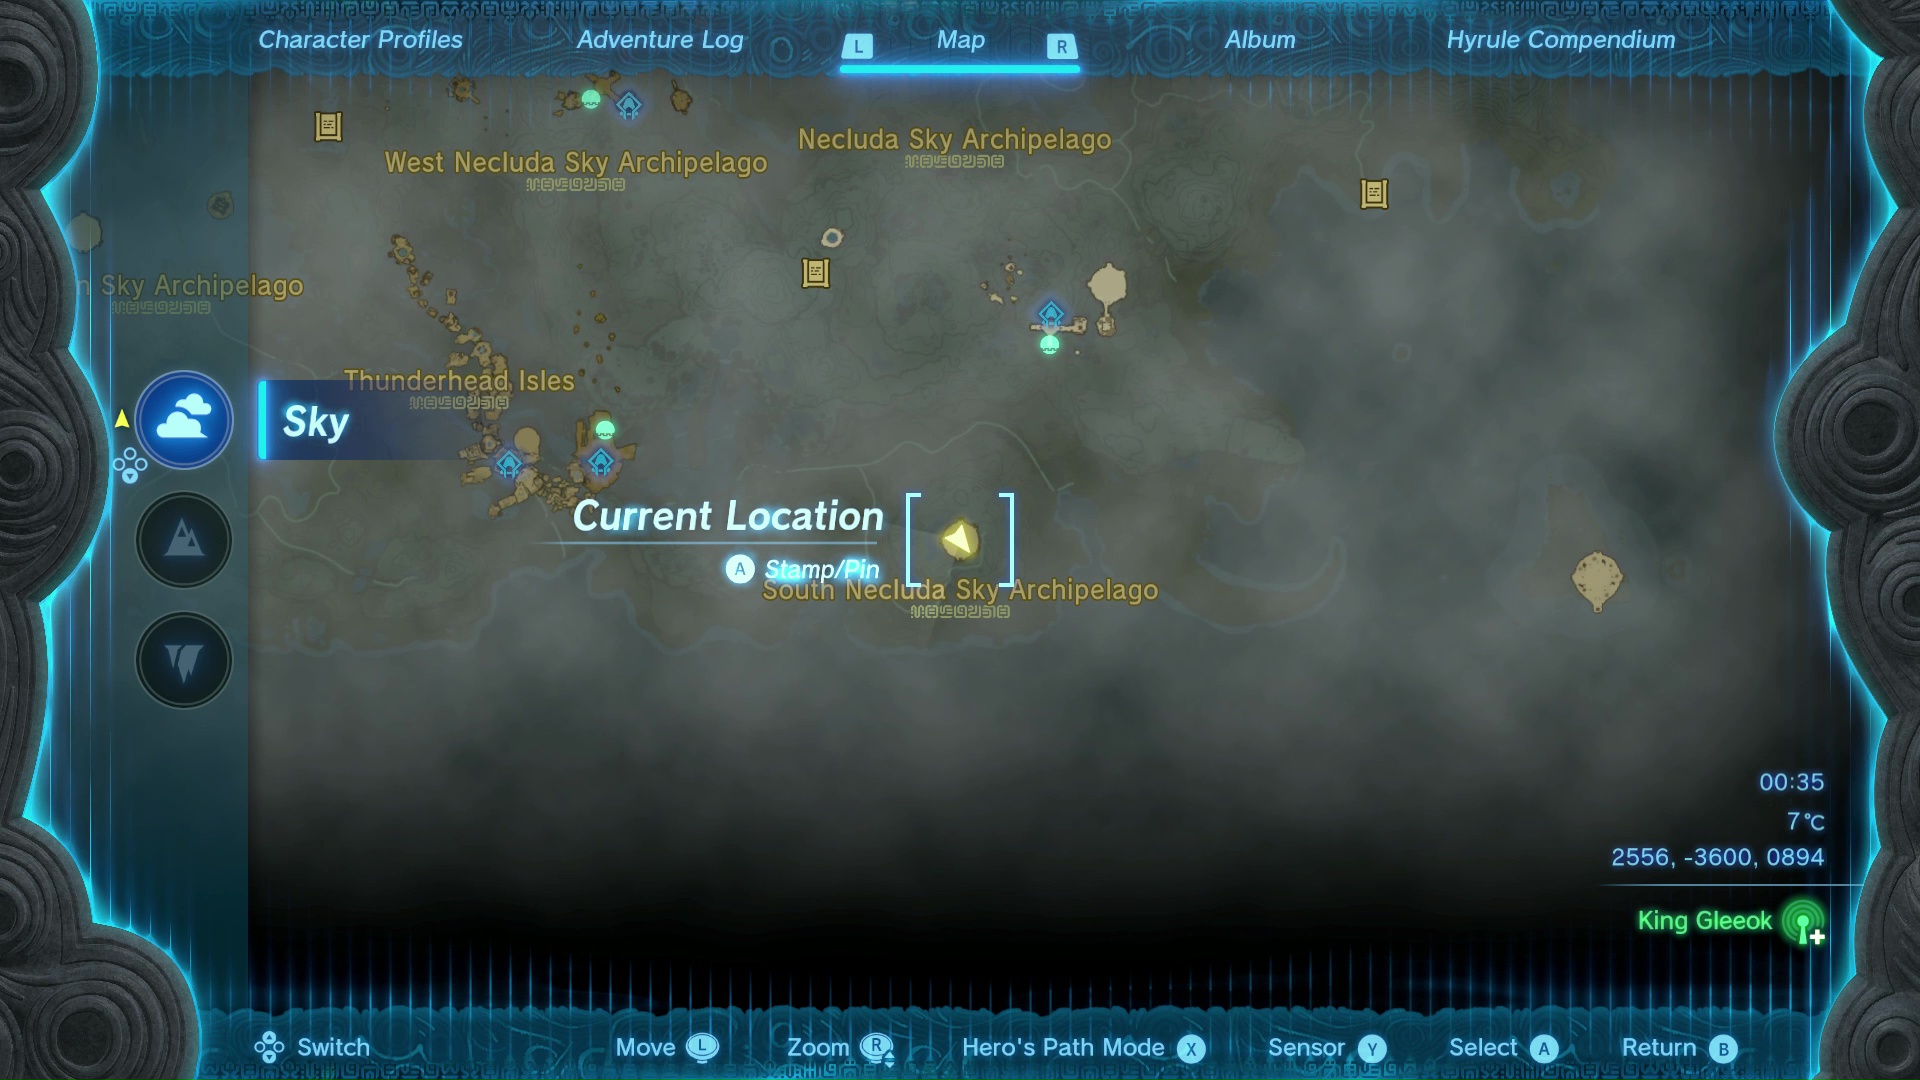
- (coordinates 2556, -3600, 0894)
This one is the final of the three Flux Construct III boss fights (though not the last time you'll fight a construct) accessible by gliding down to the arena from the islands North of it, and follows the exact same rules as the other two: you can steal the chest, break the boss to pieces or actually win the fight, but you'll get the Sage's Will either way.
13. Southeast Necluda Sky / Eventide Isle Sage's Will location
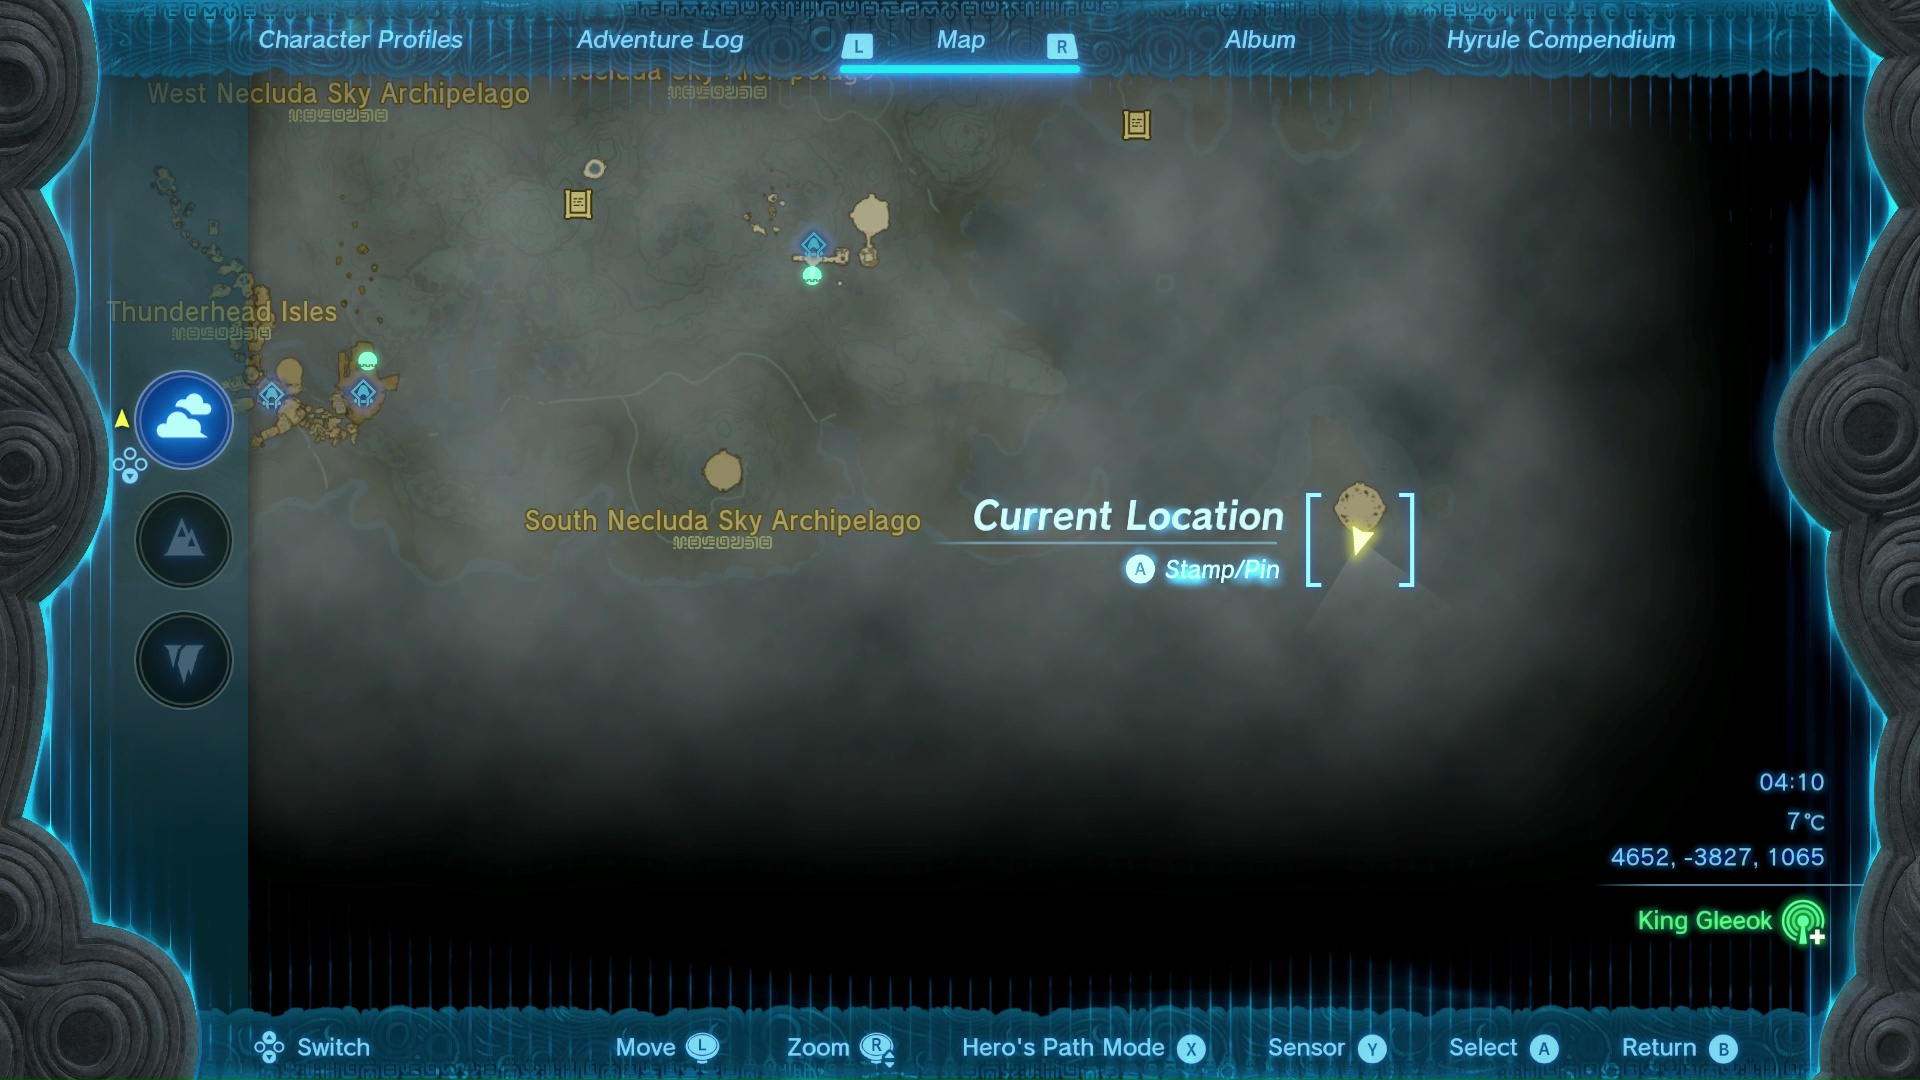
- (coordinates 4652, -3827, 1065)
Another Sage's Will and the last of three boss fights, this is the last King Gleeok boss fight, on an arena very high above Eventide Isle in the very bottom-right corner of the map. You'll definitely need a vehicle to reach this point - a balloon or airbike from Eventide should get you up there if you have enough battery - but unlike the other two arenas, there's no weather effects to deal with during the fight. Kill the Gleeok and the chest it was guarding will pop open to reveal the Sage's Will inside.
14. North Necluda Sky Archipelago Sage's Will location
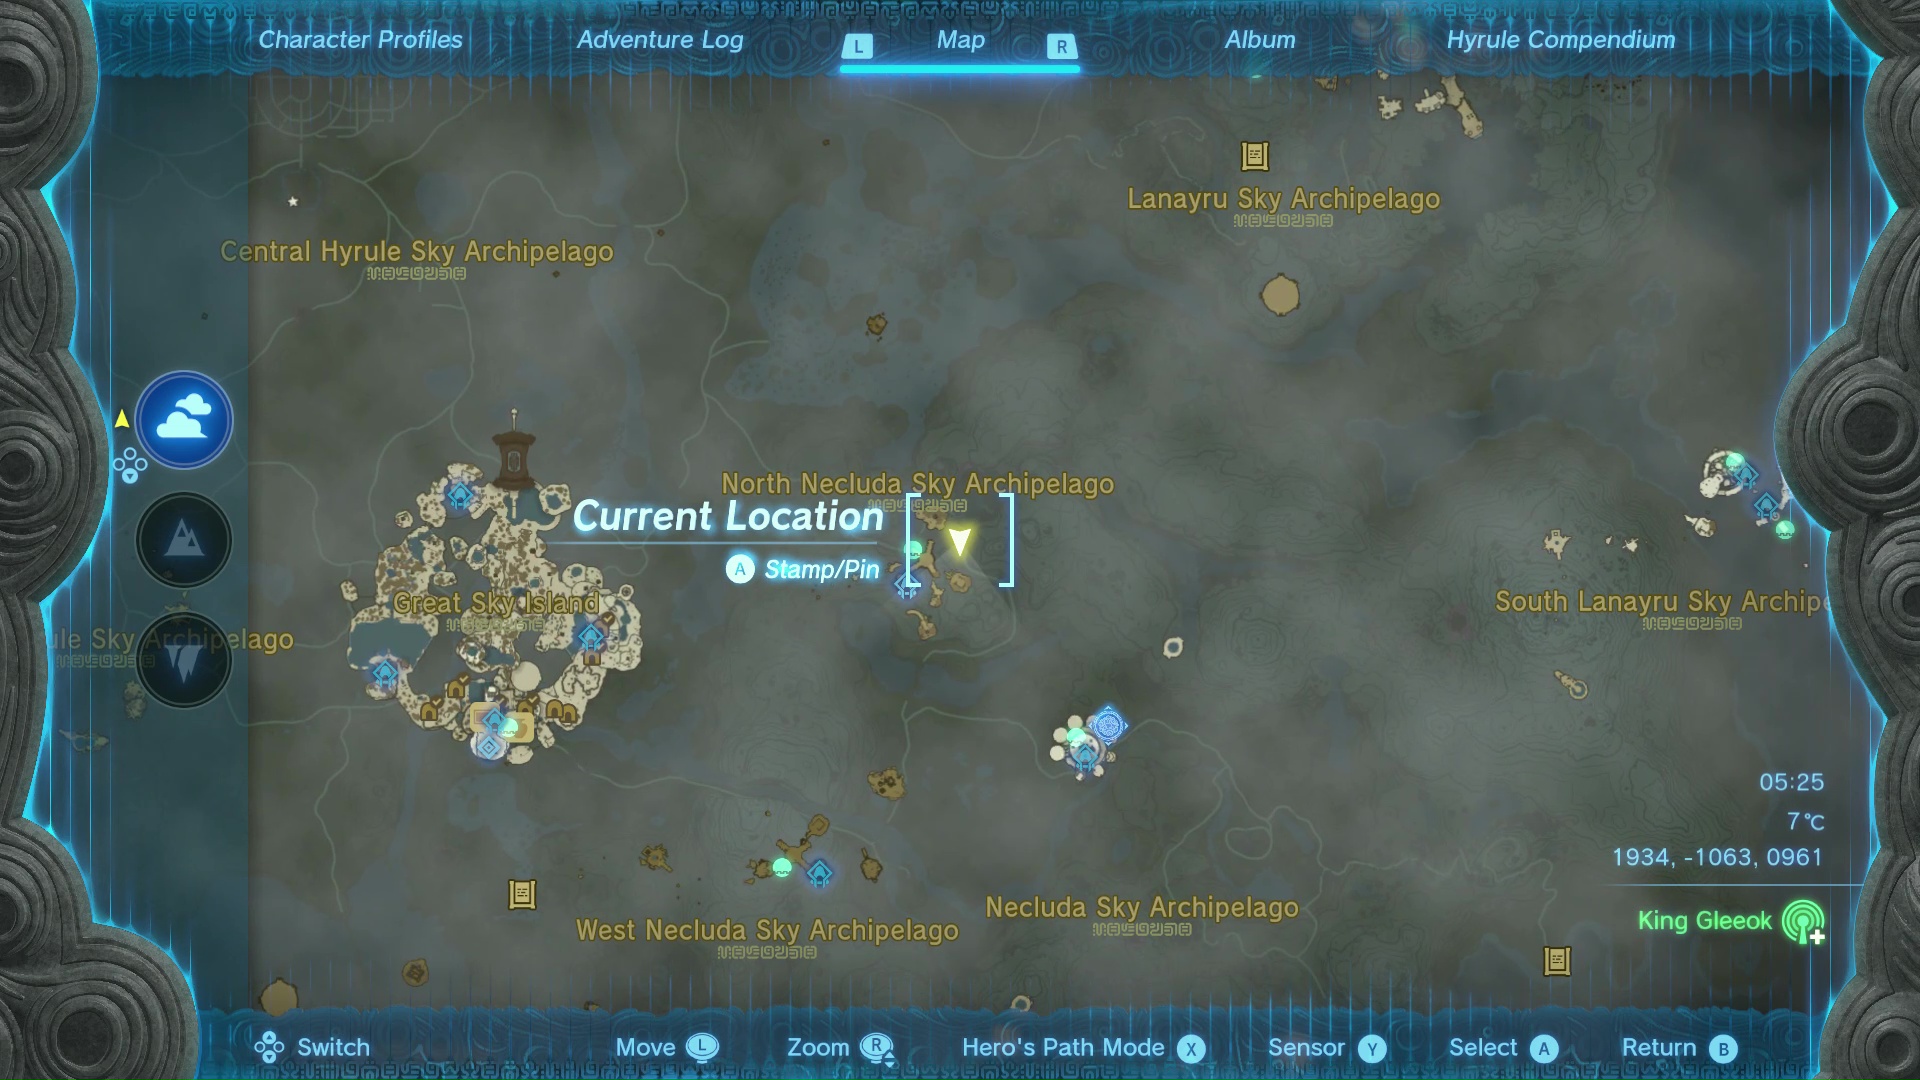
- (coordinates 1934, -1063, 0961)
Next head to the little cluster of islands centered around a launcher, East of Great Sky Island. From the launcher, to the Northeast, you should be able to see a tiny little floating crop of luminous stones up in the air, not very far away. Use the launcher to fling yourself there, and on the opposite side should be a chest with the Sage's Will inside.
15. Lanayru Sky Archipelago Sage's Will location
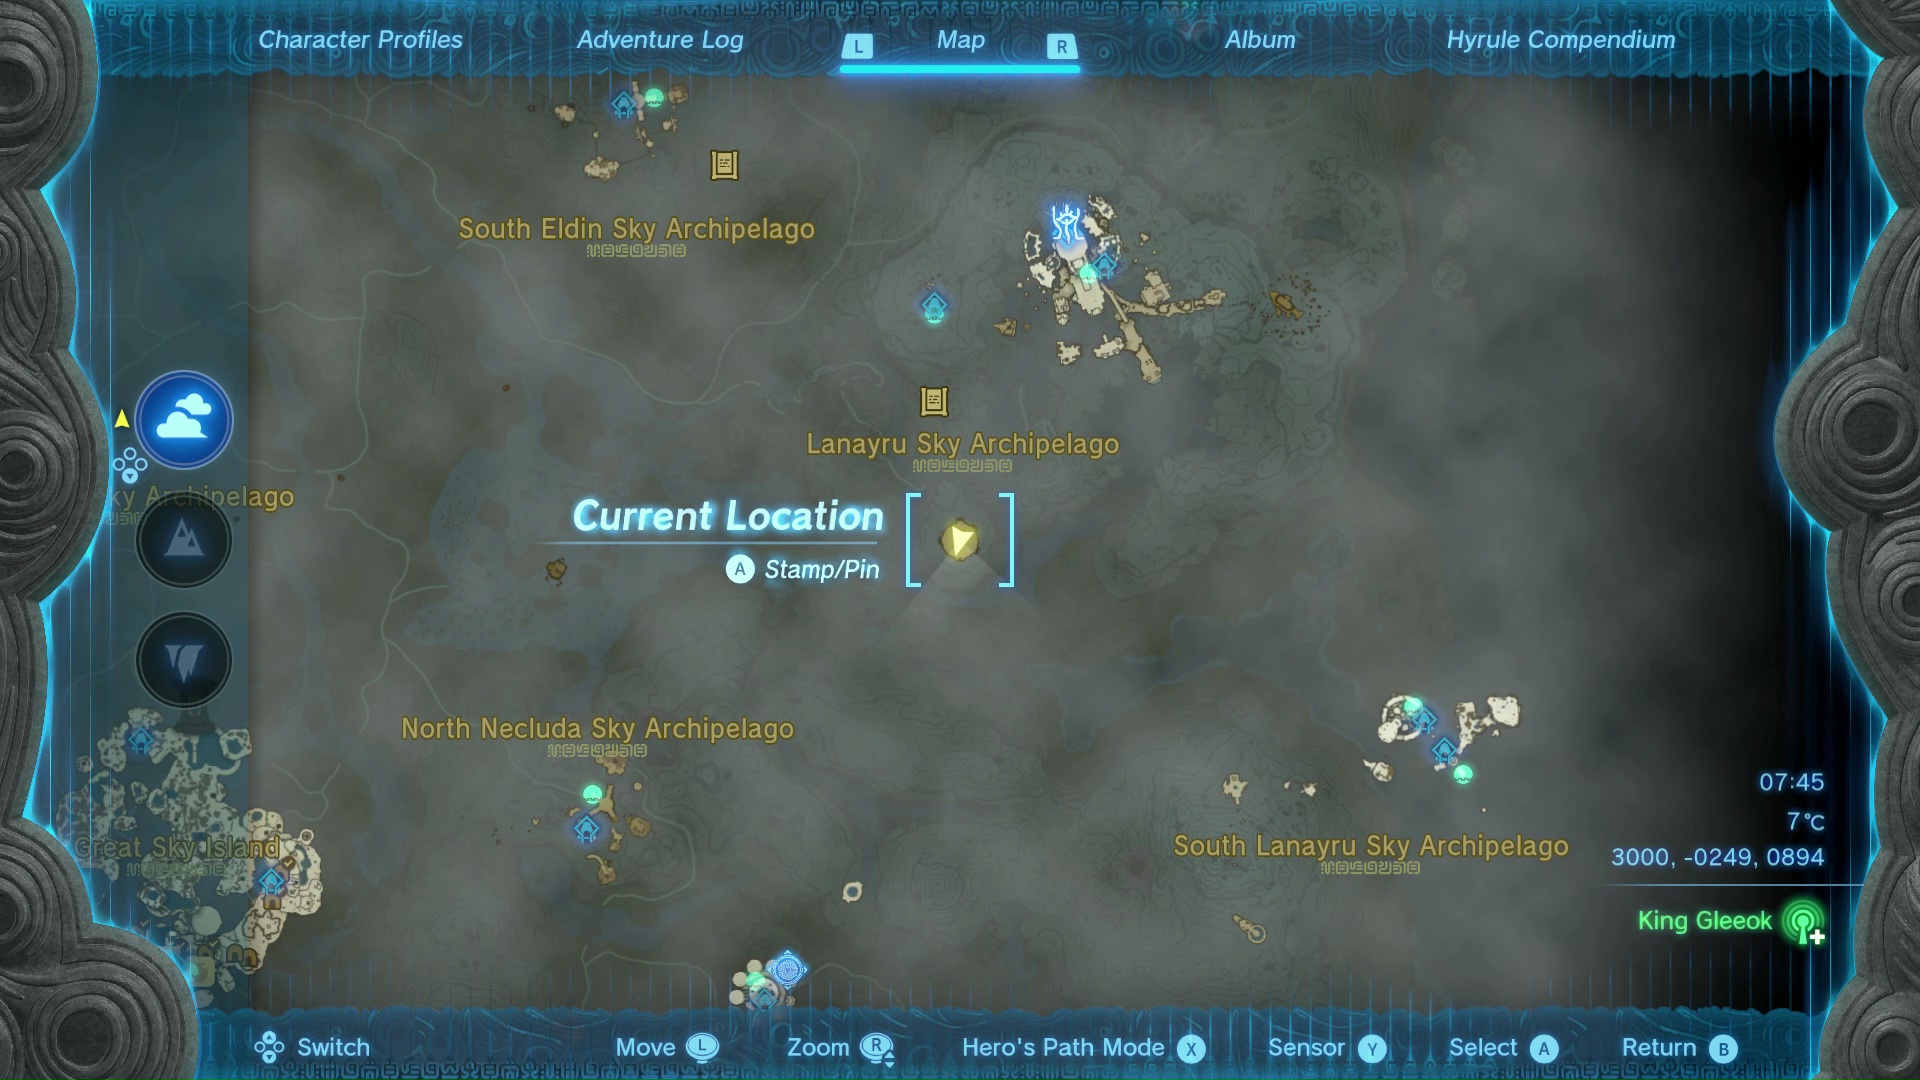
- (coordinates 3015, -0257, 0894)
It's another Flux Construct boss fight - but this time it's only a Grade 2 encounter, easier than the 3's you've been fighting until now. Use a vehicle or Sky Tower to reach this little isolated island on the Necluda/Lanayru border, and feel free to deal with the Construct how you choose. If the Constructs until now were proving two difficult, this one might be easier for you.
16. South Eldin Sky Archipelago Sage's Will location
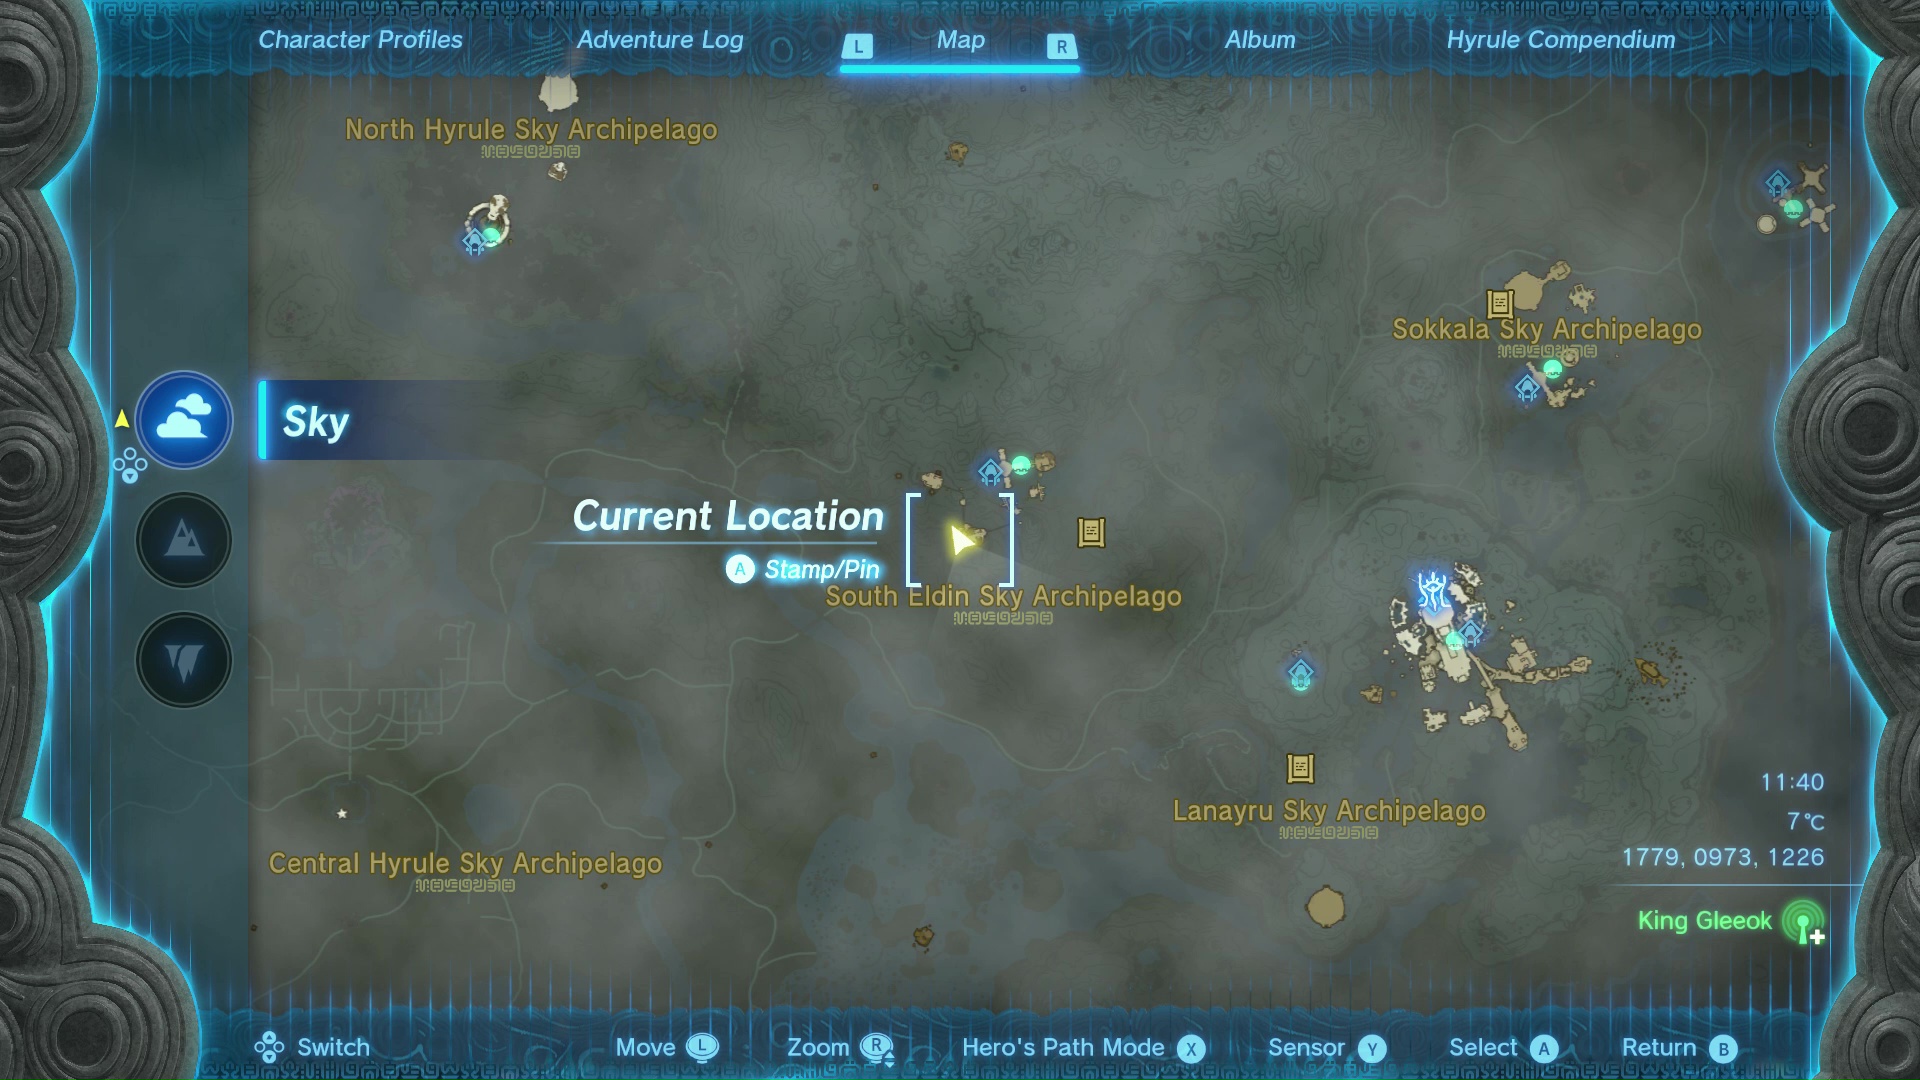
- (coordinates 1781, 0981, 1226)
This Sage's Will is in the lower level of another island in a greater archipelago, similar to the number 7 example you encountered in East Gerudo. Accessible by rail, jump off the island and glide down the Northern side until you see a little outcropping and some vines.
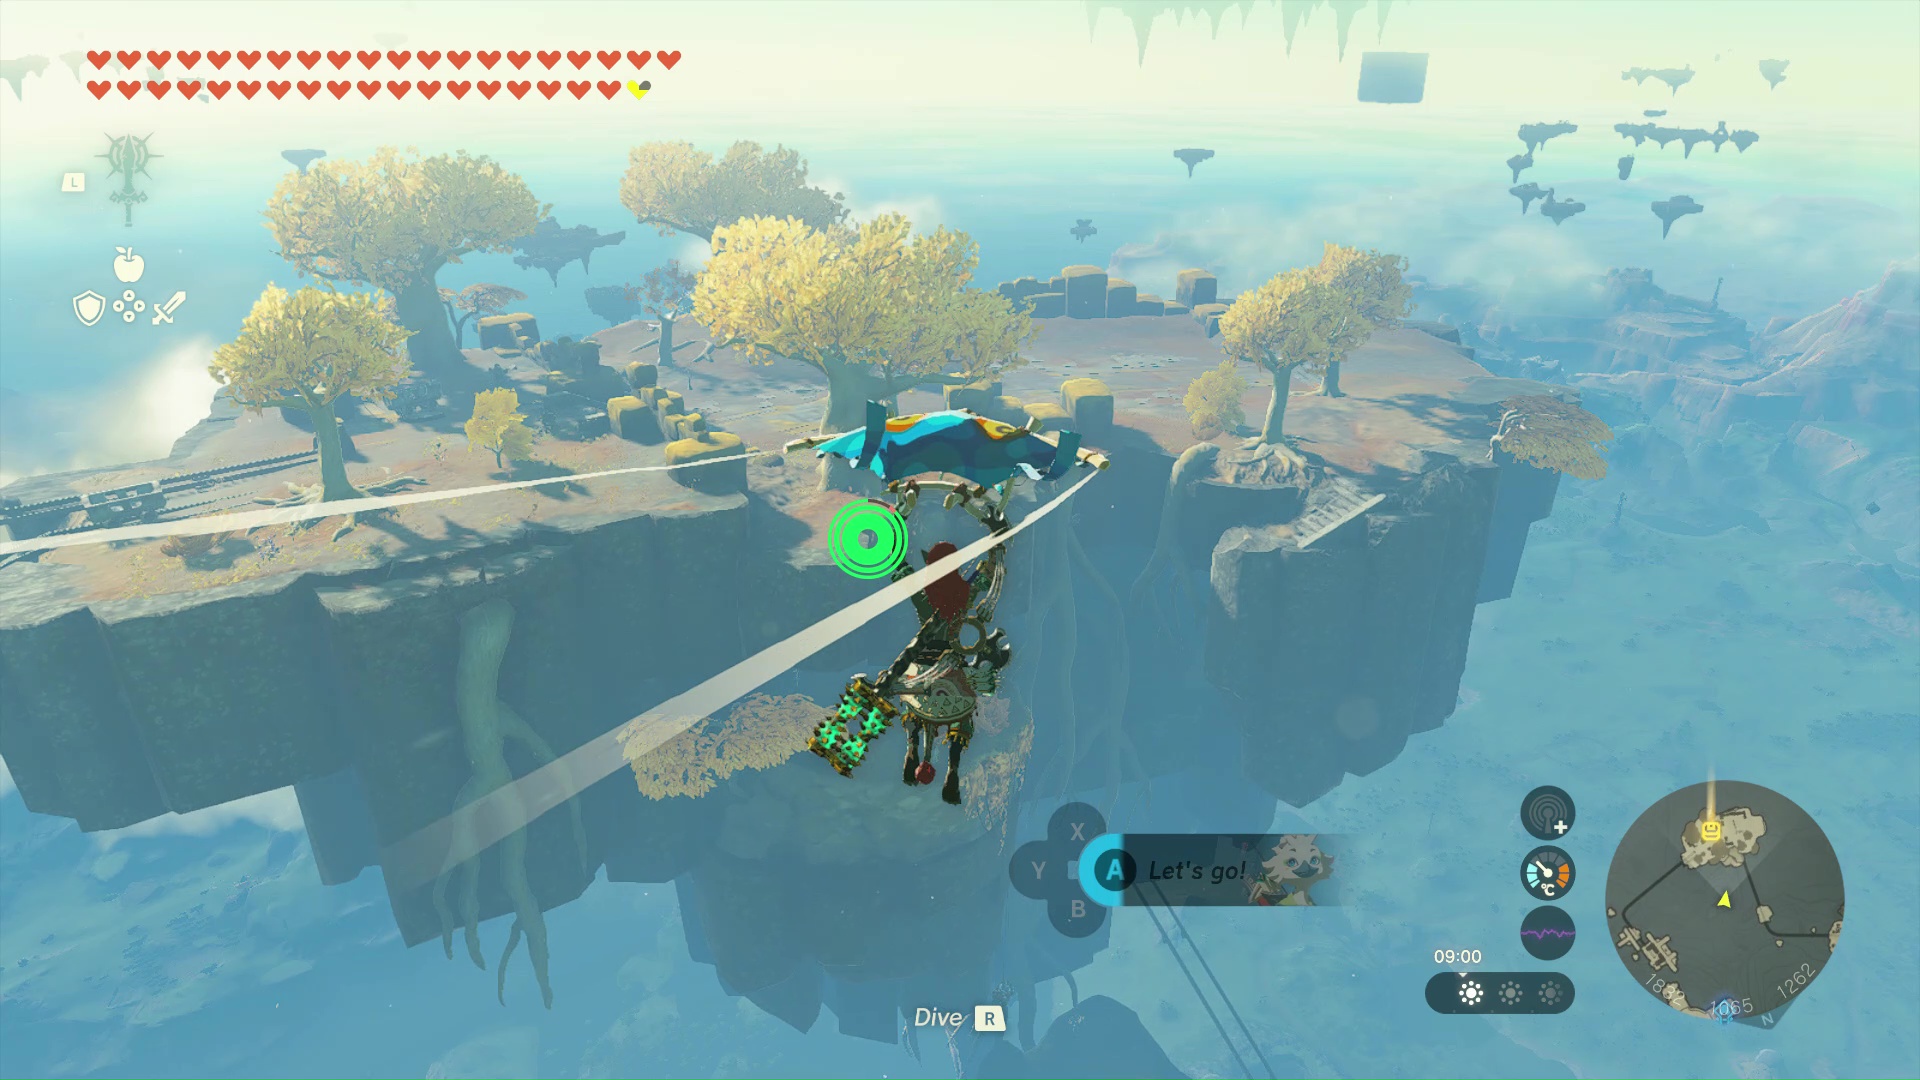
Burn or cut the vines and follow the path around, killing the minor combat construct along the way, until you find the little enclosure sealed by vines on the South. Destroy those, and you'll have the chest with the Sage's Will before you.
17. North Lanayru Sky Archipelago Sage's Will location
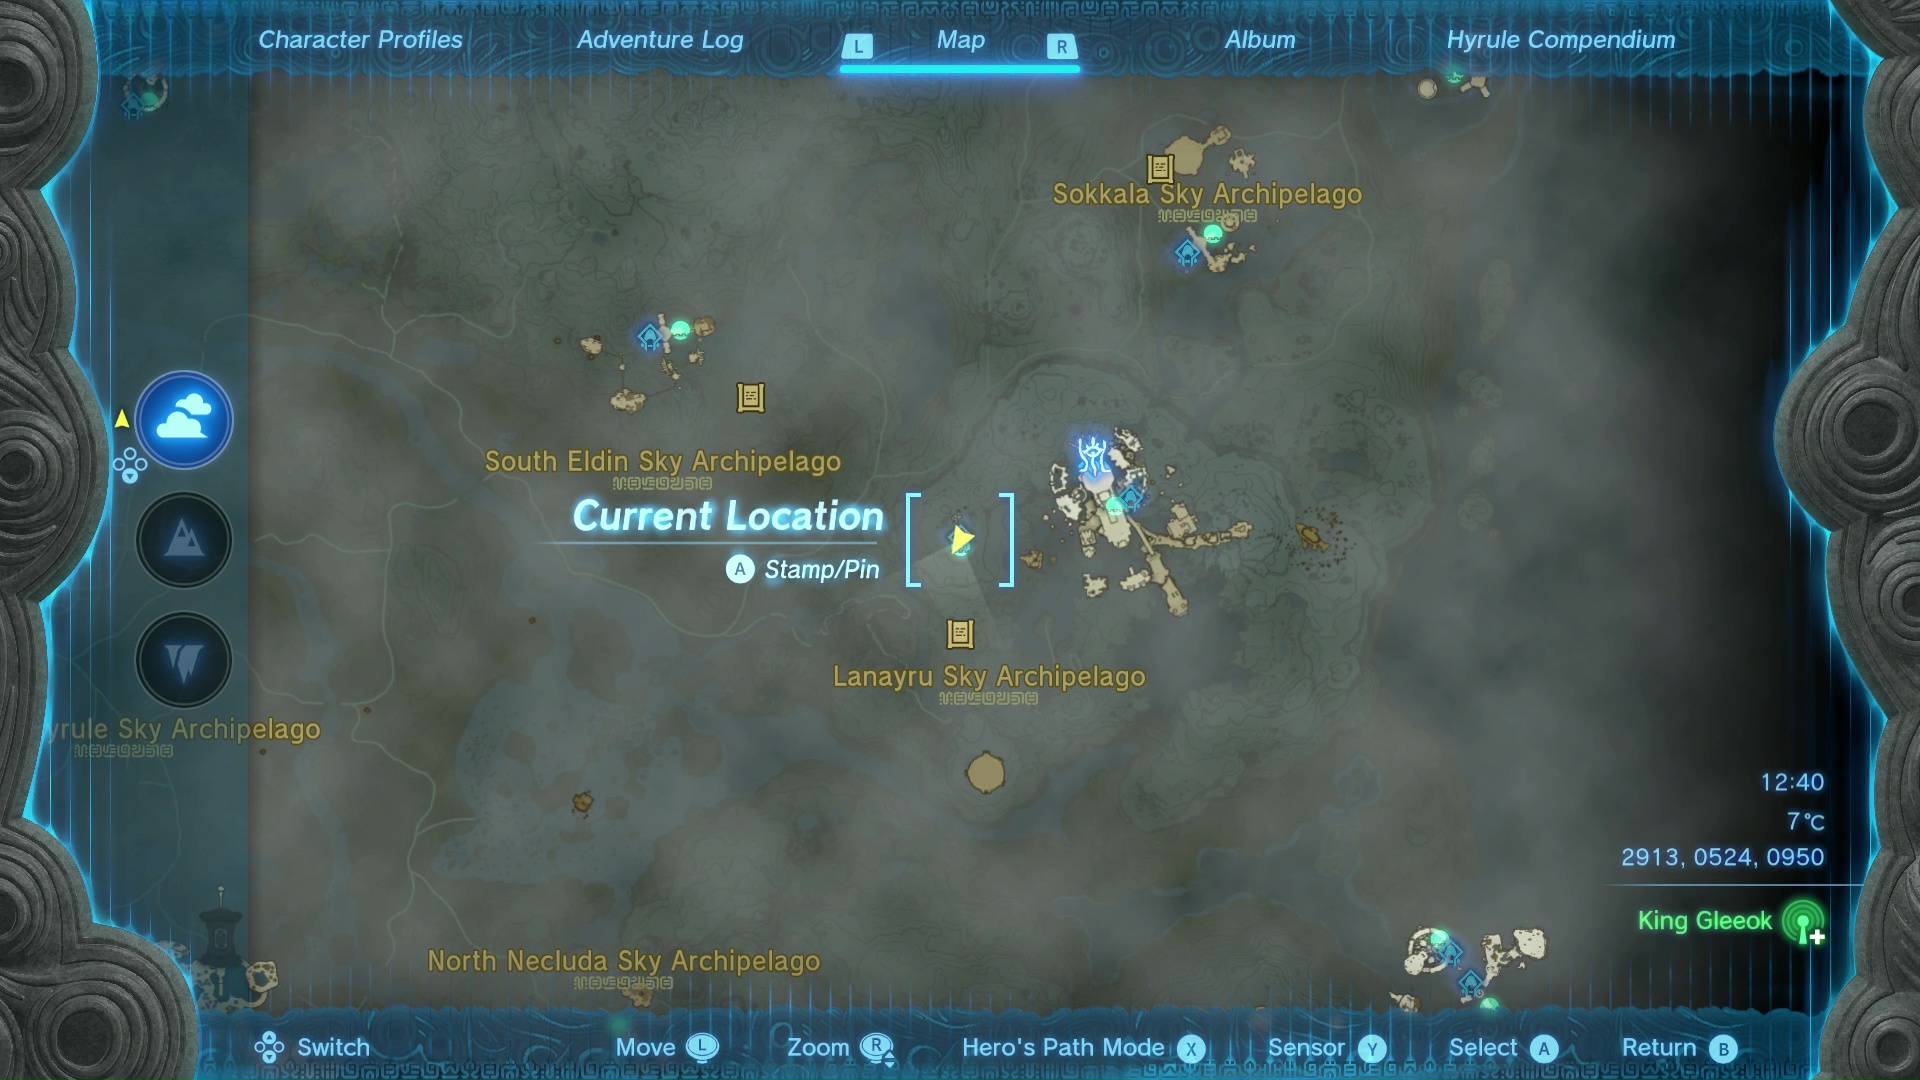
- (coordinates 2911, 0525, 0929)
This one is in another Orb structure like Starview Island, alongside the Jirutagumac Shrine if you've done it already. Once inside, spin the wheel with the fan in the middle so that the opening to the orb moves down to equal level with you, as shown below.
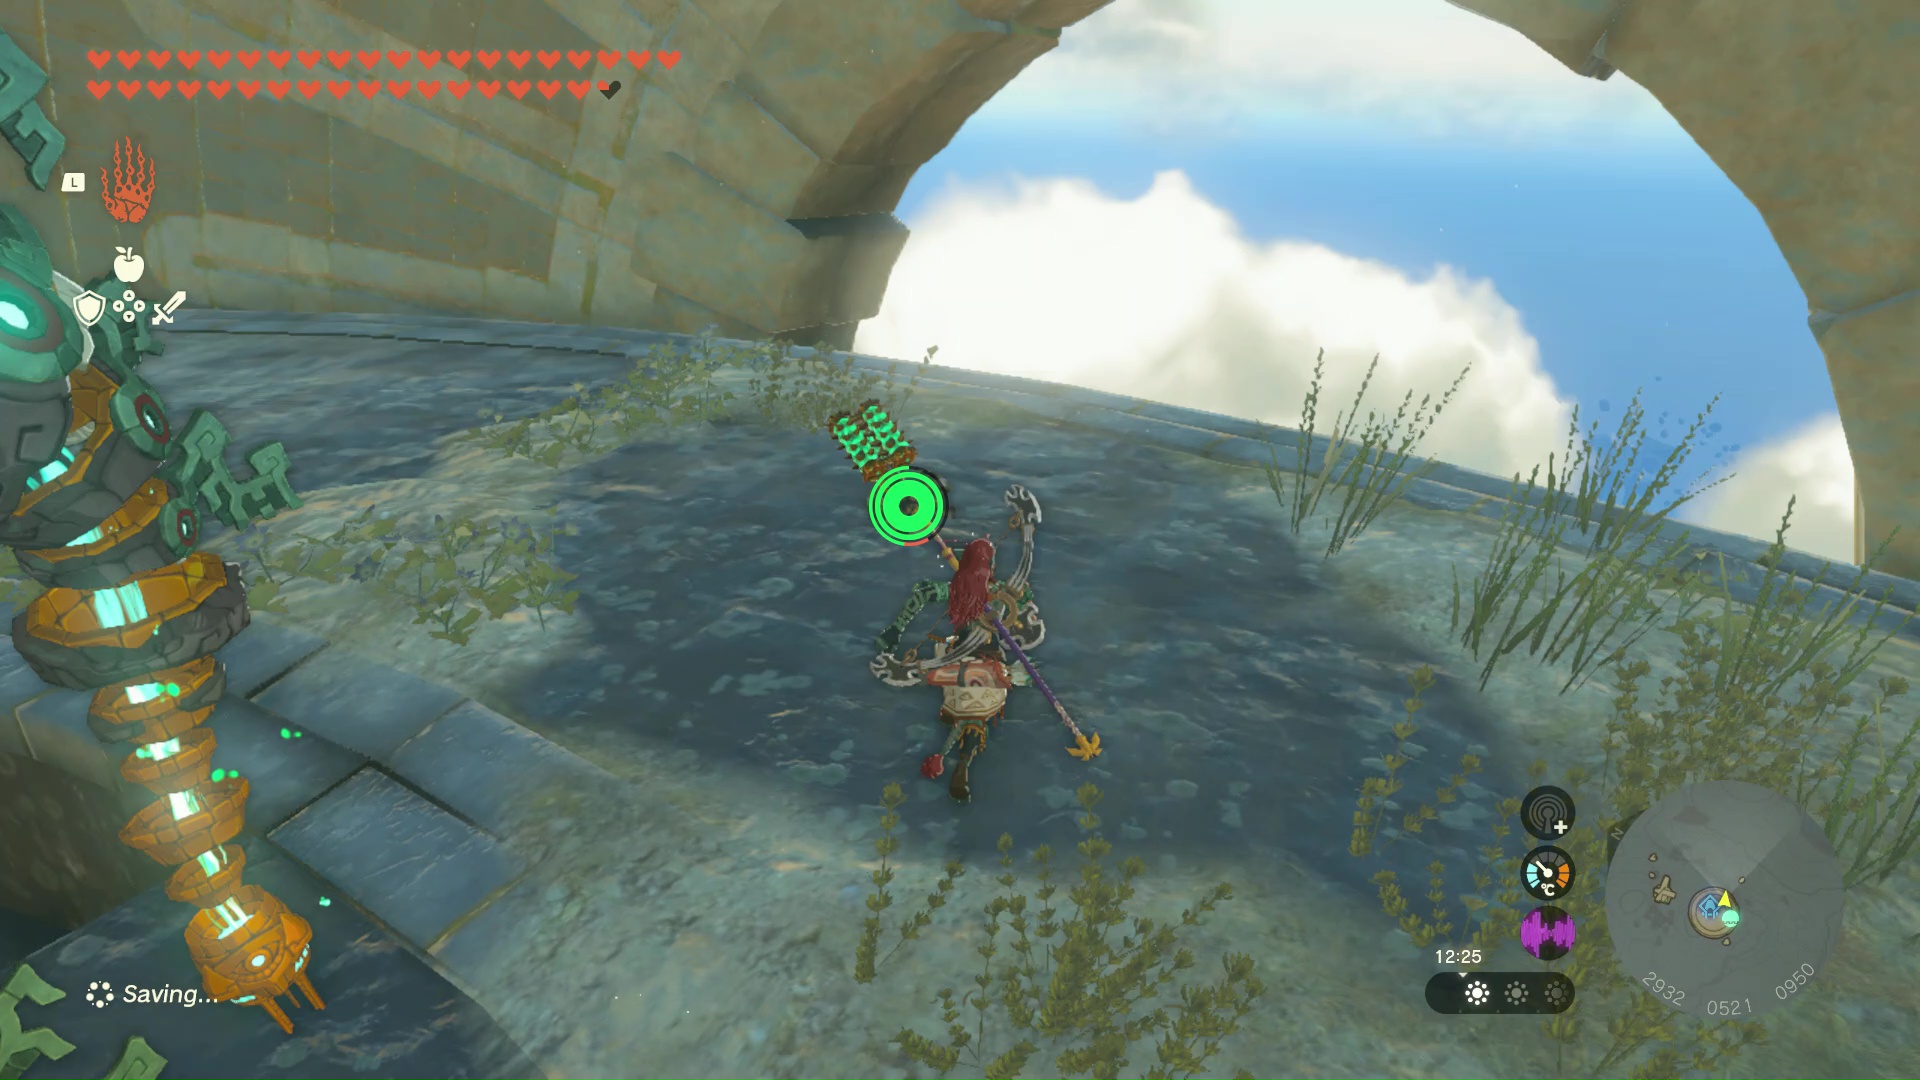
This entrance is big enough to slip through the gap under the floor into the bottom half of the orb. Down here you'll find the chest with the Sage's Will waiting.
18. Wellspring Island / Water Temple Sage's Will location
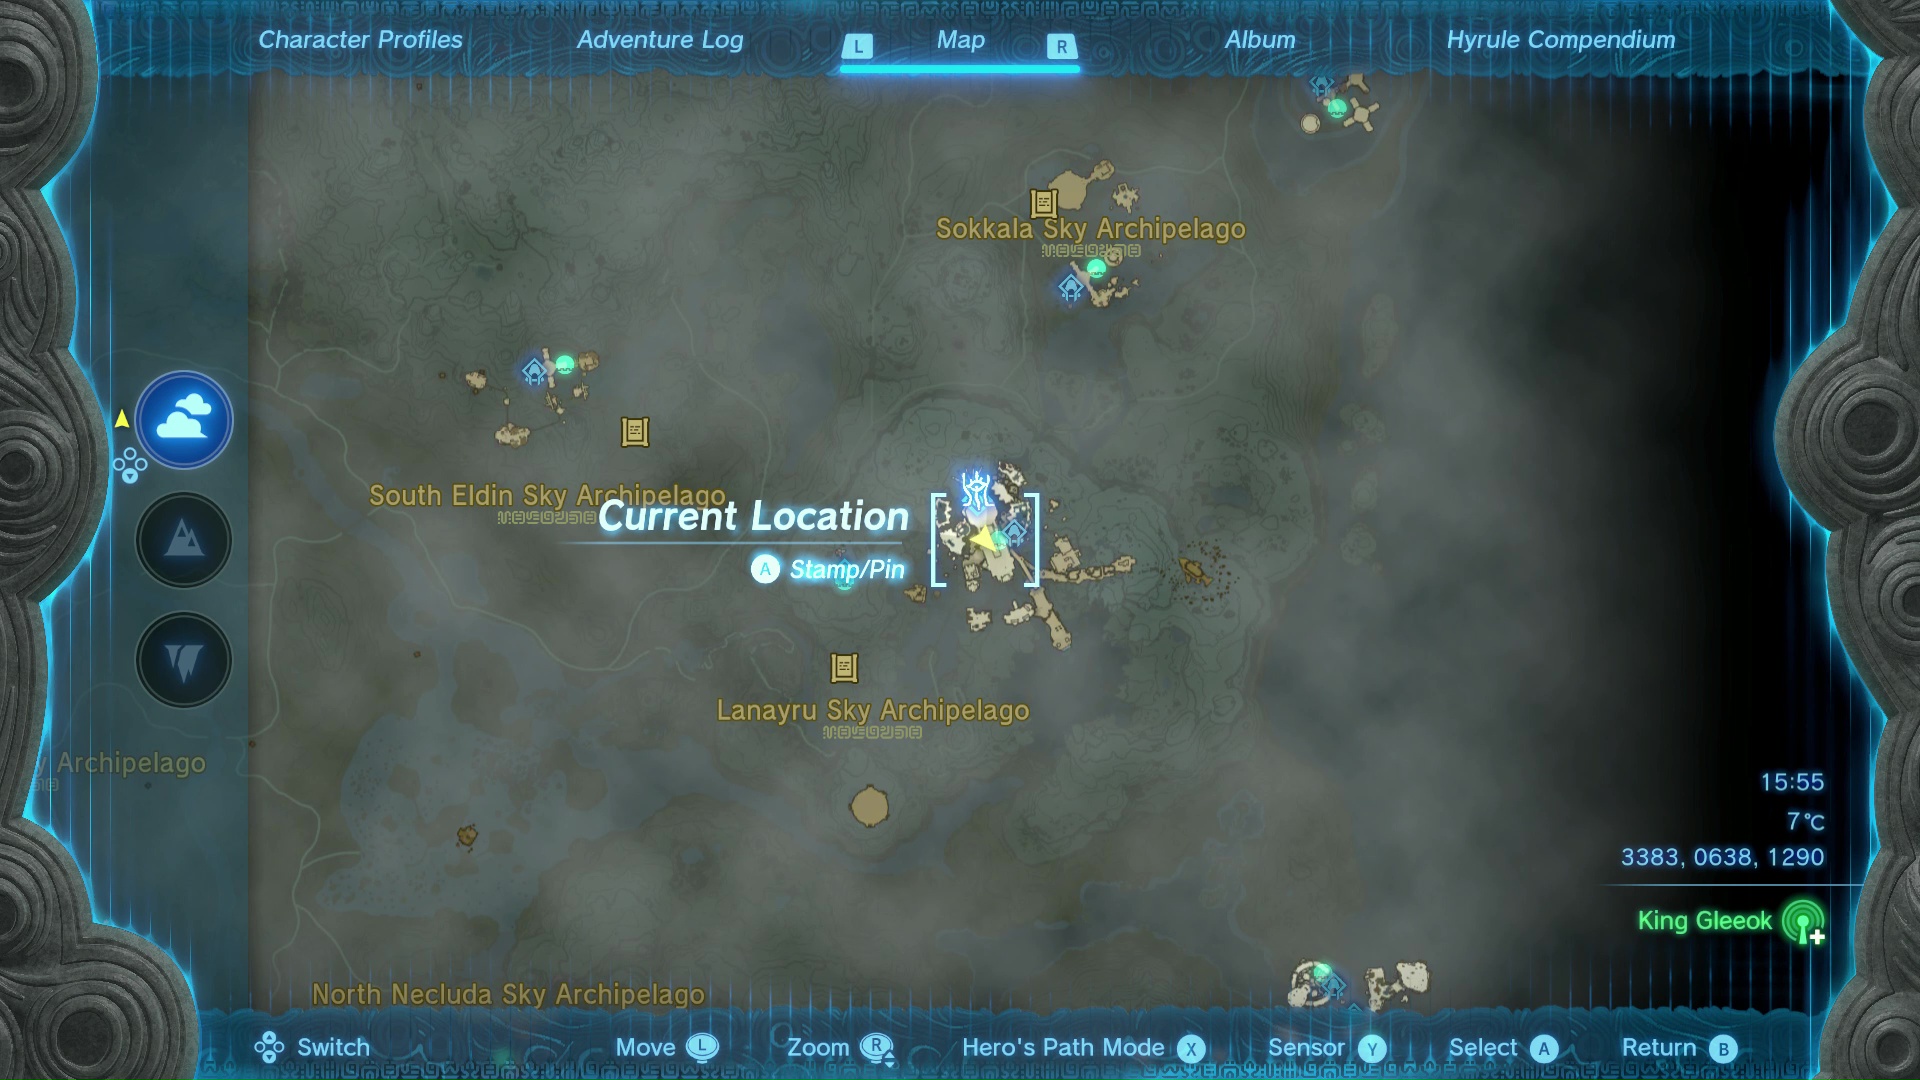
- (coordinates 3383, 0638, 1290)
This Sage's Will is actually in the path leading up to the Water Temple at the top of Wellspring Island, meaning you won't be able to reach it until you unlock it via the Zora's questline and solve the Zelda Tears of the Kingdom Mark of the King puzzle, among others.
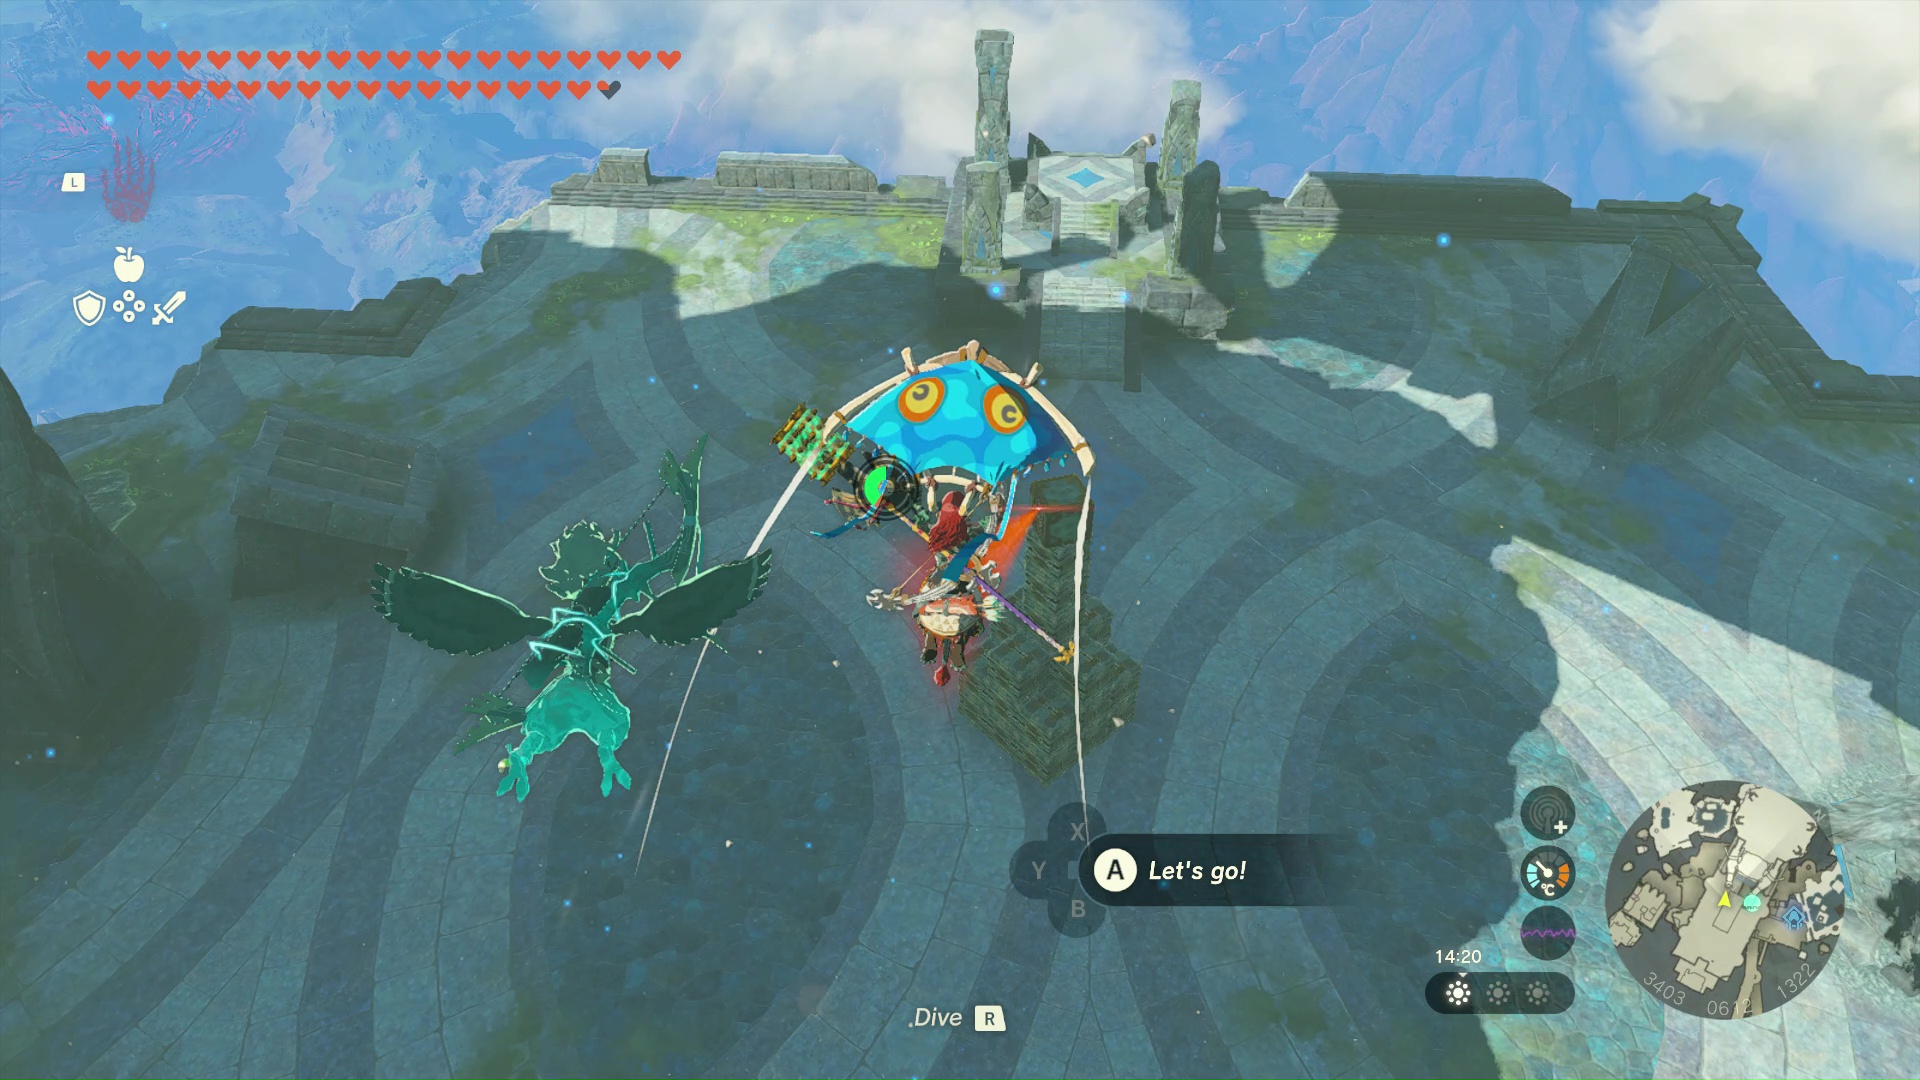
The easiest way to access this arena is to fast travel to the Water Temple, then simply jump off the main platform and descend down the arena some way below - where another Flux Construct II boss fight will be waiting. You likely know the drill by now - either grab the chest off it and run with the Sage's Will, or commit to destroying it for greater rewards.
19. Eldin Sky Archipelago Sage's Will location
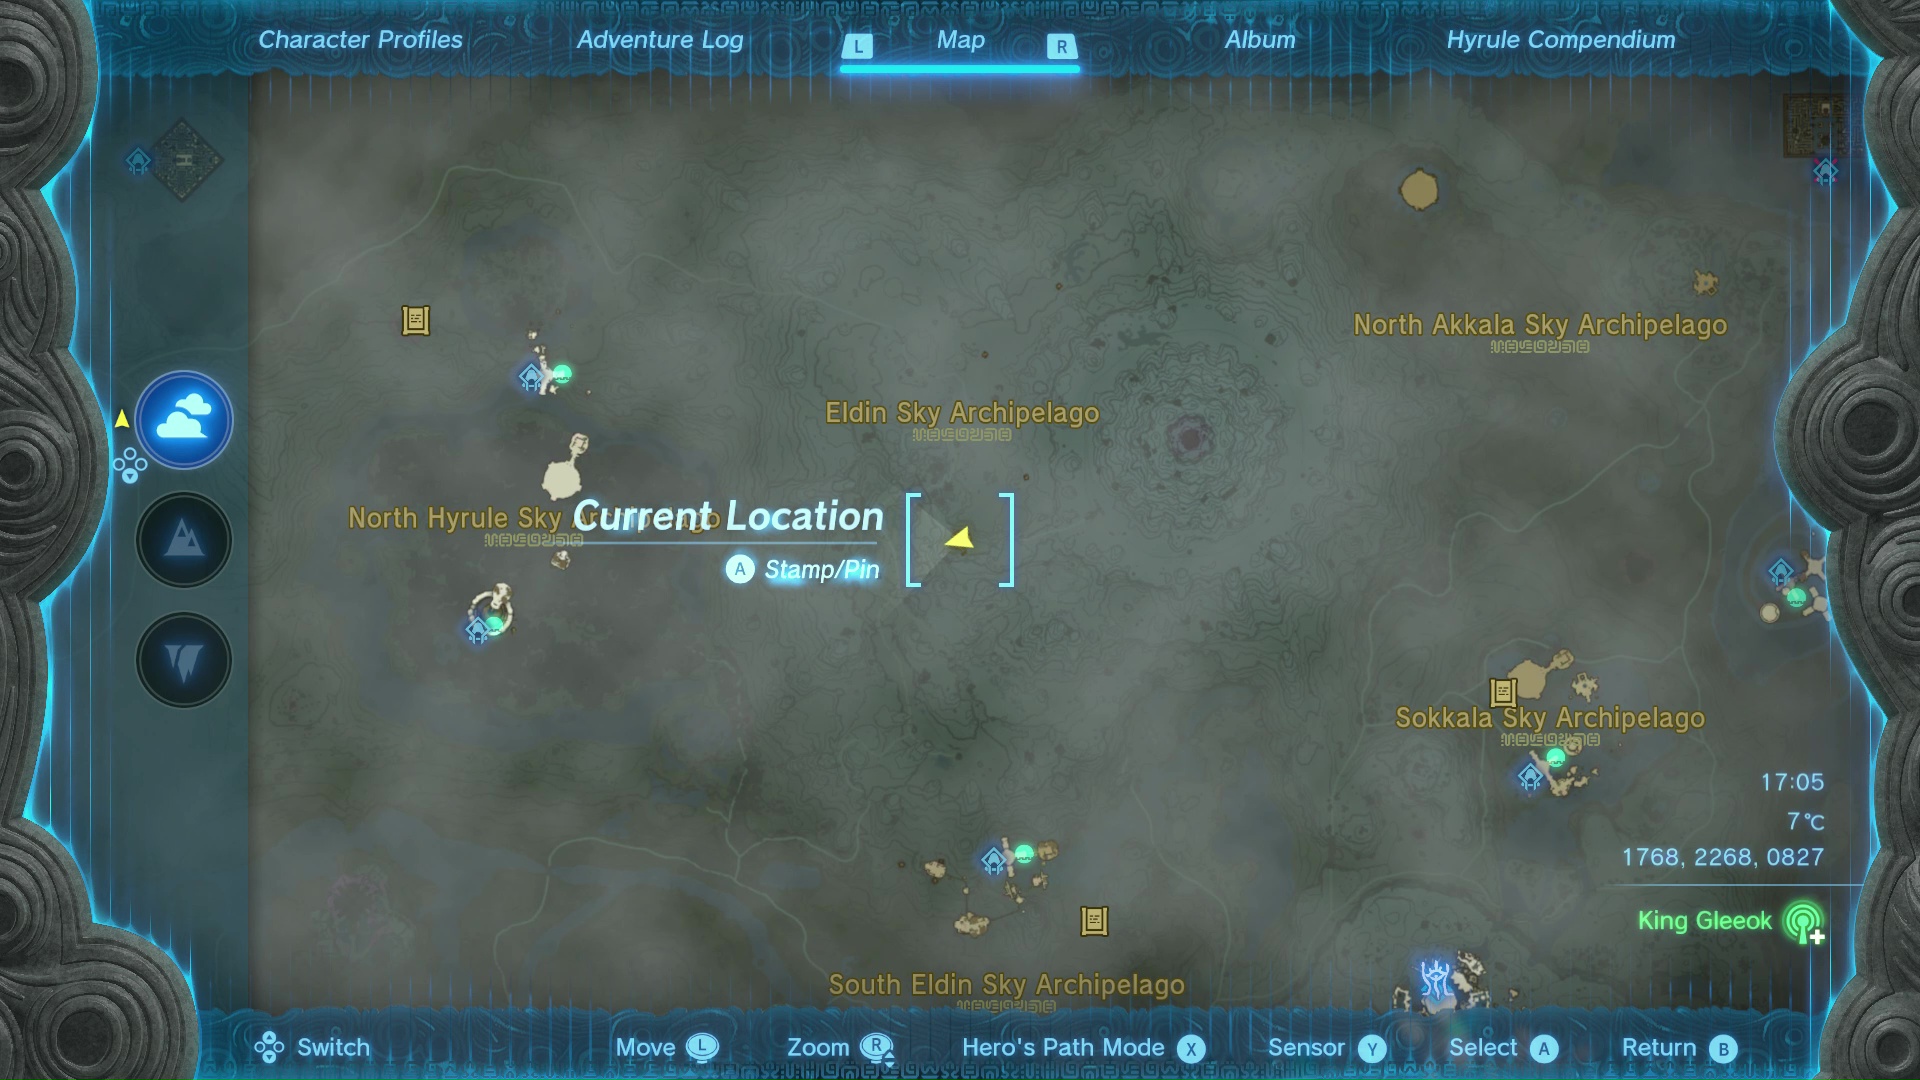
- (coordinates 1768, 2268, 0827)
A very simple and easy Sage's Will to get - off the West side of Death Mountain is a single little island with a few ruins, one of several in the region. A simple vehicle will get you up there, and once you reach it, you'll be able to see the chest with the Sage's Will inside. Pretty painless process, especially compared to those King Gleeoks.
20. Sokkala Sky Archipelago Sage's Will location
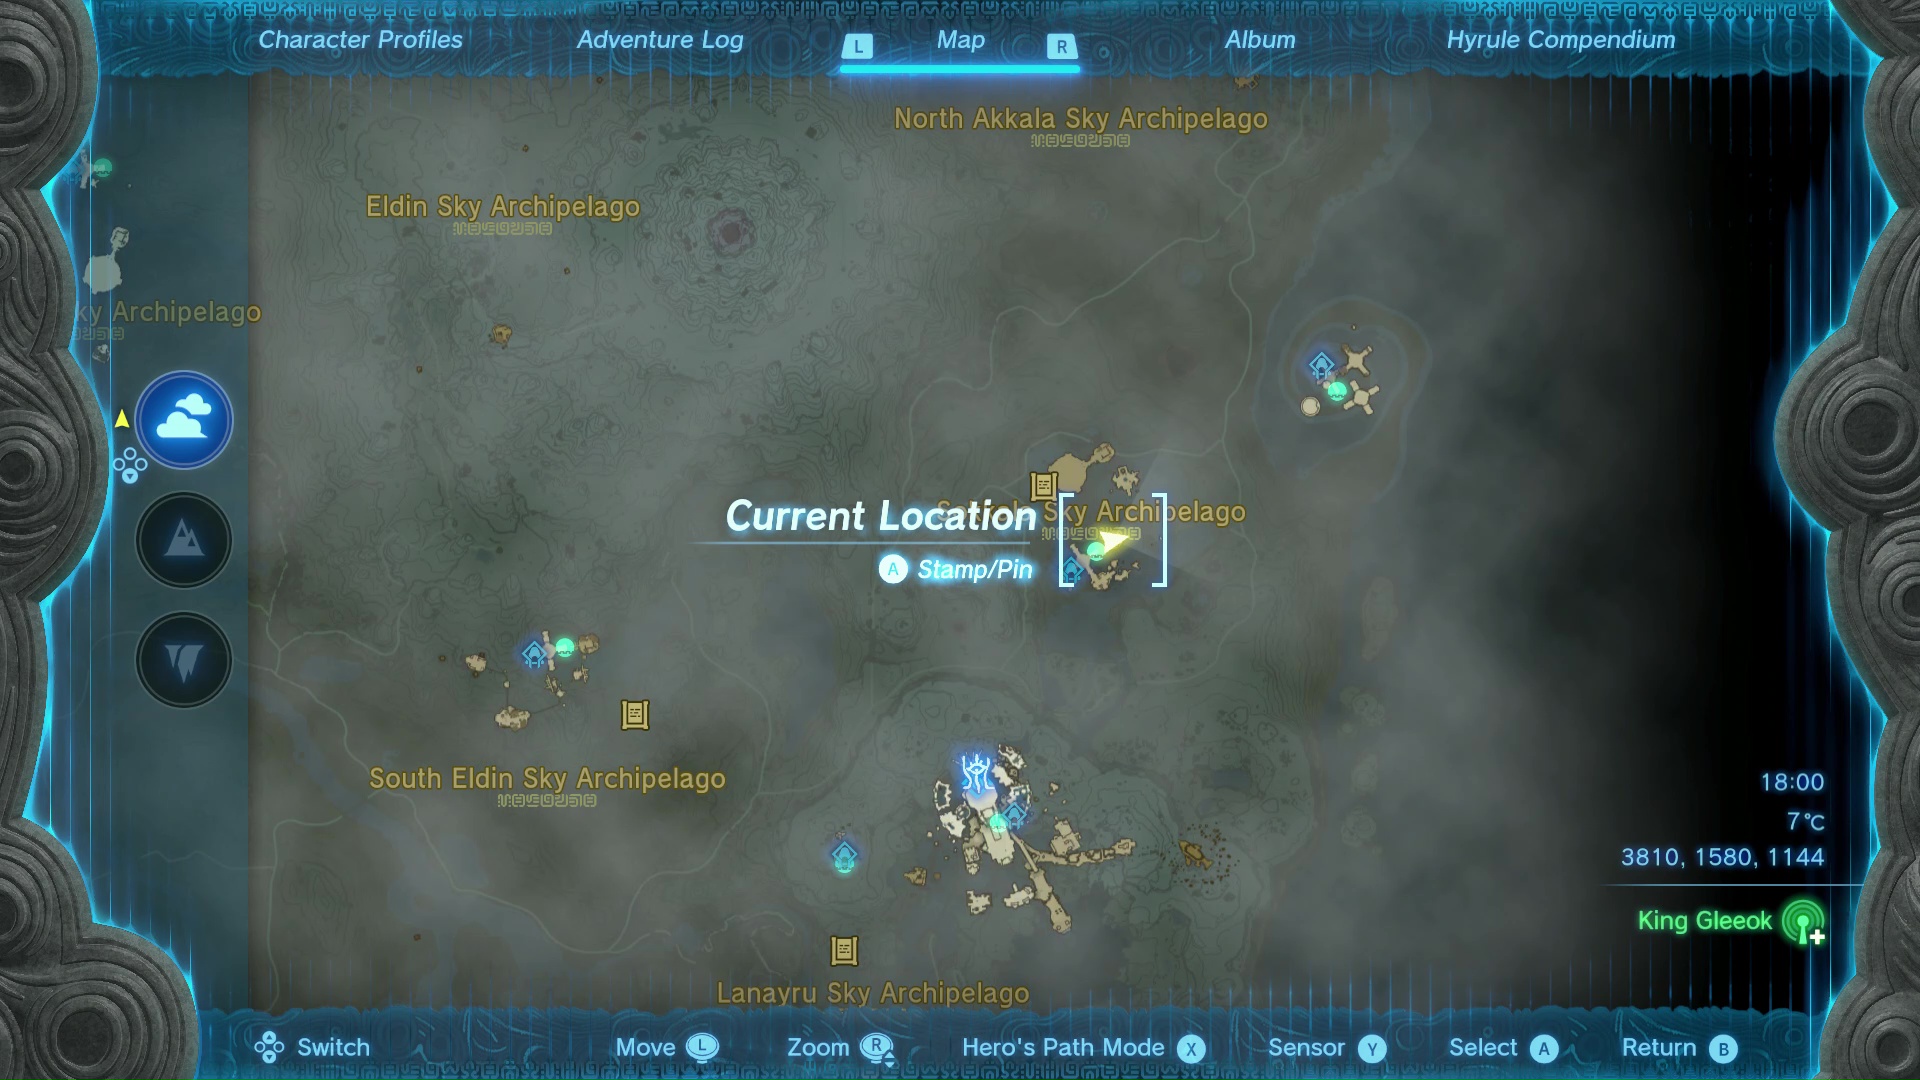
- (coordinates 3810, 1580, 1144)
The very last Sage's Will is inside another Orb structure like Starview Island and the one in North Lanayru, near the launcher in the lower half. Enter through the opening in the exterior and in the middle is a ball-shaped mechanism you can spin with Ultrahand. Doing so rotates the entire outer orb except the floor you're standing on - rotate the orb so that the opening is at the middle, and slip under the floor to reach the chest with the Sage's Will in the lower half.
© GamesRadar+. Not to be reproduced without permission
Weekly digests, tales from the communities you love, and more

Joel Franey is a writer, journalist, podcaster and raconteur with a Masters from Sussex University, none of which has actually equipped him for anything in real life. As a result he chooses to spend most of his time playing video games, reading old books and ingesting chemically-risky levels of caffeine. He is a firm believer that the vast majority of games would be improved by adding a grappling hook, and if they already have one, they should probably add another just to be safe. You can find old work of his at USgamer, Gfinity, Eurogamer and more besides.


