The Legend of Zelda: Link's Awakening walkthrough: A step-by-step guide to get you through the 2019 remake
Everything you need to get from start to finish with this Link's Awakening walkthrough
Keys, Compass and Treasure Map

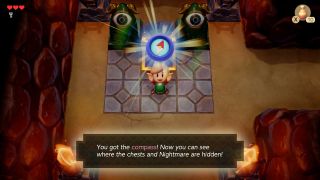
When inside Tail Cave, head into the left room, knock all the Hardhat Beetles into the pit with your sword, and collect the key that drops from the ceiling. Move left again and defeat the four Zols in this room to claim the Compass. From the entrance room of the dungeon, head one screen north, and defeat the three enemies in the room to spawn the second key. In the room to the right, kill the two Stalfos and Keese to spawn the dungeon’s Treasure Map, which reveals the entire layout to us. Walk through the one-way door on the northern wall, and from there head west. Open the chest, being careful to avoid the Spark circling it, and pick up the third key. Killing the Moldorm on the left portion of the room spawns a chest with 20 rupees in it.
Getting Roc’s Feather and the Nightmare Key

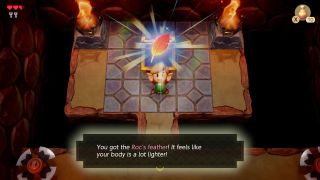
Head northwest from here, but watch out for the Blade traps just in front of the door. Follow the path around the room, avoiding the Sparks and the Zols. Push the block that’s furthest west one space right. In the next room, keep your shield up as the Spiked Beetles charge at you. Two hits of the sword as they are stunned will kill them and spawn a staircase in the top right corner. Downstairs is the first of many forced 2D perspectives in the game. Kill the Goombas (yes, Goombas from Mario) and make your way up the ladder to the left. Watch out for the Blade trap just before the chest. Collect Roc’s Feather, which allows Link to jump, and head back the way you came, collecting the three hearts in the air as you go.
Go two rooms south, and walk to the very far right of the long main room, where the locked door is. Before going through the right door, follow the path above the blocks and walk up a screen. Jump across the gap and grab the Nightmare Key. Open it and head through to the next room, and then walk north. In this room are Three-of-a-Kinds, whose symbols need to match after being hit. Match all three and a Stone Beak will drop, which will allow us to get hints off the Owl statues. Pick it up then go back into the previous room, jump the gap and enter the next room.
Rolling Bones and Moldorm

In this room is Rolling Bones, this dungeon’s mini-boss. The enemy fires a spiked roll at you, and you need to jump over it and attack the mini-boss while it is vulnerable. After four or five hits, the boss will die, leaving a fairy which will fully heal you, and a warp point back to the start of the dungeon. Head north, minding the Blade traps on the other side. Downstairs are three hearts in case you take damage from the traps. When you’re ready, unlock the Nightmare Door.
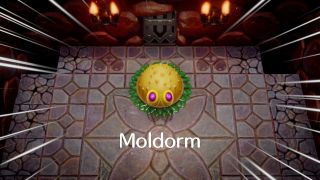
Moldorm is the boss of this dungeon. When it presents itself to you, attack the red tip of its tail. This will cause the boss to frenzy and start moving quicker. As soon as the tail turns red again, hit it. Four hits should see this giant worm off, and you’ll be rewarded with a Heart Container and the Full Moon Cello in the next room.
The Legend of Zelda: Link's Awakening walkthrough - Start of the game (Part 1)
The Legend of Zelda: Link's Awakening walkthrough - Tail Cave (Part 2)
The Legend of Zelda: Link's Awakening walkthrough - Bottle Grotto (Part 3)
The Legend of Zelda: Link's Awakening walkthrough - Key Cavern (Part 4)
The Legend of Zelda: Link's Awakening walkthrough - Angler's Tunnel (Part 5)
The Legend of Zelda: Link's Awakening walkthrough - Catfish's Maw (Part 6)
The Legend of Zelda: Link's Awakening walkthrough - Face Shrine (Part 7)
The Legend of Zelda: Link's Awakening walkthrough - Eagle's Tower (Part 8)
The Legend of Zelda: Link's Awakening walkthrough - Turtle Rock (Part 9)
The Legend of Zelda: Link's Awakening walkthrough - Wind Fish Awakening (Part 10)
Current page: Link's Awakening walkthrough: Tail Cave (Part 2)
Prev Page Link's Awakening walkthrough: Start of the Game (Part 1) Next Page Link's Awakening walkthrough: Bottle Grotto (Part 3)Sign up to the GamesRadar+ Newsletter
Weekly digests, tales from the communities you love, and more
