Batman: Arkham Origins enigma data pack locations guide

The Riddler--or Enigma as he is known in Batman: Arkham Origins--is back with some more dastardly puzzles for you to solve. This time around you won’t be after his trophies, but rather there are 200 extortion files hidden around Gotham that you need to track down. To complete each extortion file, you will need to find the 10 data packs that make it up and then listen to the dirt that Enigma is planning to spill. Below, we have listed where each and every data pack can be found and the means in which to retrieve them. Happy hunting!
Park Row
Extortion File 1
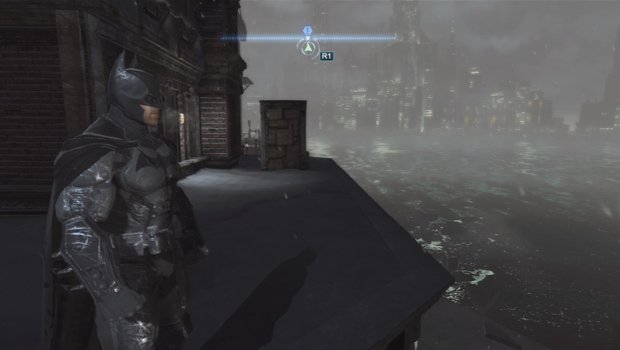
1. Along the north edge of the shore, just east of the radio tower, go to the rear of the building there and on the north side will be a small shack. Use explosive gel on the entrance to get the data pack inside.
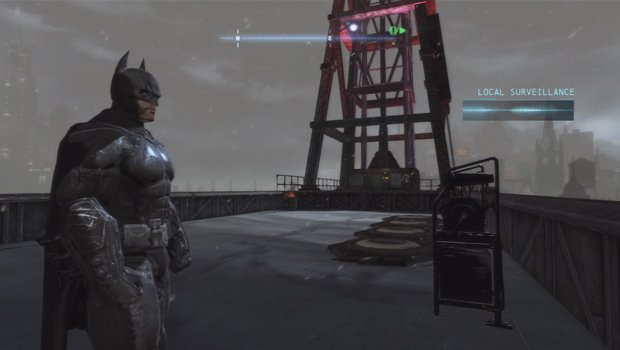
2. On the roof, at the base of the GCR Park Row tower, there will be a generator and 4 pressure pads. Charge the generator with the shock gloves then quickly run across all 4 pads to release the data pack in the corner.
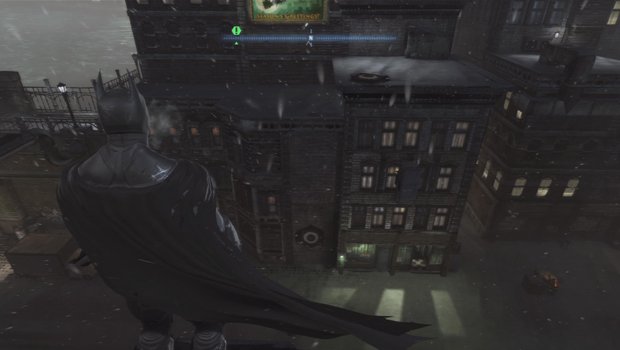
3. Just south of the GCR tower in Park Row, there will be a pressure pad on the rooftop and then two on walls. The two on walls will be opposite each other and you will have 10 seconds to hit all three to open the data lock. Start on the roof and then glide to the pad on the wall across the street. Hit it and then wall glide off of it to the third pad on the other side of the street. If you hit all three in time, the lock to the right of the third pad will open.
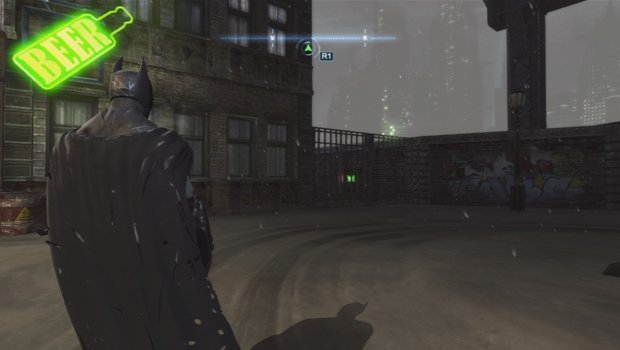
4. At the very north end of Park Row, head to the ground level and there will be a liquor store with a green neon sign as well as a lit up red tree. To the right will be a fence and this data pack.
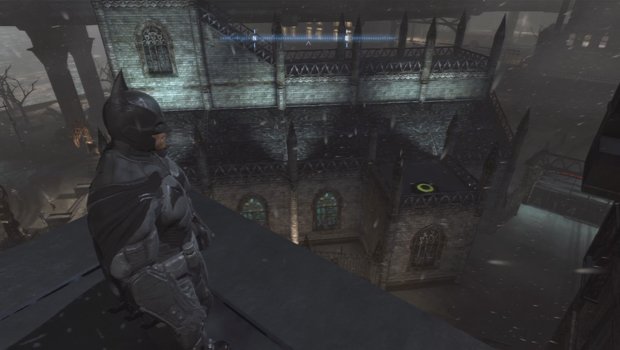
5. On the south side of the cathedral, you can find this pressure plate. Hit it and you will have ten seconds to grapple up on to the ledge ahead of you and grapple the unlocked data pack to the left.
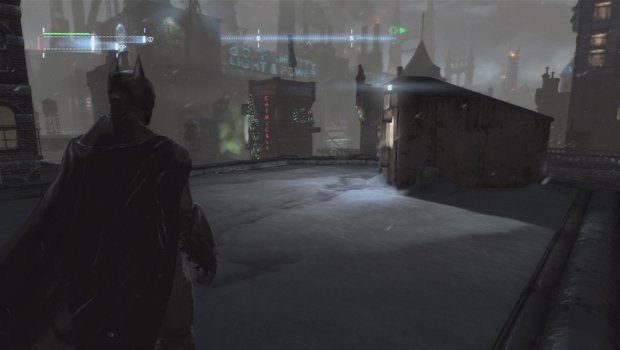
6. Inside this small shack located on the rooftop to the northwest of the Gotham Light and Power and Ace Chemical buildings, you can find the data pack on the ground after blowing open the entrance.
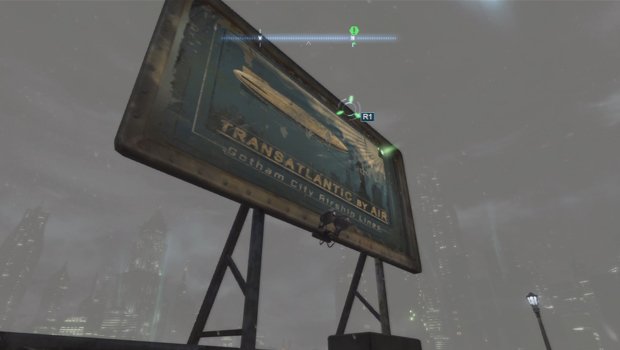
7. To the southwest of the GCR tower in Park Row, along the riverside, you can find this “Transatlantic by air” billboard. In the top right corner of it will be a data pack. Simply grab it with the batclaw.
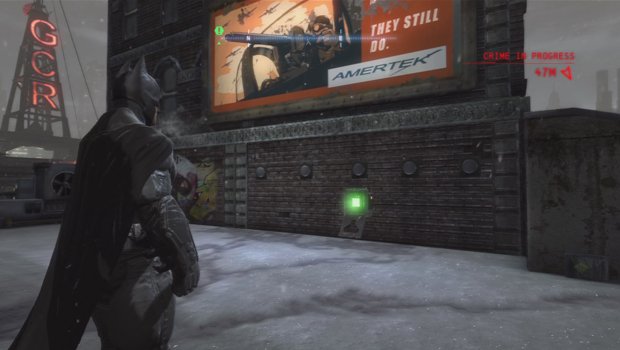
8. On the rooftop just south of the GCR building in Park Row, you will see this roof top with the orange AMERTEK billboard. There will be 5 lights that flash back and forth in a line above a locked data pack. Wait for the far right green light to light up and then hit it with a batarang to free your prize.
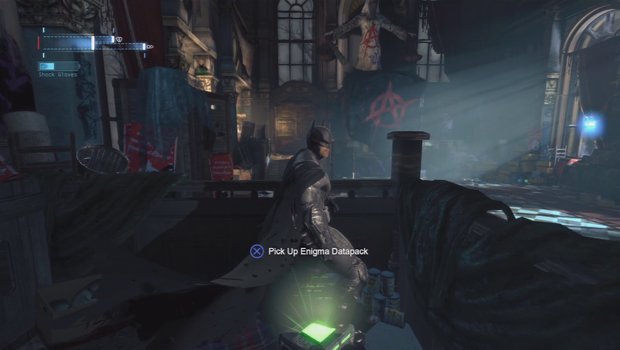
9. Once you finish the three bomb sites that Anarky sends you after during the side mission, you will then need to enter the courthouse to meet him. Once inside, the data pack will be behind a short wall on the right of the middle stairs.
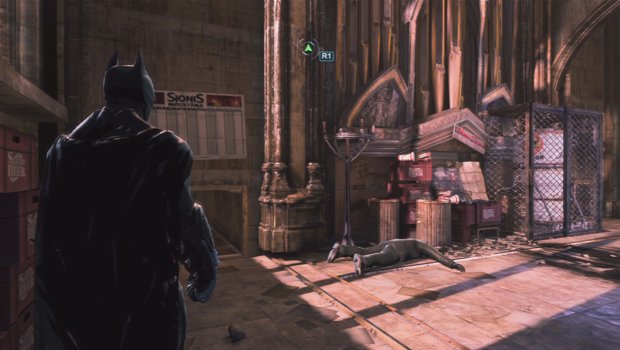
10. Once you have destroyed all of Black Mask’s chemical containers, you will need to go to the church to get one last container. Once inside the church, go all the way to the far end and then crawl through the vent in the corner to find the data pack inside, around the corner.
Park Row
Extortion File 2
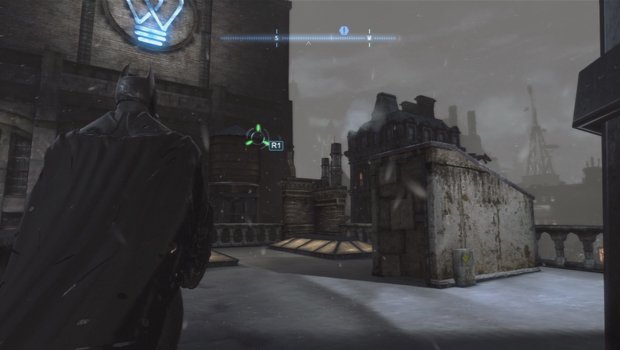
1. Behind the Monarch Theatre and across from the building with the neon giant lightbulb, there is a small shack. Blow open the entrance with explosive gel and grab the pack inside.
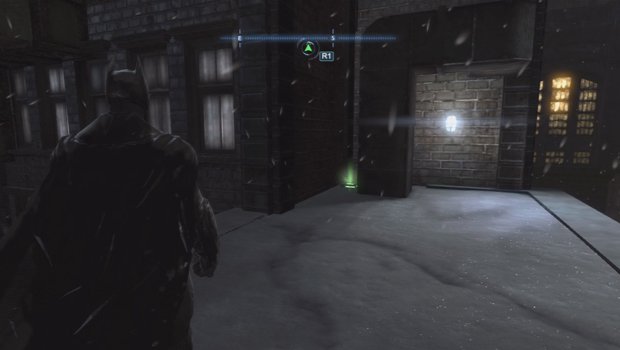
2. On the rooftop to the southwest of the cathedral, you’ll see this data pack just sitting in the corner.
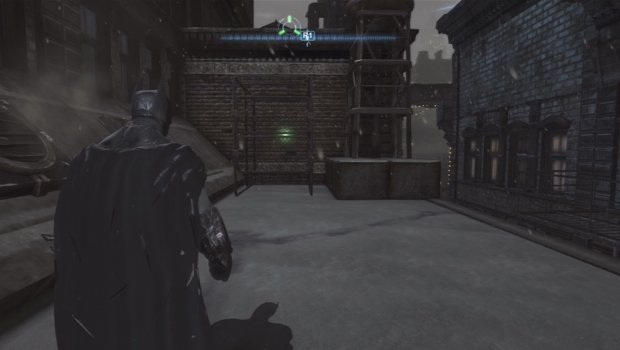
3. To get this data pack which is located on the small roof to the east of Ace Chemicals and in front of the building with the blue neon light bulb, you’ll need to slide under the cage opening at the bottom.
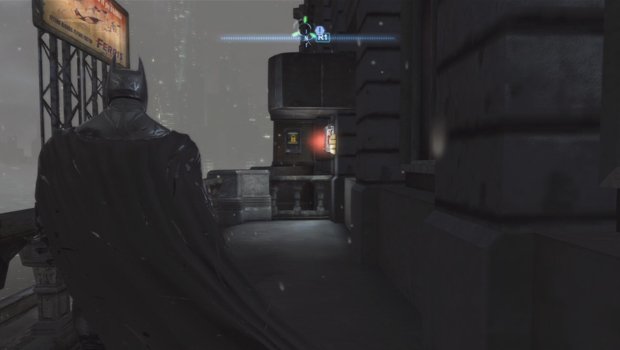
4. Just north of the Bowery GCR tower, drop down to the balcony on the west side of the building and hack the security system to get this data pack.
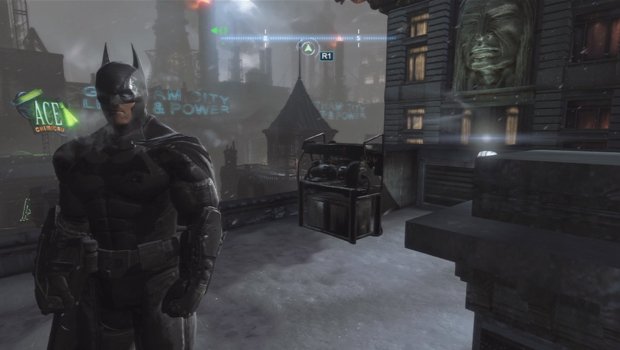
5. When you are just west of the Gotham Light and Power building and next to the Ace Chemical plant, look for the building with the large faces and then land on the nearby roof. Here will be a generator you can charge up for a brief few seconds that will charge up an antennae close by. Throw your remote batarang through the electricity and hit it hit the fuse box directly across from the generator to open the data pack lock.
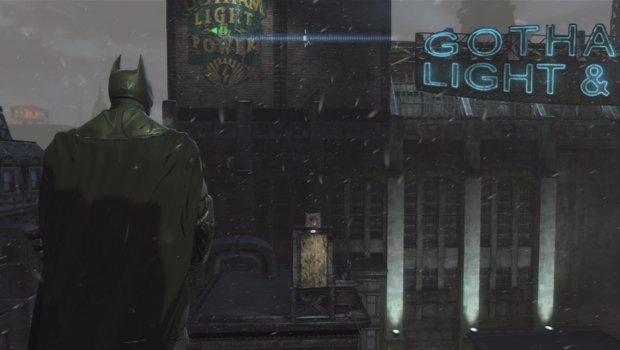
6. To the left side of the Gotham Light and Power building, facing west, there is a small shack near the top that can be broken into with the remote batclaw. Shoot a line in front of it and then zipline inside to grab the data pack.
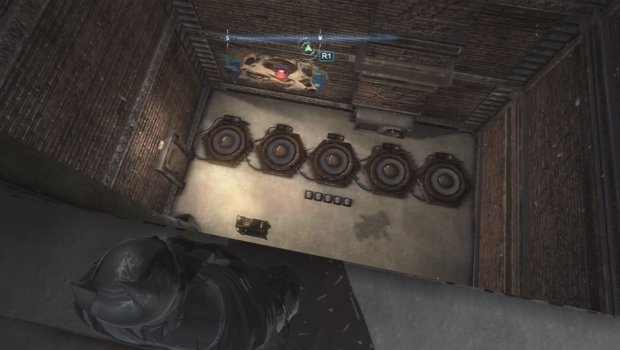
7. Directly east of the Ace Chemical building, there will be this courtyard which has 5 pressure pads in it. Use the shock gloves on the generator and then step on the corresponding pads that light up on the lights in front.
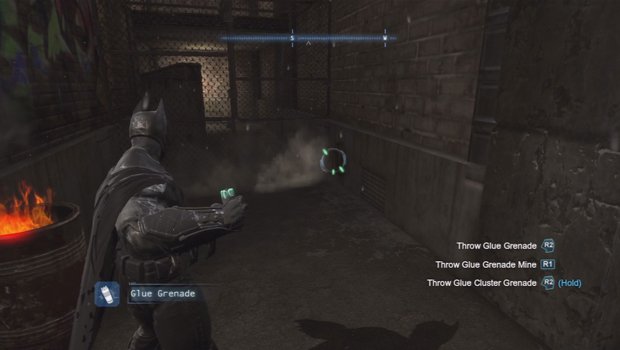
8. Directly south of the Monarch Theatre, on the street, there will be an alley a fence and a pipe blowing steam. Use the glue grenade on the pipe and then slide under the fence. You’ll need to hack the lock inside, but once done, the data pack is yours.
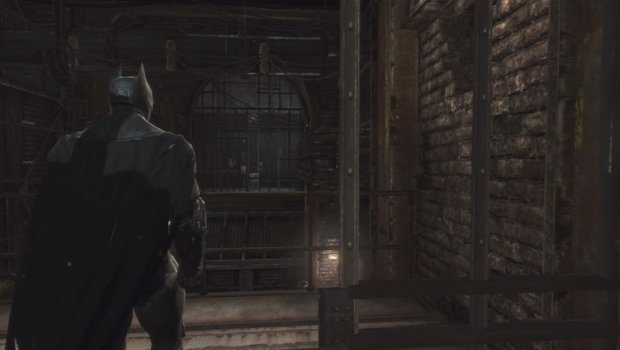
9. When you are descending the Park Row Sewers, there will be a section with a large gate on the opposite side along with an anchor inside for the remote batclaw. From the catwalk opposite, throw in a remote batarang to hit the green light and then use the remote claw. This will then allow you to crawl in at the top of the bars and grab the data pack on the ground.
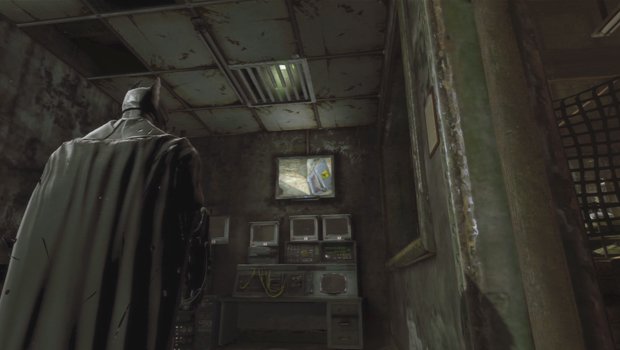
10. When you are in Bane’s HQ, enter the small office there and look to the ceiling to find a grate. Pull it down and grab the data pack inside.
The Bowery
Extortion File 3
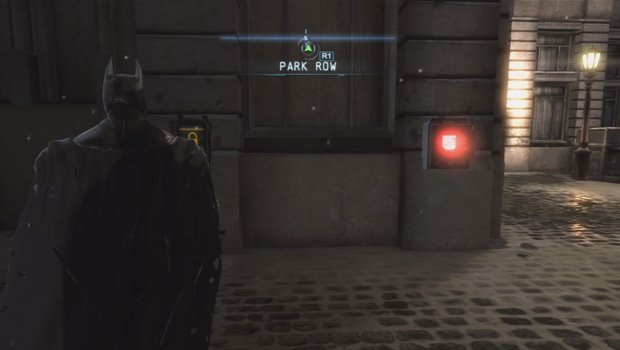
1. At the rear of the Carmine hotel, right along the border of Park Row and the shore to the west, you can find this data pack on the wall. All you need to do is hack the lock on it to retrieve it.
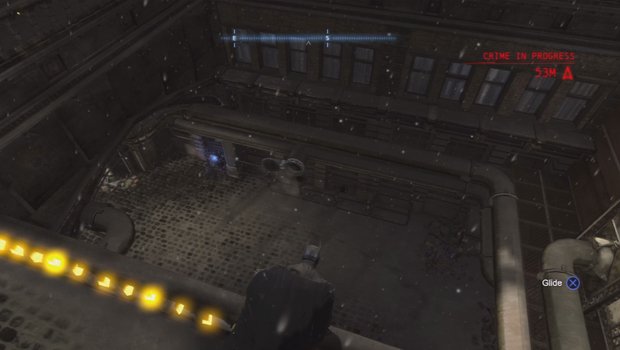
2. In this underground section on the western most part of the Bowery, you’ll need to pop open the vent above the cage and then use the shock gloves to open the cage. Once it’s open, crawl inside to get the data pack.
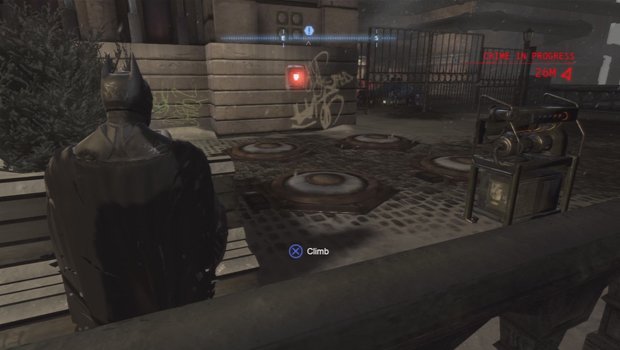
3. Just west of the previous data pack, but on ground level, there will be four pressure pads, on the ground, four lights on the wall, and a generator. Shock the generator with your shock glover and then step on the pressure pads in the order that the lights light up on the wall within ten seconds.
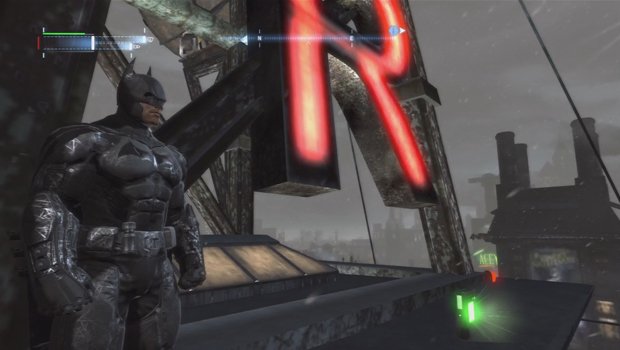
4. This data pack is located on the GCR tower but can be a bit tricky to reach. To get to it, you’ll need to climb to the highest building around—located to the southwest—and then dive off and swoop upwards towards the radio tower to get enough height to reach where the data pack is.
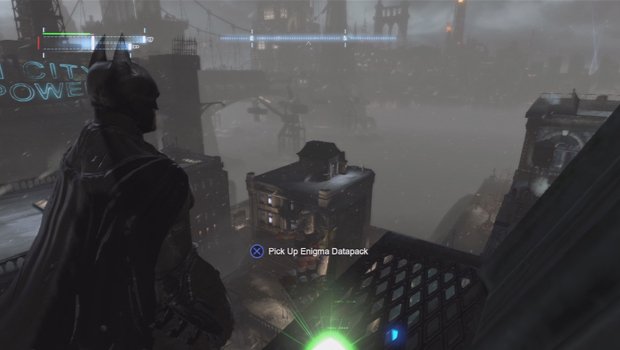
5. You can find this data pack on the east side of the Mad Hatter's shop. There is a small ledge on the very top of the roof where it is sitting and can only be reached by launching off the gargoyles to the north and then diving and swooping up to gain some extra height.
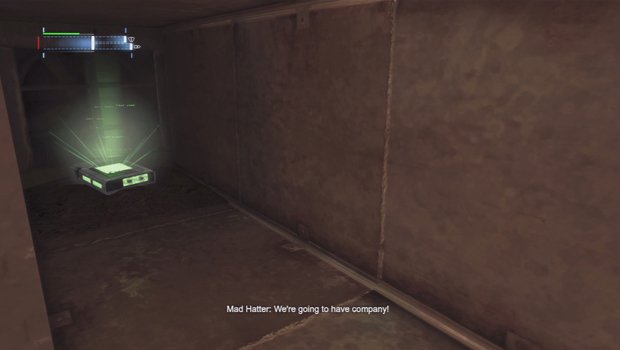
6. When you enter the Mad Hatter’s building, climb through the vent, but before dropping down into his room with other people, continue around the corner to find this.
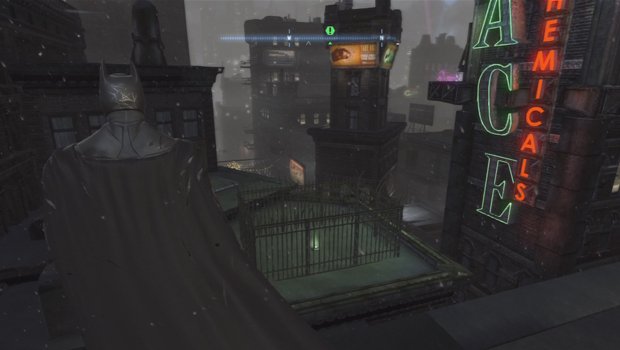
7. Across from the ACE Chemical building, facing south, there is a rooftop with a small fence around the data pack. Simply glide off the Chemical building to get inside the fence and grab it.
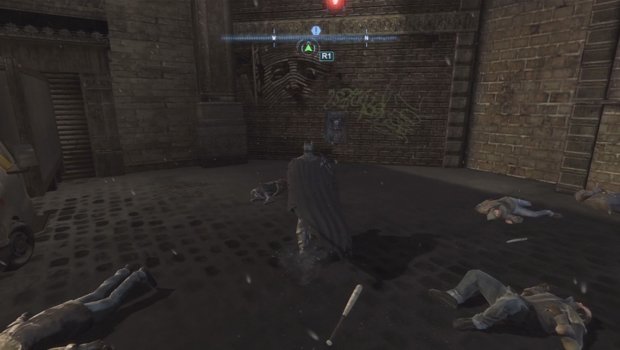
8. This data pack can be found on the ground level in front of the Gotham Light and Power Building to the north end. The pack will be on a wall across from the building in a corner and will need to use the shock gloves to retrieve it.
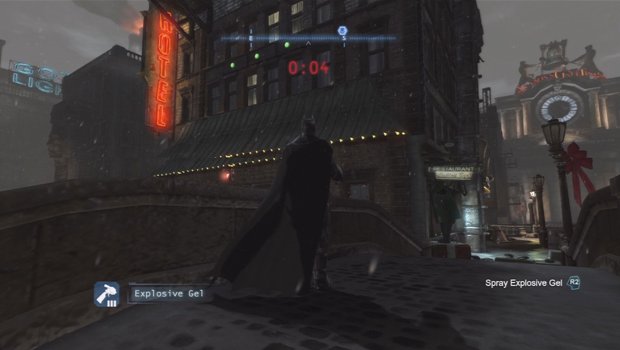
9. This file, which is located on the west side of the Mad Hatter’s building, can be a little tricky to nab. To get it, first set explosive gels on the green lights that are located on the wall to the left of the door to the Mad Hatter’s and the far wall on the other side. Once the gel is set, detonate both and then you will need to quick throw three batarangs at the three lights that then appear over the data pack.
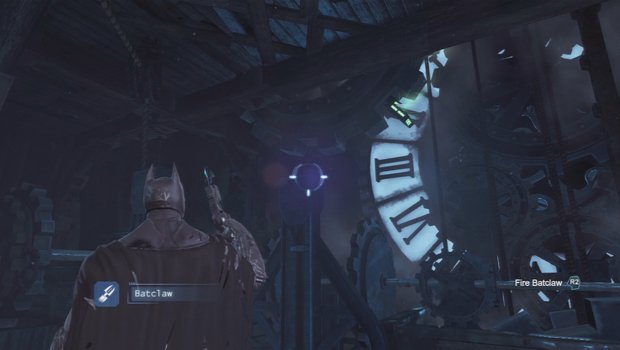
10. When you enter the Merchant’s Bank, look at the spinning gears and a data pack will be on one of the teeth as it goes round.
The Bowery
Extortion File 4
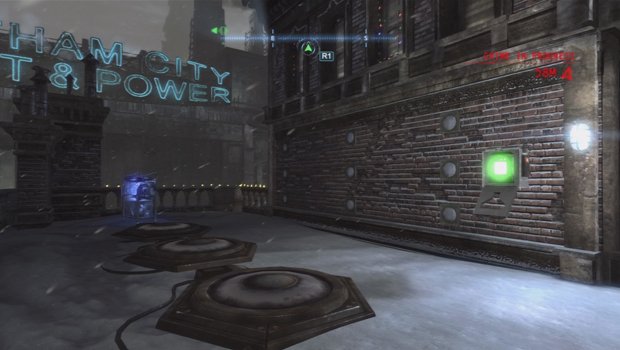
1. On the roof of the building across from both the Gotham Light and Power building and the Ace Chemical Plant, there is a generator that you must charge up with the Shock Gloves. Once you do, the three pressure pads will light up. Step on each until the middle row of three lights on the wall light up and the data pack beside them will be yours.
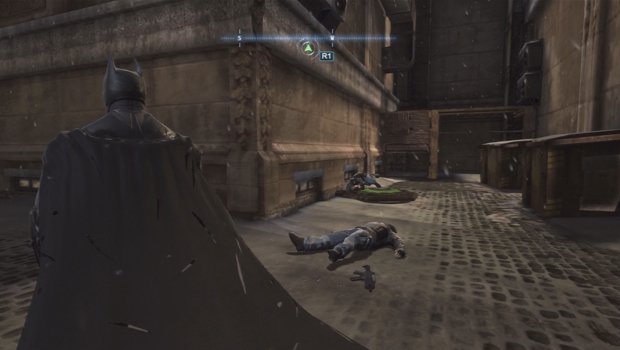
2. To the west of the entrance to the Merchant’s Bank, there is an alleyway with a pressure pad. Stand on it and then throw a remote batarang through the opening in the fence to hit the green light. Once hit, slide through to get the data pack.
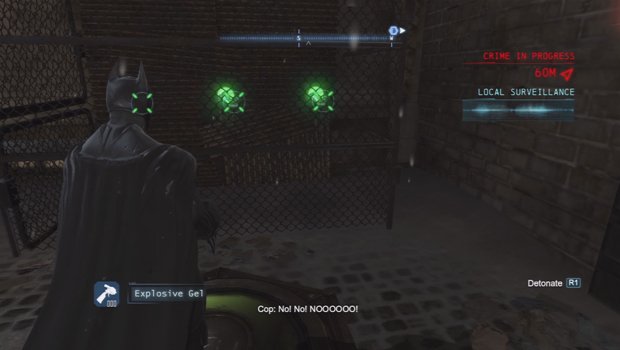
3. South of the horse sculpture, there is a cage on the ground with three green lights inside and a pressure plate outside. Enter the cage and place three explosives on where the lights are and then return to the pressure plate. Step on it and then detonate the gels to open the data pack to the right.
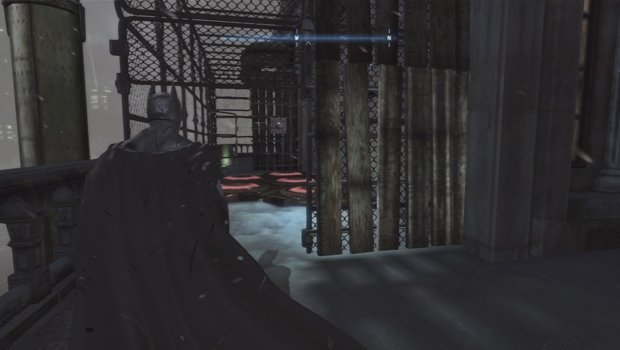
4. Directly west of the Merchant’s Bank, on the rooftop along the shore, there will be a set of pressure plates and a data pack at the far end. To reach it, use the remote claw and climb across the rope to reach the far side. Drop down and pick it up.
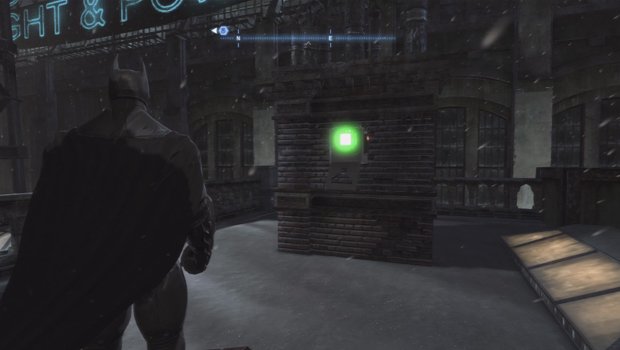
5. This data pack can be grabbed by standing on the pressure plate on the smaller roof of the eastern side of the Gotham Light and Power building. When you step on the plate, a green light to the far left will light up. Throw a remote batarang to hit it and then grab the pack.
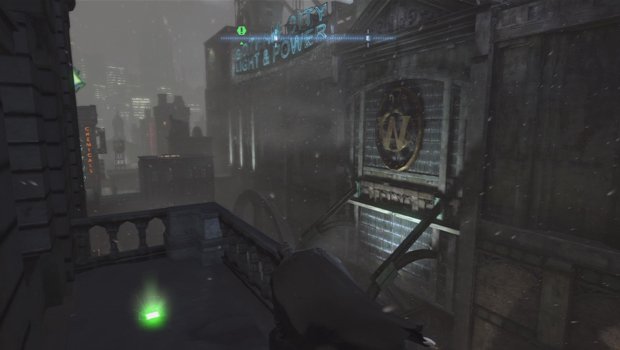
6. Directly across from the Gotham Light and Power building, on the west side, there is a very tall building with a lone balcony on the front of it. Look there to find this data pack.
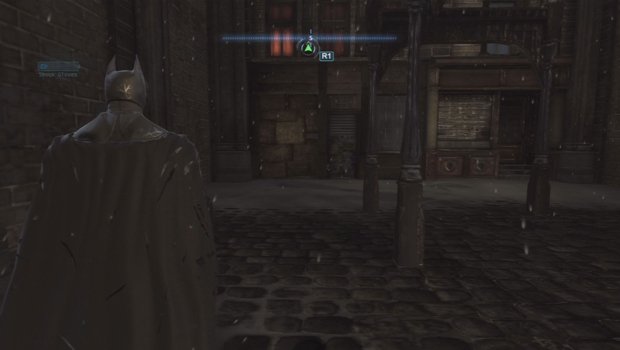
7. At the southeastern point of the Bowery, below the main street, you will find this dead end with some shops. Blow open the boards on the left side with the explosive gel to get inside and grab the data pack.
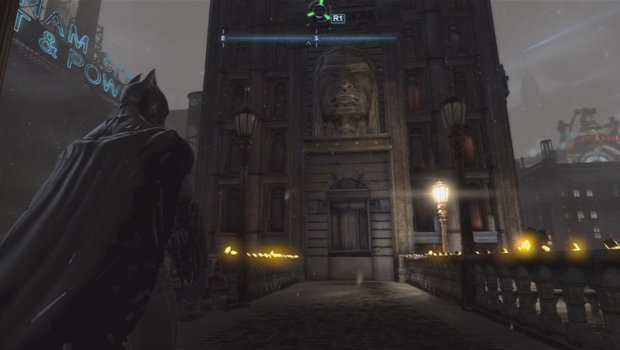
8. At this building located just to the west of the Gotham Power and Light building, there will be a security device on the left side of the building that will unlock the data packet located on the right side.
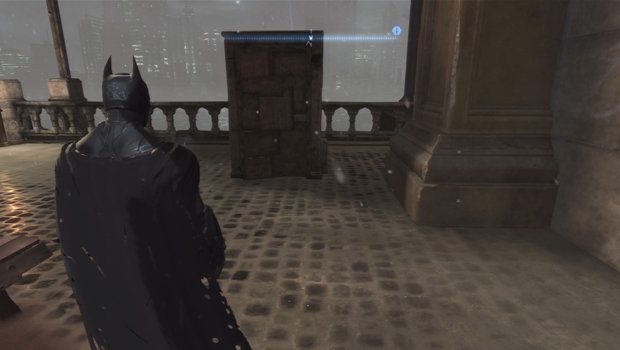
9. Right behind the Merchant’s Bank, on the ground there will be this small shack. Blow it open to find the data pack inside.
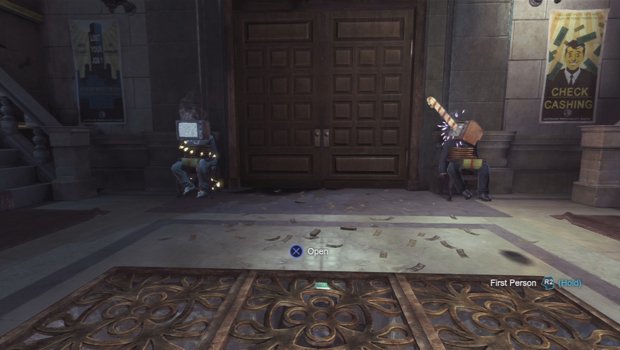
10. When you enter Merchant’s Bank, the first large room will have this data pack inside the floor grate just before the large doors.
Amusement Mile
Extortion File 5
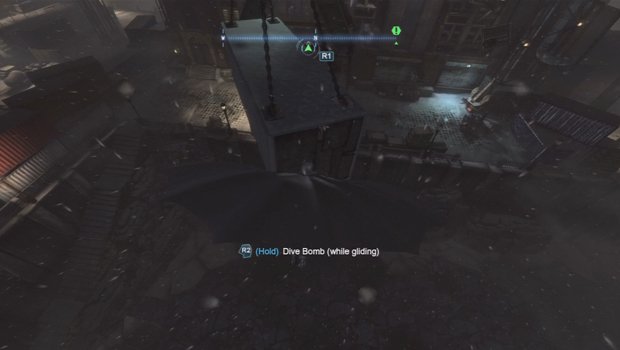
1. There will be a shipping container hanging from a crane over the south shore. Dive towards the boarded up end of the container and crash through to get the data pack inside.
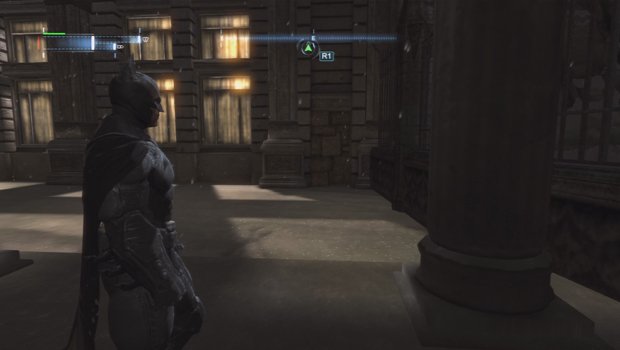
2. At the rear of the building with the Gotham Casino sign on top of it, go all the way to the ground floor and beside the iron fence, in the corner, will be a small shack that you can blow the door off of to get this data pack.
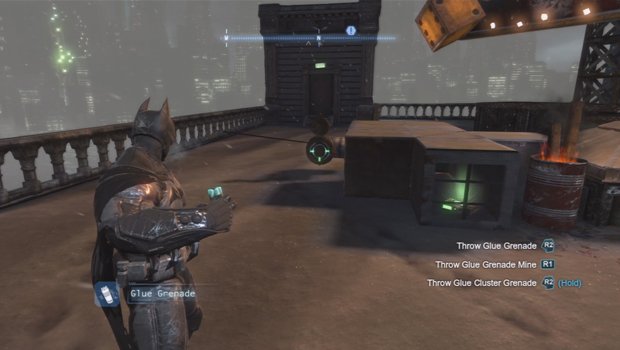
3. On the rooftop where the Gotham Casinos sign is, simply throw a glue grenade at the pipe and then crawl into the vent to grab the data pack.
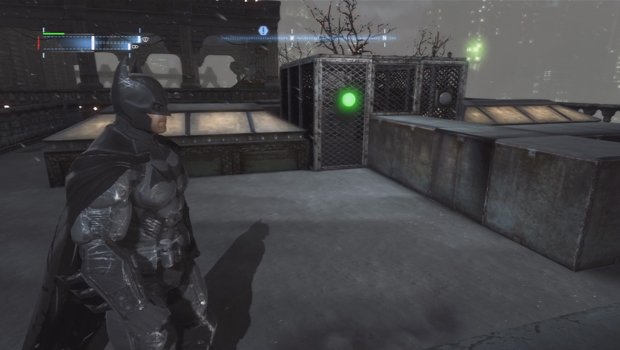
4. On the roof to the northeast of the Gotham Casino sign--directly behind it--you can find a set of vents on the roof with two lights. Place gel on the light to the right and then hit the left light. Crawl through the open vent and when you can stand, explode the gel. Crawl through the next opening to get the data pack.
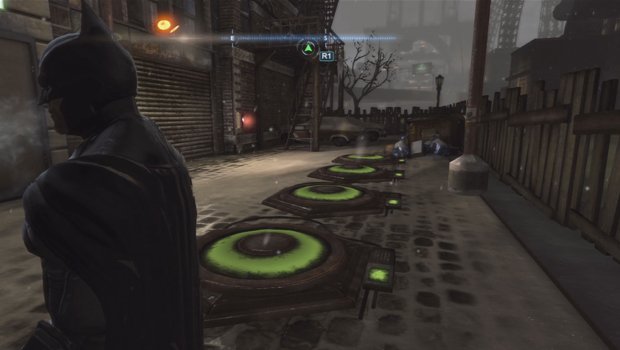
5. Just to the southeast of the graveyard in Park Row, you can find these 4 pressure plates behind a fence. Simply run along all four within the time limit to release the data pack on the wall.
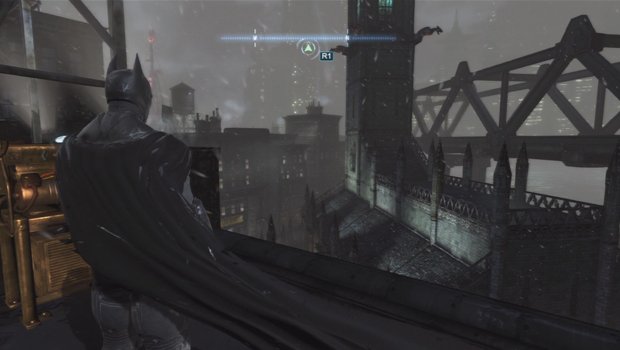
6. On a rooftop beside the rear of the cathedral in Park Row, there will be a generator. Charge it up with the shock gloves and then you will have ten seconds to grapple the data pack out of the lock at the far end with batclaw.
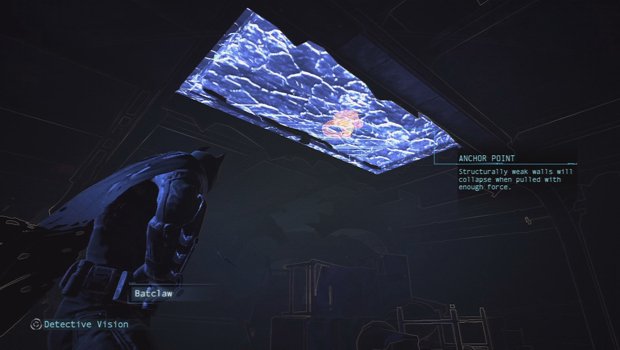
7. When going through the Final Offer and you come to the small raft you need to ride on, grapple the ceiling above you first and pull it down. Climb up and follow the corridor around to find the data pack on the floor there.
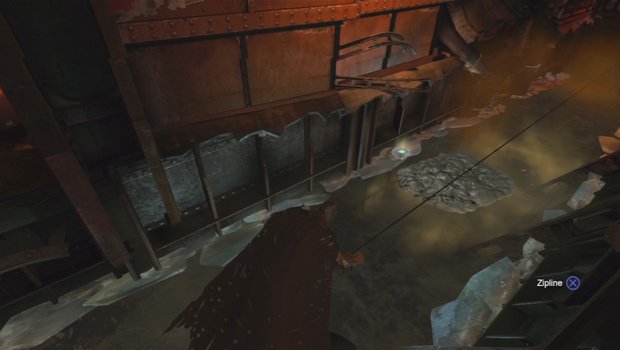
8. When you reach the first gap you have to jump over, just before the fires inside the Final Offer, look to the right down the corridor and there will be a data pack along the side of the water, frozen in ice. Use the remote batclaw to get over to it and then drop a glue grenade in the water to jump down to. Grab the data pack and hop back up to the rope.
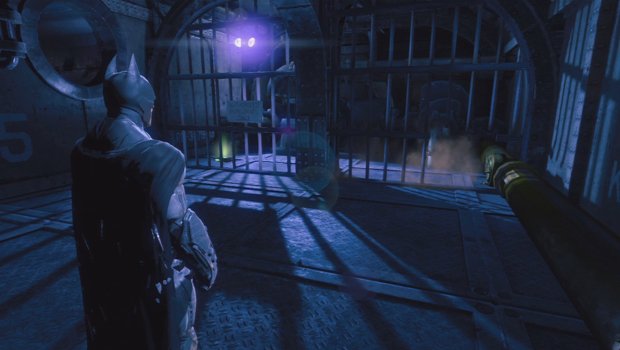
9. When you get to the top of the Boiler Room in the Final Offer, use the glue grenade to stop the steam coming out from the pipe beside the bars. Slide through the opening and grab the data pack on the left side.
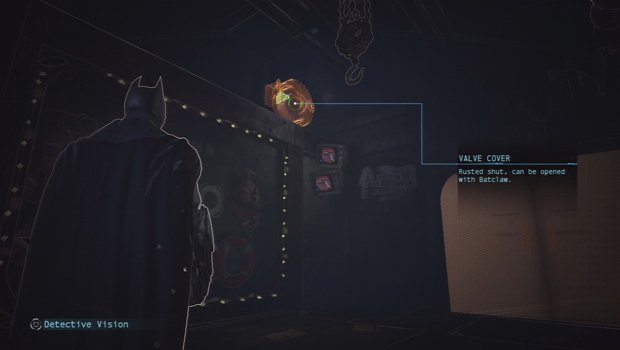
10. At the very end of the Final Offer, when you are leaving the ship, look up to the left to see a closed valve there. Pull it open with your batclaw and grab the data pack inside.
Amusement Mile
Extortion File 6
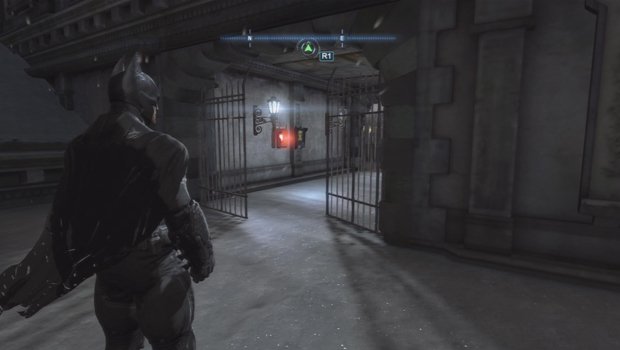
1. Directly east of the Gotham Casino, go to the middle floor of the building there and through an iron gate you will see a security panel. Hack it and the data pack is yours.
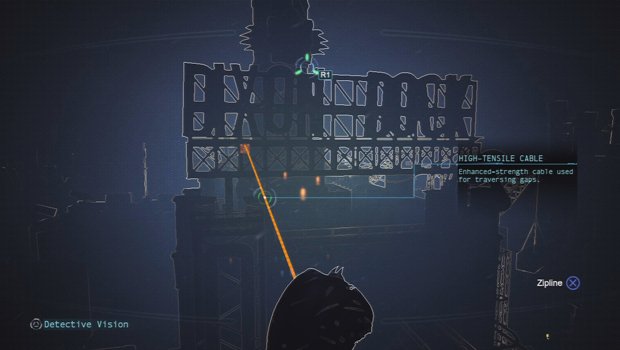
2. From the rooftop across from the DIXON DOCKS sign, go to the north east corner and look for the remote batclaw anchor. Drop the line over to the sign and then zipline back towards the west to crash through the weak wall and get the data pack.
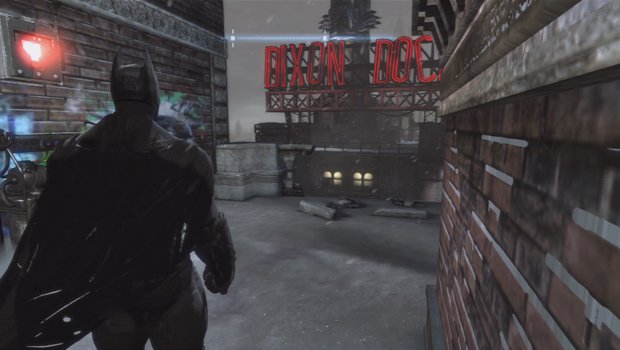
3. West of the DIXON DOCKS sign west of the Batwing launch marker, you can find this generator on the roof. Simply hit it with the shock gloves and grab the data pack.
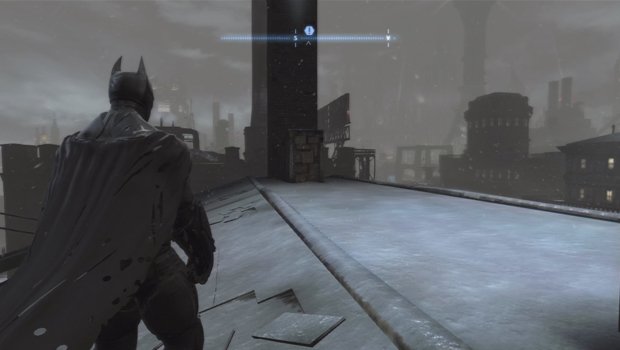
4. On top of the building to the southwest of the GCR tower, there is a small shack that you can blow the entrance open. Do so with your gel and the data pack will be inside.
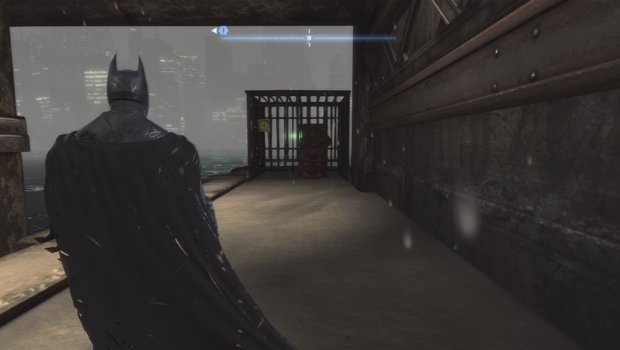
5. At the base of the GCR tower, there is a data pack inside a cage. Simply slide under the opening to reach it.
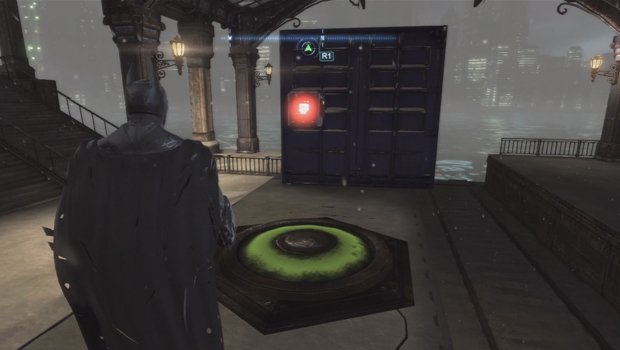
6. Hope you have your remote batarang skills up for this. Hit the train yard at the central north end of the area and there will be some train cars. Look for the blue cars facing north with the pressure pad on them and step on it. When you do, a train car behind you will open its doors. Toss a remote batarang in and guide it to the rear of the car and then u-turn it, and then dive it to the lower car where there is a green light. Hit the light and the data pack is yours.
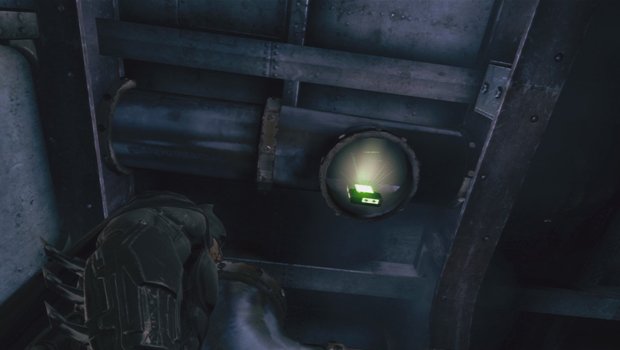
7. After you are on the ship and you slide through the low opening to reach the third floor, slide through another low opening and then look up to the pipe above to see the data pack sitting inside it.
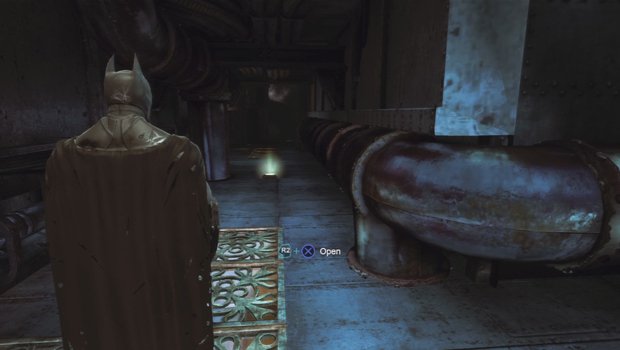
8. When in the Theatre for the large battle with thugs, enter the grates on either side of the large staircase. The grates will take you behind the stairs and once you exit, there will be a data pack there in between them.
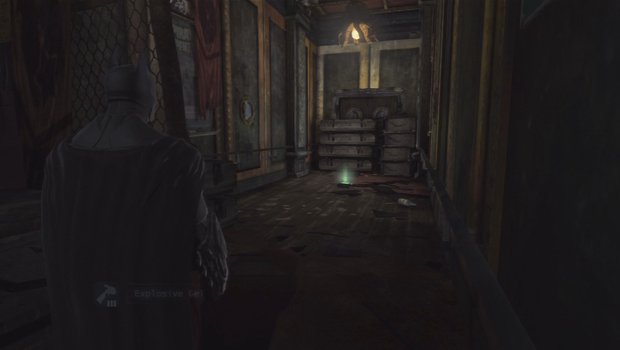
9. After you break through the glass and fight once again in the Casino, go through to the next room where there is a model of the Final Offer in a glass case as soon as you enter. Go to the left and you will come to a breakable wall there. Smash through and grab the data pack on the ground.
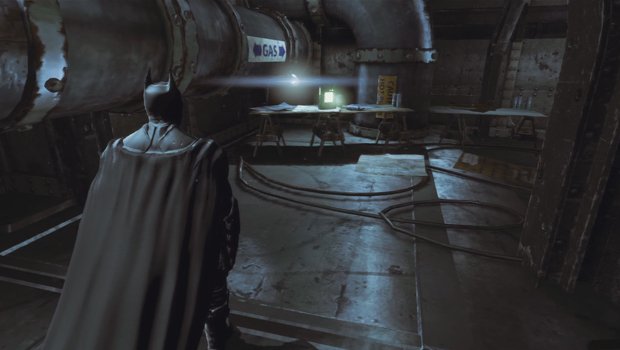
10. Once you enter the theatre on the Final Offer and deal with the room full of thugs, there will be a half fence that you can slide under in the far left corner of where you entered from. Slide under there and then follow the hallway to find the data pack on the table.
Amusement Mile
Extortion File 7
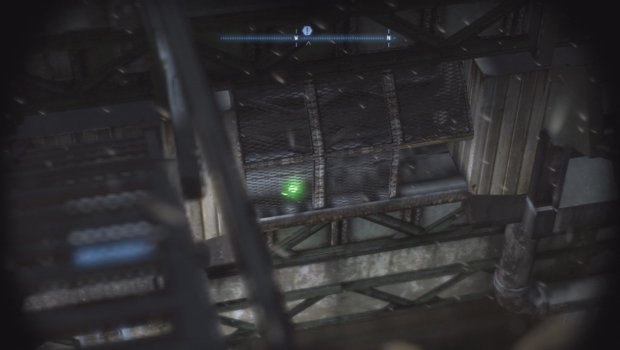
1. Directly west of the rear of the Final Offer, you will see two bird cages hanging. This data pack can be a little tricky to reach. You’ll need to stand on the roof above it, jump off and then swoop back towards the small opening in the side of the wall just to the right of where the data pack is. Once you grab on, just climb up and crawl through to get it.
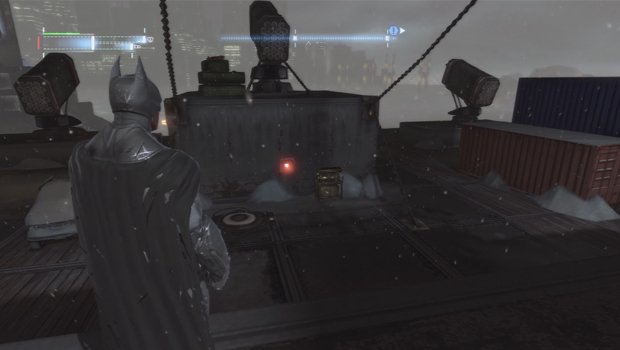
2. At the rear of the Final Offer there are three pressure pads and a generator. To release the data pack, you will need to fore up the generator with the shock gloves and then step on all three pads without hitting the ground outside of the pads. Step on the closest pad and then use the mast as a launch point for the other two pads. Dive when needed. Once you hit all three, the data pack lock will open.
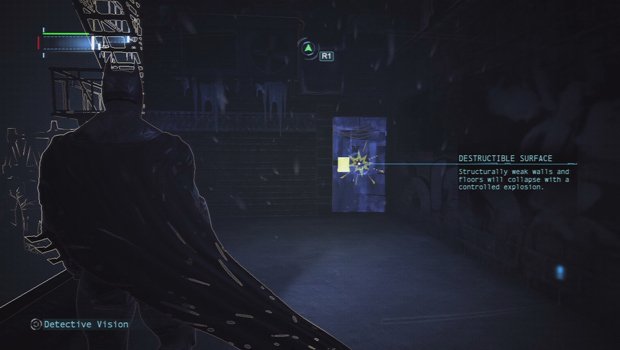
3. Northeast of the Wonder tower you can find this data pack stashed away in a small corner of a roof behind a destructible wall. The roof it’s on is small and is directly south east from the front of the cathedral in Park Row.
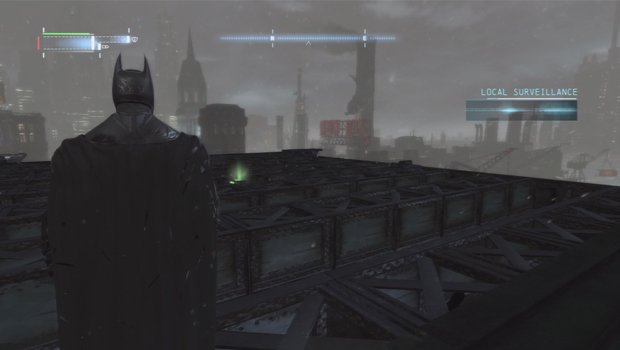
4. Directly northeast of the Wonder Tower, there is a set of girders above the uncompleted bridge. Simply grapple up and grab the unaware data pack there.
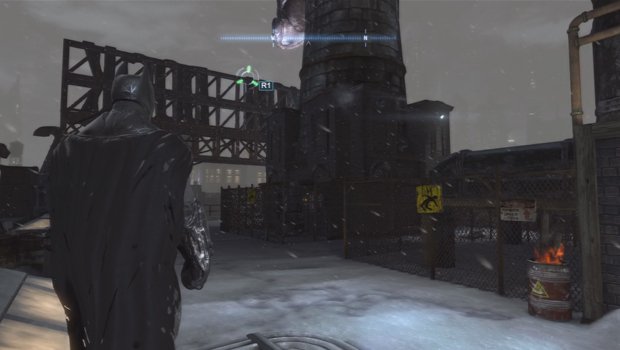
5. On top of the DIXON DOCKS building, there will be a fence and a vent system. Toss a remote batarang into the vent and lead it through to hit the green light at the end. Once it does, hop over the fence and retrieve your data pack.
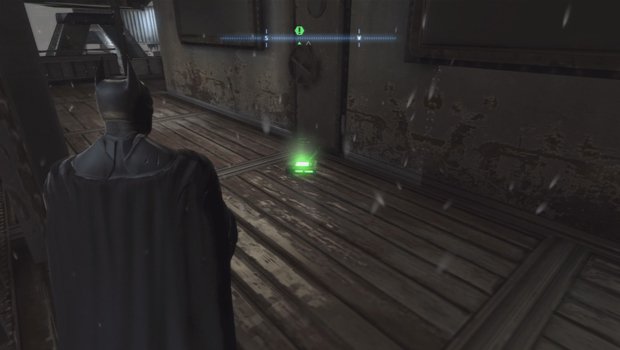
6. On the east side of the Final Offer, you can find this data pack just sitting on the upper deck.
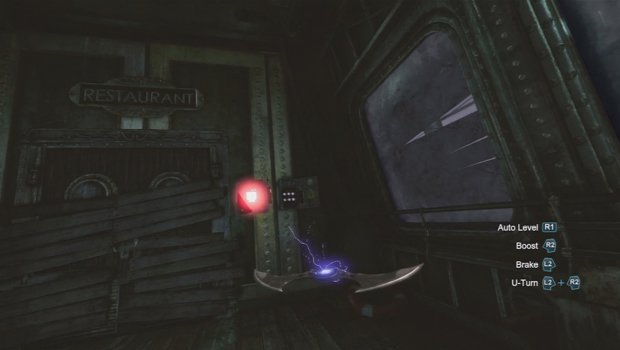
7. When you reach the upper deck, you will come to electrified wires above a gate. Go past that and at the end of the hallway, pull down the ceiling to reveal an opening. Now use the remote batarang through the electricity and up through the opening to hit the fuse panel and open the lock holding the data pack.
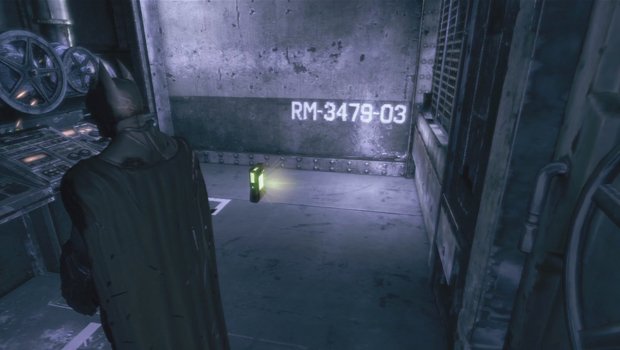
8. When on the way out of the Final Offer, when you reach the Deck Access Corridor, there will be a security panel to the right you can get to by hopping over a gap. Do that hop and you will open the door that has a data pack on the floor.
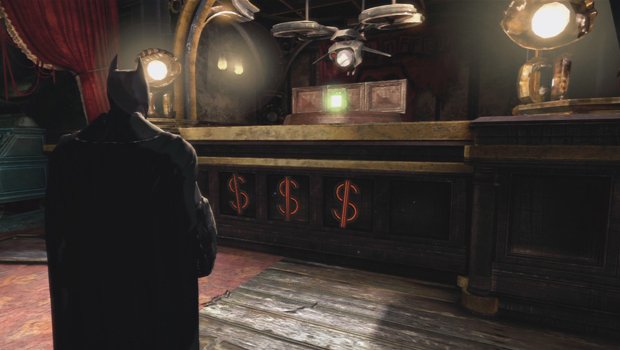
9. When in the casino, inside the ship, there will be three dollar signs on a stage. Hit all three with a quick tap of the batarangs and the data pack will spin around revealing itself.
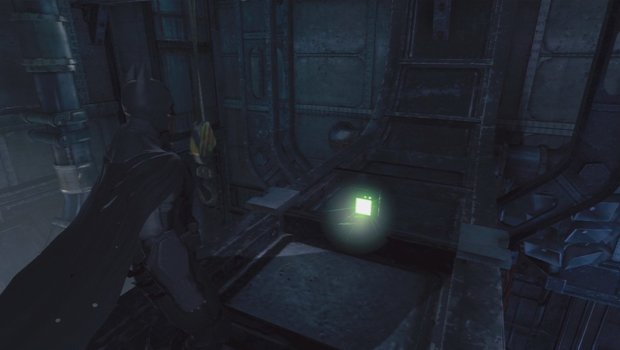
10. Once you have defeated Deathstroke and taken his remote claw, use it to create a line above you and then climb up. Look over to the crossbeam above the fuel tanks and the data pack will be there. Just glide over to grab it.
Industrial District/Sheldon Park
Extortion File 8
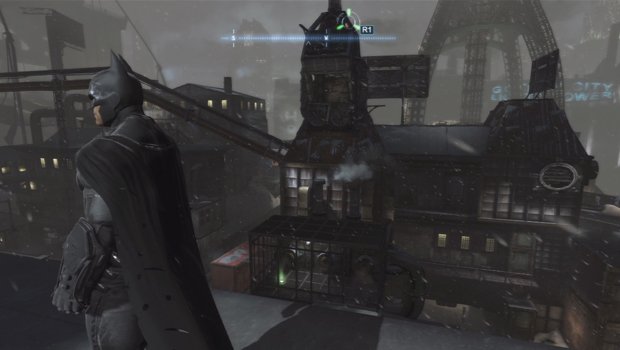
1. East of the Wonder Tower and west of the dual tall smoke stacks, you can find this cage on a lower roof. To retrieve the data pack inside, you simply need to use the glue grenade on the three pipes inside.
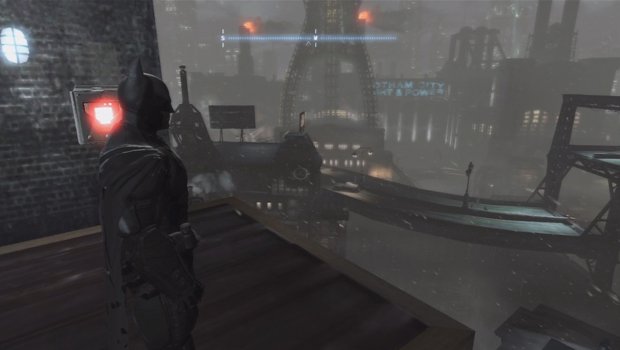
2. On the side of the shorter third smoke stack, directly east of the Wonder Tower, you can find this data pack. To retrieve it, you’ll need to hack the security panel three times.
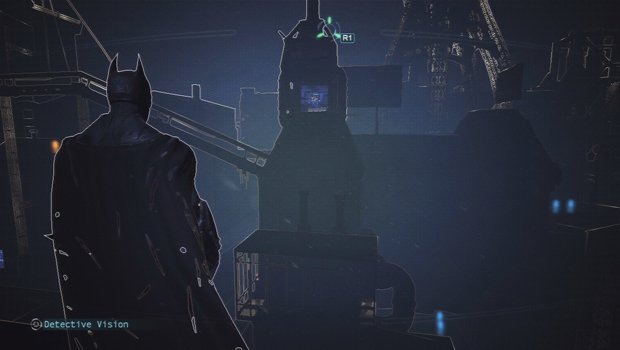
3. Directly west of the two tall dual smoke stacks, there will be a destructible wall inside the tower there. To reach it, dive off the tall smoke stack and glide over to the platform.
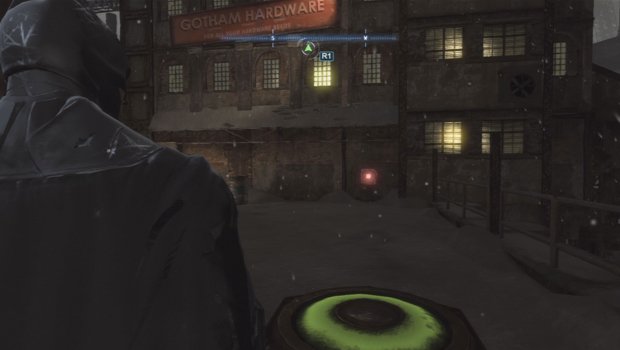
4. At the northwest tip of the Industrial District, you can find a pressure pad on the ground in front of the hardware store. Simply step on it and ten grapple the data pack on the wall.
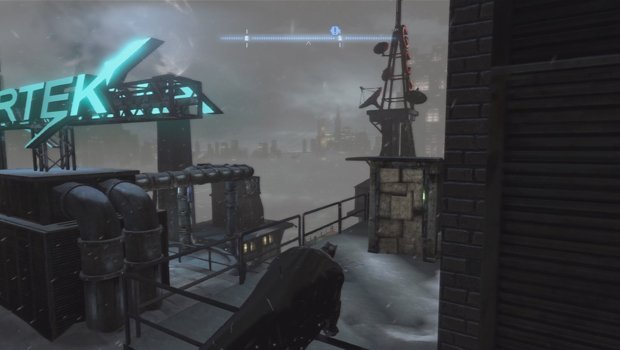
5. On the small roof directly to the west of the Amertek sign, you can find this small shack. Blow the entrance open and grab the pack inside.
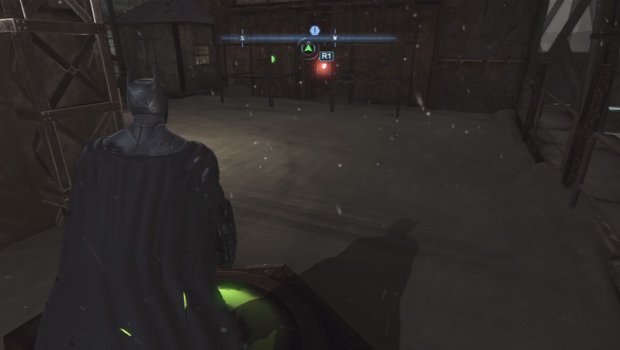
6. To the north of the Industrial District, to the west side of the Amertek building, there will be a cage and a pressure pad on the ground. Place some gel on the green light to the left of the cage and then step on the pad. Explode the gel and then throw a remote batarang into the opening of the cage on the right to hit the second light.
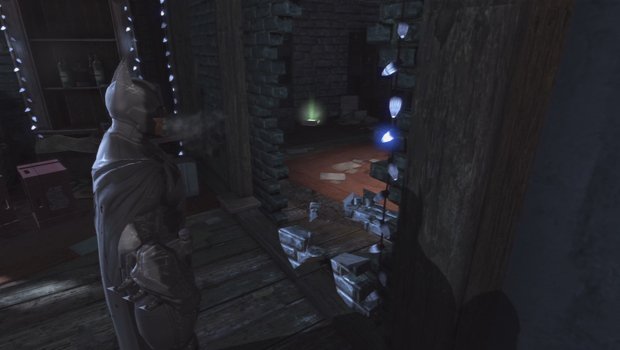
7. When you enter Sionis’ Mill and reach the second floor where the automated turret is, blow open the wall to the left of the vault door to find this inside.
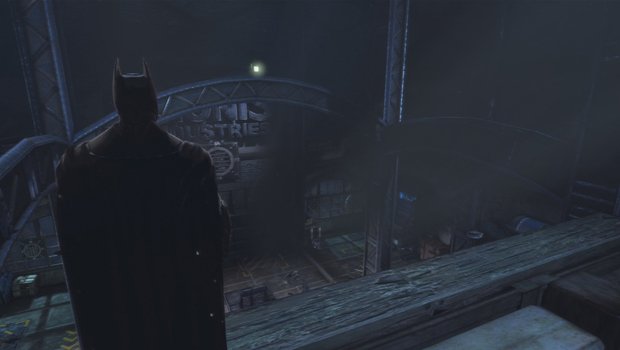
8. In the very first room you enter in Sionis’ Mill, you can find this data pack above, sitting on an arch. Snag it with the batclaw to receive it.
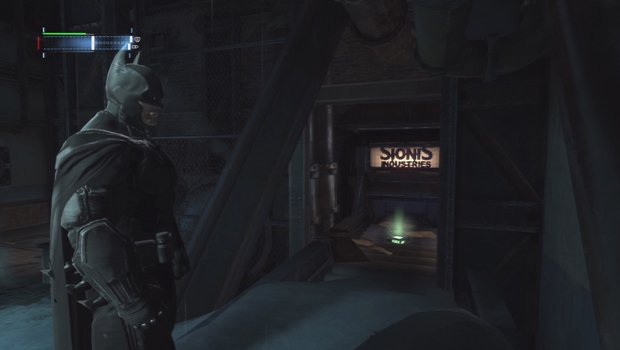
9. In the Loading Bay Depot of Sionis’ Mill, just after getting the security passcode to enter it, go to the left and there will be a breakable wall. Blow it up and grab the data pack.
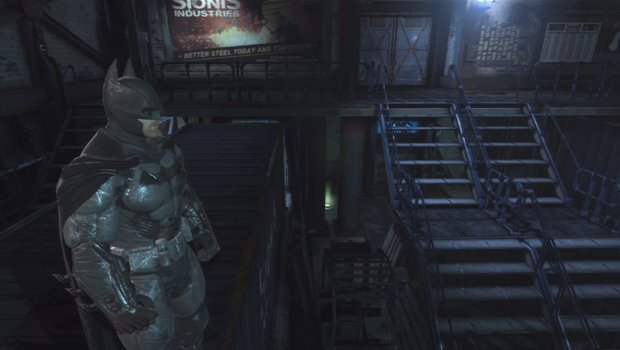
10. When you enter the large warehouse in Sionis’ Mill, where you need to break through the upper wall with the swinging pipes, look under the stairs you entered from and the data pack will be under there.
Industrial District/Sheldon Park
Extortion File 9
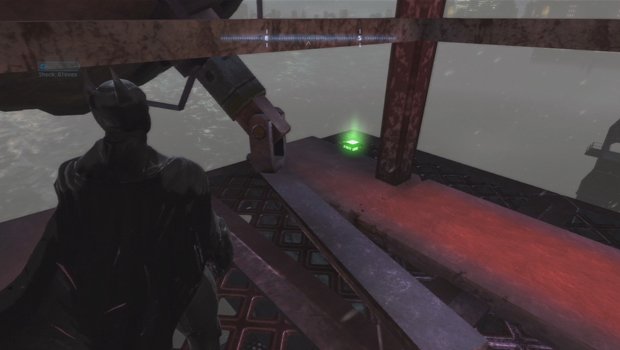
1. This data pack can be found on the very top of the GCR tower. To get there, you will need to go to the smokestack that is located to the northeast and then glide over to it and land.
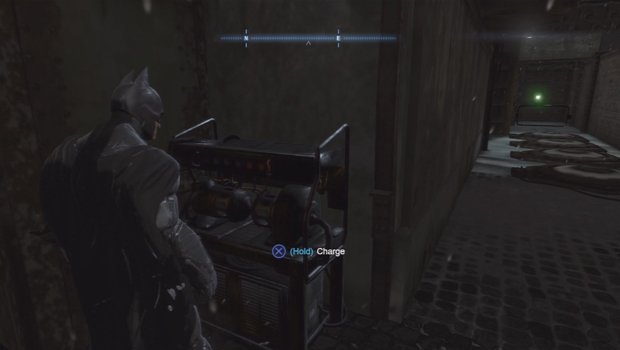
2. Southwest of the Amertek building, there will be a small alley with 5 pressure pads inside it. Use the shock gloves on the generator and then run across all the pads and slide under the cage at the end to get the data pack.
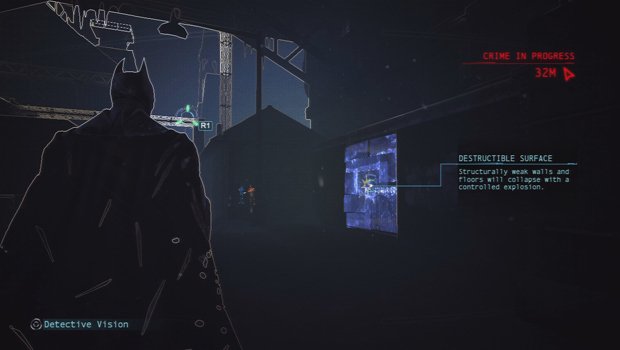
3. At the base of the Gotham City Works building, just west of the Industrial District map label, you can find this weak wall which has the data pack behind it.
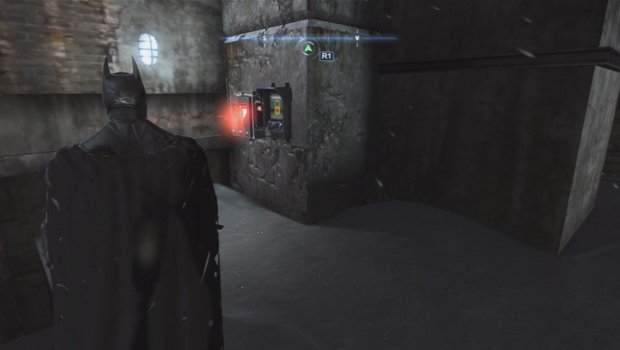
4. At the base of the westernmost smoke stack north of the steel mill, you will find this data pack near the ground on the side of the building there.
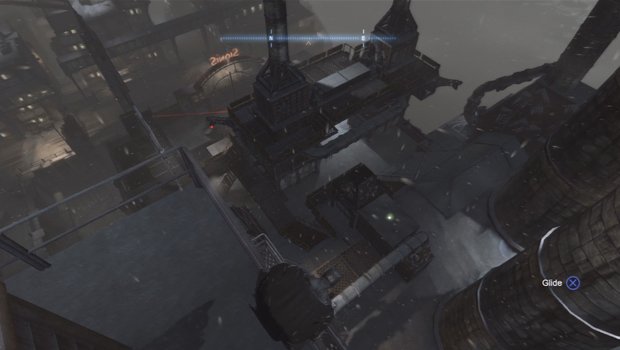
5. Just south of the entrance to the Steel Mill, you can find this data pack just hanging out on top of a catwalk.
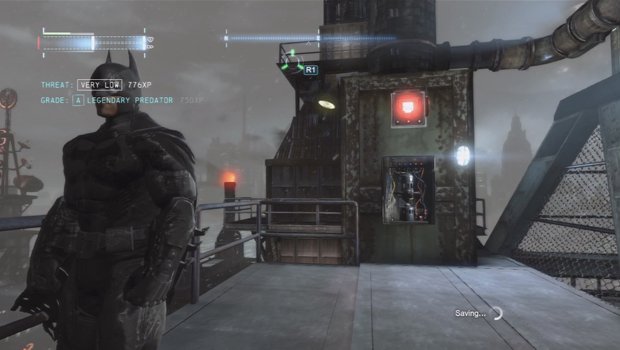
6. On top of the steel mill, you will find this generator and the data pack directly above it. Simply use the shock gloves and then grapple the data pack before it closes.
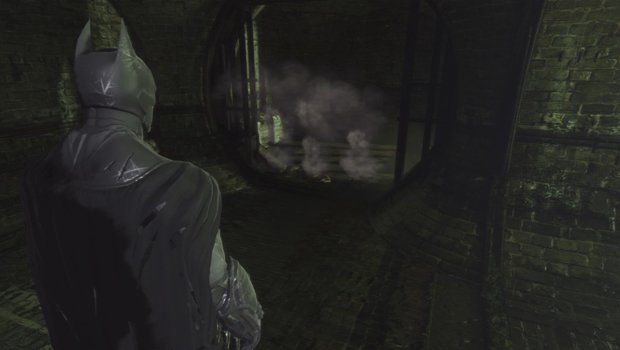
7. When you enter the large warehouse in the mill, go to the far left back corner behind the shelves and there will be a door there. Go through and drop down to the sewers below. Use the glue grenade on the pipes and retrieve the data pack around the corner.
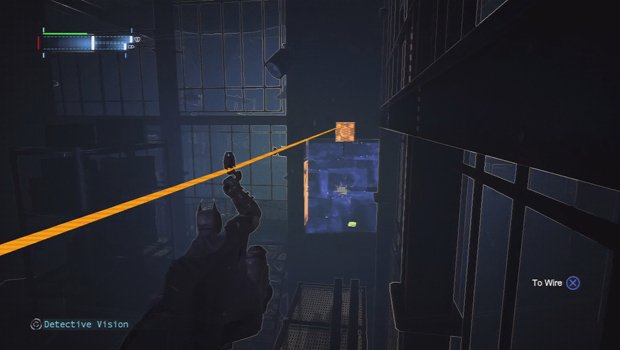
8. When you enter the large Warehouse in Sionis’ Mill, go to the far left corner and there will be a breakable wall there. Use the remote batclaw to zipline through it and grab the data pack on the ground.
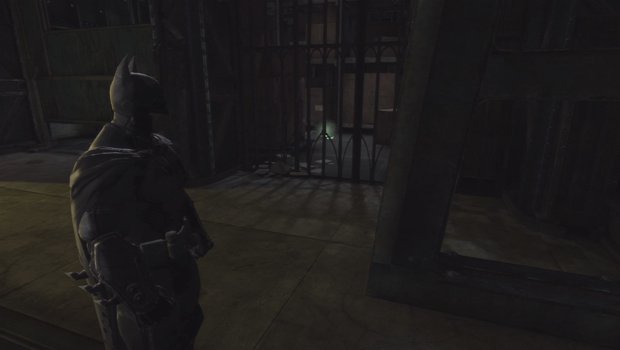
9. After you break through the wall with the pipes in the mill, hop through the opening and immediately on your right will be a data pack through the bars. To get it, toss a remote batarang through the slit in the door to the left of the bars and make a u-turn with it so it hits the switch. Once open, slide under to get the pack.
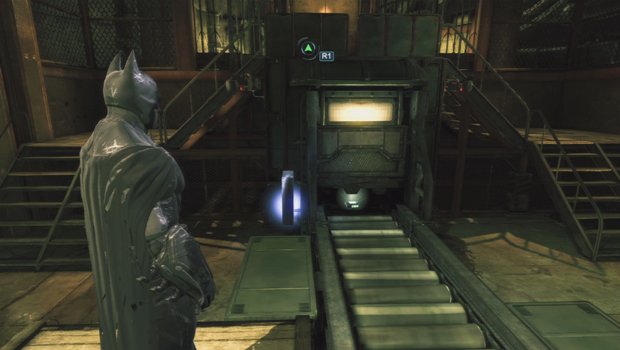
10. When you are in the large drug lab room, there is a generator beside the conveyor belt between the stairs. Use the shock gloves on the generator and the chute at the end of the conveyor will open revealing the data pack.
Industrial District/Sheldon Park
Extortion File 10
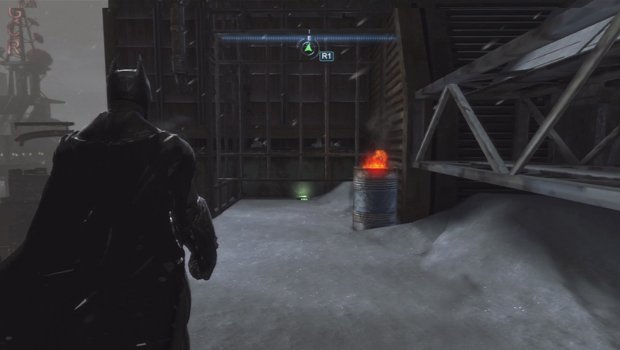
1. On top the Steel Mill, facing east, this data pack can be grabbed simply by sliding under the bars to reach it.
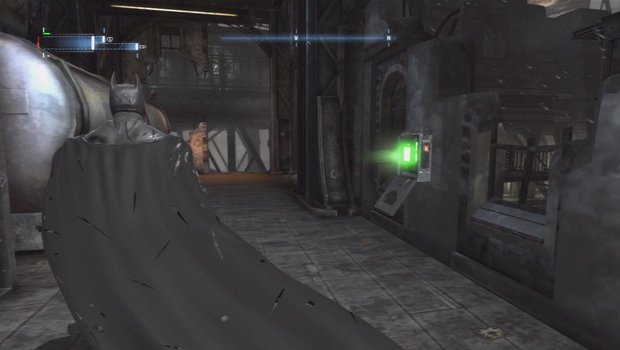
2. Just east of the Pioneer Bridge, there is a small building that you can find this data pack in side of. To release it, you will need to hit the three green switches that light up on the opposite wall--all within ten seconds.
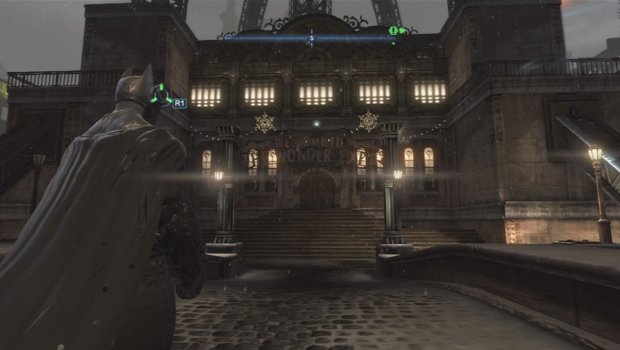
3. On the bridge to the north of the Wonder Expo, there is a pressure plate that will light up three lights. One will be on the upper left, one on the upper right and one directly forward under the locked data pack above the Wonder Expo entrance. Quick-hit the left and right lights, but then use the remote batarang to hit the centre one.
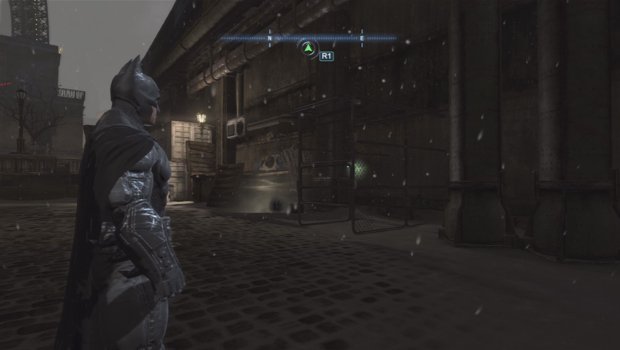
4. On the west side of the northern part of Pioneer Bridge, there is a cage with this data pack inside. Keep in mind, this is actually in Sheldon Park, and not the area marked Industrial.
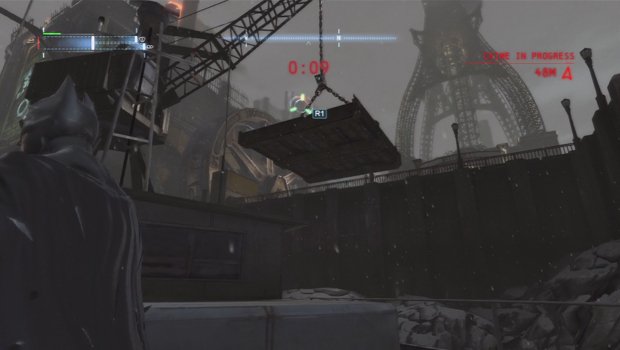
5. At the north tip of the bridge, in the western part of the water, there is a boat with a pressure plate on it. Step on it and then grapple to the up to the flat platform. Once you land, quickly grab the data pack with the batclaw. You only have 10 seconds to complete this.
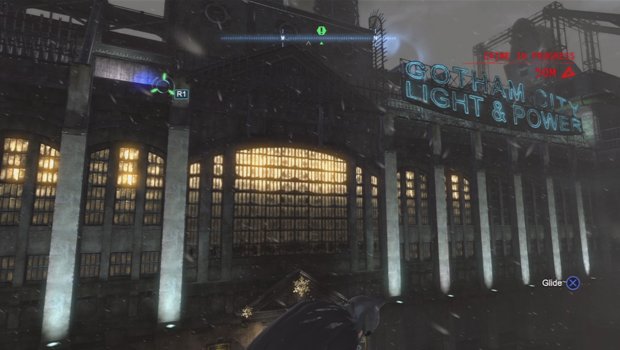
6. On the west side of the Gotham Light and power building, go to the left side of the building and on the ledge near the roof, you will find a generator that you need to shock with the shock gloves to open the data pack there.
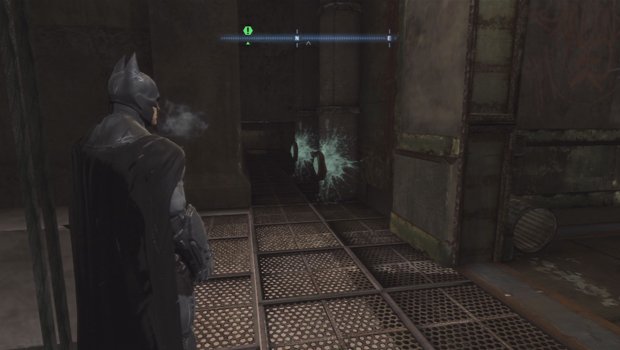
7. As soon as you enter the Gotham Light and Power building from the front entrance on the west side and grapple up to the second floor, there are two steam pipes on the left. Use your glue grenades on them and slide through to get the data pack at the far end.
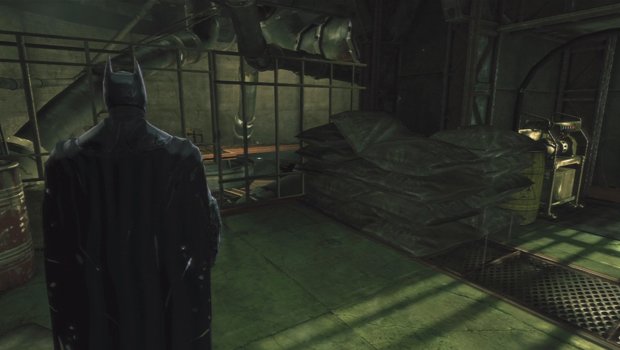
8. When in the drug lab on the lower level of the mill, go to the far left of where you entered, to the windows. Here you will find a generator that you can charge up with the shock gloves. Do so and the turbine through the bars will spin. When it does, grapple the data pack through the opening in the bars.
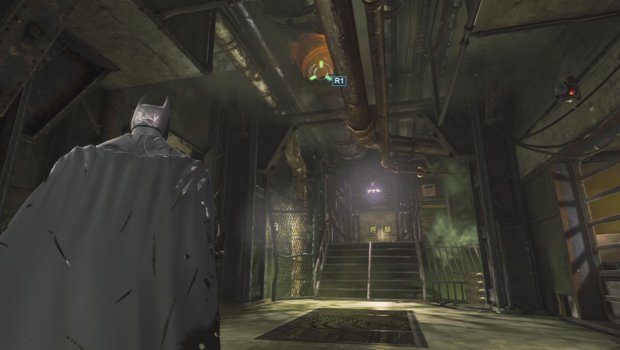
9. Once you take the elevator down in the mill, walk a few steps and then look for the broken pipe above. Grapple up to it and then crawl through the small room. Hack the security there and then grab the data pack off the wall.
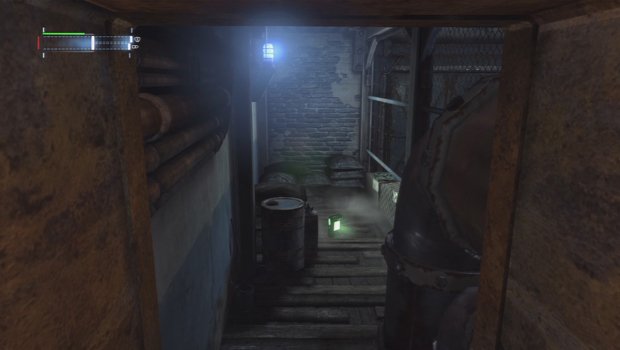
10. Once you have the security codes in Sionis’ Mill, enter the Loading Bay Depot and go up the stairs to the far left. Crawl through the vent there and you can grab the data pack from the next room.
Pioneer's Bridge
Extortion File 11
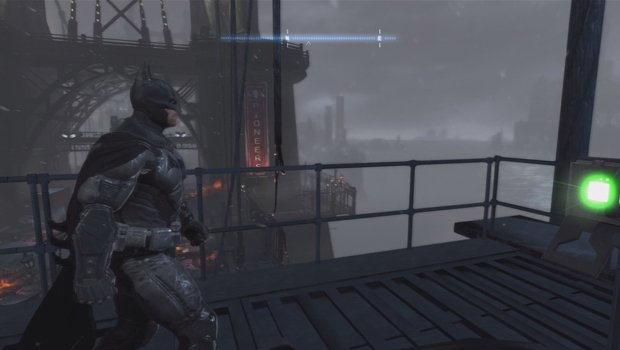
1. On the southern half of the bridge, hit switch on the catwalk above the bridge and on the opposite side of the platform the unlocked data pack will there to pick up.
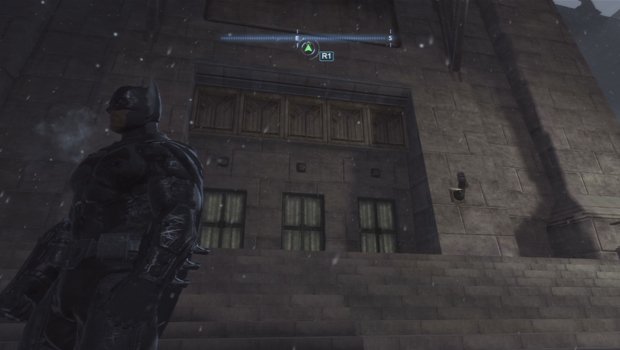
2. At the far south end of the bridge, go to the west side and near the shoreline you will see three doors and a catwalk above. Toss a remote batarang at the green light on the balcony and the three lights above the doors will light up. Quick-throw three batarangs at the lights and the data pack on the catwalk above will be open.
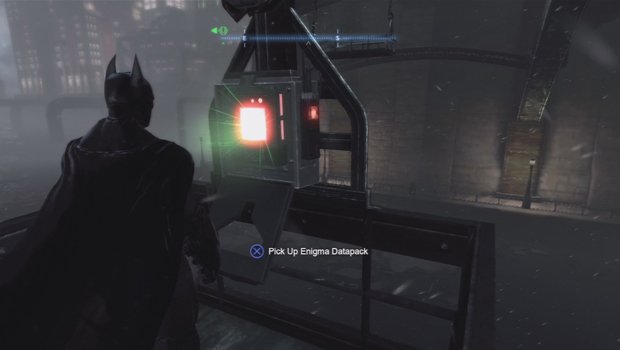
3. Underneath the southern section of the bridge, there are three hanging platforms that have pressure plates on them. Once you hit the first, you will have 20 seconds to hit the other two. Simply glide and rappel and you should be able to get it easily. The data pack will be on the third platform.
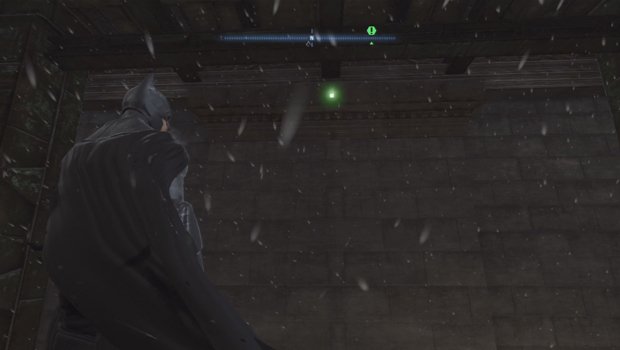
4. Underneath the very northern section of the bridge, at the very top, this data pack will be hanging out. Grab it with the batclaw from the opposite ledge.
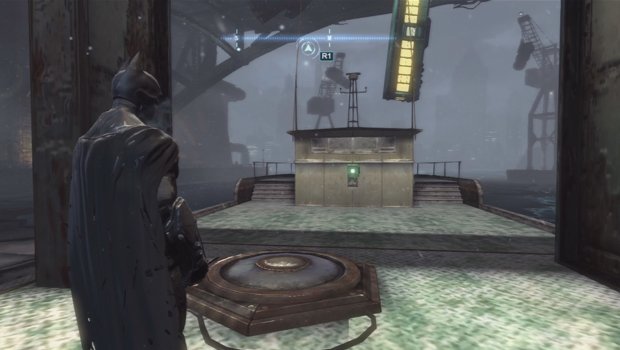
5. On the northern half of the bridge on the east side, there is a ship with a couple cranes around it. On one of the ships will be two pressure plates and the data pack at the front of the cabin. Step on the upper pressure plate and then grapple up to the crane on the left without stopping. Glide back around and land on the second pressure plate without stopping. When you land on it, the data pack will be unlocked.
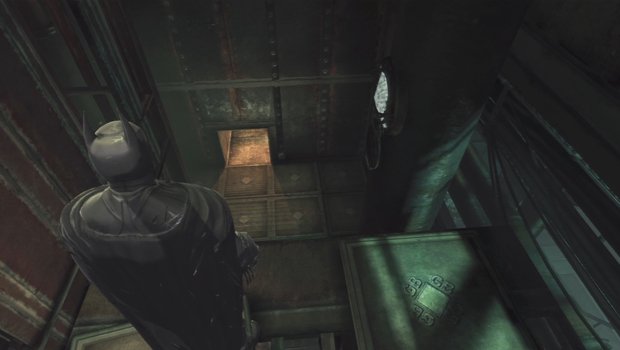
6. When you enter the Maintenance Room under the bridge to get the bombs, go all the way to the top of the first shaft and before going through the door at the top, go up and around to the left to find a steam pipe and a grate. Go through the grate to find this at the end.
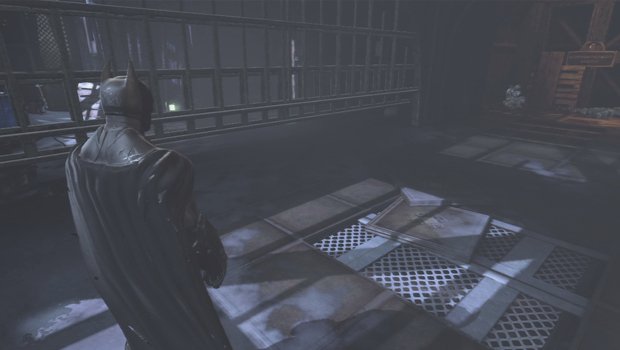
7. After you pass the boiler room and meet up with Brandon, the SWAT officer, there will be a gate to the left of where he is with a data pack behind it. To reach it, pull open the vent cover above where he is and then toss a remote batarang in and guide it to the switch behind the bars. Once it is hit, slide under the gate to get the data pack.
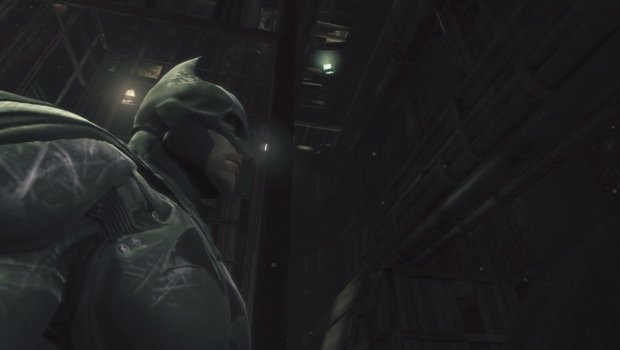
8. When you enter the area under the bridge while going after the bombs, before you climb the first ladder in the freight elevator shaft, turn around and look up behind the pipes there to find this data pack along the wall.
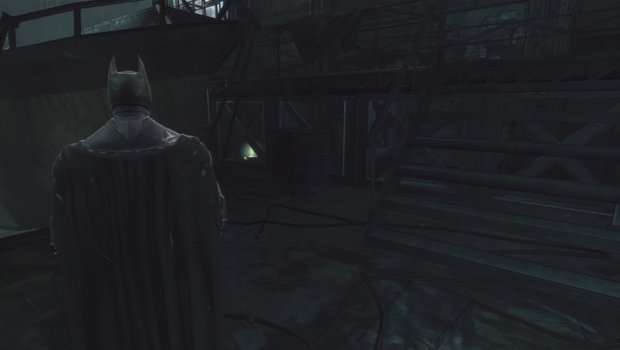
9. As soon as you enter the Maintenance Room under the bridge when going after Firefly’s bombs, crawl under the stairs to the right of the boat and then run and slide under the walkway you entered on. You can grab the data pack off the ground there.
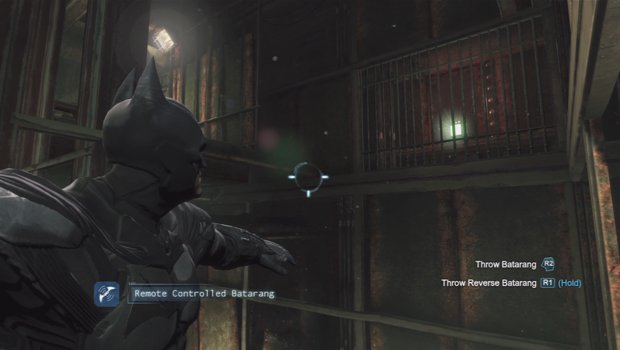
10. When you are about half way up the freight elevator shaft under the bridge, you will see a data pack behind a fence. Toss a remote batarang to the switch that is behind the wall on the left of the cage and the bars will rise once hit. Grapple the data pack to retrieve it.
Pioneer's Bridge
Extortion File 12
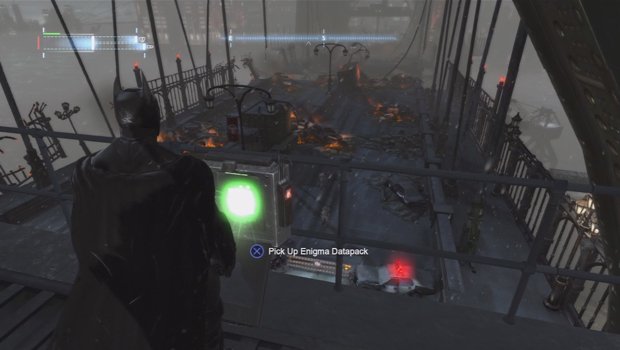
1. On the very northern part of the bridge, go to the upper catwalk and there will be a generator to the east that you will need to charge up with the shocking gloves. Once it is charged, just go to the opposite side of the catwalk to get the data pack.
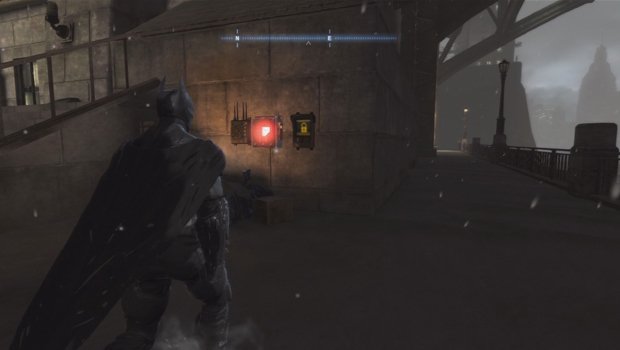
2. At the foot of the bridge at the north end, on the west side, there will be a pile of trash and a jammer beside this data pack. It can be a little tricky to spot, but it is on the southwest corner beside the staircase.
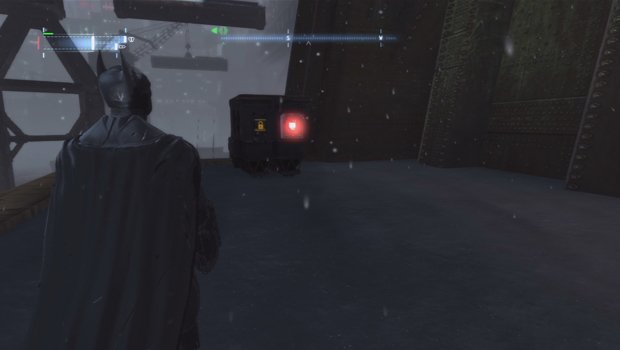
3. Just above the entrance door to the Maintenance room under the bridge, you can find this simple data pack that you just need to hack three times to open.
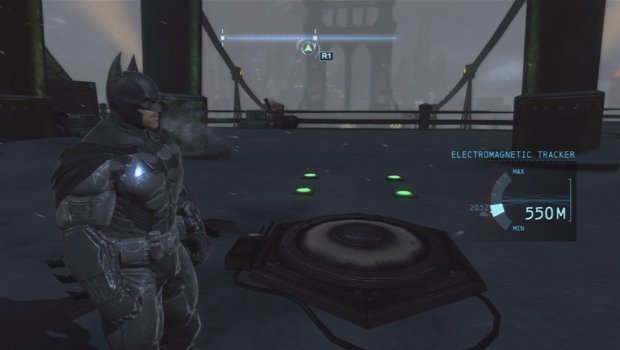
4. On the upper level in the centre on the bridge, there will be a pressure plate between the two support structures. Stand on the plate and then use your remote batarangs to hit the green lights that glow on the corners of the two pillars. Facing forward, go clockwise from the light to left and back. Hit them in order and the lights on the ground in front of you will stay lit up and open the data pack directly above you.
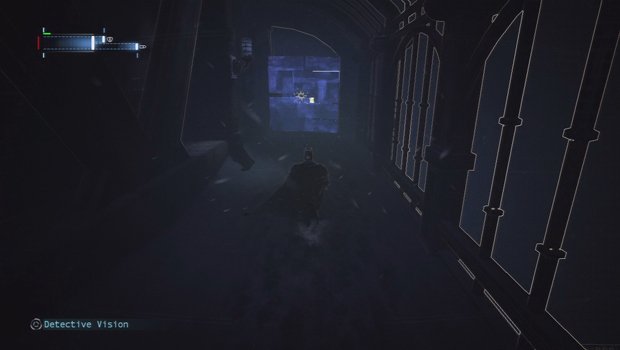
5. On the west side of the bridge, just before the centre of it, on the level just below the road, there is a breakable wall at the end of the walkway. Smash through it and you can find the data pack inside there.
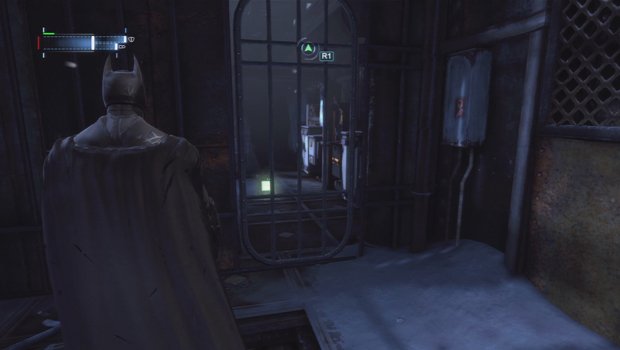
6. When you reach the top of the freight elevator shaft inside the bridge, enter the room to the boiler room and there will be a barred door ahead of you. You will need an upgraded cryptograph to unlock the door and grab the data pack off the floor.
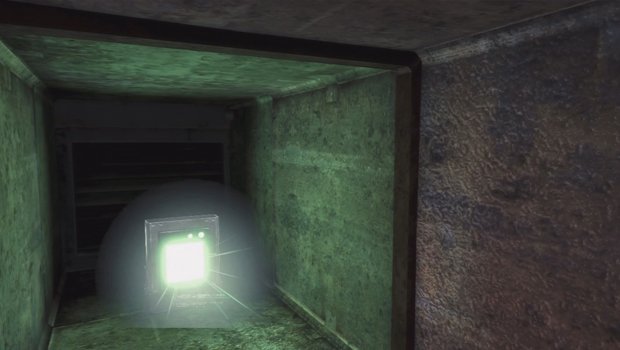
7. When you enter the main train station area, hop into the grate on the floor and follow it to the left of where you enter, all the way to the end to find the data pack in the corner.
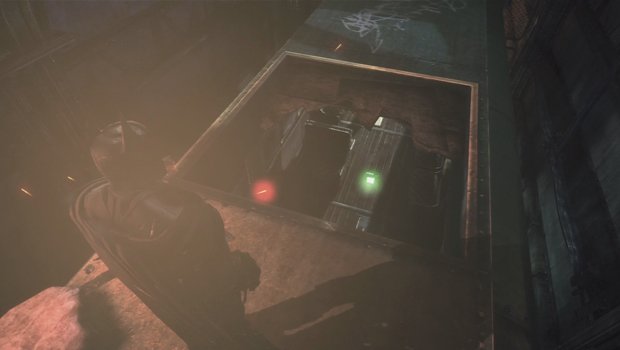
8. When you are heading through the north gate from inside the train station, there will be a door on the right to the Depot. On the right wall will be a generator that you need the shock gloves to charge. When you do, toss a remote batarang through an opening in the fence and have it go through the electricity the generator created at the far end. Make a u-turn with the batarang and hit the fuse box to open the gate. Grapple up through the new opening and then blow a hole in the top of the train to find the data pack inside.
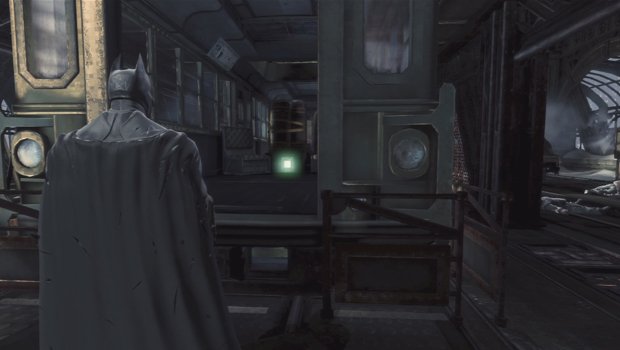
9. When you return to the train station after the hostages have been rescued and have left the train car, you will then be able to enter through the open end and retrieve this data pack from inside.
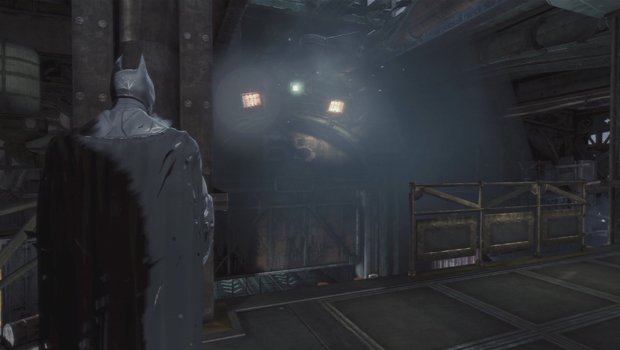
10. When you are in the main train station where the hostages were in the car, look to the top of the far end of the room to see the data pack up high against the wall, between two lights.
Coventry
Extortion File 13
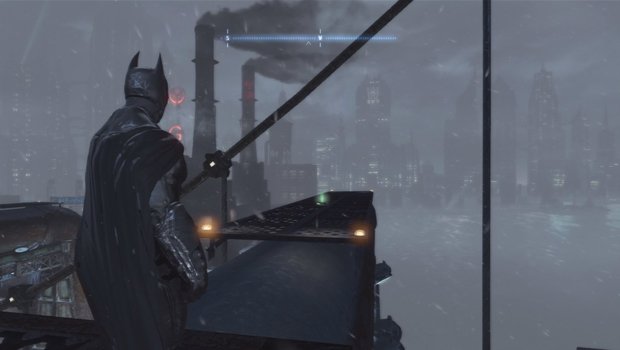
1. At the south end of the Pioneer Bridge, on top of the pipe just before it to the south end, you can find this data pack just lying there.
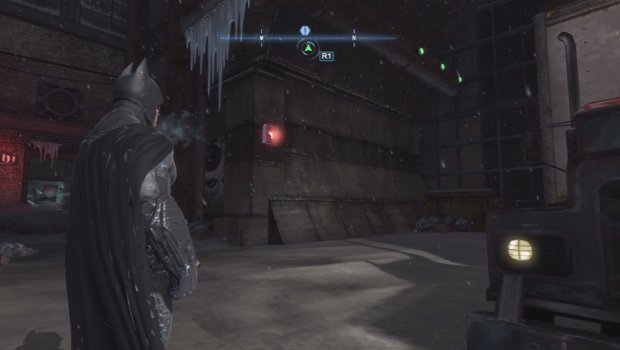
2. Just outside the front entrance to the My Alibi Nightclub, there will be a large truck and a data pack across from it on the corner. Hop on the truck and then quick-fire batarangs at the lights above to open the lock.
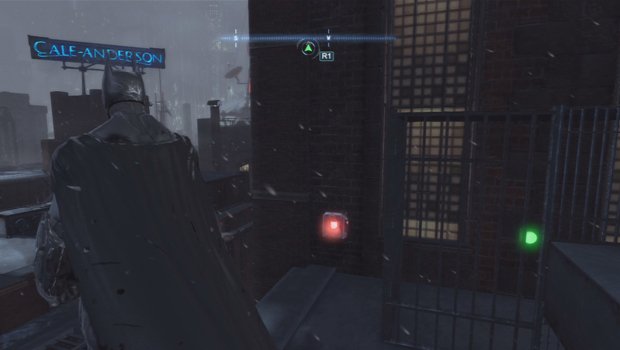
3. On the south western roof of the My Alibi Night Club, there will be a data pack beside a cage and a vent. You will need to toss a batarang through the vent to hit the green light and then the data pack will be yours for the taking.
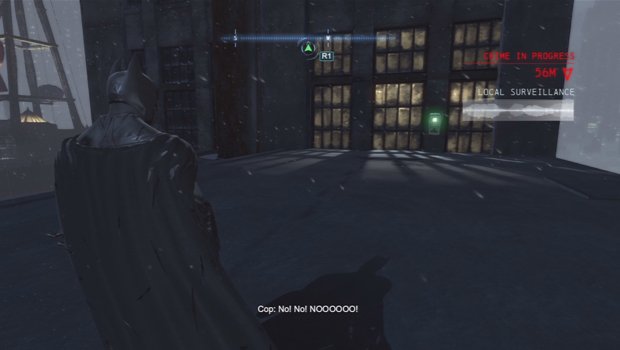
4. Go to the east side of the building found at the very northwest corner of Coventry and you will see a small bridge between the two buildings. The Data pack will be on the west side, but to get it, you will need to batclaw it from afar as the lock will close if you get too close.
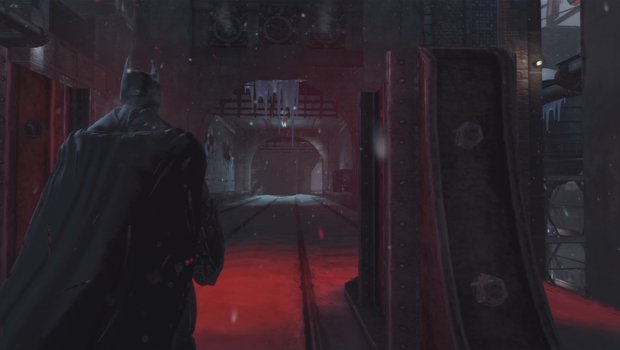
5. Look for the end of the rail tracks just north of batwing launch marker on the map and you will be able to find this data pack in the tunnel directly across from the red lights there. Simply grapple it down from the tunnel ceiling.
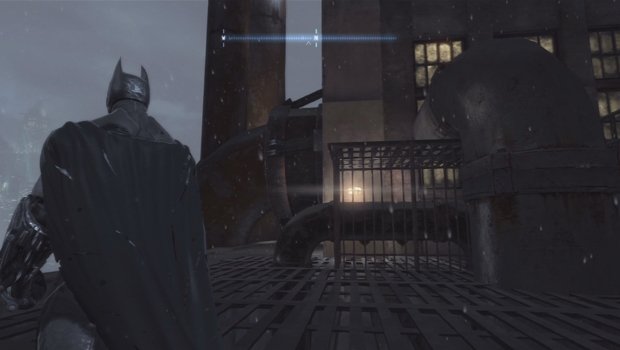
6. Along the northwest shore, you can find this cage to the side of the building to the north. Simply toss in your glue grenades at the pipes and then walk in to grab the data pack.
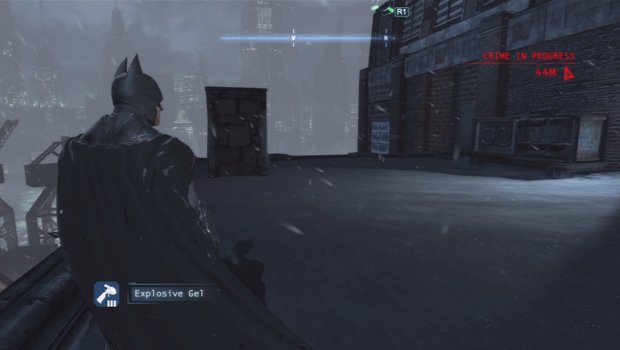
7. At the southwest roof right next to the GCR tower, you can find this small shack. Simply blow the entrance open and walk in.
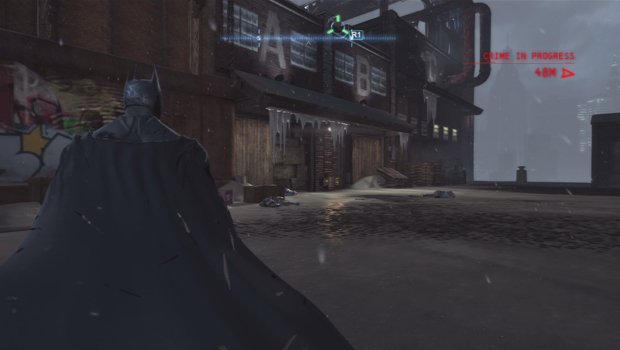
8. At the far southwest end of Coventry, at the docks, look for the building with the large A and B on it and then blow open the boarded up wall between the letters to find the data pack.
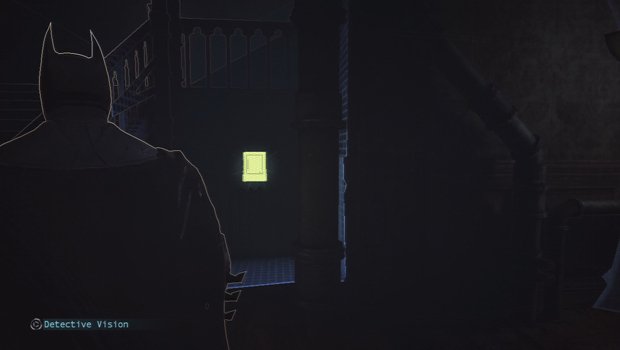
9. Once you enter Sionis’ safe house in Lacey Tower, go to the right of the staircase that is located to the left of the crime scene. The data pack will be on the wall there.
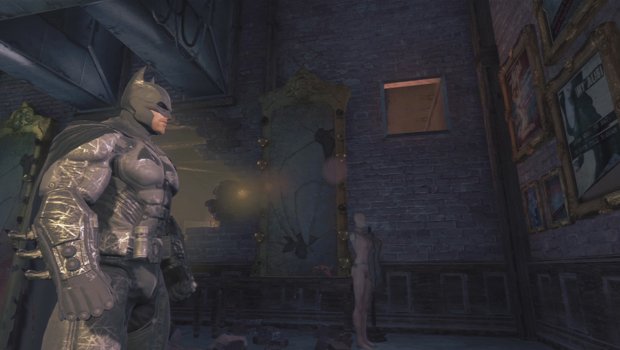
10. After you deal with Bird in the My Alibi Nightclub, go to the back dressing room through the now open doors and pull down the grate to the right of the hole in the wall. Climb up and you will find the data pack in there.
Coventry
Extortion File14
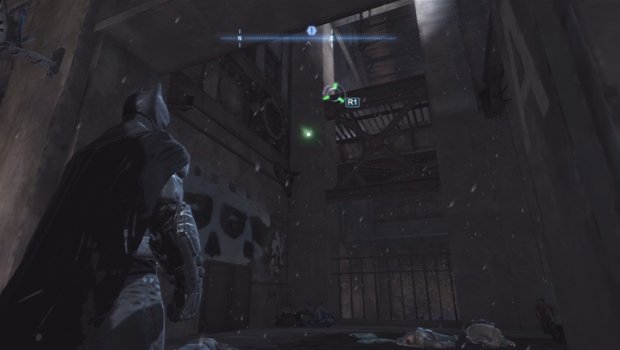
1. To the southeast of the GCR tower, on the main street level below the train tracks, you can find this data pack high up on the wall. Simply grapple it to retrieve it.
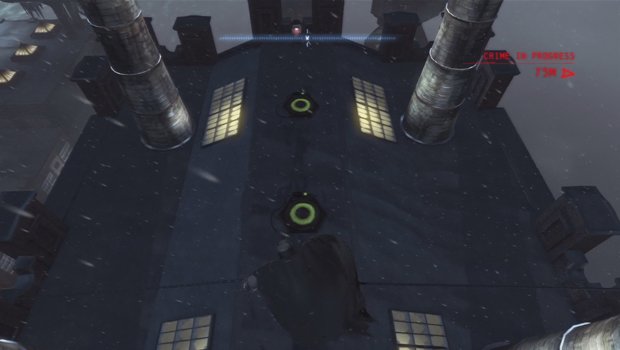
2. On top of the Koul-Brau Brewery, just south of the GCR tower, you will find three pressure pads on the roof and the locked data pack at the far end. To get the data pack you need to hit all three pads without touching the ground. Stand on the first, the farthest from the lock and use the remote batclaw on the anchors attached to the two smoke stacks beside you. Grapple up and then glide down to the second pad. Now shoot a diagonal line from the next anchor ahead of you to the middle one. Grapple up and you will now be able to glide down to the third pad easily, opening the lock.
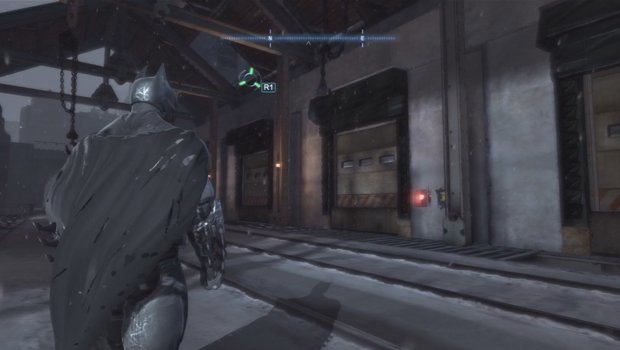
3. To the south of Coventry, you can follow the train tracks to the end of the line. When you reach the end of the tracks, look for the locked data pack beside the set of large doors. Use the sequencer on the lock to retrieve the pack.
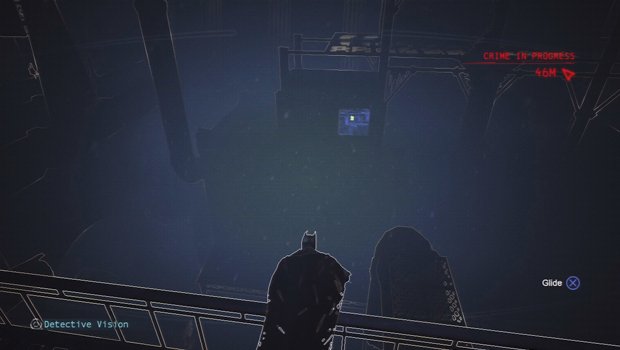
4. Directly south of the entrance you use to get into Lacey Tower, there is a wall of glass that you can glide over to and smash through. Do so and the data pack is inside.
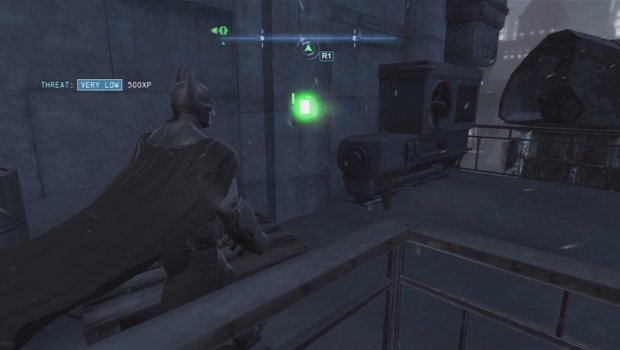
5. Before you enter the doorway that takes you into Lacey Tower, go to the right of the door a few steps and you will find the data pack on the wall there.
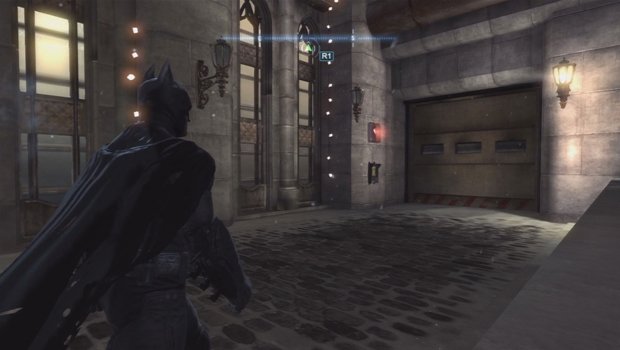
6. At the northwest corner of Lacey Towers, you can find this data pack on the side of the building beside a loading door. Simply hack the panel the sequencer and grapple it down.
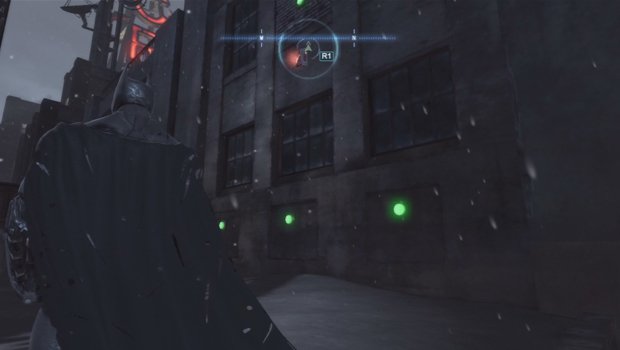
7. Just east of the radio tower, there will be four lights on the south side of a wall. Hit all four lights with your batarangs and the data pack will be yours.
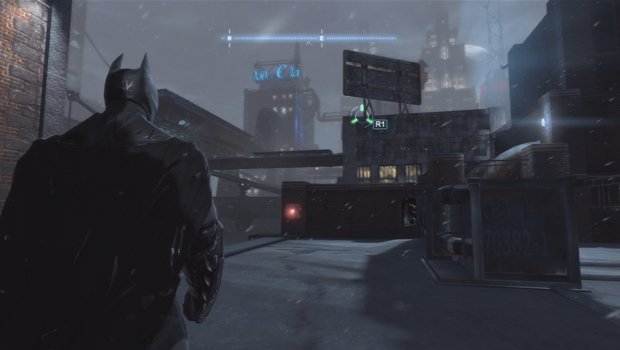
8. Just south of the Cale-Anderson sign, one building south of the My Alibi nightclub, you can find this data pack on the roof. Simply use the shock gloves on the generator beside it to open the lock.
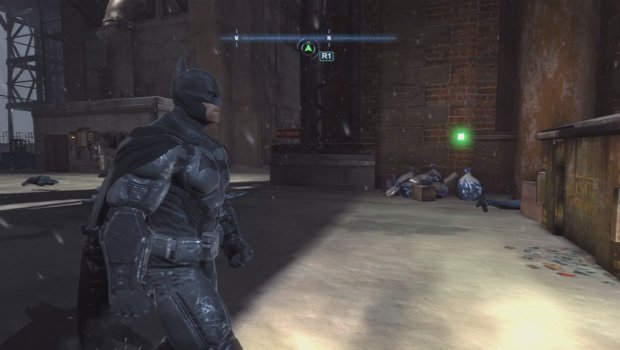
9. At the base of the Cale-Anderson building, on the southwest corner, you can find this data pack on the wall. Nothing fancy is needed to get it other than to beat up a few fellows hanging around.
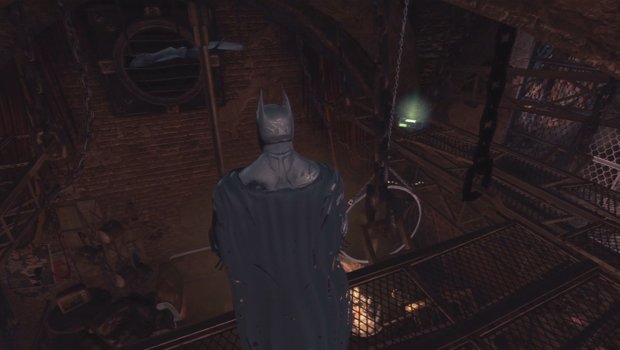
10. When you enter the My Alibi Nightclub after starting the Bird side mission, fight the group of enemies there and then once all is quiet, grapple to the cage above the main floor to find the data pack on it.
Diamond District
Extortion File 15
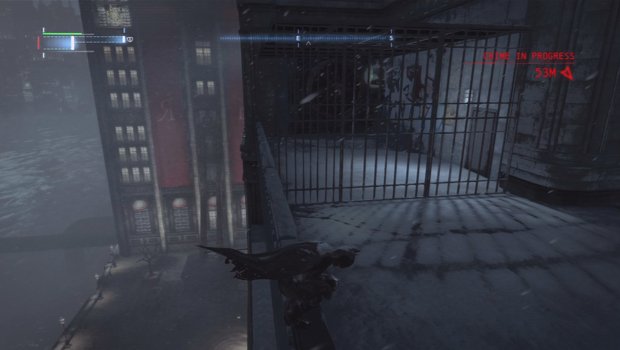
1. On the north side of the GCR building, you can find this lower balcony. To reach it, you will need to swoop down from the story above since it won’t actually let you grapple on the lower edge. Swoop in and simply grapple down the data pack.
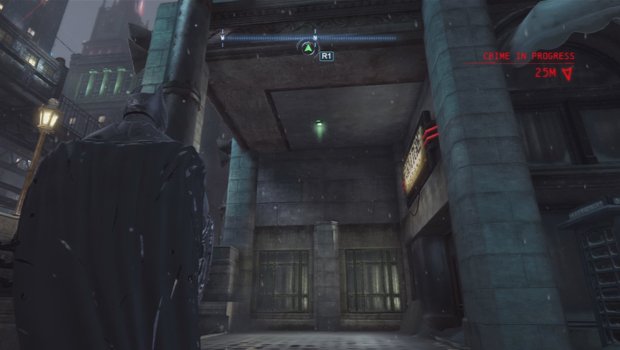
2. At the southwest corner of the GCR tower building, on the street level, you can find this data pack hanging out on the ceiling.
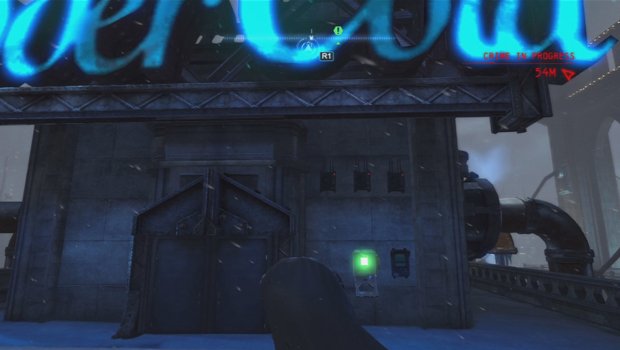
3. In front of the sign at the Soder Cola building, there will be three signal jammers that need to be taken out before you can grab this data pack. Take them down and then hack to the terminal to get it.
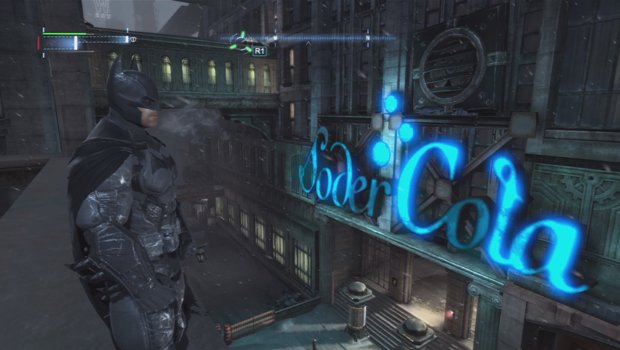
4. Directly in front of the entrance to the Soder Cola building, you can find this data pack to the right of the entrance. Simply hack the terminal three times to gain access to it.
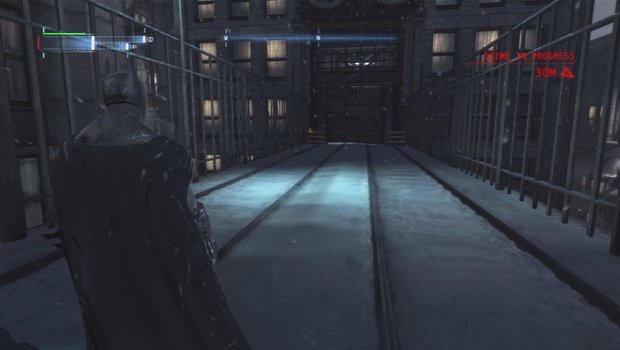
5. On the train bridge right beside the Batwing launch map marker, you can find a wall at the end of the track that can be blown up. Do so and blow up the next two walls as well to finally reach the data pack on the ground.
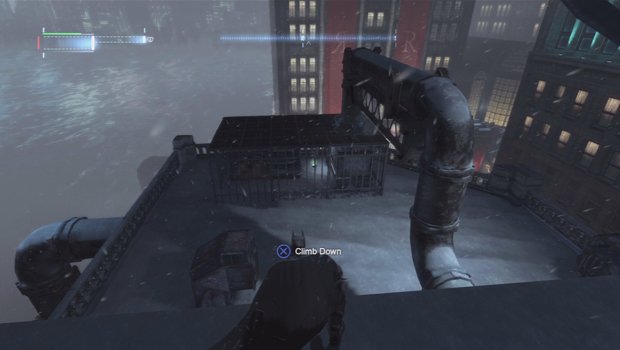
6. On the lower roof of the building just north of the GCR tower, you can find this cage with two pipes billowing steam. Use the glue grenades on the pipes and then walk in to grab the data pack.
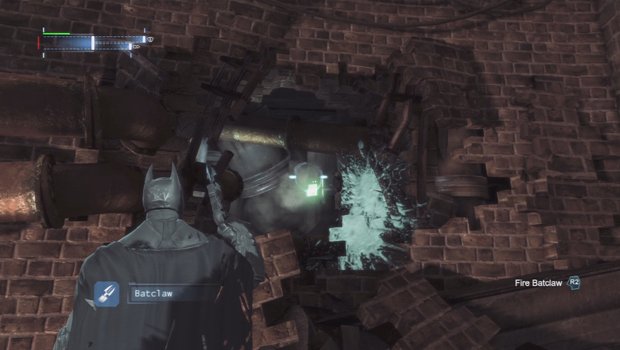
7. When you enter the parking garage, there will be a small alcove with steam pipes blocking the open data pack. Use your glue grenades on the pipe and grapple the pack.
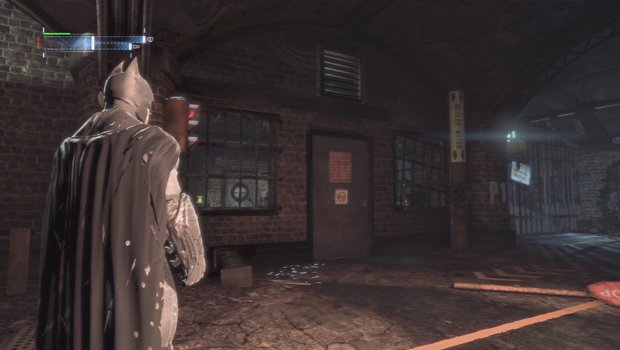
8. When you are inside the parking garage of the hotel, look on the left side to find this grate above a door. Pull it down and climb into the room to find the data pack on the floor.
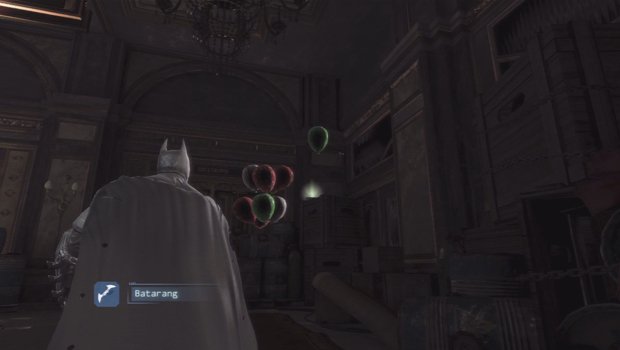
9. When inside the Royal Hotel, take the elevator up from the parking garage and as soon as you exit, there will be some balloons on your right. The data pack will be behind them.
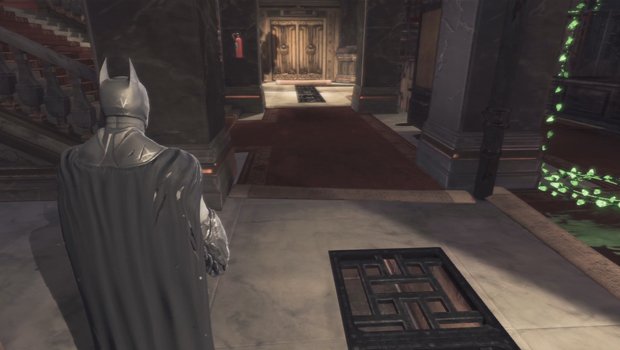
10. When you are inside the Hotel Lobby, go through the floor grates at the bottom of the large set of stairs to find this there.
Diamond District
Extortion File 16
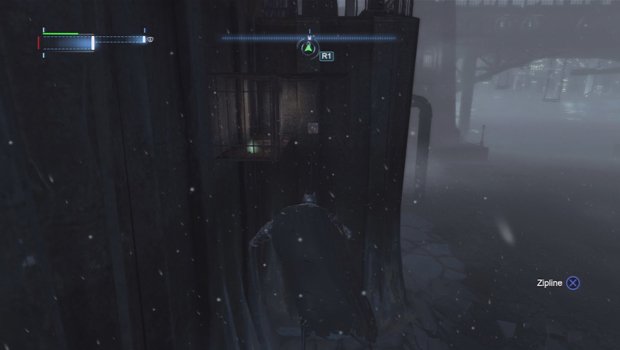
1. Along the north shore of the Diamond District, you will find this cage along the cliff face. Use the remote claw on the anchor points and then simply walk along the rope the cage opening to retrieve it.
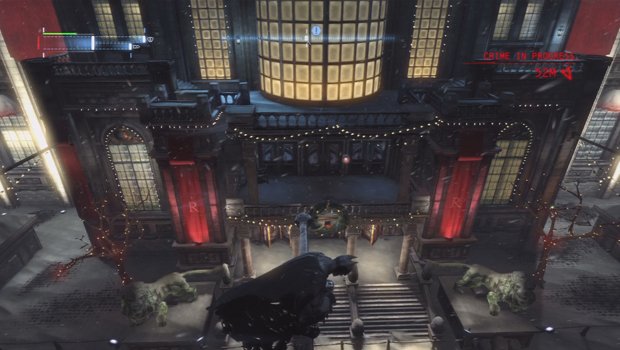
2. At the very front of the Royal Hotel, climb up to the first balcony and use the shock gloves on the generator to open the lock on the data pack. Simply walk over and grab it before the generator times down.
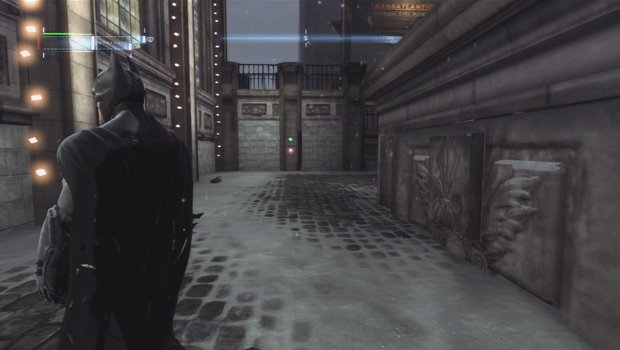
3. To the right side of the front of the Royal Hotel, there will be a lone pressure pad behind a wall. Step on it and a green light will appear across from you. Simply hit it with a batarang to unlock the data pack.
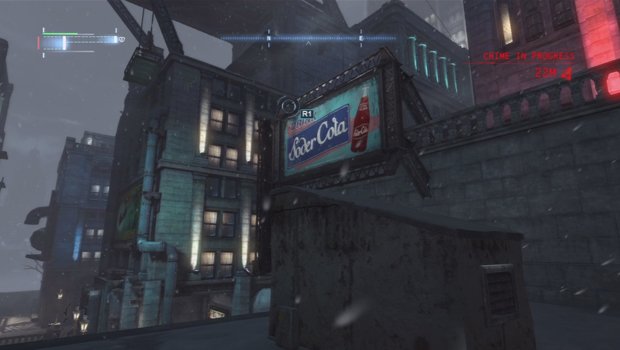
4. To the southwest of the GCR tower, you can find this small shack in the corner of two buildings. Simply blow open the entrance to walk inside.
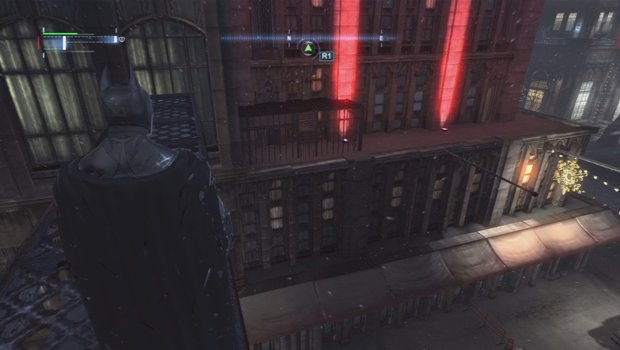
5. East of the Hamilton Hills building, look for this cage along the red lights on the side of the building. Grapple the grate off the side of the cage and then swoop down to climb inside and retrieve the data pack.
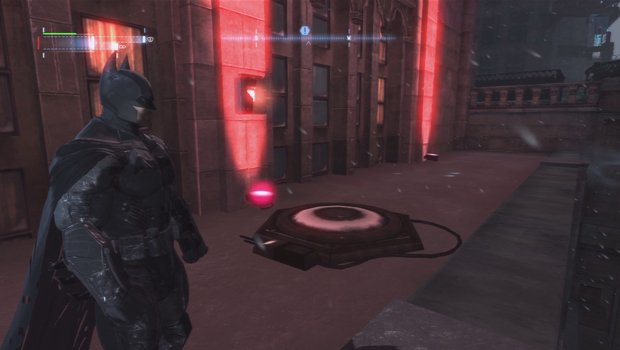
6. Directly west of the Royal Hotel, look for the red lit ledge and there will be a pressure pad there. Step on the pad when it glows green and grab the data pack right beside it.
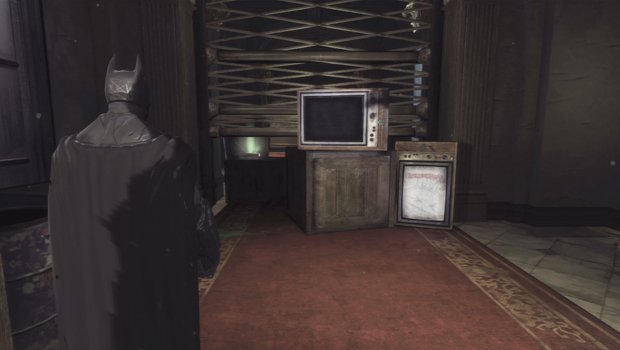
7. Once you have received the Shock Gloves, this data pack will be behind the second gate that you can open with them, in the same hallway as the first.
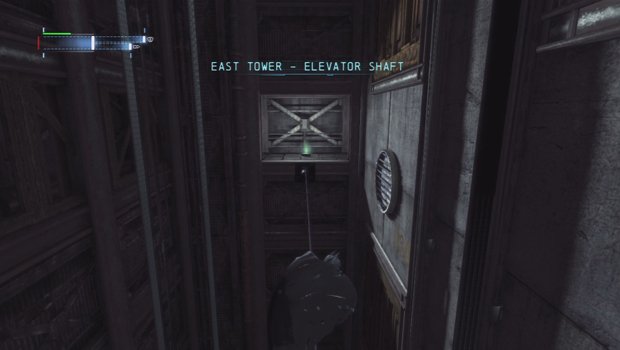
8. When you need to shock the generator on the elevator to get up to the 19th floor, ride the elevator to the top and then use the remote claw on the anchors above at the top of the elevator shaft. Grapple up to the line and crawl across to the opening where the data pack is.
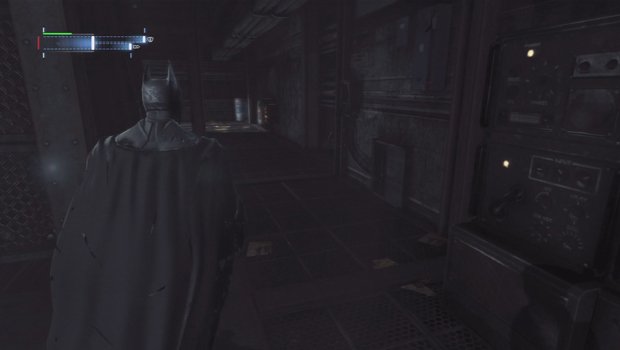
9. When you are near the very top of the ventilation shaft, you will come to this corridor with an opening on the right side. Crawl in to it and then grapple up under the large fans. Shimmy to the right a bit and the data pack will be on the ledge there.
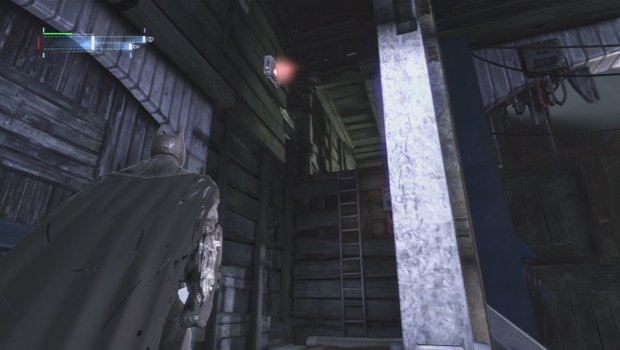
10. Once you enter the Joker’s ballroom, In the next hallway around the corner where the guards are in strapped in chairs in the water, there will be a data pack high on the wall to the left. To open it, you’ll need the range extender on the sequencer to hack the panel that is above the doorway high on a beam.
Diamond District
Extortion File 17
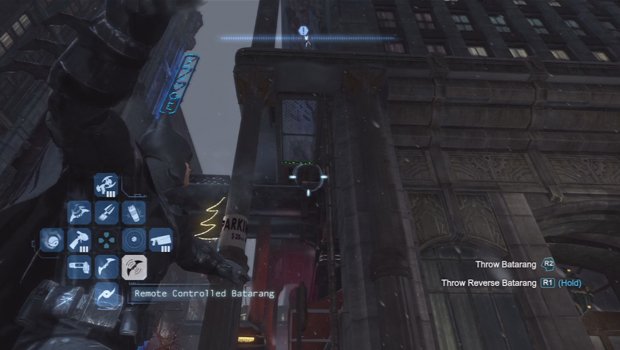
1. West of the GCR tower, and on the main streets, look for this intersection and then look up to see the green Christmas lights. You’ll need to toss a remote batarang through the opening within the green lights and make the batarang fly to the end of the passage to hit the green switch. Once hit, grapple up to the top of the green Christmas lights and grab the unlock data pack there.
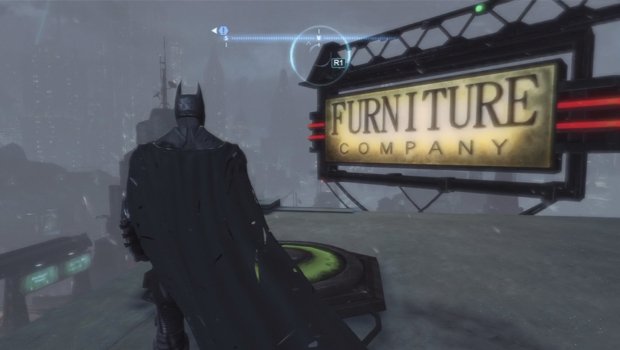
2. On top of this building right next to the furniture billboard, directly west of the Batwing launch point, there will be a pressure pad that will light three green lights on top of the billboard. Quick-hit the three lights and step off the pad to hit another three that light up. Hit all six within ten seconds and the lock for the data pack to the right will open.
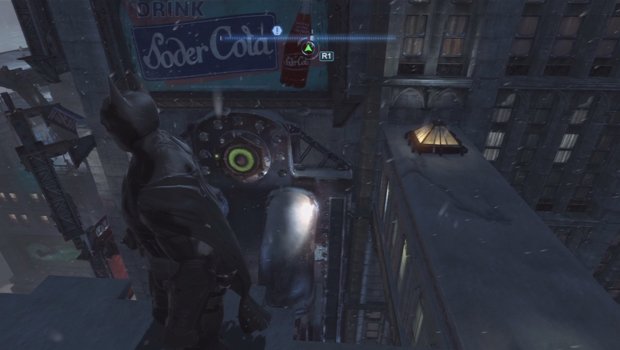
3. Just west of the Diamond GCR tower, you can find a billboard for Soder Cola on the west side of a building. Between the two buildings there will be two pressure pads. Just off the westernmost building and then bounce off and glide over to hit the other pressure pad to open the data pack lock above the second pressure pad.
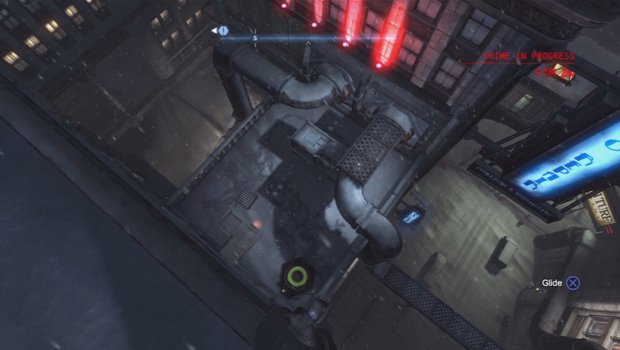
4. To the east of this red lit building, there will be a pressure pad and a vent. Tear the grate off the right side of the vent and when you step on the pressure pad, electricity will spark in the electrical panel across from you. Toss a batarang into the electricity and then u-turn it and swoop it around to enter the vent and hit the fuse box inside. Once done, grapple the data pack down.
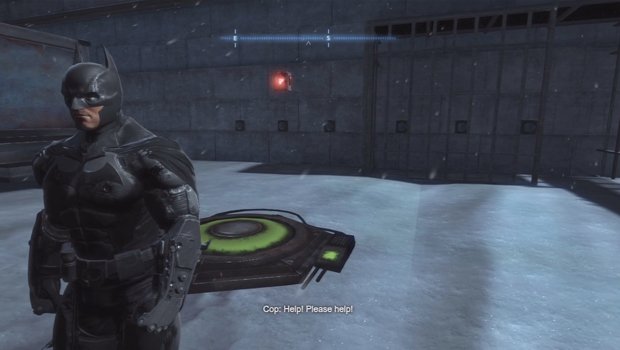
5. On the north side of the Hamilton Hill building, on the low roof, there is a pressure pad along with six lights, three of which are behind bars. Use the explosive gel on the three behind bars and then step on the pad. Quick-throw to hit the three open lights and then detonate the gel to hit the other three. Grab the data pack once all six have been hit.
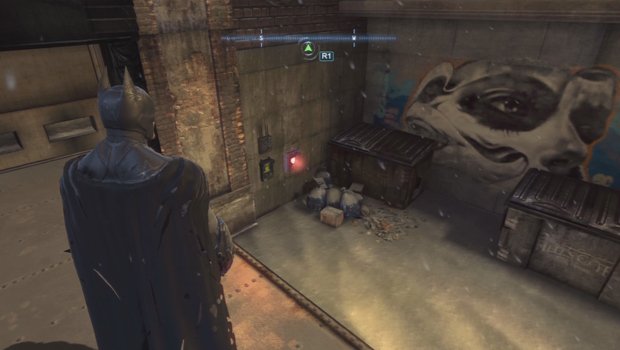
6. Just to the east of the Hamilton Hill building, drop down to the ground and behind a truck will be this data pack. Hit the jammer with the Disrupter and then hack the panel to retrieve it.
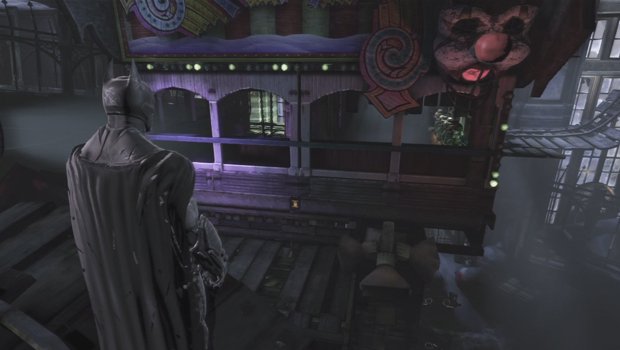
7. Inside the Joker’s Ball room, after you have dealt with the large crowd, grapple up to the balcony and activate the switch for the Jack in the Box. Once it pops out, create a rope with the anchor point and crawl half way across. Before reaching the other side, jump down to the right on the tracks in front of the purple building and there will be a security device there. Hack it and the nose of the large clown will pop open revealing the data pack inside.
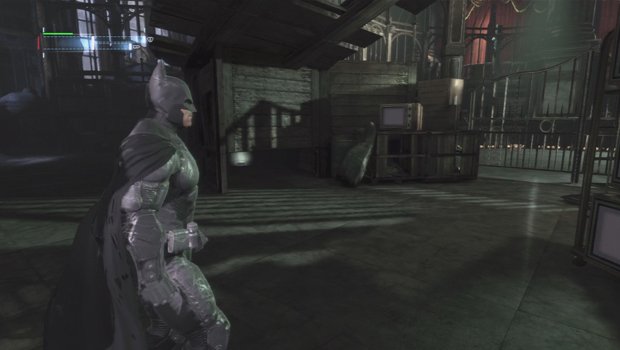
8. When you are in the large room with the roller coaster tracks, drop down to the main floor and just before you enter the gate to fight the crowd of bad guys, look to the left to find this data pack under the tracks.
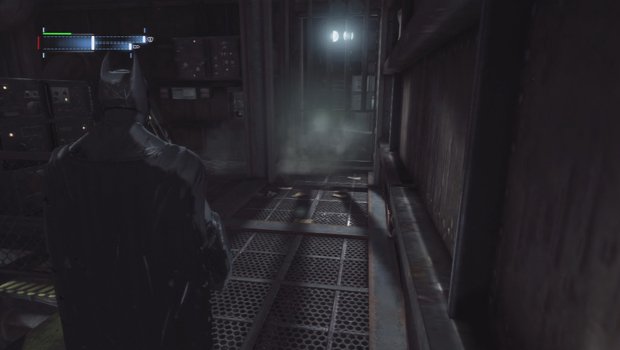
9. Once you reach the top of the ventilation shaft in the west tower, there will be a pipe blowing stream beside a low opening in a barred door. Use the glue grenade on the pipe and then slide under to get the data pack on the wall.
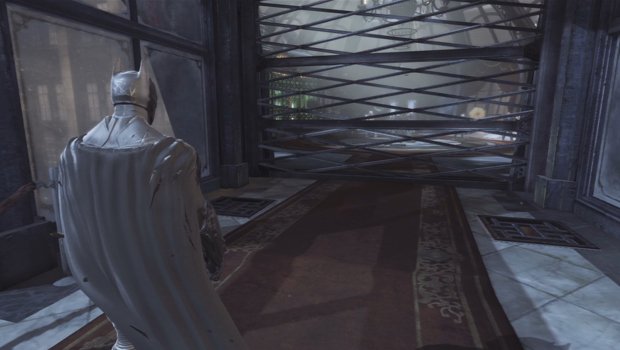
10. After you save the hotel employee and arrive at the closed gate to the Over/View restaurant, enter the grate on the side of the hallway in the floor and the data pack will be in the centre.
Burnley
Extortion File 18
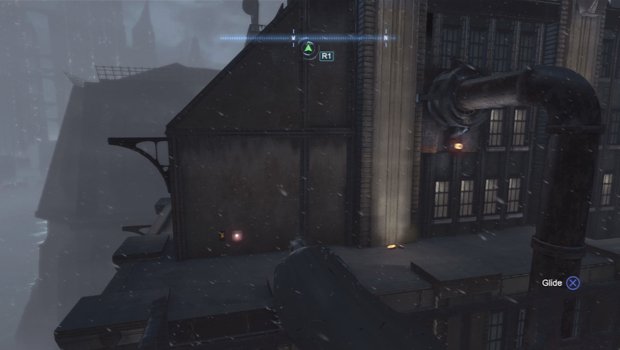
1. On the east side of the GCPD building, you can find this data pack on the side of the building. A simple hack is all that’s needed to retrieve it.
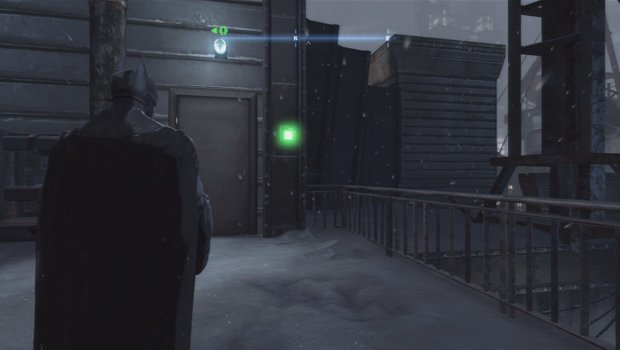
2. This can be found on the roof of the GCPD to the north side in the centre.
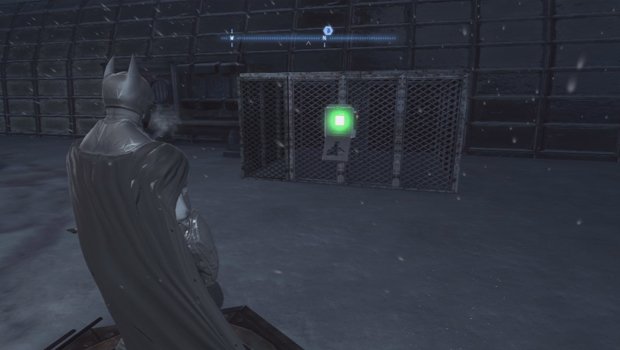
3. For this Data pack located on the roof, south of the GCR Tower, you will need to stand on the pressure plate in front of the cage and toss a remote batarang inside to hit the green button. Once you do, toss another one through the roof of the cage and hit the second green button to access the data pack.
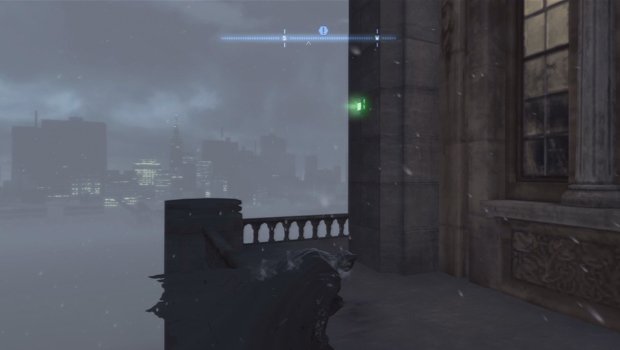
4. At the very southeast corner of Burnley, walk along the ledge behind the building there to find the data pack up on the wall near the corner.
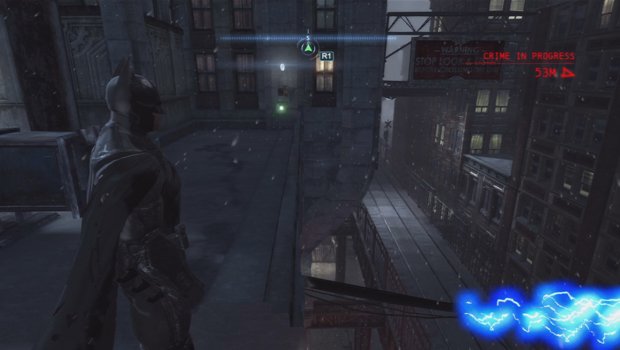
5. Directly in front of the Hamilton Hill, at the base of the GCR tower, and to the left of some electrical wires, this data pack will require you to toss a batarang through the electricity and then up onto the balcony to hit the fuse box on the wall. Try to throw the batarang through the loop on the wire to make sure it goes through.
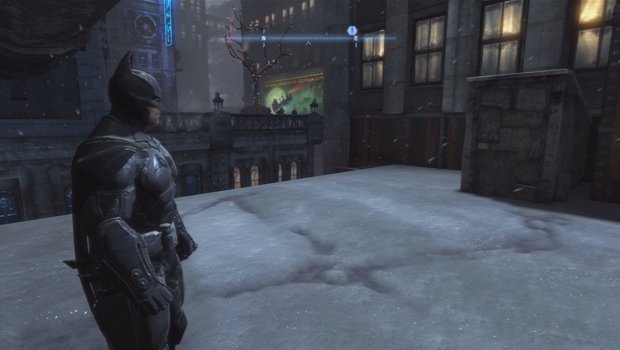
6. Along the north border of Coventry and Burnley, look for this small shack that is just east of the two large smoke stacks. Blow the opening of it and grab the data pack inside.
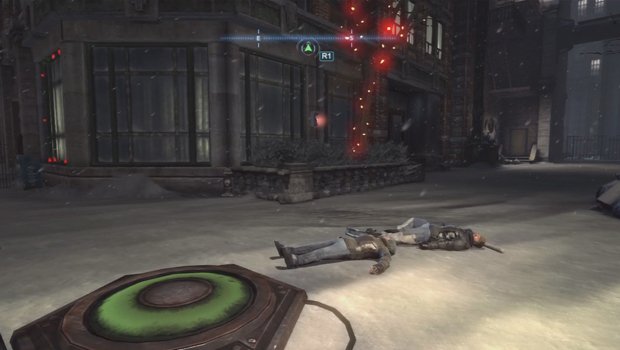
7. Just to the east of Enigma’s hideout, there are some red lit trees on the ground. Step on the pressure pad there and then quick-throw some batarangs at the green lights that appear up and to the left under the bridge. Once all fire lights are hit, the data pack will unlock ahead of you.
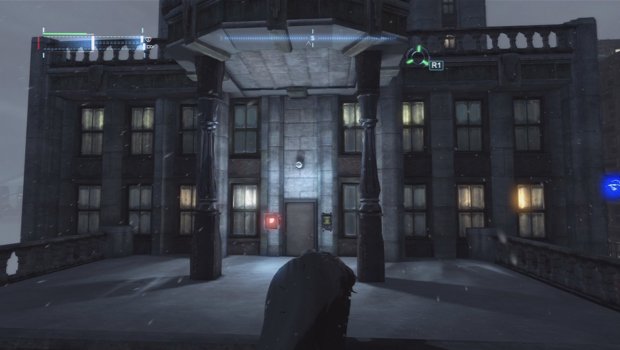
8. Directly to the east of data pack 5, there is a doorway under a small roof with a security console and a locked data pack. Hack the panel three times and the data pack will be yours.
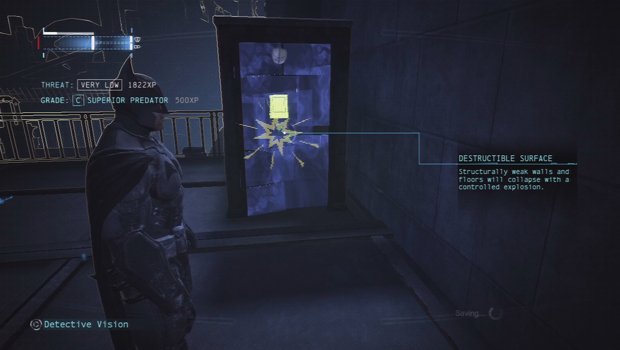
9. This can be found inside a small shed near the roof of the Hamilton Hills building. Blow open the boards blocking the entrance and then enter to grab it.
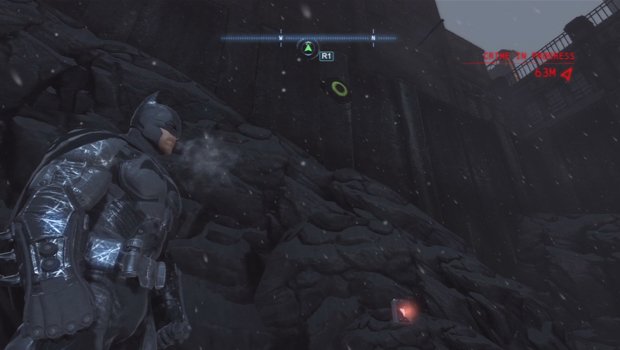
10. On the eastern shore, just inside the Diamond District, there will be a pressure pad up high on the cliff face and the data pack locked below. Grapple up to the pole above and then glide down to hit the pad. Drop to the ground and then grapple the data pack with the few seconds allowed.
Burnley
Extortion File 19
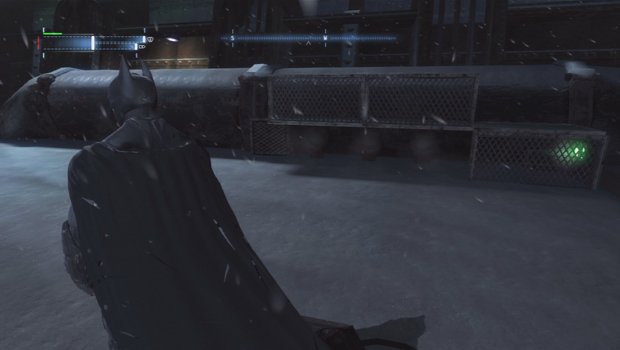
1. Just north of the GCPD, there is a large green billboard. Just to the south of the billboard, you will be able to see a pressure plate on the roof. Step on it and then toss three glue grenades at the pipes. Once they are clogged, crawl in the open end of the cage to get the data pack.
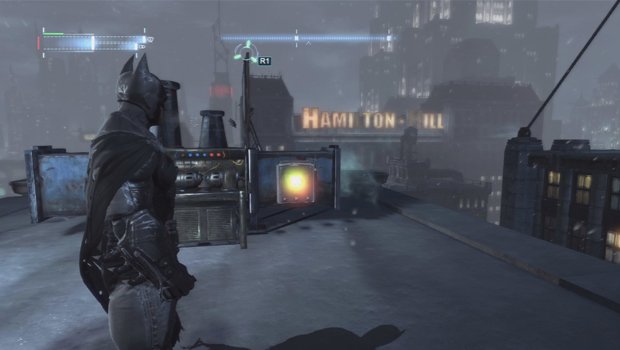
2. Just across from the Hamilton Hills building in south Burnley, you can find this generator on the rooftop. Simply use your shock gloves on it to release the data pack.
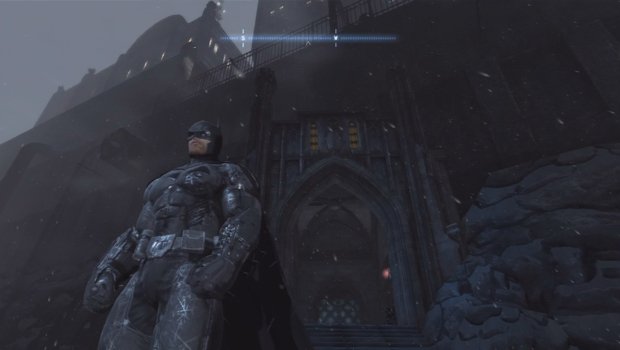
3. Along the eastern shore, just northeast of the radio tower, there is a doorway with stairs leading up from the ice. Use the shock gloves to hit the generator and then quickly grab the data pack with the batclaw.
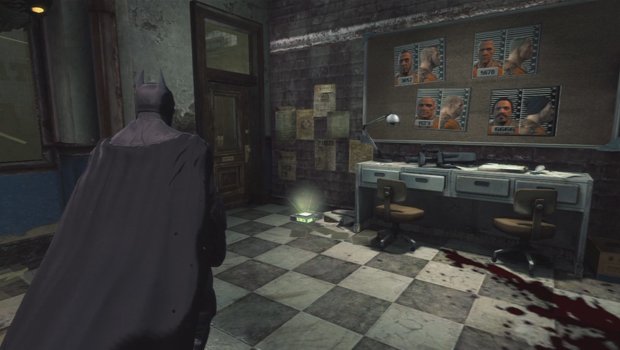
4. When inside the GCPD, just after you pass the room full of SWAT officers, you will come to an office where you can break through the glass. Hop through to find this in the corner.
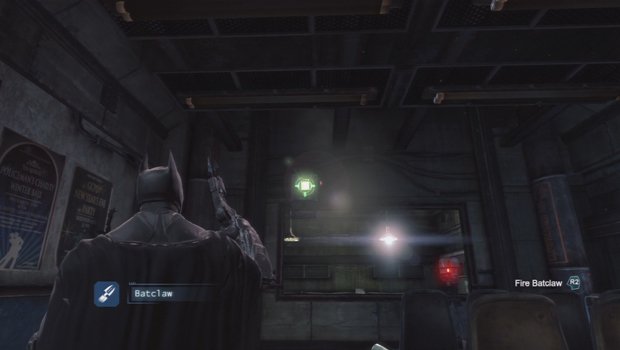
5. Inside the interrogation room in the GCPD, there will be a green switch on the wall beside the glass. Hit it with a remote batarang and then grapple the data pack down when the flap covering it opens.
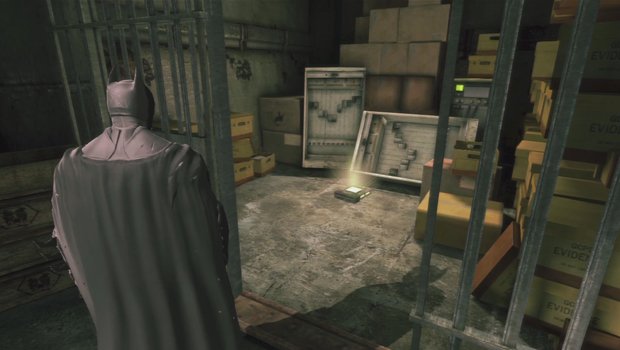
6. When you reach the Evidence locker in the GCPD, use a remote batarang to go back through the vent and hit the electricity and then u-turn it back through the vent again and hit the fuse box to the right of the cell with the data pack inside.
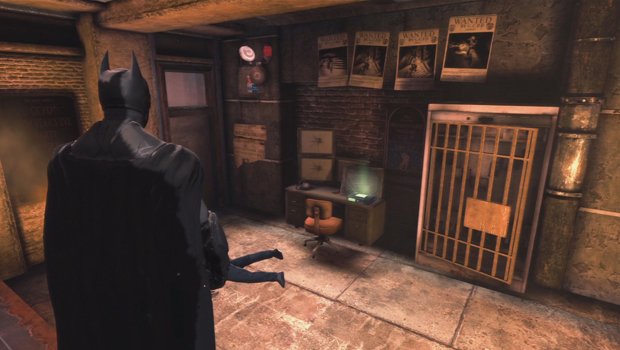
7. Inside the office on the upper floor of the cell block access, smash through the glass on the far side to get this.
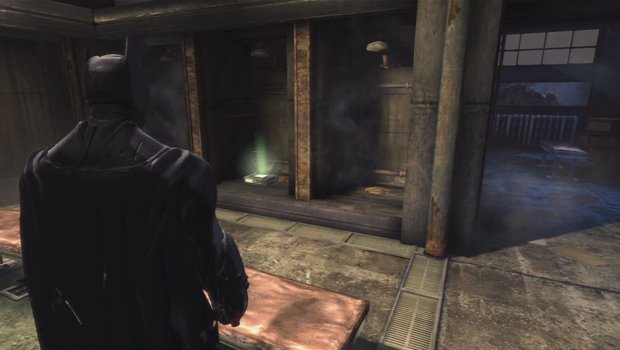
8. After you have received the shocking gloves, you can return to the SWAT managers office in the GCPD and use the generator on the door to enter the locker room. In here you’ll find a data pack in one of the showers.
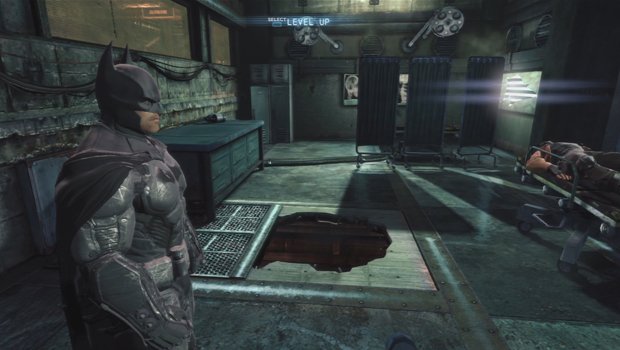
9. When you go to the morgue in the GCPD, blow open the section of floor beside the table before leaving.
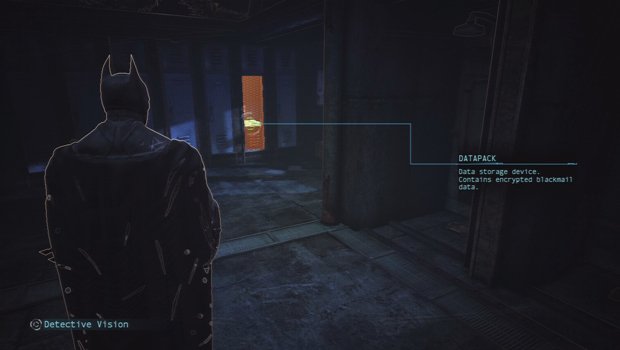
10. When you have made your way to reception in the GCPD, you can enter the second locker room that is through the back room. It’s much easier to reach here once you have finished the game as the station will be empty. Once in the locker room, pull open the locker with the batclaw to grab the data pack.
Burnley
Extortion File 20
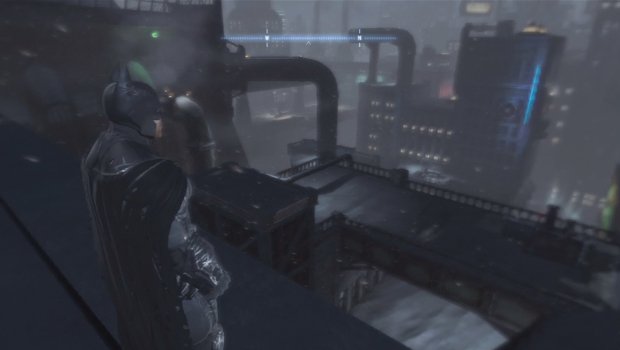
1. To the west of the Hamilton Hill building, there will be a small bridge with some vents on top of it. Simply crawl inside the opening in the vent to grab the data pack.
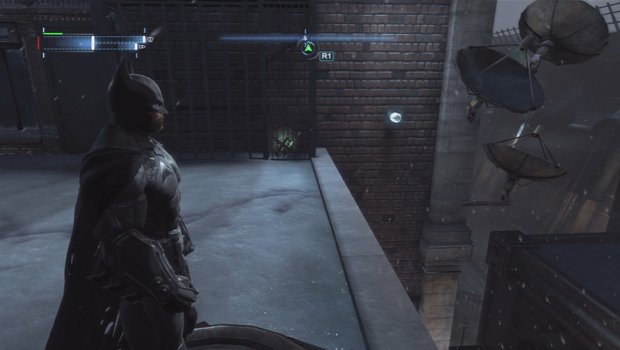
2. On the middle roof of the hotel, that is a building north of the GCPD, there will be a ball inside a cage and two pressure pads. Use the generator with the shock gloves and then step on the two pads to move the ball down to the lower right corner. Once it is, walk up to it to get the data pack.
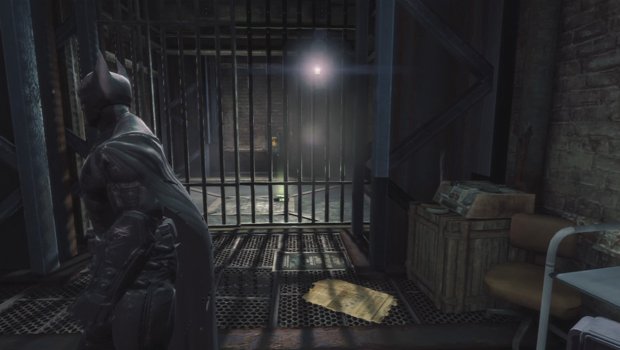
3. After you pass through the second locker room through the air vent and listen to the conversation between Barbara and her dad, there will be a cell that has a data pack in it. You will need the range amplifier to be able to reach it however.
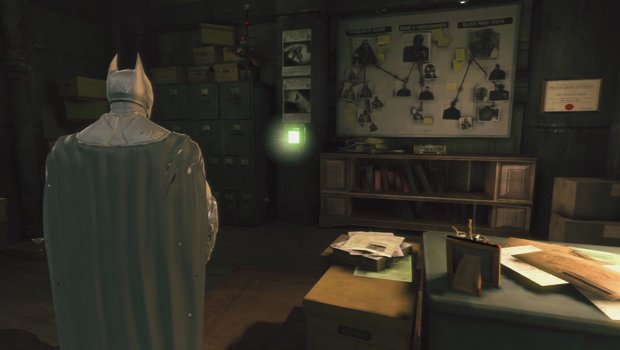
4. After the battle in the large GCPD Bullpen with the 7 guards, go to the corner office across from the large clock and enter it. This will be Gordon’s office and the data pack will be on the wall beside the desk.
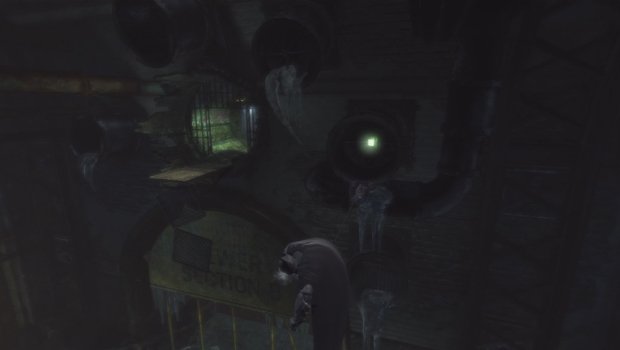
5. As soon as you enter the sewers, go to the first large room and use the remote batclaw on the hook to the left. Hop on the rope and then look behind in the pipe to find the data pack inside.
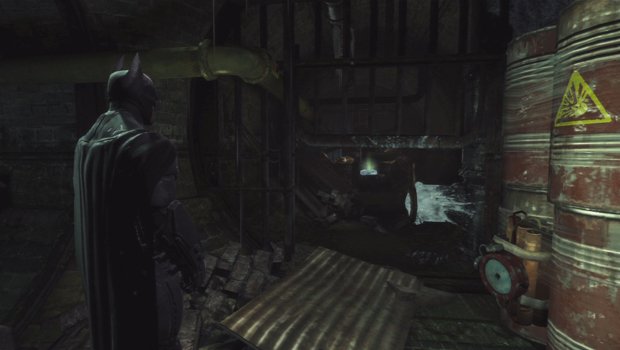
6. Once you enter the Burnley Sewers West, climb down the ladder and to the right at the first tunnel will be a pipe blowing steam with a data pack behind it. Use the glue grenade once you have it and slide under the gate to grab it.
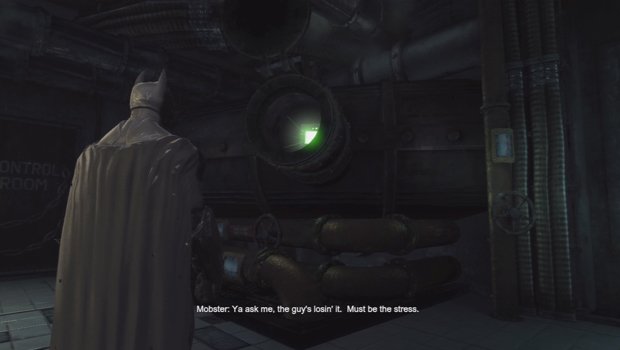
7. When you reach the GCPD Telecom room in the sewers, use the batclaw to open the pipe just to the right of where you enter. Use the claw again to grab the data pack.
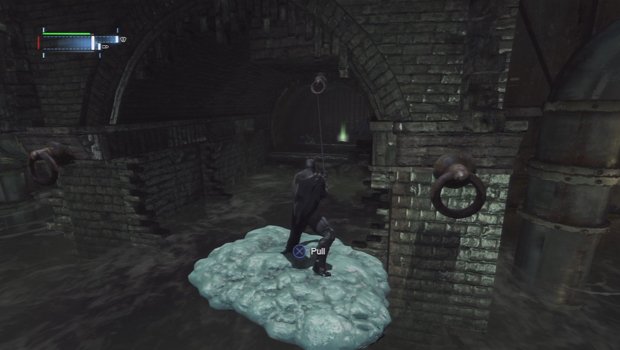
8. When you are in the Burnley Sewers and you come to the water below, instead of gliding over it use your brain boat and grapple forward and then to the west to the small alcove where the data pack is.
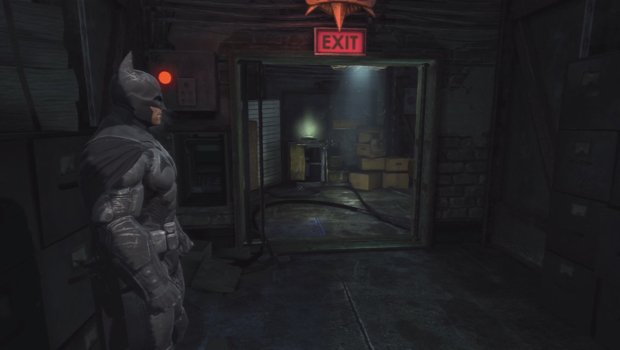
9. Once you have the Shocking Gloves, you can return to the GCPD by entering the sewers and this data pack will be in the first area to the left. Shock the wall panel and then you will have 15 seconds to hack the panel on the barred door.
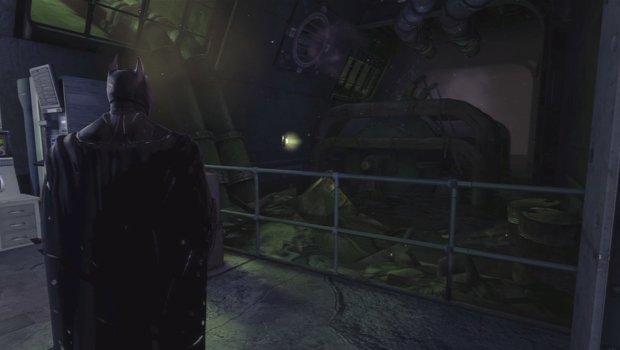
10. Inside Enigma’s HQ, take the elevator down and when you reach the first computer room, look to the right to see this on the wall.
Weekly digests, tales from the communities you love, and more
Jeff McAllister is a freelance journalist who has contributed to GamesRadar+ over the years. You'll typically find his byline associated with deep-dive guides that are designed to help you scoop up collectibles and find hidden treasures in some of the biggest action and RPG games out there. Be sure to give Jeff a thanks in the comments while you're completing all of those tricky Achievements and Trophies.


