Mordhau best weapons: fight to win with our guide to swords, loadouts and classes
Take out your enemies with ease by using our Mordhau loadout with the best weapons and armor
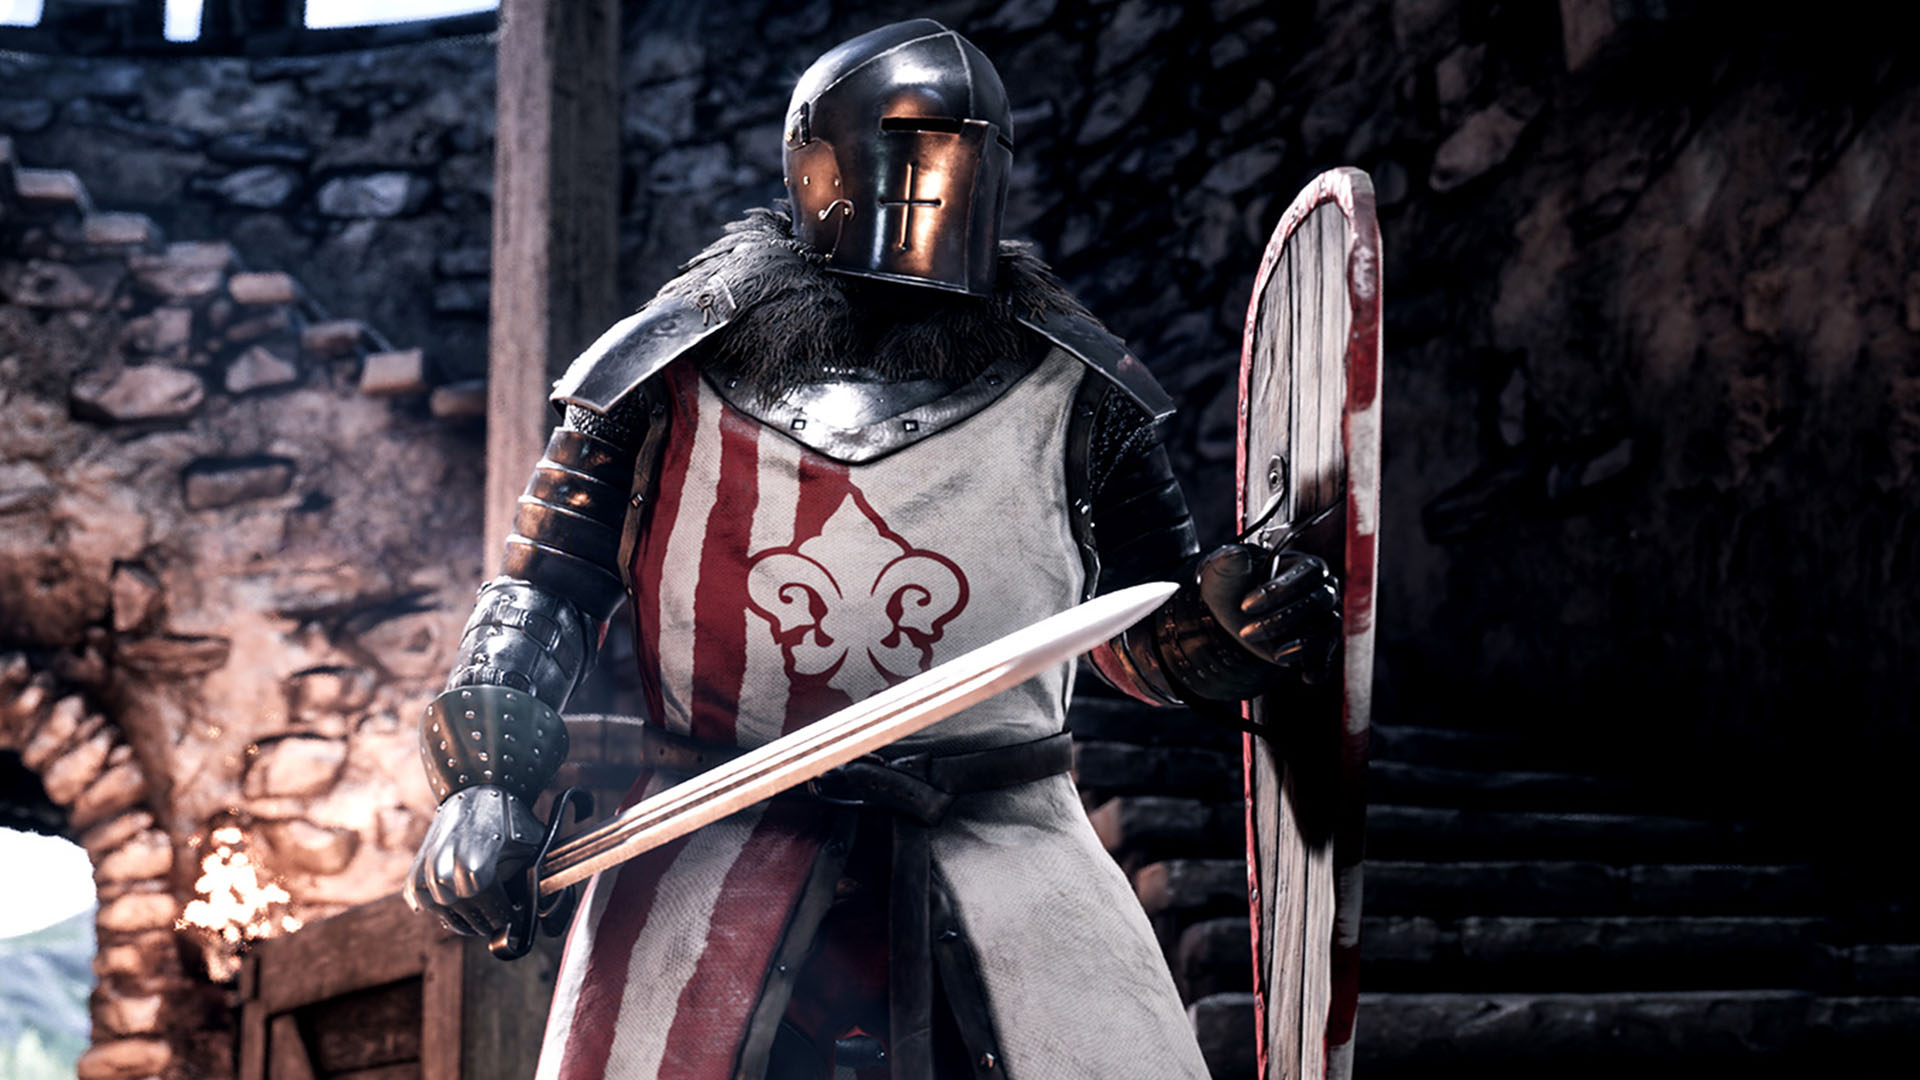
Skill with a blade is good, but you want the best Mordhau weapons to really win. With all the different swords, axes, and other sharp things to pick there's a lot to learn and master. That, and the best Mordhau loadouts can make the difference between medieval victory and defeat. So these Mordhau tips should help give you an armoured edge.
In fact, there’s so much choice it can be rather difficult to know which Mordhau weapons, armor and perks you should prioritise when making the perfect knight. Every class brings something different to the table and you’ll need to adapt your playstyle to unlock each weapon’s full potential. Swinging your sword around blindly will often reward you with a kill or two, but it’s often best to learn the basics before you begin lopping off heads. To get you started we’ve put together a guide that will go over the basics of creating a loadout in Mordhau, detailing the perks, armor, and weapons you need to obliterate your foes in the blood-soaked battlefields of Mordhau.
How to create a loadout in Mordhau
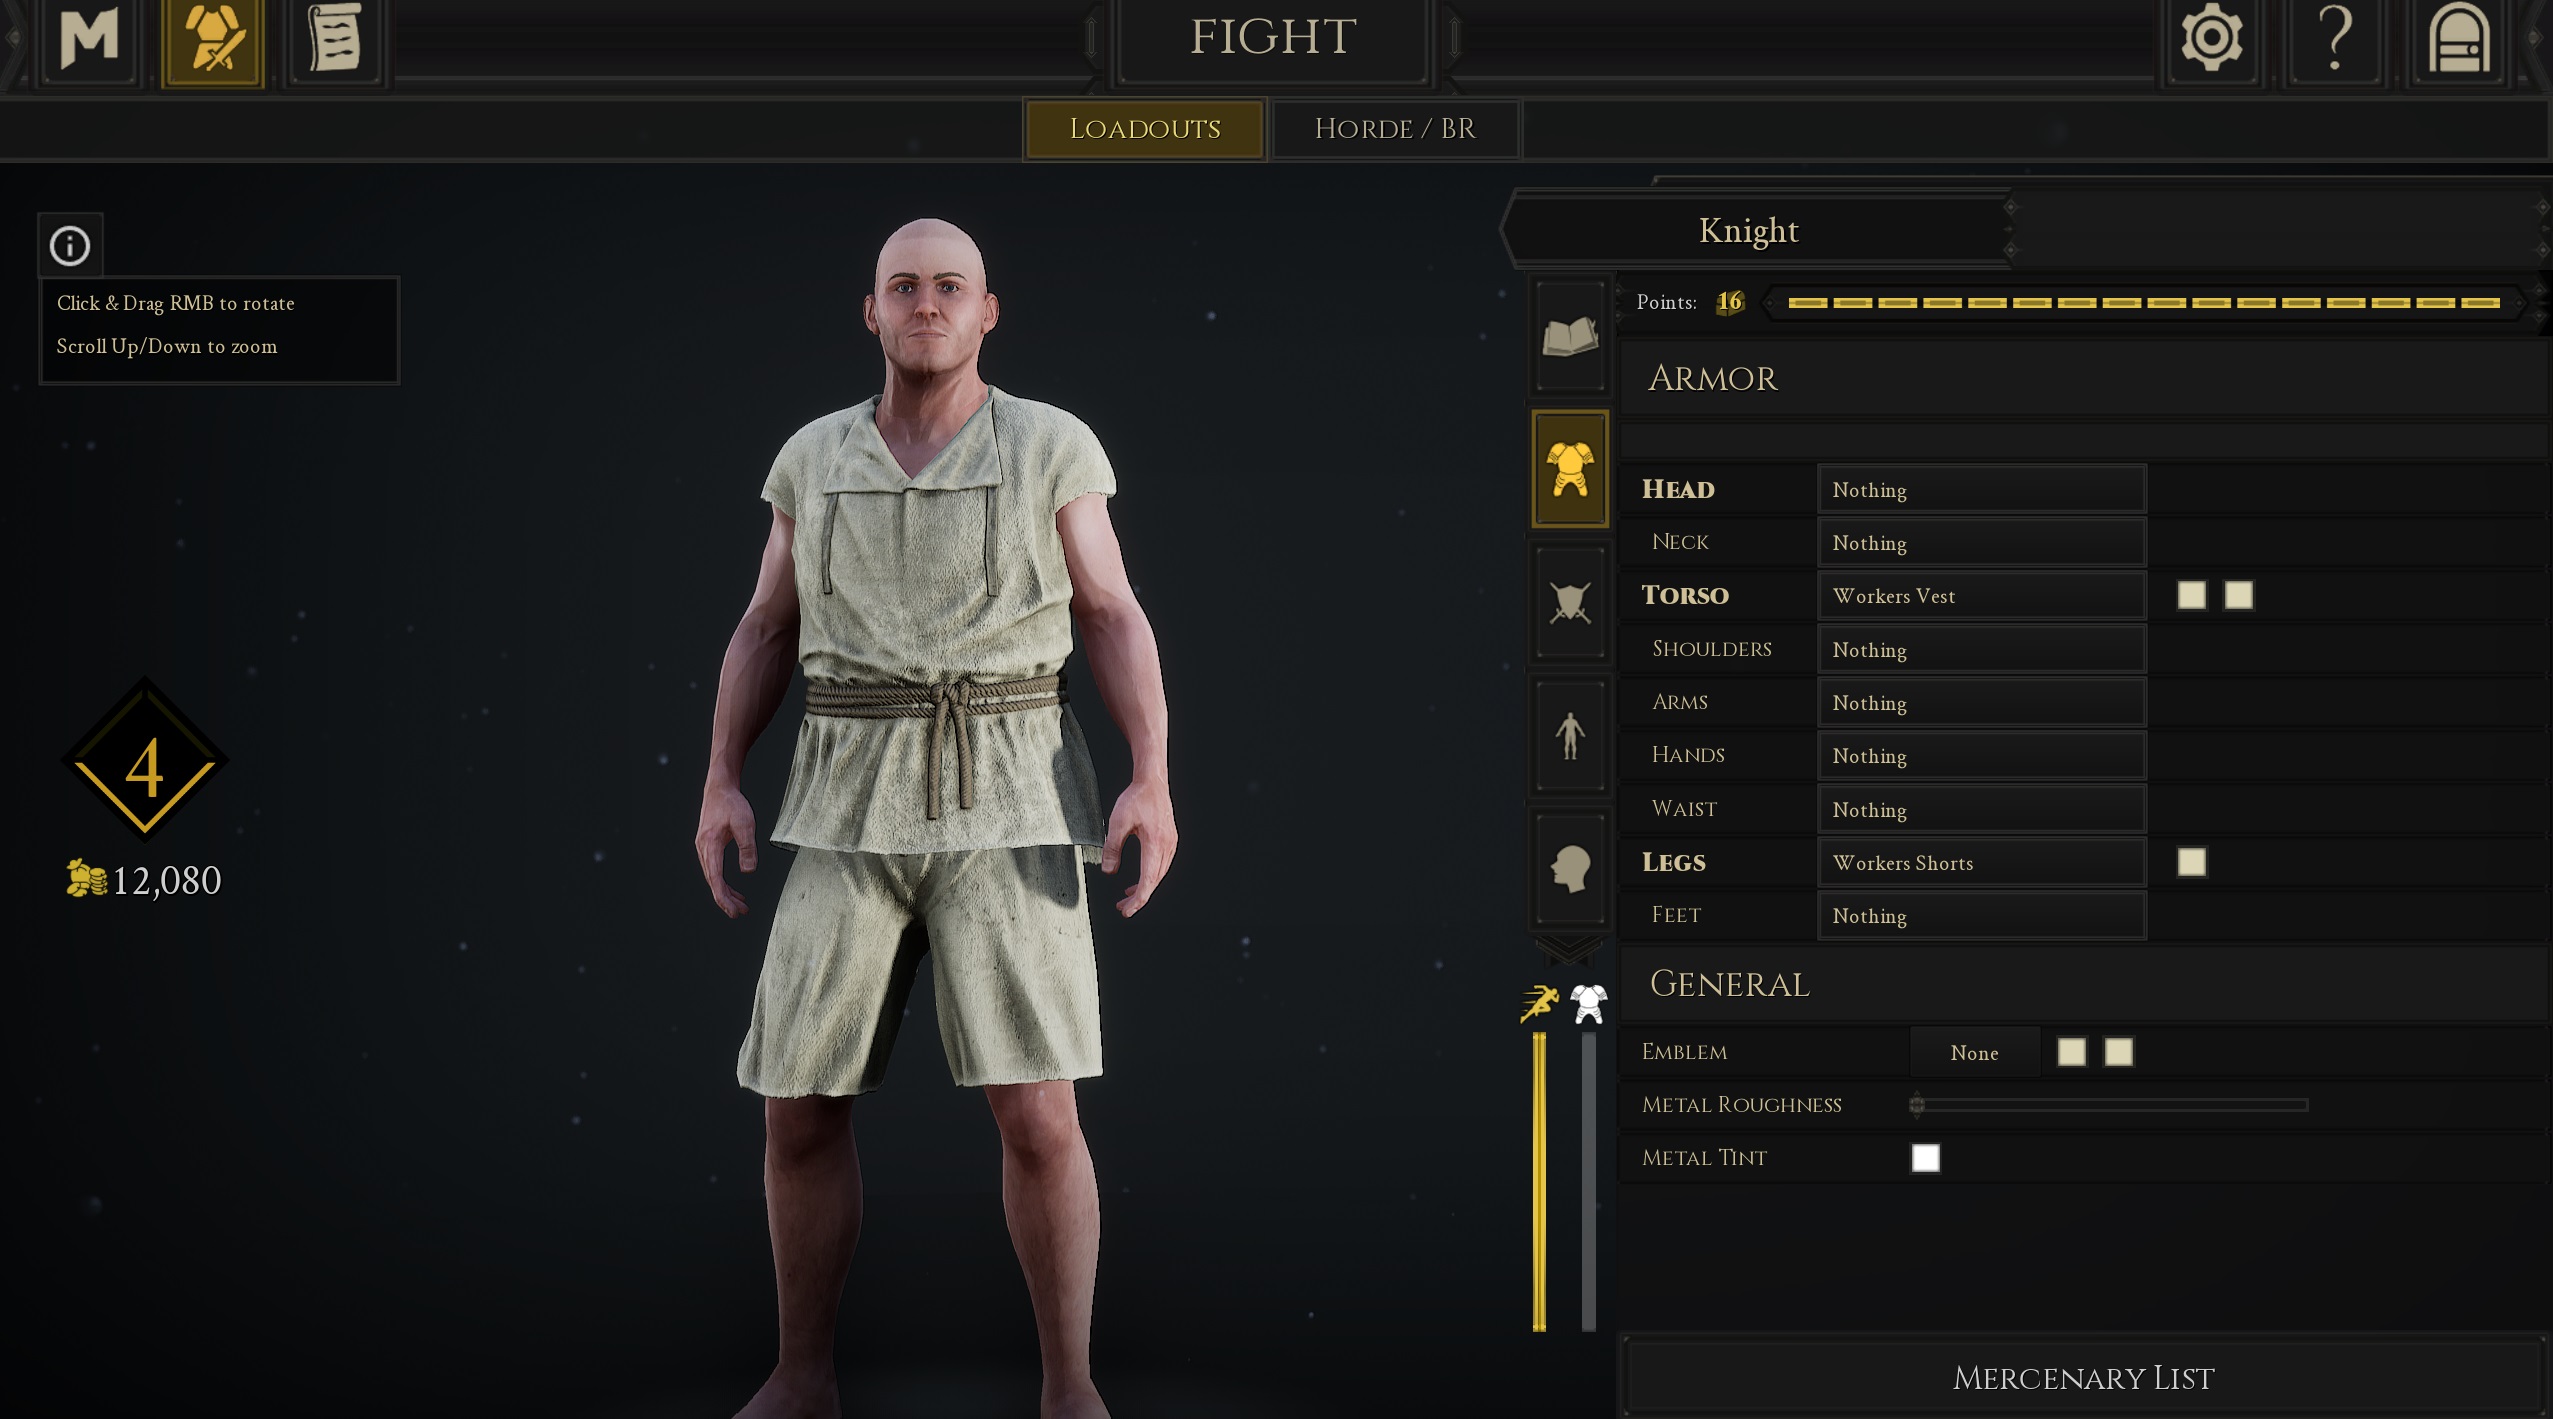
If you want to create your very own knight in shining armor in Mordhau, you’ll need to head on over to the Armory. The Armory can be accessed from the Home screen and is located in the top left corner, simply click on the armor icon and click on the “New mercenary” option to begin building your loadout. However, before you go purchasing that shiny new greatsword, it’s important to understand that each loadout has a maximum of 16 equipment points that can be spent. Every perk, weapon, shield, and non-cosmetic armor piece in Mordhau has an individual equipment point cost tied to it, so make sure you take this into account before purchasing any expensive gear. If you find yourself lacking the funds needed to obtain your ideal arsenal, then simply play a few games of Frontline to earn some gold.
Best weapons in Mordhau
While building a good loadout is largely down to what kind of play style you prefer, there are few weapons that really stand out amongst the crowd.
Short Spear
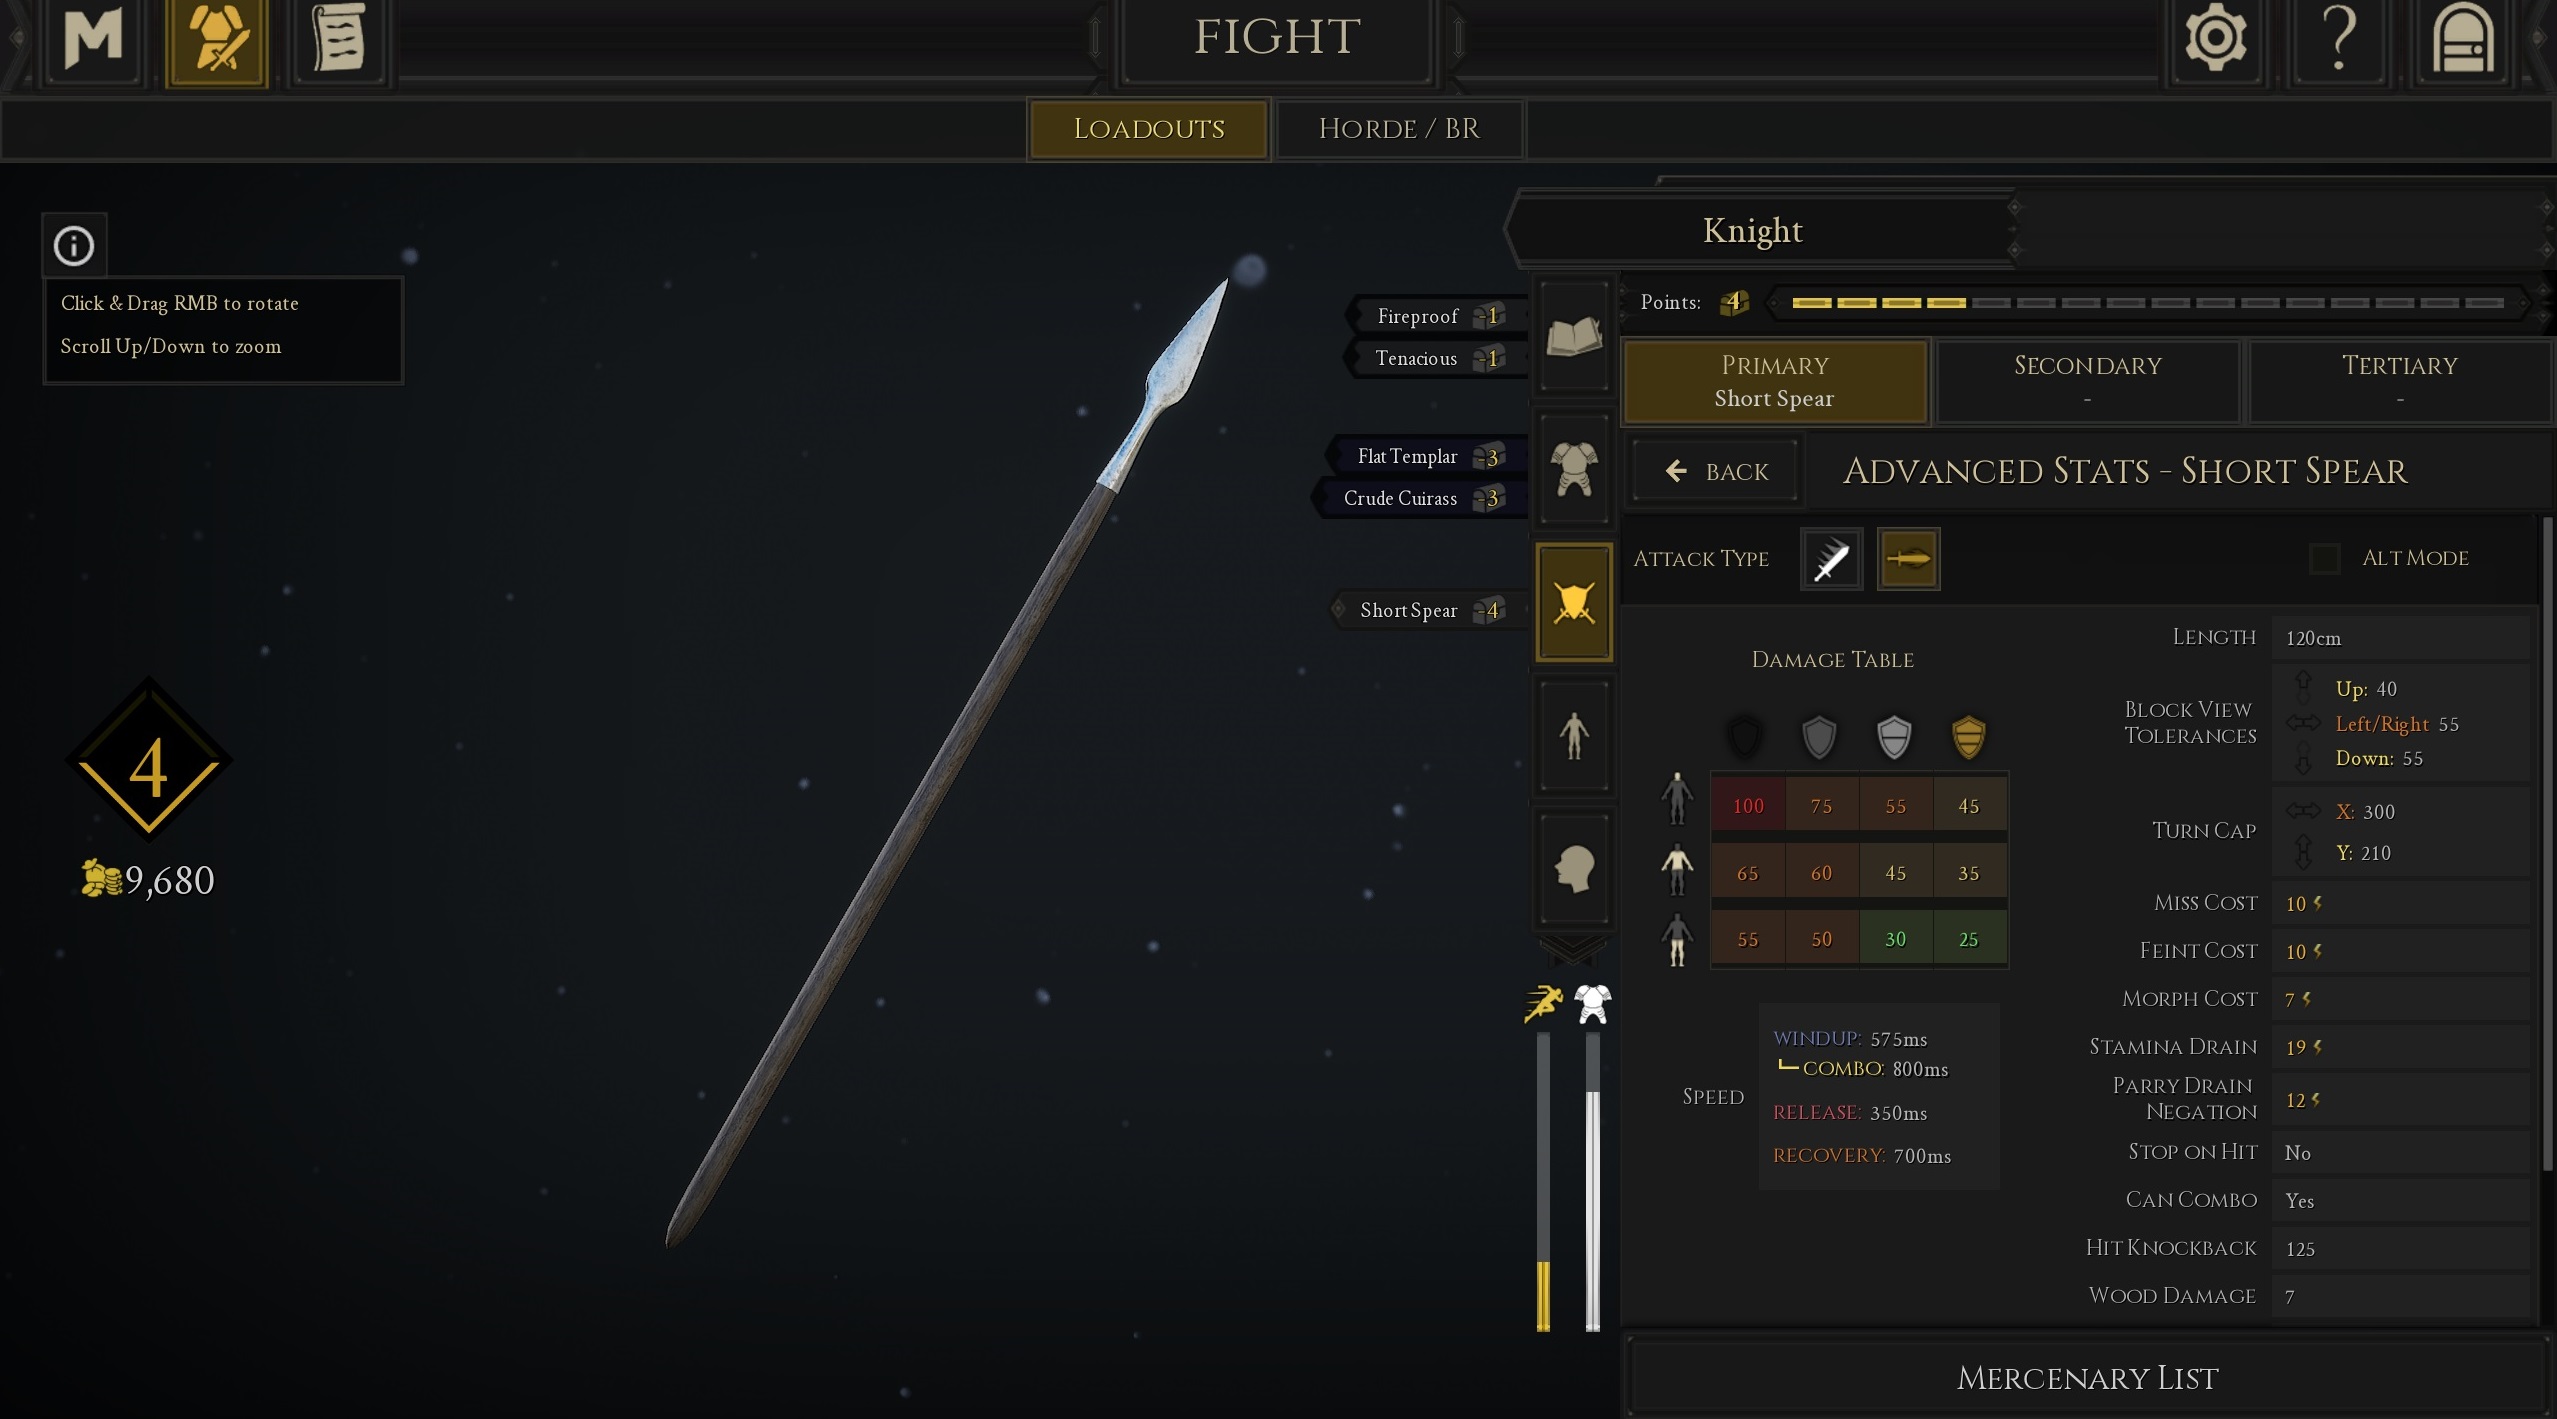
- Equipment cost: 4
- Head damage: 100/75/55/45
- Body damage: 65/60/45/35
- Legs damage: 55/50/30/25
The Short Spear is one of the most devastating weapons in the game and can be particularly hard to deal with, especially when combined with a shield. While the Short Spear may not have the range of the game’s other pole-based weapons, it does pack tremendous amounts of damage thanks to its accuracy and speed. Things can get messy when skirmishing in Mordhau and friendly fire can lead to many an allied death, so a little finesse is sometimes needed to break through the armored ranks. Fortunately, the Short Spear’s accurate thrust can penetrate through even the hardiest of foes, while its projectile throw can snipe pesky bow users who are cutting down your allies from afar. The Short Spear is an incredibly versatile weapon and should be added to any light armor loadout.
Rapier
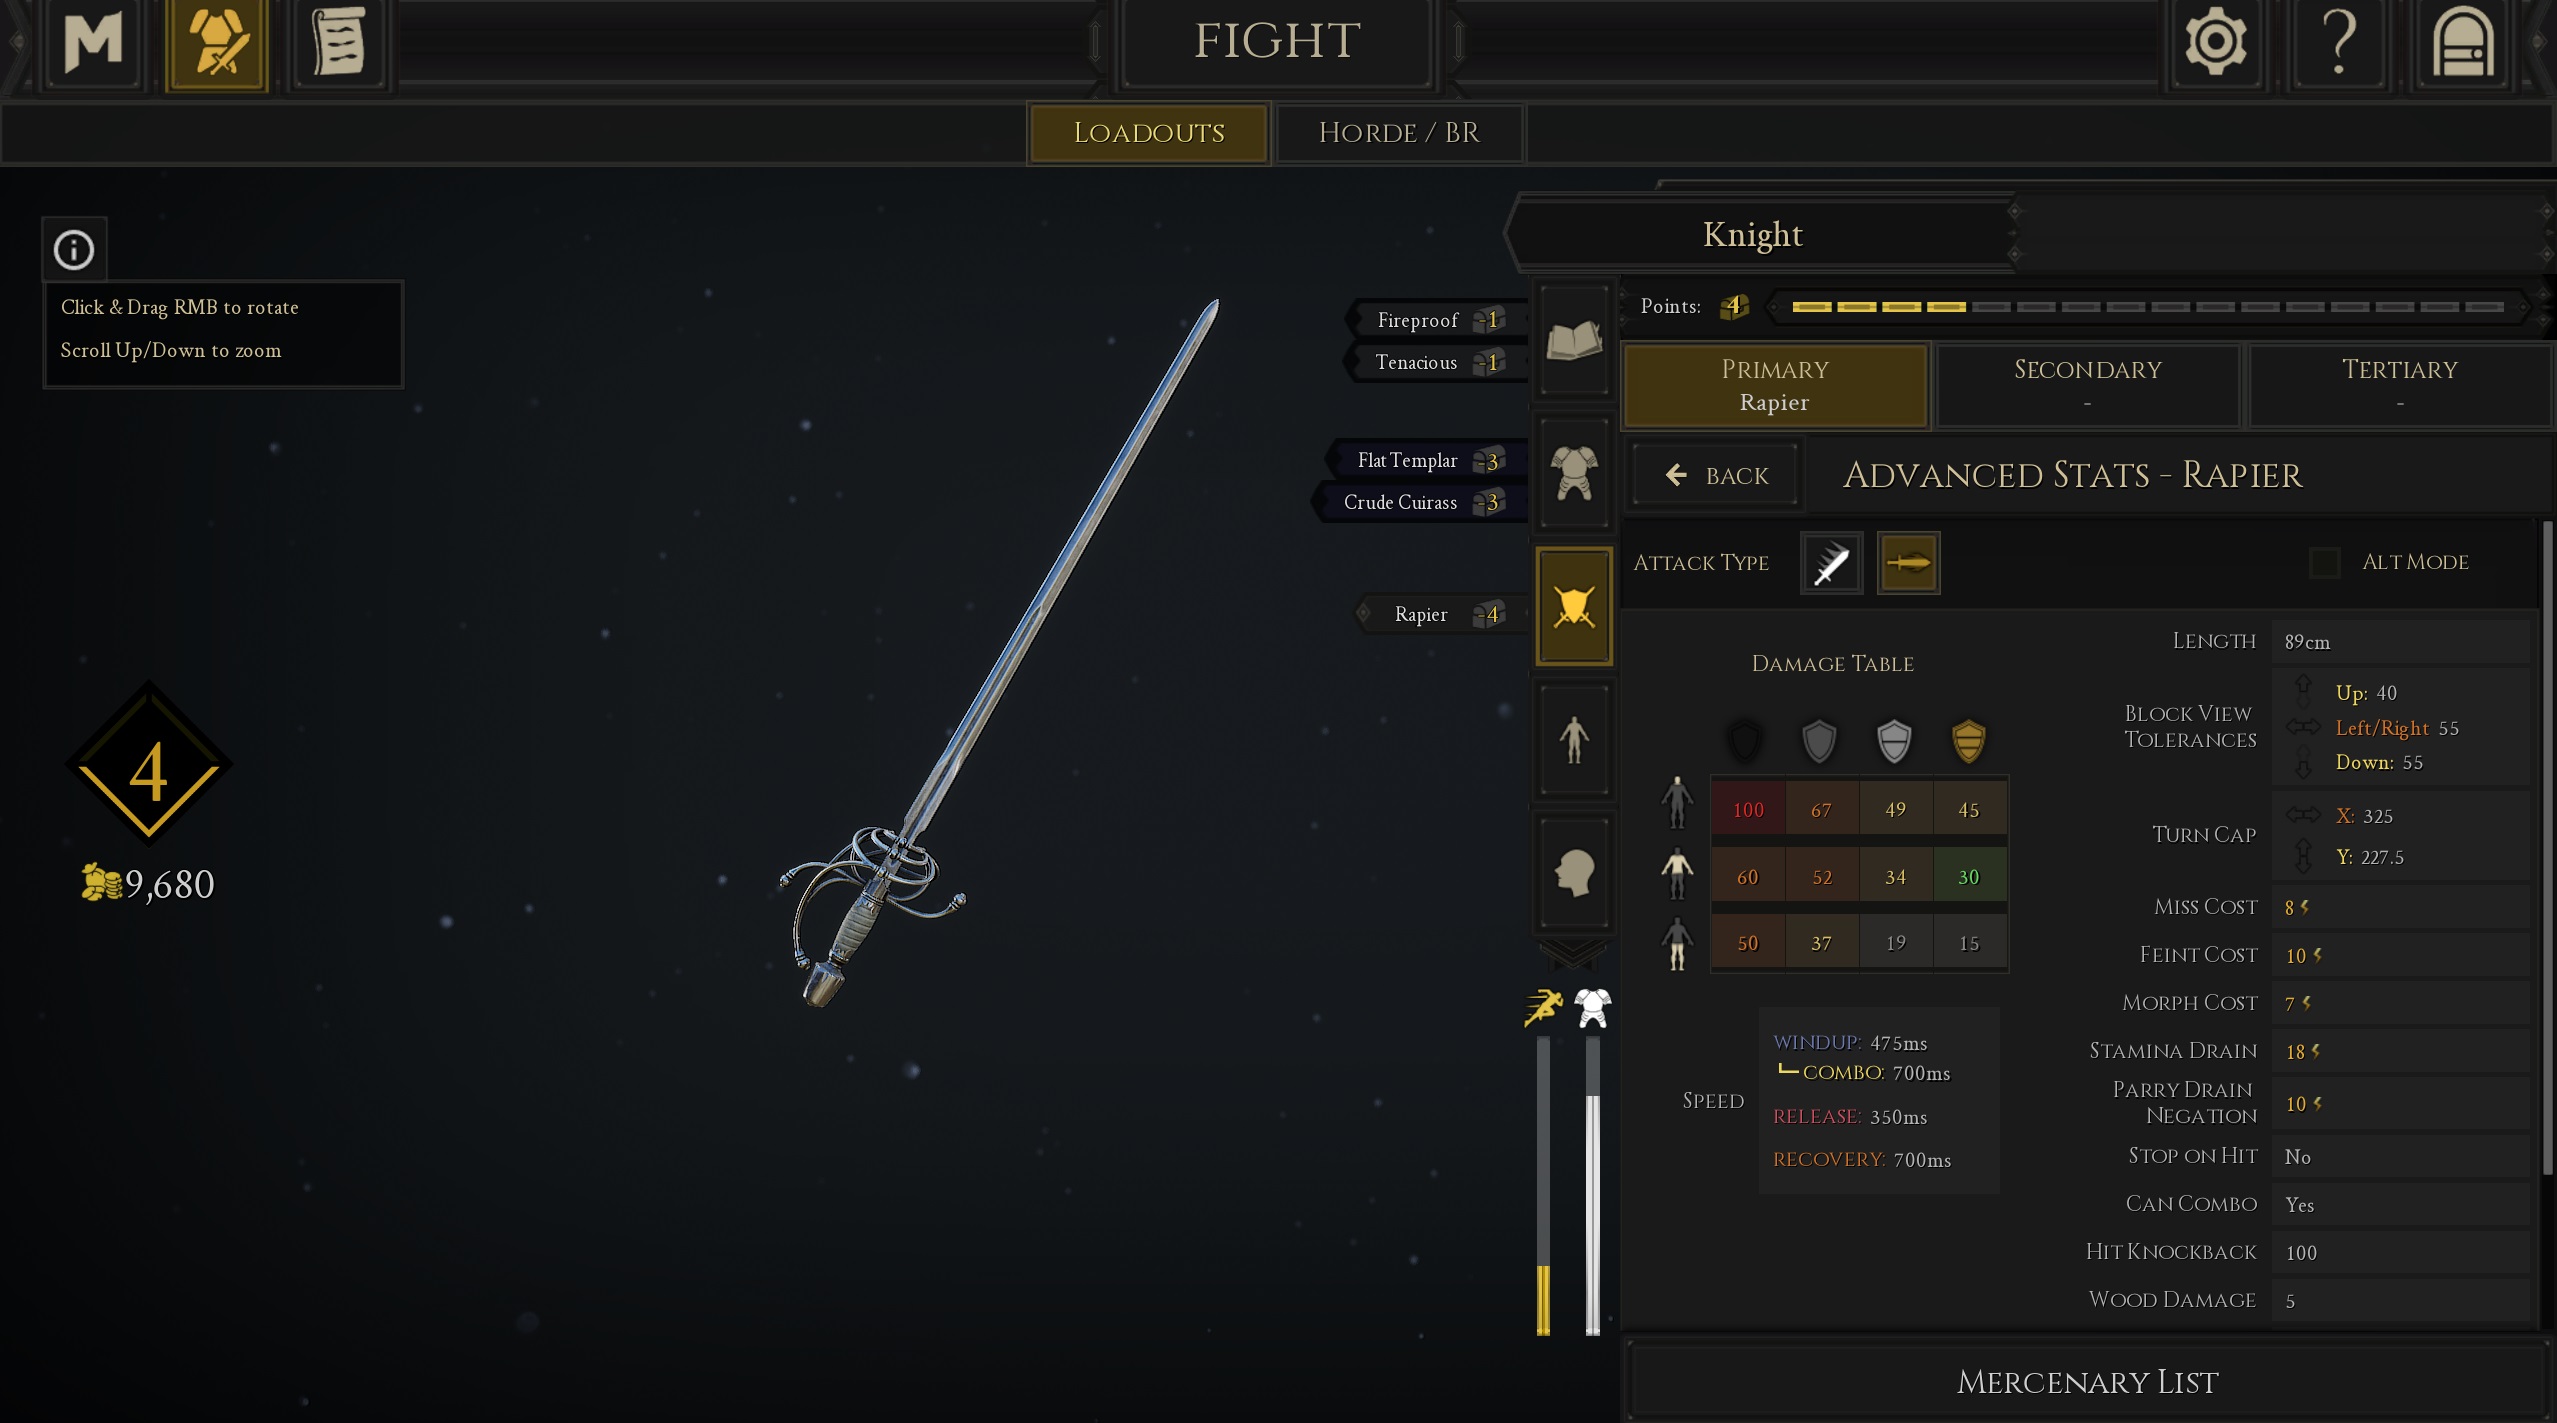
- Cost: 4
- Head damage: 100/67/49/45
- Body damage: 60/52/34/30
- Legs damage: 50/37/19/15
The Rapier is incredibly popular among beginners thanks to its lightning-fast fast thrust attacks, high mobility, lethal headshot potential, and overall ease of use. Try to get the jump on your foe and be ready to stab them in the back or finish off any low health targets that are trying to creep away. Throw in some feints and be ready to punish any targets that try to land heavy blows with a quick stab to the head. If you like the idea of overwhelming your opponents with successive stabs and fancy roleplaying as one of the Three Musketeers, then you’d be wise to add the Rapier to your collection.
Executioner’s Sword
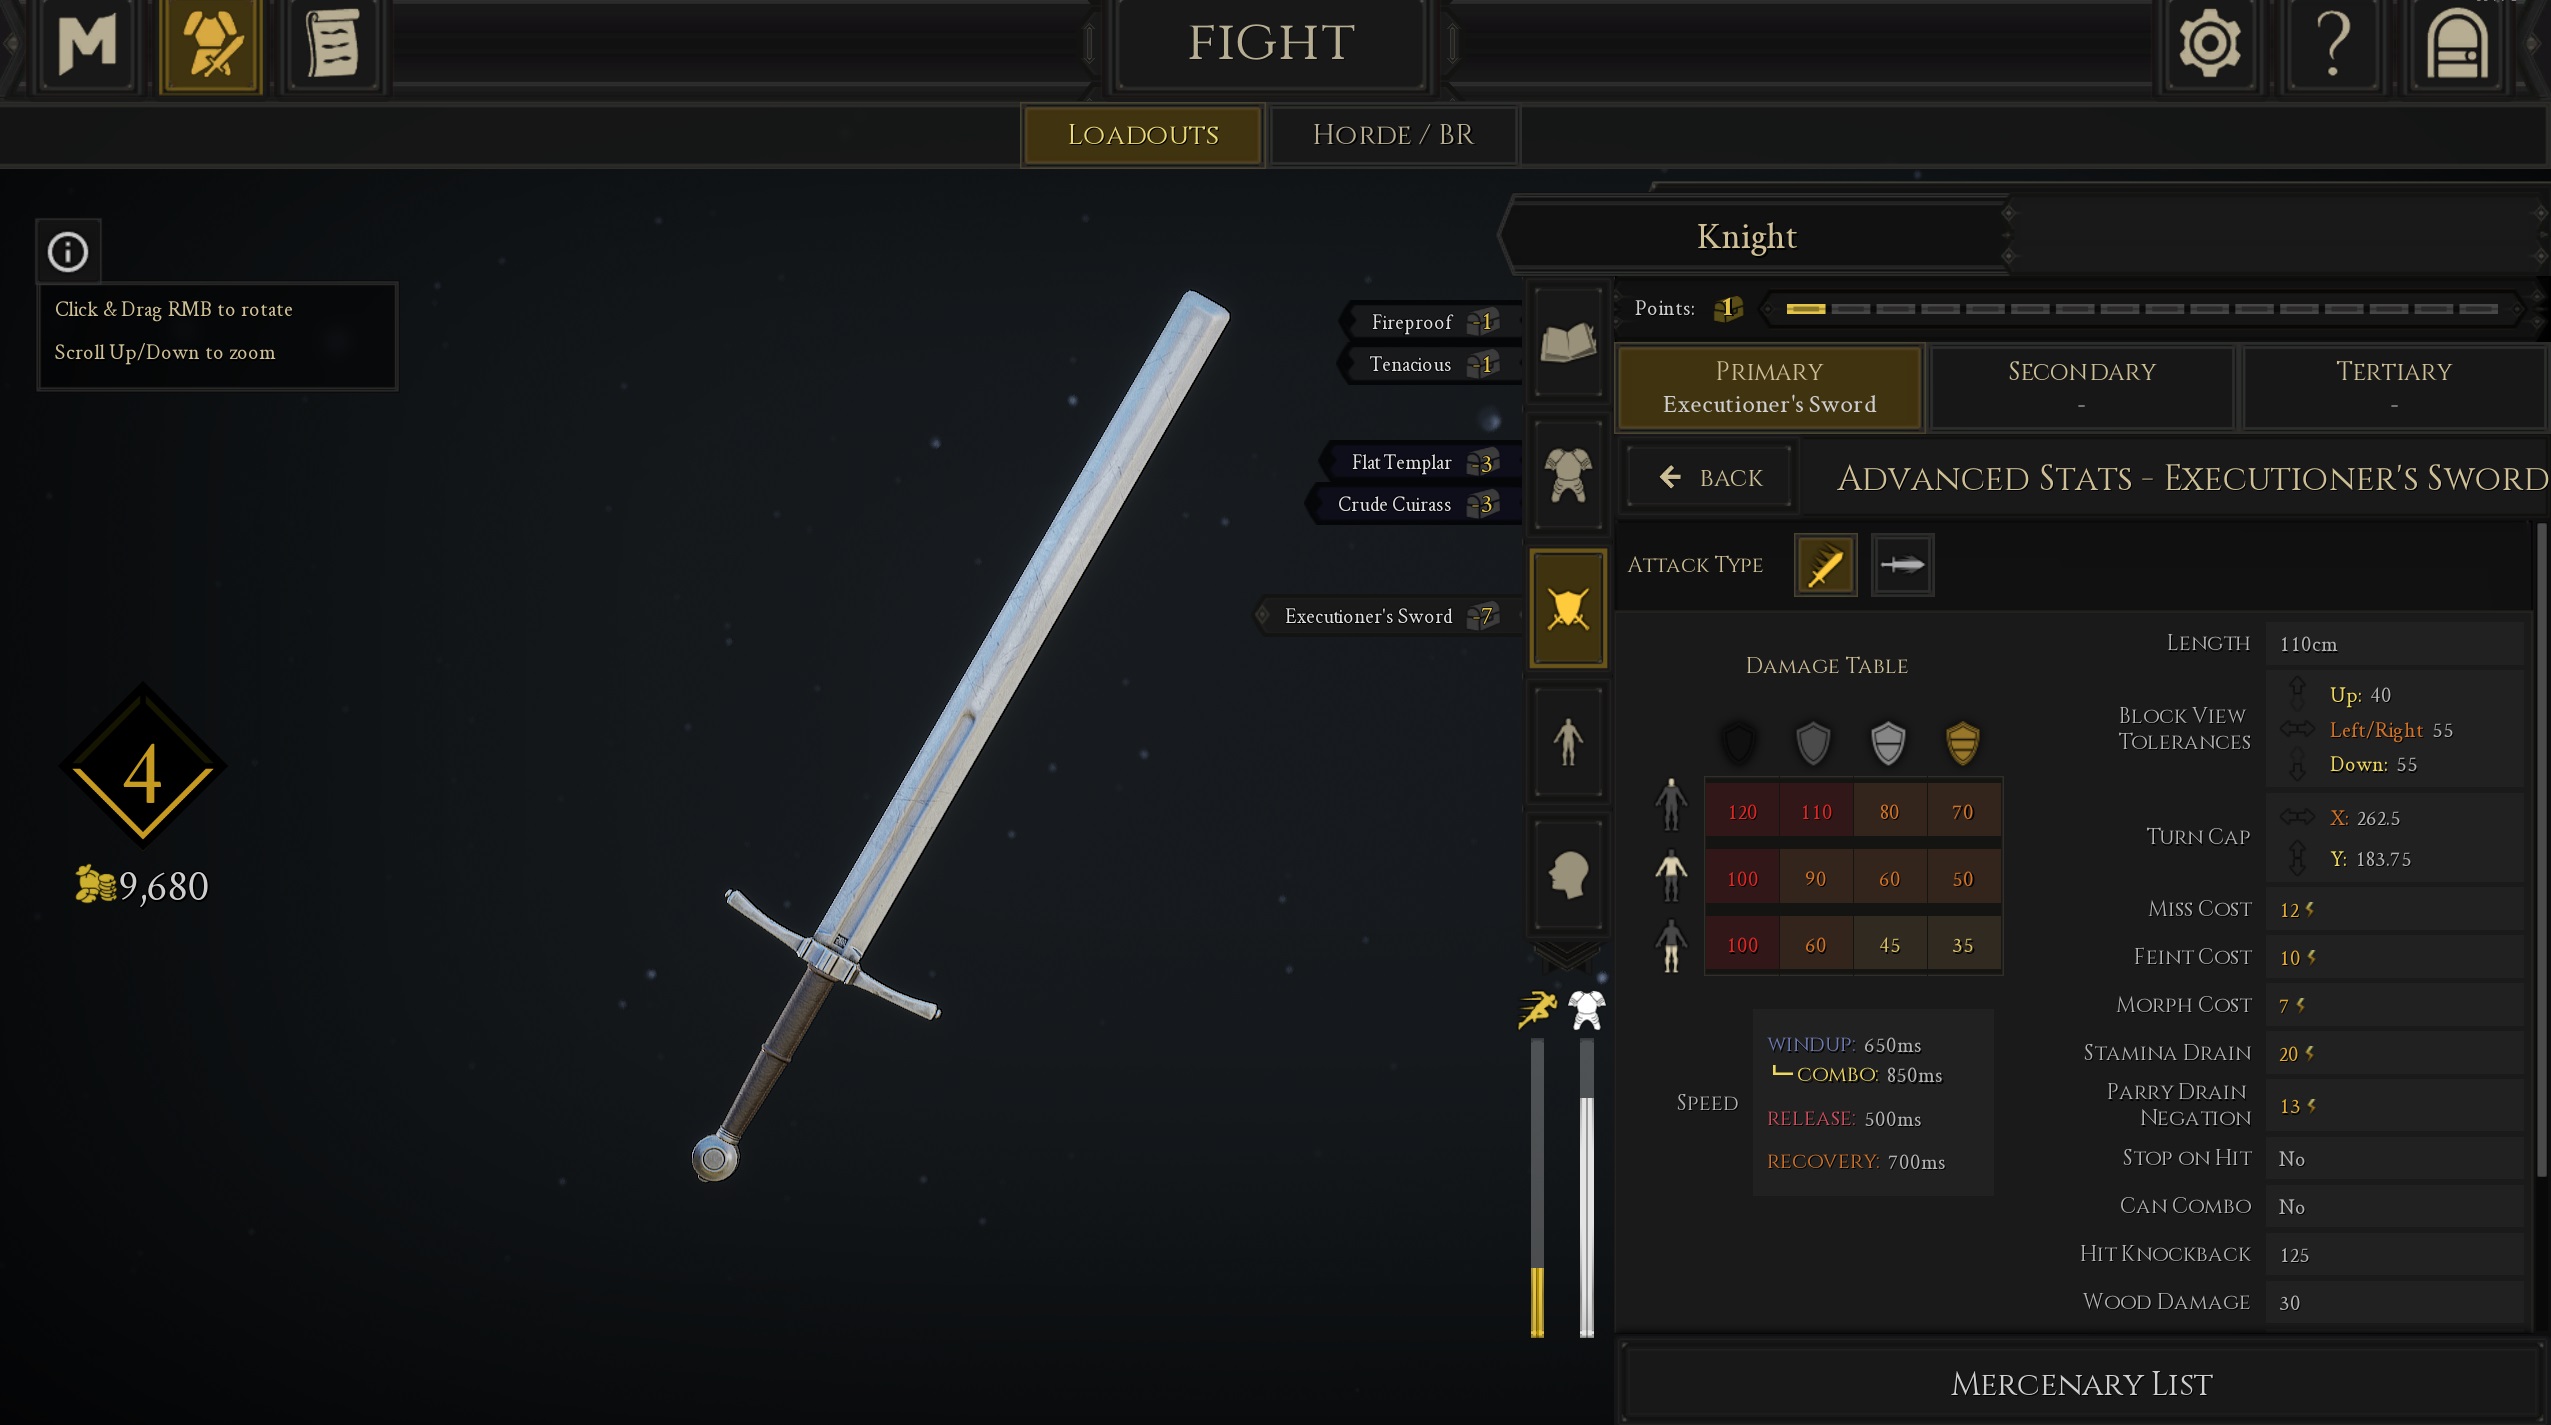
- Cost: 7
- Head damage: 120/110/80/70
- Body damage: 100/90/60/50
- Legs damage: 100/60/45/35
The Executioner’s Sword is a fan-favourite due to its ridiculously high damage output that allows players to cut down multiple armored units with a single swing. If you’re after a weapon that not only looks cool but is also insanely powerful, then the Executioner’s Sword is a weapon you’ll want to purchase. This beastly sword costs a whopping 7 equipment points and can seem rather lacklustre due to its complete lack of combos, but its incredible damage potential more than makes up for this. Put on a suit of heavy armor and punch your ticket to the frontline to see why this sword is so feared.
Maul
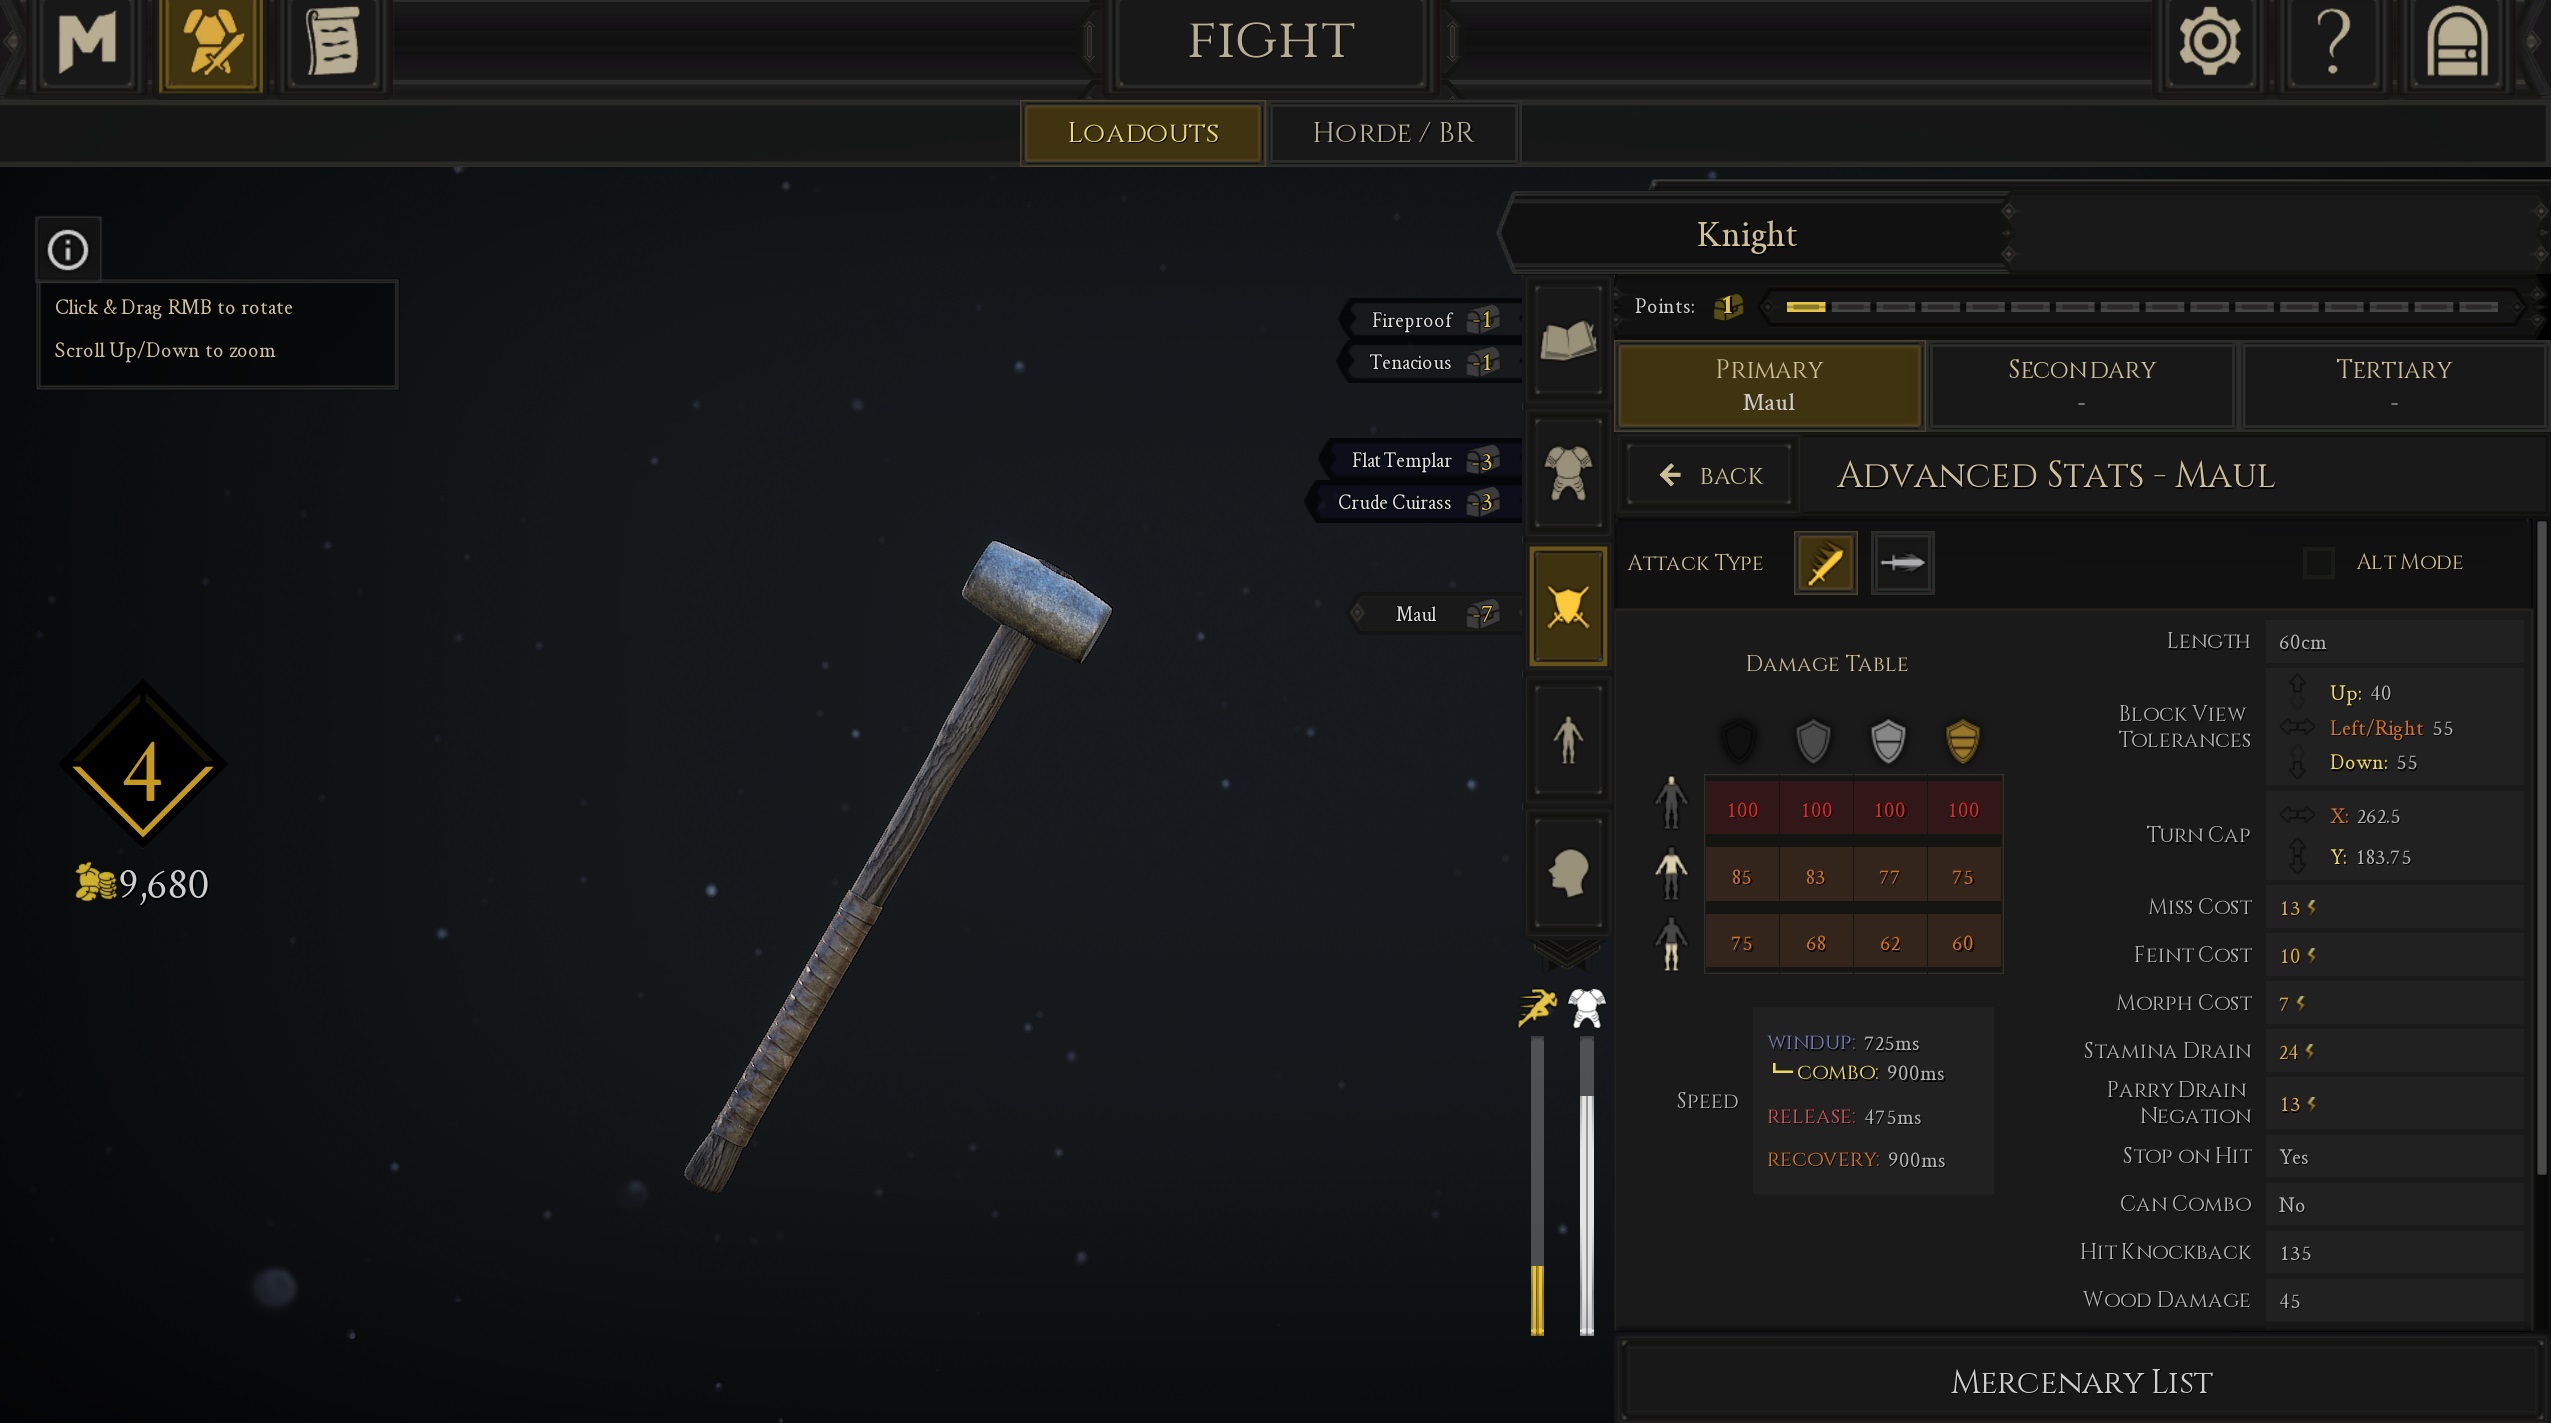
- Cost: 7
- Head damage: 100/100/100/100
- Body damage: 85/83/77/75
- Legs damage: 75/68/62/60
The Maul is the perfect weapon if you wish to give your opponent more than just a severe headache – after all, heavily armored units can be a real pain to deal with and sometimes the slashing of a sword just won’t cut it. Fortunately, the Maul’s powerful swings can bludgeon even the tankiest of foes and when you manage to get some momentum behind them, you’ll be obliterating your enemy before they can even react. Make sure you pick the Bloodlust perk in order to regain health upon every successful kill and spam your almighty war cry to strike fear into those who dare to duel you.
Best loadouts in Mordhau
The Tank
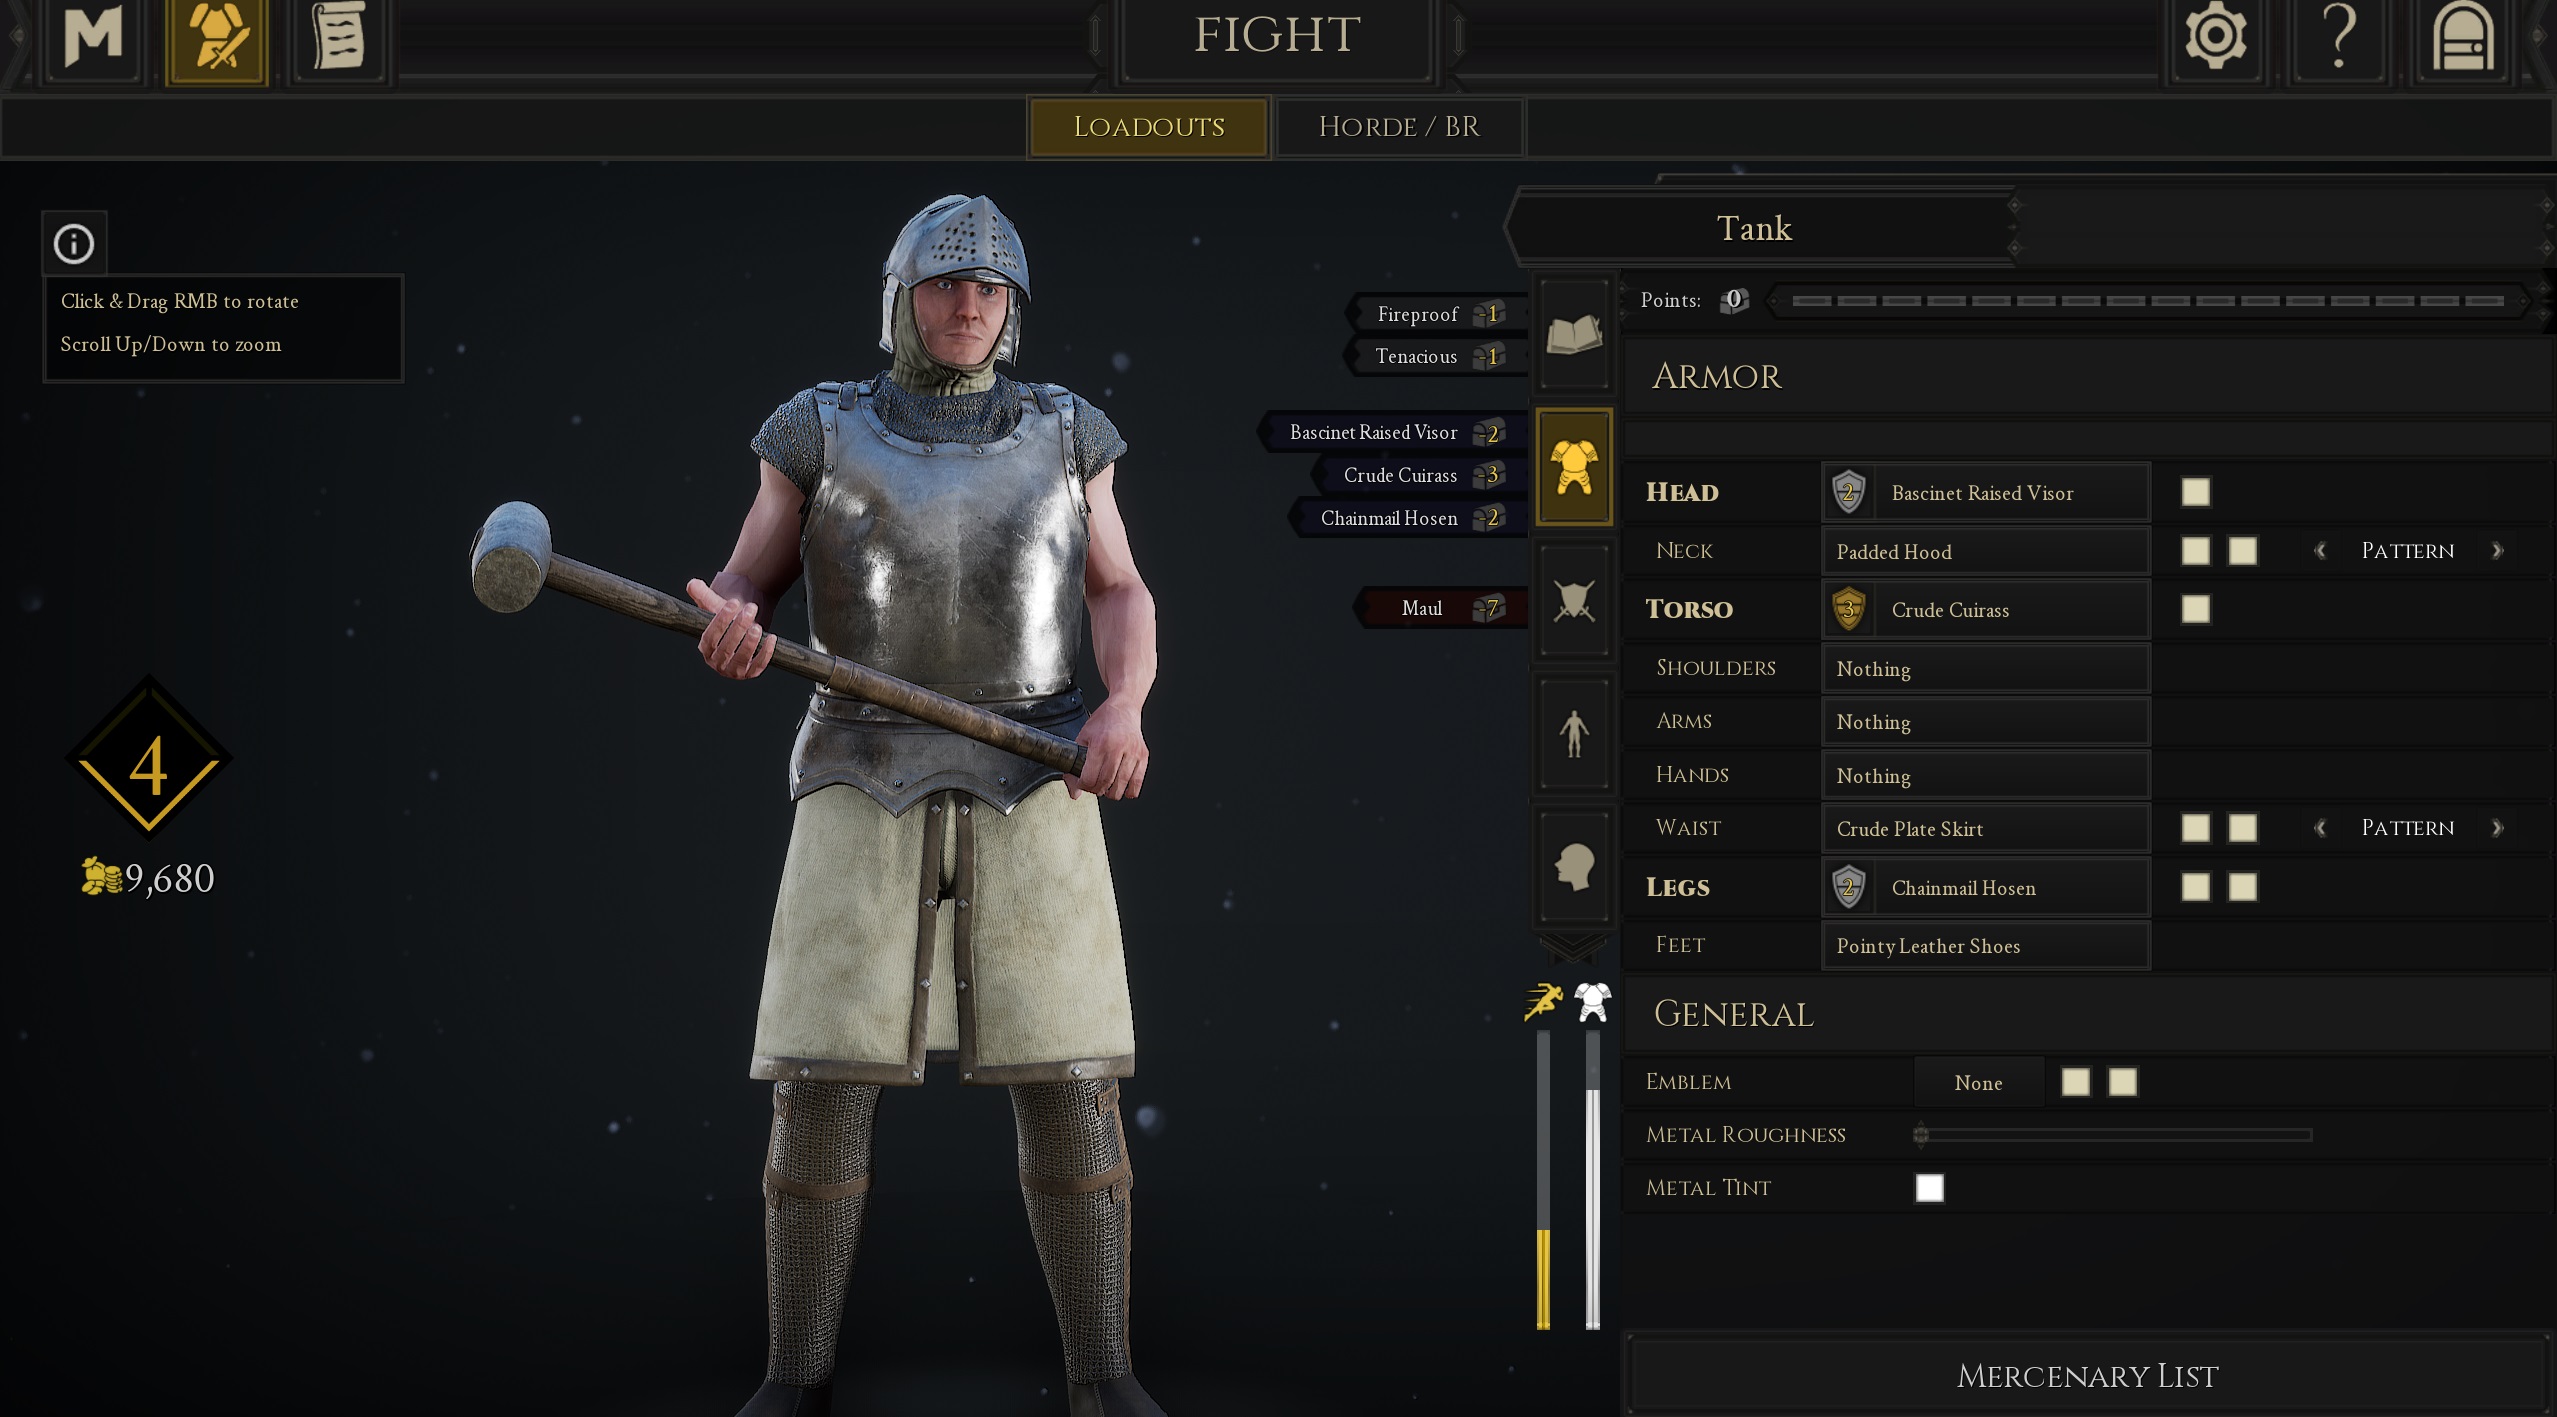
If you love to dive headfirst into the action and want to really get into the thick of things, then you’ll want to opt for a tanky build that can take a beating. The 64-player battlefields of Mordhau can get pretty intense and surviving on the frontlines is not an easy task, especially when multiple enemies are trying to cleave your head off. Perks like Tenacious and Fireproof will help with your passive health regeneration and fire damage reduction, giving you the strength needed to keep on fighting. Supplement these perks with a mixture of medium and heavy armor (2,3,2) of your choice and consider picking up shield if you wish bolster your defensive capabilities even further. Two handed weapons like the Eveningstar, Maul, Greatsword, and Halberd are great choices and allow you to make short work of multiple foes when skirmishing.
The ranger
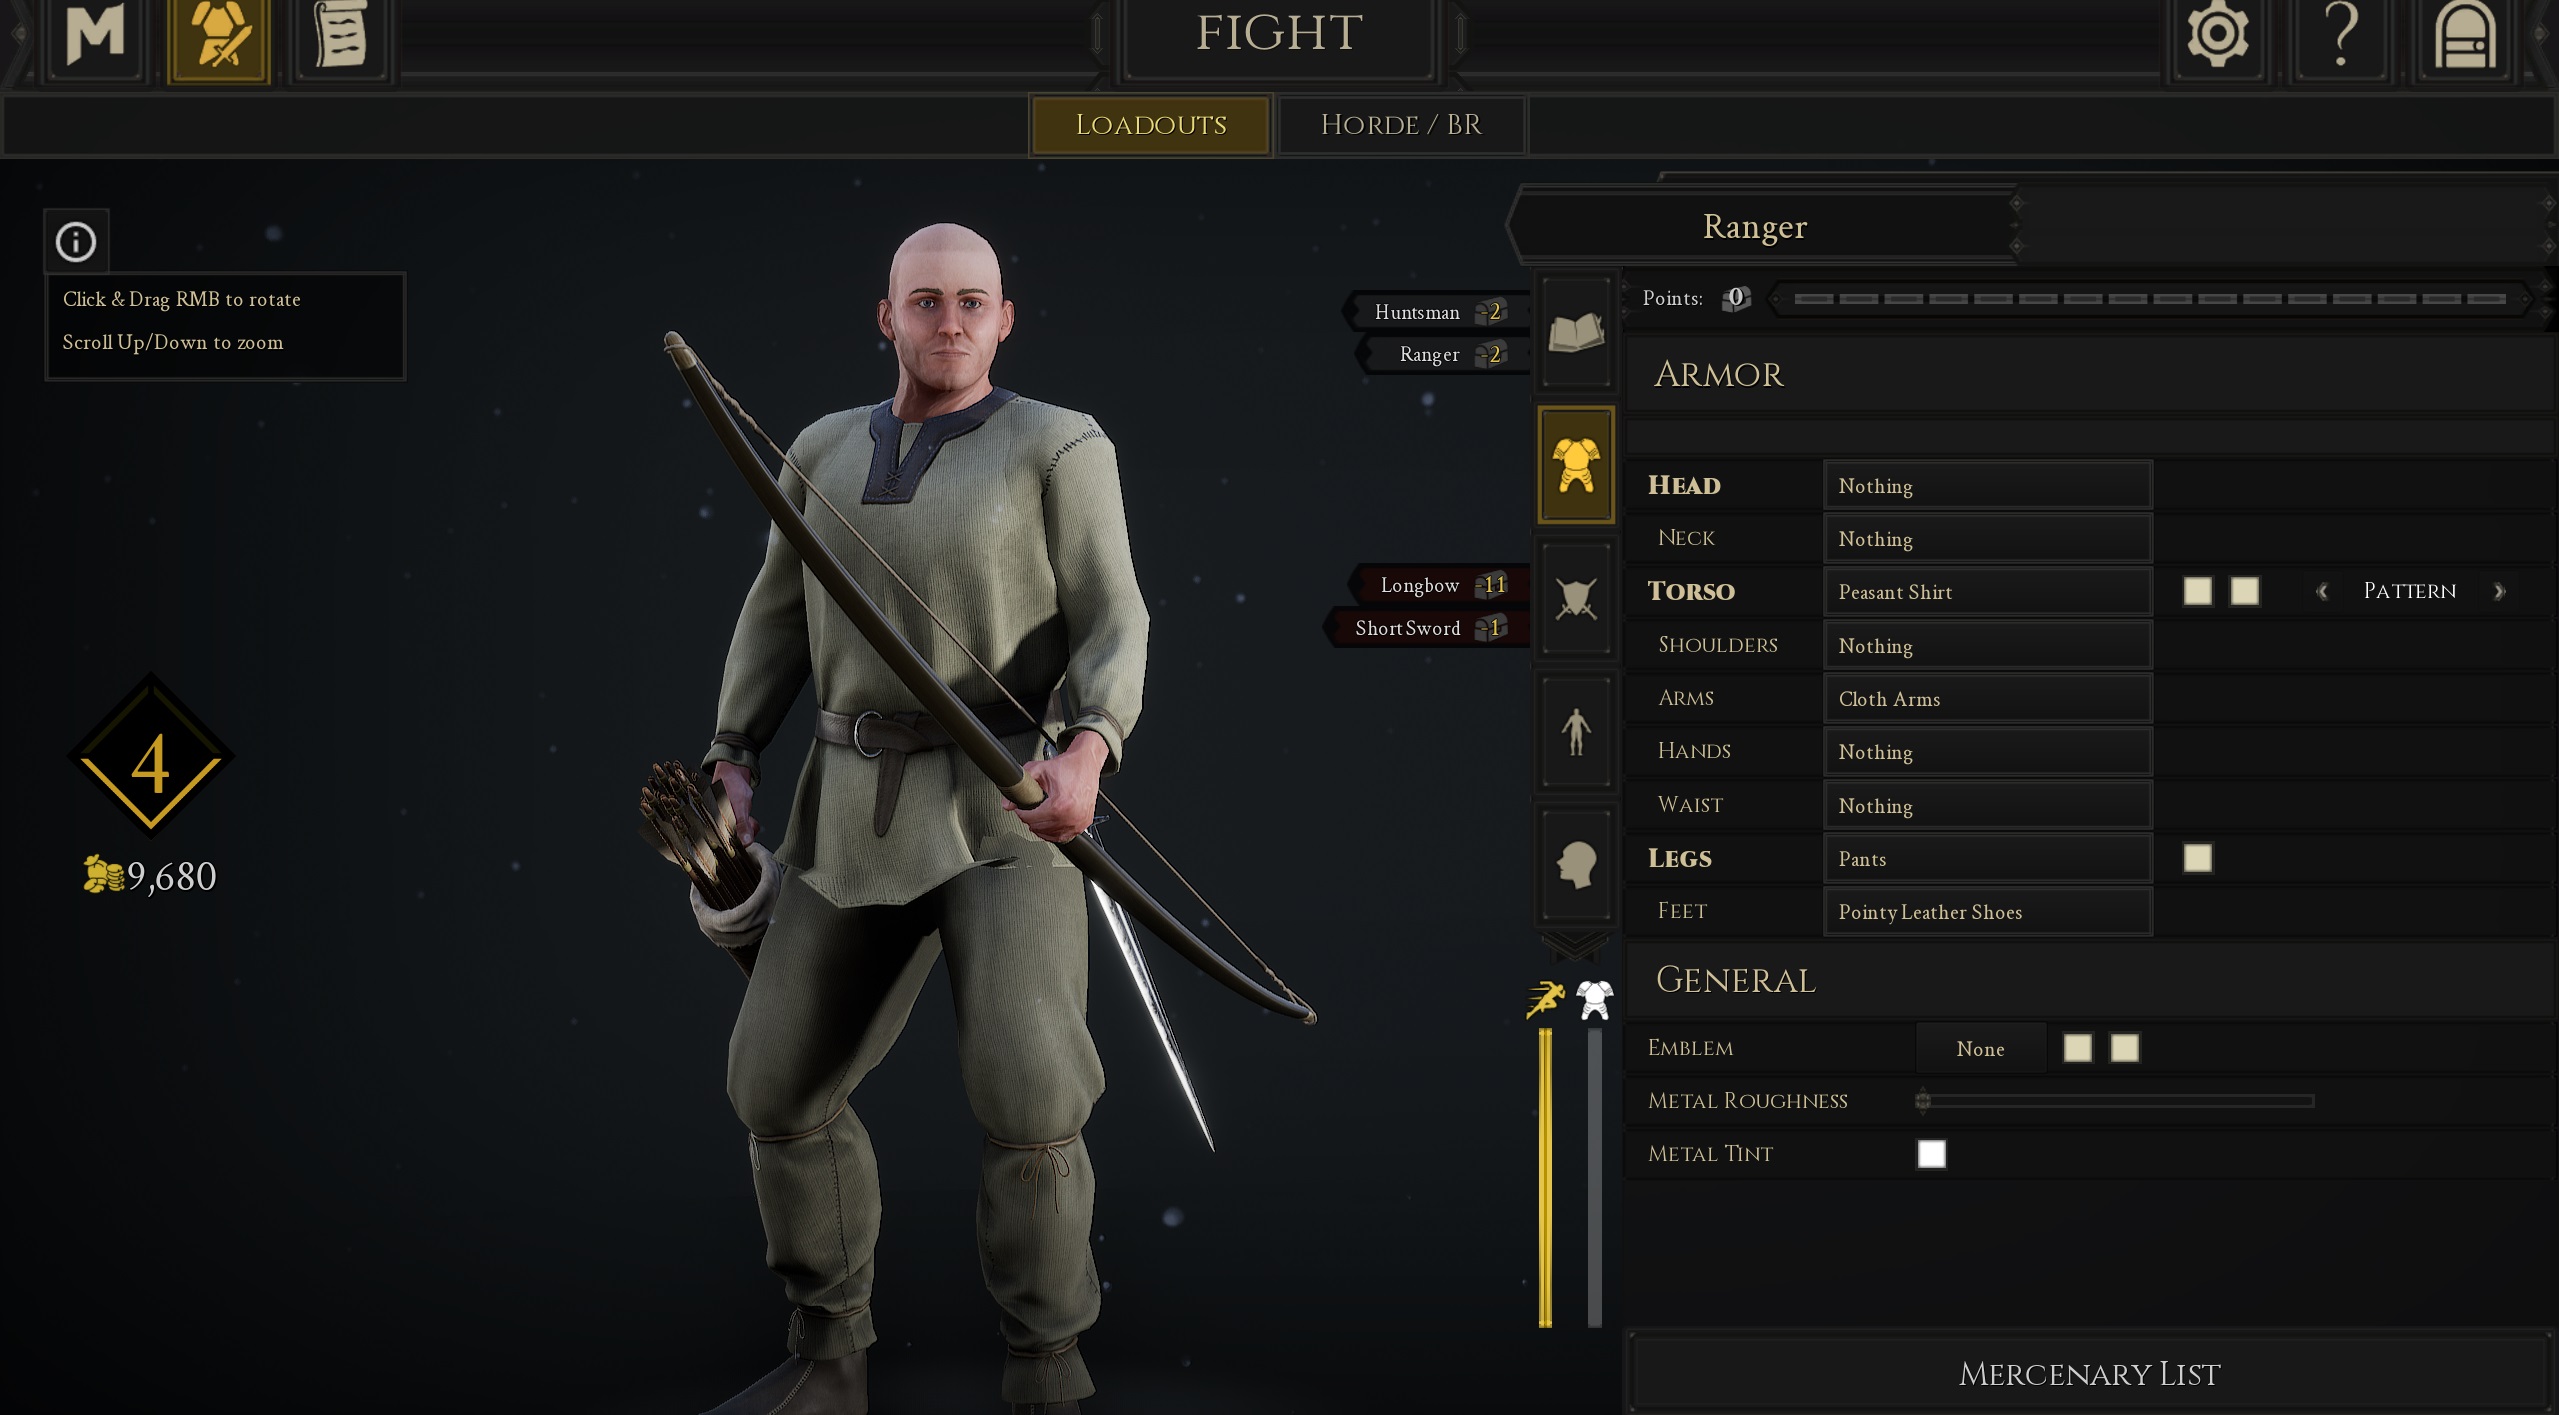
Your battles needn’t always be close quarters affairs – in fact, sometimes it’s best to get some high ground and scan the battlefield for potential targets. While clashing swords in a haze of sparks and blood make for some incredibly satisfying moments, there are a few scenarios where rangers can really help turn the tide of a battle. If your enemy has broken through your team’s defences, try to keep them at bay with some well-placed headshots. Ensure you have both the Huntsman and Ranger perks selected as these will bolster your DPS and mobility, giving you more opportunities to secure those all-important kills. Armor isn’t needed as you’ll be fighting the majority of your battles from the safety of the backline, so don’t waste any loadout points on glamorous garments – instead, purchase a Longbow and crush your foes with a volley of deadly arrows.
The flanker
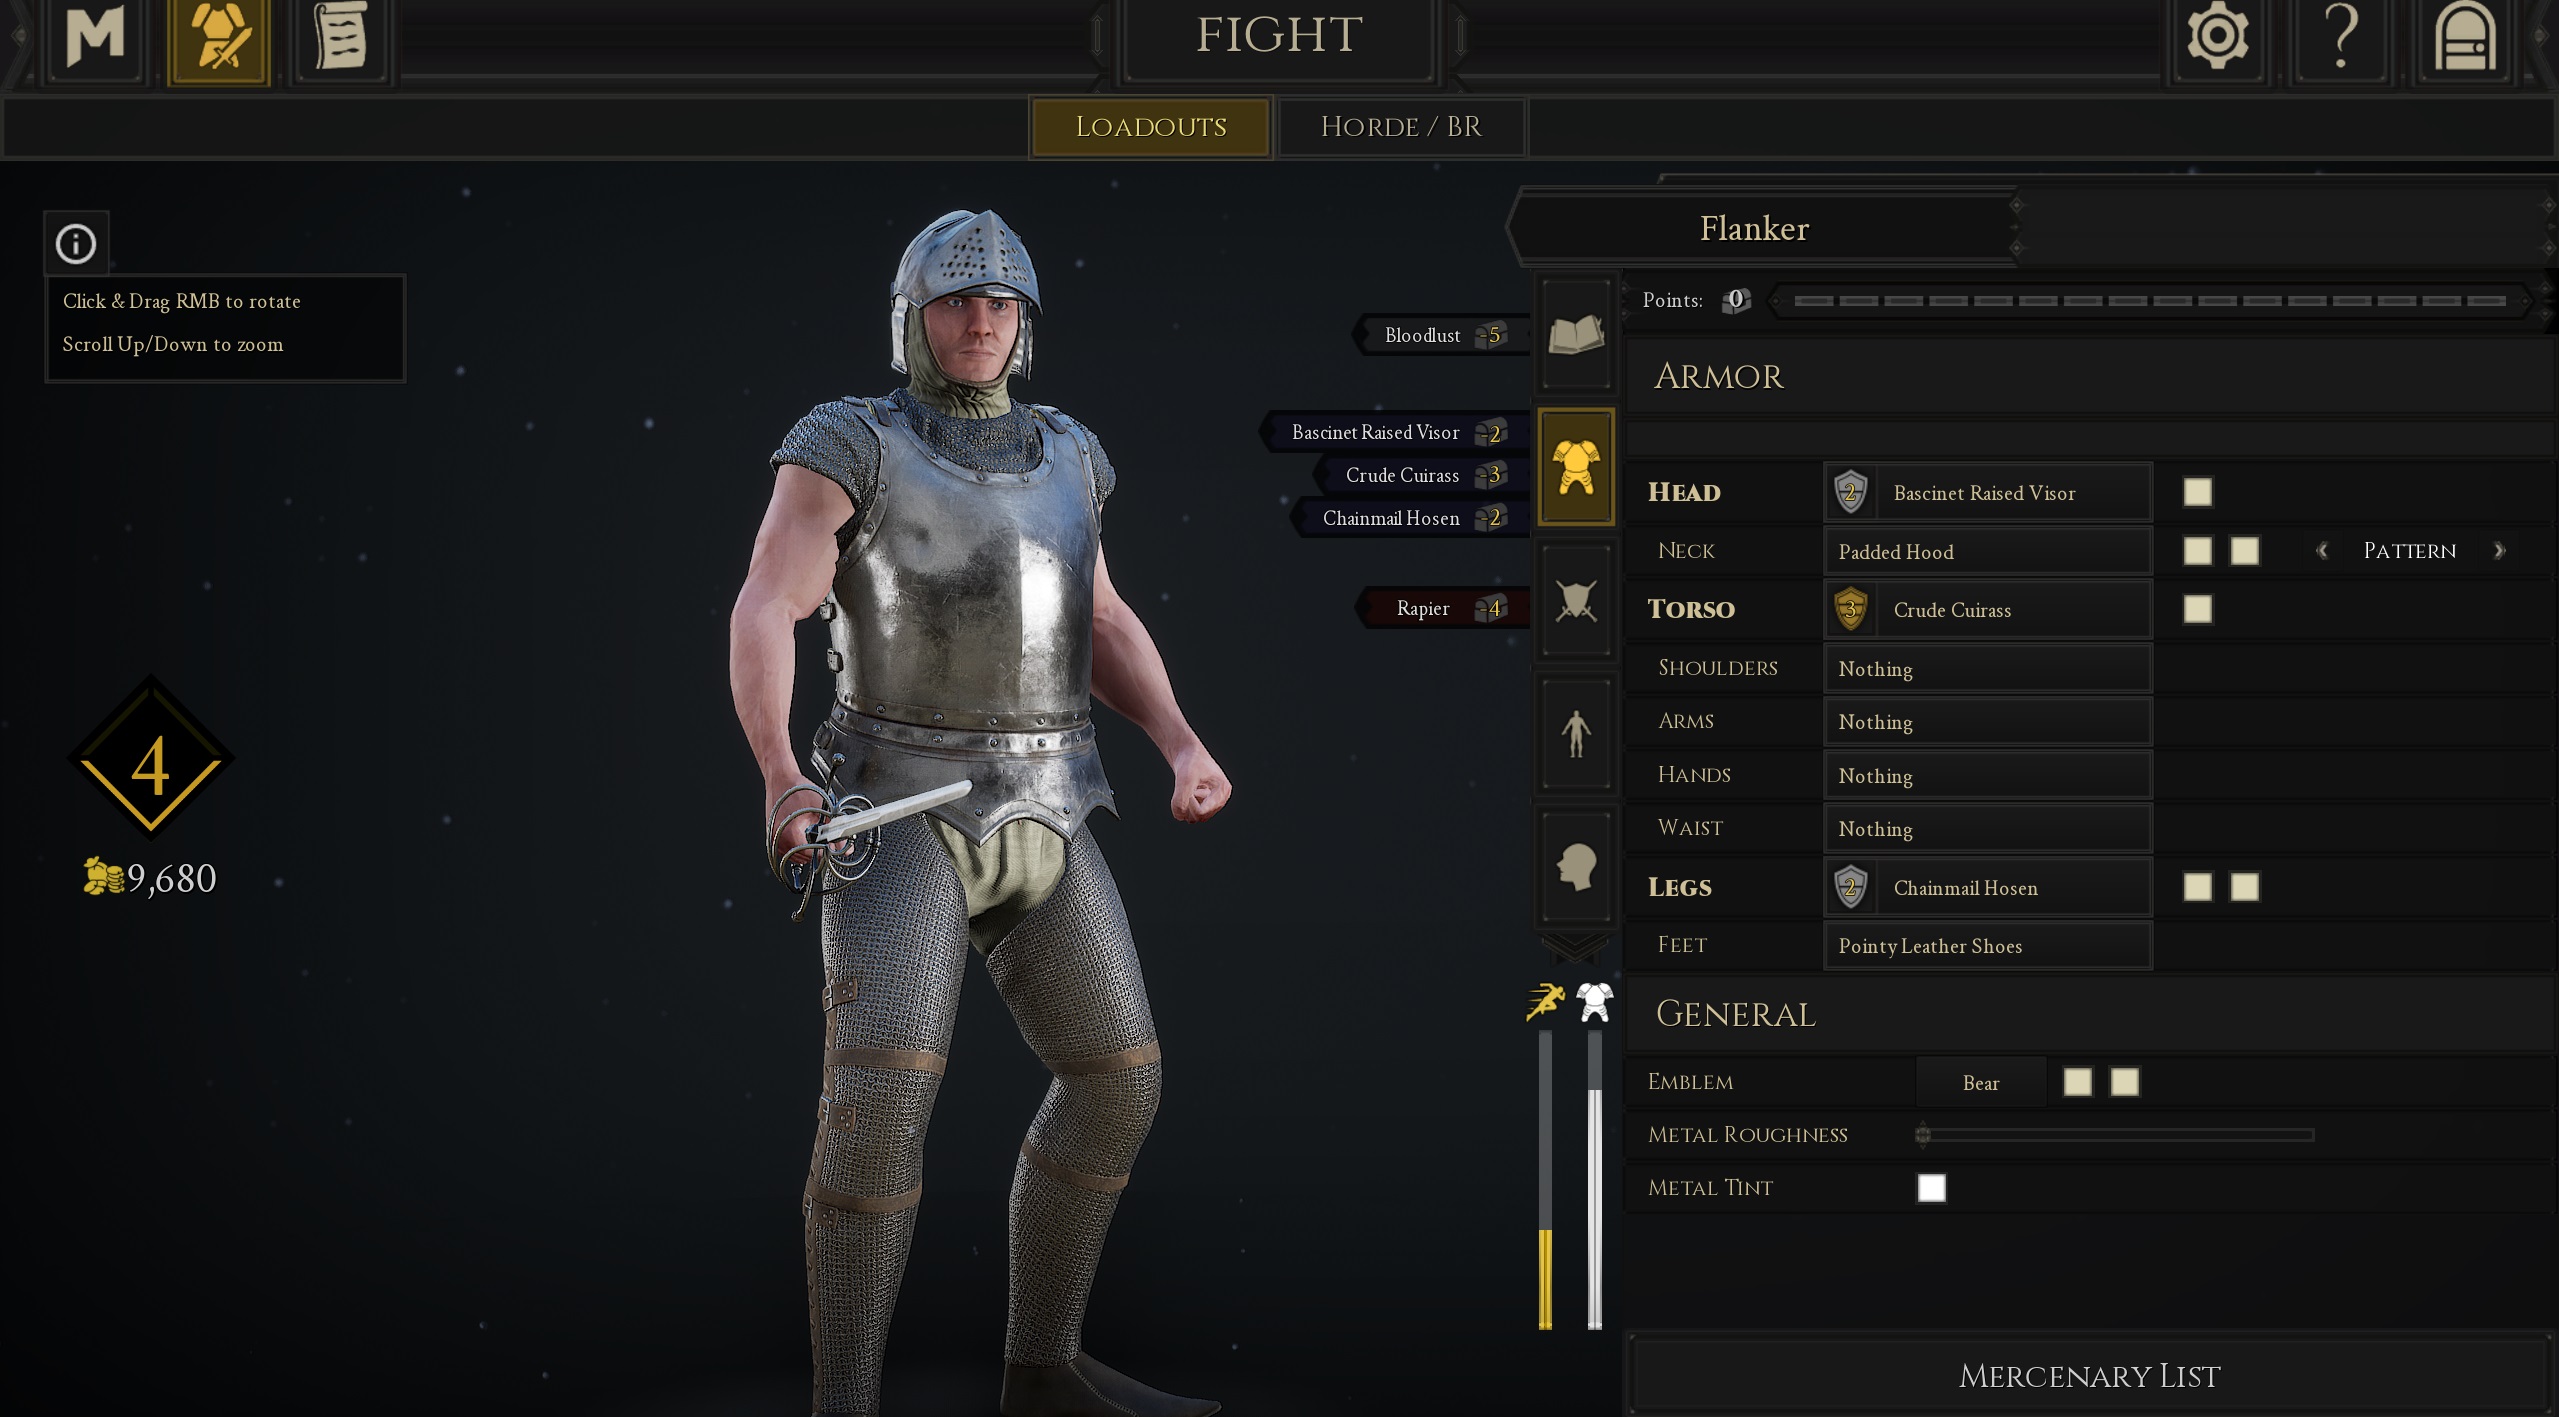
If you like slinking around the battlefield or love to deal metric tons of damage, then having a build that utilises the Bloodlust perk is imperative for any leaderboard topping player. Bloodlust gives you full health upon every successful melee kill, rewarding hyper-aggressive plays and sneaky backline flanks. The standard armor build for this loadout is medium helm, heavy torso, and medium legs (2,3,2) which gives you the perfect amount of defence, while still maintaining plenty of speed needed to chase unsuspecting targets. Pair this with the blisteringly fast thrust attacks from the Rapier and you’ll be cutting down your foes in no time.
The support
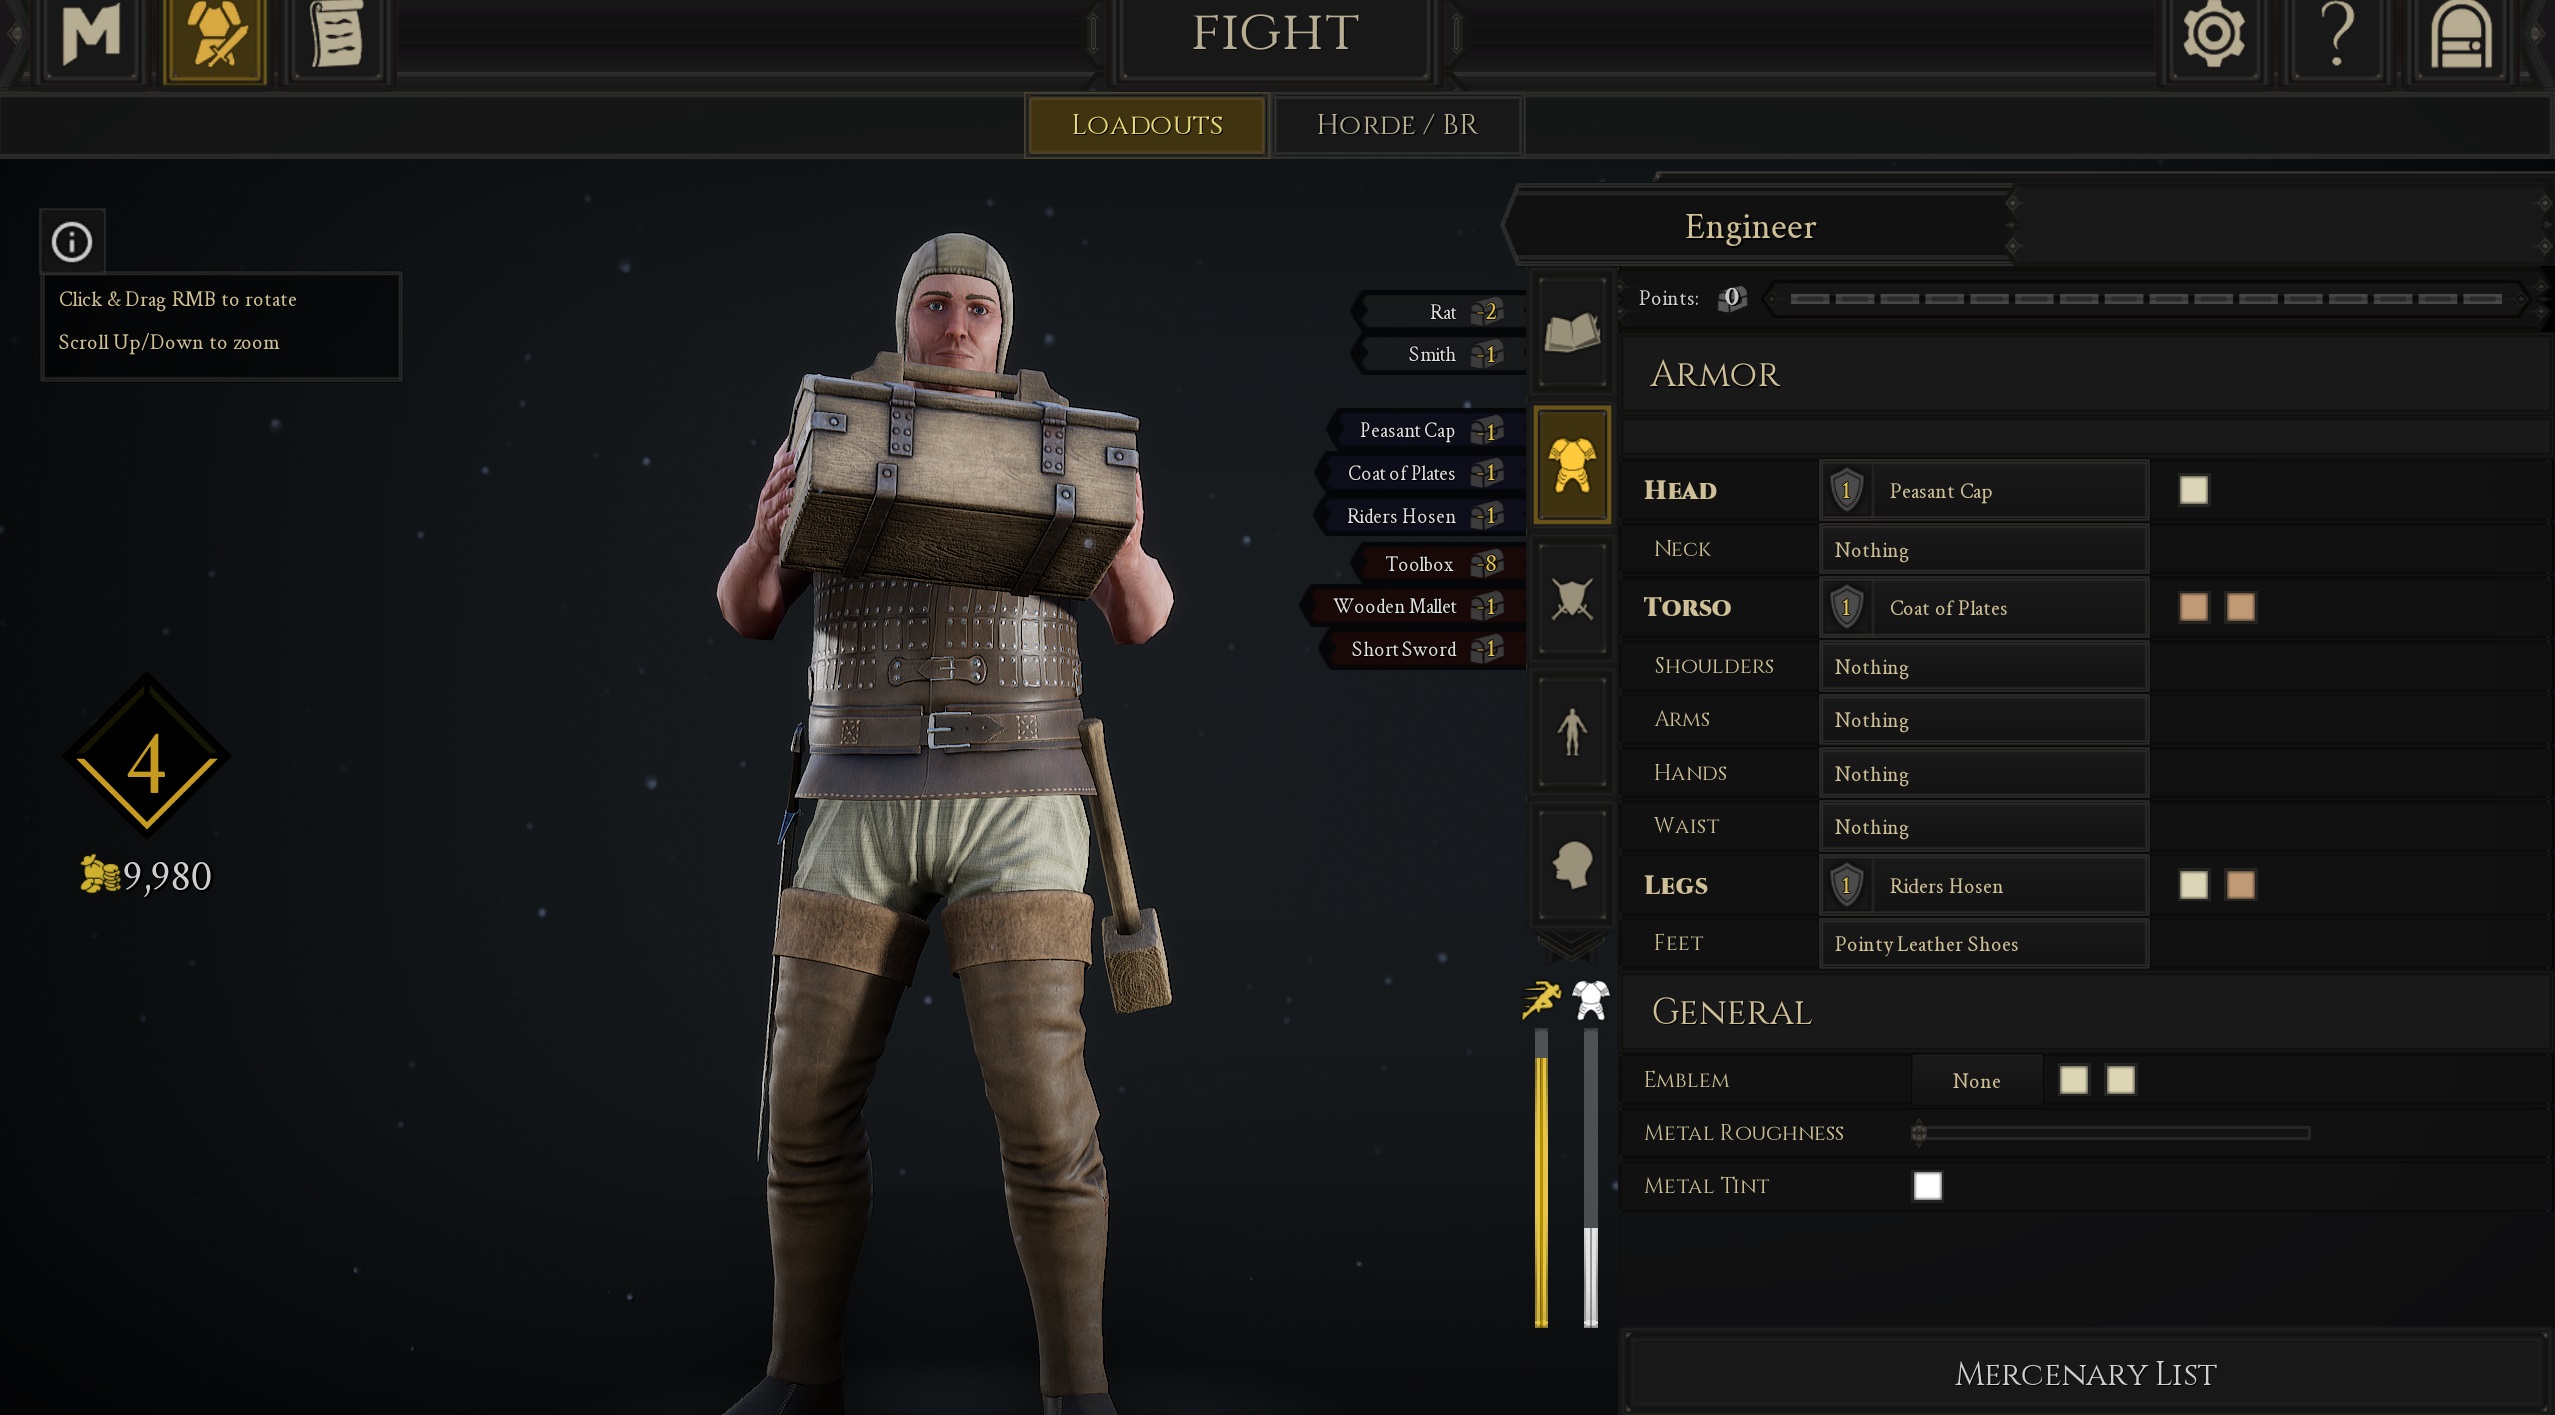
Just like most games, the support (Engineer) class is incredibly underrated in Mordhau. Being able to build defensive structures around key choke points and preventing mounted units from swooping in and killing your allies is incredibly useful, especially in Frontlines where the battlefield is littered with construction locations. Make sure you pick up the Smith perk to increase your repair effectiveness by 50% and arm yourself with the Toolbox and Blacksmith Hammer. The Toolbox will allow you to construct wooden walls, wooden spikes, and the all-important mounted crossbows that can rain terror onto your foes. Light armor is a must here as you’ll want to quickly retreat when objectives have been overrun or when multiple enemies have caught you building. If you prefer sneaking around the battlefield and enjoy supporting your team, then give this engineer loadout a go.
Weekly digests, tales from the communities you love, and more
James Busby is an experienced journalist who has written for sites like GamesRadar+, Kotaku, Red Bull Gaming, and many more. James has a BA (Hons) in Journalism, and can usually be found writing news, reviews, and guides over at Dexerto.


