The best Guns for Hire in Far Cry New Dawn (and where to find them)
Sharpshooter grannies, mutant warthogs, and all the best Guns for Hire you can recruit in Far Cry New Dawn

The residents of Hope County may be struggling to survive the aftermath of a nuclear apocalypse in Far Cry New Dawn, but that hasn’t stopped them from offering their services as Guns For Hire, the NPC recruitment system that first appeared in 2018’s Far Cry 5. There are a total of eight Guns for Hire in New Dawn (two of which are non-human Fangs for Hire), and all of them can be enlisted to join you in adventures across the Montanan wasteland, provided you know where to find them.
Better yet, each Gun for Hire comes with their own unique perks, weapons, and missions, and you can switch between these followers at any time during the game, dismissing one for another to suit each combat situation. While every Gun For Hire’s first perk is already unlocked after recruiting them, they’ll need to attain 15 and 40 kills while fighting with you to unlock their second and third perks respectively, so don’t forget to call them into battle often to level them up. Below, you’ll find all the information you need to know about all of the Far Cry New Dawn best Guns for Hire, including guides on how to unlock them, and the best ways to use your new BFFs in the apocalypse.
Far Cry New Dawn review | Far Cry New Dawn tips | How to unlock Timber the dog in Far Cry New Dawn | How to unlock Horatio the boar in Far Cry New Dawn | How to unlock Far Cry New Dawn fast travel | How to get Far Cry New Dawn circuit boards | Get Far Cry New Dawn perk points fast | Earn Far Cry New Dawn ethanol fast | Far Cry New Dawn music players locations | Far Cry New Dawn photographs locations | How to find Far Cry New Dawn Joseph Seed | Far Cry New Dawn ending explained | How to find your Far Cry 5 character in Far Cry New Dawn
Carmina Rye
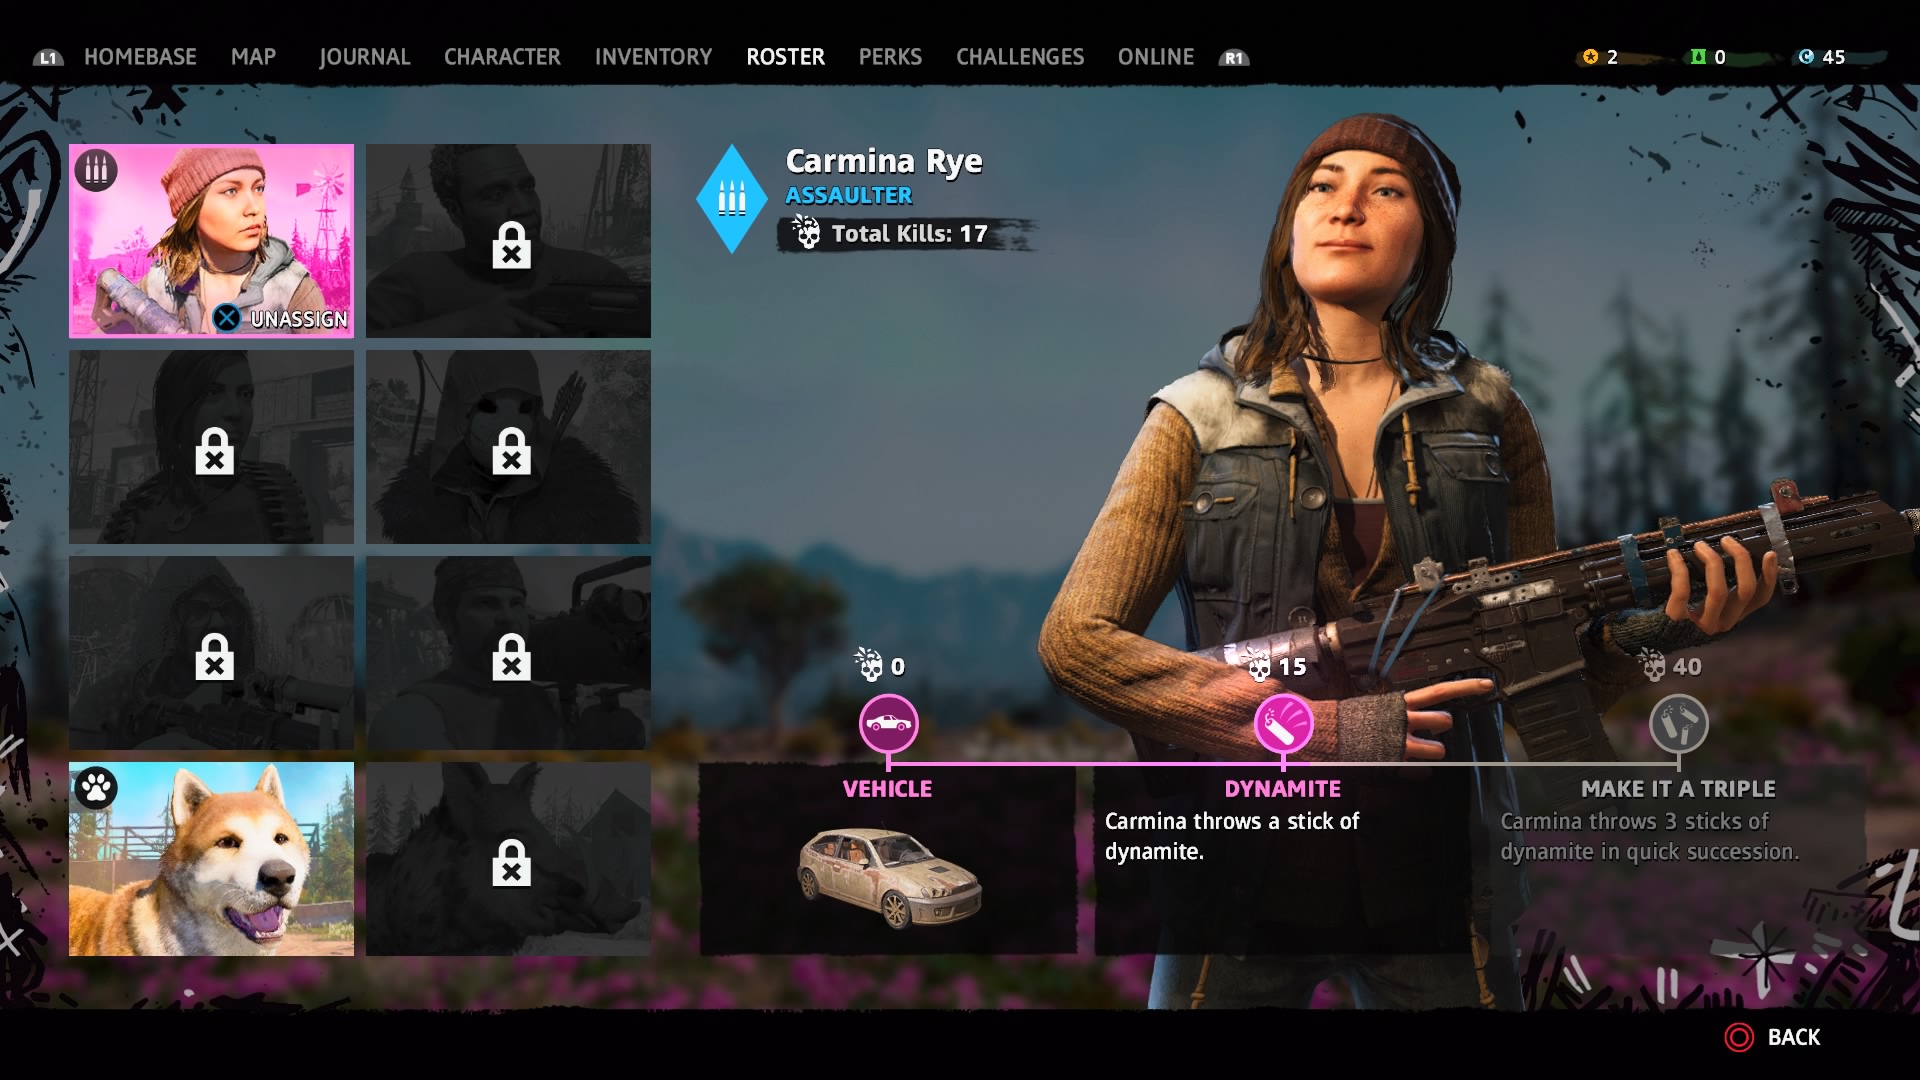
Class: Assaulter
Weapon: Assault Rifle
Perks: Vehicle (Brings a vehicle when called), Dynamite (Throws a stick of dynamite), Make it a triple (Throws three sticks of dynamite in quick succession)
Mission: Complete the opening chapter of the story, and Carmina will automatically be available to recruit at Prosperity
Pros: Carmina’s use of dynamite is a godsend for blowing up vehicles and heavily armoured enemies, and the fact she brings a vehicle to every fight is a definite plus.
Cons: Don’t expect the daughter of Nick Rye to be any use for stealth runs, as she’s a loud and proud soldier who doesn’t know the meaning of the word quiet.
Nana
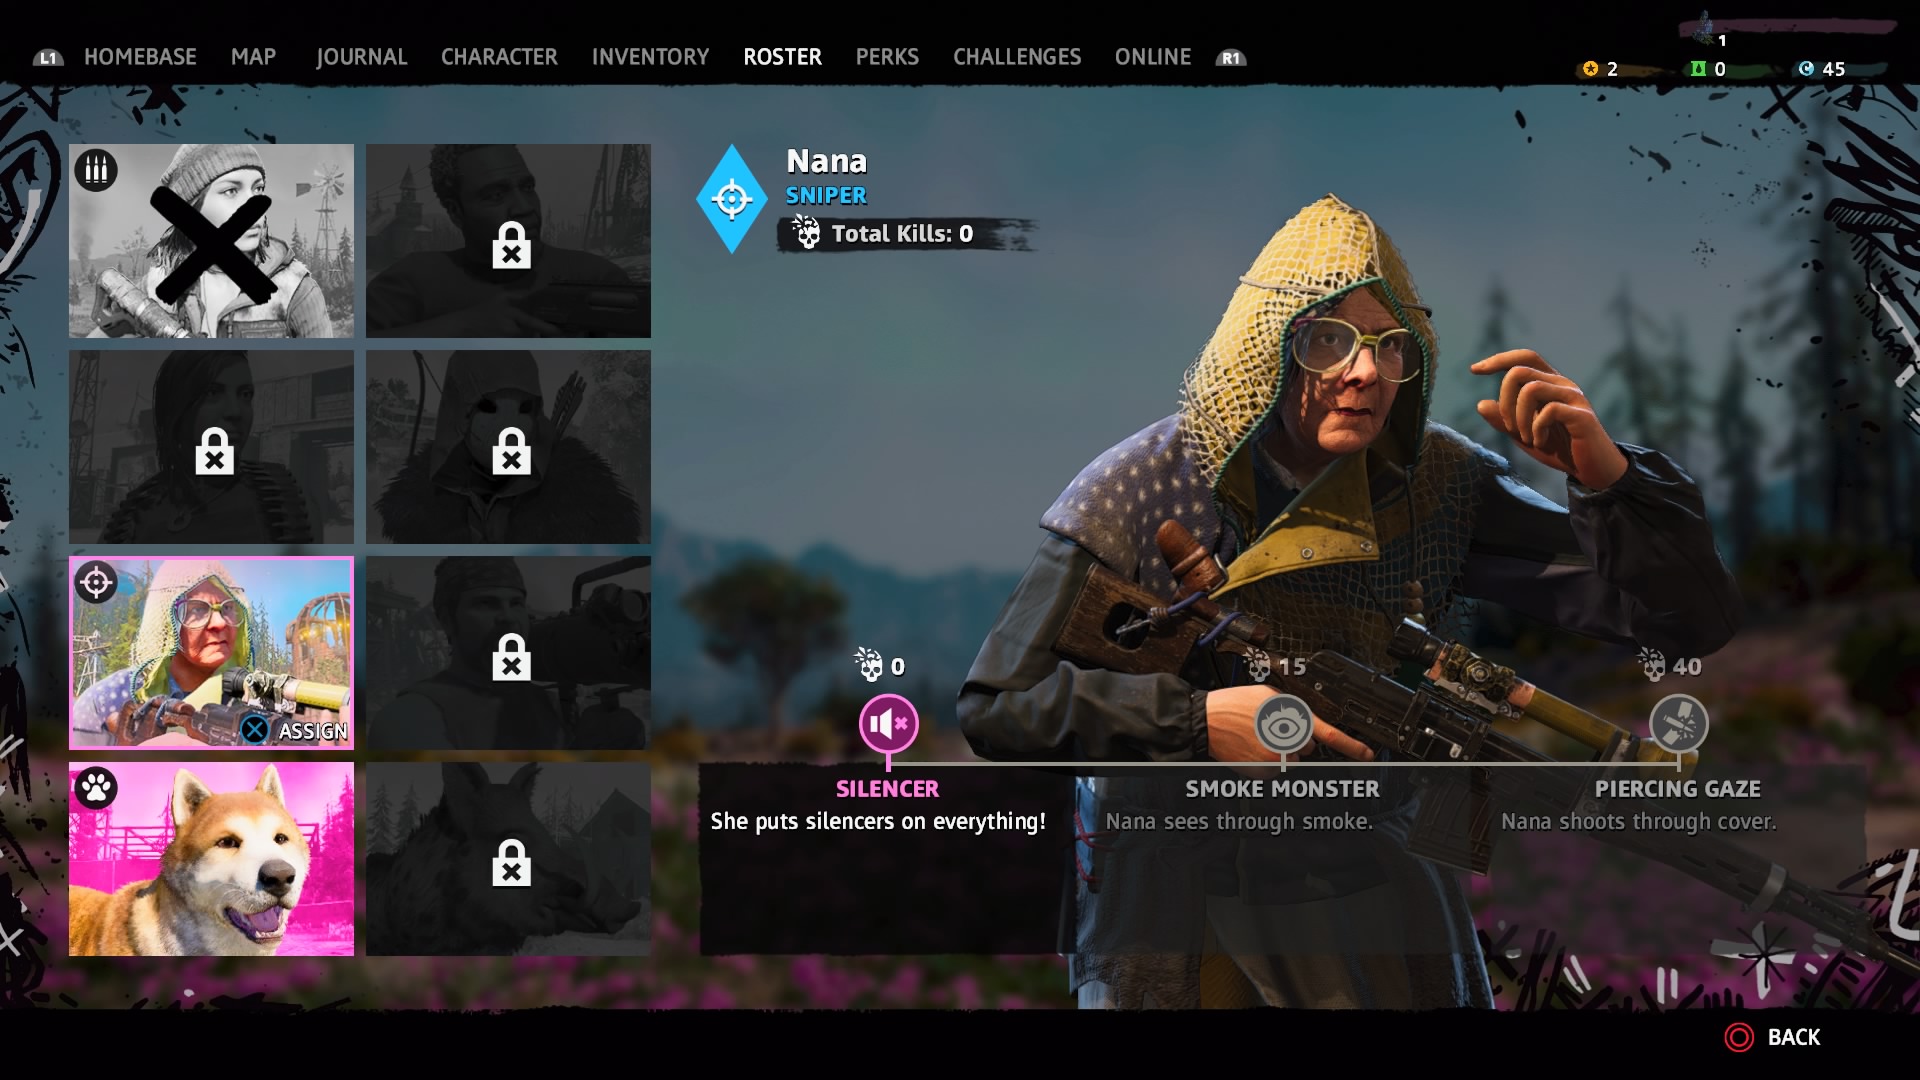
Class: Sniper
Weapon: Sniper Rifle
Perks: Silencer (She puts silencers on everything!), Smoke Monster (Nana sees through smoke), Piercing Gaze (Nana shoots through cover)
Mission: Go to Nana's Perch, East of Blacklung Mine, and speak to Nana to start the mission “Crow's Feet, Eagle's Eyes”, in which you'll be challenged to hit a series of targets with a sniper rifle. Complete the challenge, and Nana will sign her services up to your fight.
Pros: As a sniper, Nana is ideal for cover support from afar, while her use of silencers makes the feisty pensioner a perfectly viable choice for stealth assaults on any outposts.
Cons: Naturally, this old codger ain’t too great when it comes to close range combat, so maybe dismiss her for someone else when the enemy rushes in for close encounters.
Pastor Jerome
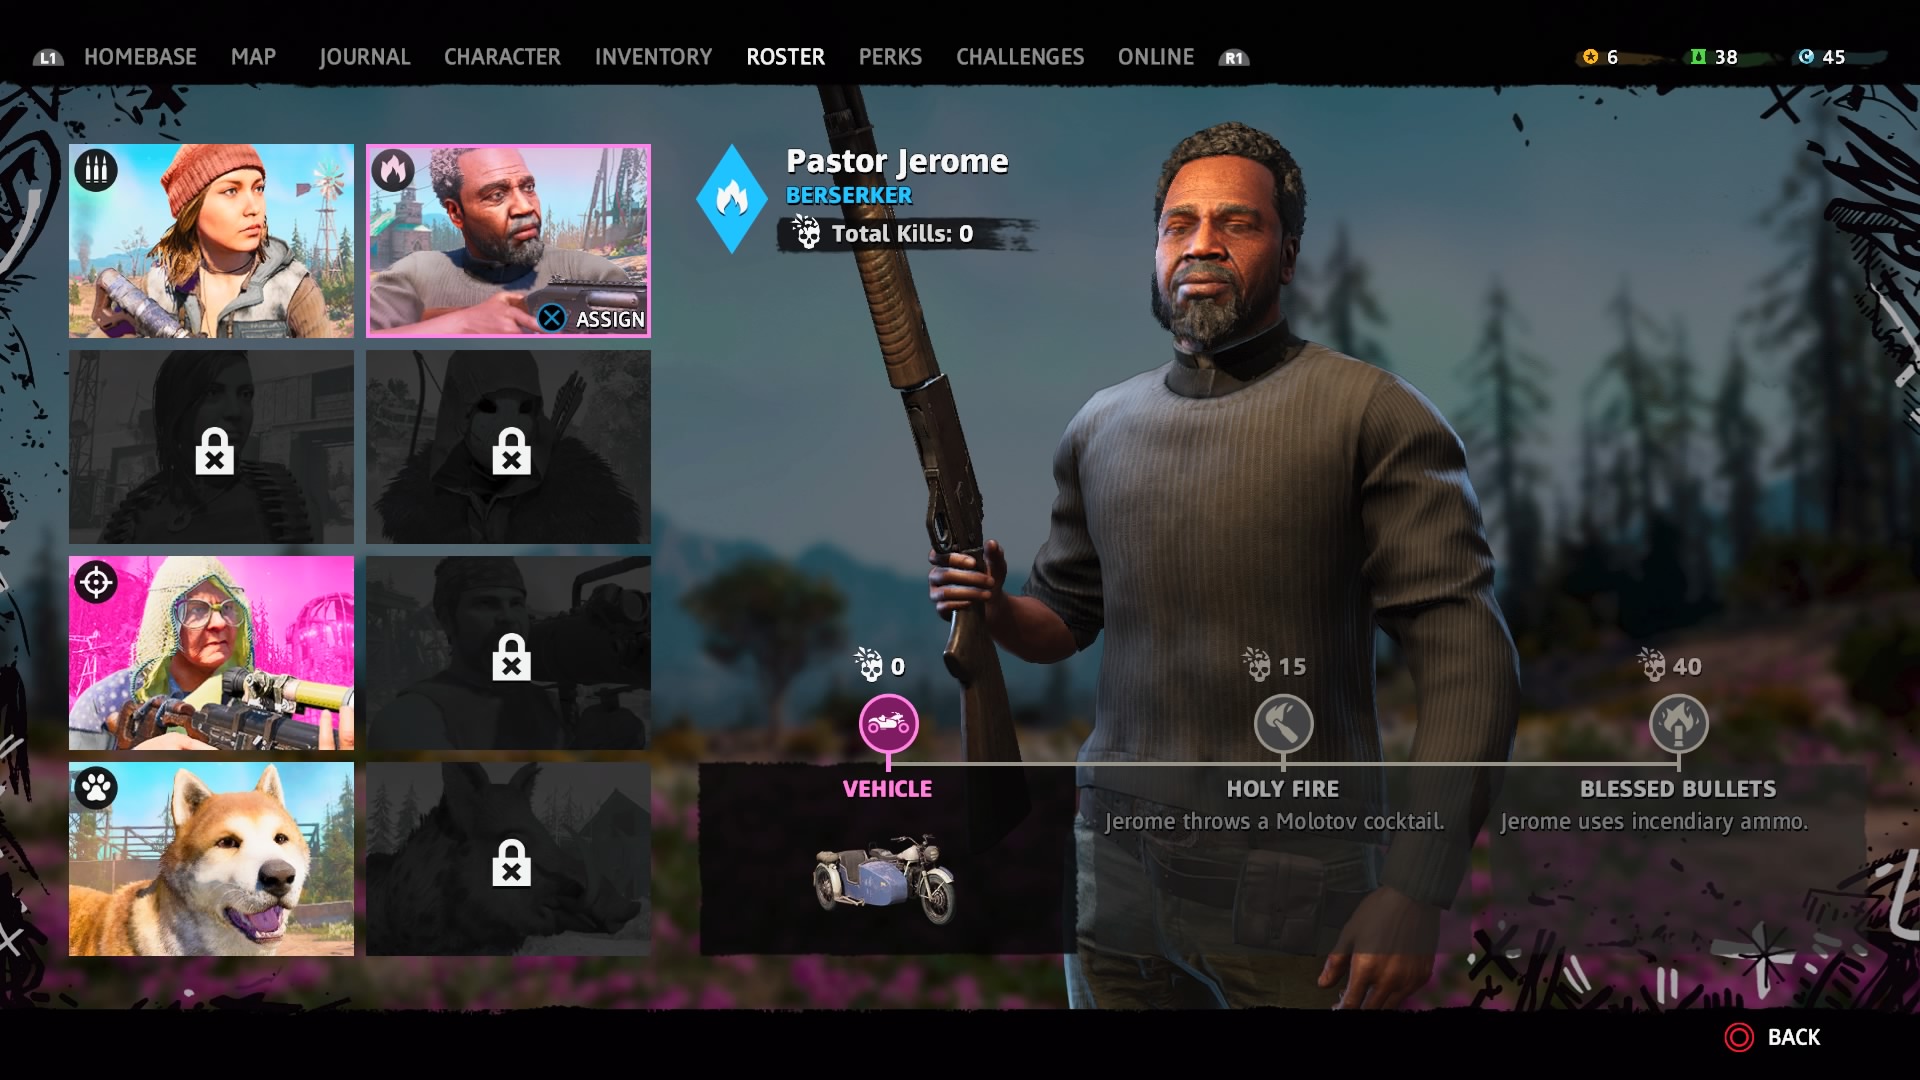
Class: Berserker
Weapon: Pump action shotgun
Perks: Vehicle (Brings a vehicle when called), Holy Fire (Throws a molotov cocktail), Blessed Bullets (Uses incendiary ammo)
Mission: Venture to Ramone's Lookout Northeast of Prosperity and speak to the nearby NPC to begin the mission “Jerome Comes Home.” You'll need to liberate the pastor from a moving convoy, or follow it to a nearby outpost that then needs to be secured. With this done, speak to the freed captive to complete the mission and recruit him as a gun for hire.
Pros: Brandishing a shotgun with incendiary ammo and several molotov grenades, Jerome is your man for close encounters in tight spaces, especially as Far Cry’s physics system allows fires to spread quickly, setting entire buildings ablaze in seconds.
Cons: With that said, those fires won’t discriminate between friend or foe, meaning Jerome’s arsenic agenda can come at the cost to your own health bar.
Timber
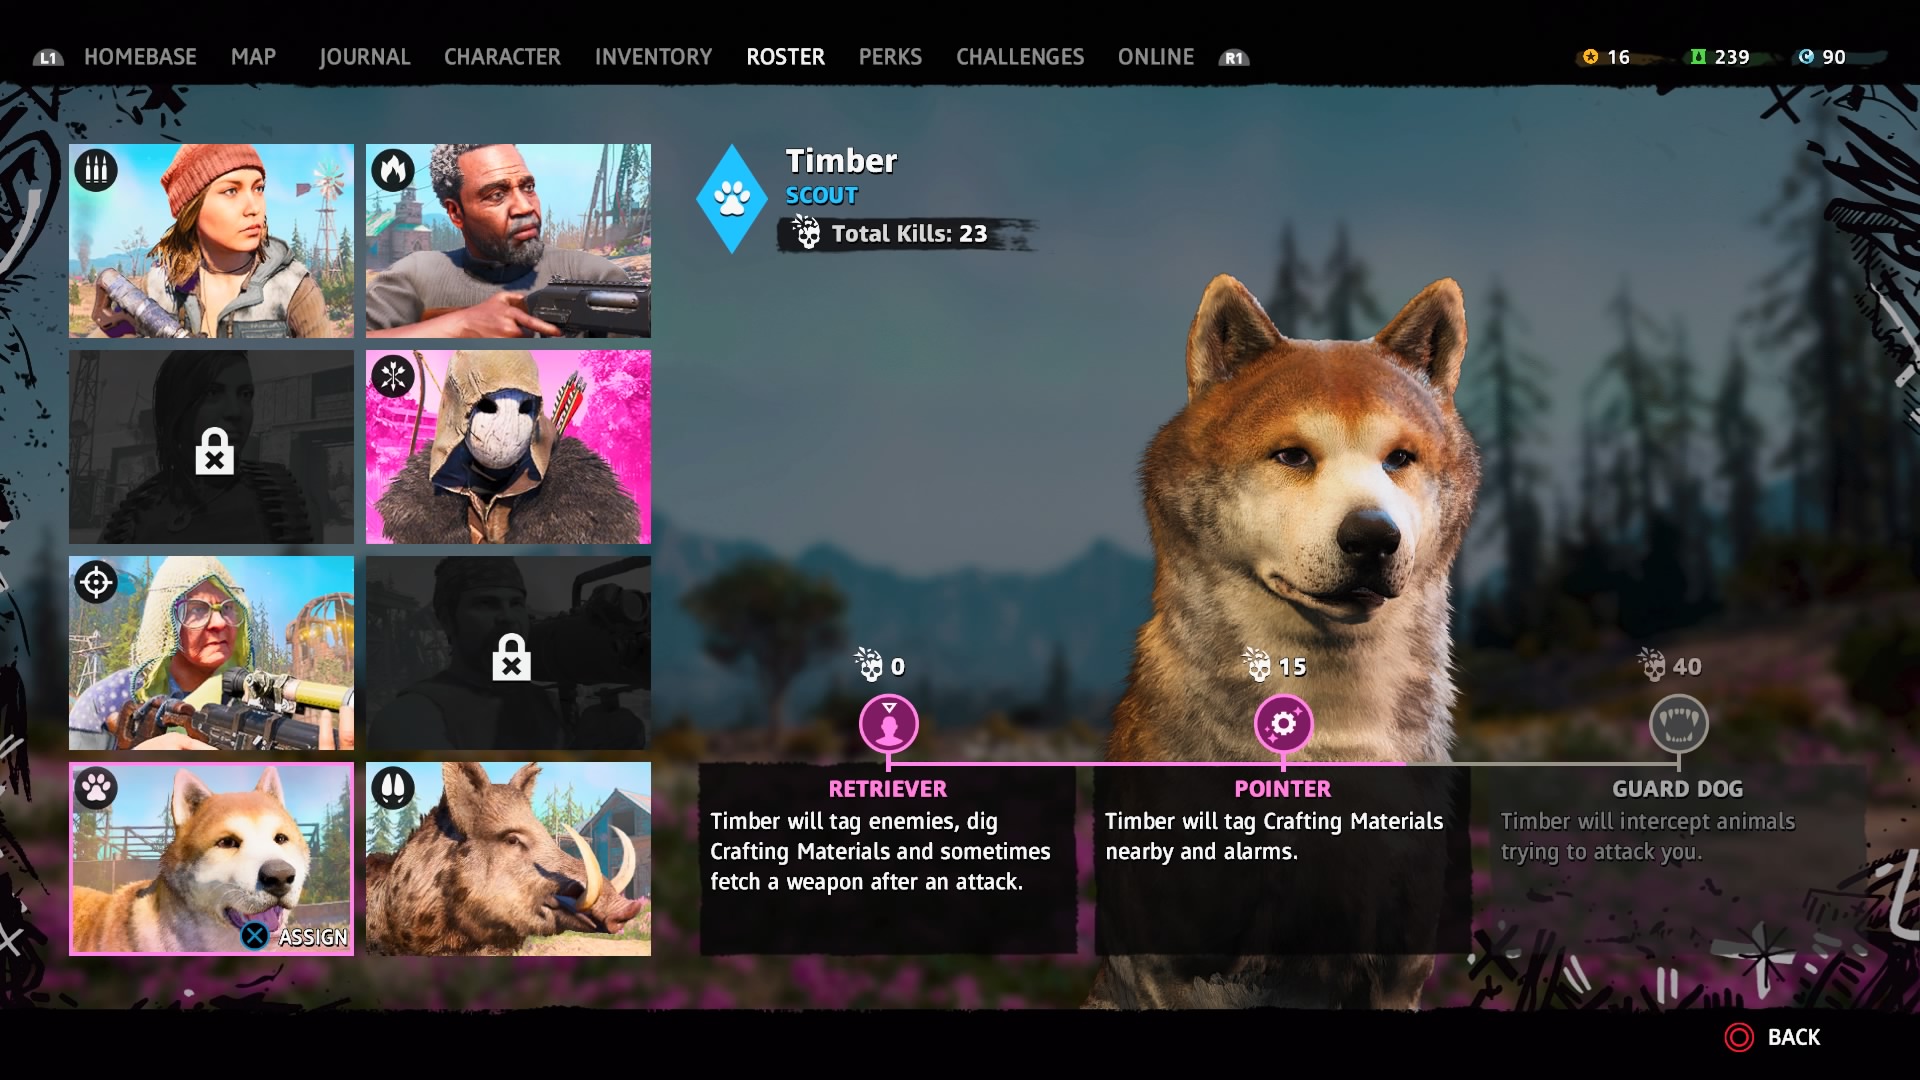
Class: Scout
Perks: Retriever (Tags enemies, digs crafting materials, and fetches weapons), Pointer (Tags crafting materials nearby), Guard Dog (Intercepts animals trying to attack you)
Mission: Head to the Meatfort, East of the Broken Forge outpost, to begin the “Man Eat Dog World” quest, and explore the search zone until you find Timber locked up in a basement. Help him liberate the rest of his friends by finding the key from a nearby dog corpse (*sob*) and unlocking their cages, before petting Timber to complete the mission and recruit him as a Gun for Hire.
Pros: A four legged scavenger, it’s worth calling Timber in when you’re low on resources or weaponry, while his ability to tag enemies saves time when scouting an outpost.
Cons: Timber ain’t the strongest fighter in the roster, so don’t expect him to be much use during the harder, larger firefights found in Far Cry New Dawn’s later missions.
Horatio
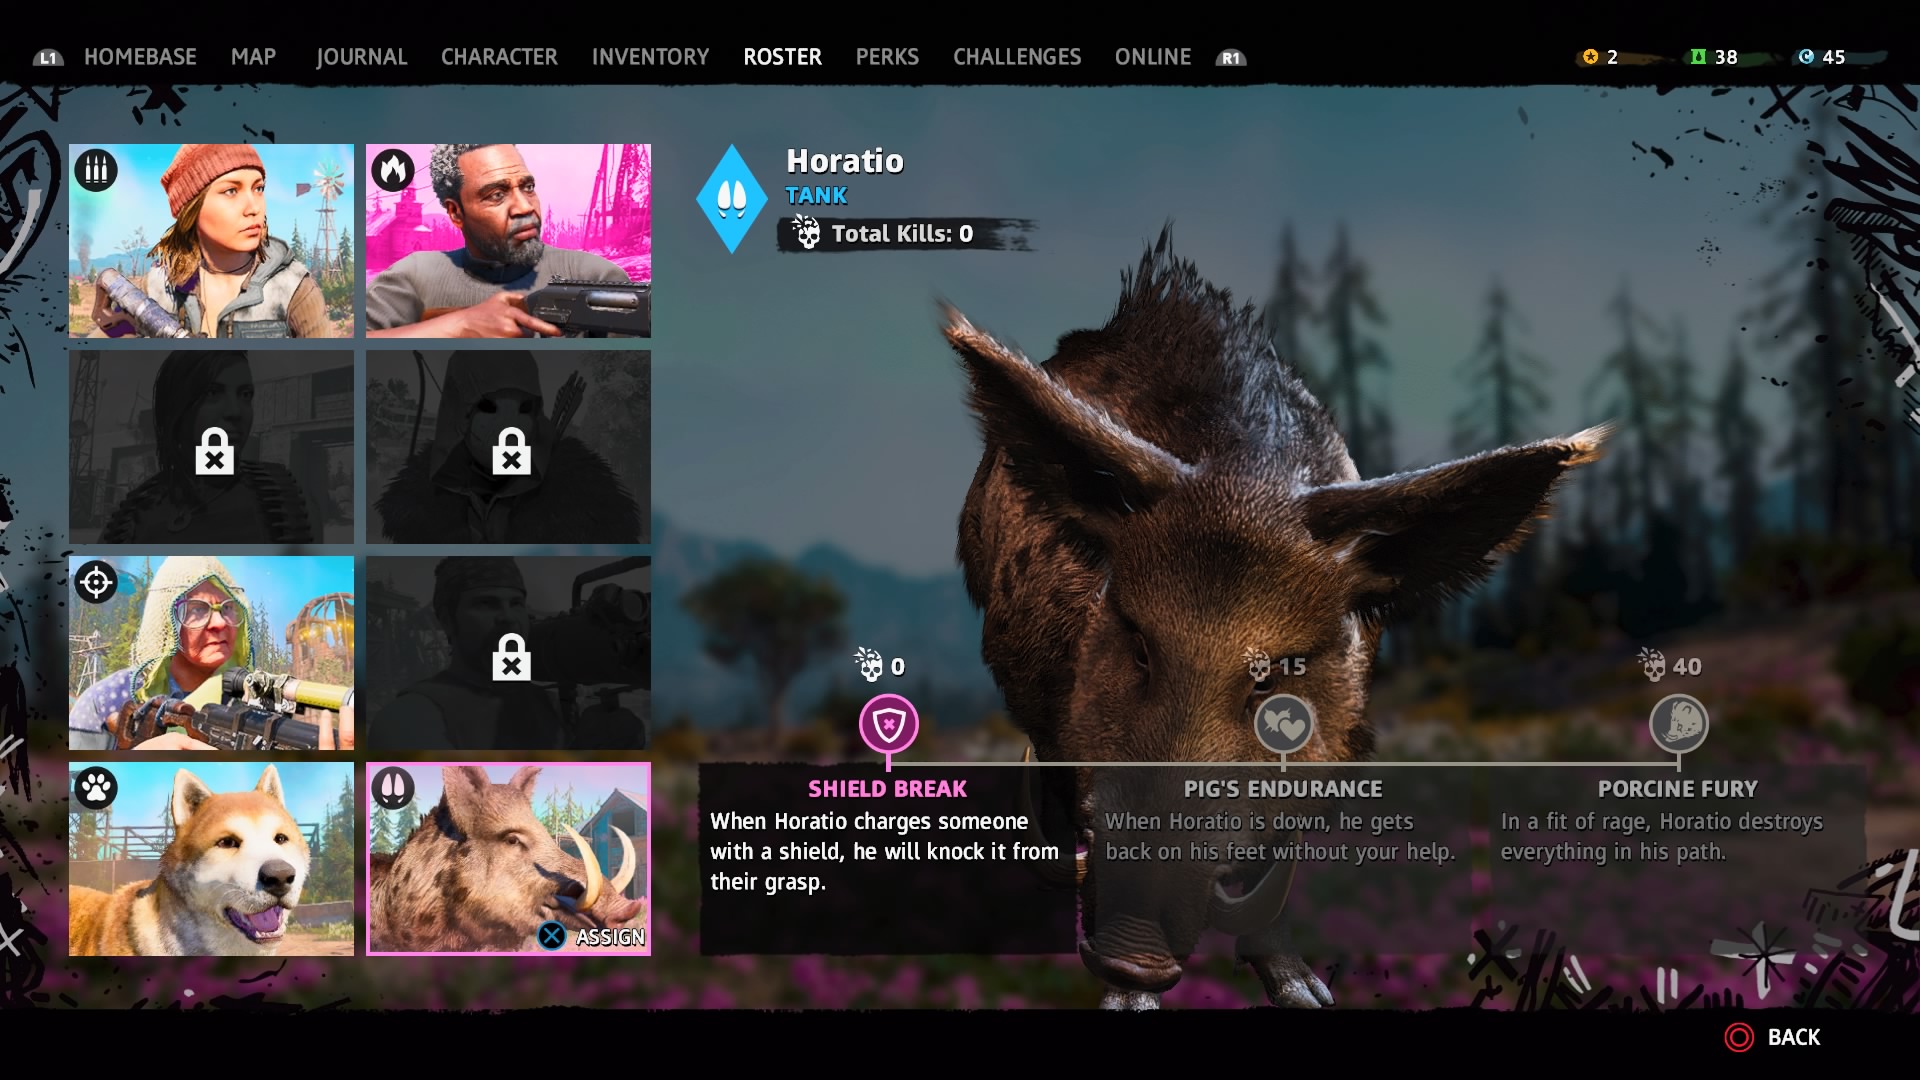
Class: Tank
Perks: Shield Break (Knocks enemies’ shields from their grasp), Pig's Endurance (When Horatio is down, he gets back up on his feet without your help), Porcine Fury (In a fit of rage, Horatio destroys everything in his path)
Mission: Head to Elsinore Farm on the midwest border of the map to begin the “To Love a Boar” quest. Follow your marker to the nearby shed and shoot the lock on its front door to free Horatio from within. Secure the area of any foes with Horatio’s help before petting him to complete the mission and recruit the boar permanently as your Gun for Hire.
Pros: Horatio is fantastic for creating mayhem and causing distractions, capable of taking out several enemies and vehicles at once while you safely pick off any stragglers.
Cons: Don’t expect Horatio to be any good for stealthy playthroughs, and he won't be able to tag along with you in any vehicles either. You know, on account of being a giant pig.
Hurk
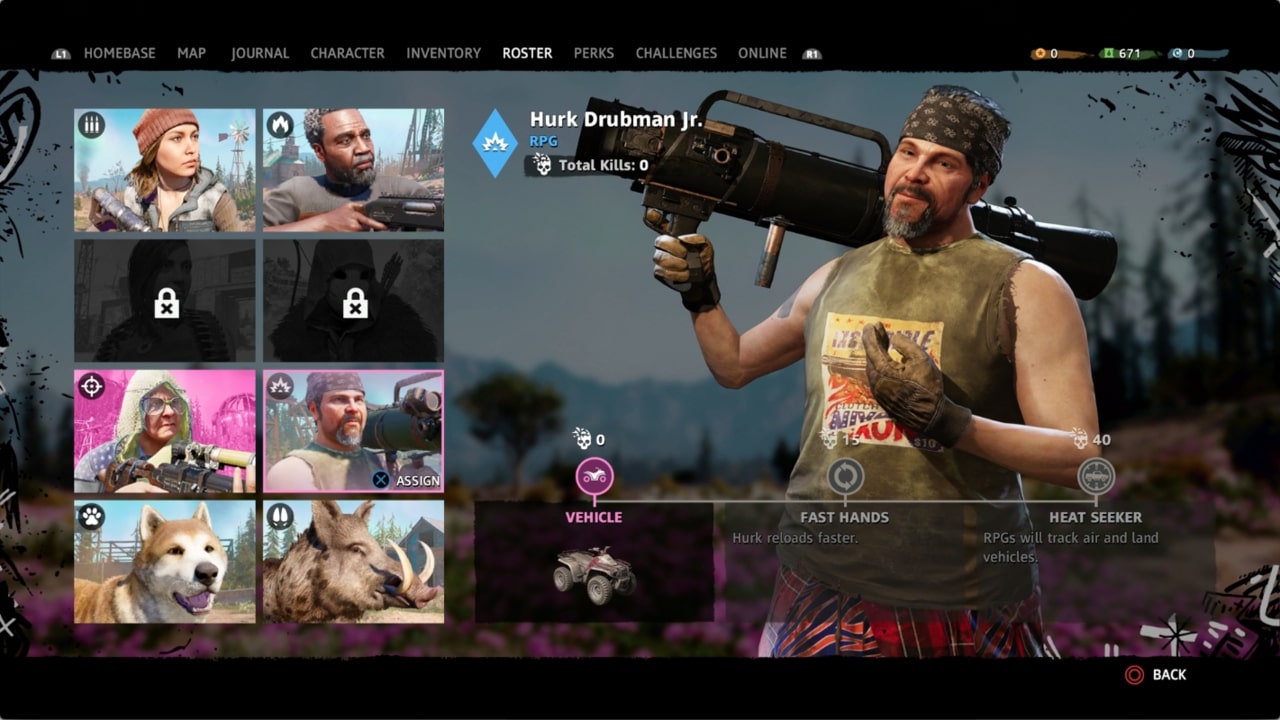
Class: RPG
Weapon: Rocket Launcher
Perks: Vehicle (Brings a vehicle when called), Fast Hands (Hurk reloads faster), Heat Seeker (RPGs will track air and land vehicles)
Mission: You can find Hurk in the Southeast corner of the map at *ahem* Shitlord’s Tunnel. Speak to him to begin the mission “Days of Blunder” and reap revenge upon the Highwaymen as his personal driver. Complete the mission, and Hurk will offer up his services as a Gun for Hire.
Pros: Dealing with an armoured vehicle on land, air or sea? No problem. Hurk is your best bet for making quick work of any automobiles with his explosive toolset.
Cons: Hurk’s reliance on the RPG makes him as much of a danger to you and himself as the enemy, which can accidentally result in some unwanted collateral damage.
The Judge
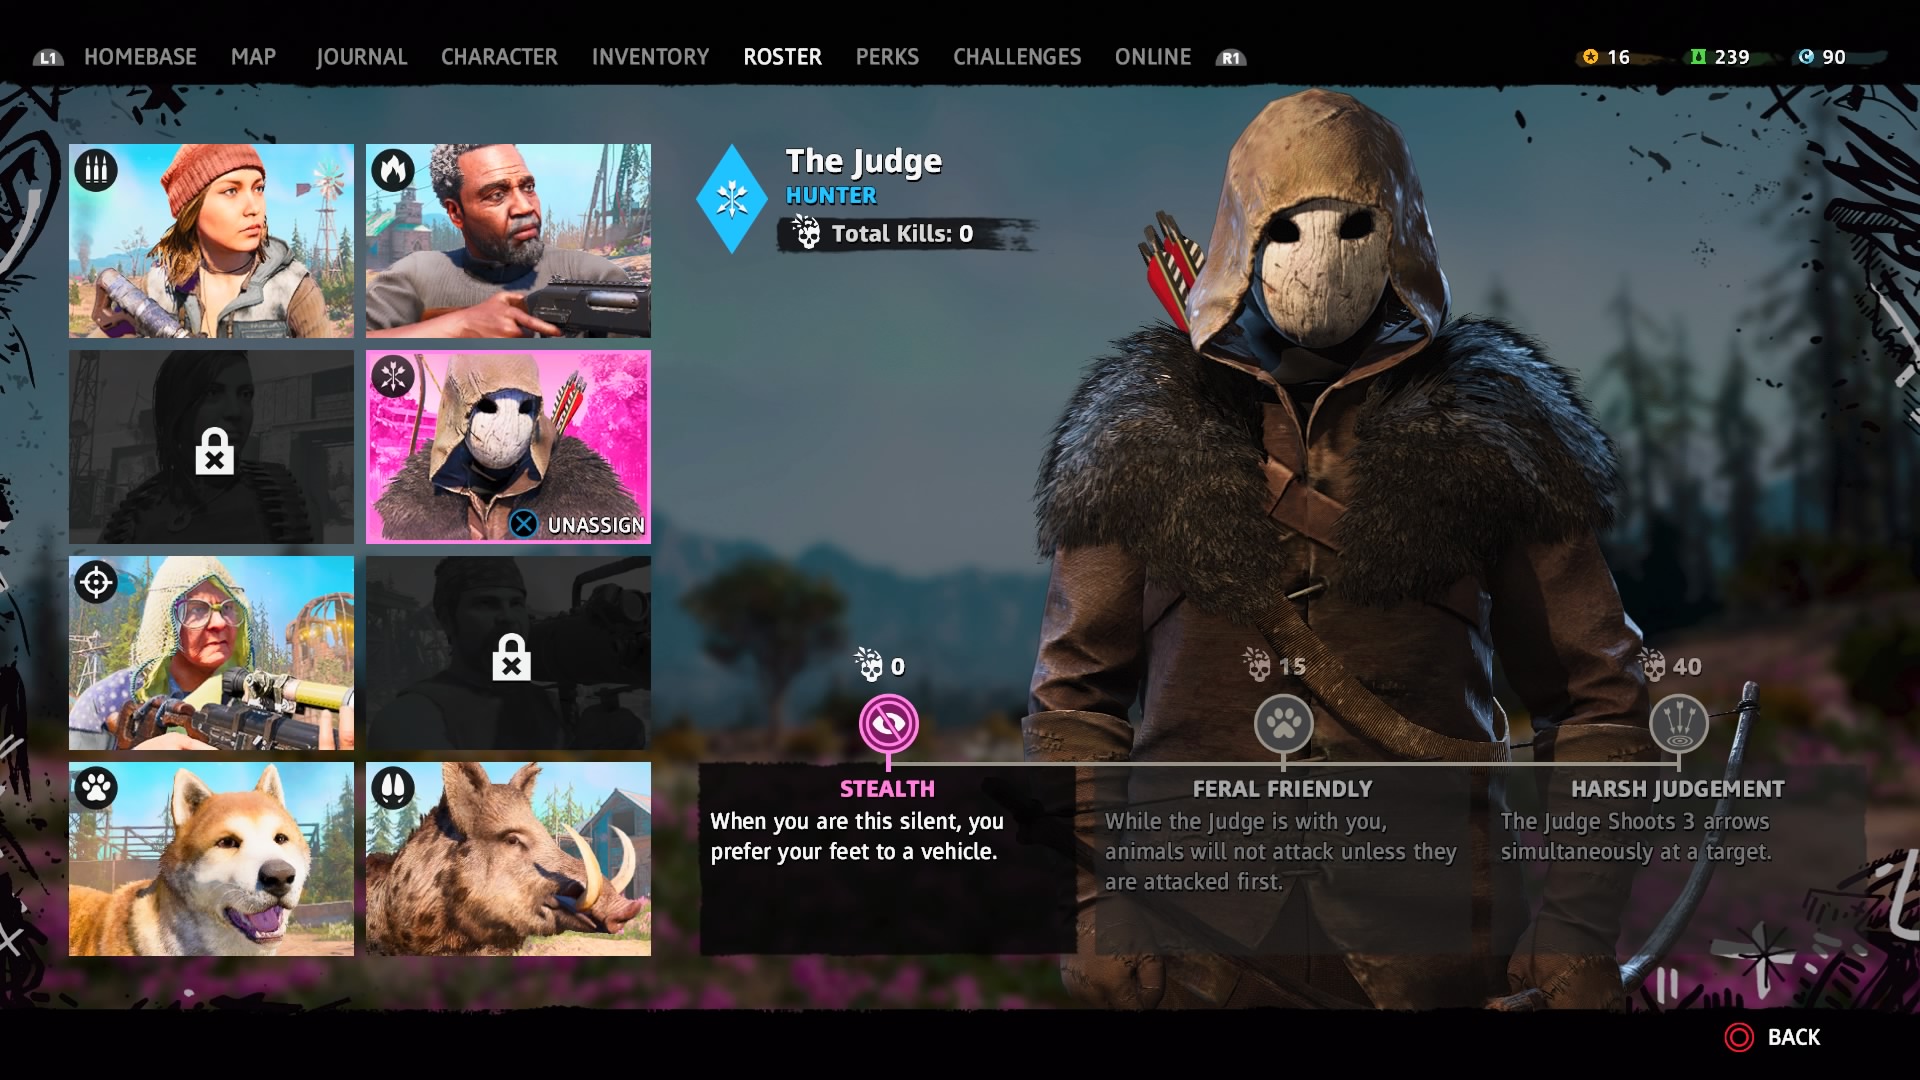
Class: Hunter
Weapon: Bow and arrow
Perks: Stealth (Walks silently), Feral Friendly (Animals will not attack unless they are attacked first), Harsh Judgement (Shoots three arrows simultaneously at a target)
Mission: Complete the story mission “Joseph's Secret” in Act 2 of the campaign and The Judge will automatically become available as a Gun for Hire.
Pros: Obvious alert, but The Judge is a prime pick for any hunting excursions on your travels in New Dawn, not least because their second perk prevents any beasts from you attacking you first.
Cons: As a silent woodsman, The Judge is no use against heavy artillery or vehicles, as their arrows can only pierce flesh, and not metal.
Gina Guerra
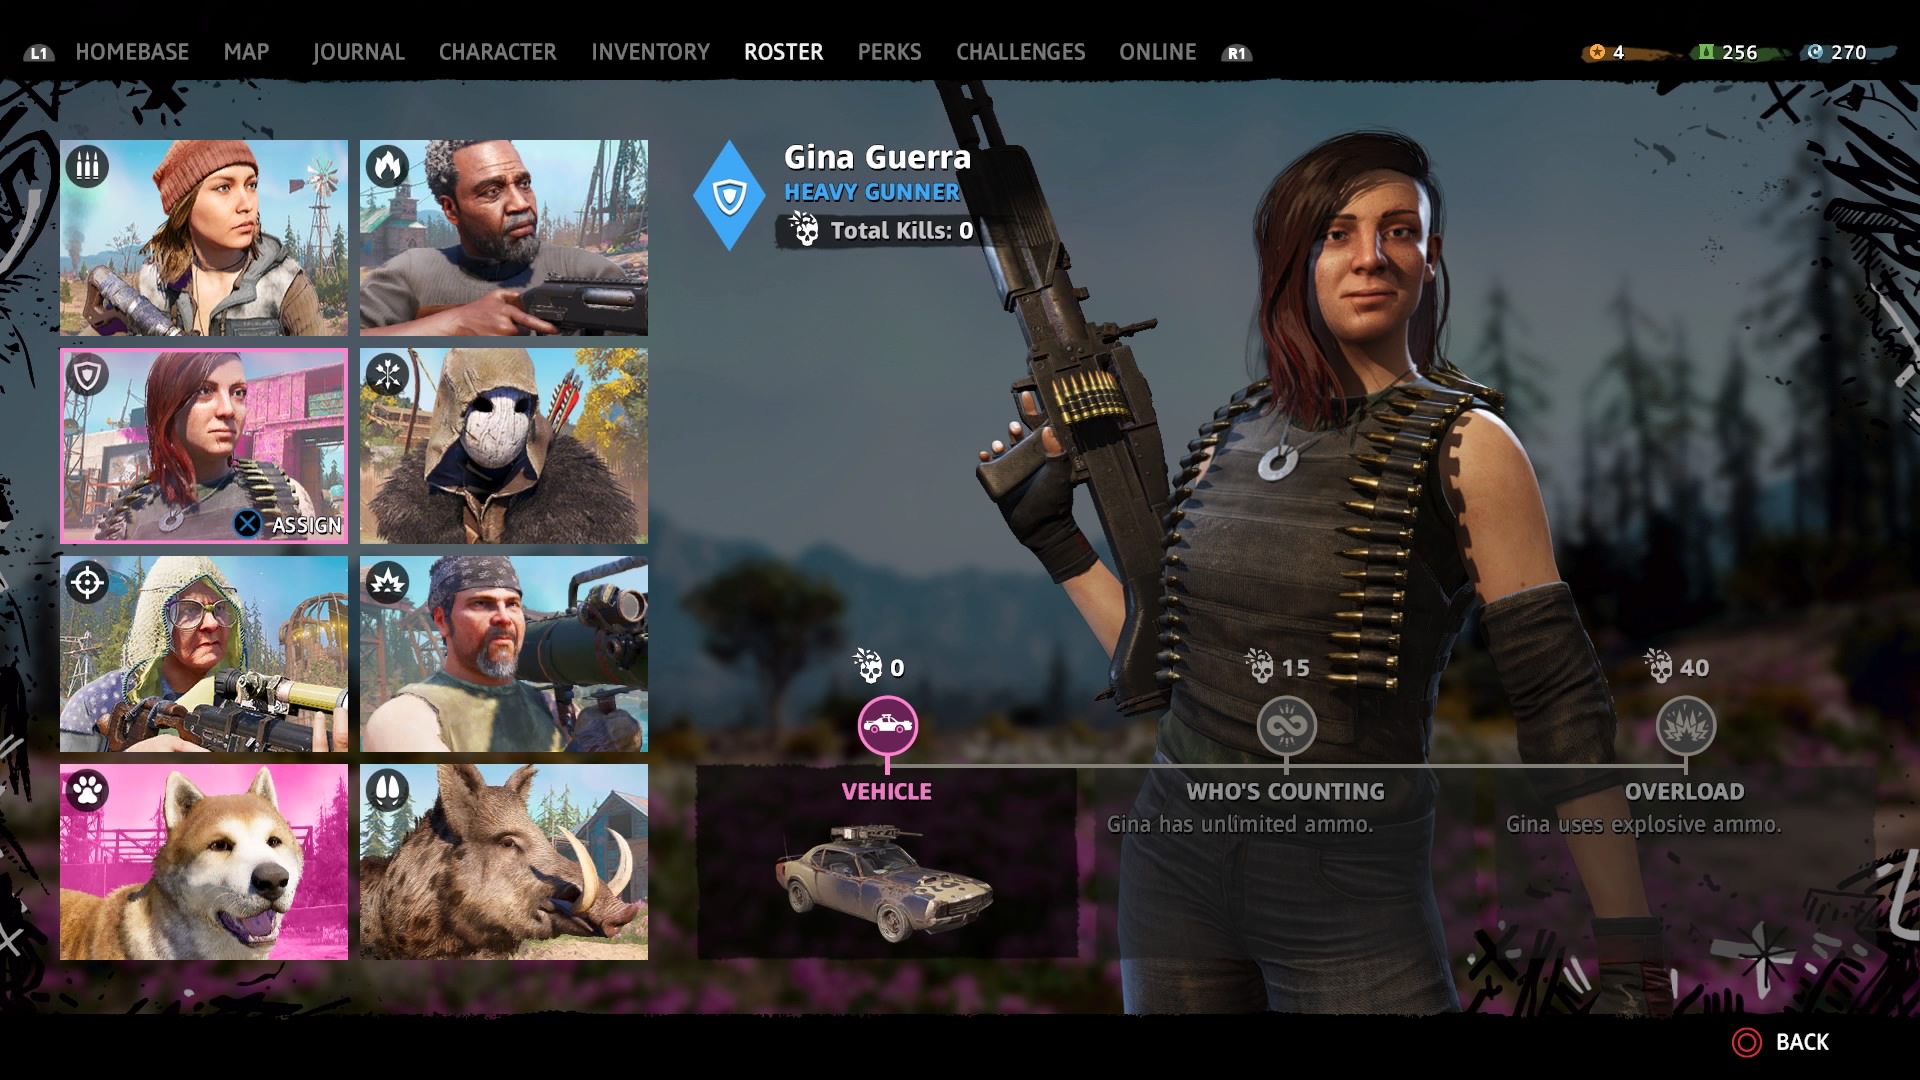
Class: Heavy Gunner
Weapon: LMG
Perks: Vehicle (Brings a vehicle when called), Who’s Counting (Has unlimited ammo), Overload (Uses explosive ammo)
Mission: Speak to Sharky at Chateau Boshaw on the central eastern ridge of the map, and complete the mission “Adventures in Babysitting.” Once you've done that, find Sharky back at Prosperity and he'll give you the mission “Mo’ Mommies, Mo’ Problems” to rescue Gina from the Highwaymen’s derby race. Completing this will unlock the character as a Gun for Hire.
Pros: With her unlimited ammo and beefy light machine gun, Gina is your go to for crowd control when you’re severely outnumbered, capable of cutting through dozens of enemies in a single magazine.
Cons: It takes a while for Gina to reload that giant weapon, however, making her vulnerable to fire at precisely the wrong time, so you’ll need to cover for her more attentively during those moments.
Watch our Far Cry New Dawn tips video below:
Weekly digests, tales from the communities you love, and more
I'm GamesRadar's Features Writer, which makes me responsible for gracing the internet with as many of my words as possible, including reviews, previews, interviews, and more. Lucky internet!


