Gears of War 3 multiplayer weapons and maps guide
Learn how to keep all of your body parts attached with our guide to the weapons, maps, and gameplay of Gears 3 multi

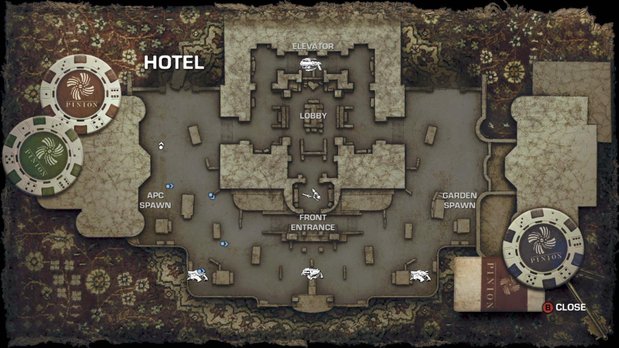
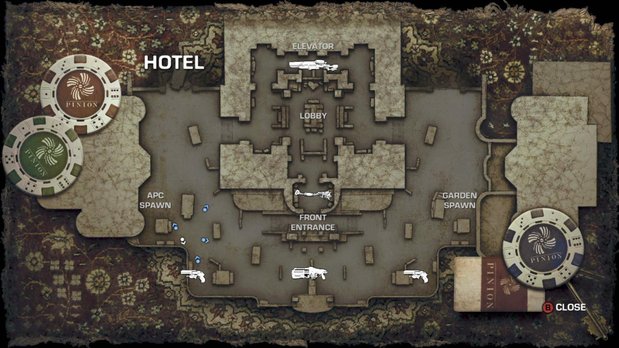
Hotel is nice and varied since you can fight both outside and inside. However, most of the action revolves around the struggle to control the indoors area, so don’t waste a lot of time on the street.
Be very careful entering and exiting the hotel through the front. This area is fairly wide open and can be very hard to escape if you’re in trouble.
Don’t forget about the Digger/Boomshot located on the street in front of the hotel’s main entrance. Like we mentioned, most of the action takes place inside, with many players rushing in after their spawns in a frantic effort to continue the battle. These weapons really come in handy when used indoors, so go grab ‘em!
The area where the Torque Bow/Longshot spawns is the sweetspot of this map. You can see all three entrances from this slightly raised area and there is decent cover, granted you aren’t hanging out here all alone.

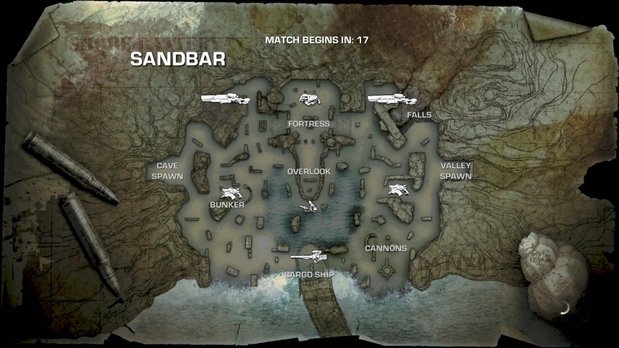
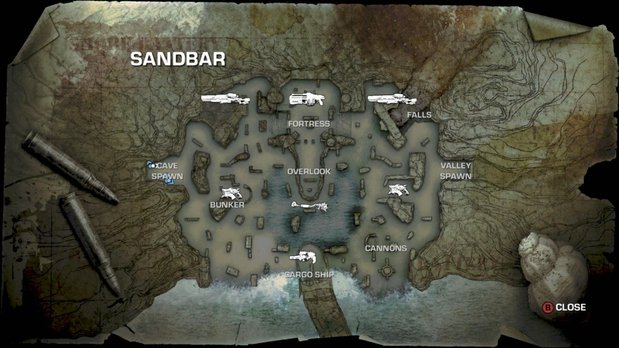
Sandbar is the biggest Gears multiplayer map ever. With lots of winding routes, it’s important to know where you’re going. There are several false paths that lead to dead ends or invisible walls. Study the map carefully to make sure you’re not running in the wrong direction. Also, try to learn quickly where you can and cannot step into the water. It’s not always clear, and a mistake during an escape could cost you your life.
If you find yourself at the overlook without a decent weapon and you have not yet been spotted, try to focus on helping your team by marking opponents instead of shooting them. Shooting will give you away and shorten your life expectancy, and from this distance you can’t do much damage with an assault rifle anyway.
The Longshots and the Digger/Boomshot are fairly close to the overlook. Try taking one of these weapons up there.
Even though it’s the low ground, the cargo ship is a great place to hold out with your team. There is lots of good cover, easily defendable entrances, and of course, the Hammer of Dawn/Oneshot spawns there. Just watch out for grenades and the Boomshot, as the area is small and can be cleared out with these weapons.

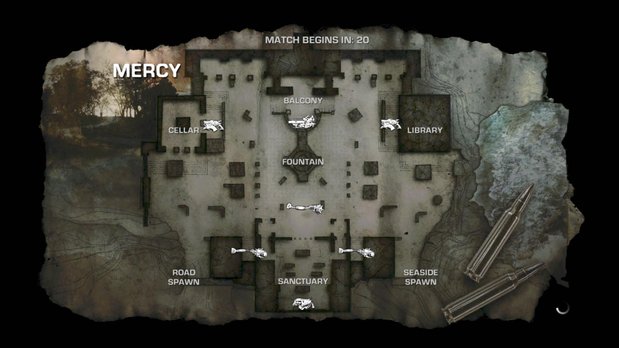
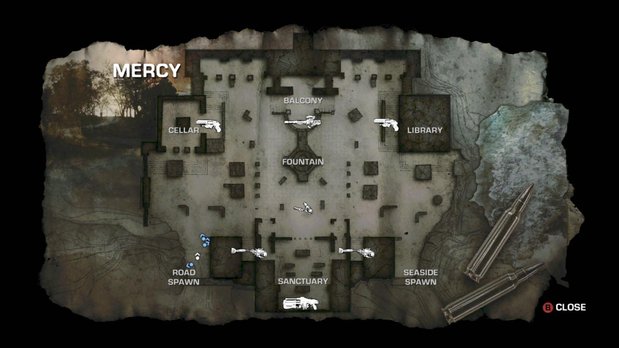
The Mortar, found on the balcony every other round, is especially valuable on this map given how much open space there is.
The sanctuary where the Digger/Boomshot spawns is one of the most easily defendable areas you’ll find on a Gears map with only two small entrances. You can shoot and even throw grenades through the front gate. Be wary on rounds where the Mortar spawns though, as the roof to the sanctuary is missing.
The foliage can make players hard to see in the middle of the map. Watch out for hiders just waiting to smear you with a shotgun.
Because it’s close to the spawn points, a lot of the action goes down right in front of the sanctuary. Try not to get goaded into fighting here, and instead make for the balcony or go inside the sanctuary.

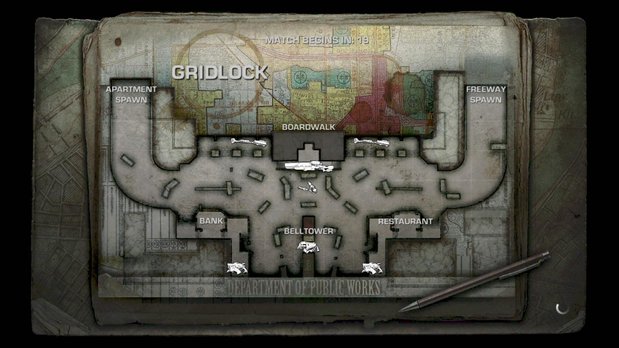
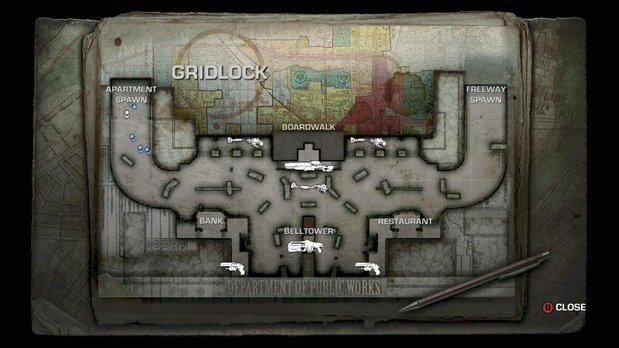
The area with the Longshot is usually the most contested spot on the map, with one team trying to hold out the tiny area at the top of the stairs and the other team assaulting them from below.
If you are defending this area, we recommend sending one scout to either the Bank or the Restaurant (whichever is closer to the enemy spawn) that can mark approaching enemies and fire on enemies in cover that are trying to assault the Longshot position. Make sure this scout is good with the shotgun though, because eventually the opposing team will be onto this scheme and send someone to take out the scout.
Don’t forget about the grenades in the middle of the road just below the Longshot spawn. If you’re trying to assault the stairs, these will obviously be a big help.
If you are holding the Longshot spawn area, make sure to always plant any grenades you have at the bottom of the stairs.

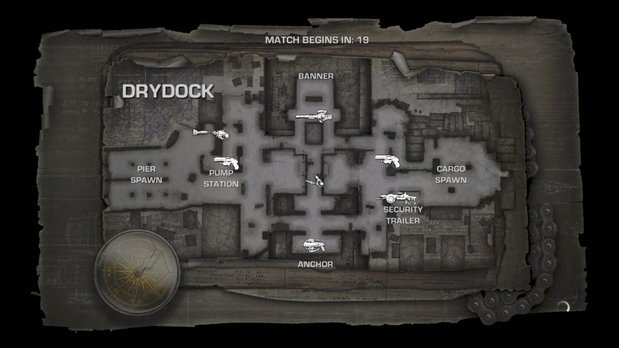
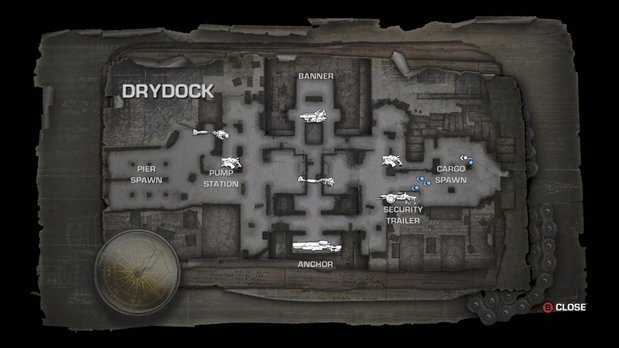
Drydock is all about controlling the central high ground. If your team can hold out there, you’ll have a relatively clear view of the enemy as they try and make their way from the spawn points to your location. This strategy can turn Drydock into a nightmare for lone wolves.
Alternatively, to take over the high ground from an entrenched team, you’ll want to coordinate pincer attacks by flanking from different routes and ramps as opposed to assaulting one ramp. It will be harder for the enemy to defend themselves when you’re attacking from all sides.
The I-beams on both sides of the central bridge that run parallel to it can be climbed onto. This is a great way to sneak around to the other end of the bridge if the enemy has it locked down.
You can shoot through the central bridge’s floor grates. If you’re using something like the Lancer, not every bullet will go through, but still enough to distract enemies above/below you.
Sept 27, 2011
Weekly digests, tales from the communities you love, and more
