Dragon Age: Origins walkthrough
Stuck? We'll get you to the Archdemon in no time flat
Weekly digests, tales from the communities you love, and more
You are now subscribed
Your newsletter sign-up was successful
Want to add more newsletters?
Join the club
Get full access to premium articles, exclusive features and a growing list of member rewards.
NEW AREA: Anvil of the Void
Grab the Lyrium during battles for a much-needed Mana boost. There’s a room full of green gas nearby. It won’t hurt you too much to fight the Golems in there, but if you lure them through the doorway you came in, this otherwise difficult battle becomes almost comically easy. Make sure your teammates hold their positions, and dispatch all the Golems one by one. The same goes for the next room. Make your party wait outside, and force the Golems to bring the fight to you.
MINIBOSS: Forgotten Spirits
This battle is a bit different. By killing a Forgotten Spirit, you’ll activate the Anvil near it. Touching the Anvil will make the faces on the column spew blood, which means you’re doing it right. Hit the bleeding eyes with anvil beams as fast as possible. This will stop more spirits from being summoned. This is a tough battle, but it gets easier as you go. Don’t give up! Be sure to save once you’re done because a big decision is coming up.
BOSS: Branka/Caridin
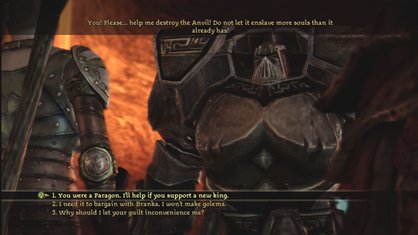
You’ll have to side with either Caridin or Branka regarding whether or not you’ll preserve or destroy the Anvil. The right, moral thing to do is destroy the Anvil. As a result, Leliana and Alistair will strongly disapprove of any attempt to use it, while Zevran or Morrigan will approve. Oghren doesn’t want to fight his wife, but he will approve of destroying the Anvil, so for him it basically balances out. Either way, fighting all these Golems is pretty tough. Try to avoid elemental spells like Fire, but Electrical attacks work OK. After the battle, make sure to reload your save file so you can get both Achievements/Trophies.

Once you’ve got your crown, loot the nearby chest for a bunch of goodies, including a Medium Silver Bar for Zevran. There’s also an easy sidequest here if you take a tracing of the Golem’s Registry. Once you’re ready to leave, talk to Oghren. You’ll warp all the way back up to Orzammar to settle the election business. Get another save file ready – you’ll want it soon.

Back at Orzammar
Guess what? Regardless of whether you backed Bhelen or Harrowmont originally, you can choose whomever you want now that you have the crown in your possession. If you go with Bhelen, you can fight Harrowmont or let him go. You’ll get the Maul from Bhelen as a reward. If you side with Harrowmont, you’ll immediately have to fight Bhelen. You’ll get a fancy staff and some approval points from Alistair for your troubles. Regardless, you’ll get the troops you need to fight the Blight.
Congratulations! You’ve crowned the next king of Orzammar.
Weekly digests, tales from the communities you love, and more
 Join The Community


