Dragon Age: Origins walkthrough
Stuck? We'll get you to the Archdemon in no time flat
NEW AREA: Denerim Gates
At this point, the baddies shouldn’t be too much of a problem. Use area spells to thin out the Grunts, gather what remains of your party, and venture into the Market District.
Market District
For this battle, you’ll have the help of your armies and you can choose which class to send into battle. We recommend using Mages to take down the Ogres, but there are a number of good strategies here based on your team makeup and fighting style.
The Alienage
Convince Shianni to defend her home if you can. Either way, hit the Ogre and archers with every area spell you’ve got as long as you’re protected by the wooden gate. You’ll get the Dawn Ring from Shianni for your help. Head north and continue to the Palace District.
You’ll have to hold the gates with your secondary party while your main party forges ahead. Speak with the Officer to begin the battle, and make sure everyone is properly equipped. If you’ve been neglecting your secondary characters, here’s your chance to redeem yourself. Talk to the Messenger once the gates are secured to finish this encounter.
Palace District
Head up the left, battling the archers on the stairs. Again, we recommend controlling Mages, but pick the allies you like best. The enemies here are weak, but plentiful. Focus on the Alphas and thin out everyone else with area spells. Don’t forget about Mind Blast, and save as often as you can after each battle.
Fort Drakon
There’s a Dragon Thrail ready to greet you, along with a number of archers – remember that dragons are immune to fire spells. Be careful of spell traps, and above all else, be patient and let the baddies come to you. Now’s a great time to call your Elves if you’ve got ‘em.
Once you’re inside the Fort, head straight down. You’ll be ambushed by Lesser Shades first, then face a ton of corpses in a narrow hall. Don’t forget to grab the great weapons and armor in the nearby armories.
Weekly digests, tales from the communities you love, and more
Fort Drakon: Second Floor
At this point, you should be used to the general tactics associated with dungeon crawling. There aren’t any hugely valuable items here, so head towards the center of the map and keep heading south. A few more Ogres stand in your way before you hit the rooftop. Get ready for the final battle!
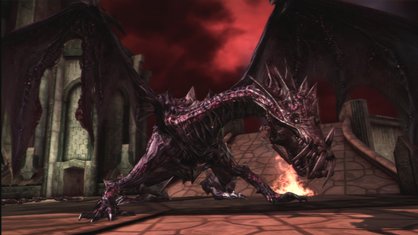
BOSS: Archdemon
First off, remember that you have your armies at your disposal. This battle is broken into 4 parts. For the first part, the Archdemon will mostly stand still and attack, though it will fly to a new location every once in a while. You can dodge its attacks if you’re far enough away, but your tank’s health should be your top priority. Be patient and be careful. If your tank falls, it’s over.

For the second phase, the Archdemon will summon Darkspawn minions and fly to a harder to reach area. Avoid the vortex it spits out – it will decrease your attack and defense. You can deal absurd amounts of damage from a safe distance by using the ballistae on the battlefield. By keeping away, you should be able to bypass the third phase of this fight altogether.
Congratulations! You’ve saved Ferelden from the threat of the Blight. Give yourself a big pat on the back. You’ve earned it.
Jan 8, 2009


Your guidebook to getting the ladies and lads of Ferelden into your party… and pants!

Get ready for high fantasy at its finest

Dragon Age: Origins – blood party
A primal primer to your blood spattered brethren in this ultraviolent RPG

 Join The Community


