Dragon Age: Origins walkthrough
Stuck? We'll get you to the Archdemon in no time flat
Even though level scaling means that each quest is equally difficult, we recommend tackling the Circle of Magi quest first. Once you’ve finished it, you can enlist the Magi’s help in exorcising the demon from Connor, who waits in Redcliffe.
The Circle of Magi
NEW AREA: Lake Calenhad Docks
To the left is the Spoiled Princess bar. The innkeeper has an Apprentice’s Amulet to sell, but other than that, there’s nothing vital to do. Carrol is waiting at the docks. If you have Morrigan in your party, try cutting a deal with him for a laugh. At the tower, Gregoir will greet you. Don’t worry about losing approval here; you’re fine either way.
NEW AREA: Magi Tower
Article continues below 
RECRUIT: Wynne
After a few corridors, you’ll meet up with Wynne. Agree to help her, and she’ll join you. Morrigan will disapprove, though. Battle your way through some demons. Wynne will help you out a great deal with her healing spells. Owain is on the top floor. He’ll mention Niall, which will update your quest.
A Blood Mage will attack shortly after, and you’ll need to choose whether or not to kill her. In other words, you will have to decide between siding with Leliana (by sparing her) or Alistair (by killing her). The fallen Blood Mage will give you the Rose of Orlais. Give it to Wynne if you like. A Water-stained Portrait lies in the Charred Corpse in the stockroom. Sten will love it. At the top of the map is a Silver Chain, which Morrigan will appreciate. On this floor to the west, there’s a Chantry Amulet, which Leliana will want, too.
KEY ITEM: Black Grimoire
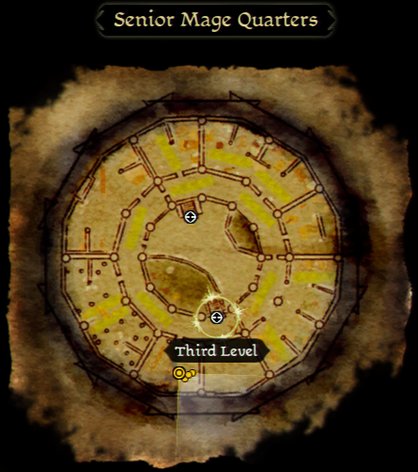
Found the Black Grimoire in Irving’s Chest at the bottom of the map in the Senior Mage Quarters. If you’re playing a male character, giving it to Morrigan is a one-way ticket to romance. She’ll read it back at camp, and as soon as she finishes it, she’ll task you to kill Flemeth.
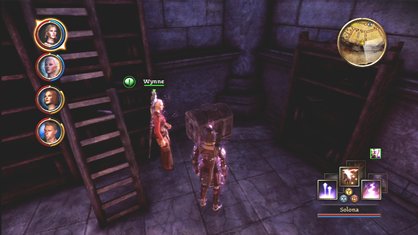
Above: You’ll find the Black Grimoire in the Senior Mage Quarters
Weekly digests, tales from the communities you love, and more

Above: After you give Morrigan the Black Grimoire, she’ll ask you to kill Flemeth
On the third floor, you’ll see a series of statues. If you accepted the Watchguard quest, triggering them in the following order will complete the quest: left, right, center. In the center room are a lot of baddies. One Abomination holds a White Runestone, for Alistair. Cursed Templars are in the two o’ clock room, one of which holds a gold bar, for Zevran.
BOSS: Bewitched Templar / Desire Demon
The Desire Demon has some area spells, but your Winter’s Grasp can freeze her in her tracks. Once she’s down, pick up the Sun Blonde Vint-1. When you meet Oghren, he’ll want it.
NEW AREA: Lost in Dreams
BOSS: Duncan
You’re going to have to fight your way back to consciousness. Attacking the fake Duncan one-on-one is tricky, so keep your distance if you’re a mage. Take him out first if you can. The other Wardens won’t pose too much of a threat afterwards. Grab the Lyrium to continue.
Talk to Niall, and then touch the portal. After killing the Rage Demon, talk to the mouse, and he will teach you how to shapeshift. You’ll open up a slew of new areas here by touching the Fade Pedestal. Go to “The Darkspawn Invasion” on the map and take the mouse hole there. If you go straight, you’ll pick up The Essence of Cunning, which adds a permanent +1 to your cunning stat. Keep fighting demons and traveling through mouse holes until you get a new shapeshifting ability, Spirit. Use Spirit on the Essence of Willpower statues for a boost, and go back to Weisshaupt with it on for another boost. In the Burning Tower, there’s a mouse hole and an Essence of Cunning to grab, along with some burning dogs to take down. Knock out the Burning Templar to get his power, letting you walk through flames and rendering you invulnerable to fire damage. There’s a Spirit Door you can walk through in the previous room for some good loot. Next stop is Mages Asunder.
One room in particular is filled with Crazy Mages, and is pretty tough. Using the Burning Man is the best strategy. You’ll be immune to the Mages’ fire attacks, and you’ll be able to use the Fireball spell at range. Don’t forget that while shapeshifting, you won’t be able to use Quick Heals. You’ll get the Golem form last. At this point, feel free to explore the Fade some more and gather upgrades, or head to the Templar’s Nightmare to progress.
Use all your forms here wisely, switching as necessary. Near the end, you’ll spot a demon that turns into a mouse. Follow her and take her down to open up new paths. Now start venturing into each area and taking out the demon boss at the end using your powers. Sprits are strong against Golems, Golems are strong against humans, and Burning Man can be helpful for both, provided you keep your distance.
Nightmares
For each area you complete, you’ll gain access to your party members’ nightmares. Each member of your party is being tricked by demons. You can Persuade them to come to their senses if you’re coercive enough, but once the spell is broken, you’ll have to fight the demons off.
NEW AREA: Inner Sanctum
BOSS: Sloth Demon
He’s faster than his name would suggest. However, you can freeze him in place for a moment with an ice spell. The Spirit’s prison won’t hold him, so try and stun him with the Golem. For his second form, ready all your ice spells. The third form is burnable, but at this point you should just be attacking him with anything you’ve got. When the Sloth Demon turns into a Spirit and summons a Blizzard, crush him with the Golem.
Talking to Niall doesn’t affect your party’s approval, so say what you want to him. Loot his fallen body for the Litany of Adralla. Now that you’re conscious again, search the nearby rooms and fight a Drake. A beef Bone lies in a nearby chest, for your Dog. Watch out for an ambush in the second to last room!
Cullen is in the last room – Wynne will fight you if you say you plan to hurt any innocents, so you’d be wise to anger Cullen instead. He’s in no position to fight.
BOSS: Uldred
You may be confused about how to use the Litany of Adralla in battle. You’ll need to open the advanced section of the radial menu to use it on the mages with the white circles coming from them. This will free them from the Blood Mage’s control, allowing them to help in your fight. You can use it on Uldred when he casts spells too.
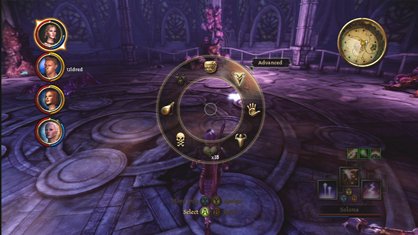
Once Uldred is defeated, create a new save. You’ll soon have to decide whether to side with the Blood Mages or the Templars. If you reload and do both, you’ll get both Achievements. Wynne will officially join your party either way.
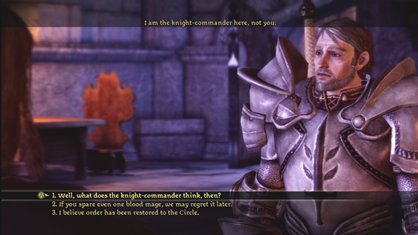
Congrats! You’ve saved Ferelden from the wrath of the Blood Mages.

 Join The Community


