Donkey Kong Country: Tropical Freeze KONG Letter and Puzzle Piece locations guide
Track down all the collectibles with our complete guide
Juicy Jungle
- 5-1: Harvest Hazards
- 5-2: Reckless Ride
- 5-3: Fruity Factory
- 5-A: Beehive Brawl
- 5-4: Panicky Paddles
- 5-B: Jammin' Jams
- 5-5: Jelly Jamboree
- 5-6: Frosty Fruits
- 5-K: Platform Problems
5-1: Harvest Hazards
Puzzle Piece #1
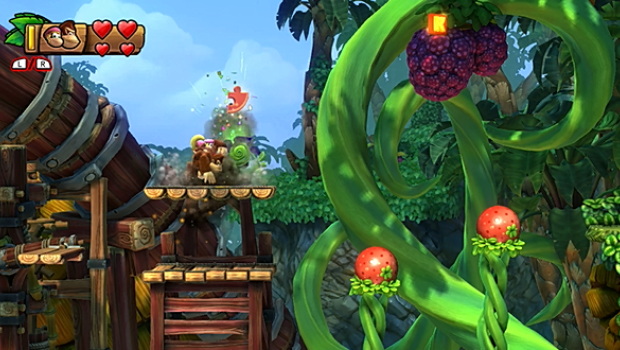
Above the character barrel is a blue plant. Slam it for a puzzle piece.
Letter K
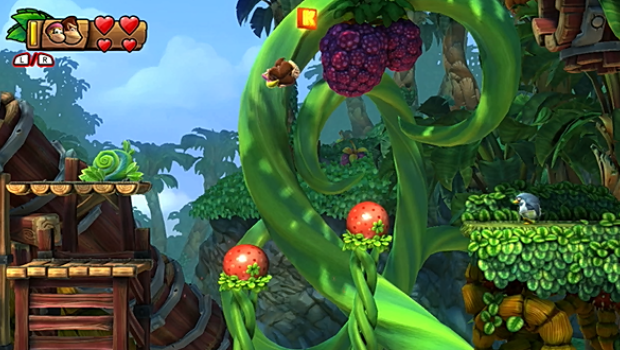
Immediately beyond is the first KONG letter. Use good bounces off the fruit to grab it.
Puzzle Piece #2
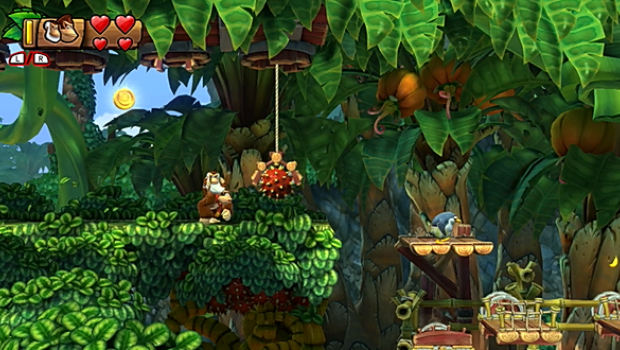
Right after the letter is a set of harvesters. Wait by the rightmost one--it alternates between extending a harvester and a bonus barrel. Hop in to reach a bonus room, then collect the bananas in time for a puzzle piece.
Puzzle Piece #3

When you see this fruit-carrying enemy, note the rings of bananas above. Bounce off the fruit to grab the bananas and spawn a puzzle piece.
Letter O
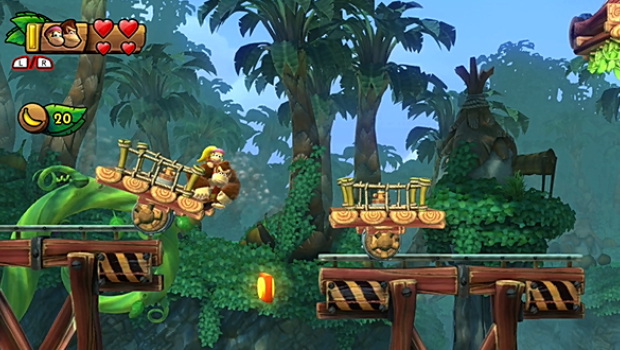
When you spot the next KONG letter, let your platform roll off the rail. Jump as it falls to grab the letter.
Puzzle Piece #4
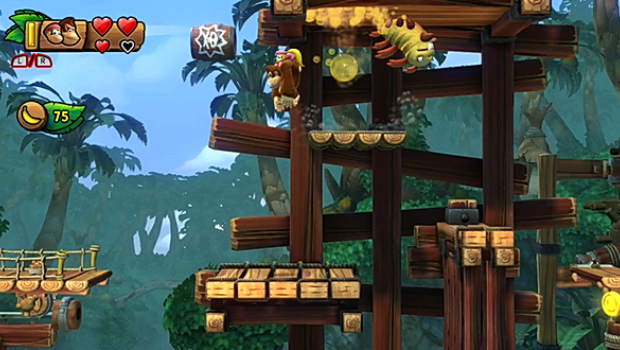
You'll spot this barrel above you later on. Leap up the platforms to reach it, and you'll be taken to a bonus room. Collect the bananas before time runs out for another puzzle piece.
Letter N
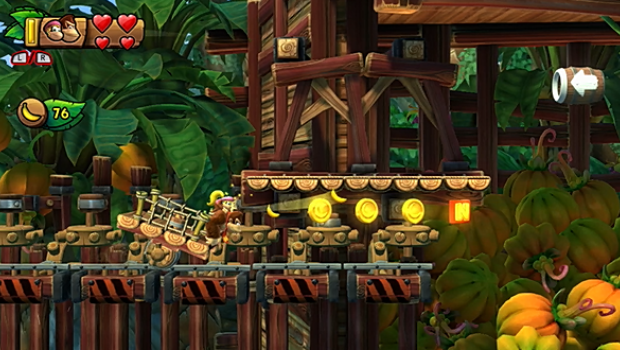
You'll have to ride your platform across the whole row of temporary rails to reach the third KONG letter.
Puzzle Piece #5
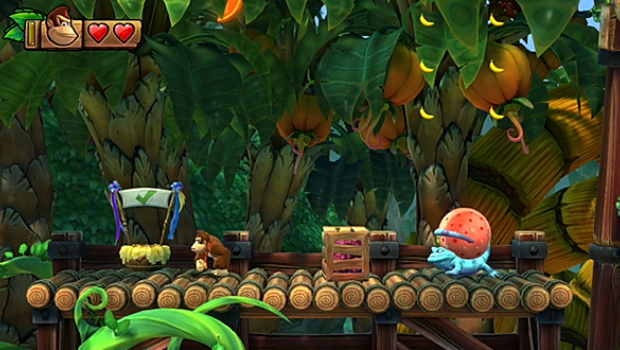
A puzzle hovers above the following checkpoint. Bust up the crate so that the fruit carrier has more room to move, then bounce off him to grab it.
Puzzle Piece #6
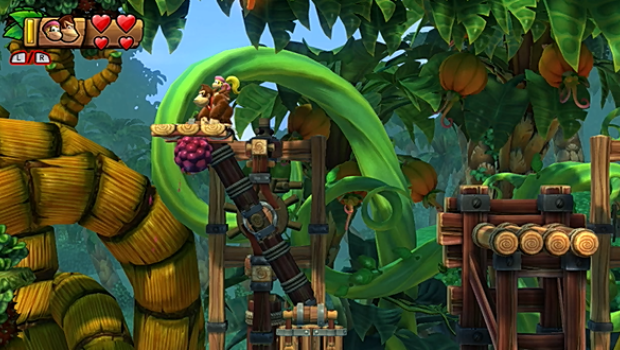
The next puzzle piece appears above a lift just after the checkpoint. Jump to it when your platform is at its peak.
Letter G
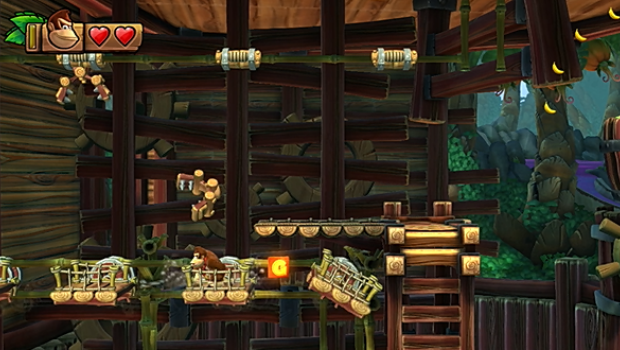
You'll spot the final KONG letter during some scrolling platforms. Keep jumping in place close enough to grab it.
Puzzle Piece #7
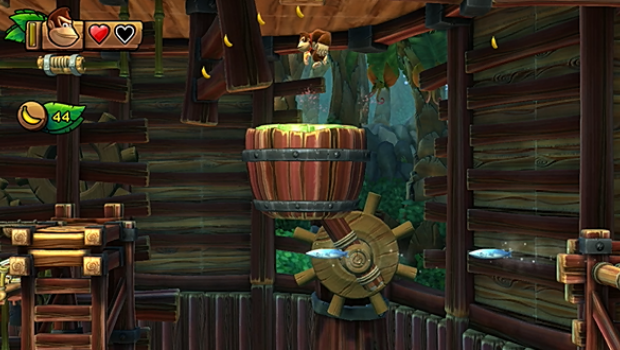
Immediately after is this rotating drum. Gather the string of bananas it passes to spawn a puzzle piece.
5-2: Reckless Ride
Puzzle Piece #1

Turn left at the very start of the level to enter a bonus room. Collect every banana in time to win a puzzle piece.
Puzzle Piece #2
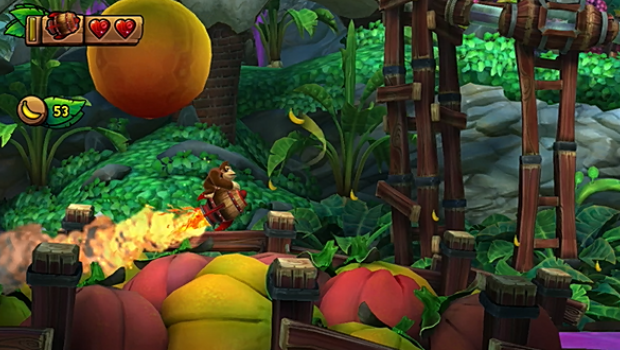
You'll approach a string of bananas by some large fruit. Collect them all to spawn a puzzle piece.
Letter K

This is found under an arch once the camera angle changes. Swing down to grab it.
Puzzle Piece #3

Once the machine goes away, you'll be near a string of bananas and some owls. Collect the bananas to generate a puzzle piece.
Letter O

The next KONG letter appears right after the machine knocks over an arch. Swing down as the arch falls to grab it.
Puzzle Piece #4
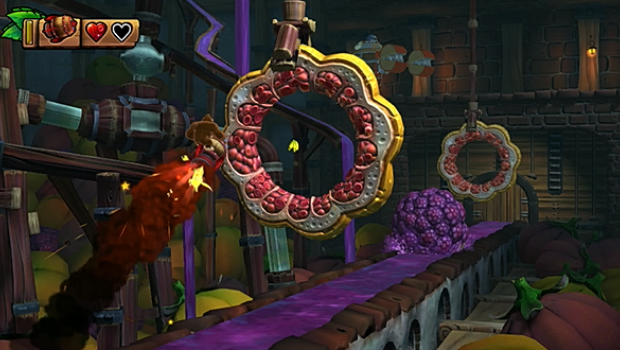
When you see a fruit ring with a bunch of bananas, grab that bunch. This spawns more bananas and a puzzle piece.
Letter N
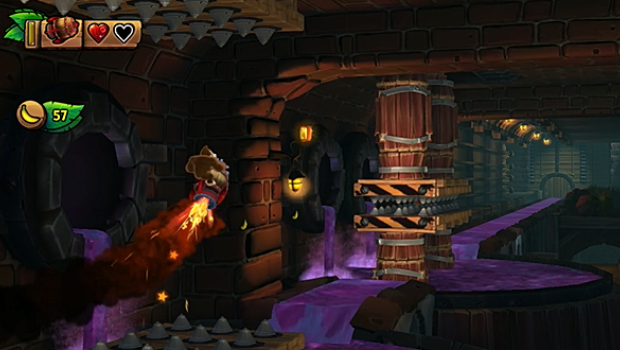
This appears between two crushers in the next section. Fly up to grab it.
Letter G
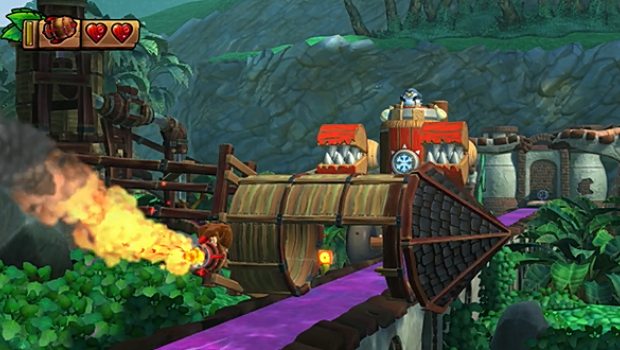
After the machine spills three rounds of fruit, it will knock over a water tower. Quickly swing down to grab the KONG letter that appears inside it.
Puzzle Piece #5

At the level exit, a bonus barrel appears in the head of the machine. Use Cranky's cane, Dixie's twirl, or a well timed rolling jump off the right platform to reach it and be sent to a bonus room. Collect the bananas in time for a final puzzle piece.
5-3: Fruity Factory
Puzzle Piece #1
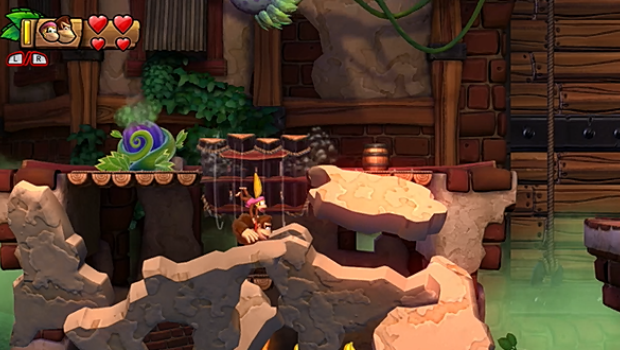
Under the first plant enemy is a trap door. Slam through to find a puzzle piece in a hidden room.
Puzzle Piece #2
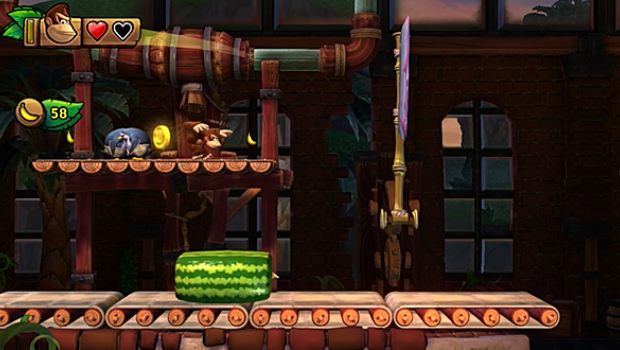
At the first conveyor belt, use a watermelon to get on the higher platform. From here, bounce off a penguin to the moving platforms carrying the watermelons. Make your way left to find a bonus room. Collect the bananas there within the time limit to earn a puzzle piece.
Letter K
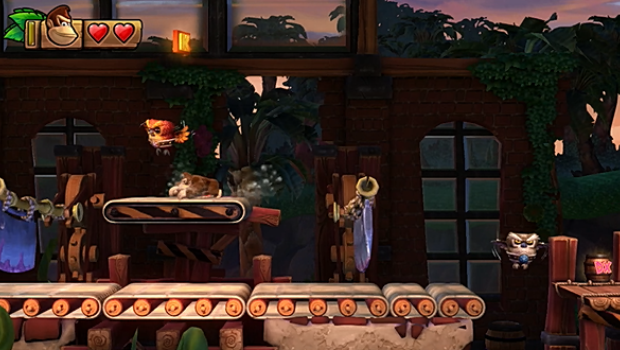
When you pass by the first KONG letter, jump to the higher conveyor belt. Bounce off the fire owl when he's not lit to grab it.
Puzzle Piece #3
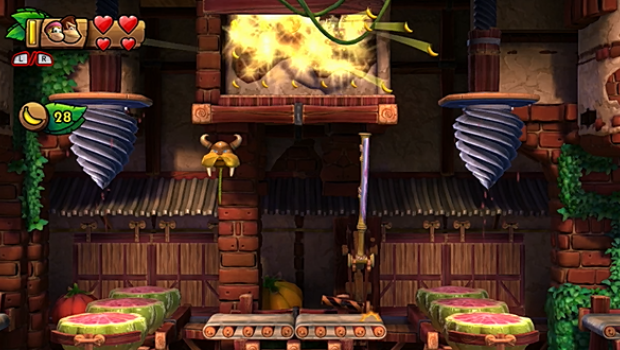
Jump atop the second drill, then jump left. The wall will move, revealing a hidden room with bananas and a puzzle piece.
Letter O

This appears over the second set of fruit blades. Get a good jump off the last platform to grab it before landing in the barrel cannon. Dixie's twirl makes this much easier.
Letter N
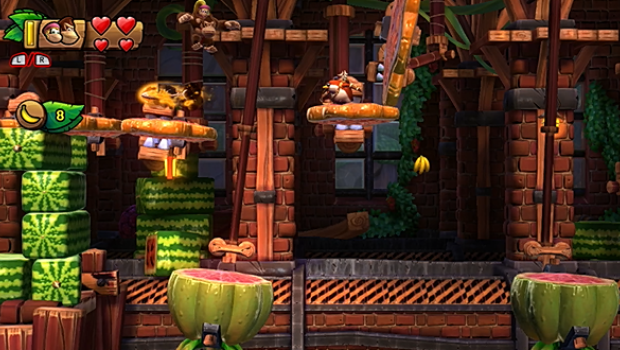
When running from the vertical blade, quickly drop to the first pendulum to grab the KONG letter under the walkway.
Puzzle Piece #4
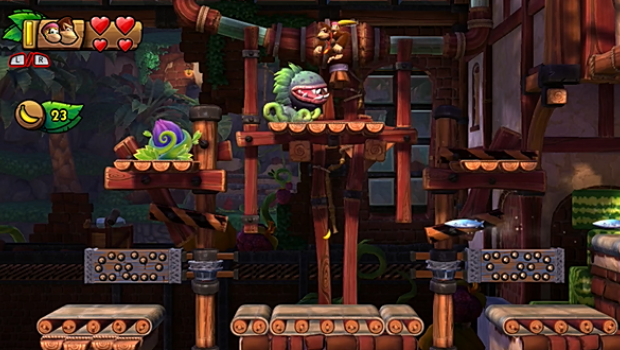
At the next checkpoint, cross the conveyor belts and circle back across the upper platforms. Take out the enemy, then slam the plant for a puzzle piece.
Letter G

When you see this, time your jumps across the moving stacks of watermelons to grab it.
Puzzle Piece #5
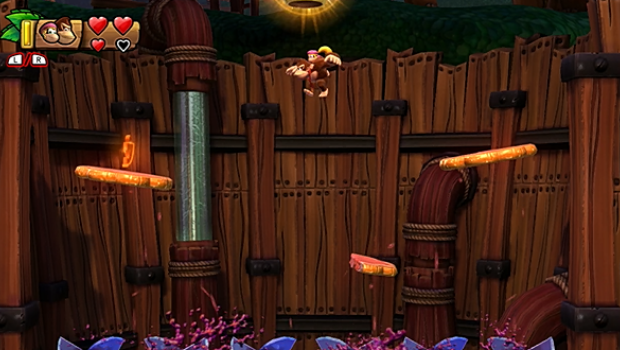
During the final segment, chunks of fruit fly upwards. Keep an eye on the left side of the screen, then get a good jump to the puzzle piece when it appears.
5-A: Beehive Brawl

To access this level, you must find the secret exit in 5-3: Fruity Factory. To find it, proceed to the checkpoint by this trio of platforms. Get a nice rolling jump off the top platform to the right, and the wall will pull back, revealing a portal to the secret exit.
Puzzle Piece #1
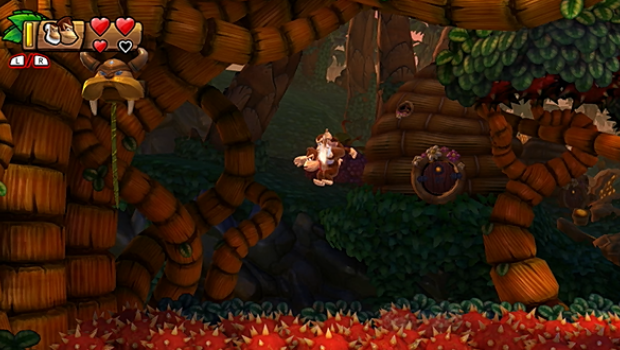
To the left of the level start is a floor of spikes. Use Cranky's cane to hop across this and grab hold of a vine. This spawns some bananas--grab them before they disappear for a puzzle piece.
Letter K
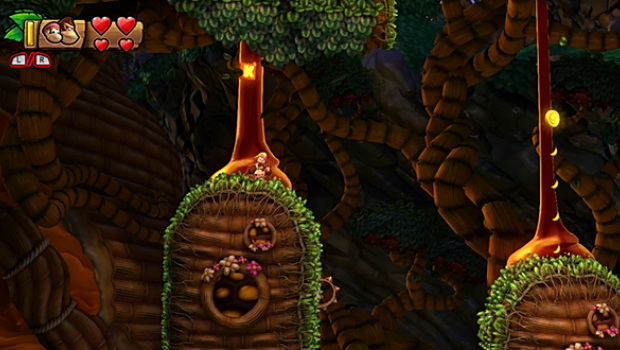
The first KONG letter appears atop one of the grass-covered beehives. Leap off the top to grab it.
Puzzle Piece #2

Leap to the hanging grass to the upper left of the very next beehive to find a bonus room entrance. Collect the bananas inside within the time limit for a puzzle piece.
Puzzle Piece #3
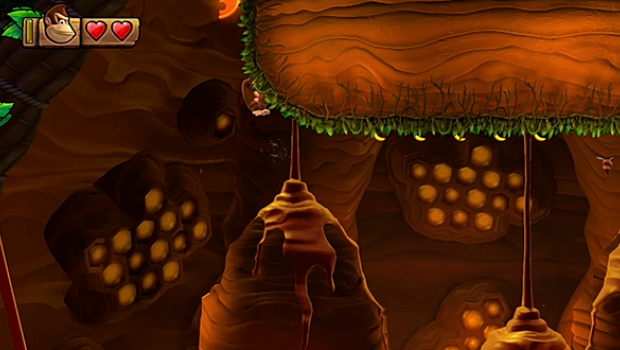
When you ride a swinging beehive to some hanging grass, grab hold and move left. There's a puzzle piece nestled up here.
Letter O
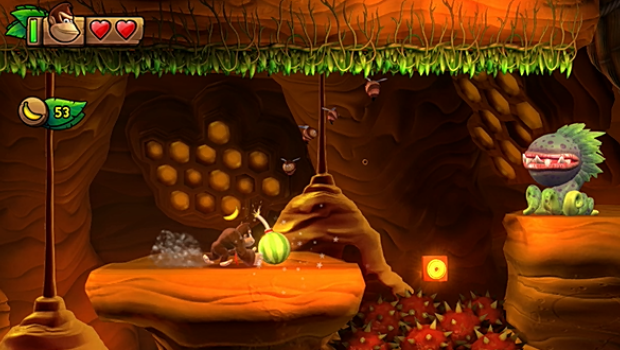
You can't miss this one atop some spikes. Use Cranky's cane to grab it, or perform a well executed rolling jump to snatch it up.
Puzzle Piece #4
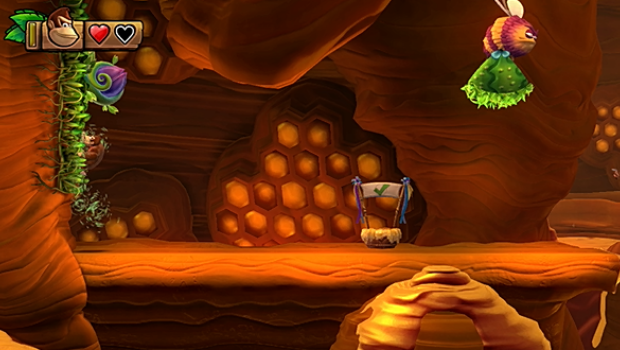
When you reach the next checkpoint, climb the hanging grass to the left to reach another bonus room. Collect the bananas in time for another puzzle piece.
Puzzle Piece #5

After riding the bees carrying grass, you'll be dropped off at this platform. Move forward to have the wall move, revealing a puzzle piece.
Letter N
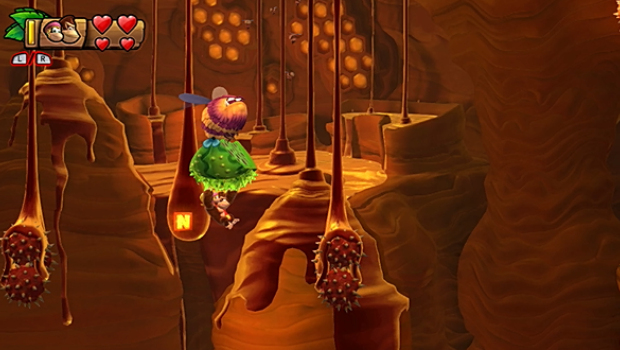
This is hanging from some honey during the second bee ride. Time your descent to grab it out of the air.
Puzzle Piece #6
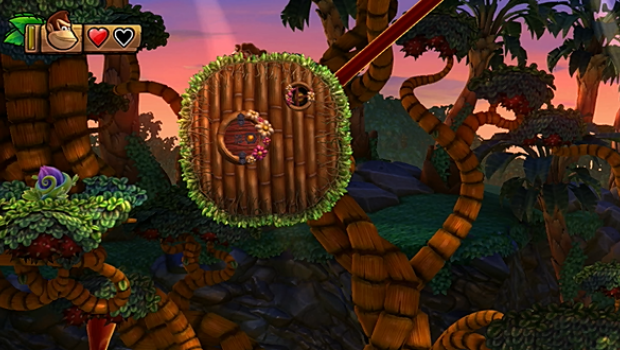
After the next checkpoint is a series of swinging beehives. Work your way to the upper left to find a plant, them slam it to spawn some bananas. Collect them before they disappear to earn a puzzle piece.
Puzzle Piece #7

Now head for the bottom right. See that cannon barrel by the tree? Leap to it, and the series of cannons will shoot you into another puzzle piece.
Letter G
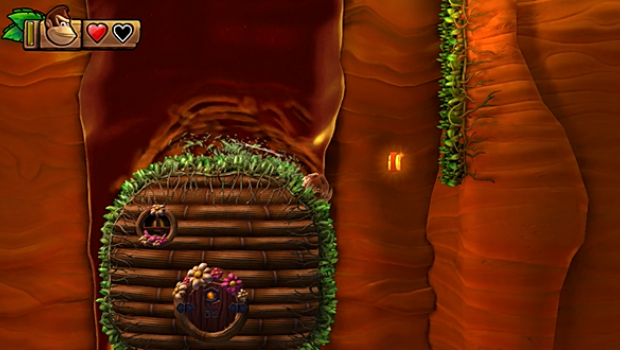
While riding the bouncing beehive, look for this final KONG letter. As the beehive sinks down the honey, jump off at the last second to grab it.
5-4: Panicky Paddles
Puzzle Piece #1
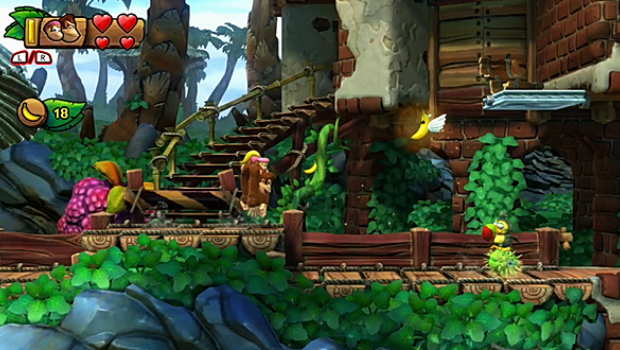
When you return to dry land, use Dixie's twirl to reach this chest on a trap door. Slam it to reveal a winged banana, then collect the bananas he trails for a puzzle piece.
Letter K
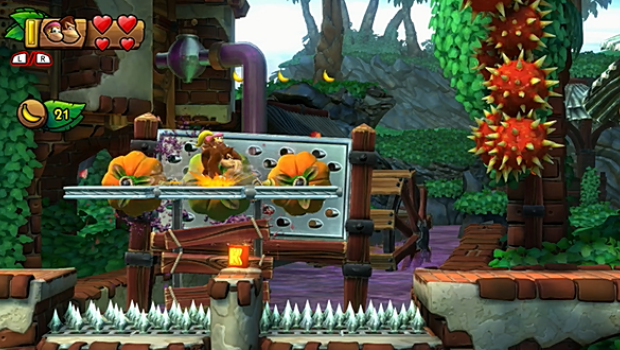
You'll spot this under some moving trap doors. Time your slam to drop onto it safely.
Puzzle Piece #2
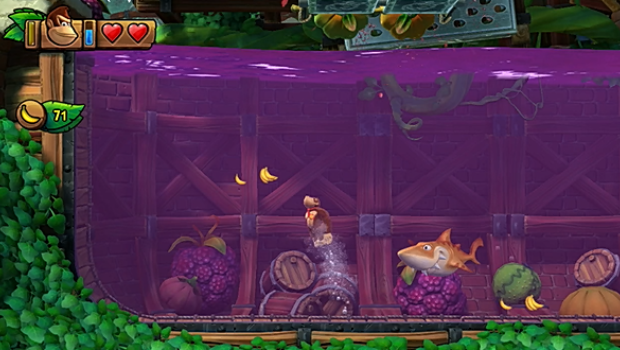
Now dive into the water below. Grab the strings of bananas while avoiding the shark to earn a puzzle piece.
Puzzle Piece #3

In the next area are spikes bouncing on trap doors. Slam through to the lowest one to enter a bonus room. Collect the bananas before time runs out for another puzzle piece.
Puzzle Piece #4
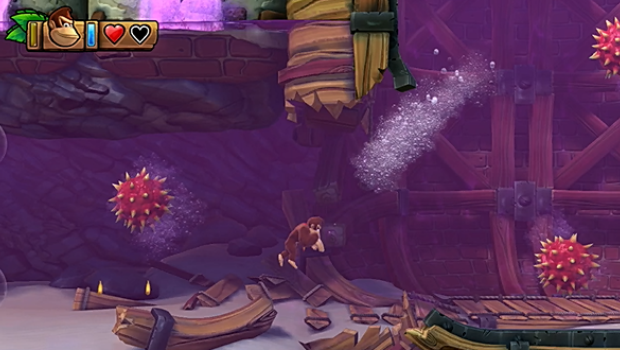
At your next opportunity, dive into the water. Swim left through the tunnel to find a puzzle piece down here.
Letter O

This KONG letter can be a bit tricky to grab. When you see it, you'll have to grab it off the trap door before another spike ball tumbles down.
Puzzle Piece #5

When you reach the part where you have to get a watermelon bomb over trap doors to a target, dive into the water. Swim down and collect the bananas to reveal the puzzle piece.
Puzzle Piece #6
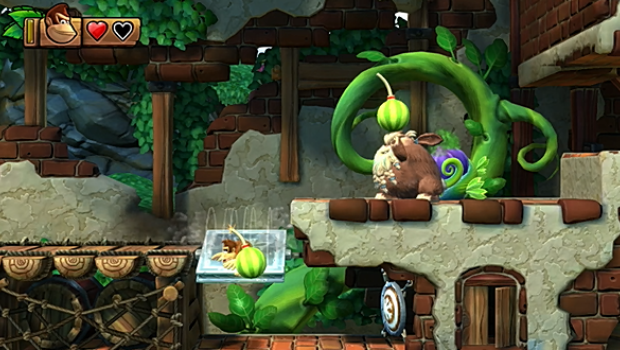
When you reach this watermelon bomb-tossing enemy, stand on the trap door. When he throws the bomb there, slam through to drop it below, then use it to bust through the target and into another bonus room. Collect the bananas in time for another puzzle piece.
Puzzle Piece #7
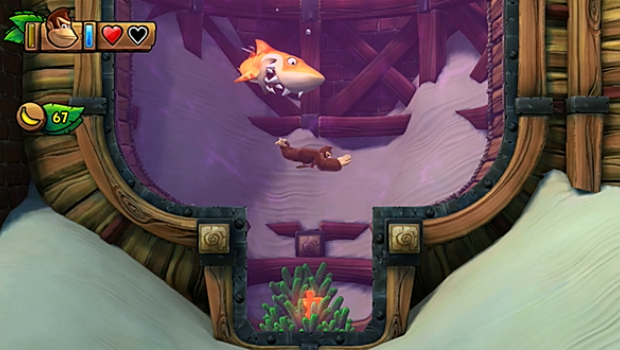
Immediately after, dive into the next body of water. Swim down to grab the puzzle piece guarded by a shark.
Puzzle Piece #8
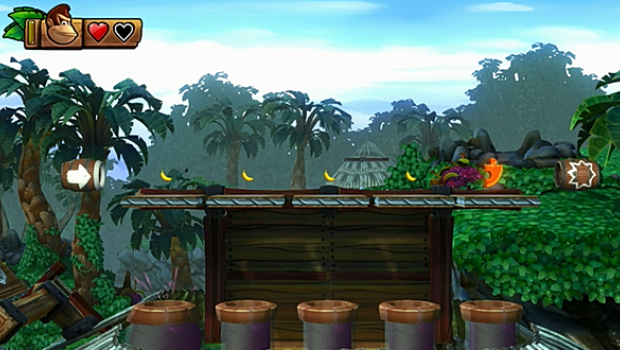
Pay attention when moving through the barrel cannons--this vertical row of paddles holds a puzzle piece. Fire when it's exposed to snatch it out of the air.
Puzzle Piece #9
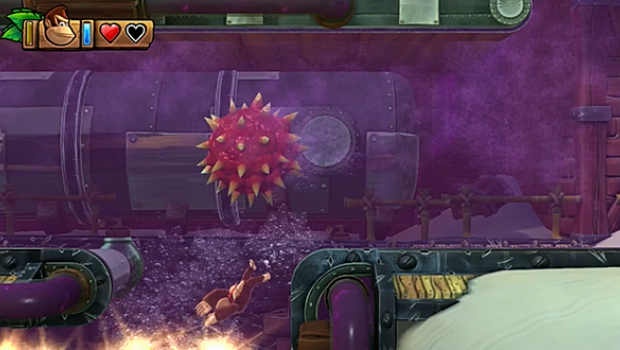
When swimming against the current containing spiky balls, swim down into this brick wall. It will move away, revealing the final puzzle piece.
Letter N
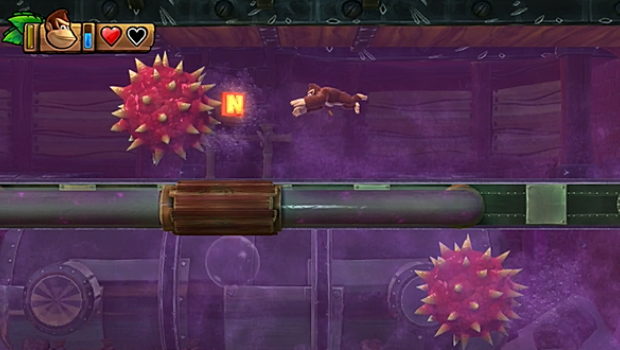
After clearing the current, double back across the top part to grab the KONG letter you passed.
Letter G
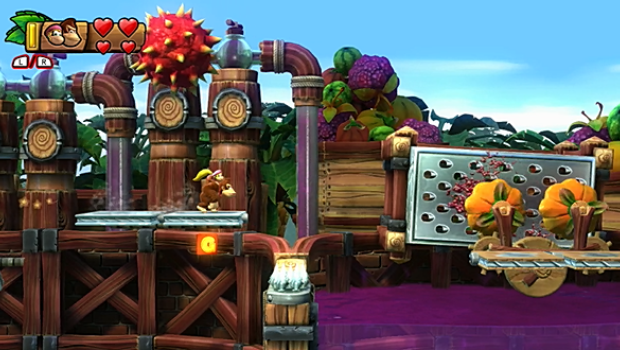
The final KONG letter is the biggest pain. You'll have to drop through, then recover with Dixie's twirl to grab it.
5-B: Jammin' Jams

To access this level, you must find the secret exit in 5-4: Panicky Paddles. When you reach the final body of water, dive in. Swim down and use Dixie's twirl to beat the current and reach a portal to the secret exit.
Puzzle Piece #1
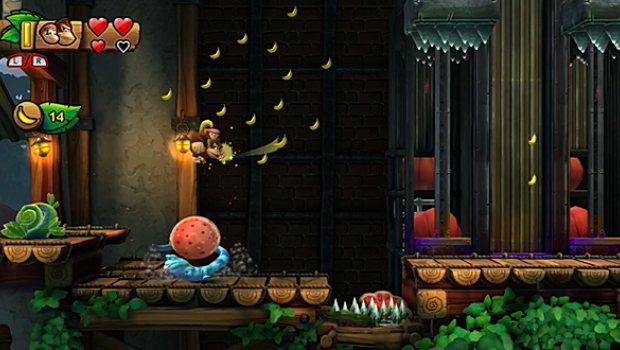
After the first set of barrel cannons is a fruit-carrying baddie. Use him to bounce and grab the circling bananas for a puzzle piece.
Letter K

When you spot this, hop up and bounce off the helmeted penguin or the archer's fish arrows to reach it.
Puzzle Piece #2
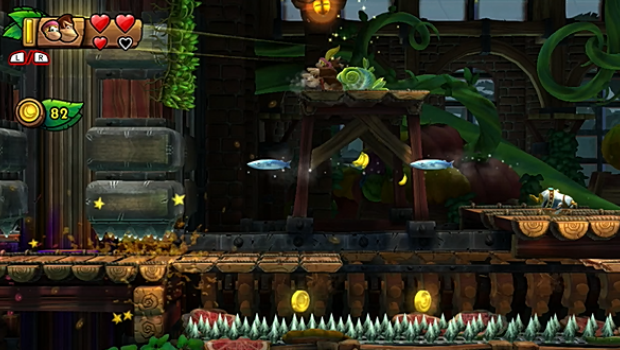
Now bounce to the platform on the left. From here, you can jump to some hanging grass on the side of the crusher. This leads to a bonus room--collect the bananas in time for another puzzle piece.
Letter O

This is easy to spot, but tricky to grab. The best strategy is to wait for the spiky balls to clear, dip down, then use Dixie's twirl to return to the platform above.
Letter N
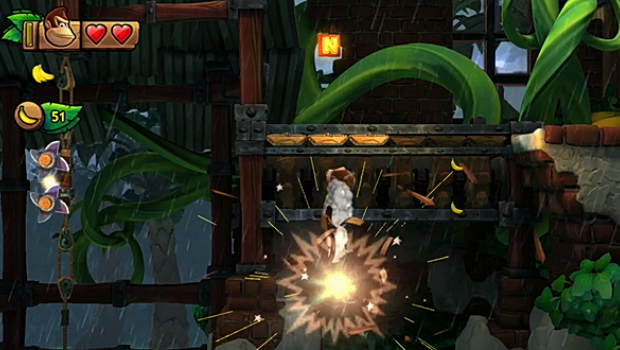
During the next series of cannons, time your shot to grab this KONG letter above.
Puzzle Piece #3
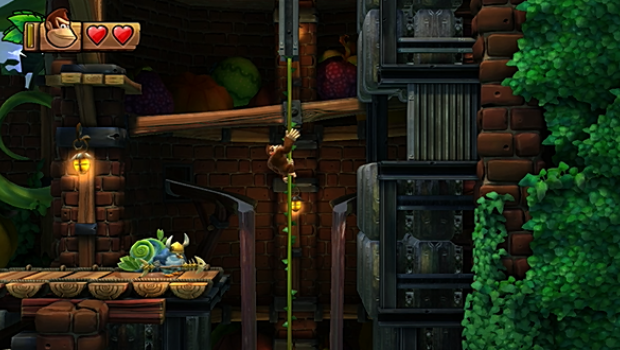
When you reach the long vine, climb up instead of down. Jump into the alcove on the right to enter a bonus room. Once again, collect the bananas before time runs out for another puzzle piece.
Puzzle Piece #4

After crossing the shifting platforms and hanging grass, bounce off the fruit-carrier and double back. Leap to the left platform with the plant, then slam it for a puzzle piece.
Puzzle Piece #5
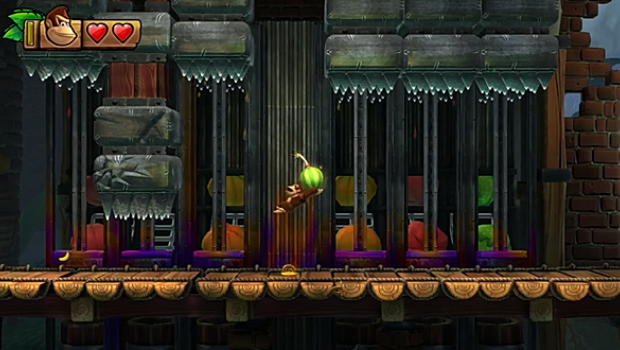
Under the final trio of crushers is a ring. Quickly pull it up while they're retracted to receive a watermelon bomb. Throw it at the cracked crusher you just passed to reveal the final puzzle piece.
Letter G
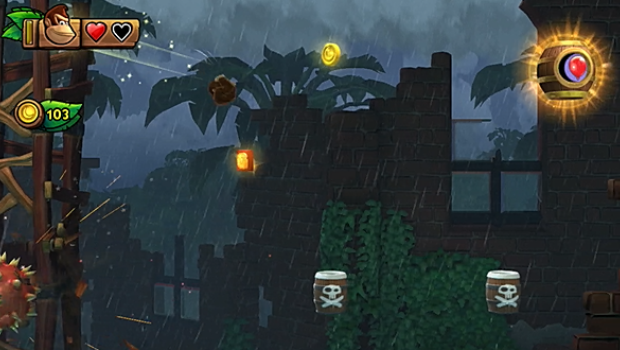
During the final cannon sequence, you'll have to time your shot just right to grab the last KONG letter.
5-5: Jelly Jamboree
Puzzle Piece #1

At the very start of the level, roll left into the jelly cube to free a puzzle piece.
Puzzle Piece #2
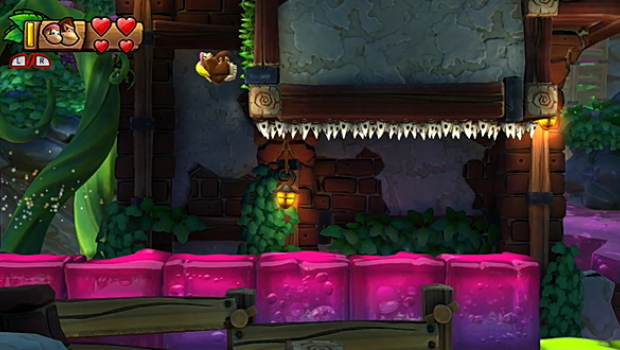
Bounce along until you spot this hanging grass. Climb and slam the plant up there for another puzzle piece.
Letter K
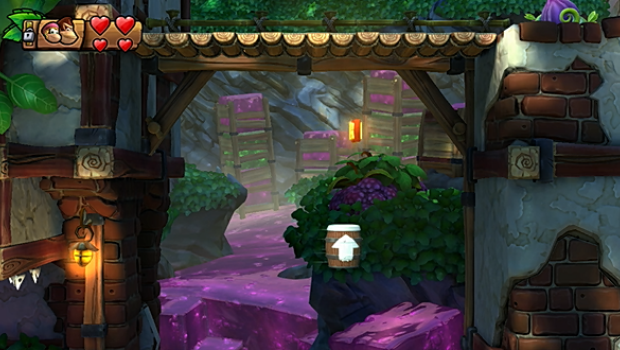
Time your shot out of the first cannon to grab this KONG letter.
Letter O
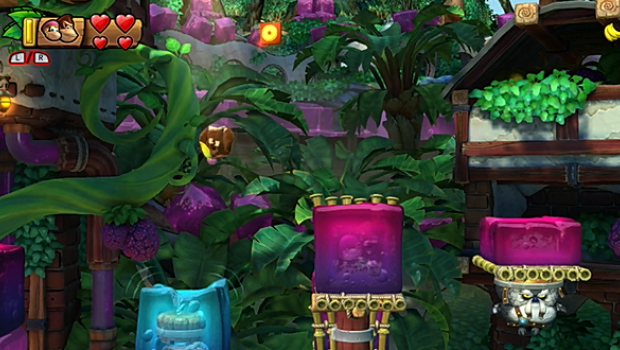
Blue jelly cubes work like switches. Hit this one to get the higher of the two pink jelly cubes, then use it to bounce to the KONG letter.
Puzzle Piece #3
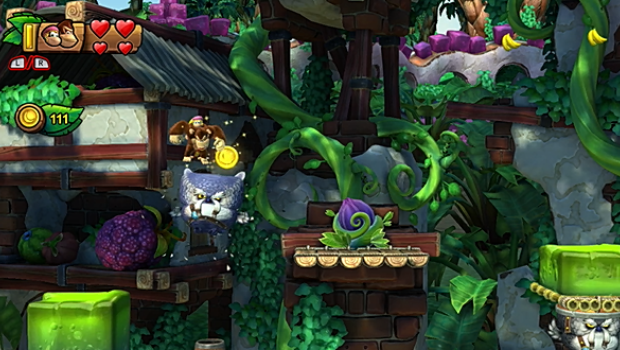
Just beyond is a big owl. Pound him three times, then drop to the hard-to-spot cannon beneath him. This takes you to a bonus room--collect the bananas before time expires to earn another puzzle piece.
Letter N
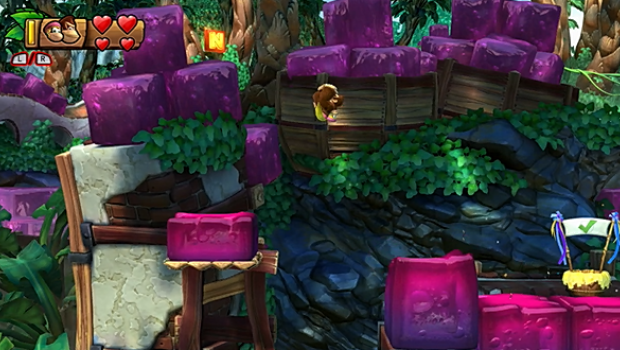
Bounce left of the next checkpoint to grab this KONG letter.
Puzzle Piece #4
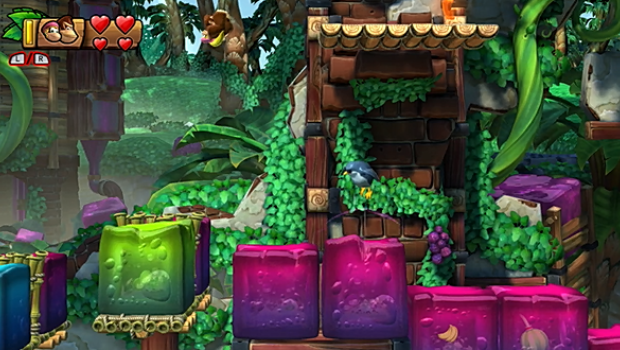
You'll soon approach two blue jelly cubes. Use the first to activate the second, then use the second to get a green cube set up (green bounces you higher). Now use the green cube to reach the puzzle piece high up on this platform.
Puzzle Piece #5
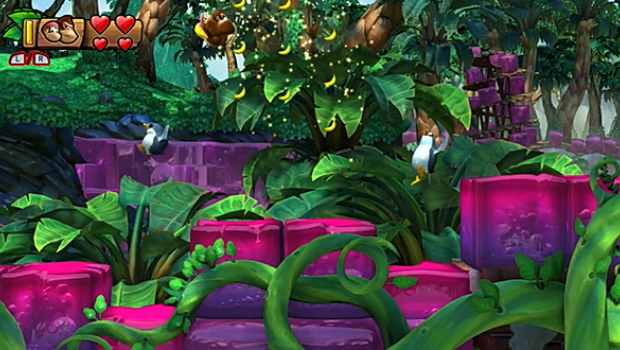
As you bounce along the cubes at the next checkpoint, two groups of bananas appear. Grab them all to spawn a puzzle piece.
Letter G

After swinging from a vine, you'll land on some green cubes. Bounce on the right to pop the final KONG letter out of the left.
Puzzle Piece #6
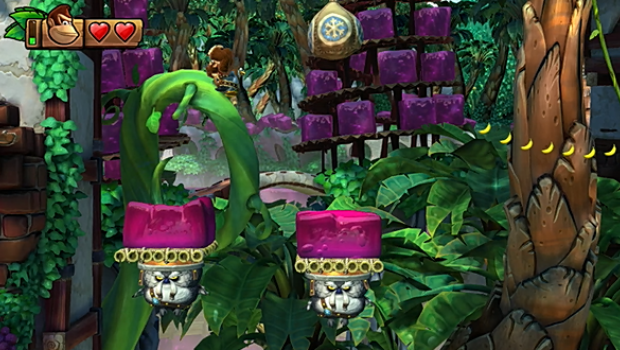
Immediately after is a helmeted penguin. Stun him, pick him up, then hop to the jelly cubes. Chuck him into the hanging bag here for another puzzle piece.
Puzzle Piece #7
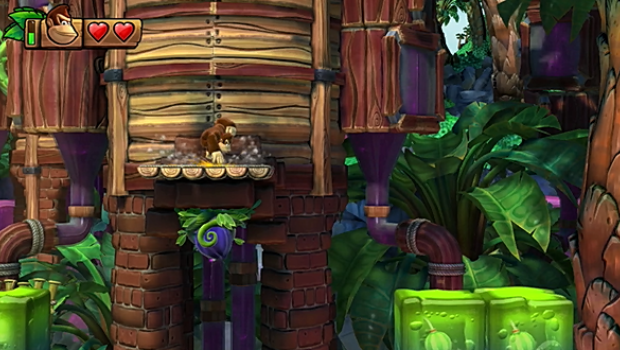
When you bounce to this platform, slam to make the plant underneath spit out the final puzzle piece.
5-6: Frosty Fruits
Puzzle Piece #1

When you spot these two little ice cubes, slam through to enter a bonus room. Collect the bananas in here before time runs out two win a puzzle piece.
Letter K
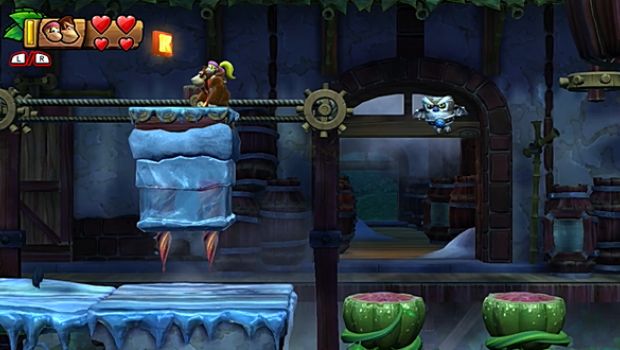
This one's not hard to get. When you see it above, use the bouncy pads nearby to reach the top of the ice block.
Puzzle Piece #2
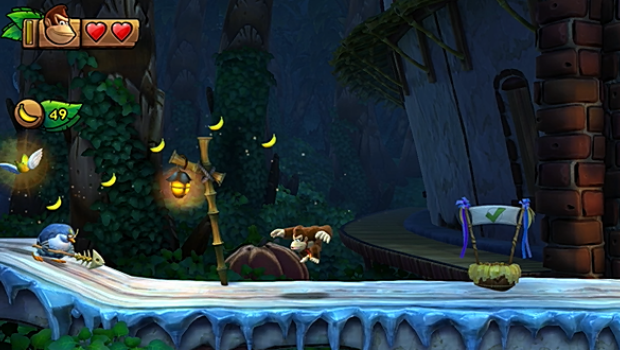
By the checkpoint is an ice cube. Slam through, then yank up the ring it was blocking. This summons a winged banana--collect the bananas it trails to earn another puzzle piece.
Letter O
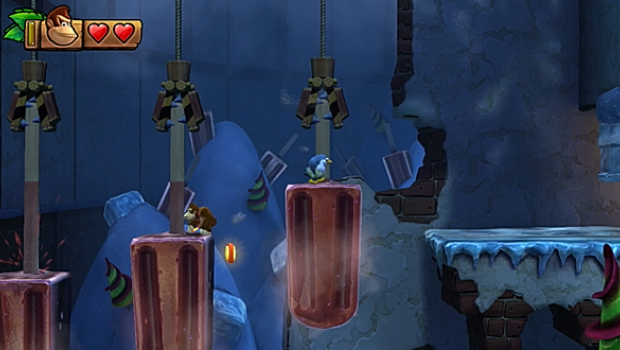
When you spot this one, you'll have to jump from the popsicle you're on at the last moment to grab it.
Puzzle Piece #3
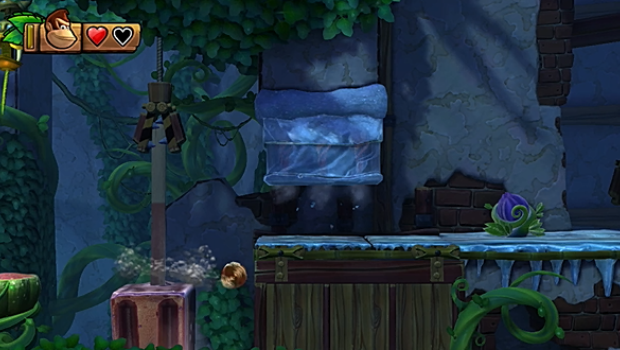
After pulling the vine to activate a popsicle platform, pause a moment. Instead of jumping off, roll into the little alcove underneath the following platform to find a secret tunnel containing a puzzle piece.
Letter N
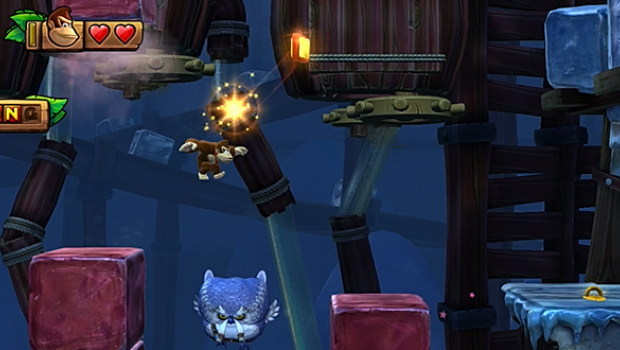
This one's not too tricky to get. When you spot it, use your jump to reach it. This saves you an extra bounce of the big owl when waiting for the next platform to drop into place.
Puzzle Piece #4
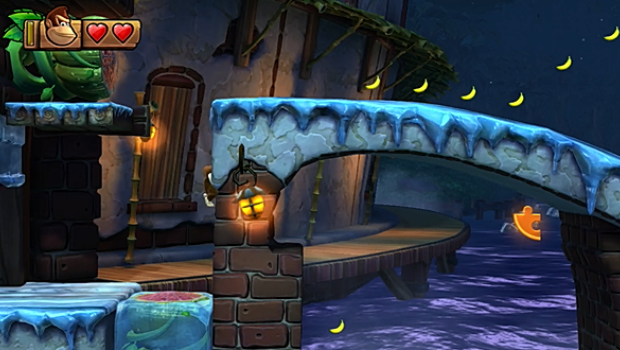
When you see this, simply jump through the brick wall towards the lone banana. This drops you in a barrel cannon, where you can time your shot to grab the puzzle piece.
Letter G
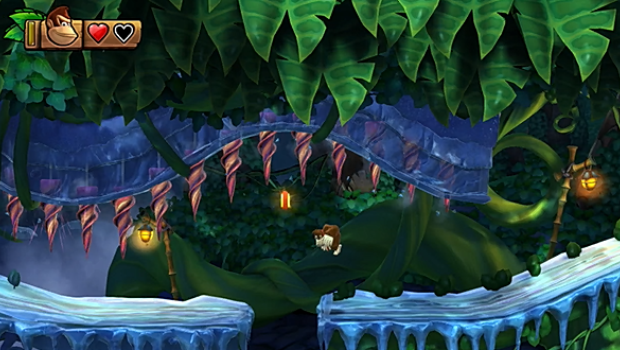
You'll spot this while sliding along the ice. Jump when the drills are retracted to safely grab it.
Puzzle Piece #5
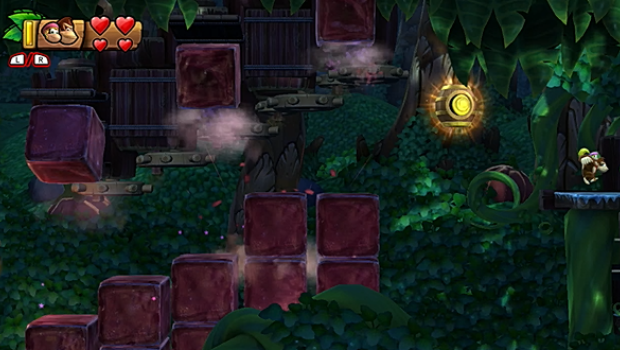
At the final stack of cubes, roll under the level exit and jump to reach a hard-to-spot platform. Here, you can drop to the final puzzle piece when the drills retract.
5-K: Platform Problems
Puzzle Piece #1

When you approach this string of bananas, grab them all to generate a puzzle piece.
Puzzle Piece #2
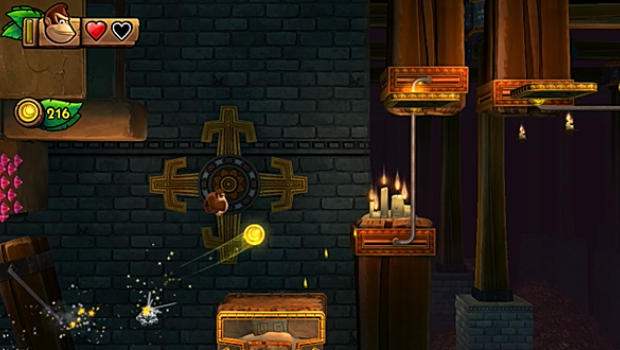
Note the wall to the upper left of these platforms. Looks a little suspicious, eh? From the vertical platform, get a good rolling jump to that wall--it will pull back, revealing a puzzle piece.
Puzzle Piece #3
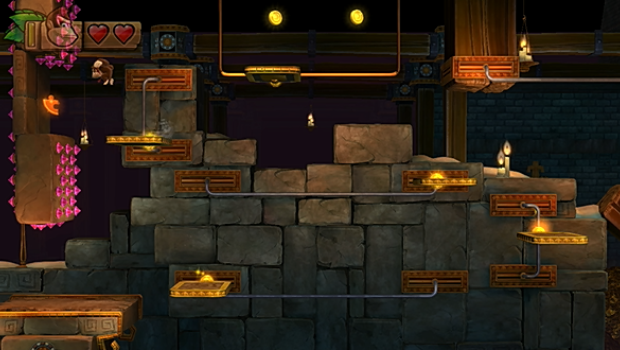
This is found at the wall of quick platforms. Jump from the upper left one to grab this from its alcove.
Puzzle Piece #4

While riding the platform past the trio of owls, hop off and use them to reach this puzzle piece.
Puzzle Piece #5

When you see medals above a trio of owls, bounce off them to grab the medals. Get all three, and a final puzzle piece appears.
Jump to Section:
Current page: Donkey Kong Country: Tropical Freeze - Juicy Jungle
Prev Page Donkey Kong Country: Tropical Freeze - Sea Breeze Cove Next Page Donkey Kong Country: Tropical Freeze - Donkey Kong IslandWeekly digests, tales from the communities you love, and more
Tony lives in Maryland, where he writes about those good old-fashioned video games for GamesRadar+. His words have also appeared on GameSpot and G4, but he currently works for Framework Video, and runs Dungeons and Dragons streams.
