Donkey Kong Country: Tropical Freeze KONG Letter and Puzzle Piece locations guide
Track down all the collectibles with our complete guide
Bright Savannah
- 3-1: Grassland Groove
- 3-2: Baobab Bonanza
- 3-3: Frantic Fields
- 3-4: Scorch 'N' Torch
- 3-5: Twilight Terror
- 3-A: Rickety Rafters
- 3-B: Bramble Scramble
- 3-6: Cannon Canyon
- 3-K: Precarious Pendulums
3-1: Grassland Groove
Puzzle Piece #1
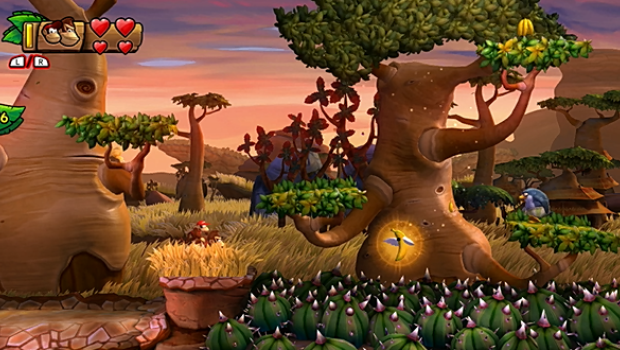
When you reach this pair of trees, use the branches to reach the upper left platform. Grab the banana here to summon a winged banana. Grab the bananas it trails before they vanish to earn a puzzle piece.
Letter K
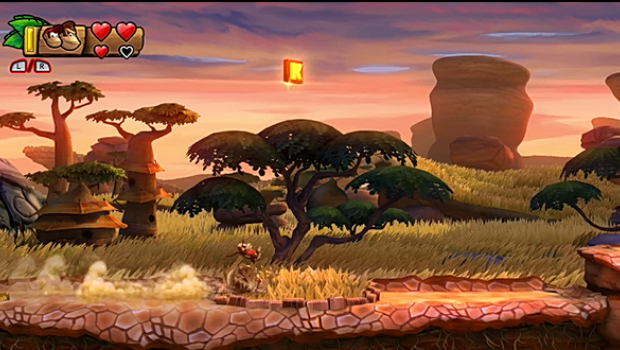
When you see the KONG letter above, roll through the grass patch beneath it to summon platform. Now you can reach it.
Puzzle Piece #2

When you reach the helmeted penguin in front of this tree, roll through him and the grass to reveal a ring. Yank it to pull up a puzzle piece.
Article continues belowPuzzle Piece #3
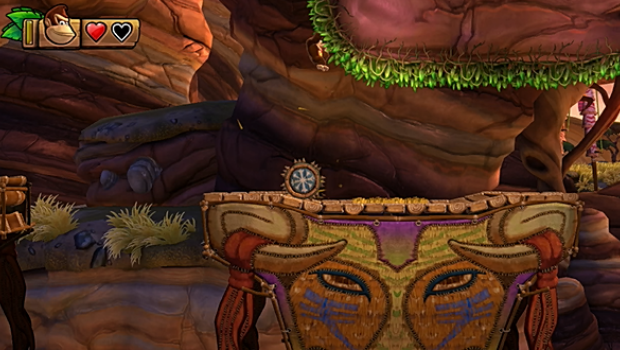
When you reach the rolling cogs and hanging grass, jump up and climb left. There's a plant up here you can slam to reveal a puzzle piece.
Puzzle Piece #4

Just after the last piece, you can spot this swooping chicken below. Drop into the cannon barrel he's guarding to be launched into a cliff face, revealing a puzzle piece.
Puzzle Piece #5
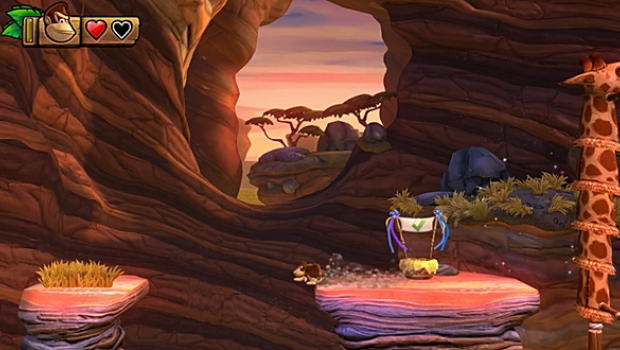
When you reach the checkpoint, make a long jump to your left to find a patch of grass. Roll through it for another puzzle piece.
Letter O
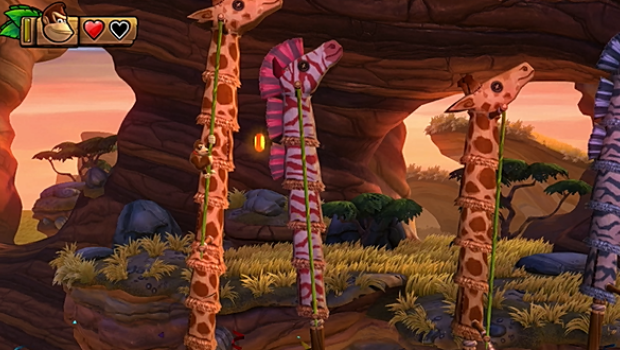
As you cross the giraffe necks, banana medals and a KONG letter will pop up. Time your jumps to grab these goodies.
Weekly digests, tales from the communities you love, and more
Puzzle Piece #6
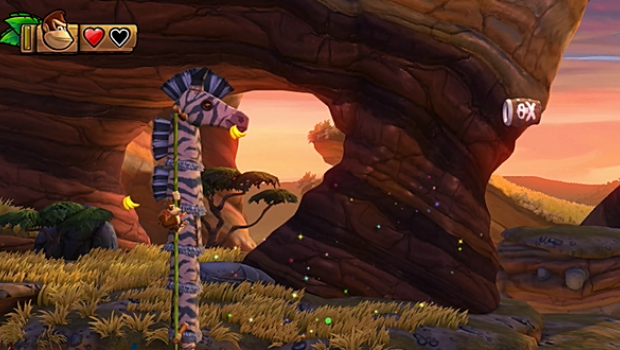
Stay on the final giraffe neck and shimmy up and down to collect the bananas in its range. This generates another puzzle piece.
Puzzle Piece #7
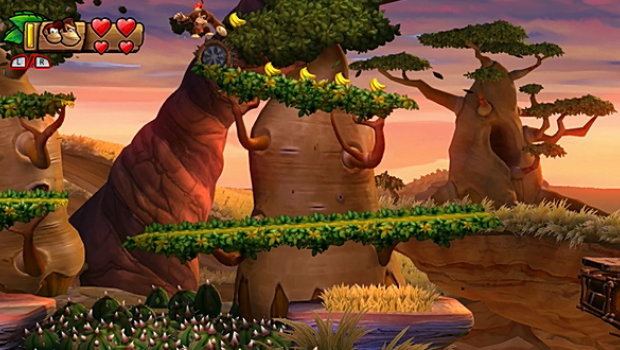
After launching to the next area, scale the branches to this top one where a cog rolls about. Gather the banana bunches here to spawn another puzzle piece.
Letter N
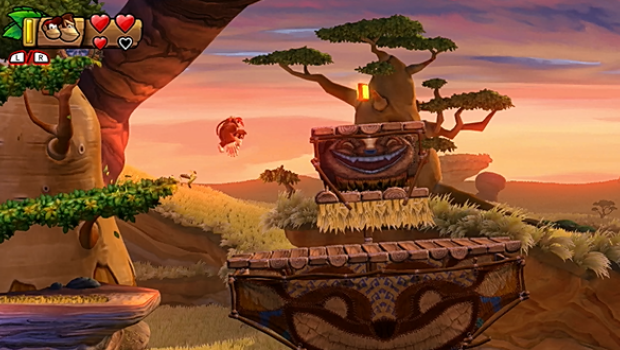
Before leaving the branches, look the next KONG letter on a platform ahead. Get a nice long jump off the branches to reach it.
Puzzle Piece #8
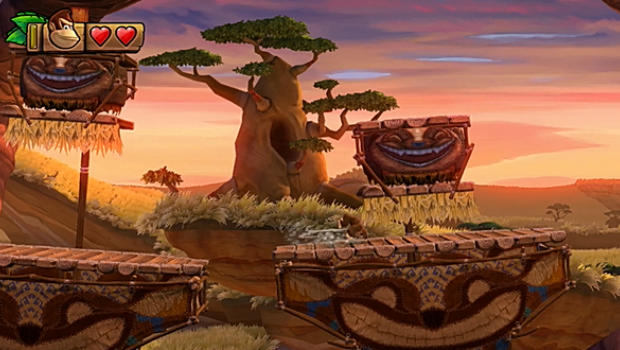
On the very next platform, roll through the brown hanging grass to summon a giraffe neck--climb it to reach a bonus barrel. Collect the bananas inside before time expires for a puzzle piece.
Letter G
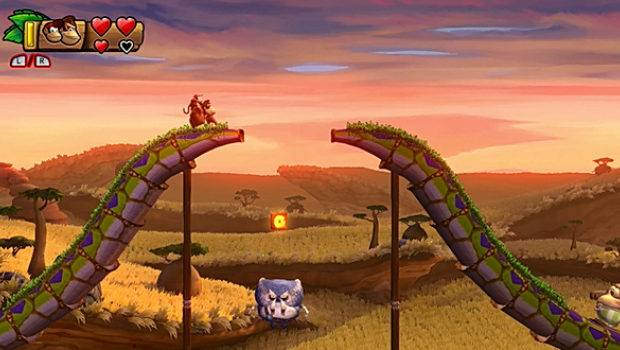
You'll spot the final KONG letter when crossing the giant serpent. Bounce from the owl's head when the serpents are lowered to safely grab it.
Puzzle Piece #9
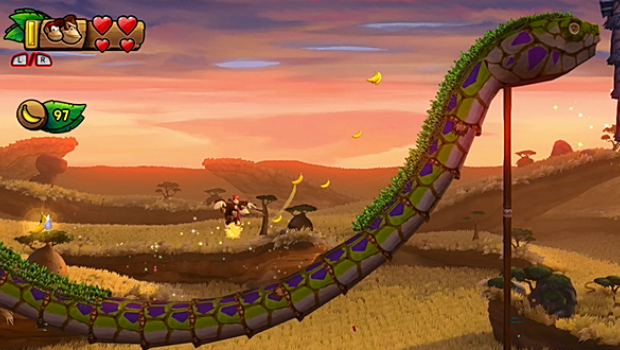
As you cross the second serpent, a winged banana will fly into view. Collect its trailing bananas before they vanish for the final puzzle piece.
3-2: Baobab Bonanza
Puzzle Piece #1
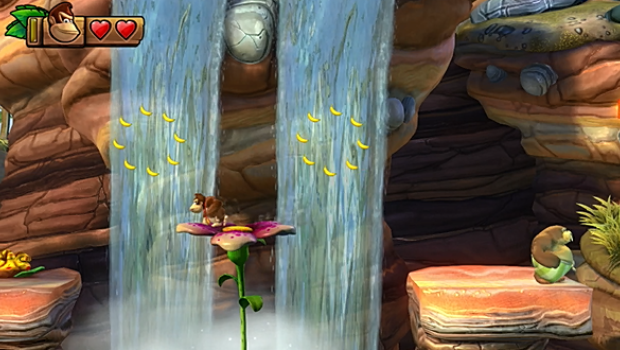
When you reach two banana rings near the waterfalls, lean the flower and jump to collect them all. You'll get a puzzle piece for it.
Letter K
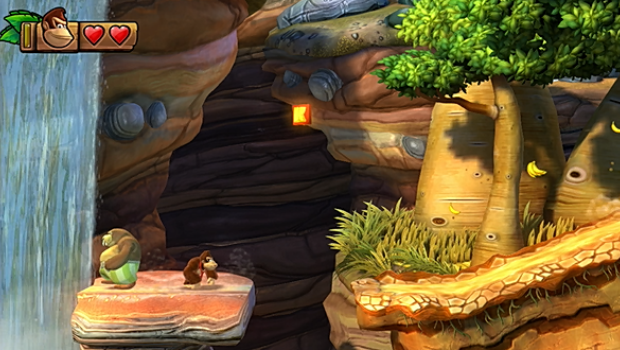
You can spot the first KONG letter right after. Bounce off the walrus enemy to reach it.
Puzzle Piece #2
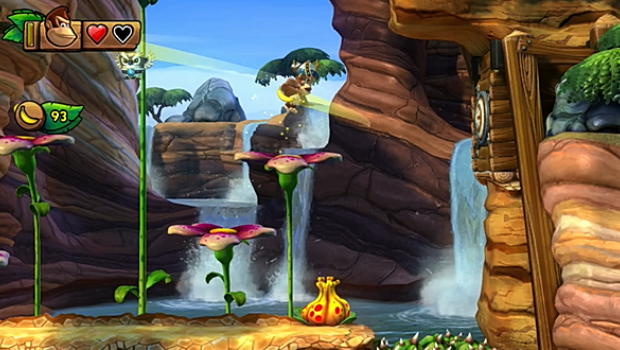
When you yank the ring to summon more plants, stun and pick up the helmeted penguin. Take him to the target to your upper right and throw him through to reveal a bonus room. Inside, collect the bananas before time expires to earn a puzzle piece.
Letter O

The next KONG letter is just past the checkpoint. Drop down when the spiky fruit is clear to grab it.
Puzzle Piece #3
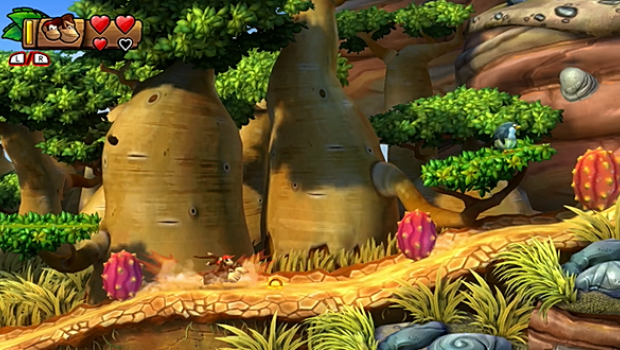
Immediately after the letter is a ring. Yank it up to discover some bananas. Grab them before they disappear to earn a puzzle piece.
Puzzle Piece #4
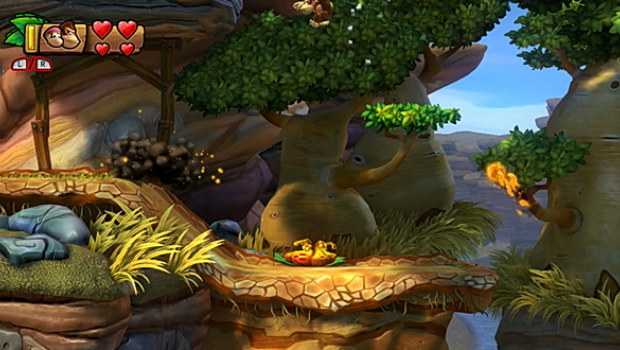
After picking up Dixie from the barrel, use her twirl to reach the spot where the spiky fruit you just past was rolling from. There's a puzzle piece up here.
Letter N
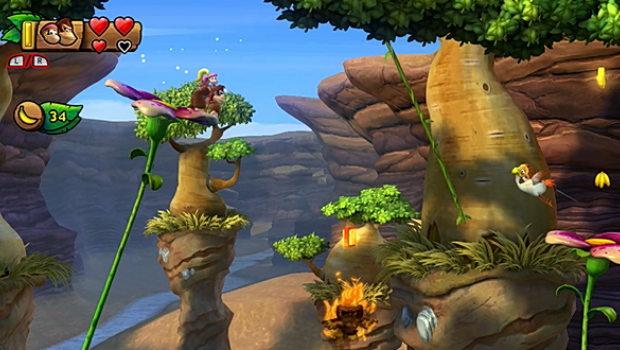
This one's tricky. You'll have to bounce off the fire owl when he's not lit to safely acquire it.
Puzzle Piece #5
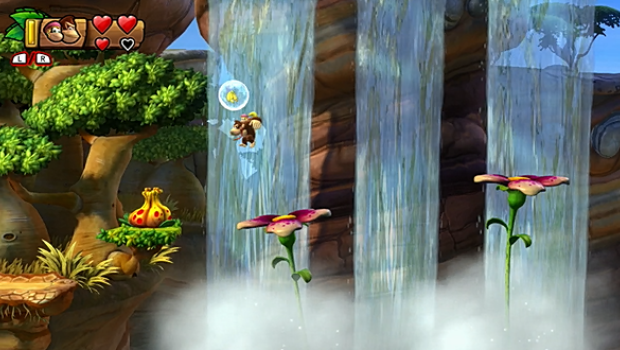
When you reach the trio of waterfalls, pause a moment. Bananas will start coming down the falls. Collect them all for a puzzle piece.
Puzzle Piece #6
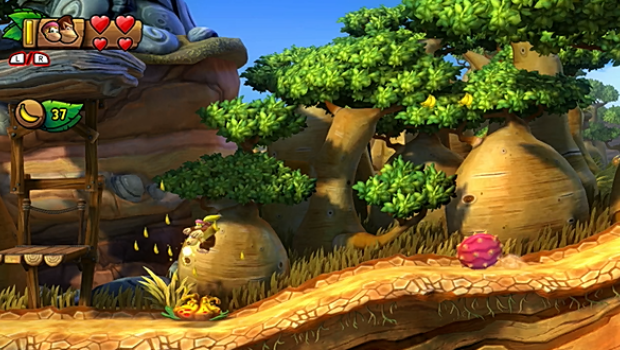
There's a plant by the next scaffolding. Slam it to spawn some bananas--collect these before they vanish for a puzzle piece.
Letter G

This is found when running from the giant fruit. When you leap to the hanging grass, let yourself fall low enough to grab this before climbing up.
Puzzle Piece #7
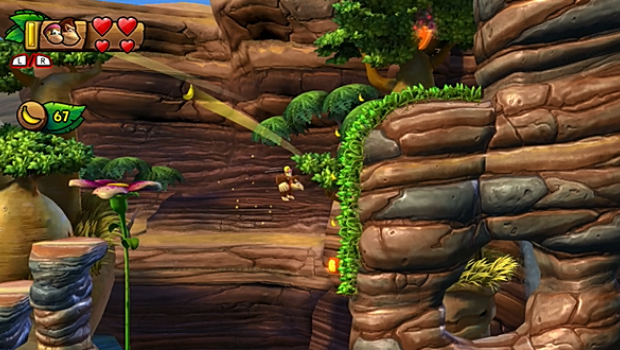
This one's tricky, and requires Trixie. While running from the giant fruit, you must grab every banana bunch and banana medal. If you do this, a puzzle piece will appear just as the level wraps up.
3-3: Frantic Fields
Puzzle Piece #1
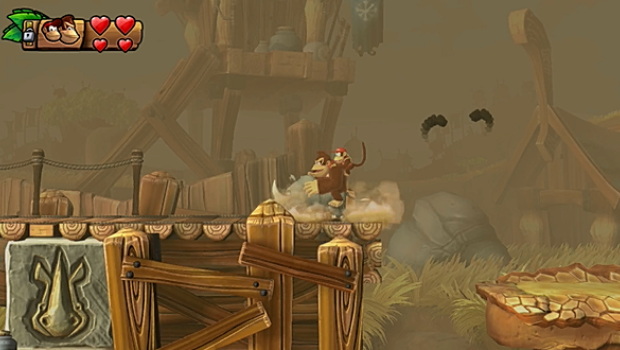
After acquiring Rambi, backtrack to the boardwalk you just leapt from. Bust through the Rambi block here to discover a bonus room. Collect the bananas inside before time expires to earn a puzzle piece.
Puzzle Piece #2

Past the next tree is another Rambi block. Bust through to find a hidden puzzle piece.
Letter K
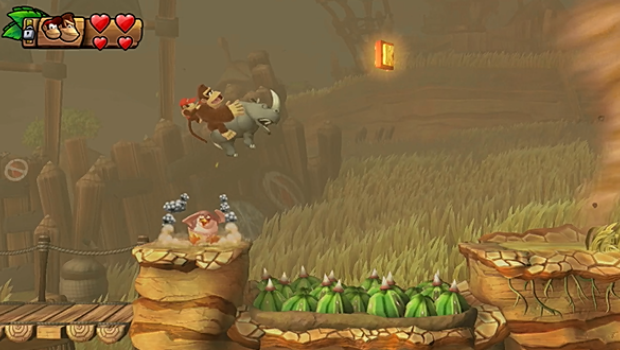
Directly above is a penguin enemy you can use to reach a KONG letter.
Letter O
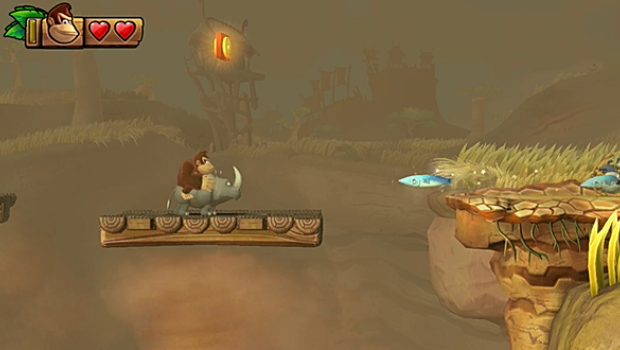
As you cross the next section of platforms, leap up to collect another KONG letter.
Puzzle Piece #3
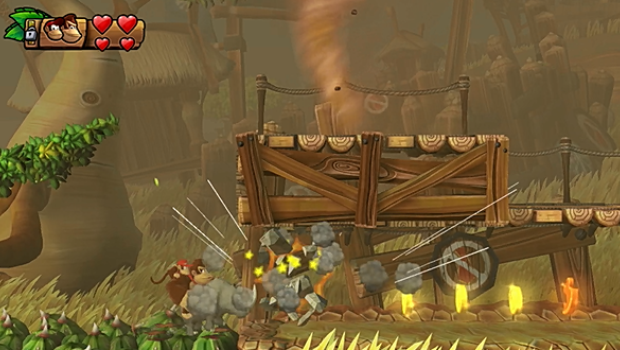
On the very next hill is a ring. Yank it up to unearth a puzzle piece.
Letter N
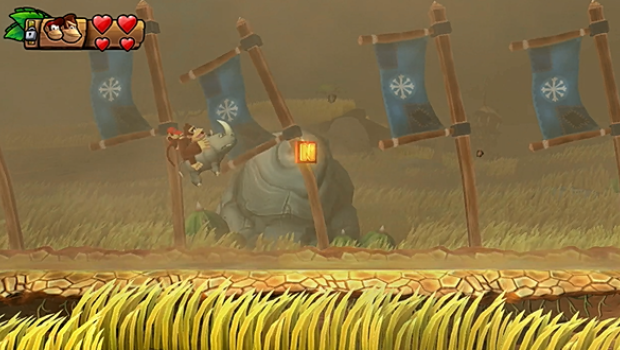
When you reach the windy flag section, keep an eye out for this as it flies by. This is your only chance to grab it.
Puzzle Piece #4
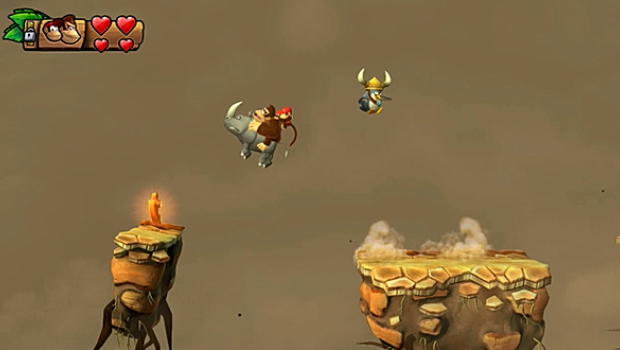
When you reach the next checkpoint, look left to spot a puzzle piece on a small, distant ledge. Use Rambi's charge jump to reach it.
Puzzle Piece #5
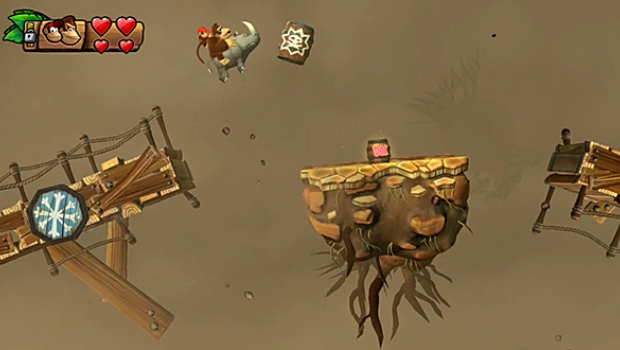
When crossing the broken bridges, a bonus barrel will quickly fly by--hit it to reach a bonus room. There, collect all the bananas before time runs out for a final puzzle piece.
Letter G
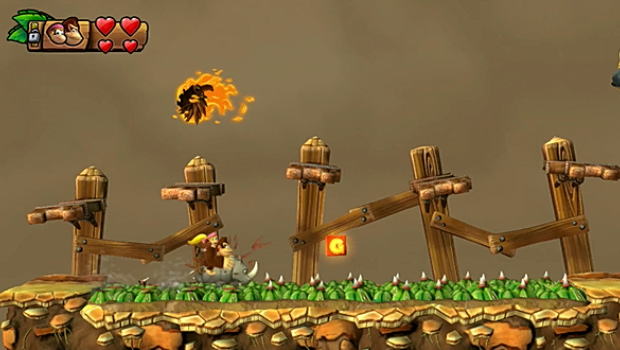
If you hold onto Rambi until the final platform of this section, you can cross the thorns to grab the final KONG letter. Alternatively, you can dip down and use Dixie's twirl to return to safety.
3-4: Scorch 'N' Torch
Puzzle Piece #1
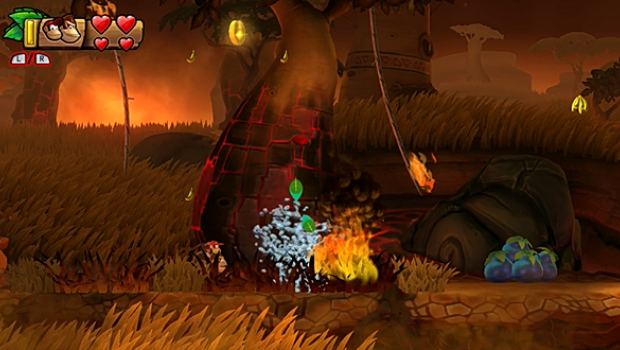
When you reach the trio of fires, use the water balloons to put them out. Roll through the grass here to unearth a puzzle piece.
Letter K

When you see the first KONG letter above, quickly use the nearby tree branches to reach it before they burn up.
Puzzle Piece #2

Just before the checkpoint is a sinking tall tree. As it falls, leap up its branches and grab each banana to generate a puzzle piece.
Puzzle Piece #3
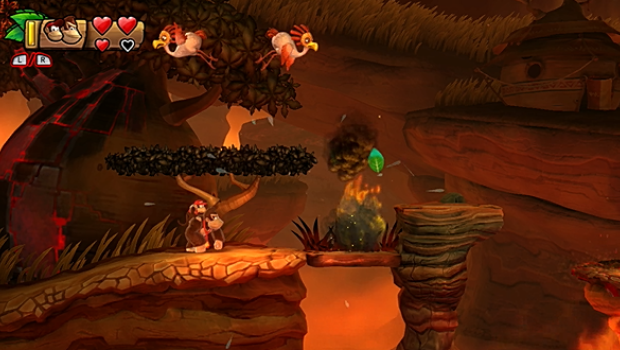
Further ahead is a burning bush atop a trap door. Douse it with a water balloon, then slam through to reach a bonus room. Collect the bananas in time for a puzzle piece.
Puzzle Piece #4
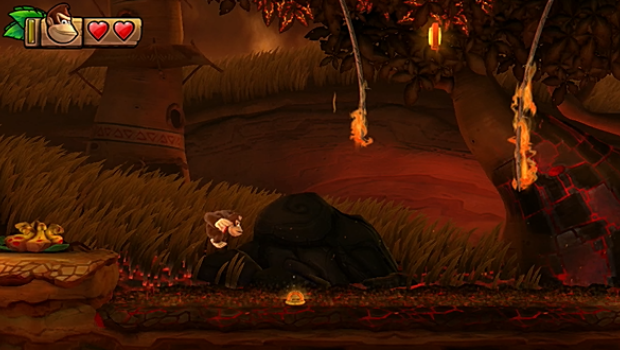
When you see this ring atop hot coals, be ready to move quickly. Yank it out and move away before being burned to grab the puzzle piece that appears.
Letter O
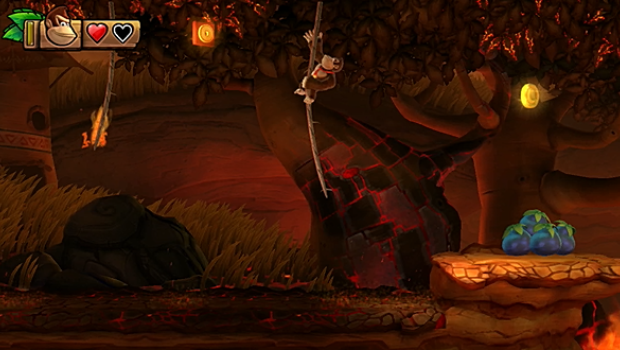
Immediately after is a burning vine. Douse it with a water balloon, then climb on to reach the letter above.
Letter N
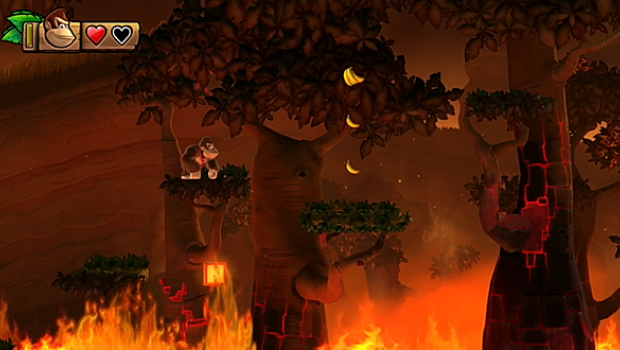
The next KONG letter comes quickly after. While the trees, sink ride the branches until the last second to grab it before jumping to safety.
Puzzle Piece #5

On the top branch of the very next tree is a puzzle piece. Keep scaling the branches to grab it.
Letter G
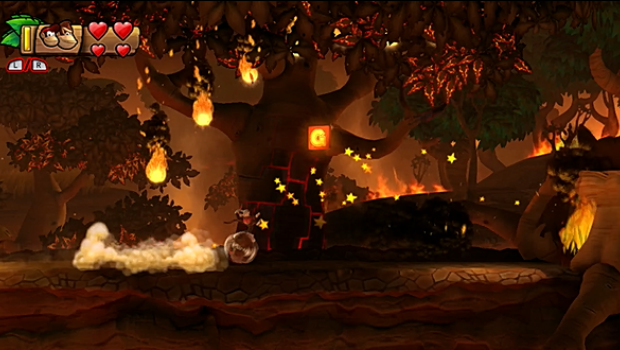
The final KONG letter floats in the middle of some falling fireballs. Time your run to dash through and jump to it in between intervals of fireballs.
Puzzle Piece #6
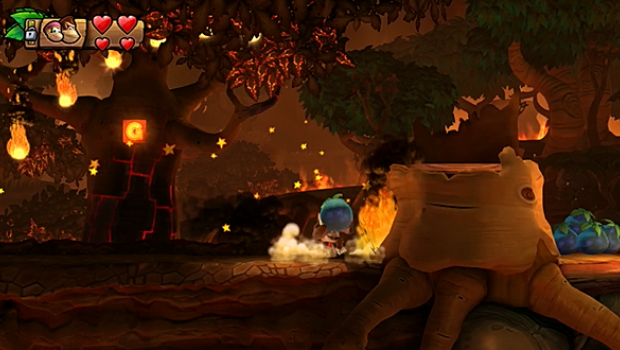
Immediately after the fireballs, grab a water balloon and hop back over the stump. Douse the flames here to enter a bonus room. Collect the bananas within the time limit to earn a puzzle piece.
Puzzle Piece #7
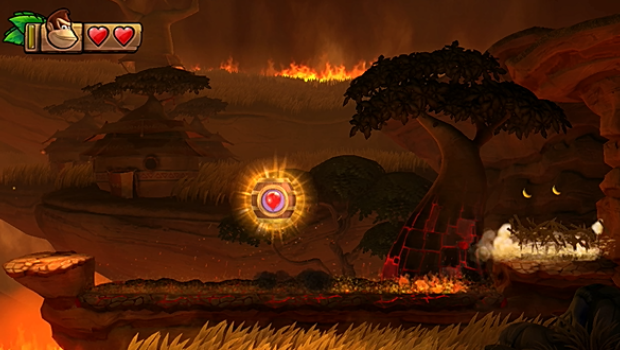
Skip the level exit and head to the patch of grass to the right. Roll through it to reveal a puzzle piece.
3-5: Twilight Terror
Puzzle Piece #1
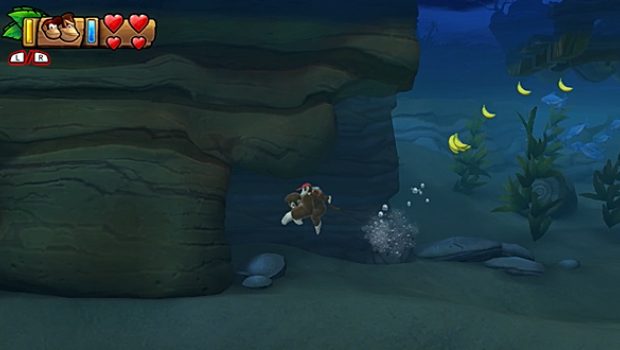
Before taking off in the rocket barrel, dive into the water. Swim down and to the left to find a bonus room. Collect the bananas inside before time expires to earn a puzzle piece.
Letter K
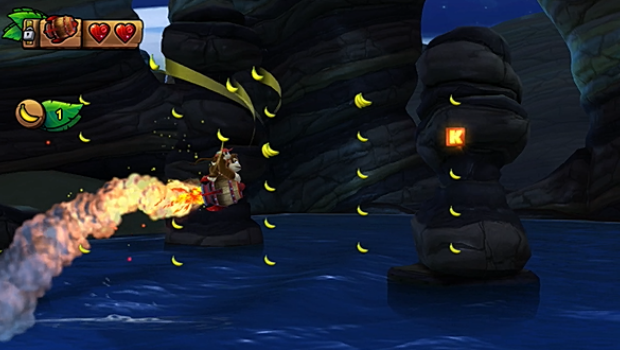
The KONG letter appears during the first string of bananas.
Puzzle Piece #2
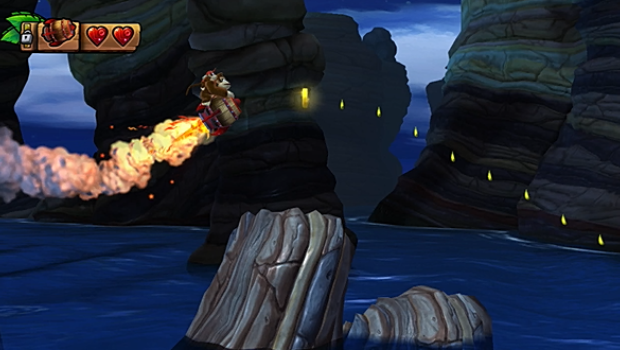
You'll next approach a string of bananas and banana medals. Collect them all to spawn a puzzle piece.
Letter O
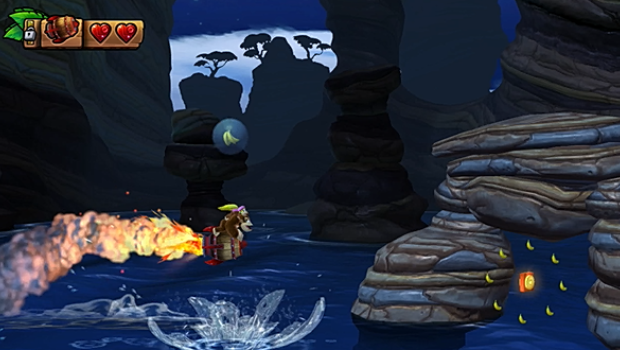
When a fish with a banana bubble pops up, stay low. Fly under the next rock arch to grab this.
Puzzle Piece #3
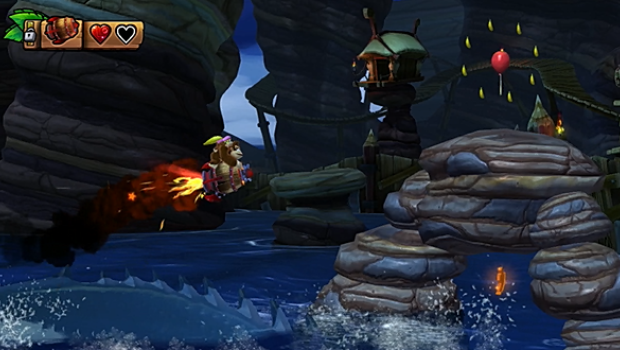
After the giant fish shoots up some banana medal bubbles, stay low again. There's a puzzle piece under the next arch.
Puzzle Piece #4
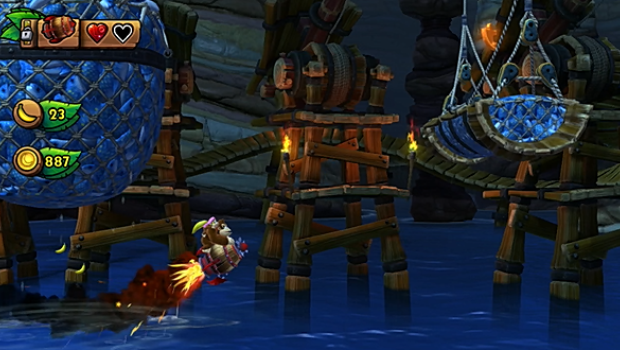
When you pass by the fish nets, keep an eye for this high one. Zip up and over it to grab the puzzle piece.
Letter N
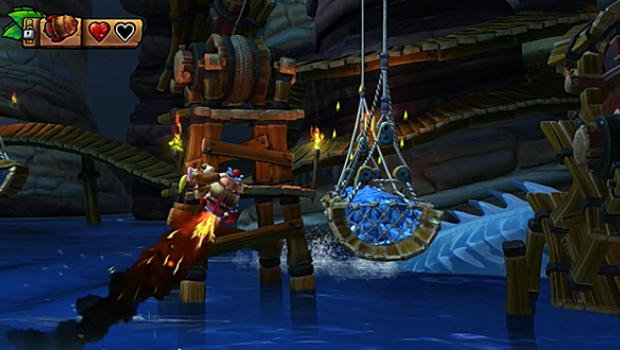
Almost immediately after, you can grab a KONG letter atop another fish net.
Letter G
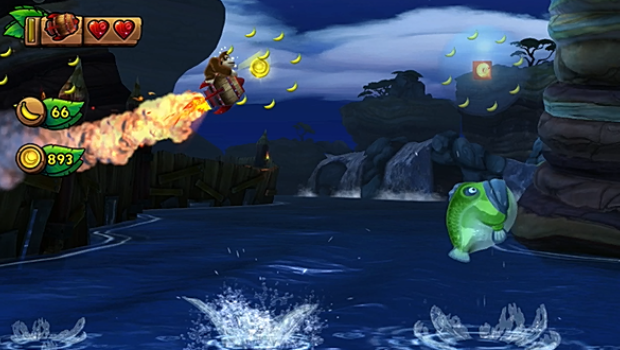
After the next checkpoint, some fish will shove bubbles into the air. The last one contains the fourth KONG letter.
Puzzle Piece #5
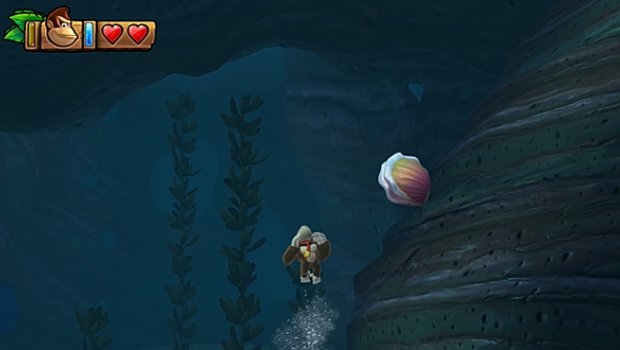
Before leaving the level, dive into the water and swim down to find a clam shell against the rocks. Slam into it to earn the final puzzle piece.
3-A: Rickety Rafters
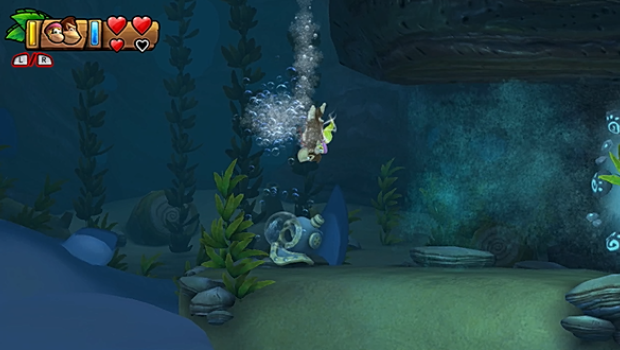
To access this level, you must find the second secret exit (there are two) in 3-5: Twilight Terror. First, you must take Dixie all the way to the end of the level. Then, instead of using the exit barrel, dive down into the water. Swim down and to the right to find a portal shooting out a current. Use Dixie's twirl to swim through and reach the secret exit beyond.
Puzzle Piece #1
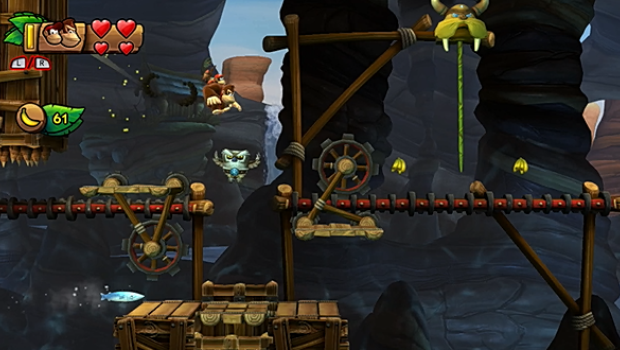
When you reach the owl, take him out and drop to the platform below. Slam through the trap door here to enter a bonus room. Collect all the bananas within the time limit to earn a puzzle piece.
Letter K
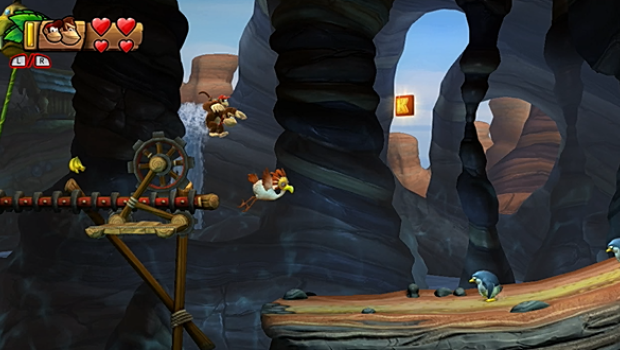
Right after, you'll have to bounce off the flying chicken to grab this KONG letter.
Puzzle Piece #2
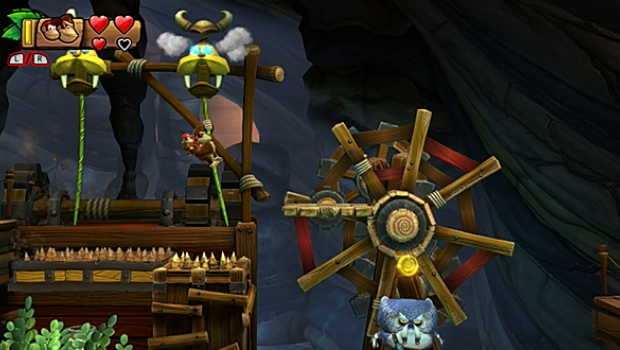
Proceed to these two vines. Pulling the second one opens a trap door below. Drop through into a barrel cannon to be launched into another puzzle piece.
Letter O
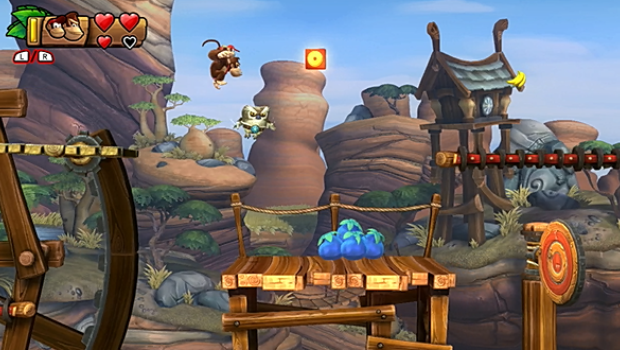
Just after, you'll have to bounce off the owl's head to grab another KONG letter.
Puzzle Piece #3
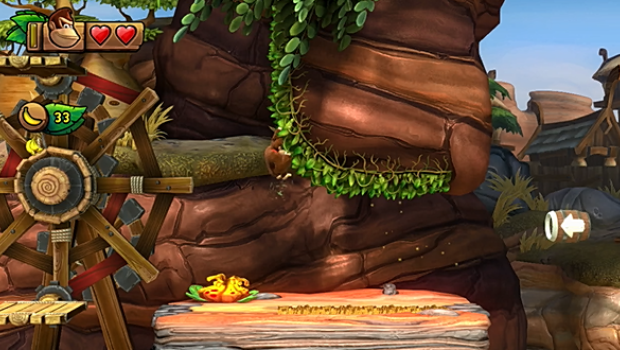
When you reach some hanging grass, grab on and climb to the left. Up here, you can grab a hidden vine that opens a secret room containing a puzzle piece.
Letter N
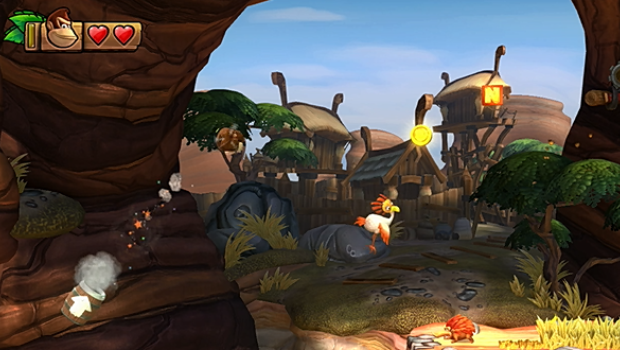
Right after, time your shot out of the barrel cannon to bounce off the chicken and grab the floating KONG letter.
Puzzle Piece #4
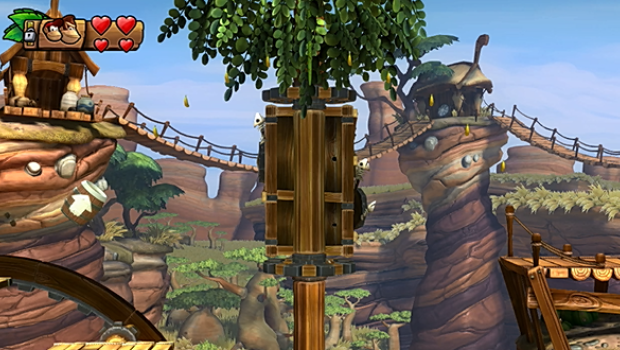
When you reach this barrel cannon by a large tree, pause a moment. See that really well hidden vine in the treetop? Hold the grab button when you leave the cannon to grab hold of it and spin the tree around, revealing a tricky puzzle piece.
Letter G
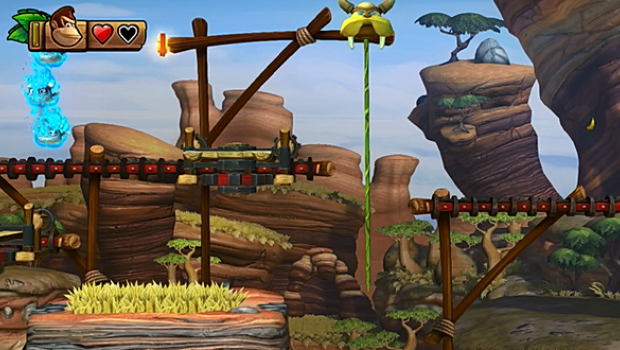
When you pass the two columns of flames, quickly climb up the vine and jump to the upper platform. From here, you can reach the last KONG letter. Alternatively, you can take a hit and ride the top platform right through the flames.
Puzzle Piece #5
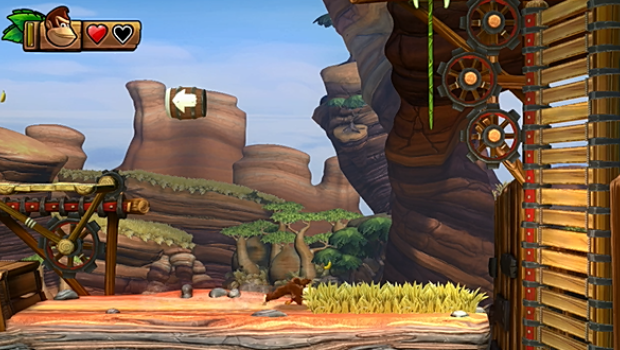
Before taking the barrel cannon out of this section, roll through the grass in the lower area to unearth a puzzle piece.
3-B: Bramble Scramble
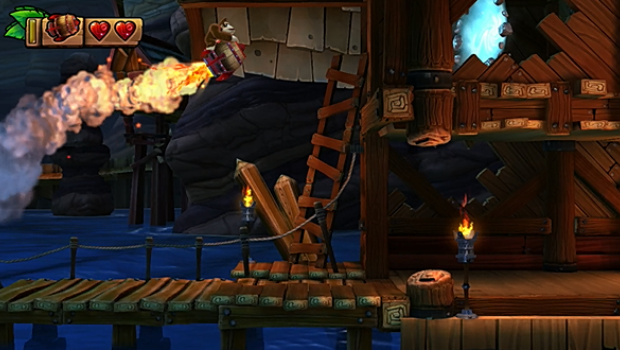
To access this level, you must find the first secret exit (there are two) in 3-5: Twilight Terror. When you approach the first building, fly up to the portal in the open attic. Here, you must use Dixie's twirl or Cranky's cane to reach the secret exit barrel.
Puzzle Piece #1
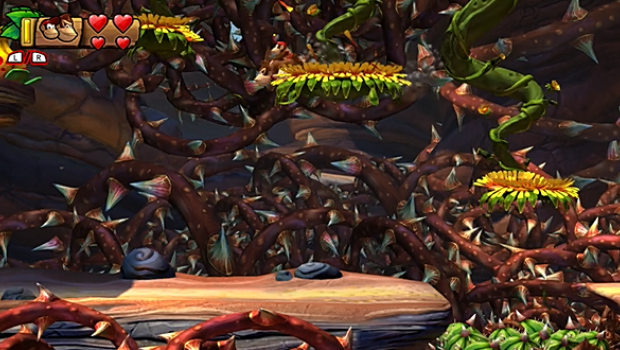
When you jump onto the first vine platform, another one appears to your left. Jump to this, then to another platform to reach a ledge with a plant you can slam for a puzzle piece.
Letter K
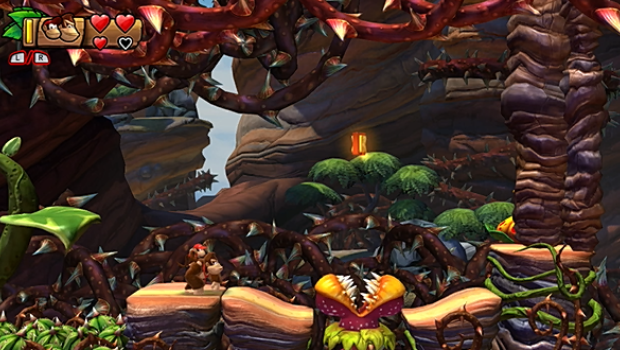
You'll spot this one no problem. Bounce off the plant when its mouth is closed to grab it.
Puzzle Piece #2
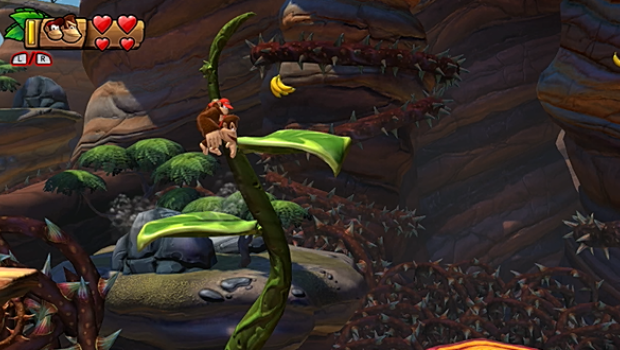
Just after the KONG letter is this plant. Grab the banana bunch, and a string of bananas will appear. Grab them to generate a puzzle piece.
Puzzle Piece #3
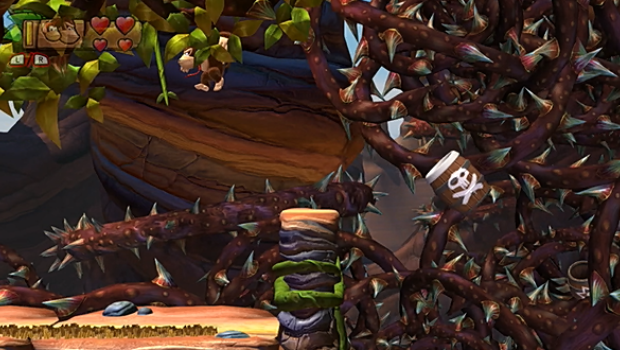
Before jumping into the barrel cannon, look left for a vine hidden in the treetop. Pull it to activate a new barrel cannon that launches you into the background. Use the hanging grass here to collect the bananas and avoid the wheel-riding rats, and you'll earn a puzzle piece.
Puzzle Piece #4

When you cross the leaves after the first checkpoint, bounce off the second owl to reach a hidden ledge which leads to a bonus room. In here, you must collect every banana before time expires to earn a puzzle piece.
Letter O
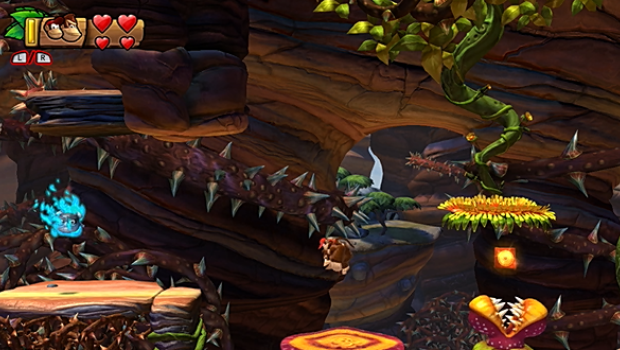
This appears atop another snapping plant. Leap to it when its mouth is safely closed, then leap to the platform above for safety.
Puzzle Piece #5
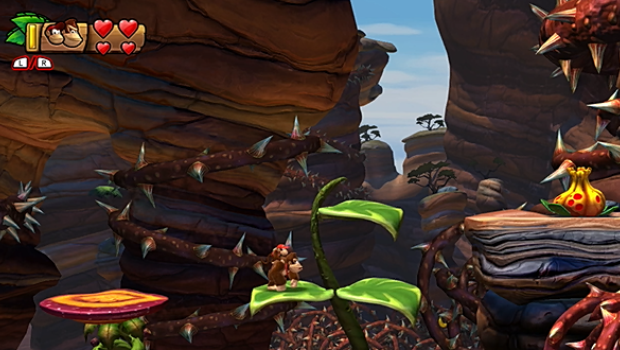
Before returning to solid ground, stop at this plant. See that lone banana? Drop down over it to land in an unseen barrel cannon which blasts you into a tricky puzzle piece.
Puzzle Piece #6
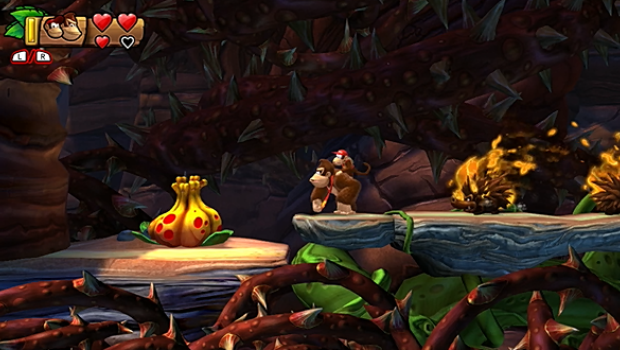
When you drop into an area with fiery porcupines, move left--the brush will clear and reveal a hidden plant. Slam it and collect the bananas it spits out before they disappear to earn a puzzle piece.
Puzzle Piece #7
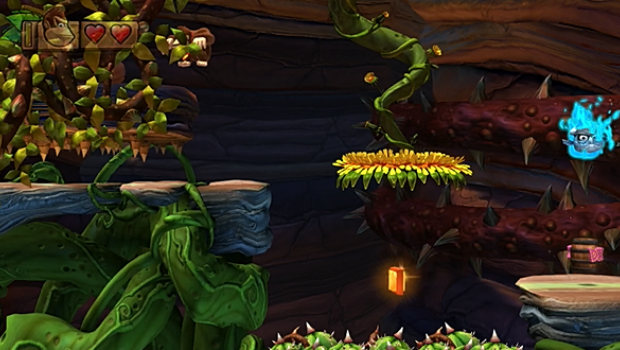
When you pass the platform that moves up into spikes, jump to the upper right section of those spikes. The brush clears here too, revealing a bonus room. Collect the bananas before time runs out to earn a puzzle piece.
Letter N

Immediately after is a character barrel. Use it to summon Cranky, then use his cane to bounce on the brush and grab the KONG letter below.
Letter G
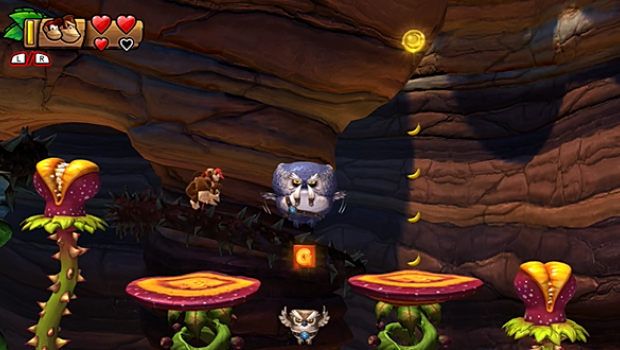
You'll next spot this letter between two owls. To get it, use a light bounce--do not gain extra air by jumping!--to the smaller owl. This will get you the letter, and another small bounce will get you to the next plant.
3-6: Cannon Canyon
Puzzle Piece #1
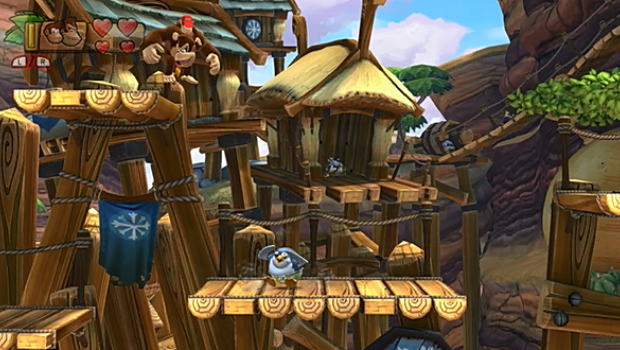
Right at the level start, bounce off the penguin onto this upper ledge. Enter the bonus room up here, and collect the bananas within the time limit to earn a puzzle piece.
Letter K
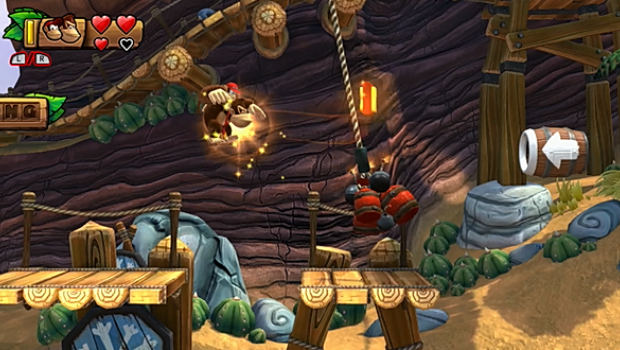
You'll easily spot the first KONG letter. With a well timed jump, you can leap over the explosive bundle here and grab it.
Puzzle Piece #2
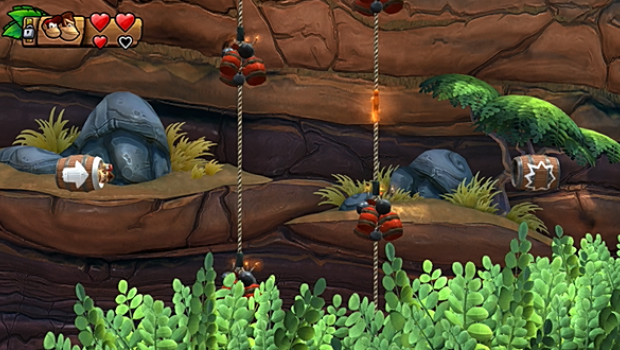
Pause when you reach the double ropes--the puzzle piece will descend on the right side in a moment. Time your shot to grab it.
Letter O
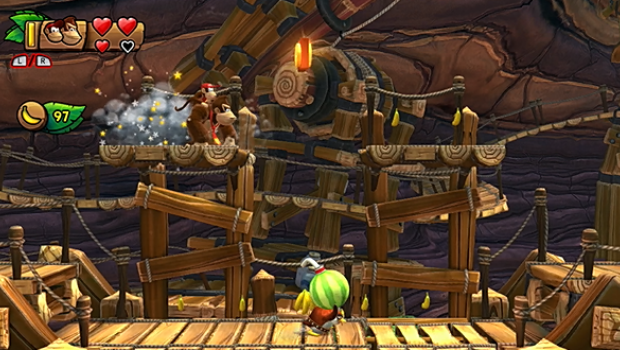
This isn't even a challenge. When you see the KONG letter, simply jump up to the platforms and grab it.
Puzzle Piece #3
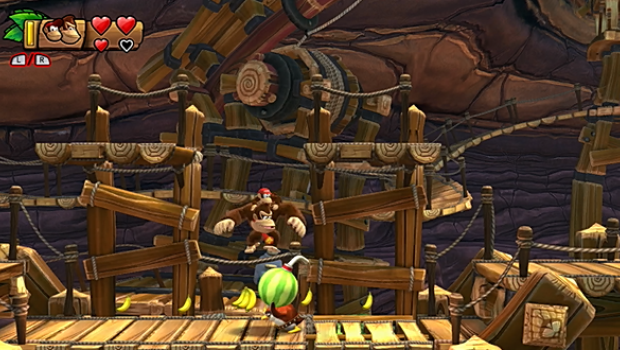
Now carefully drop onto the enemy carrying the watermelon bomb below. After knocking him out, quickly grab the bomb and move left. Place it by the target to have it explode and reveal another bonus room. Once again, collect the bananas in time for a puzzle piece prize.
Puzzle Piece #4
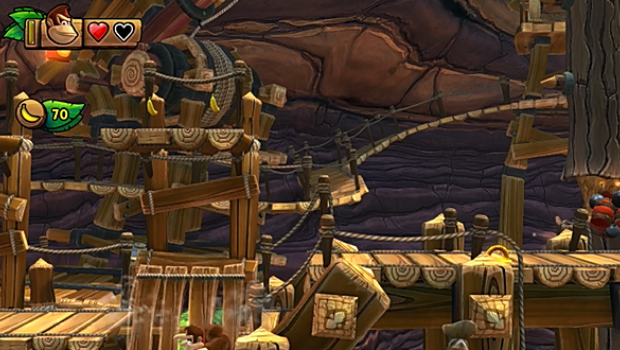
Finally, slam the trap door by where the watermelon bomb guy was patrolling. Yep, that's three collectibles in one small area!
Letter N
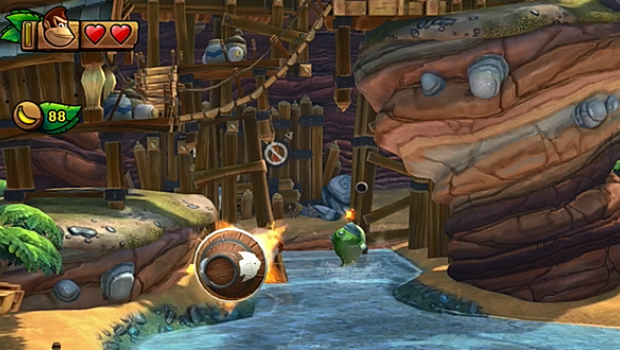
As soon as you land in the river cannon, fire yourself forward. This is the only way to catch the KONG letter the fish up ahead is carrying.
Letter G
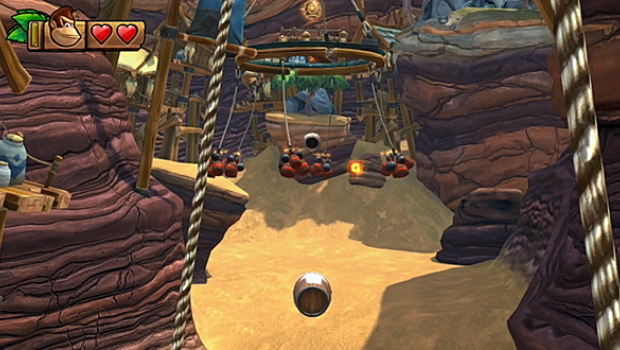
The timing on the final KONG letter is tricky. You have to fire just after the explosives before it passes.
Puzzle Piece #5
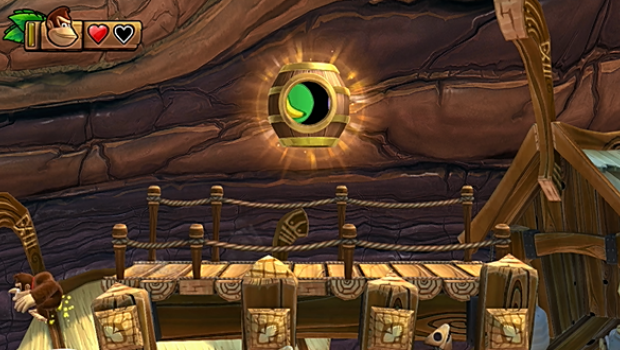
Before exiting, drop off the left side of the final platform where the lone banana is floating. This drops you to an unseen barrel cannon that launches you into the final puzzle piece.
3-K: Precarious Pendulums
This level unlocks once you've collected every KONG letter in Bright Savannah.
Puzzle Piece #1
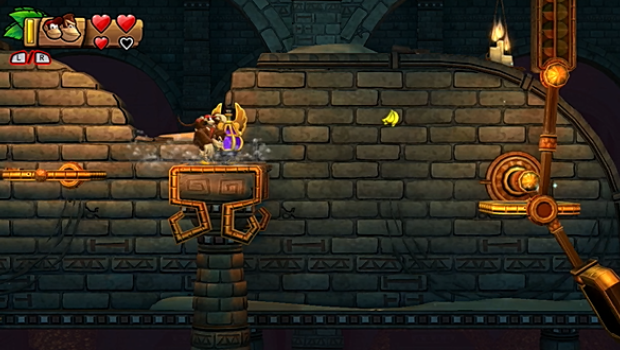
When you reach the second purple ornament, slam it to summon some bananas. Grab them before they disappear to earn a puzzle piece.
Puzzle Piece #2

At the second moving barrel cannon, wait for the cannon to align left. Fire off to grab a previously unseen puzzle piece.
Puzzle Piece #3
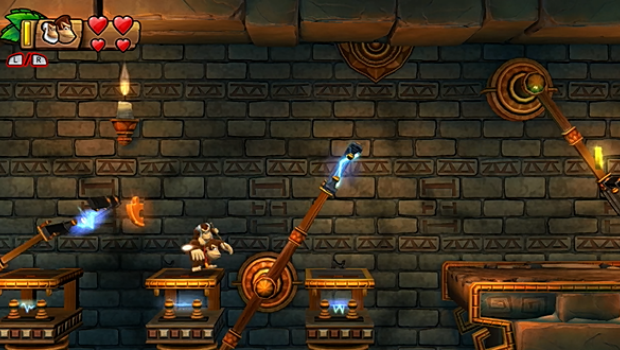
The third puzzle piece is tricky to grab. You must leap straight up from the sinking platform to grab it when it passes overhead.
Puzzle Piece #4
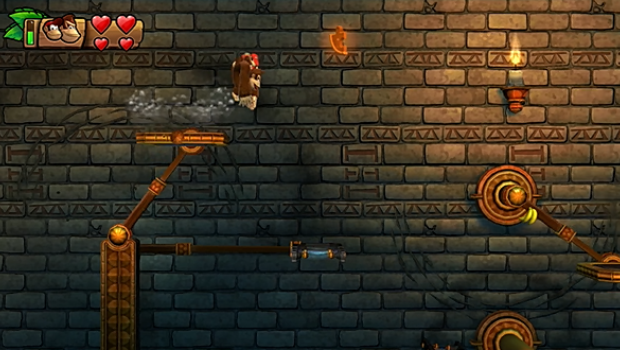
To get this, you'll have to execute a big, well timed rolling jump off the pendulum to the piece's left.
Puzzle Piece #5
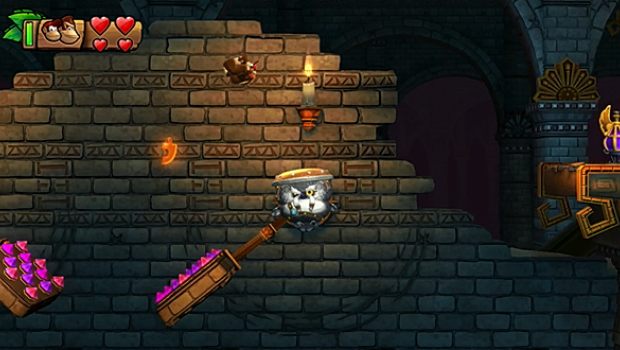
Your best bet to grab the final puzzle piece is to just sacrifice a hit when the spiked end of the pendulum creates a platform under the piece. Alternatively, you can bring Cranky along for the whole level and use his cane to safely grab the piece.
Jump to Section:
Current page: Donkey Kong Country: Tropical Freeze - Bright Savannah
Prev Page Donkey Kong Country: Tropical Freeze - Autumn Heights Next Page Donkey Kong Country: Tropical Freeze - Sea Breeze Cove
Tony lives in Maryland, where he writes about those good old-fashioned video games for GamesRadar+. His words have also appeared on GameSpot and G4, but he currently works for Framework Video, and runs Dungeons and Dragons streams.

 Join The Community


