Call of Duty: Black Ops 2 multiplayer guide
Lock and loadout
Perks
You can have anywhere between three to six perks on a single character. Three is the baseline, but you can add perk slots by choosing the appropriate wildcard modifier for your build. Adding wildcards effectively cost you two slots for a perk (the wildcard slot and the perk slot), so it’s expensive, but can definitely be worth it.
There are three different groups for your perks. The groups aren’t necessarily in order of quality or effectiveness, but they do mean that you can’t necessarily select any three perks that you want; your group 1 perk slots can only be filled by group 1 perks, not perks from any other group. Let’s take a look at what you have to choose from. You won’t have access to all perks right away; you’ll have to unlock the more advanced perks by levelling up in-game.
Perk Group One
Lightweight: Lightweight is a no-nonsense baseline perk which allows you to move faster (by around 10%) and take no damage while falling. Speed is always your friend in this game, and as such this is always a good default perk choice if you don’t have something more specific that you need to use this perk slot on. This is a mandatory perk for game modes like CTF that require you to move fast. The falling damage elimination is less necessary, but it still comes in handy when you need to make a hasty exit through a window, or drop into tunnels.

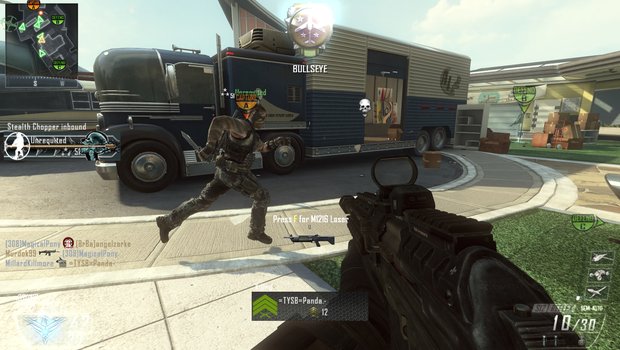
Lightweight lets you move faster, as does moving with a knife in your hand, as this speedster no doubt knows.
Hardline: Hardline will increase the rate at which you earn scorestreaks by around 20%. Note that this DOES NOT increase your score in the game or let you earn experience faster; it simply lowers the amount of experience you need to earn before you can start popping UAVs and other scorestreaks. You’ll have to examine your own game experiences before you decide whether or not this perk is for you: if you find yourself struggling to stay alive long enough to even earn the UAV pop, then this is effectively a wasted choice for you, but if you consistently get big enough streaks to get your VTOL launched, then this will let you do so more quickly and more often.
Your choice of streaks will also determine how useful this is to you. A typical early-game streak selection of UAV/Hunter-Killer/Care Package only requires 550 points to cycle through, so Hardline will generally only save you one or two kills to achieve those points. If you’re busting out risky, high-end streaks like Swarm, which requires a 1900 streak to activate, you’ll be shaving off almost 400 points from the requirement, which is a substantial number.
If your gameplan is to sit back and build up big scorestreaks, Hardline is a great option; if you’re a first-through-the-door operator that racks up a lot of deaths in every match, then it won’t do much for you.
Blind Eye: Blind Eye protects you from most AI-controlled enemy scorestreaks, including the ever-popular Hunter-Killer, Stealth Chopper, Swarm, Escort Drone, and Warthog. These abilities will be unable to target you at all, making it easier for you to avoid them, or shoot them down if that’s your bag.
As a purely defensive perk choice, though, and an awfully situational one, Blind Eye is tough to recommend for general gaming. It won’t help you kill anyone, although protection from Hunter-Killers will probably save you from a death every few matches. The rest of the streaks that it protects you from are all very expensive at over 1,000 points a pop, however, meaning that they’ll be more rare occurrences on the battlefield. As such, Blind Eye will often be doing nothing for you at all. It can be a good defense if you’re stuck in a lobby with a player that habitually calls down Warthog strikes, but apart from that, you’ll be better off choosing another perk.
Flak Jacket: With a Flak Jacket, your resistance to explosive damage is greatly magnified, making it almost impossible to die from grenades, rocket launchers, or other explosives, unless you’re already wounded or an enemy scores a direct hit on you. This is useful in almost any game mode, but is especially handy when assaulting or defending an objective; these spots are magnets for grenades and explosives, and a Flak Jacket will greatly improve your ability to plant or defuse bombs in these situations, just by keeping you alive longer.
Ghost: One of Call of Duty’s defining perks, Ghost will mask you from enemy UAV scans so long as you stay moving. UAVs are a cornerstone ability in BLOPS2, and your opposing team will probably have active scans up a significant amount of the time. Ghost will prevent those scans from spotting you on the minimap, enabling you to get the jump on enemies that are relying on that minimap to get a gauge on whether or not to enter a room or watch their backs.
Ghost is the cornerstone of any solo stealth build, although you’ll need to get all the way to level 55 to use it. For maximum effectiveness, you’ll want to pair Ghost with a weapon with a suppressor, so that your gunfire likewise won’t highlight you on enemy minimaps. Also note that Ghost is only useful if you’re standing away from friendly players who aren’t using Ghost, since they’ll appear on enemy minimaps regardless of whether you do. Maybe an enemy who spots that ping will expect one enemy instead of two, but they’ll still be chucking grenades at you regardless.
Perk Group Two
Toughness: With Toughness, you’ll flinch less when you get riddled with bullets, allowing you to more steadily aim your weapon and hopefully take down your attacker before he kills you. This is a great option for any player whose style involves a lot of sprinting or running into open areas to engage enemies, which means it’s a great option for almost everyone, especially if you’re using assault rifles or SMGs. With these weapons, you’re usually going to be aiming down the sights, and it’s here that Toughness will steady your aim under fire and let you get that headshot you need before you go down.

Toughness is great in situations where you’re fighting against someone prone.
Toughness is less likely to be useful to players who use sniper rifles (where the whole goal is to take down your opponent before they have a chance to fire at you) and shotguns (where you’re probably going to be firing from close range or from the hip), but when it is needed, it can mean the difference between a kill or a death.
Cold Blooded: With Cold Blooded, you’ll be immune to the effects of player-controlled aircraft, gear like Sensor Grenades and some advanced optics, and streaks like Dual Band, Target Finder, and MMS. You’ll also not display a name or red crosshair when an enemy player is targeting you. This is a powerful stealth perk, and the removal of your name in multiplayer matches is a large part of that. When you play online, the red name above an enemy’s head is often your first indicator that they’re a foe, rather than a friendly; seeing someone running around without one of these indicators often results in a split-second of confusion, which can often be enough for you to get your shot off first.
Protection against the streaks and optics is a nice touch. Cold Blooded doesn’t do much for you after the enemy becomes aware of your presence, though, so if you’re staying solitary and defending an objective, it won’t offer much in the way of defense. It’s a great choice for an aggressive player, though.
Fast Hands: Fast Hands doubles the speed with which you switch weapons and use equipment, like grenades and charges. Increasing the speed with which you switch weapons can be useful when your secondary weapon is something like a rocket launcher, which ordinarily takes some time to switch to and use, but it won’t make a huge difference when you’re sporting a pistol. However, if you’re the sort who prefers to switch to pistol when you run out of primary ammo in a close-range fight (as opposed to attempting a reload or closing for a knife kill) or are using a weapon unsuited for such fight (such as a sniper rifle), then this might still give you the fraction of a second you need to pull out your kill.
The ability to reset the timer on frag grenades is nice, but only if you’re the type to actually choose to do so; the far better option in most circumstances is to run from the grenade entirely.
Hard Wired: Renders you immune to EMP effects and enemy Counter-UAV streak effects. This is a very, very situational perk, as EMP grenades are less common than concussions in low-rank games or flashbangs when playing with more experienced players. Eliminating the effects of CUAV can be handy in crowded games, but still probably isn’t worth spending a slot on.
Scavenger: All enemies that are killed with anything other than explosives (i.e. anyone that gets shot) will drop an ammo pack, refilling your ammo and lethal/tactical equipment. This is a great perk for anyone that routinely finds themselves running out of ammo on your primary weapon, as you’ll continually be topped off by running over the packs your fallen enemies drop; as such, spray-and-pray weapons like SMGs and some assault rifles benefit most from it.
The ability to refill grenades is also unspeakably handy; you can opt out of a secondary tactical grenade, for instance, or simply spam a flashbang through every single door you come through, assured that you’ll eventually be able to pick up another. It also pairs up exceedingly well with the ever-popular grenade launcher attachment, or any other kind of gun or equipment that has limited ammo. Note that this perk is far more useful if you’re capable of staying alive for long periods of time; dying refreshes your ammo, so if you’re playing free-for-all or other high-death game modes, you might want to choose something else.
Perk Group Three
Dexterity: With Dexterity, you’ll be able to aim more quickly when you come out of a sprint, which can make the difference between life or death if you’re the sort to sprint into enemy-held positions often. It’s not going to be of huge use if you’re using a weapon that already has slow aiming, like a machinegun, or if you’re using a build that de-emphasized sprinting, such as a sniper build. Still, a good baseline perk for the early game.
Dexterity also allows you to mantle objects and climb obstacles twice as fast. This is a situational skill, obviously, but can be tremendously useful on maps like Cargo that feature a large number of elevated areas.
Extreme Conditioning: You can sprint for twice as long with this perk which, again, is going to be useful for most playstyles, but not all of them. If you favor an aggressive, mobile playstyle, Extreme Conditioning is an easy recommendation, especially if you’re heading into a large map with many open areas, like Aftermath. Switch to another perk if you’re on something tight like Nuketown.
Note that using Extreme Conditioning to sprint towards the middle of the map at the start of a round is a great way to leave your teammates well behind you. That’s a recipe for disaster; use this tactically, but ensure that you stick near friendlies and don’t accidentally barge into a group of enemies.
Engineer: Engineer has a number of benefits to it. First, it will allow you to spot enemy equipment (claymores, C4, etc.) through walls. Information is power, especially when you’re playing an objective-based gametype and have to head for a defended spot; enemies will lay down plenty of claymores and charges to defend these spots, and knowing what you’re up against will let you survive. If you’re playing on a well-organized team that’s communicating via voicechat, you can also warn the rest of your fireteam what’s around the bend. This is less useful in straight team deathmatch or free-for-all, but it’ll still save your bacon on occasion.
Engineer also pairs up well with the Care Package streak, as it’ll let you reroll the Care Package and attempt to get something of higher quality. You can reroll any Care Package that you see, and if you happen to spot an enemy Care Package, you can even boobytrap those. Care Package is one of the most popular streaks, so this will come into use more often than you might think.
Tactical Mask: Almost completely eliminates the effects of concussion grenades, flashbangs, and shock charges. You’re going to see these grenades constantly no matter what the game mode, so this will almost always come in handy, especially if you spot the grenade coming your way and know where it’s coming from. When an enemy lobs one of these through a doorway, you can bet that they’re planning on coming through a second later and will expect anyone they spot to be dazed. Get in a corner near the doorway, or go prone and wait for them to appear to turn the tables on them. This works well with Flak Jacket to make yourself effectively grenade-proof, but these perks are effectively irrelevant in gunfights.

Chuck your grenades all you like, but be aware that there’ll be a few opponents with masks that won’t be affected by them.
Dead Silence: Makes your normal movement completely silent, and almost completely mutes your sprinting speed. If you’re a forward-line operator that focuses on stealth, this is a great perk to choose, especially on larger maps that encourage smaller one-on-one encounters. On smaller, more crowded maps, you won’t have to worry as much about your movement noises, since most players will more likely be distracted by the constant gunfire.
Awareness: Awareness doubles the range at which you pick up on the sounds of player movement, and also effectively cancels the effects of Dead Silence on opposing players, allowing you to hear them at the usual range. This is a great perk if you use headphones while playing or have a good 5.1 surround sound setup, since you’ll be able to pick up on audio cues that would otherwise escape most players. The same warnings about Dead Silence apply, though, in that it’s only going to be useful in maps where you can actually hear something other than gunfire.
Cancelling enemy Dead Silence can give you the edge against enemy stealth builds, considering that many players with a maxed-out build will be using suppressors and Ghost to make themselves all but invisible. It can be a bit confusing, though, since you’ll most often assume that you’re up against someone without Dead Silence when you hear footsteps; players with Dead Silence will be twice as close as you might otherwise expect, in other words. In corridors and hallways, that’s not going to be a big deal, but in more open areas it can be problematic. Still, better to hear them than to not.
Table of Contents
Weekly digests, tales from the communities you love, and more


