Among Us maps - learn your way around each level as a crewmate or impostor
The Skeld, Mira HQ and Polus Maps in Among Us explained

Have a good knowledge of Among us maps is vital if you're the Impostor trying to act natural, but not too natural, while find the the perfect blind spot or trap set up. Mastering each location will give you a huge advantage as while the rules never change, each map has unique pros and cons. The Skeld, Mira HQ and Polus all change things up with different layouts and a few varying abilities. If you want to win the game, knowing the maps is going to be a great help. As a rule it's usually a bit easier to win as a Crewmate on Mira HQ, and easier to win as an Impostor on The Skeld and Polus (we've also got some Among Us Impostor tips to help you there). But remember: the biggest advantage, whatever role you get, is to know your maps and use them to your advantage.
It would take a lot of time to figure out the details on your own, which is where this guide comes in. Naturally, the maps have a few things in common. They all consist of rooms with different names and functions, that are usually connected by narrow corridors. An important room that all maps have, is the Admin room, where you can see where players are located in real time. Now let’s take a look at them individually:
Among us The Skeld map

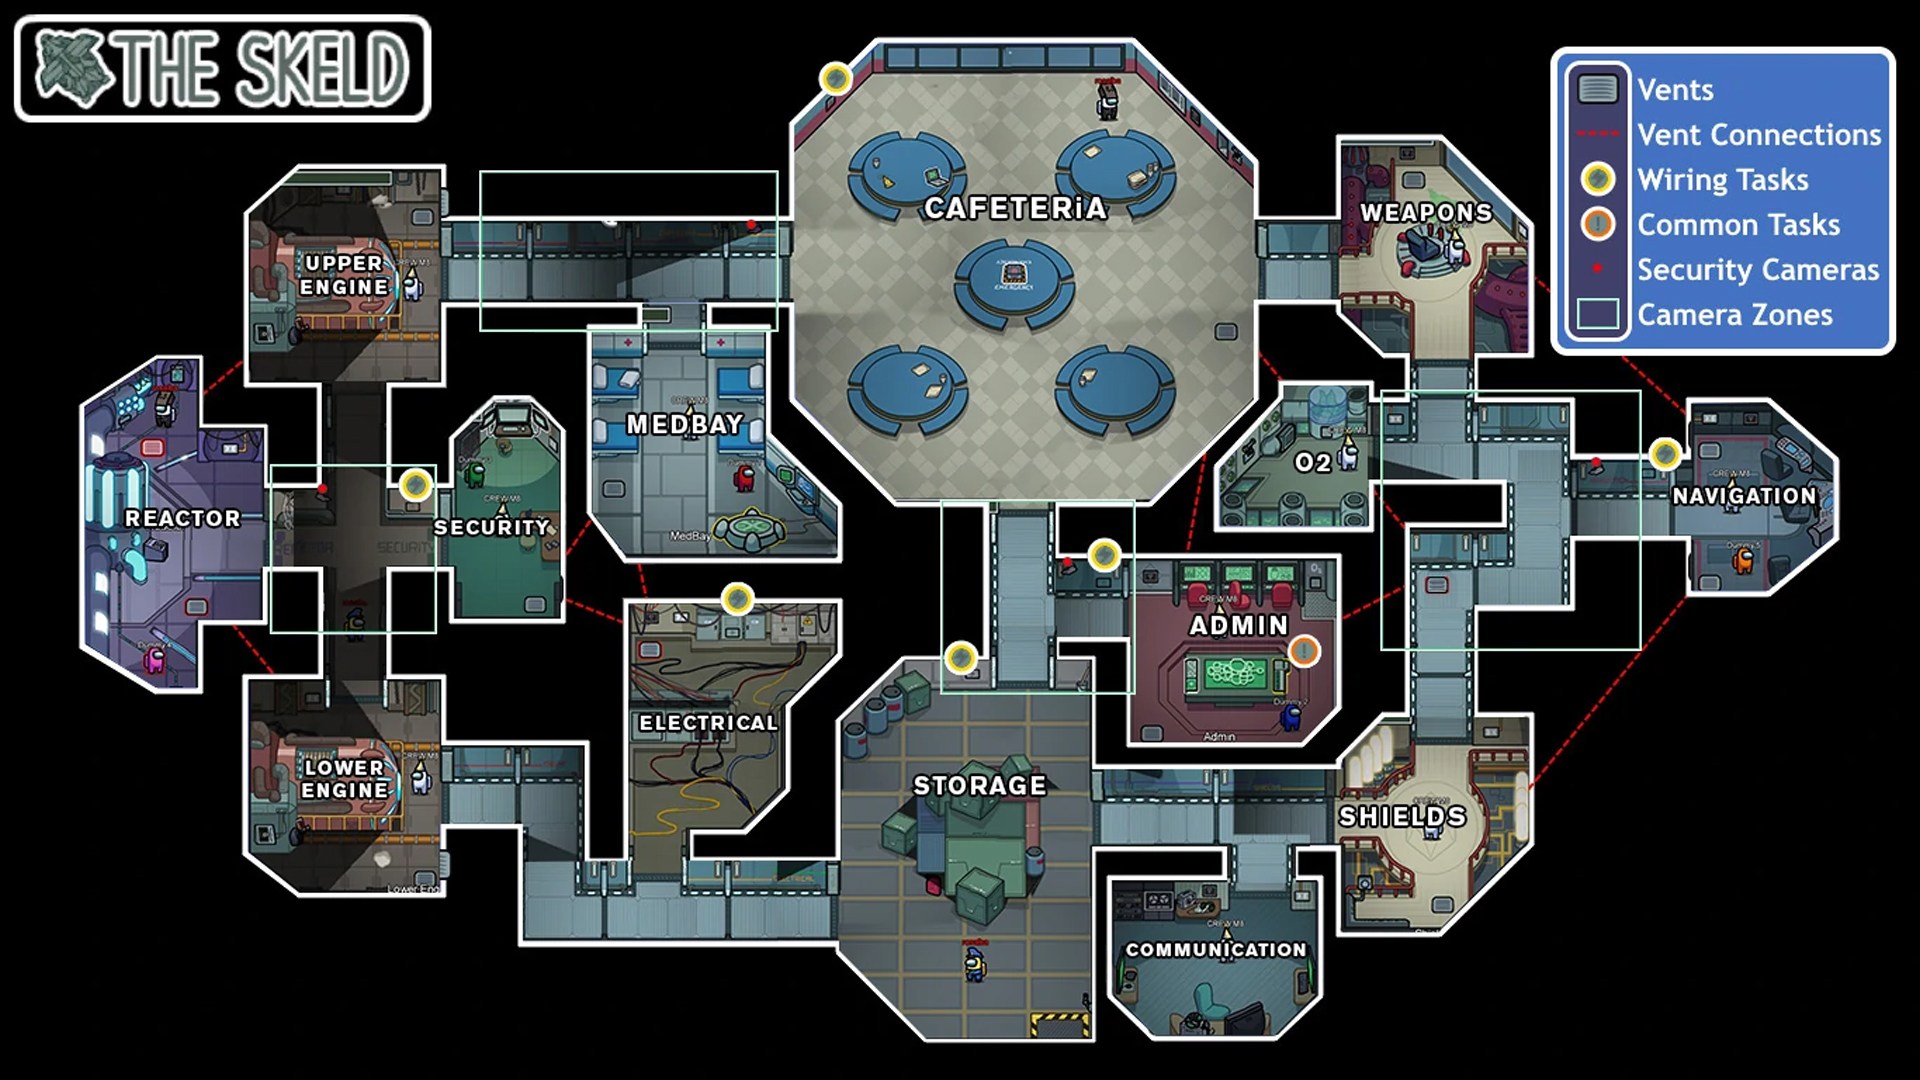
The spaceship map called ‘The Skeld’ was the only map available upon the game’s release. There are 14 rooms: two large ones in the middle and 6 smaller ones on the east and west sides. All the rooms are connected by corridors. Here are the key things to look out for:
- The structure: due to its symmetry, The Skeld is easy to navigate around; there are only two corridors taking you from the left side to the right, and three to take you from the bottom to the top of the map (and vice versa).
- The vent system: as you can see in the picture, the 5 vent connections are easy to memorize as well. Just remember the two triangle shapes in the middle and the single lines in each corner. Except for the lower middle part, there will always be nearby vents for Impostors to use.
- Visual tasks: The Skeld has 5 visual tasks, which is a lot. As a result, the odds of winning on The Skeld are better for Crewmates. The host can turn visual tasks off to fix this advantage.
- Sabotage locations: the four sabotage locations are equally spread across the map; they are at the Reactor, Electrical, Communications and O2 room. Remember that an Impostor can only lock the doors of the rooms on the left side (except for the Reactor room) and in the middle of the map. By using these features, it is fairly easy to control Crewmates’ movements.
- Security system: the security system on The Skeld allows the player to see four corridors at the same time, which is a great way to control what other players are doing. If you play as Impostor, you should remember that the only corridors that don’t have security, are the two lowest ones and the very short corridor on the top right.
- Danger zone: the Electrical room is quite dangerous for Crewmates and a good killing spot for Impostors. If you walk in to do a task and an Impostor follows you, you can’t escape and your entrance is not recorded on the security camera. Impostors can easily flee by using the vent in the upper left corner, and they can also close the door.
Among us Mira HQ map

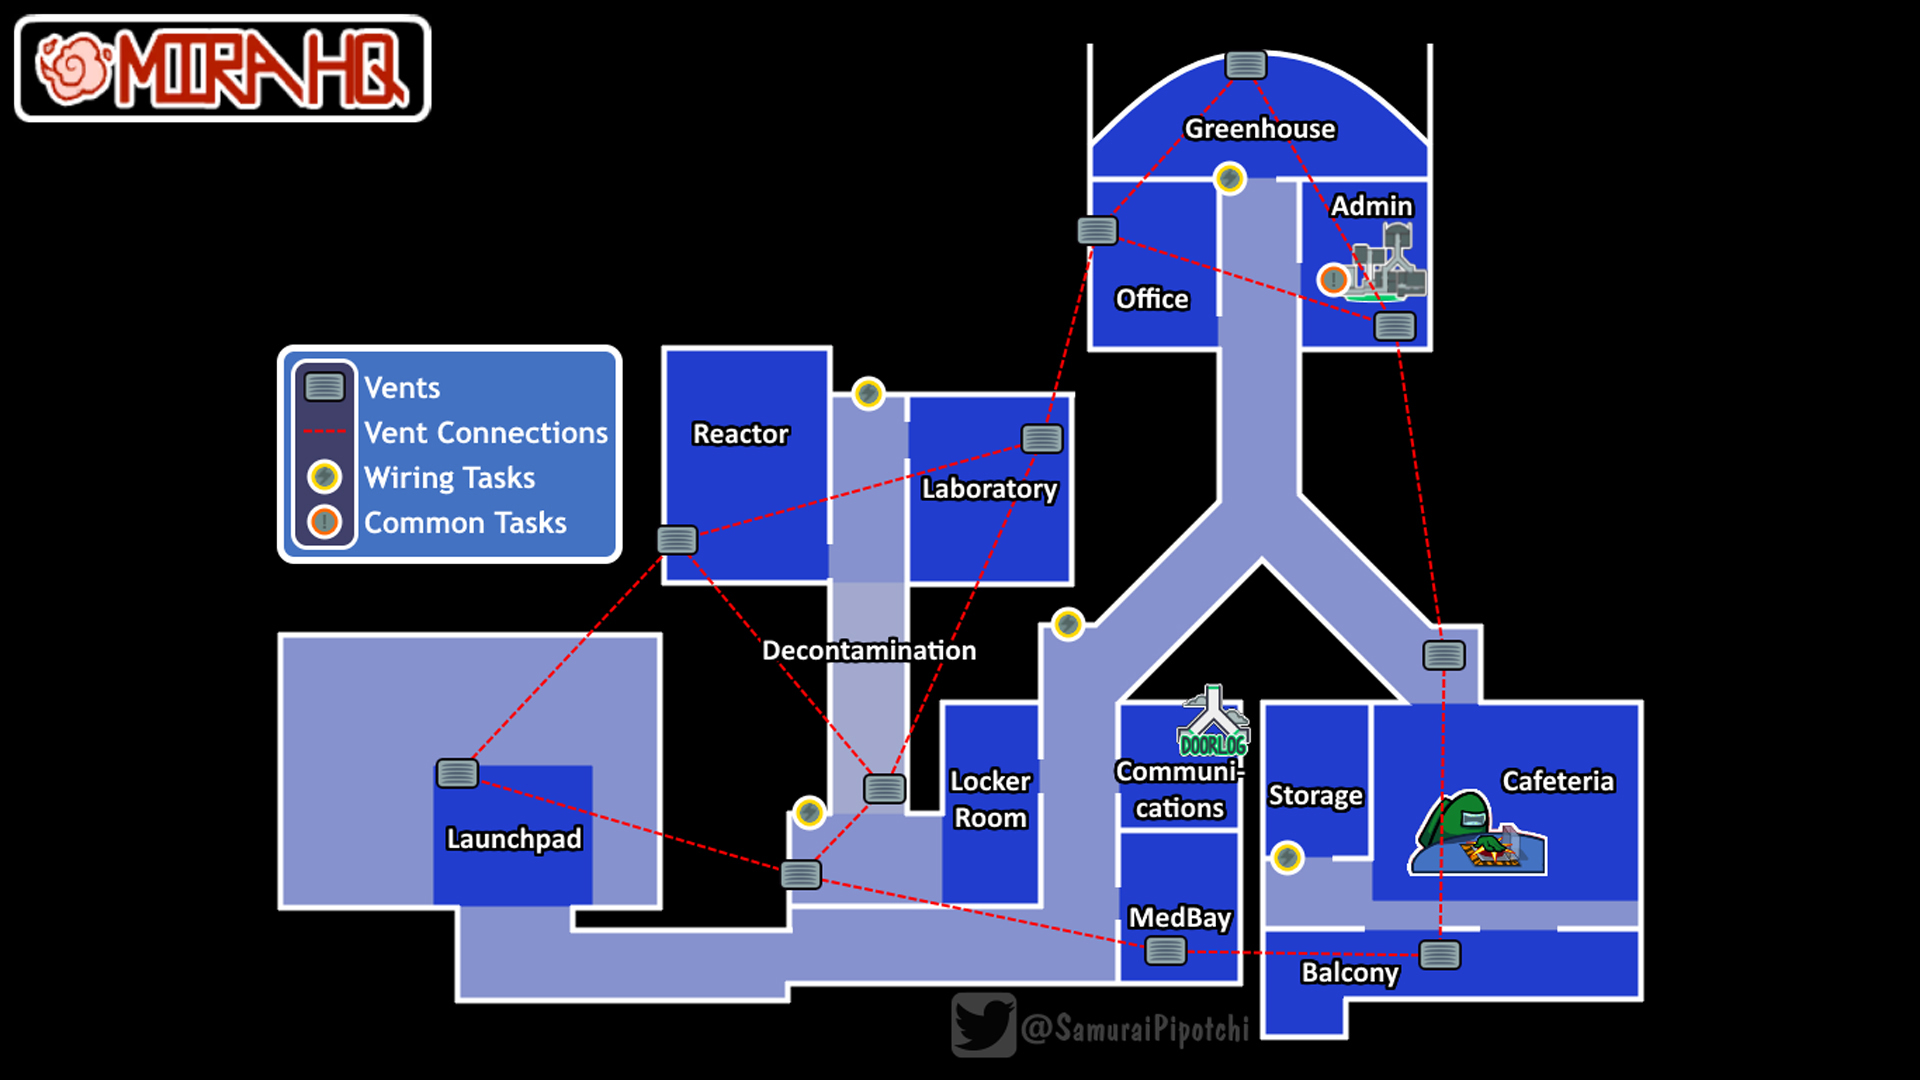
This office map is the smallest in the game with 12 rooms of all shapes and sizes and no clear structure the layout. The key thing to look out for are the single vent system, some isolated sabotage locations and the Doorlog, which replaces cameras and makes it easier for the Impostor to sneak around.
- The structure: Mira HQ’s structure is complex with some rooms very close to each other, and others isolated at the end of a long corridor. Because of its size and density, Crewmates will have a big advantage if they stay together.
- The vent system: the 11 vents on Mira HQ are equally scattered across the map. Only the area around Communications has less vents. The difference with other maps, and a great advantage for Impostors, is that all vents are connected in one system.
- Visual tasks: unfortunately for Crewmates, there is only one visual task on this map: the scan in MedBay.
- Sabotage locations: the three sabotage locations are at the top right and in the middle of the map. That means that an Impostor can easily lure a Crewmate out of the left and bottom right areas. There are no doors to lock on this map.
- Security system: instead of security cameras, this map has a unique feature called the ‘Doorlog’. The Doorlog keeps a record with up to 20 entries of the players who pass one of three sensors in the top right corridor. That also means that the Doorlog only gives information about this particular part of the map. Overall, the Impostor has to be far less worried that someone might be spying on him.
- Danger zone: the doors of the Decontamination corridor will close temporarily upon entrance. If you enter as a Crewmate together with an Impostor… Well, you will probably not leave Decontamination alive. The Impostor will be able to come and go through the vent.
Among Us Polus map

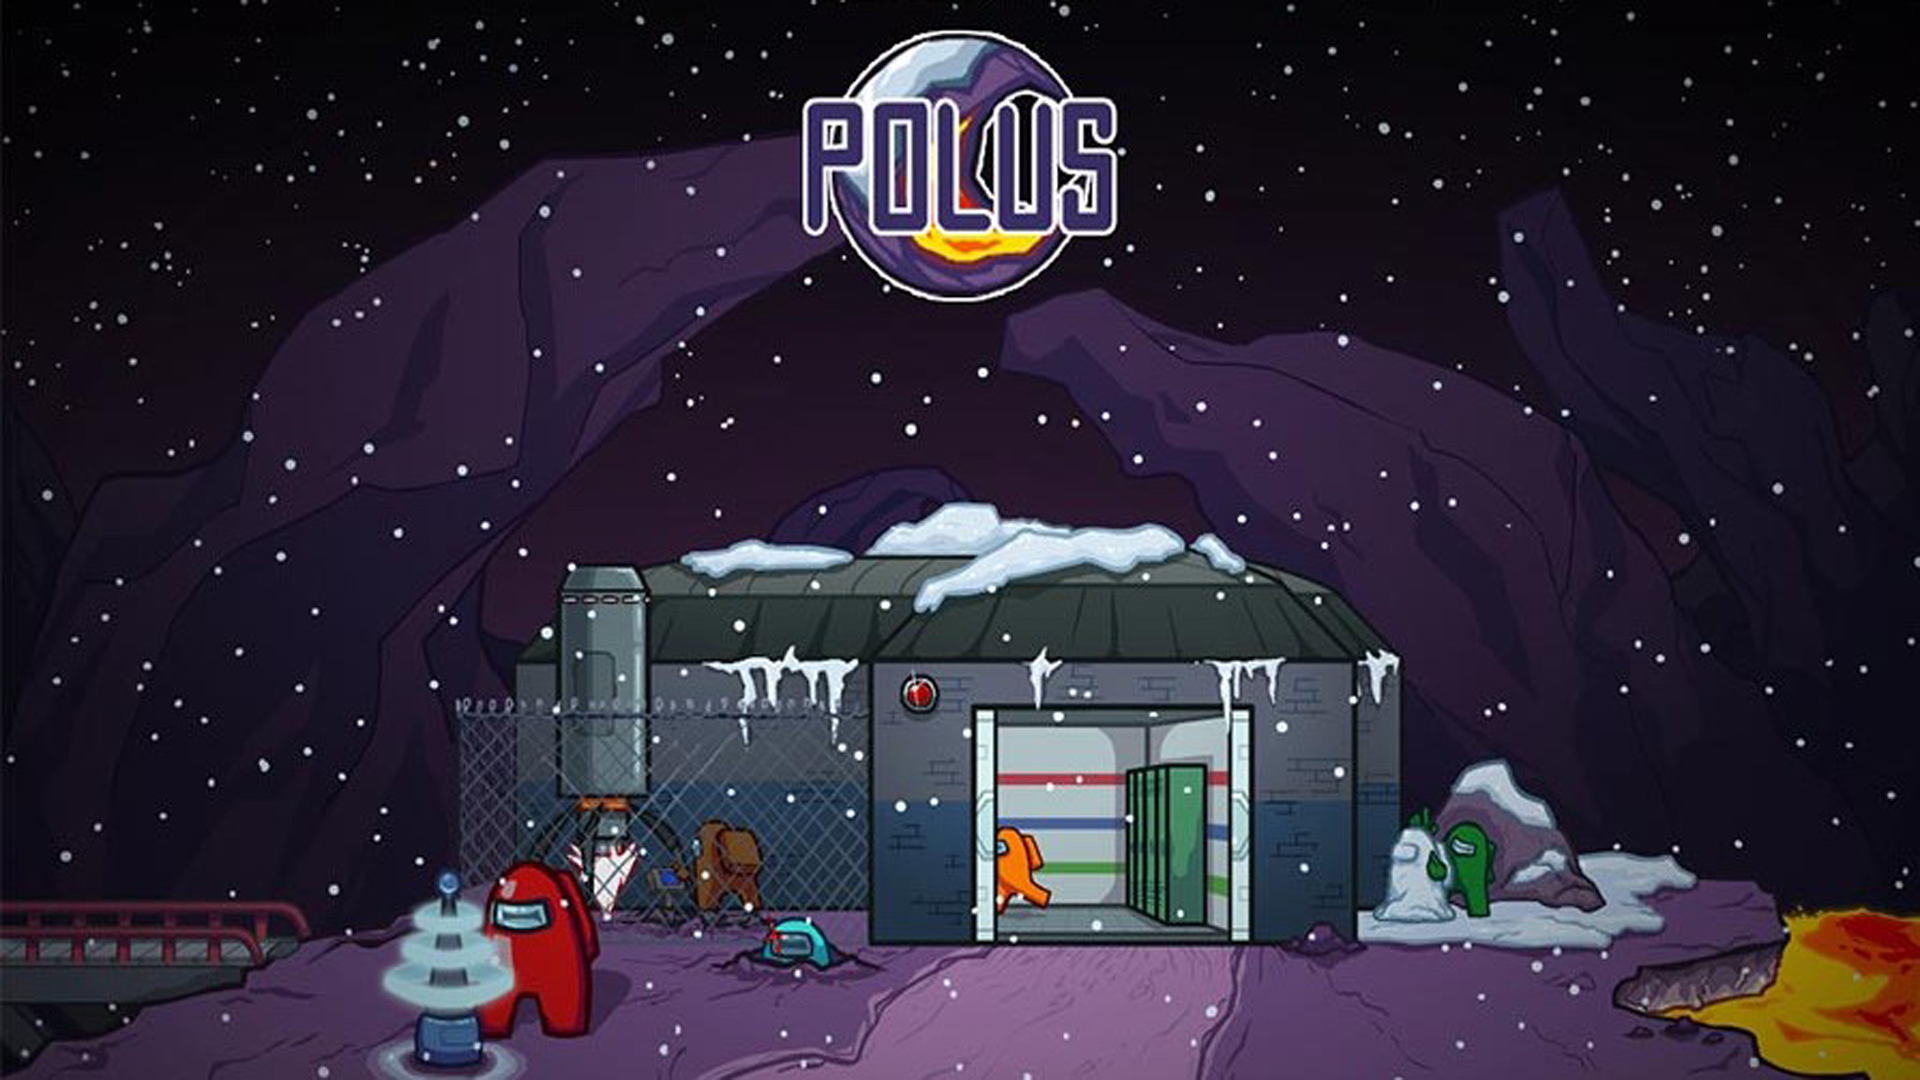
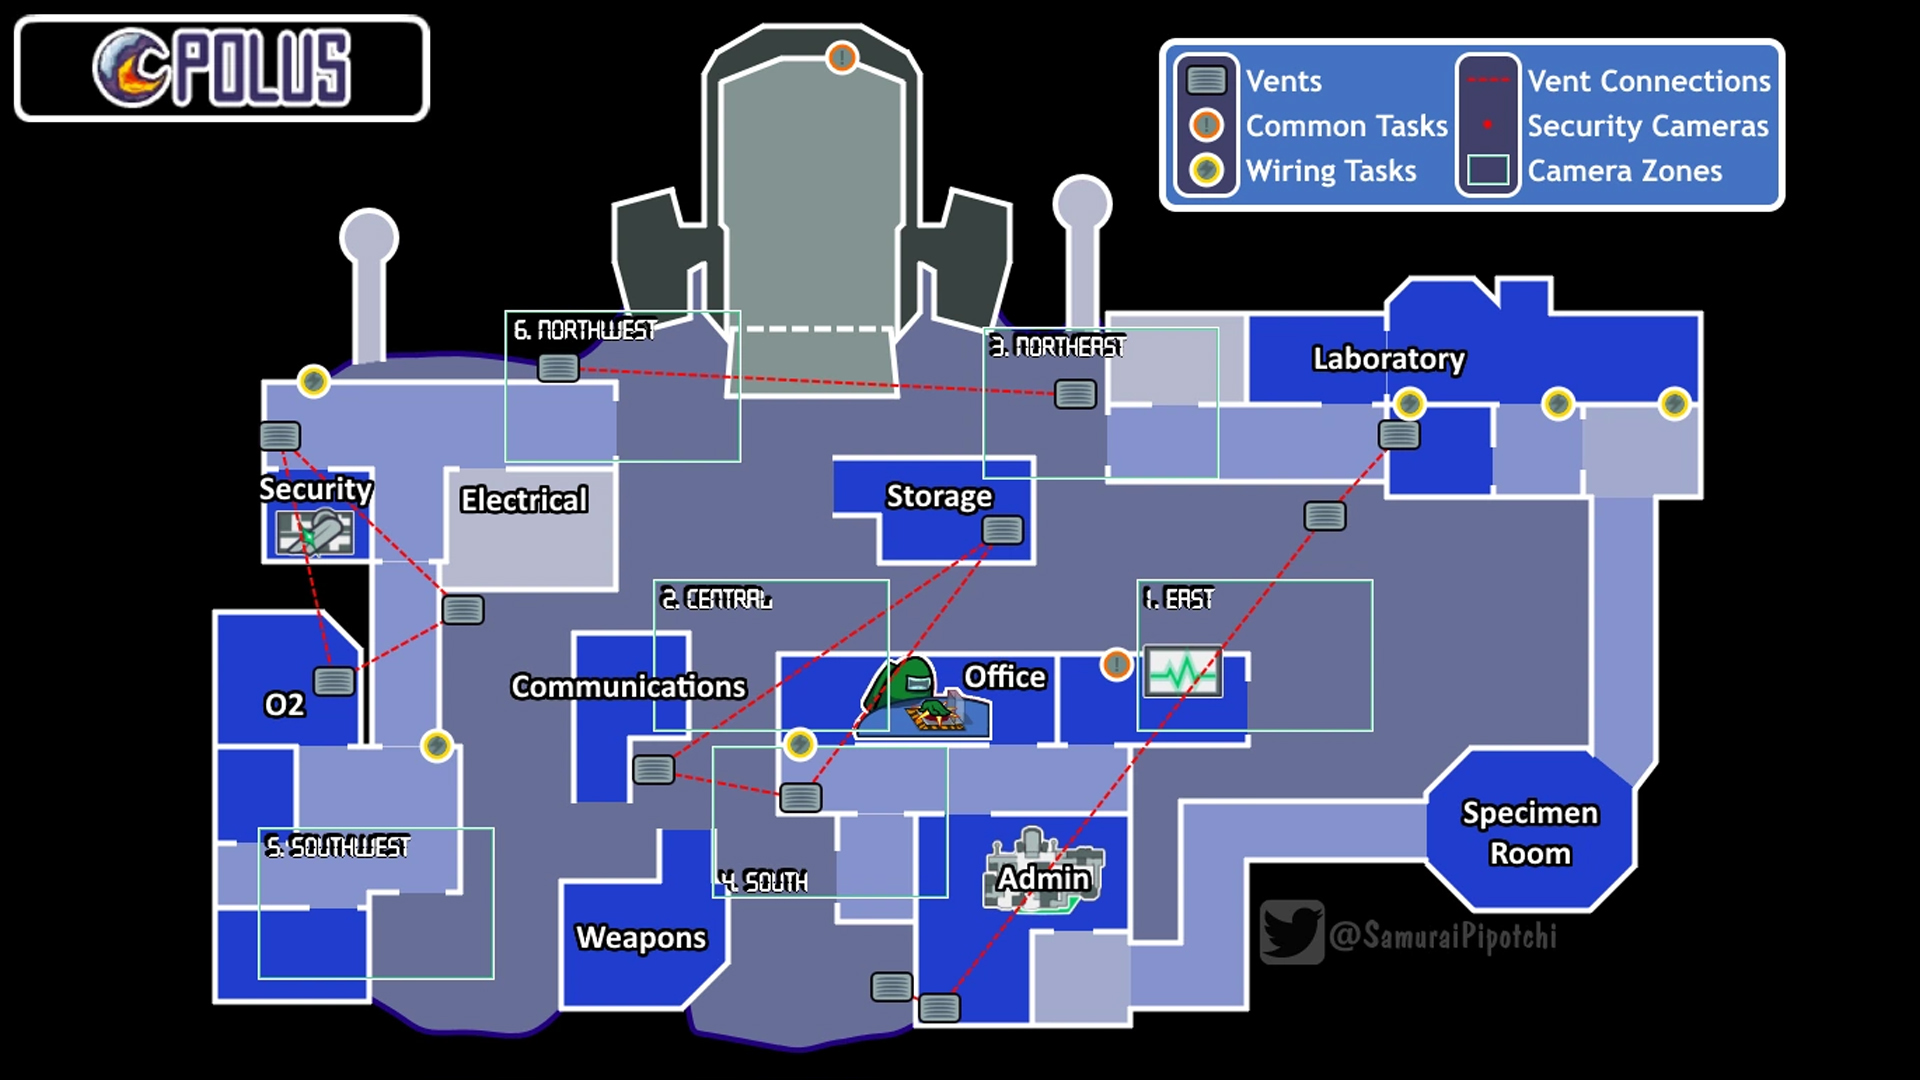
‘Polus’ is a large, snowy planet with 15 rooms. Walking around this map is a little different the others, as it features a large, open space in the middle. It means in certain places Impostors can escape in almost any direction after doing something. This also has a system to let players check who's dead or alive remotely.
- The structure: two areas on the east and west side are connected by corridors and rooms. The middle part, on the other hand, is completely open with a few ‘loose’ rooms. Your mobility is therefore influenced depending on where you are on this map. If you’re an Imposer who decides to kill in the Specimen room, know that you will have to leave through a long corridor and a decontamination room. Make a kill next to the Storage room, on the other hand, and you can walk away in any direction you want.
- The vent system: technically, there aren’t any vents; just holes in the ground. There are 12 of them, divided into four connected systems. While some of them are almost next to each other, others are very far apart. Note that the right part of the map and the lower left don’t have vents. If we separate the upper and lower half of the map, we see that the lower half only has four vents, and the upper half has eight. As a result, the Imposer might stick more to the upper parts.
- Visual tasks: Polus has two visual tasks, a scan and an asteroid shooter.
- Sabotage locations: there are three sabotage locations, plus the option to close doors. None of these are located in the lower right corner, which means that Crewmates are a bit safer there but have to run far to fix emergencies. Also important: a Crewmember can open a closed door by themselves.
- Security system: like The Skeld, Polus has a security system. This map has six large areas under camera surveillance, but you can only see one at a time. To help you memorize where they are located: there is a camera on every exit of the large east and west wings, plus one in the middle of the map.
- Decontamination rooms: beware of the small decontamination rooms that will temporarily lock you up.
- Vitals: this unique feature allows players to check who is alive and who is not. The Vitals can be found in the room on the right side of the Office.
Weekly digests, tales from the communities you love, and more
I’m a freelance journalist who (surprise!) kind of has a thing for videogames. When I’m not working on guides for GamesRadar, you can probably find me somewhere in Teyvat, Novigrad, or Whiterun. Unless I’m feeling competitive, in which case you should try Erangel. You can also find my words on PCGamesN, Fanbyte, PCGamer, Polygon, Esports Insider, and Game Rant.


