We know how hard it is to ignore Ms. 'Splosion Man. That sexy figure endlessly taunting us. That seductive siren song of a voice keeping us glued to the tv - even if we really, really want to stop. We’d do anything for her, even if it requires failing hundreds of times and getting unimaginably frustrated in our quest to find her all 47 pairs of shoes throughout the single-player campaign. It’s tough work, yes but two broken controllers and one cracked LCD later, we’ve carefully detailed how to find every pair of shoes in the hope that you will have an easier time earning the Golden Left Shoe Award achievement. Enjoy.
World 1
1-1
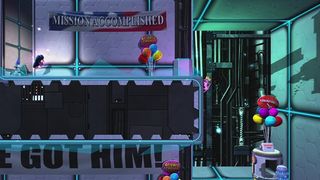
Pass the giant “We Got Him” banner then blast up and to the left.
1-2
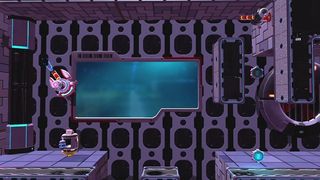
When you reach the area shown above (just after a checkpoint), use the cannon to blast yourself up and to the left. The shoes are out of sight, up in the corner.
1-3


You’ll likely spot these shoes before you can reach them if you choose to head right from this checkpoint. The laser turret will stop you, so you need to go left and proceed with the level. You’ll eventually loop around behind the turret - kill its operator so that you can safely claim the shoes.
1-4

At the point pictured above, wait for the cannon to aim down and to the right and blast into a small alcove that you may have spotted on your way up.
1-5

No matter how good or bad you are at the game, you will see these shoes. The trick is getting them, then surviving until the end of the level. Fortunately the shoes are found just after a checkpoint to ease the frustration of multiple failed attempts.
1-6
This requires a steady hand and some precise timing. You’ll get to an area where you need to make a green bomb fall through a large glass floor to proceed. Make sure to fall with the bomb, and 'splode as soon as you pass in front of the panel that recharges your 'splosions.
1-7

When you finally reach solid ground after traversing the first long pink recharge panel section, carefully drop off the left side of the platform and slide down. You’ll fall into another small section of recharge paneling with a pair of shoes at the center.
Secret Exit to 1-8

Near the end of the level, at the end of another long panel section, you’ll land on a platform that you slide down much like you did to find the shoes earlier in the level.
1-8

As soon as you start the level, leap onto the trampoline, then the second, and then the third. Now instead of bouncing up to the next visible trampoline on your left, bounce to the right.
Star Road

Simply beating level 1-8 will unlock star road.
1-9
At the second vertically shifting panel, ‘splode once to the panel in order to shift it, then once to the wall on your left, then once more back onto the panel. Now slide down the panel until you are recharged and use your three fresh ‘splosions to get up the high ledge on the left.
1-10
Nabbing these shoes involves getting above the electric beam at the end of the panel section and very carefully using the floating platforms to move left. It’s best to just watch the video. The brush with death near the end is obviously not required. The trick to fine control is to not overdo the directional inputs. Leaving the stick neutral will stop Ms ‘Splosion man from moving left or right after the next ‘splosion.
1-11
Jump inside the first Mandy you encounter and drop off the ledge to your left. ‘Splode to the right as you fall to find these shoes.
1-12
This is another serious test of your patience and skill. When you get to the switch that lowers a platform to your left, use that platform to go up and further left. When you are jumping across the skinny platforms, remember to commit. Using all three ‘splodes to go as far as you can reduces the number of times you need to line up a perfect landing.
1-13
These shoes are refreshingly easy to get. There is a recharge panel above the window you crash through after using the green platforms to gain some altitude. This panel will allow you to get even higher and nab the shoes.
Secret Exit to 1-14
After solving the puzzle just after the second checkpoint, use the floating green platforms to blast up and to the left instead of to the right.
1-14

When you reach the area with a laser turret to your right, ‘splode into the cannon above you. Now blast down and to the right so that you land on the switch under the vertical platform. Wait for the horizontal platform to move over you, then continue right to grab the shoes.
1-15

When you reach this Wilford (pictured above) do not ‘splode him or he’ll fall through a pane of glass that you’ll need intact. Hang off the ledge to your left and ‘splode over to the wall, then back over the Wilford. Walk over the sheet of glass to get to the shoes.
1-16
Oh sweet reprise, there are no shoes in this level. But that’s only ‘cause it’s a tough-ass boss battle.
