Ms. ‘Splosion Man shoes and hidden exits guide
Find every pair of shoes and every hidden exit throughout the single-player campaign with our detailed guide
World 3
3-1
Immediately after the first checkpoint, you need to ‘splode the energy core at just the right angle so that it flies up and to the left, landing in the socket next to it. Use the small recharge panel to keep yourself airborne until the energy bridge activates.
3-2
From the second checkpoint, proceed along the obvious path until you blast from the background into the foreground. Wall jump over the spinning robot of death but do not ‘splode the barrel that sends you into the background. Instead proceed left to find the shoes.
3-3
You’ll reach a section where you bounce off of a trampoline into a green barrel, which will launch you near a checkpoint. Do not hit that checkpoint. Instead jump out the window to the right, timing your splodes for max distance. You’ll just barely reach a recharge panel that will allow you to hit a green barrel and continue on to the area containing the shoes.
3-4

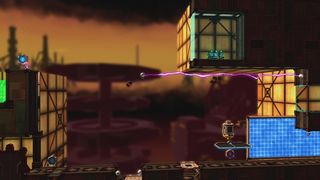
At the portion pictured above, before you use the Mandy, simply get up to this ledge and ‘splode left over the acid pool. The only tricky part is making sure you get the maximum distance from your three splodes - you’ll need it.
3-5

After you use the series of floating barrels (ending with a green) to ascend and outrun a rising electric beam, make sure to stop in your tracks as soon as you land on solid ground. Do not activate the checkpoint. Instead, slide down the wall to find some shoes.
3-6

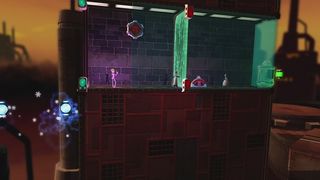
When you get blasted into the area pictured above, your momentum will be stopped by this scientist. Slide down the left wall to charge yourself up, then ‘splode off the wall to reach the shoes.
3-7
With the finish line in sight, turn back to the left. You’ll need to drop down to the barrel below as the red energy walls are moving left, making sure to stay in between them, and using your three ‘splosions to get max distance.
3-8
At the point where you need to blast out of the cannon and through the moving green platforms, bounce off the wall that you hit and use the top-right platform to get yourself even higher. After you nab the shoes, simply slide down that same wall to continue the level.
3-9
In the section where you need to dodge the laser-bots while a green barrel slowly descends (after checkpoint #3), ‘splode off the two bots on the right to get up the wall on the right. Now you can use that green barrel.
Secret Exit to 3-10
In the section where you need to dodge the laser-bots while a green barrel slowly descends (after checkpoint #3), ‘splode off the two bots on the right to get up the wall on the right. Now you can use that green barrel.
Secret Exit to 3-10
Soon after the fifth checkpoint you’ll find yourself in a cannon. The camera suggests you should shoot off to the right, but you need to shoot to the left.
3-10
Soon after the fifth checkpoint you’ll find yourself in a cannon. The camera suggests you should shoot off to the right, but you need to shoot to the left.
3-10
When you reach the pink recharge panel, line yourself up with the center so that you fall straight down to the shoes. Make sure you have three splodes stored up but only use them once you’ve made contact with the shoes.
3-11
When you reach the pink recharge panel, line yourself up with the center so that you fall straight down to the shoes. Make sure you have three splodes stored up but only use them once you’ve made contact with the shoes.
3-11
At the point where you need to shift a platform to the left, run past the switch so that the platform only moves a bit. Jump onto the platform quickly, wait for the electric beams to disappear, then hurry to the right to claim the shoes.
3-12
At the point where you need to shift a platform to the left, run past the switch so that the platform only moves a bit. Jump onto the platform quickly, wait for the electric beams to disappear, then hurry to the right to claim the shoes.
3-12
Soon after the stage begins, you’ll spot one of those rolling death machines on one level above you. Use the barrel to blast up there, wait a moment, and leap off the left wall and over the machine. Race to the other side, bounce off of that wall, and rush back to the left to safety.
3-13
Soon after the stage begins, you’ll spot one of those rolling death machines on one level above you. Use the barrel to blast up there, wait a moment, and leap off the left wall and over the machine. Race to the other side, bounce off of that wall, and rush back to the left to safety.
3-13
Just after using the rotating platforms to reach solid ground, jump out to your left. Splode off of the barrel and continue left, making sure to get max distance with your three splodes. Use the next barrel to reach the area with the shoes.
3-14
Just after using the rotating platforms to reach solid ground, jump out to your left. Splode off of the barrel and continue left, making sure to get max distance with your three splodes. Use the next barrel to reach the area with the shoes.
3-14
Immediately after the third checkpoint you’ll have to ‘splode off of several green barrels in a row. In between two of them you’ll have a chance to ‘splode off of a blue barrel if you’re quick enough. Do so, then use the switches in the pink panel area to move the platforms so that you can perform a wall jump up to yet another series of barrels that lead to the shoes. Unfortunately you’ll still need to do some work to reach the level’s end.
3-15
At the portion with the spiked panels after the third checkpoint, continue upward as you normally would, only drop back down after you reach the top. The bottom spiked panel will have receded, allowing you to move left and grab the shoes.
Secret Exit to 3-16
At the portion with the spiked panels after the third checkpoint, continue upward as you normally would, only drop back down after you reach the top. The bottom spiked panel will have receded, allowing you to move left and grab the shoes.
Secret Exit to 3-16
When you encounter the missile-launching turret, bait one of the missiles back to the left so that it hits and triggers the switchable platform. Once that is open, fall through the gap to reach the secret exit.
3-16
When you encounter the missile-launching turret, bait one of the missiles back to the left so that it hits and triggers the switchable platform. Once that is open, fall through the gap to reach the secret exit.
3-16

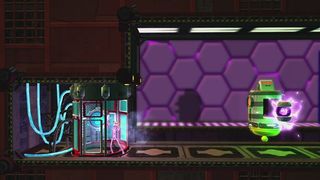
Simply head to the left once the level begins. There is a switch inside the blue teleporter. You can figure out the rest.
3-17
After passing the laser turret by using Mandy as a meat shield, ‘splode out of her at the very end of the ledge (do not fall first). You need to get to the high wall on the right and ‘splode off of it into a car. Ride the car until just before it gets destroyed, then ‘splode to the right to nab the final pair of shoes. The achievement will be earned when you complete the level (assuming you have all other shoes up to this point)
Congratulations! All of that very hard work has earned you...a measly 25g. But the self-satisfaction is worth so much more, right? Right?
Jul 19, 2011
Sign up to the GamesRadar+ Newsletter
Weekly digests, tales from the communities you love, and more
