Astro's Playroom puzzle pieces: Where to find all the jigsaw pieces
How to find all of the Astro's Playroom puzzle pieces
- CPU Plaza
- Cooling Springs - Bot Beach
- Cooling Springs - Springy Spa
- Cooling Springs - Frigid Floes
- Cooling Springs - Hotel Hopalot
- GPU Jungle - Renderforest
- GPU Jungle - Terratop Treetops
- GPU Jungle - Raytrace Ruins
- GPU Jungle - Mt. Motherboard
- Memory Meadow - Gusty Gateway
- Memory Meadow - Fastlane Fields
- Memory Meadow - Electrocloud
- Memory Meadow - Bumper Broadway
- SSD Speedway - Turbo Trail
- SSD Speedway - Caching Caves
- SSD Speedway - Deep Dataspace
- SSD Speedway - Orbital Obstacles
You'll want to collect all of the Astro's Playroom puzzle pieces if you have any intention of completing the lovely murals in the PlayStation Labo zone. There are 16 Astro's Playroom puzzle pieces to collect in each of the four zones (Cooling Springs, Memory Meadow, GPU Jungle, and SSD Speedway), but there are also some to be found in CPU Plaza. Of course, you'll find the remaining 28 Astro's Playroom puzzle pieces in the gachapon machine at the back of the PlayStation Labo area.
Here's how to find all of the Astro's Playroom puzzle pieces:
CPU Plaza
Puzzle Piece 1
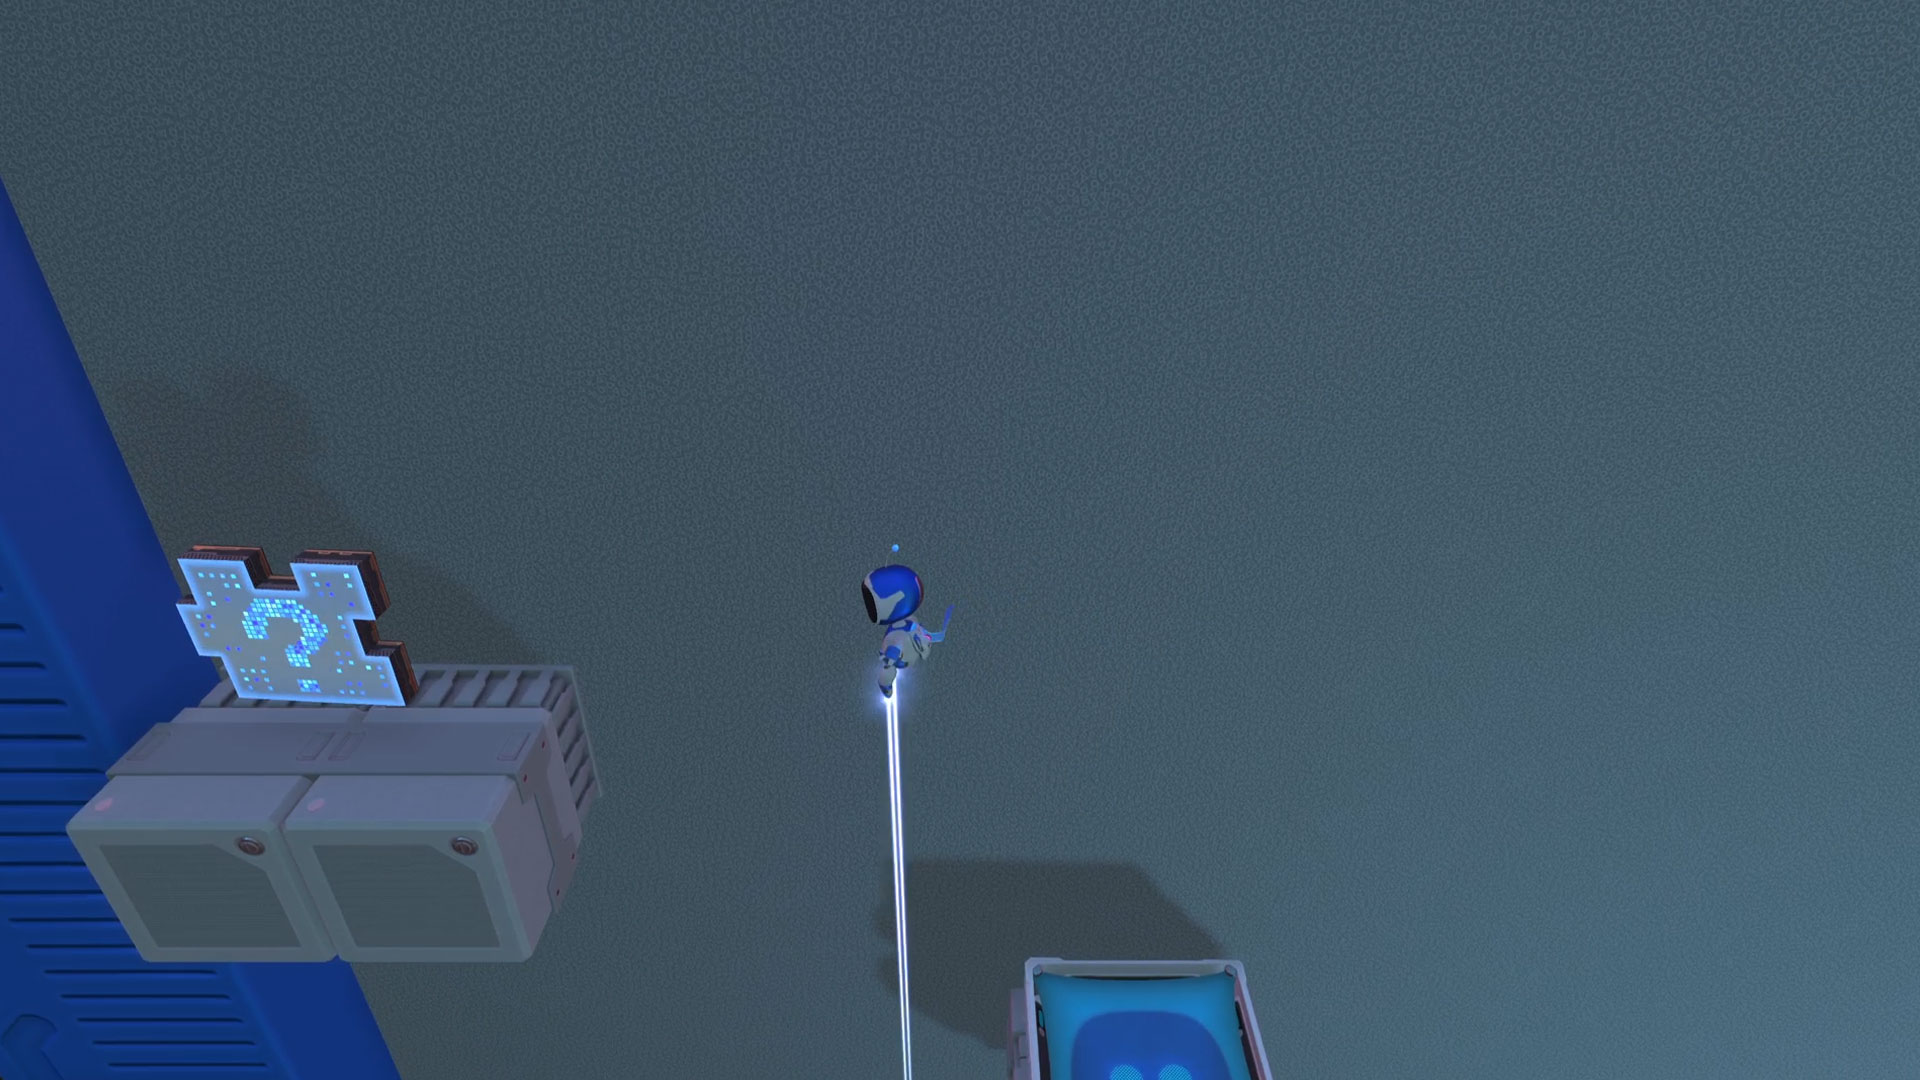
From the entrance to CPU Plaza go over to the left hand side of the room, where there's a small ramp and some wires poking out of the wall. Pull on these and you'll reveal some platforms to climb.
Keep moving up the platforms until you reach a second set of wires to tug. A new batch of platforms will appear, including a balance beam. Run along this to the left, jump off the bounce pad, and you'll find the first puzzle piece spinning above a platform to the left.
Puzzle Piece 2
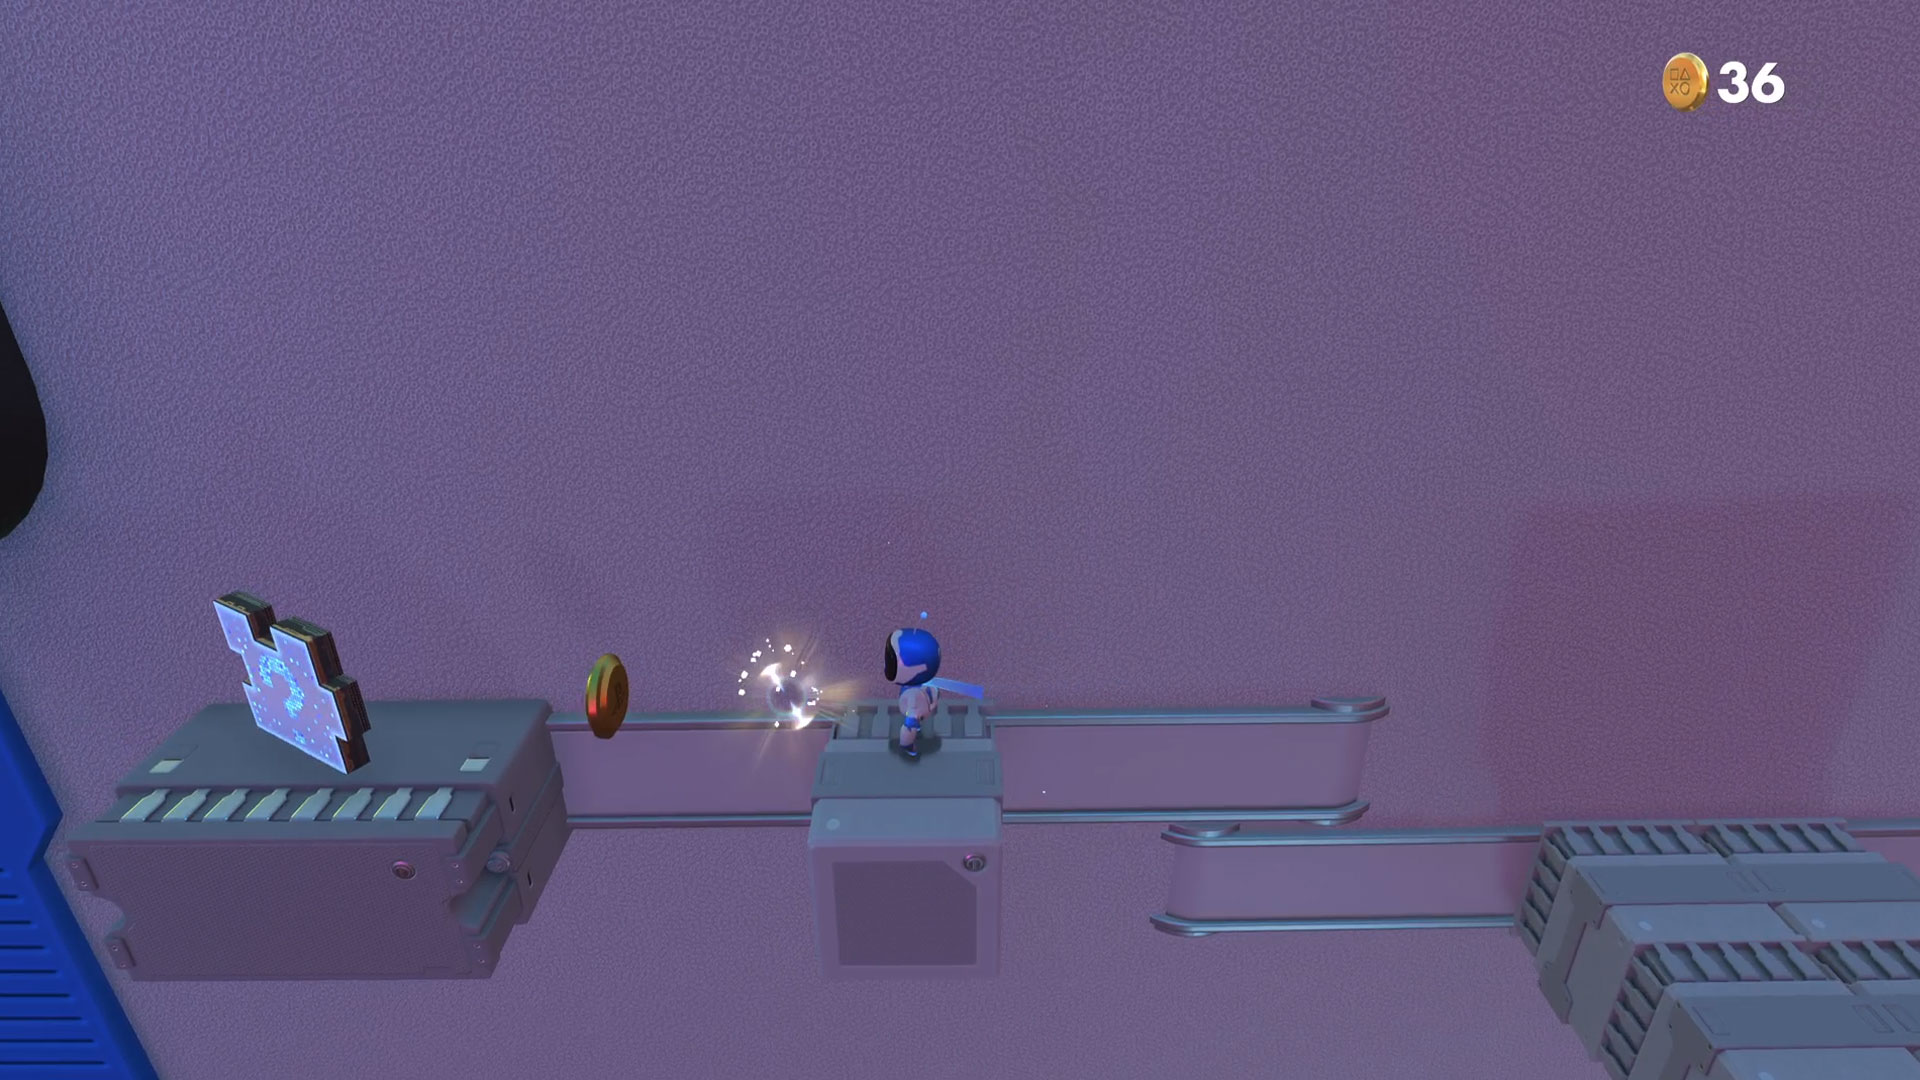
Over on the other side of the plaza, you'll reach a section about halfway up that's filled with small moving platforms on metal rails. Get to the top of these and on the right-hand side there is another set of wires to pull. But, before you do that, go left, and there's a second puzzle piece lurking on a small block.
Puzzle Piece 3
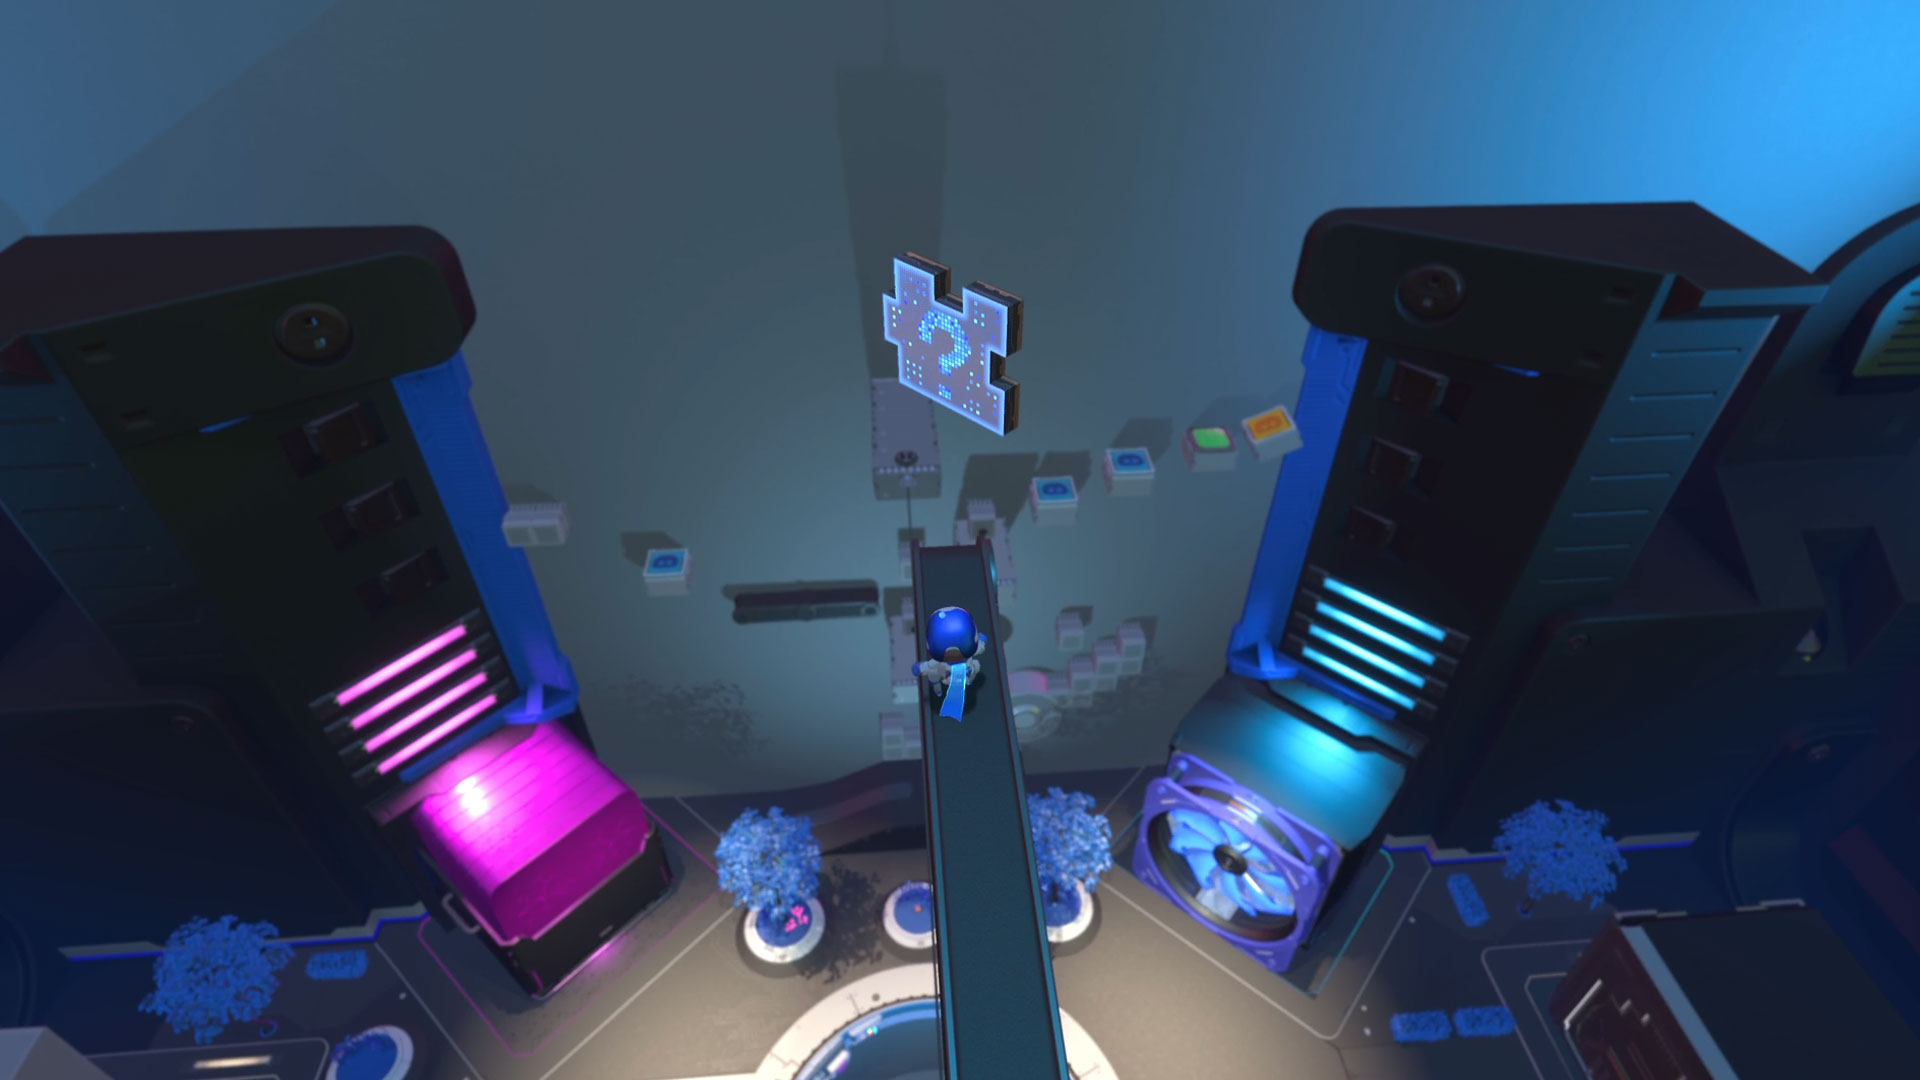
Next lookout for a power button that you can hit to turn it from red to green. Bounce on the pads that are revealed, and you'll end up on a high platform. Walk out along the beam to the edge and grab the puzzle piece that's suspended there.
Puzzle Piece 4
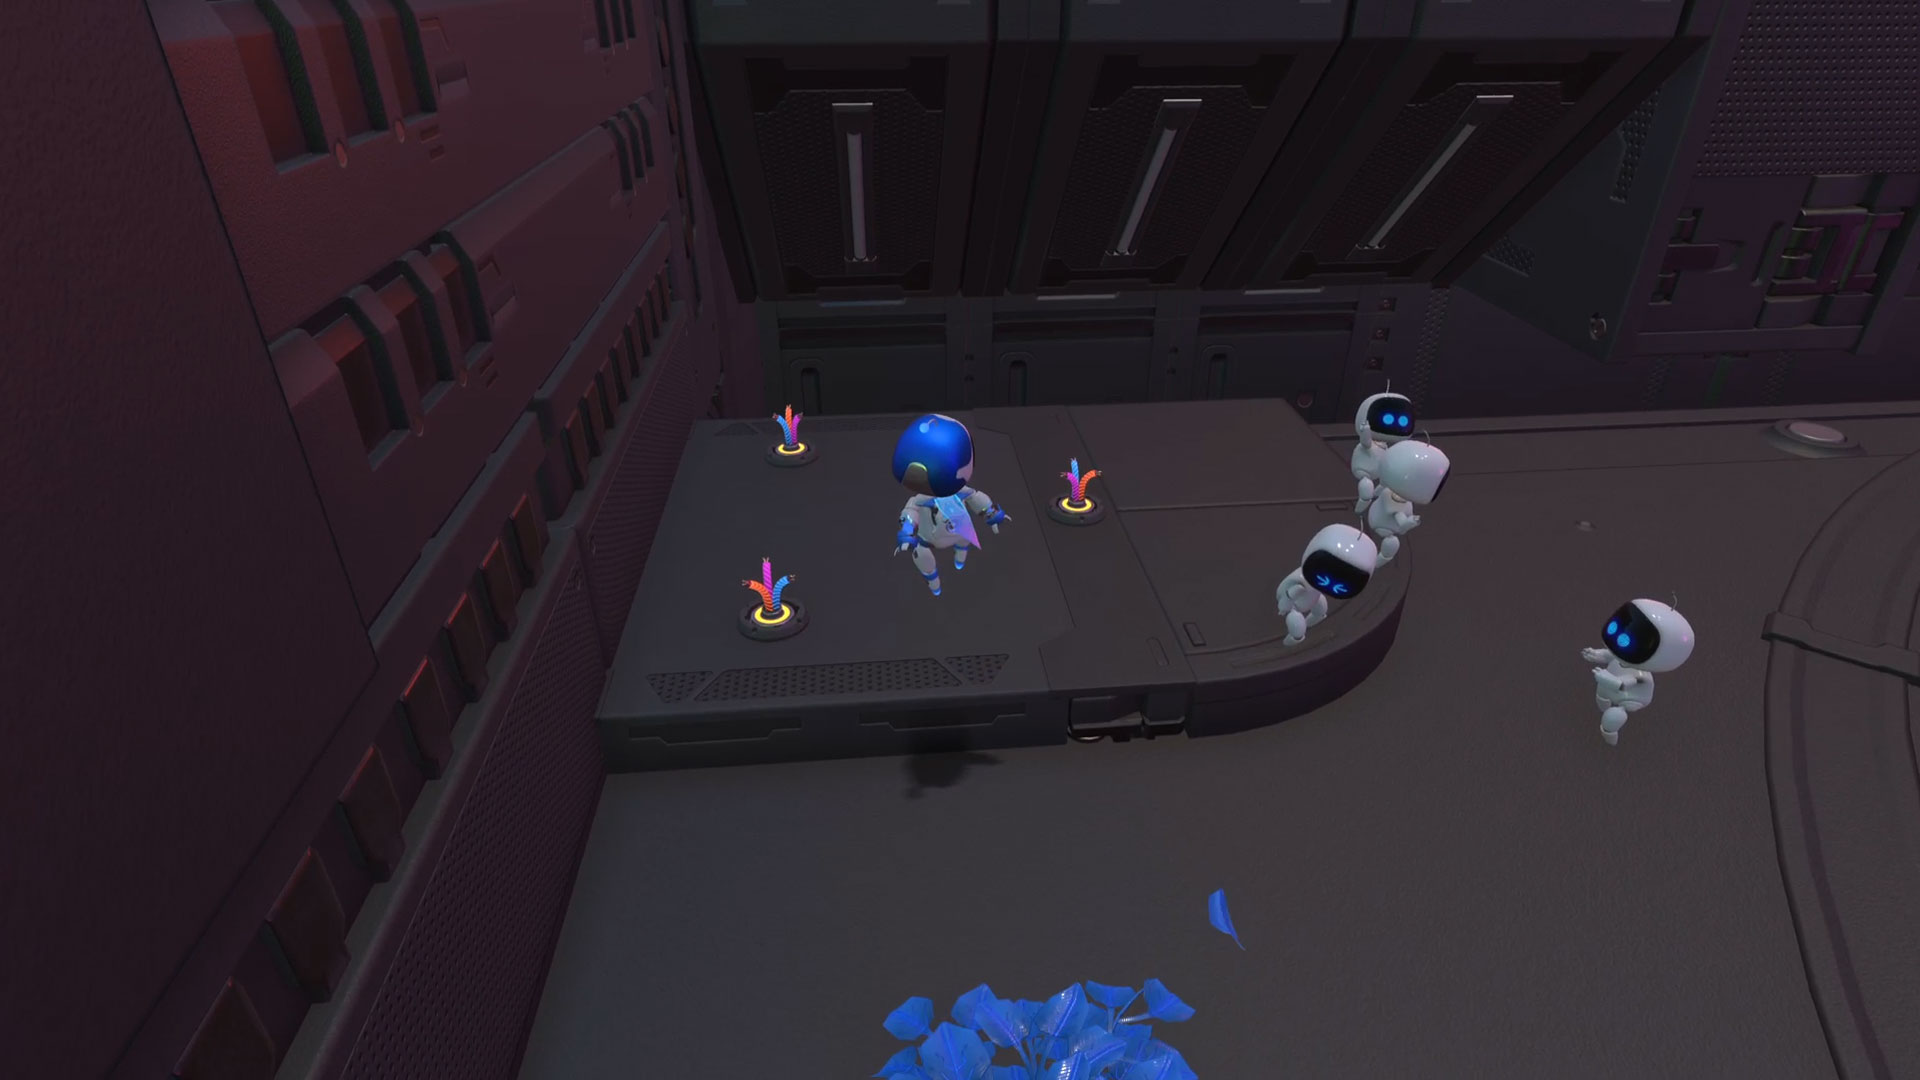
Away from the aforementioned platforming section, there's a fourth puzzle piece for the CPU plaza in the basement. Head down underneath the main level via the stairs, and there's a puzzle piece hidden in the bottom left corner that you can reveal by pulling all three wires in the ground.
Cooling Springs - Bot Beach
Puzzle Piece 1
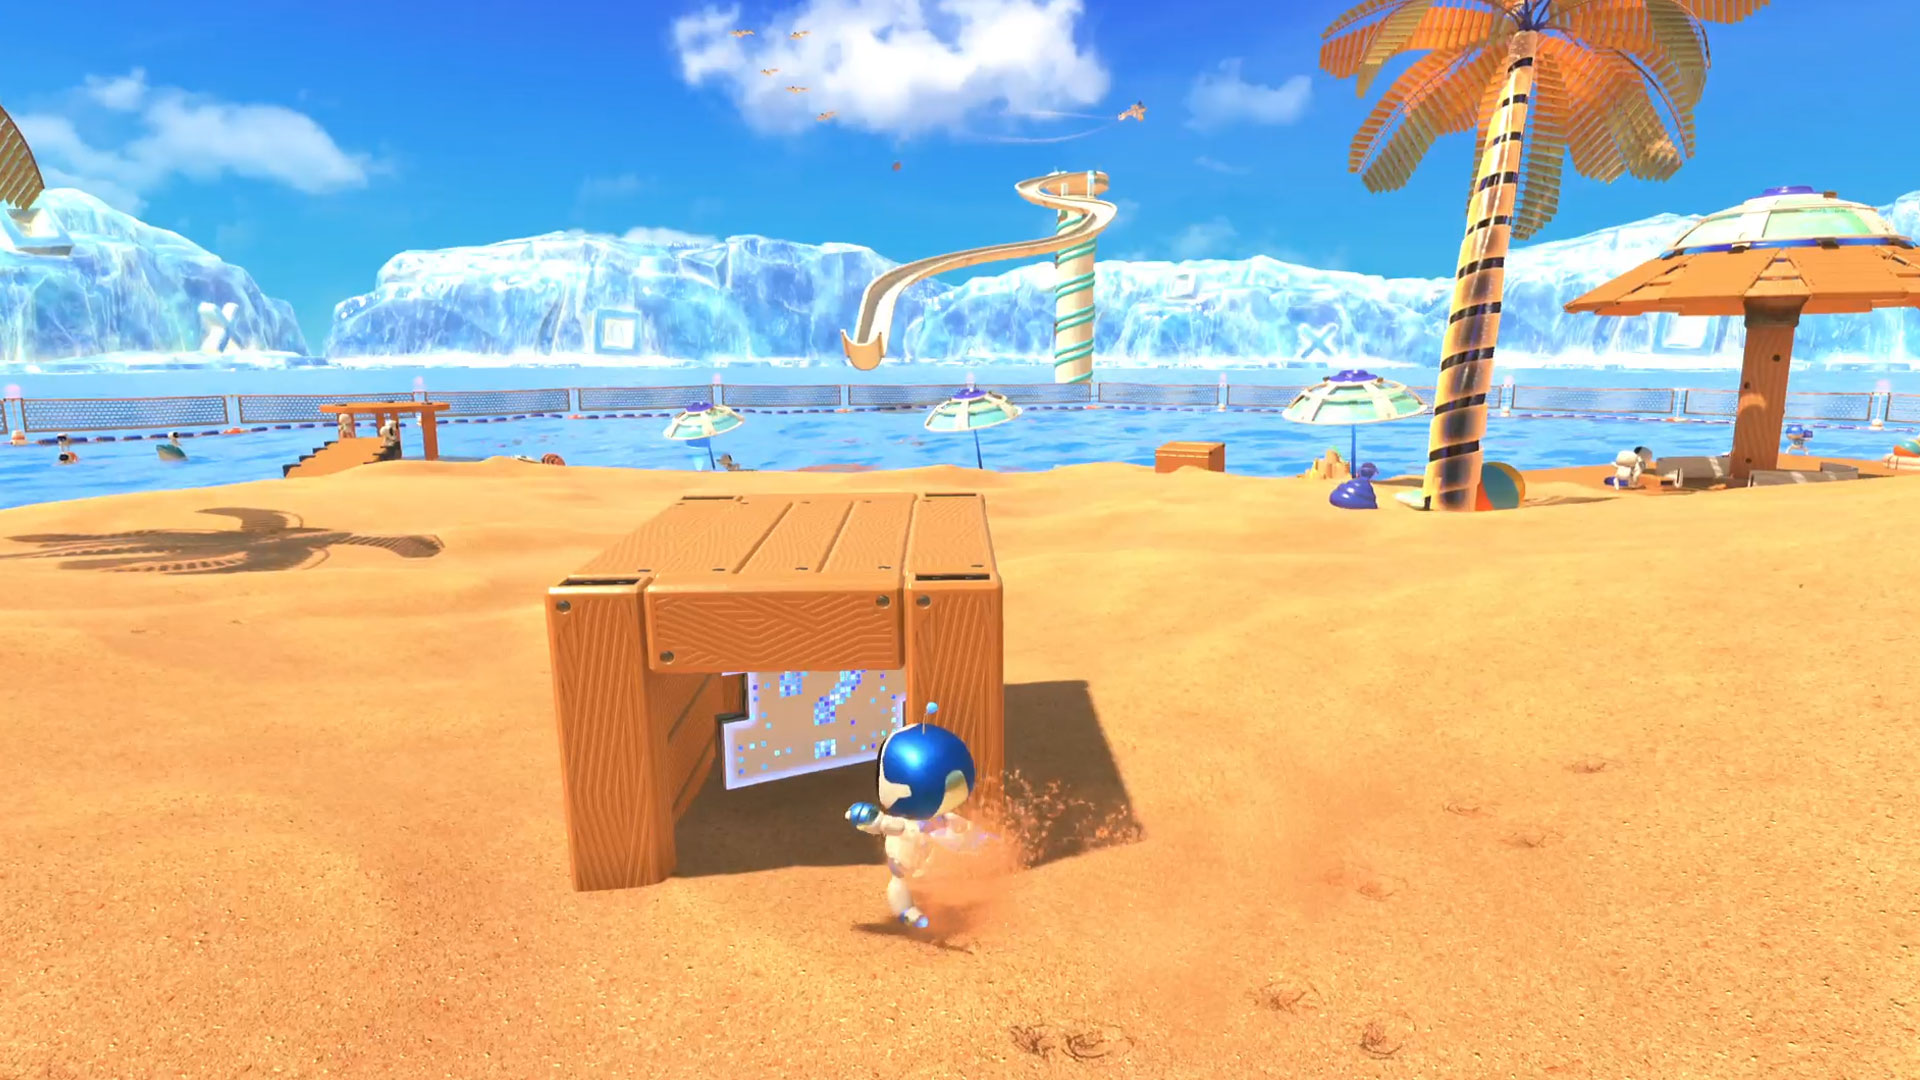
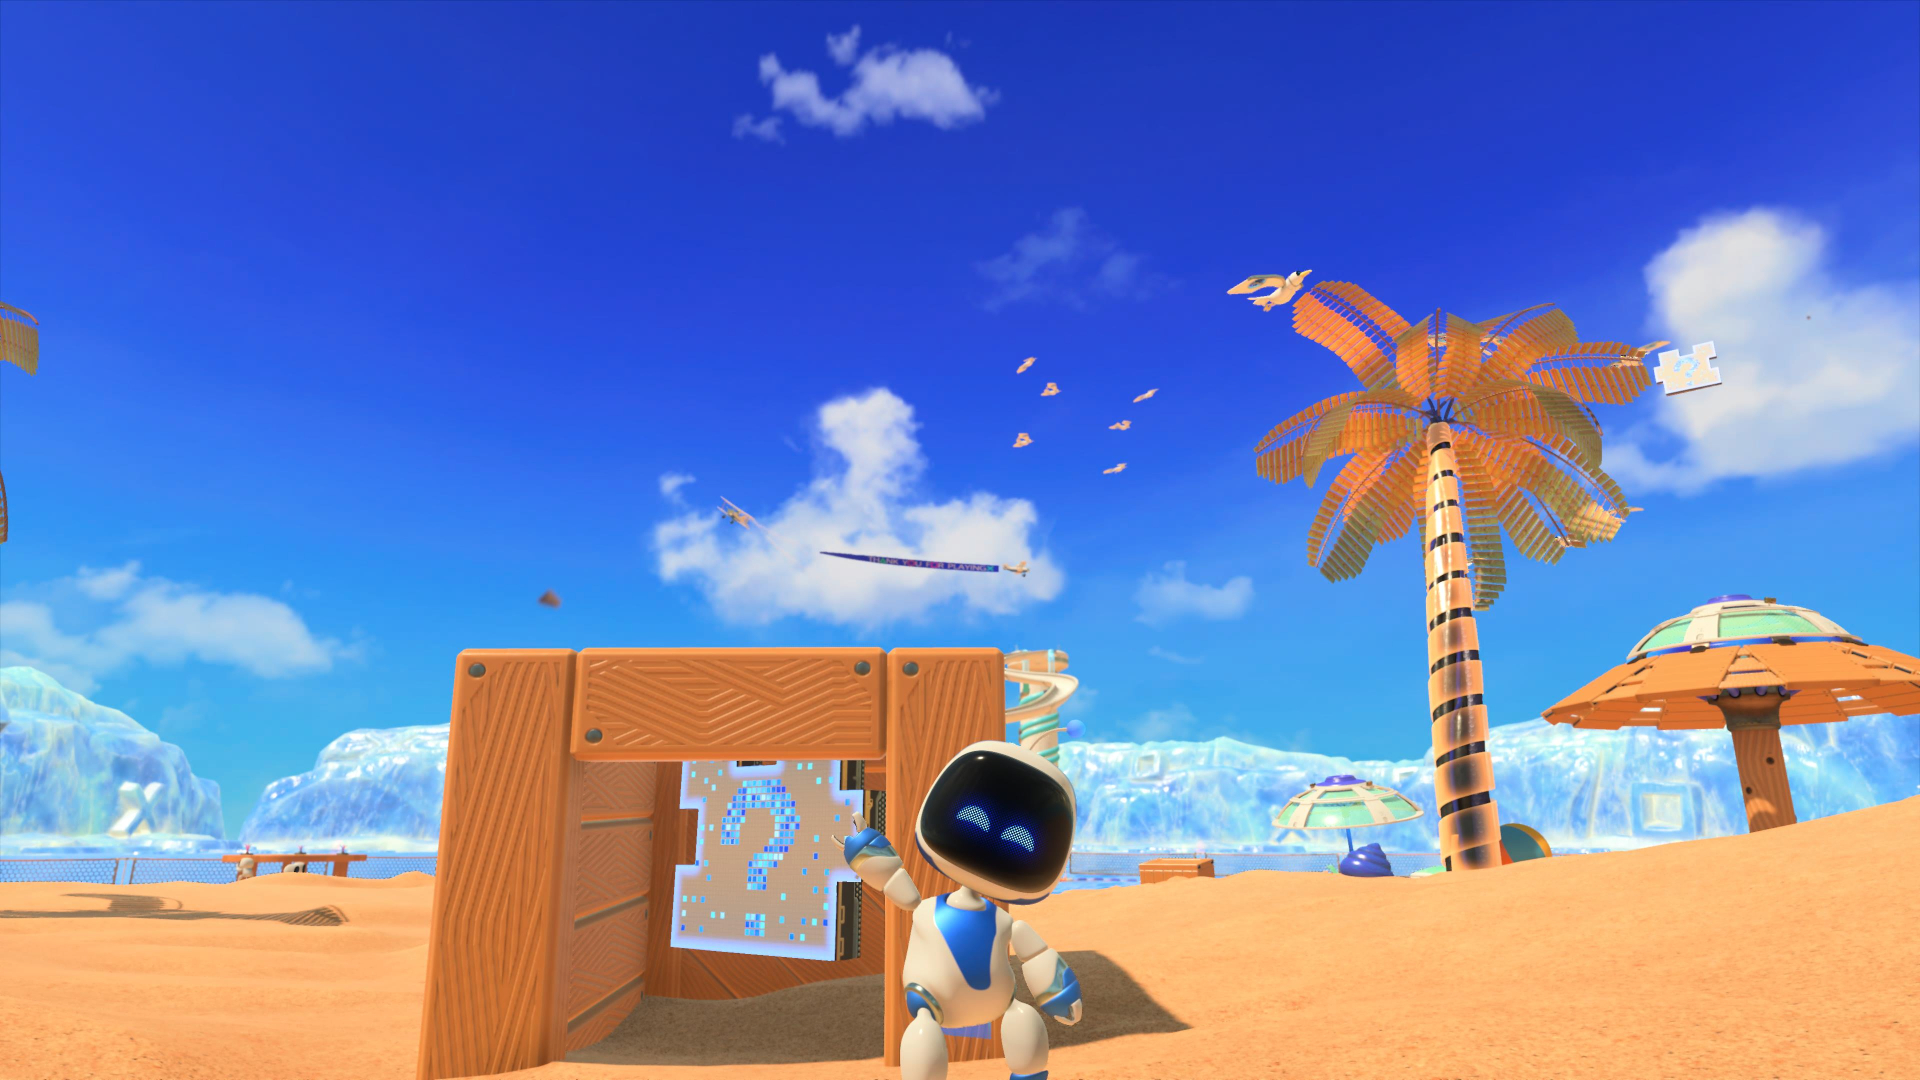
In this little open-world hub there's one puzzle piece inside the back of a box just to the left of the starting area and directly in front of the giant fans pushing sand in your face.
Puzzle Piece 2
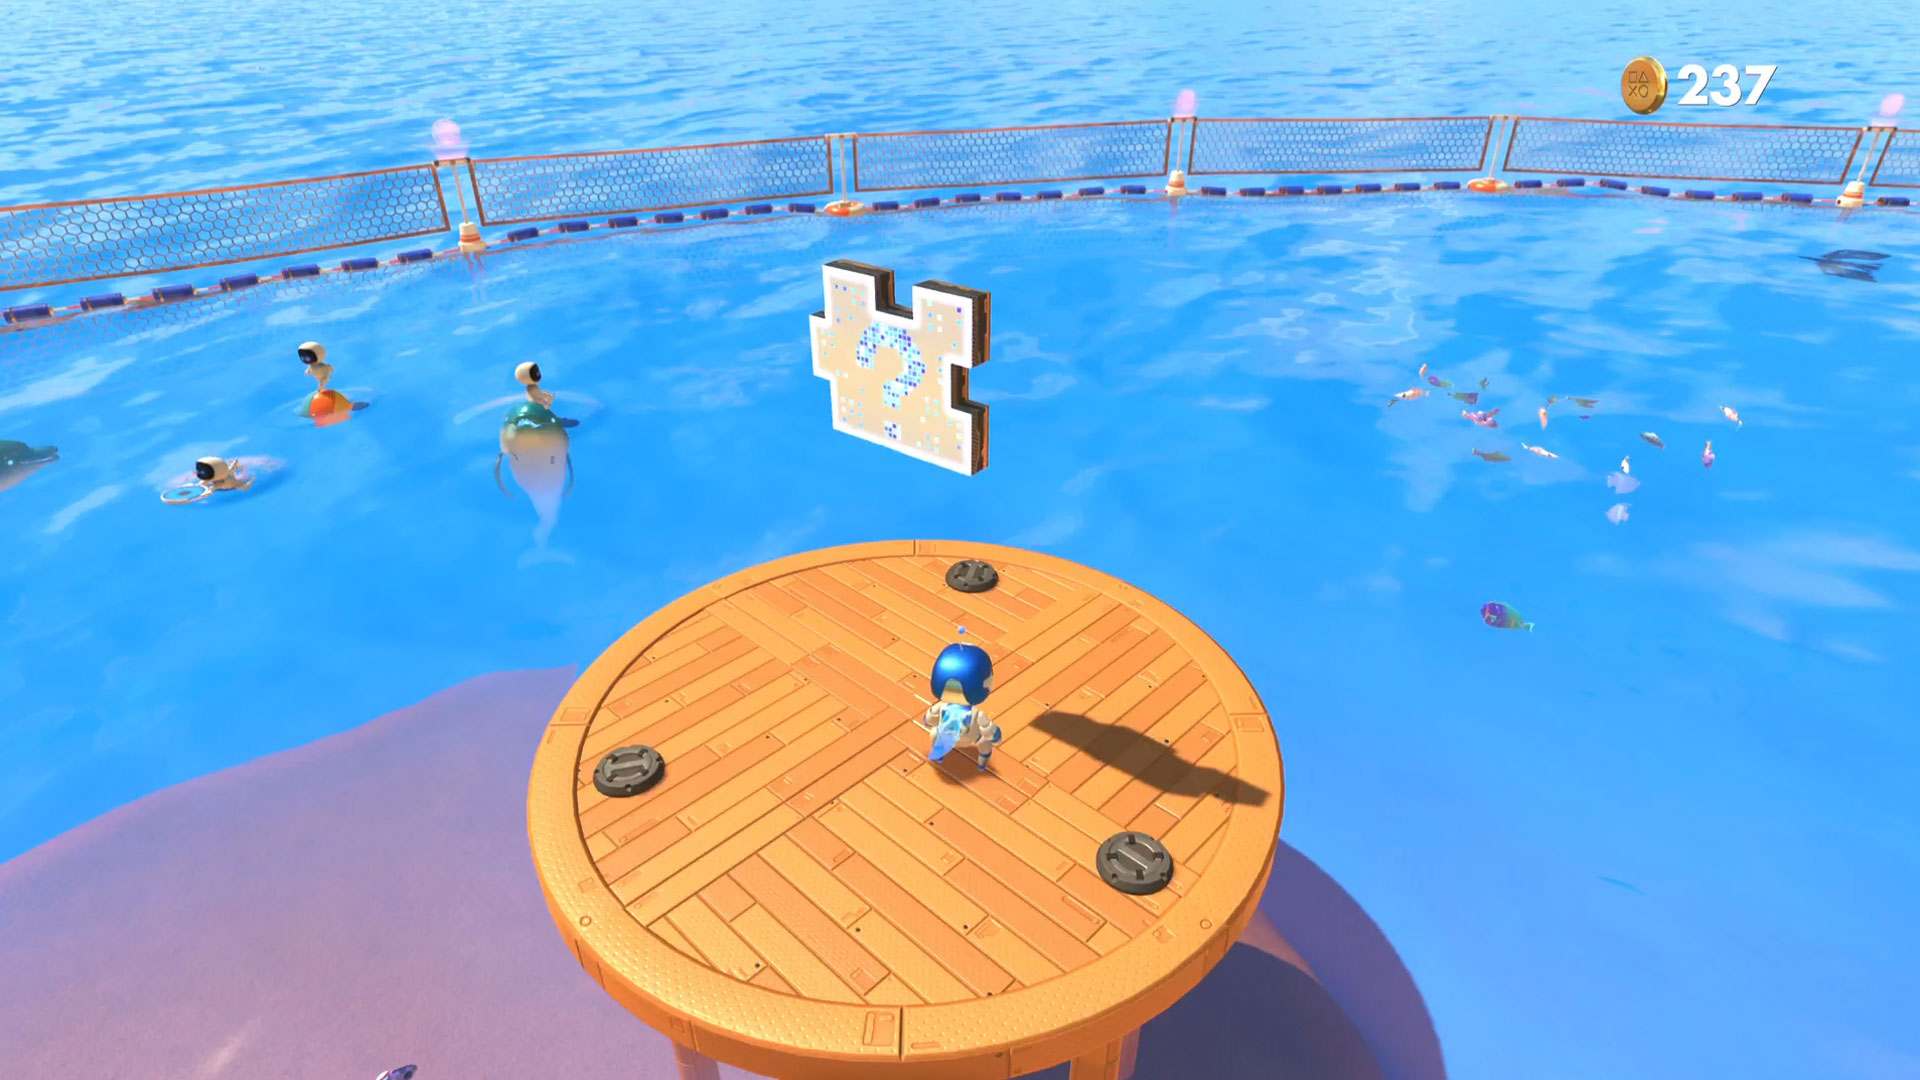
There's a wooden jetty extending into the sea towards the back of this area. At the end of the pier are three wire bunches you can pull using square. Do that and you'll find the puzzle piece springs out above you.
Puzzle Piece 3
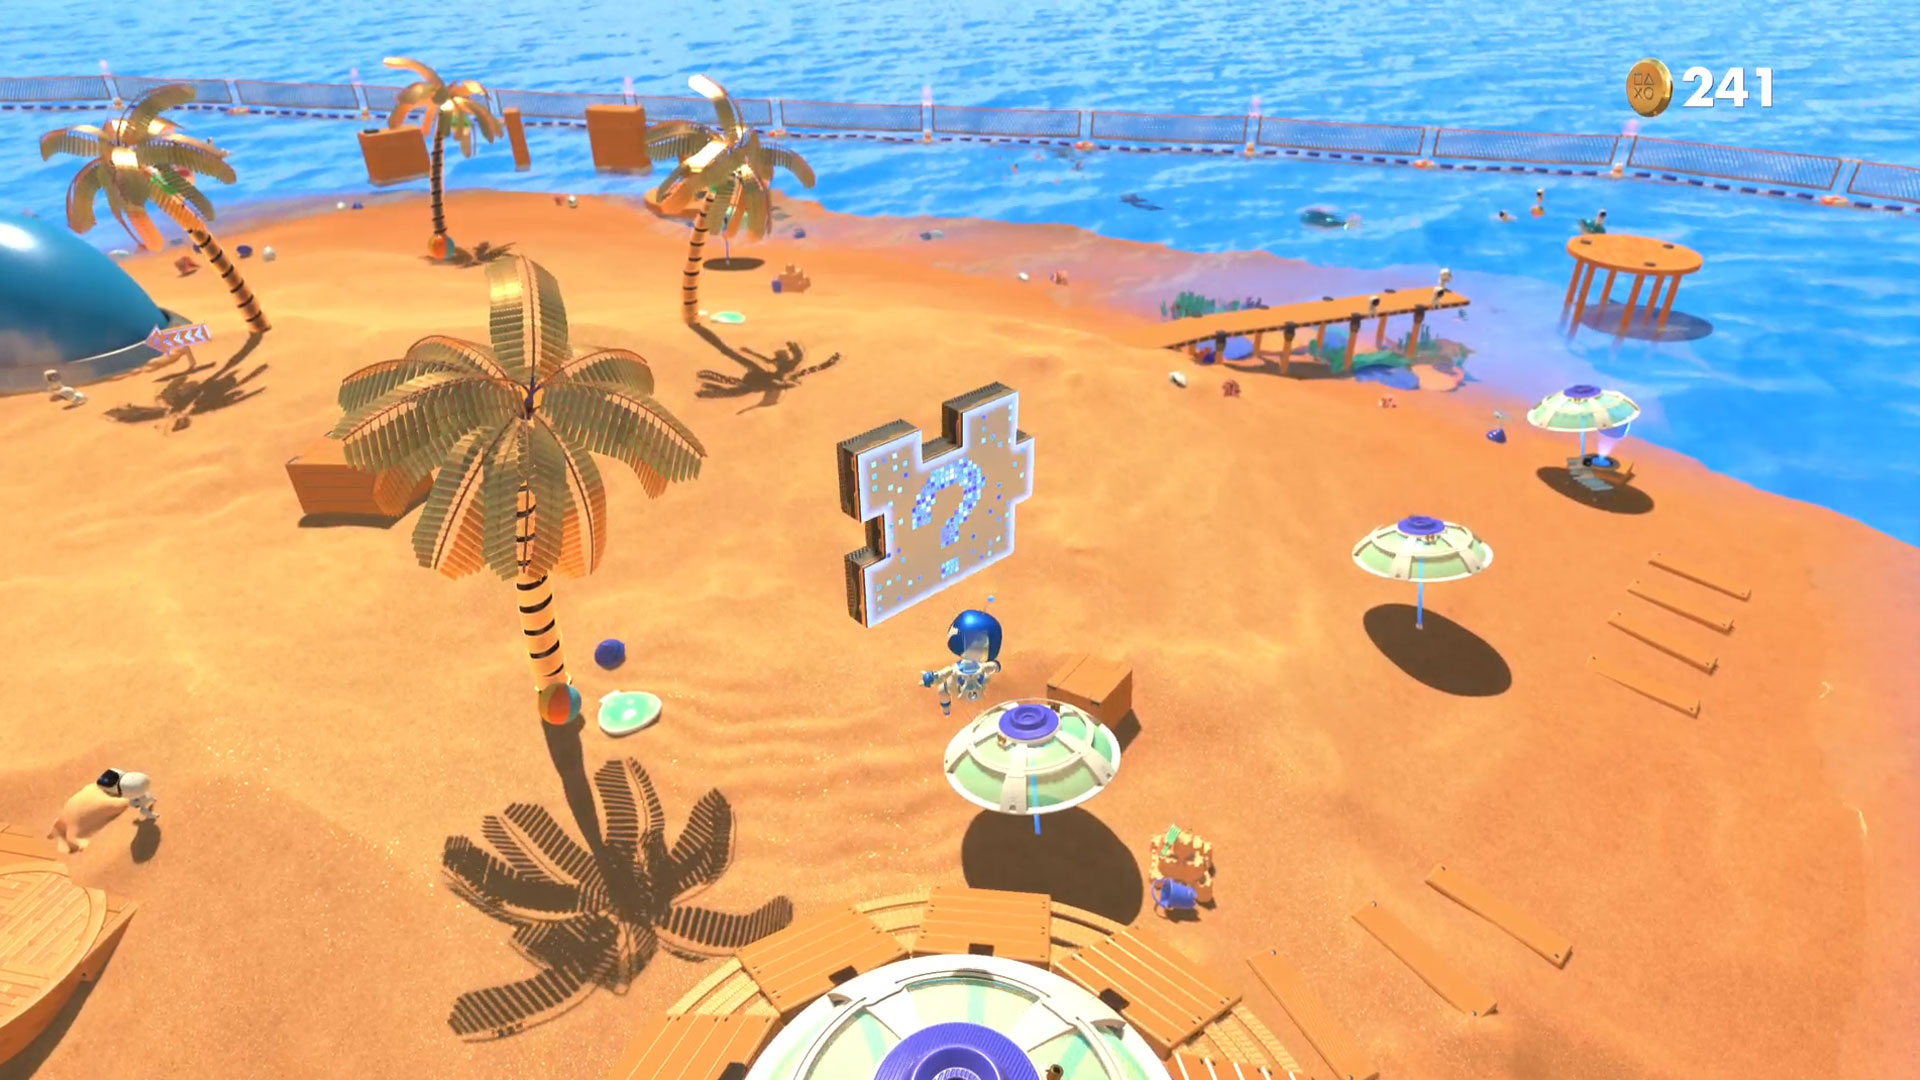
Back on the beach, use the sun umbrella next to the two sunbeds to bounce you up to reach the taller one. High in the sky above the taller umbrella is another puzzle piece.
Puzzle Piece 4
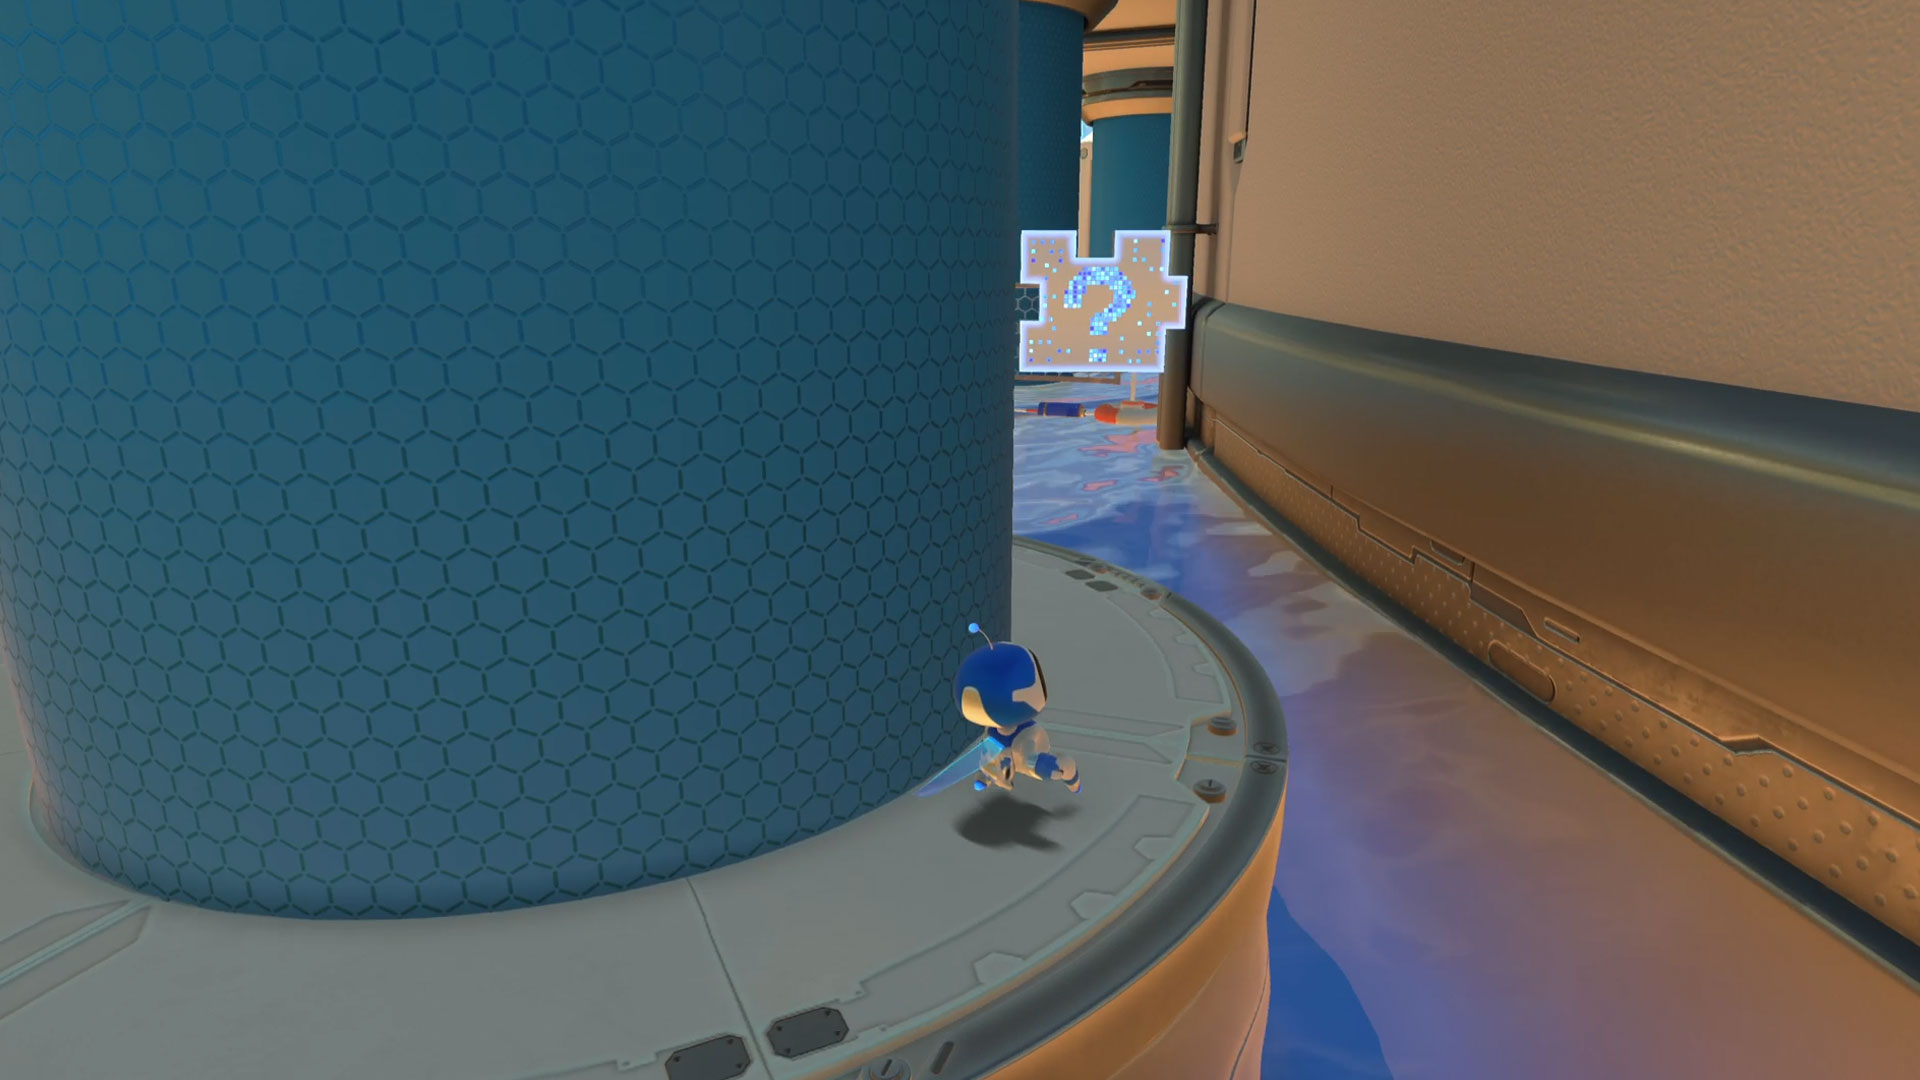
Over to the left-hand side of the entire level is a set of two bright blue pillars. Around the back of the closest one is one of the four puzzle pieces.
Cooling Springs - Springy Spa
Puzzle Piece 1
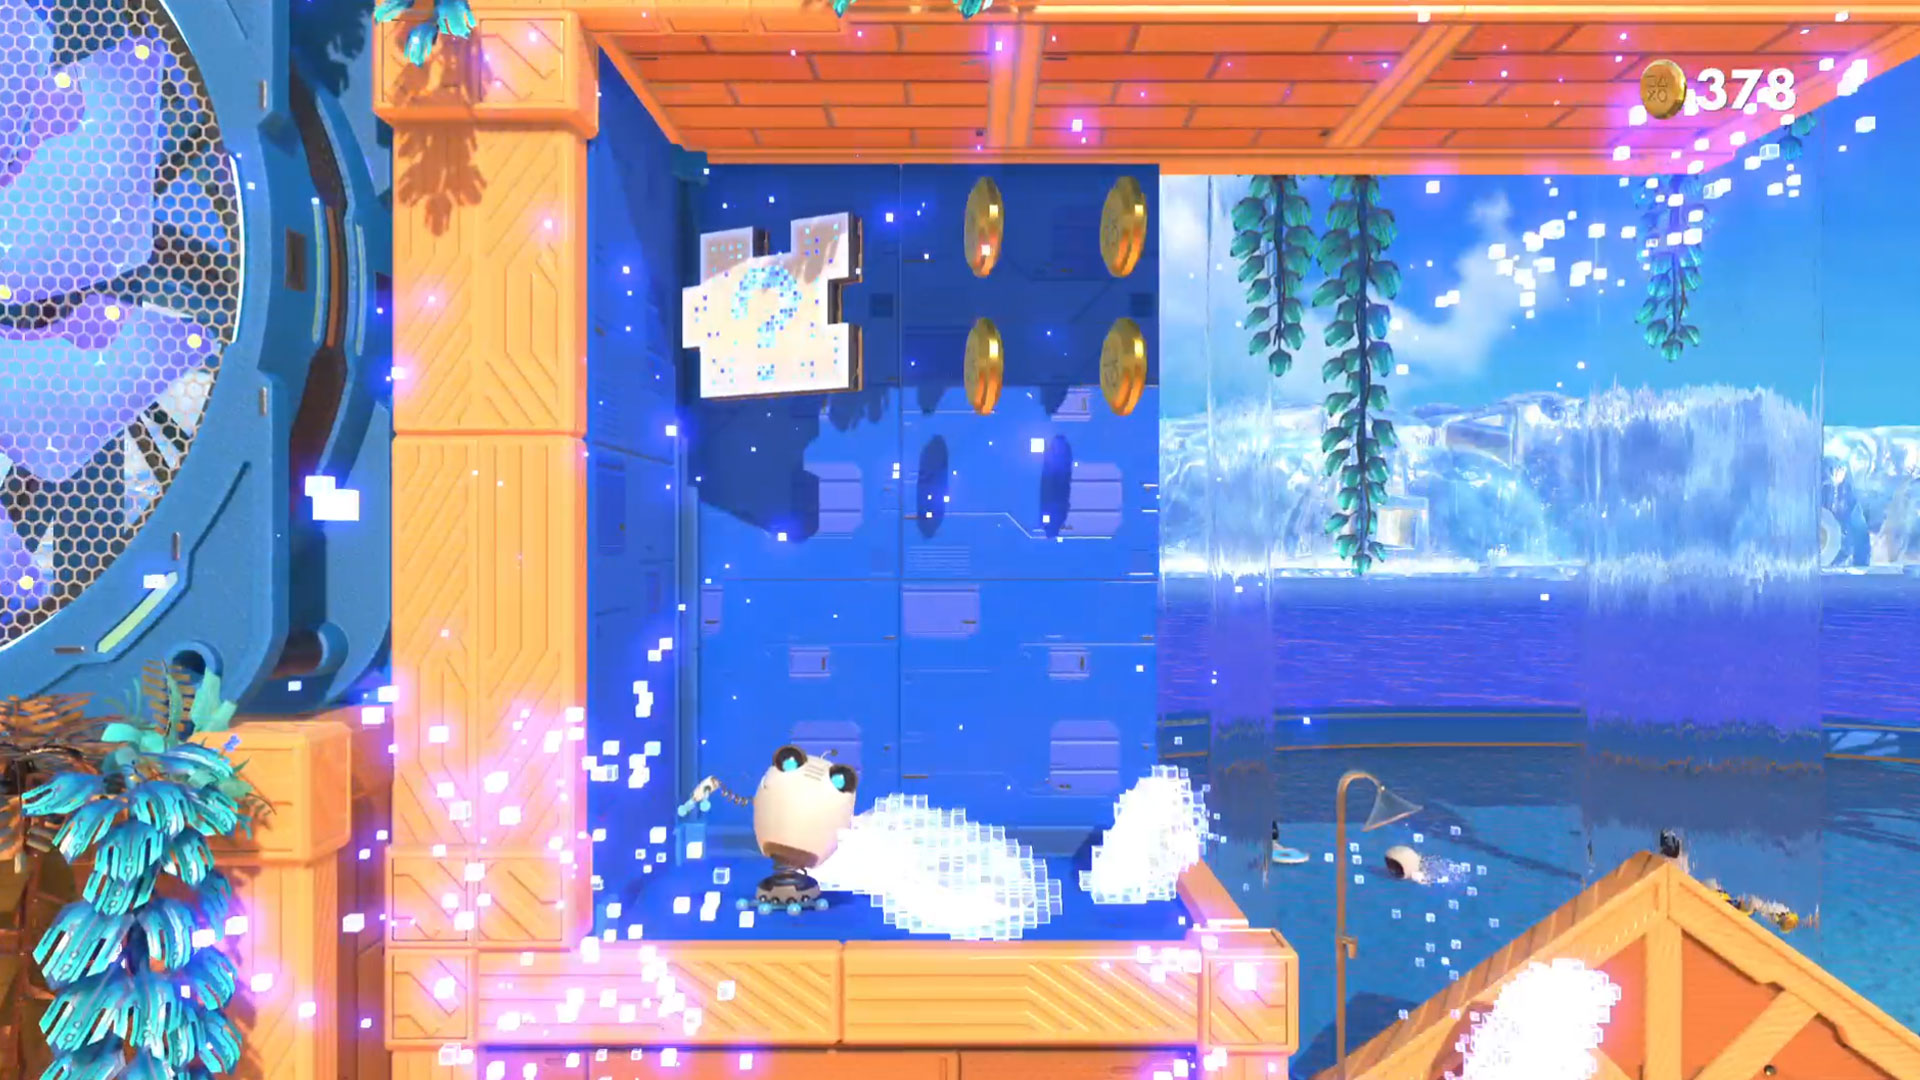
The first puzzle piece is just to the left after you first get into the frog suit. There's a huge glass panel to the left of the starting position that you can smash just by jumping into it. Inside is a little room full of coins and the first puzzle piece.
Puzzle Piece 2
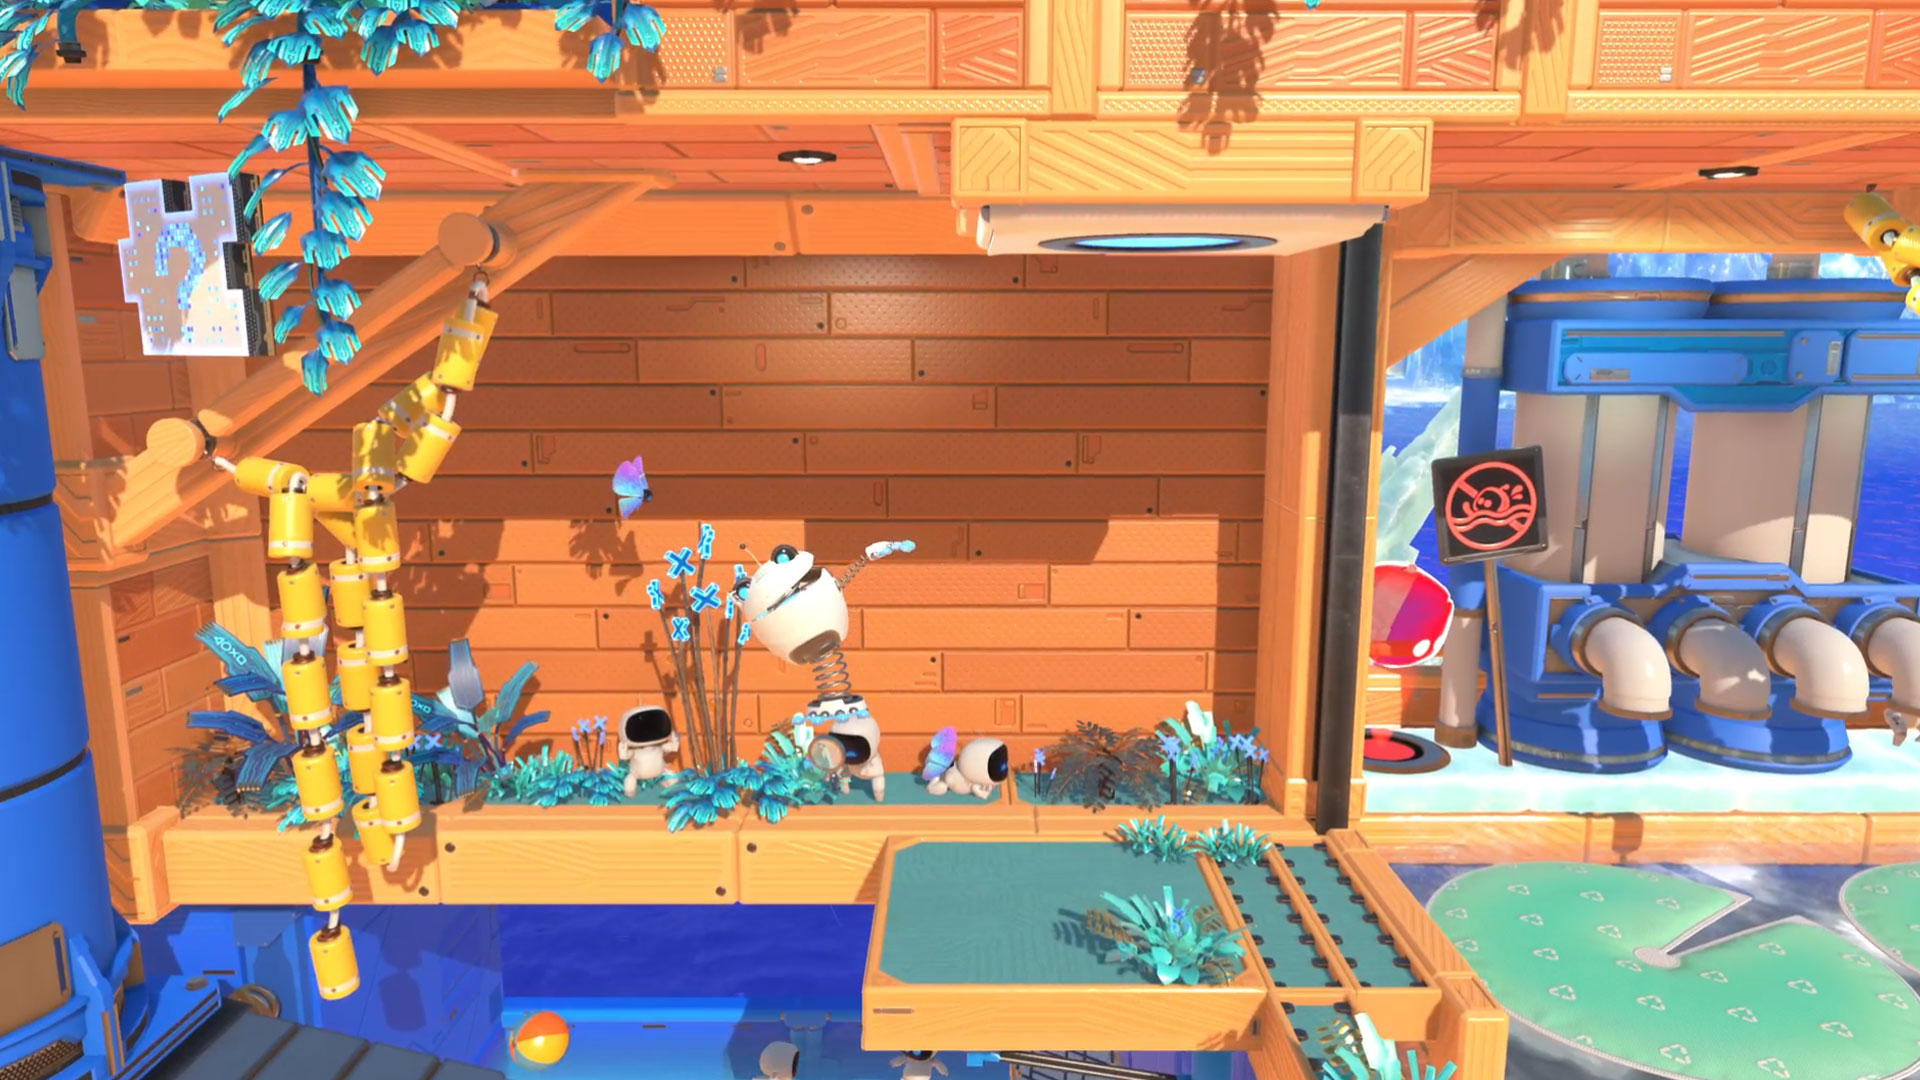
A little later, you'll find a section where you've got to hop vertically up some tilted platforms. The second puzzle piece is in the top left-hand corner of this section and is pretty hard to miss.
Puzzle Piece 3
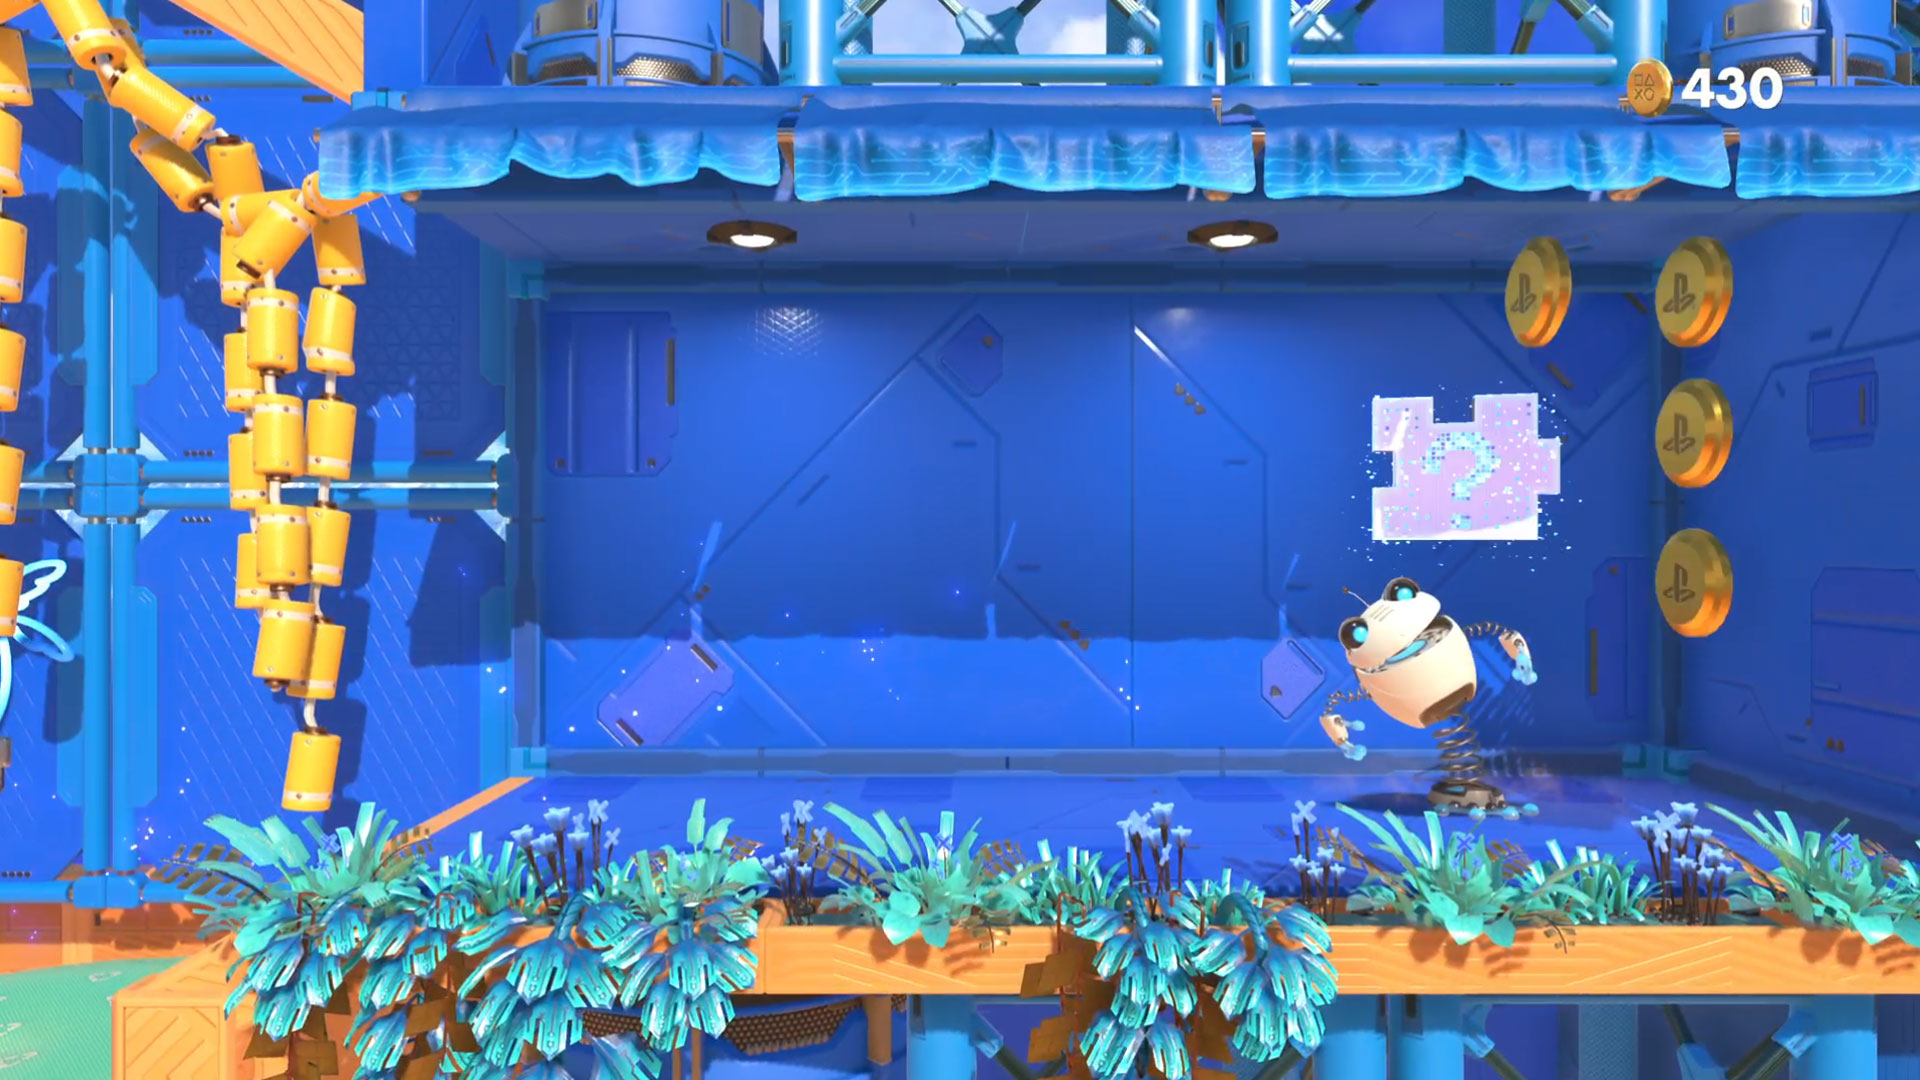
The third puzzle piece isn't too far from the second either. Make your way across the lily pads and wait for the third one to rise up. From here, smash through the glass pane to your right, there's another little room in here with coins and a puzzle piece.
Puzzle Piece 4
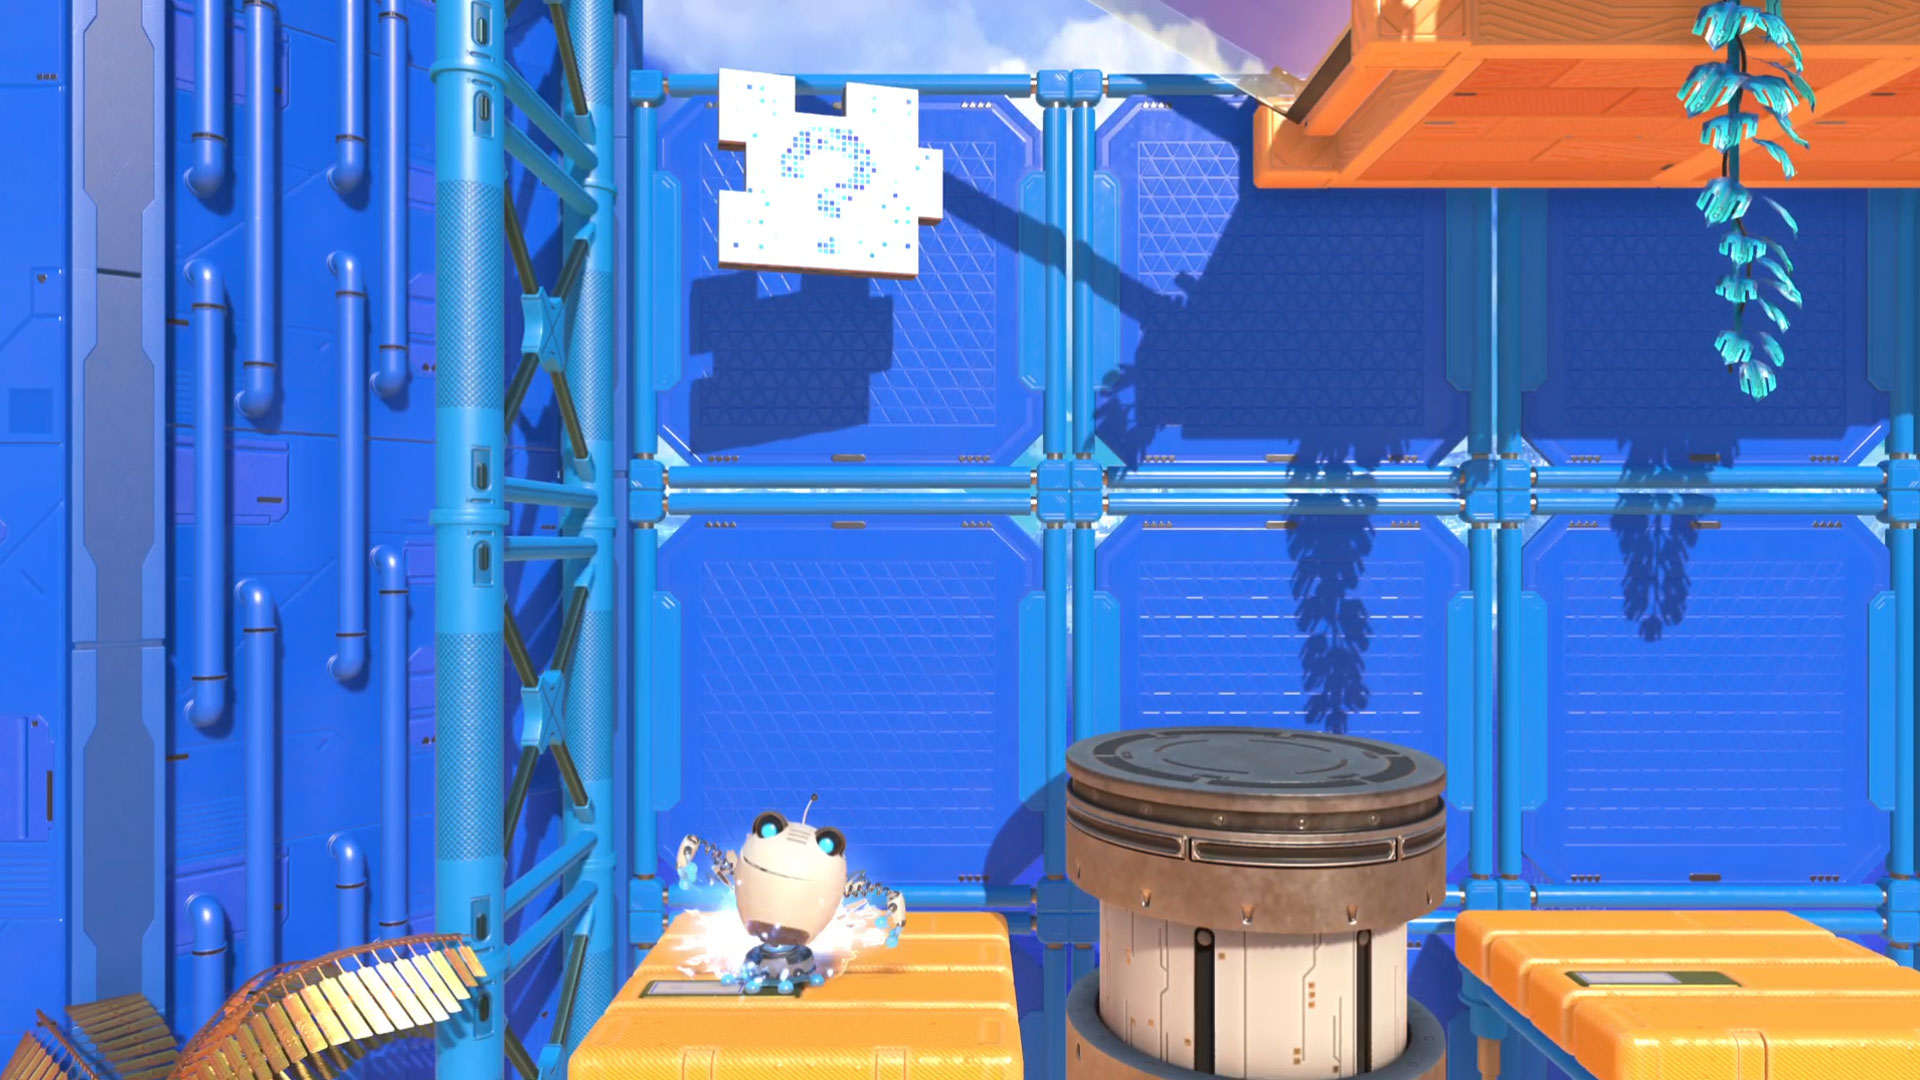
Handily, the fourth puzzle piece is pretty impossible to miss. From the third, just follow the course along and it's right at the far left end of the corridor.
Cooling Springs - Frigid Floes
Puzzle Piece 1
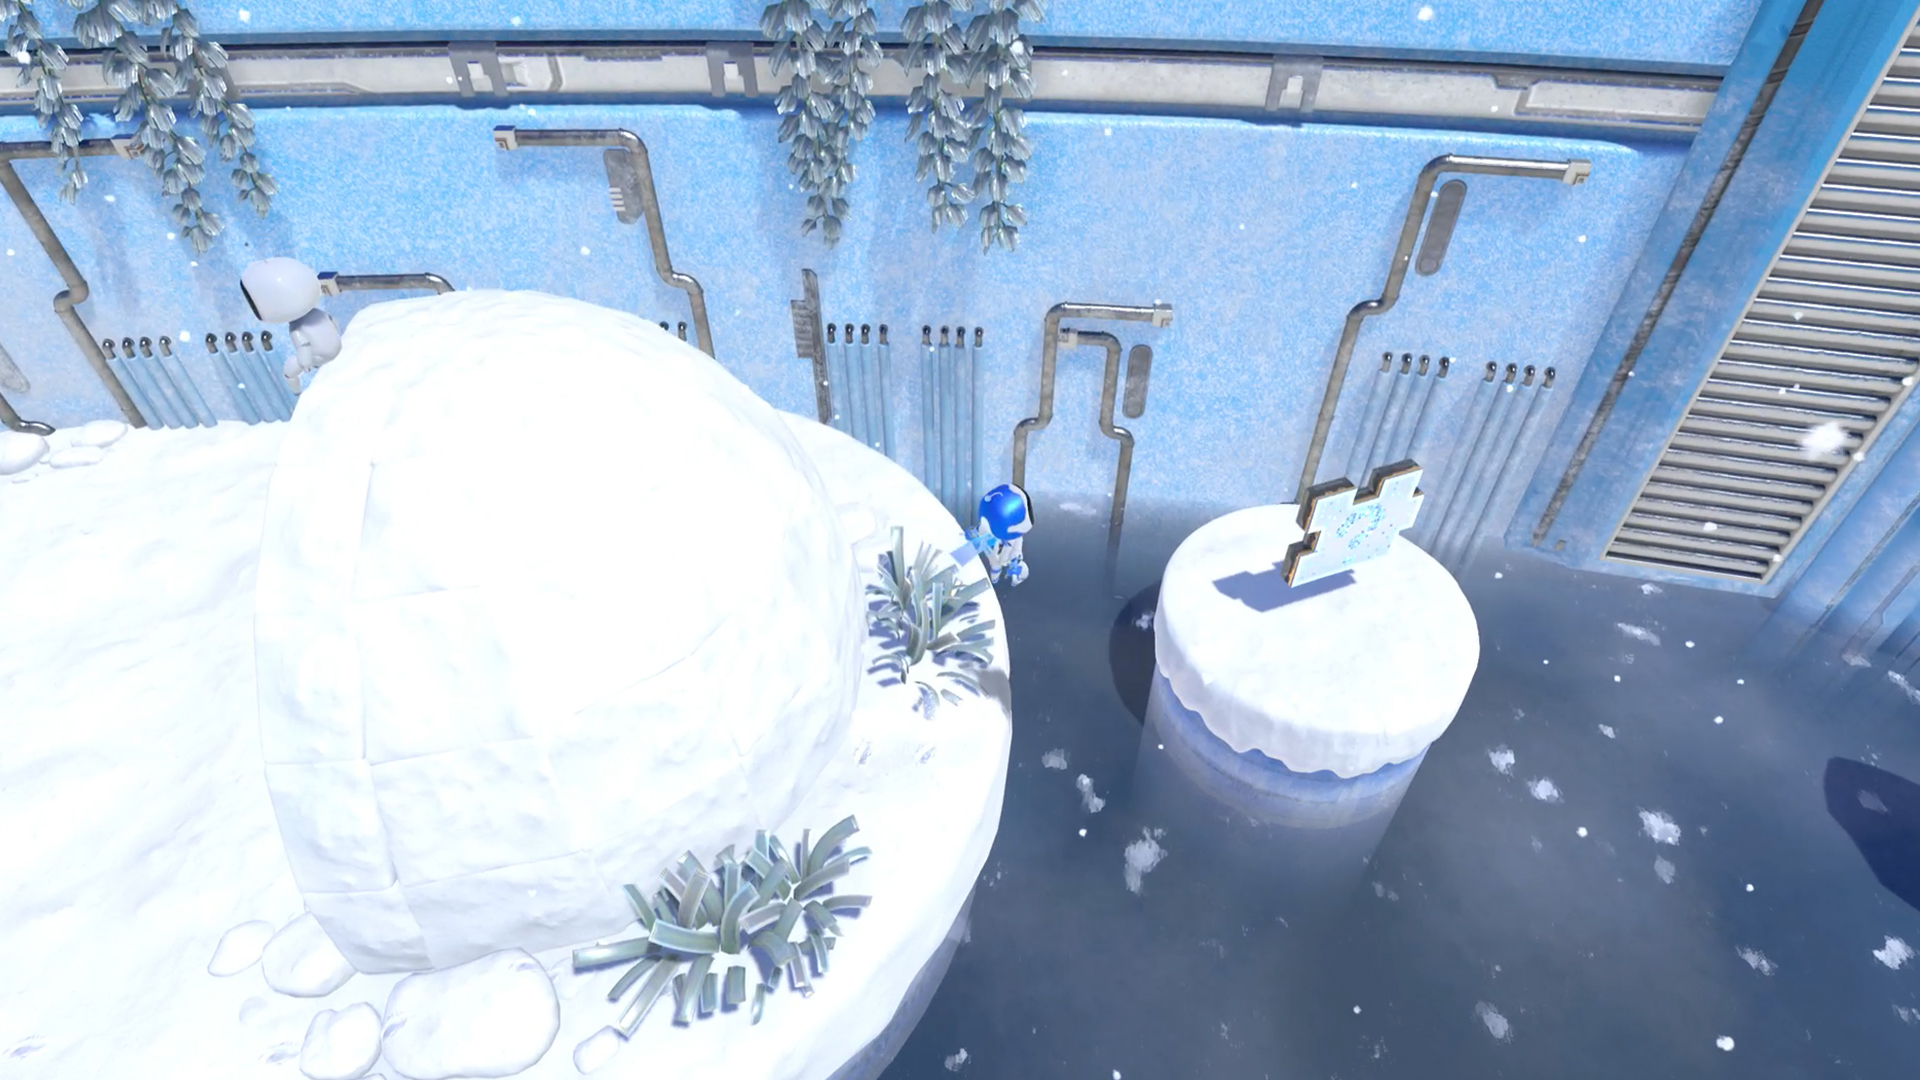
The first puzzle piece is conveniently located just to the left of the starting area here in Frigid Floes. Look for the igloo, and then go around it (or smash through it) to reveal a small platform just behind it where the first puzzle piece is hiding.
Puzzle Piece 2
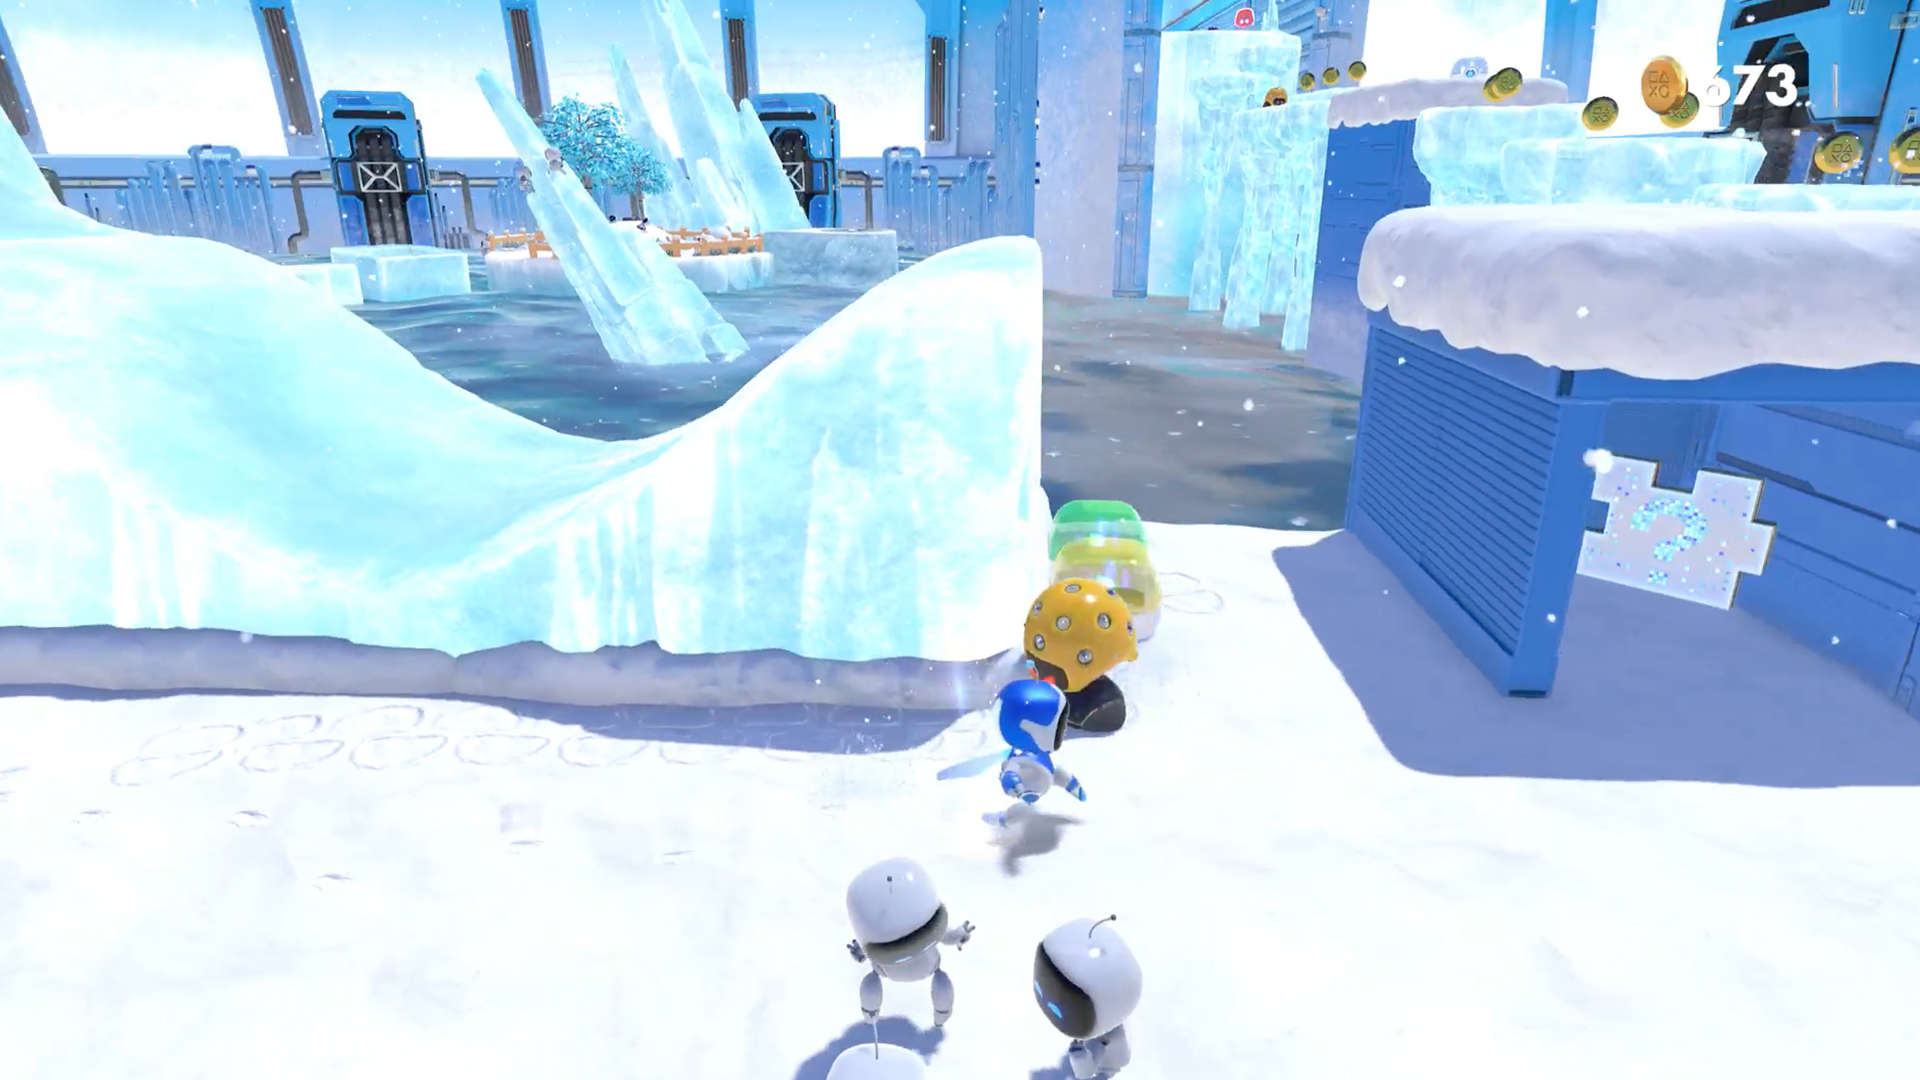
The second puzzle piece is found near the exit to this first area of Frigid Floes. There's an icy ramp that you skate across, but instead of leaping across to the next platform, drop down at the end of it. There's a puzzle piece hidden in the underside of a platform.
Puzzle Piece 3
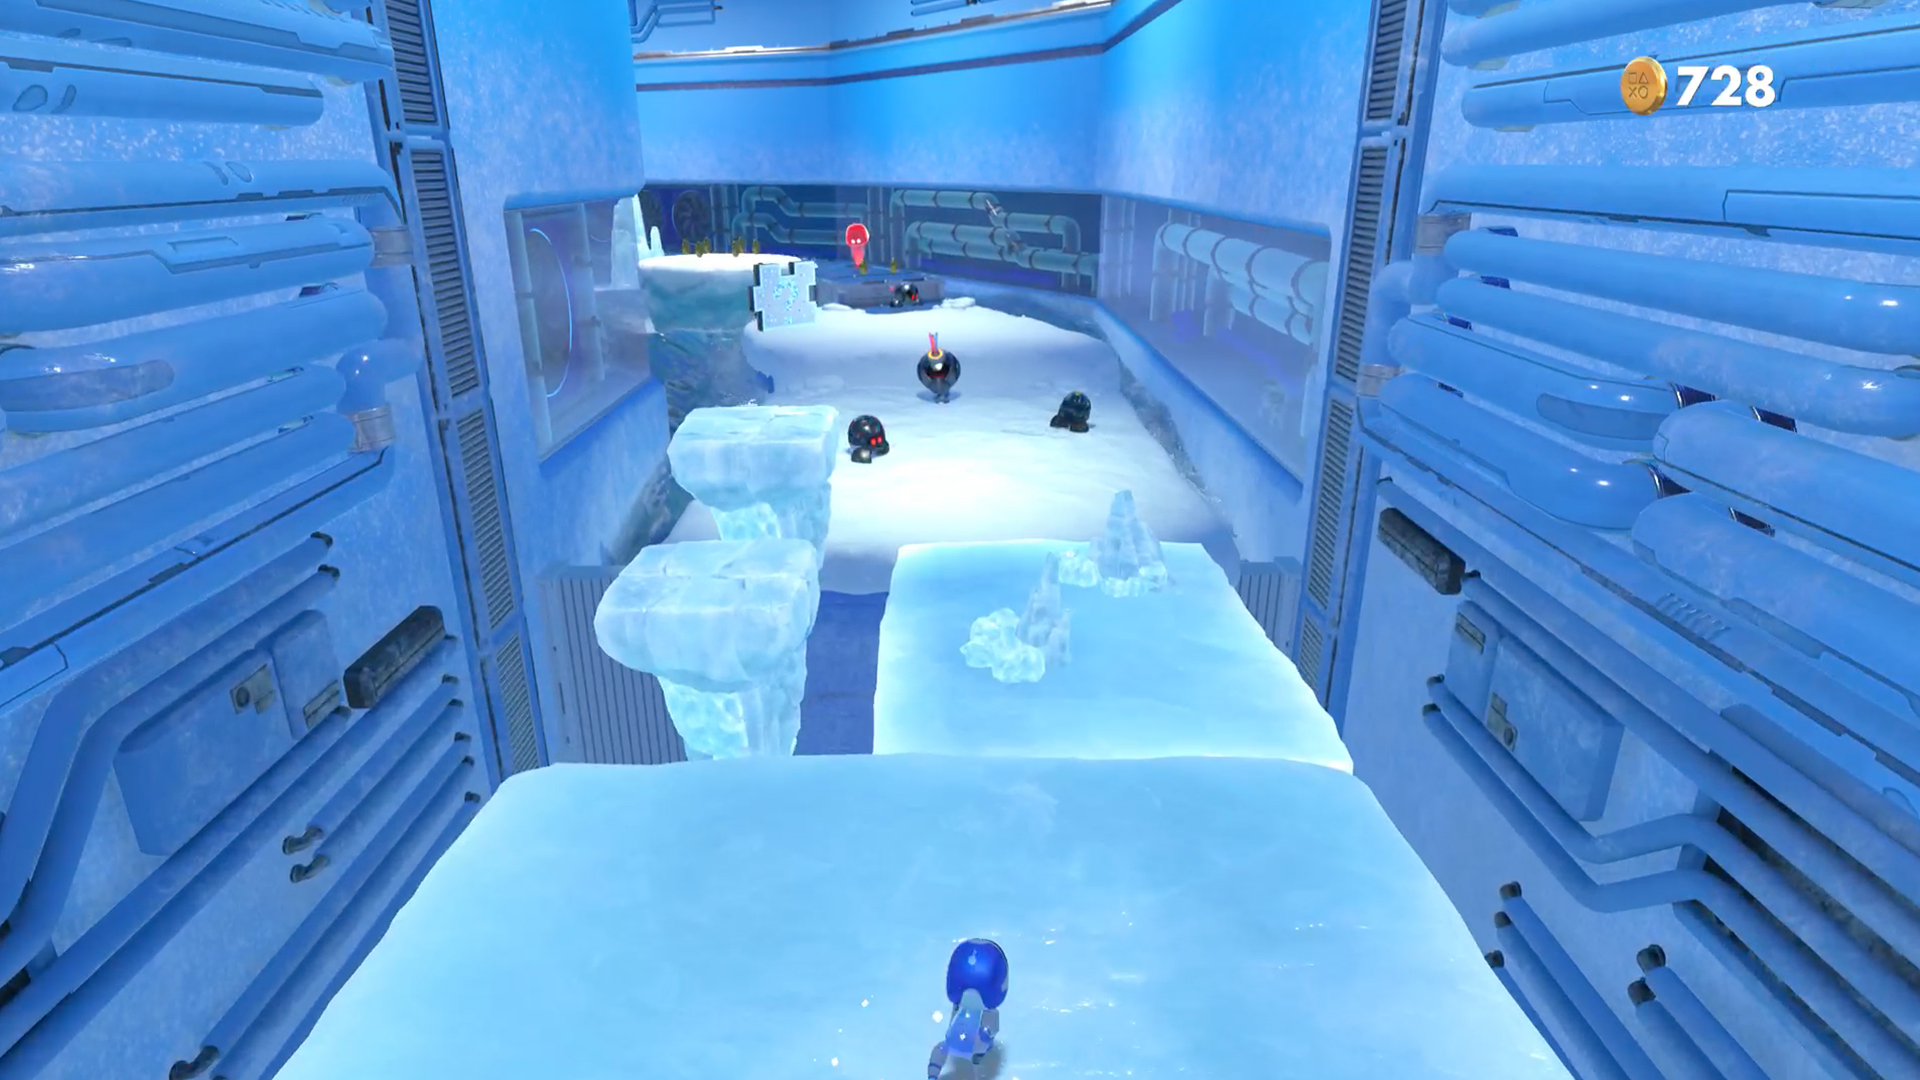
Skate through to the covered area and you'll go down an icy slope. Keep left and there are two crumbling platforms to jump on. At the top of the second one is the next puzzle piece.
Puzzle Piece 4
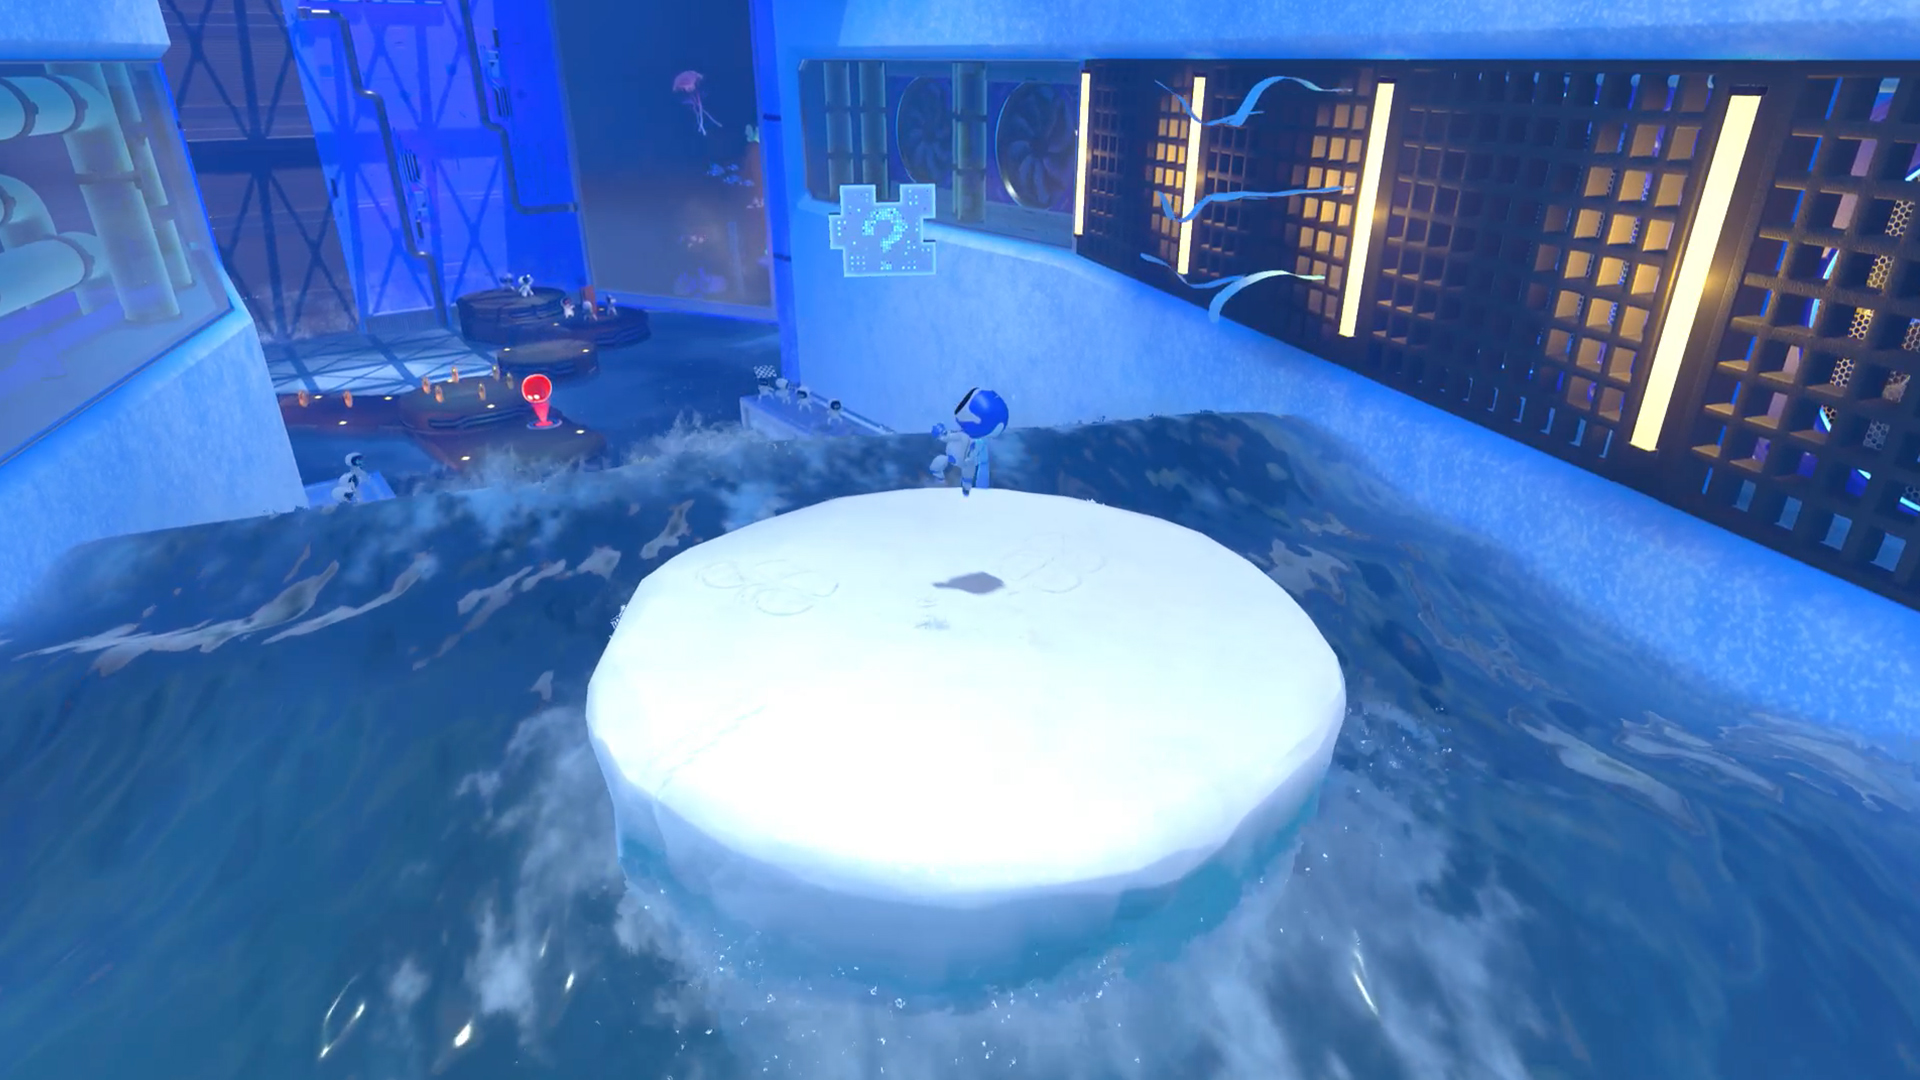
Keep following the level along until you get to a point where you are riding floating platforms through icy rapids. You'll need to blow the spinner to release the first, and then jump to a second one. It's from here you'll be able to grab the final puzzle piece with a simple leap.
Cooling Springs - Hotel Hopalot
Puzzle Piece 1
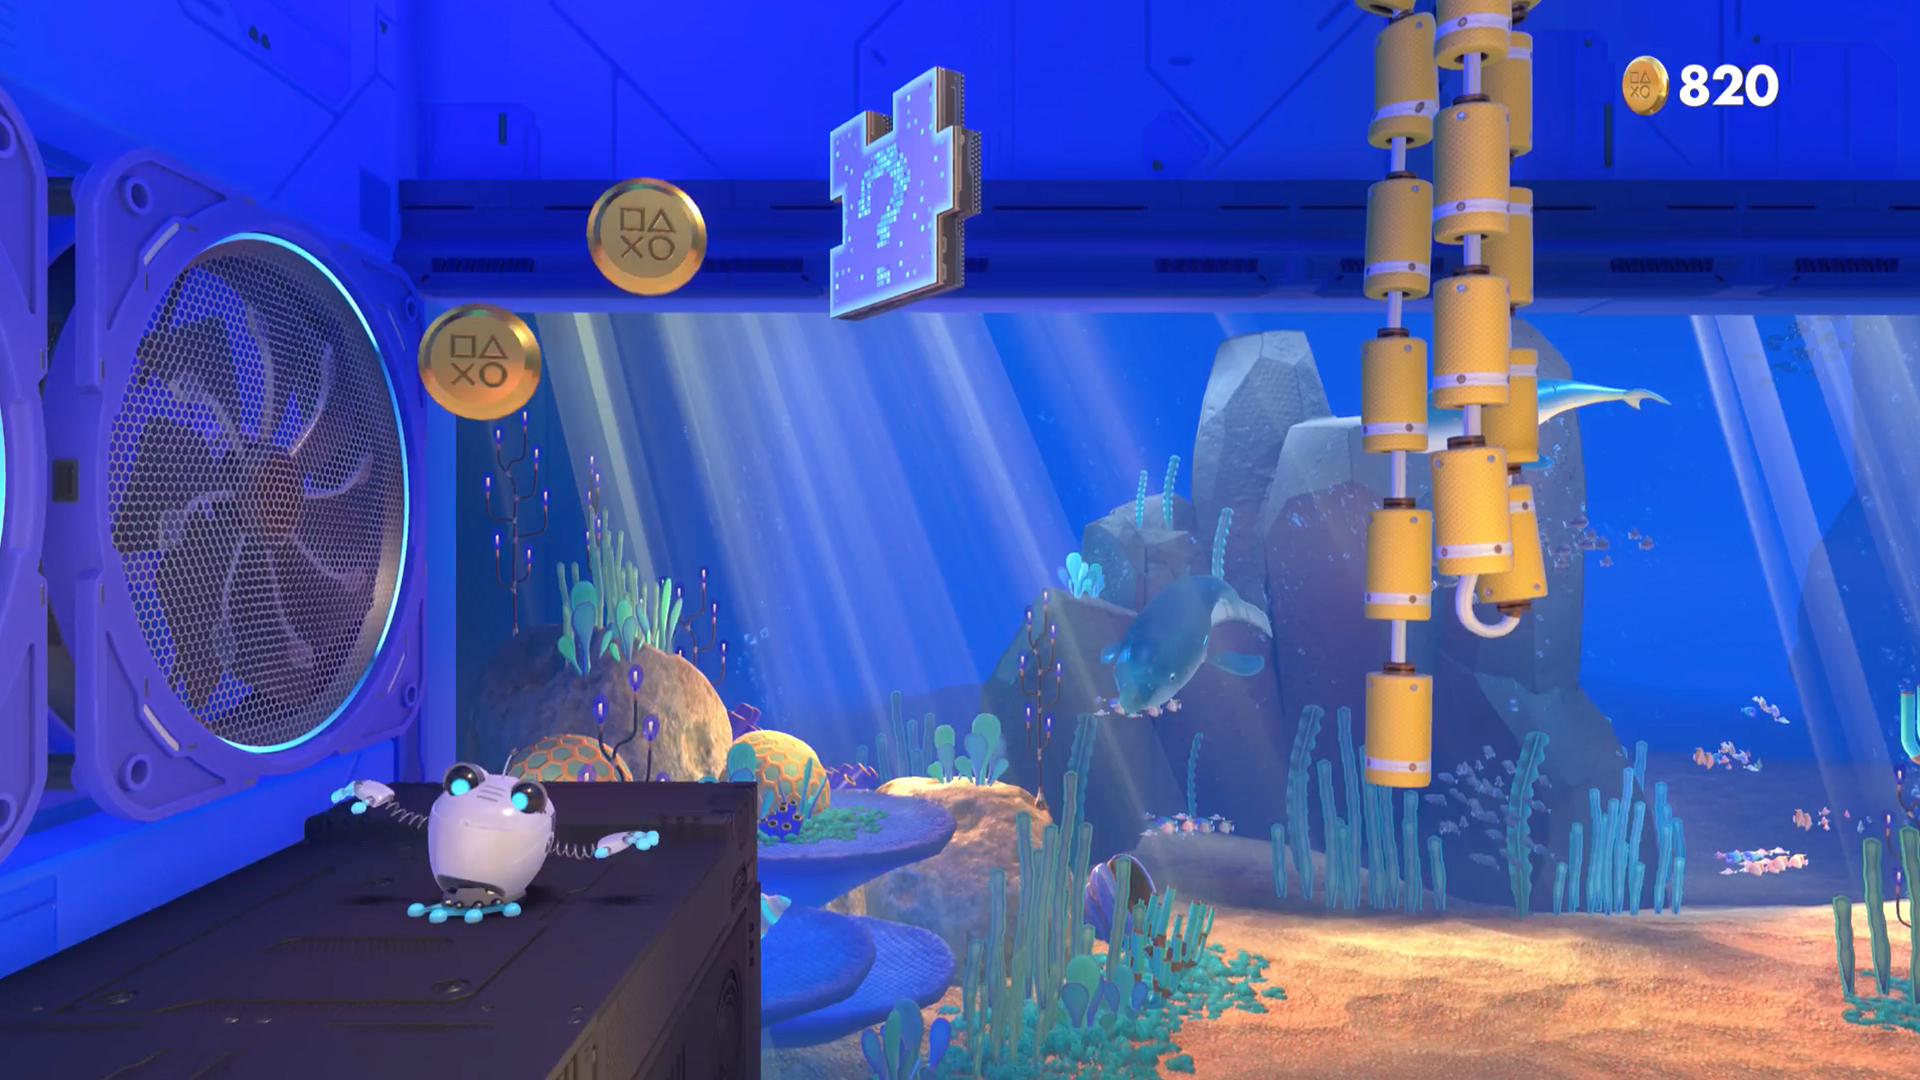
The very first puzzle piece is just to the left of the starting spot in this area. Jump on the metal pressure pad and it'll bring up two platforms. Jump up to the higher one and you'll be able to grab the puzzle piece.
Puzzle Piece 2
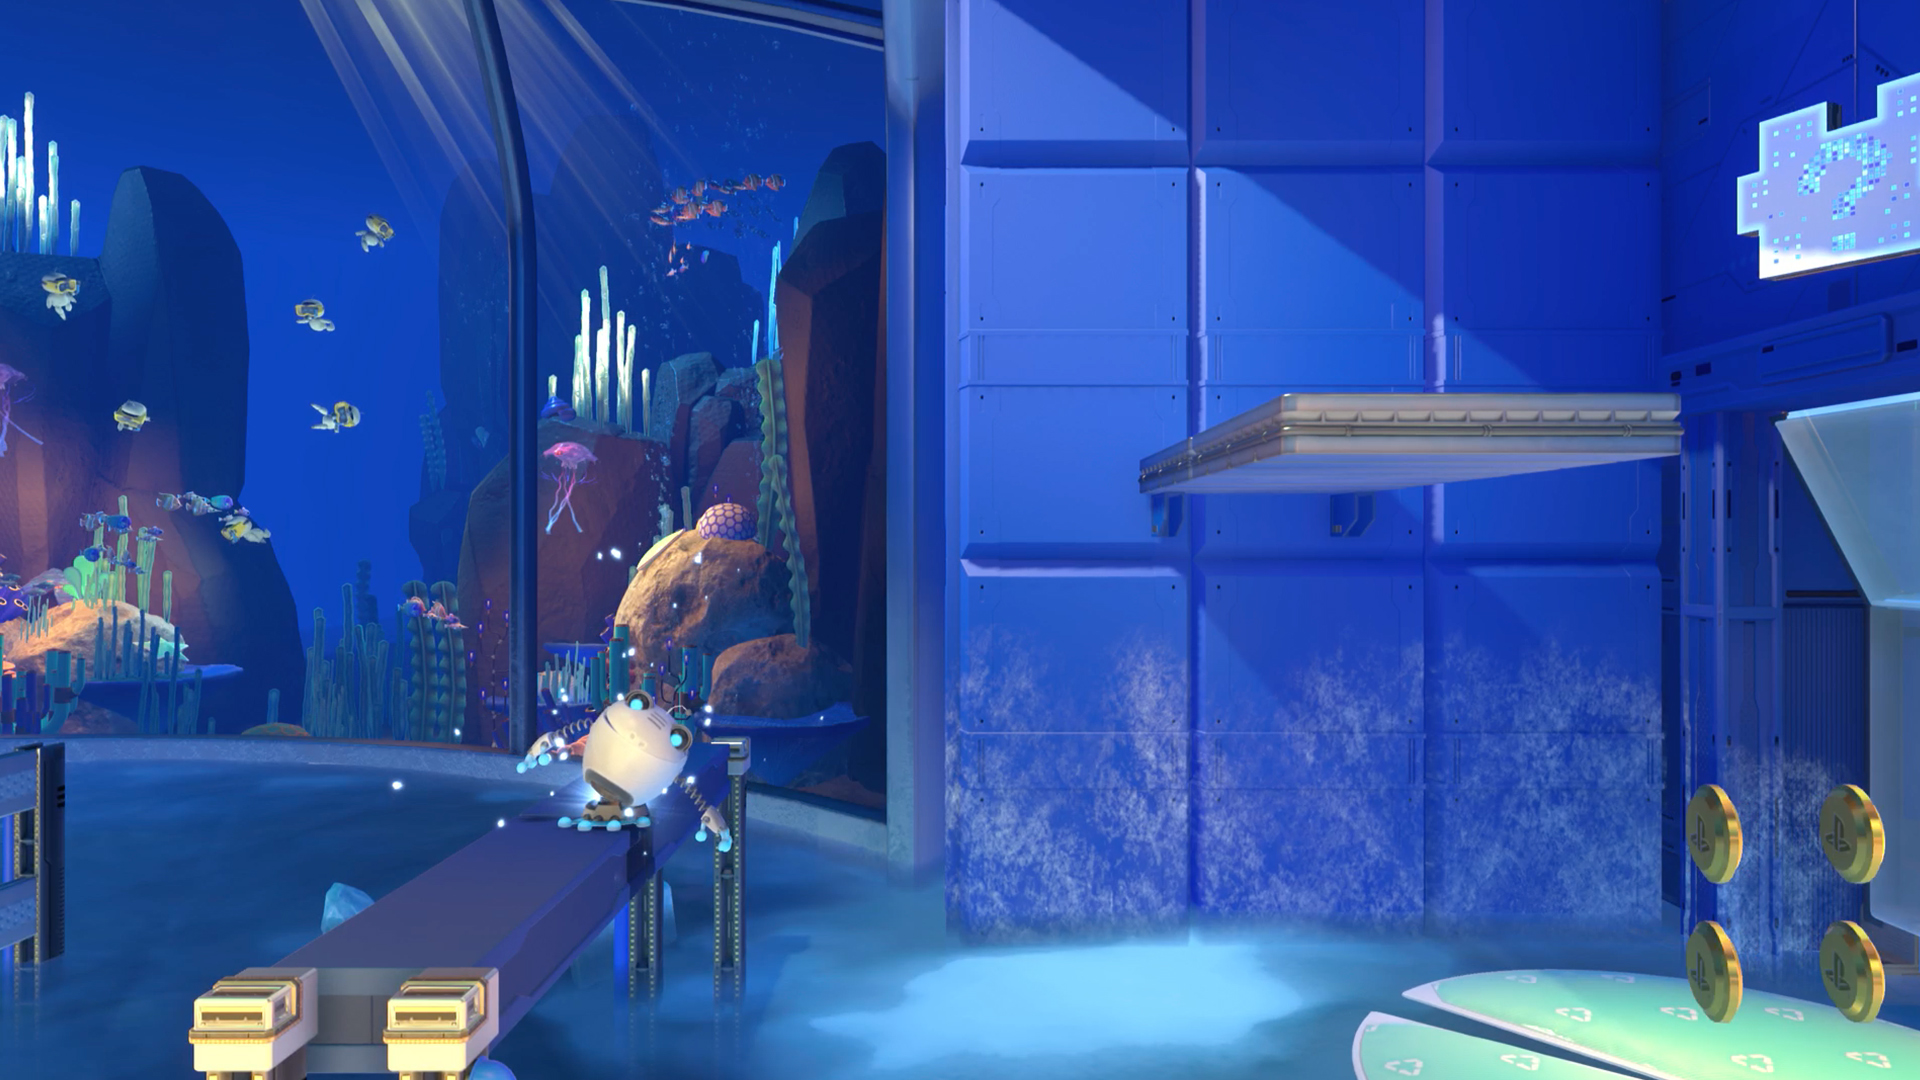
The second piece isn't too far away either. Get to the lily pad and ride it along, leaping over all the obstacles. Just before the end of your ride, you'll need to jump carefully onto the wider platform with the giant coin above it. This will allow you to reach the platform above, where you'll find the puzzle piece.
Puzzle Piece 3
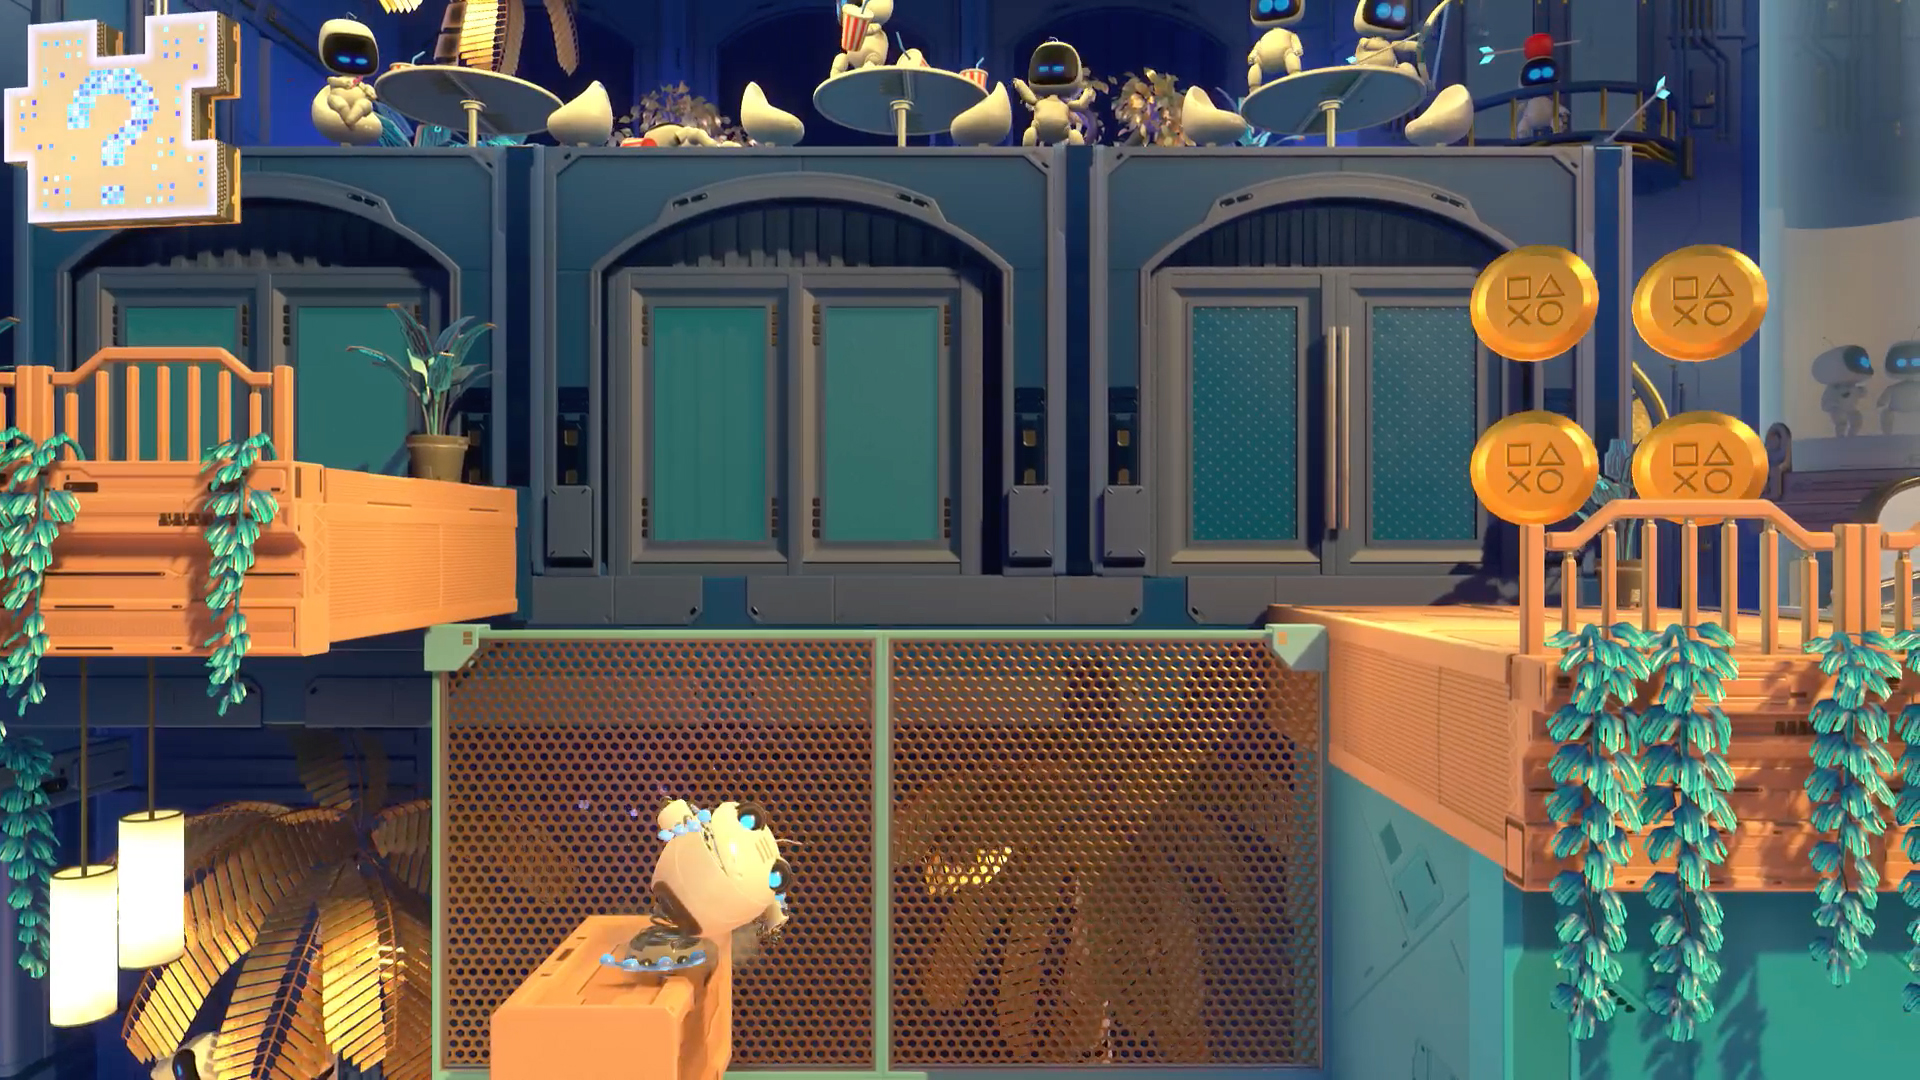
At the next checkpoint where you'll need to smash through some glass blocks, make sure to head up and left when you get out at the top before continuing on. There's a puzzle piece just up on a ledge there.
Puzzle Piece 4
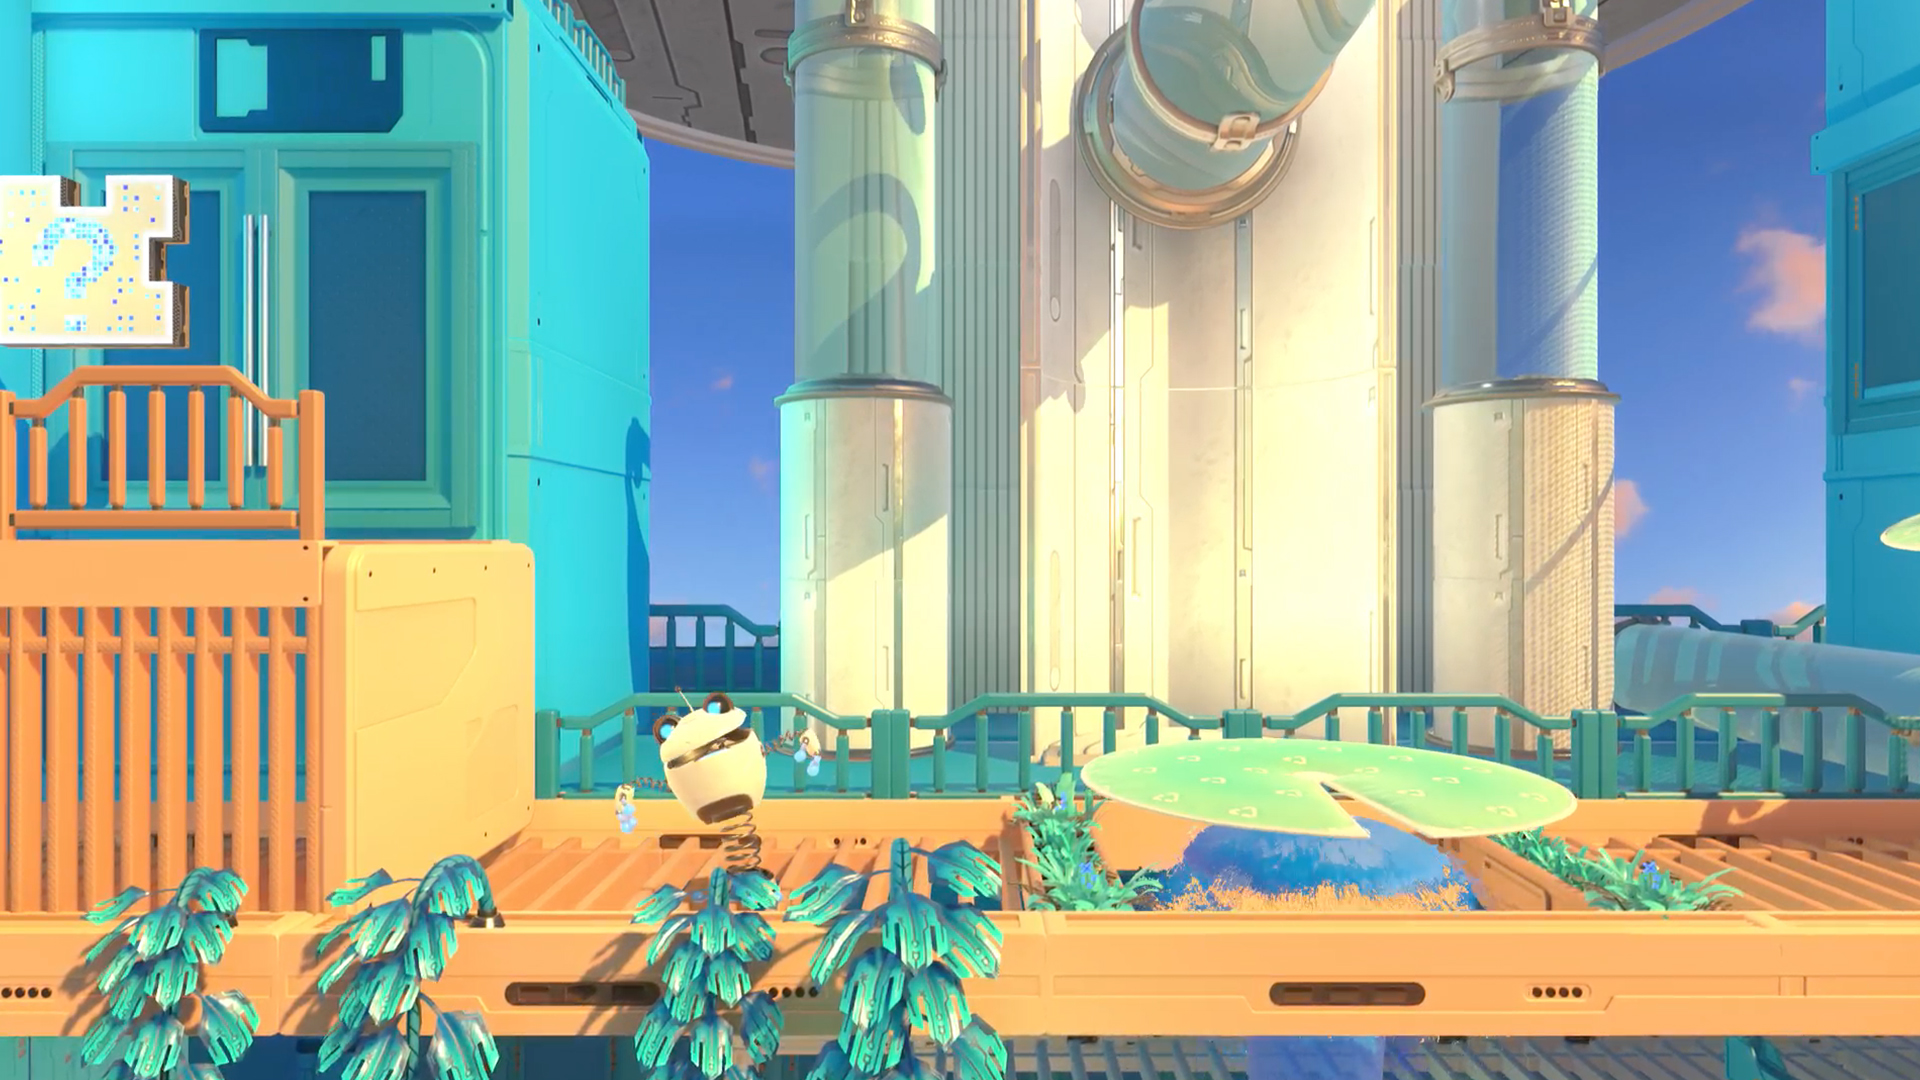
After the section where you ride a rotating hexagon across the freezing waters, you'll press a button that'll make a lily pad appear. Jump on said pad and ride the water up. Immediately to your left on a little platform, is the final puzzle piece.
GPU Jungle - Renderforest
Puzzle Piece 1
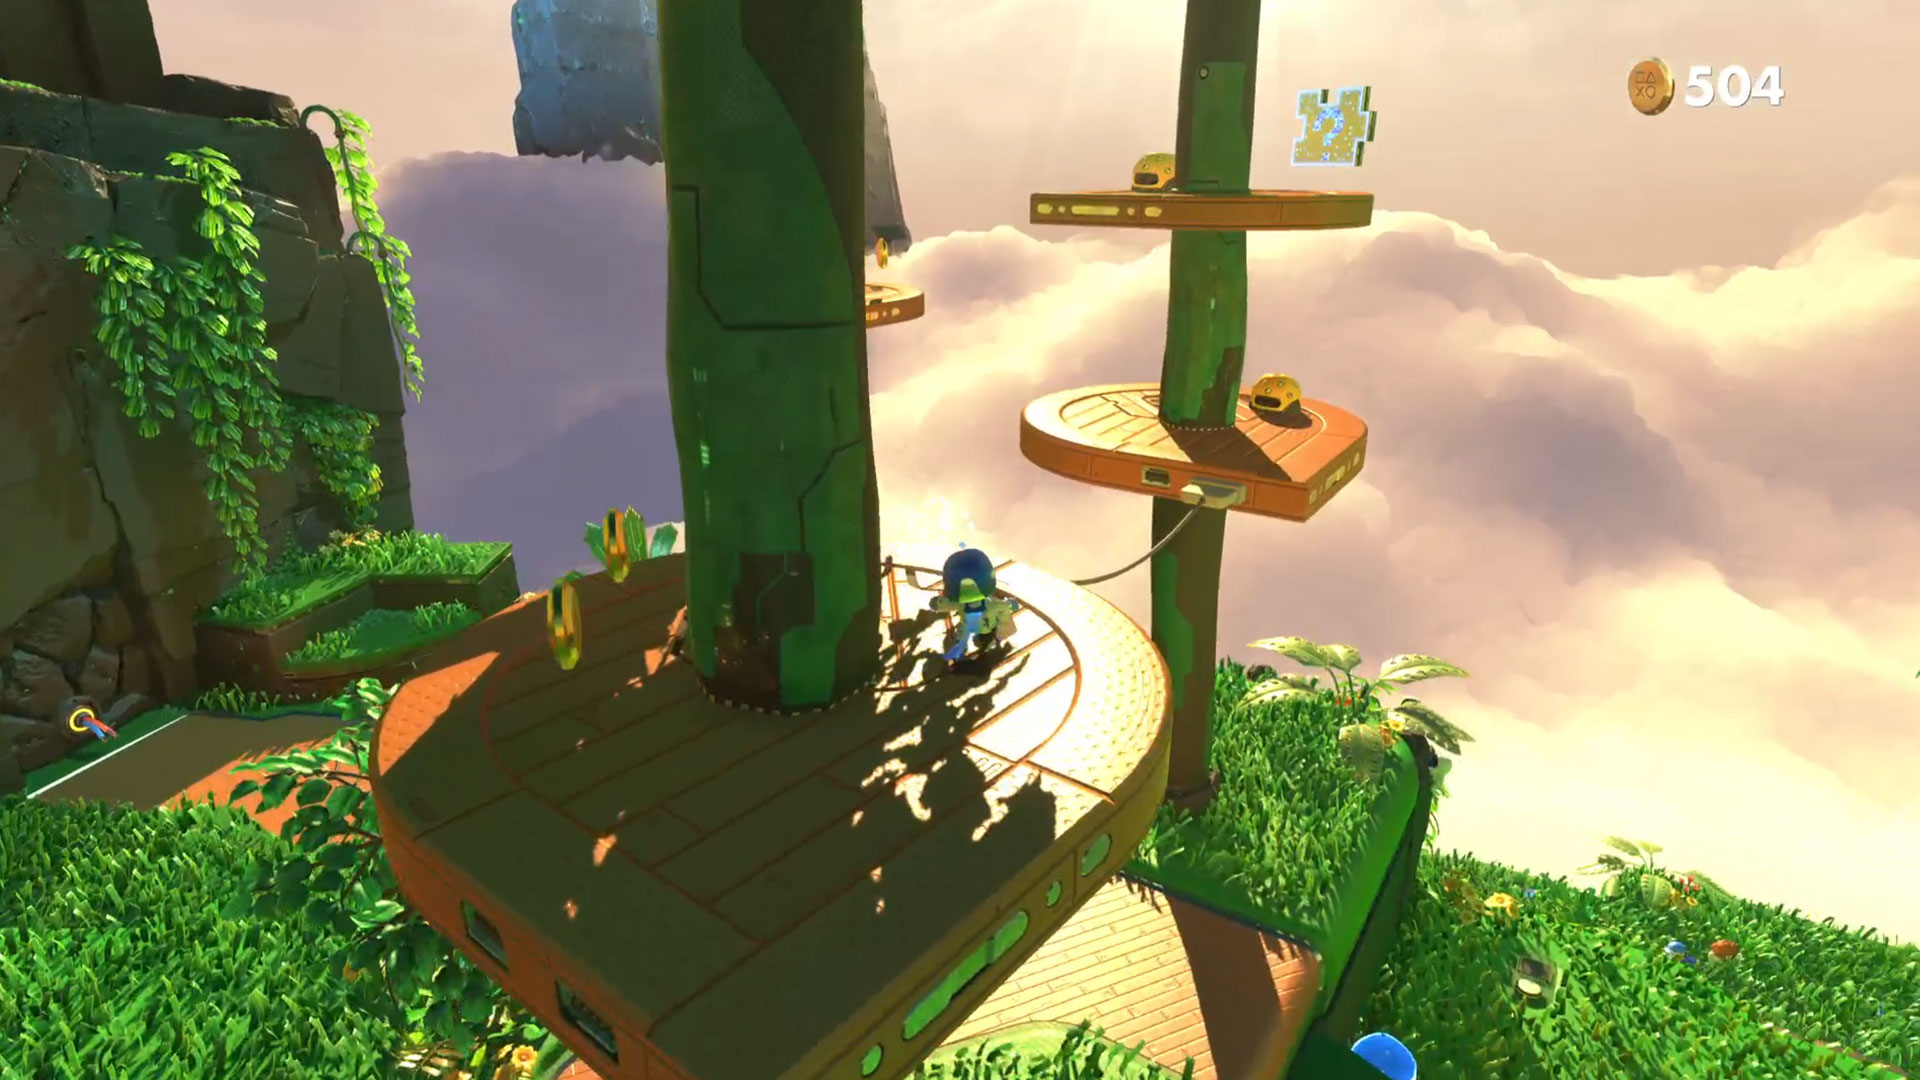
In the very first area of [insert area name here] head over to the platform on the far left towards the cliff face. There are two spike-nose caterpillars stomping around the outer edge of the platform.
Defeat these and you'll reveal a blue flower that you can spin by holding down the square button for Astro's charge punch. The flower will grow and sprout disc-like leaves. You can use these to reach a series of platforms to the right. On the second platform, after the PS1 controller cable tightrope, is your first puzzle piece.
Puzzle Piece 2
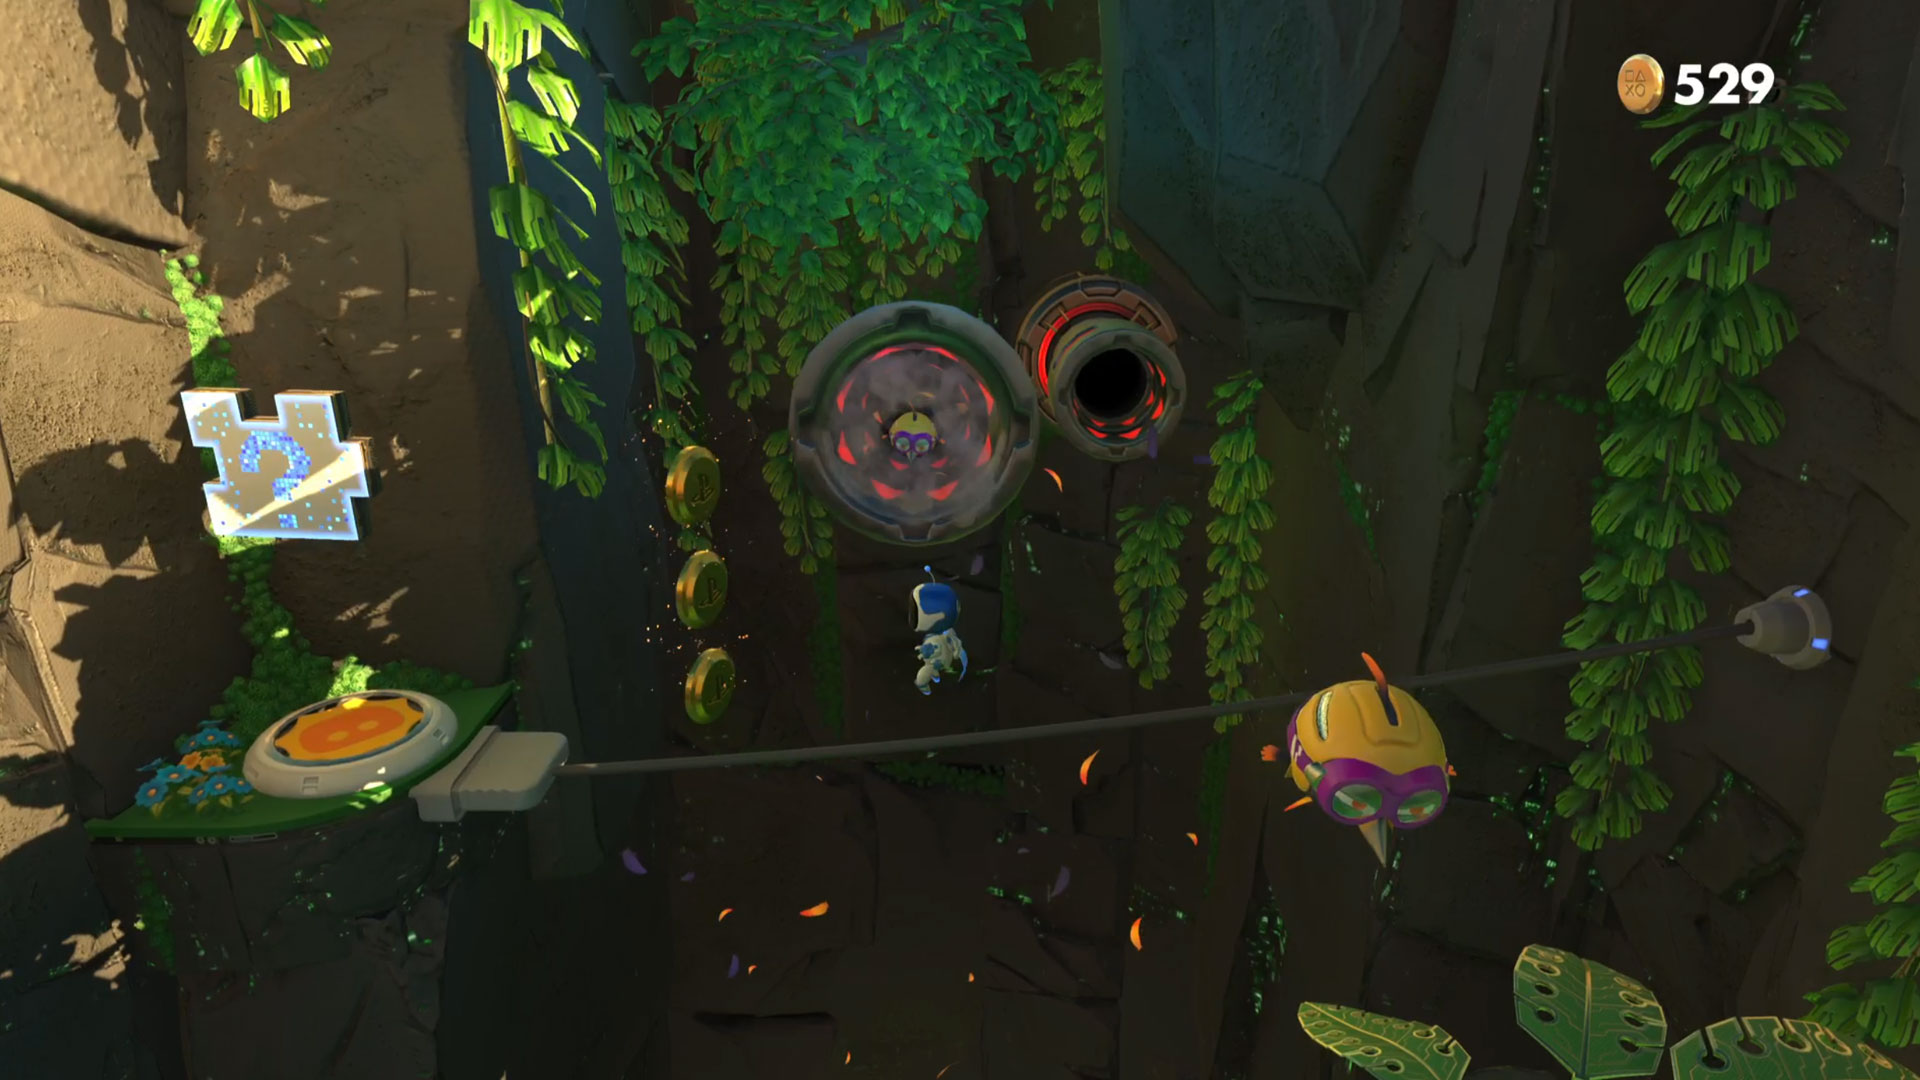
When you reach the second checkpoint, head to the left across the platform with another spike-nosed caterpillar and continue left. Pull the wires poking out of the wooden wall and use the bouncepad that is revealed to reach the tightrope above. Walk across this - avoiding the equally spike-nosed birds - to reveal the second puzzle piece.
Puzzle Piece 3
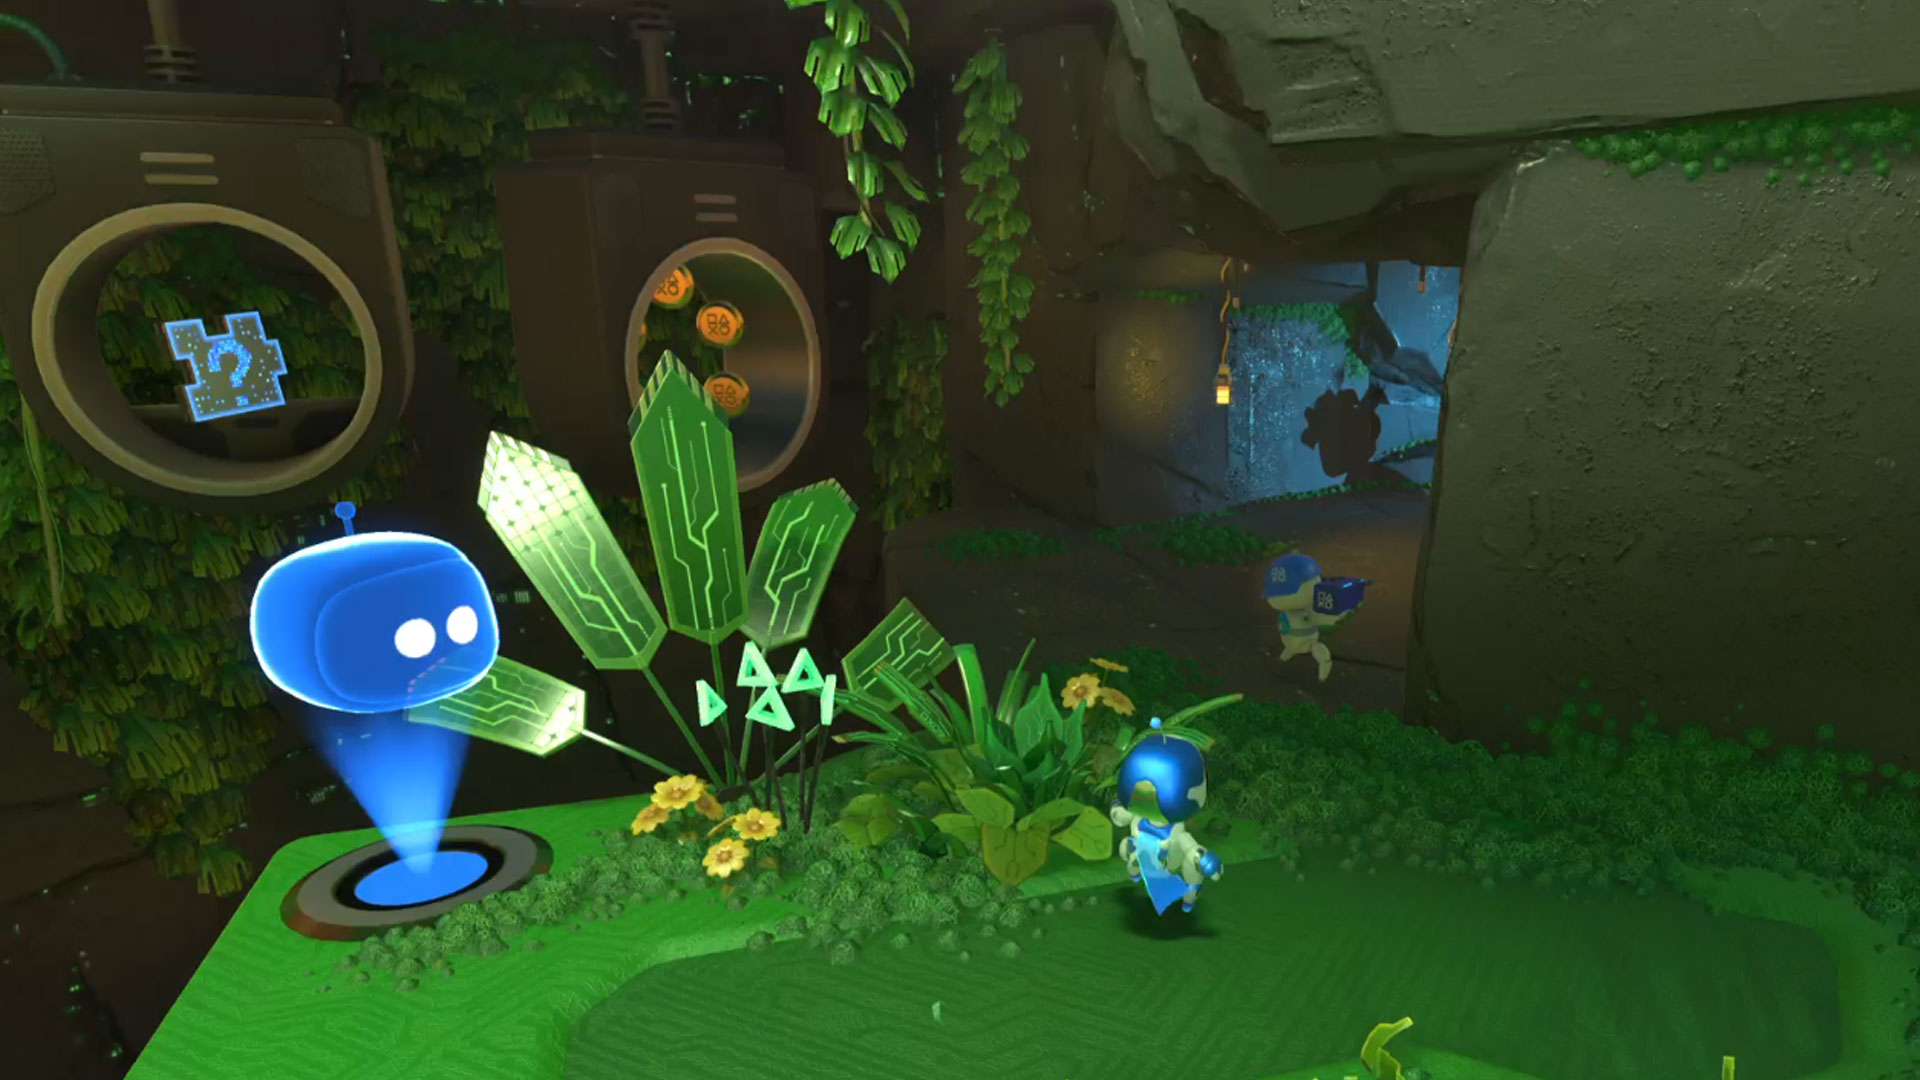
Head back to the second checkpoint from Puzzle Piece 2 in this area and defeat the aforementioned caterpillar going around the platform. On the platform behind it, slightly higher up there are some wires protruding from the ground. Pull them and you'll reveal an explosive canister. Grab it, and go back to the platform that the caterpillar was on. There are two slowly rotating panels to the right, which have yellow angry faces on them. Use your canister to destroy both of these (going back to grab a second canister from the wire source), and you'll be able to reveal another puzzle piece.
Work around the right hand-side of this area to jump between the panels and grab it - along with some coins. Don't forget to appreciate the Last of Us Easter egg too.
Puzzle Piece 4
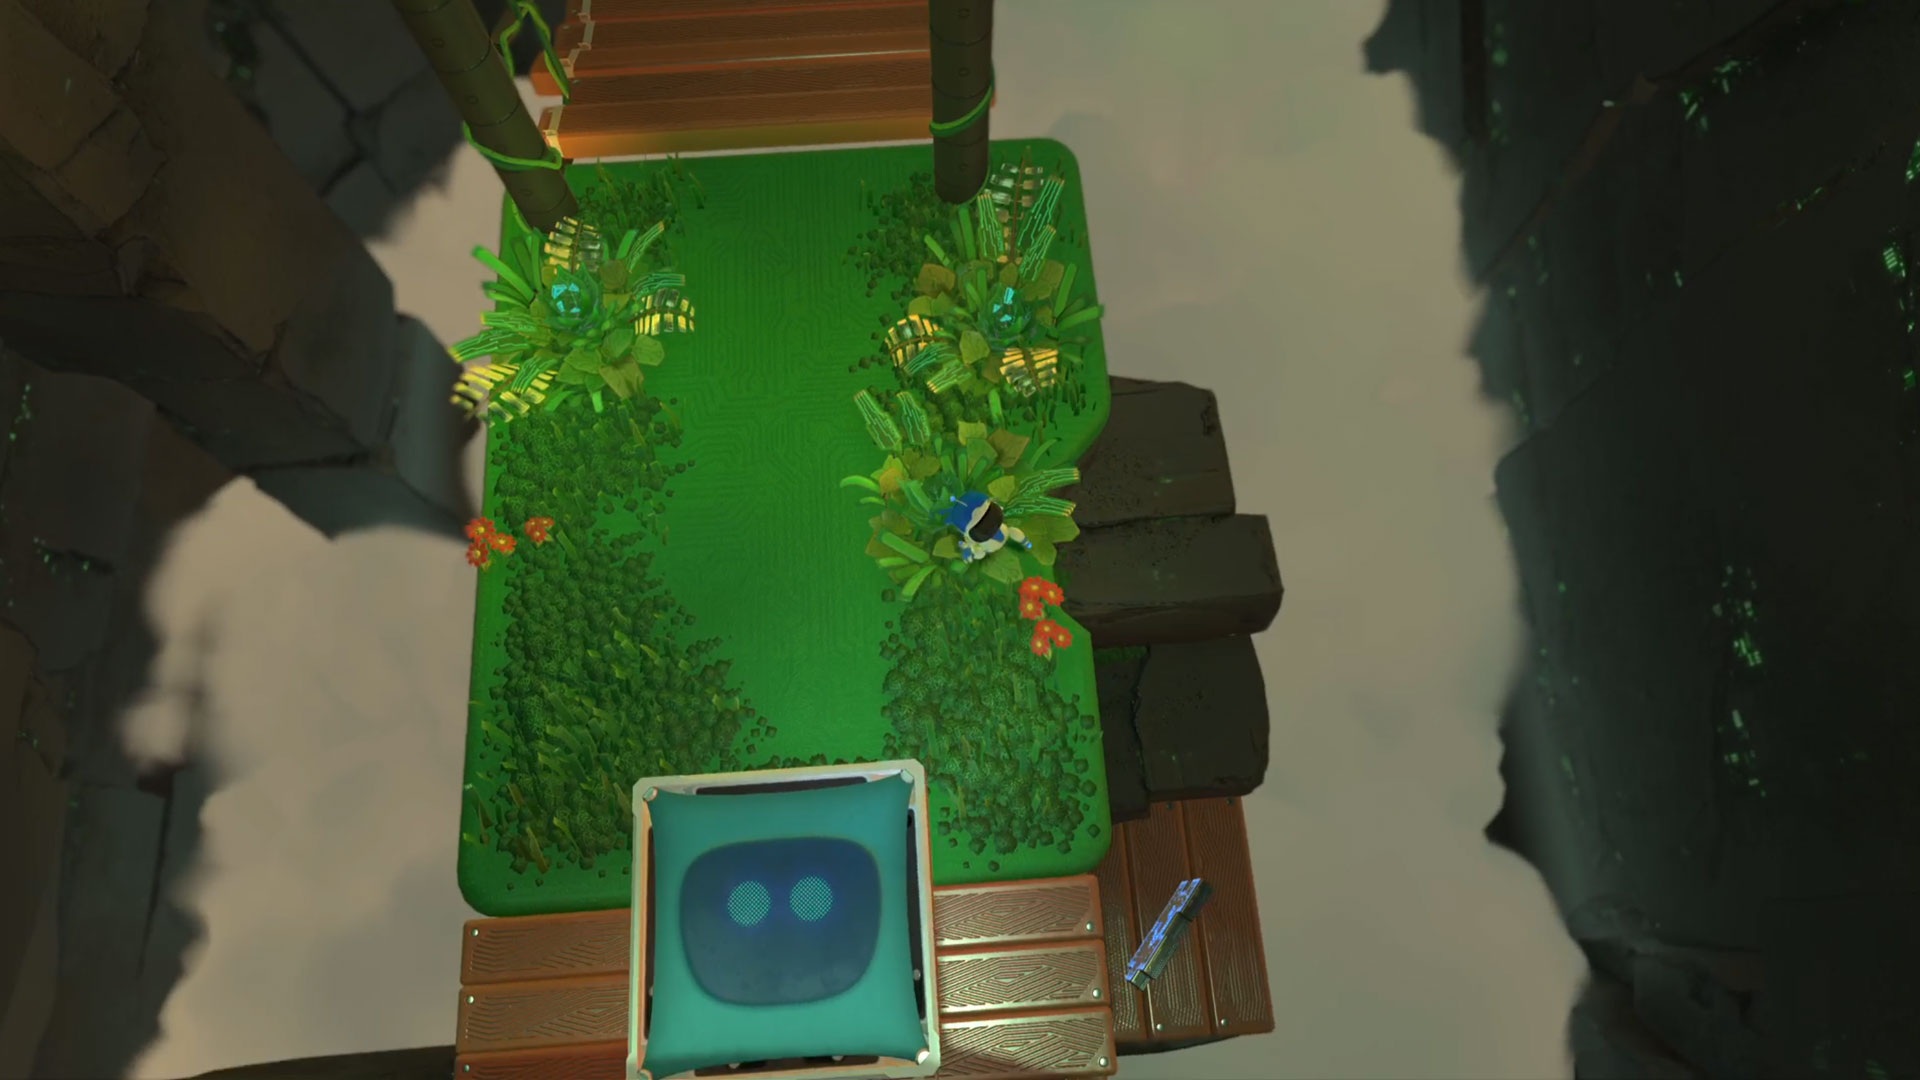
Just before you reach the marker for the next section there's a wooden suspension bridge. Cross this, and then drop down to a hidden ledge down to the left. Here you'll find the last puzzle piece for this section.
GPU Jungle - Terratop Treetops
Puzzle Piece 1
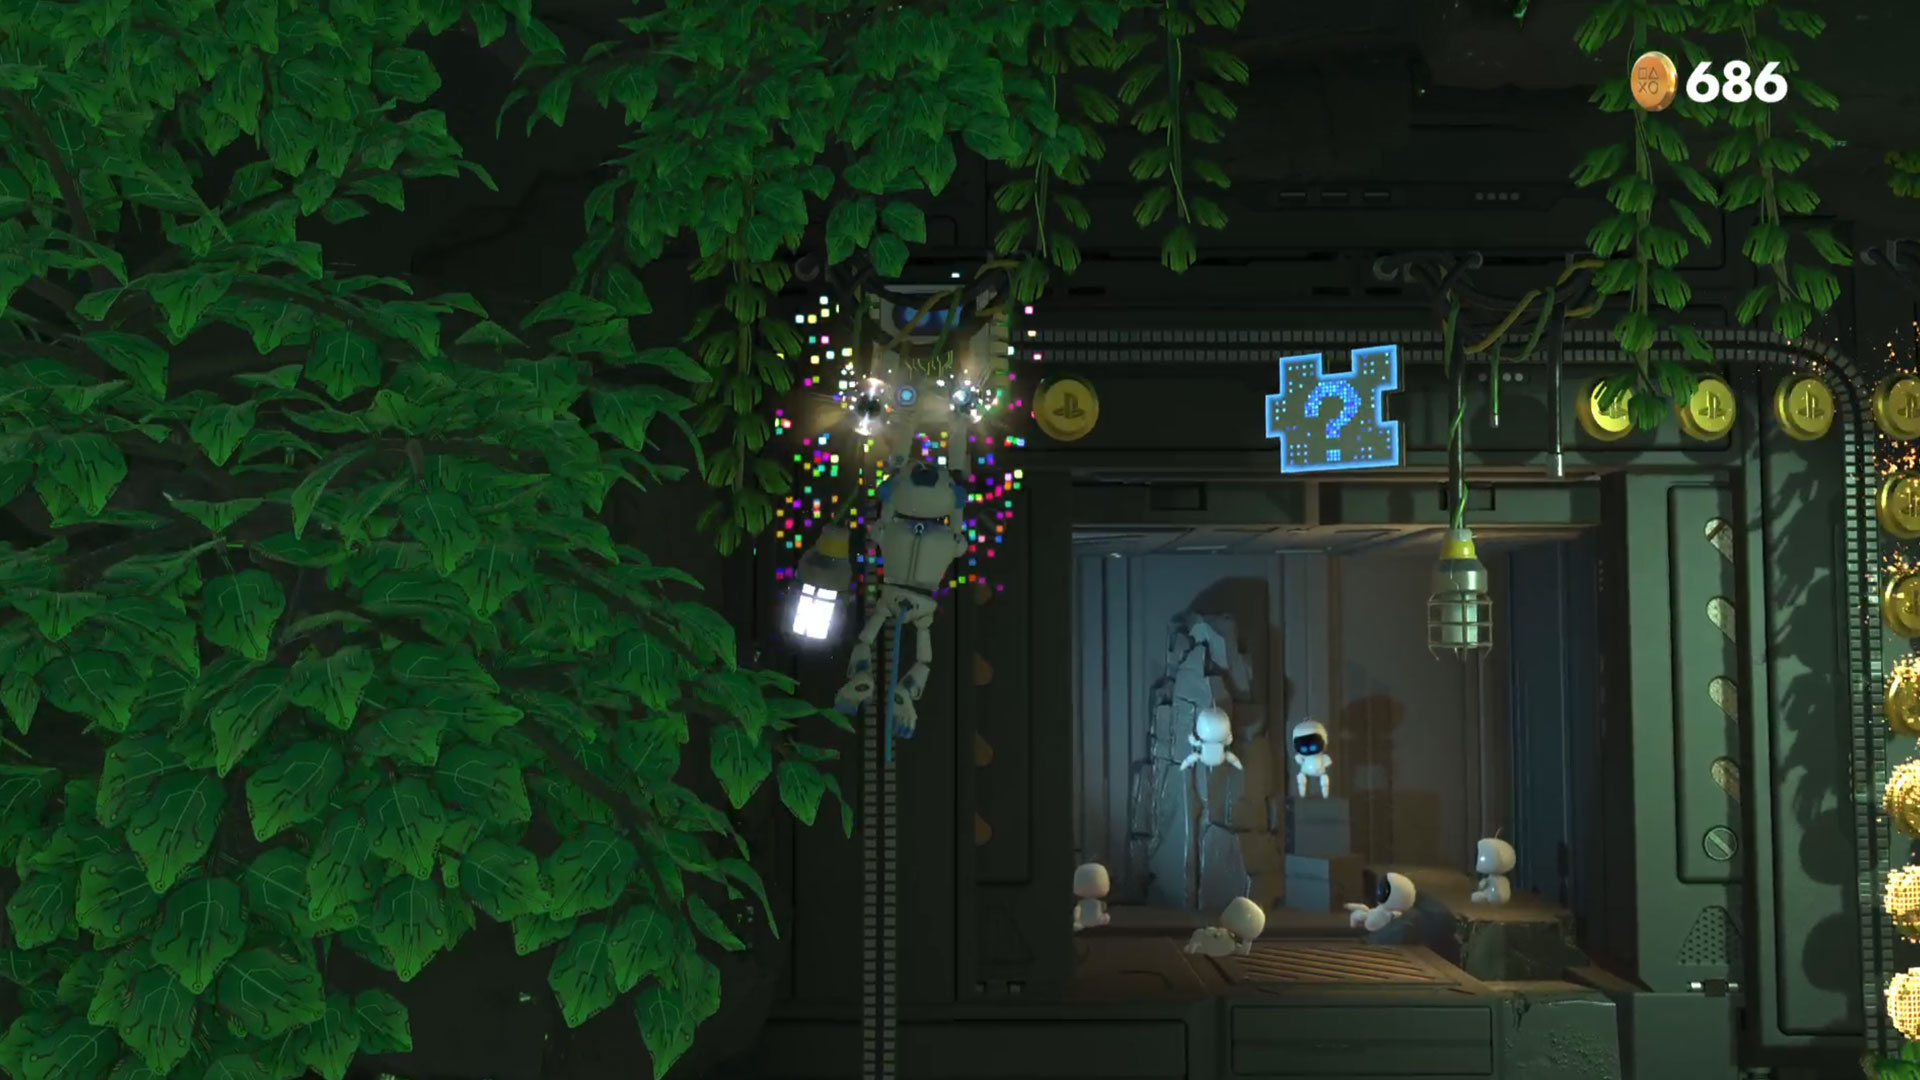
When you're in the monkey suit, work your way up the first section until you reach a platform and the first checkpoint. Here you'll have to grab a little chip that moves along like a zipper. On this very first moving piece, watch out for a yellow hand hold on the left, and grab it as soon as you're able. This will reveal an alternative path across to the left.
From here, grab the zipper that's revealed, and then move up the handholds (being careful of those pink ones that cause the rocks to move). Grab onto the second zipper and ride it round for the first puzzle piece.
Puzzle Piece 2
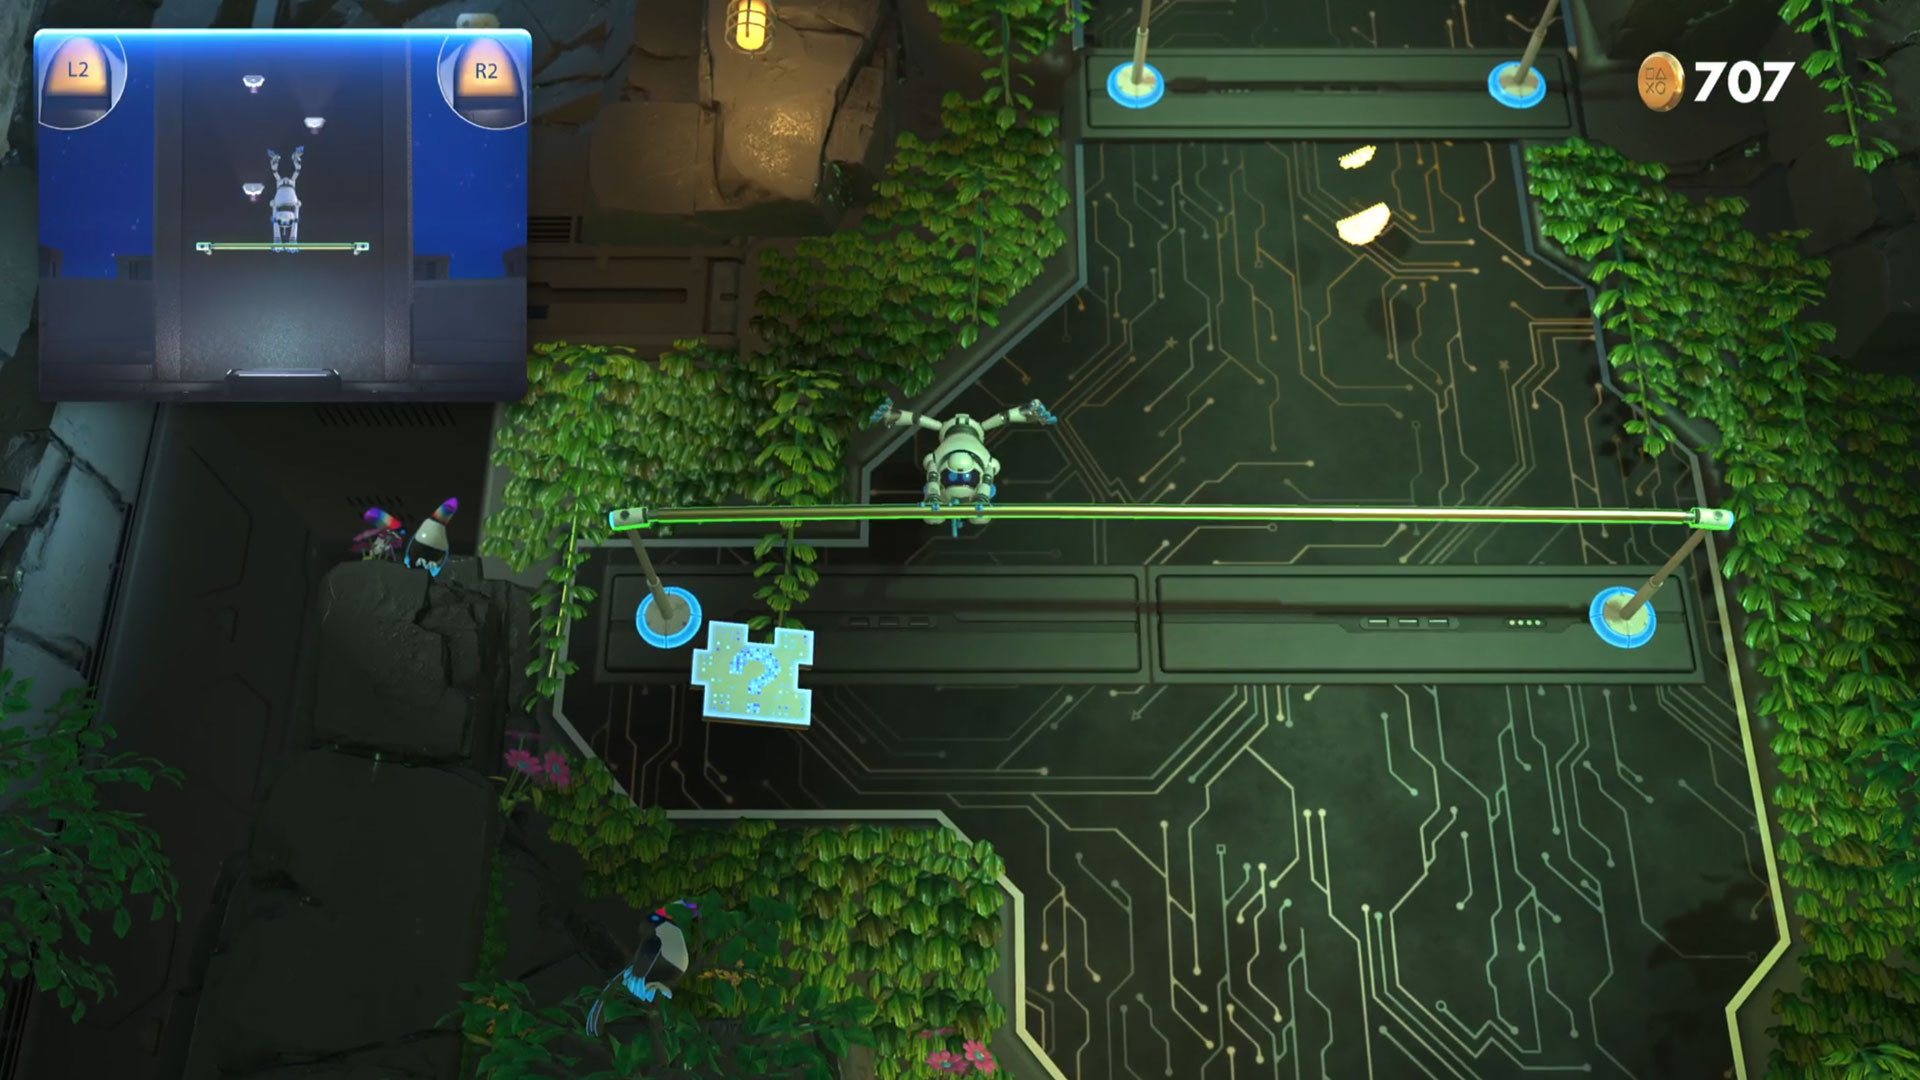
The second puzzle piece is just after the next checkpoint and very obvious. Just jump up onto the first swing section, and then move to the second one. Wiggle over to the left by tilting your DualSense and it's right there for the taking.
Puzzle Piece 3
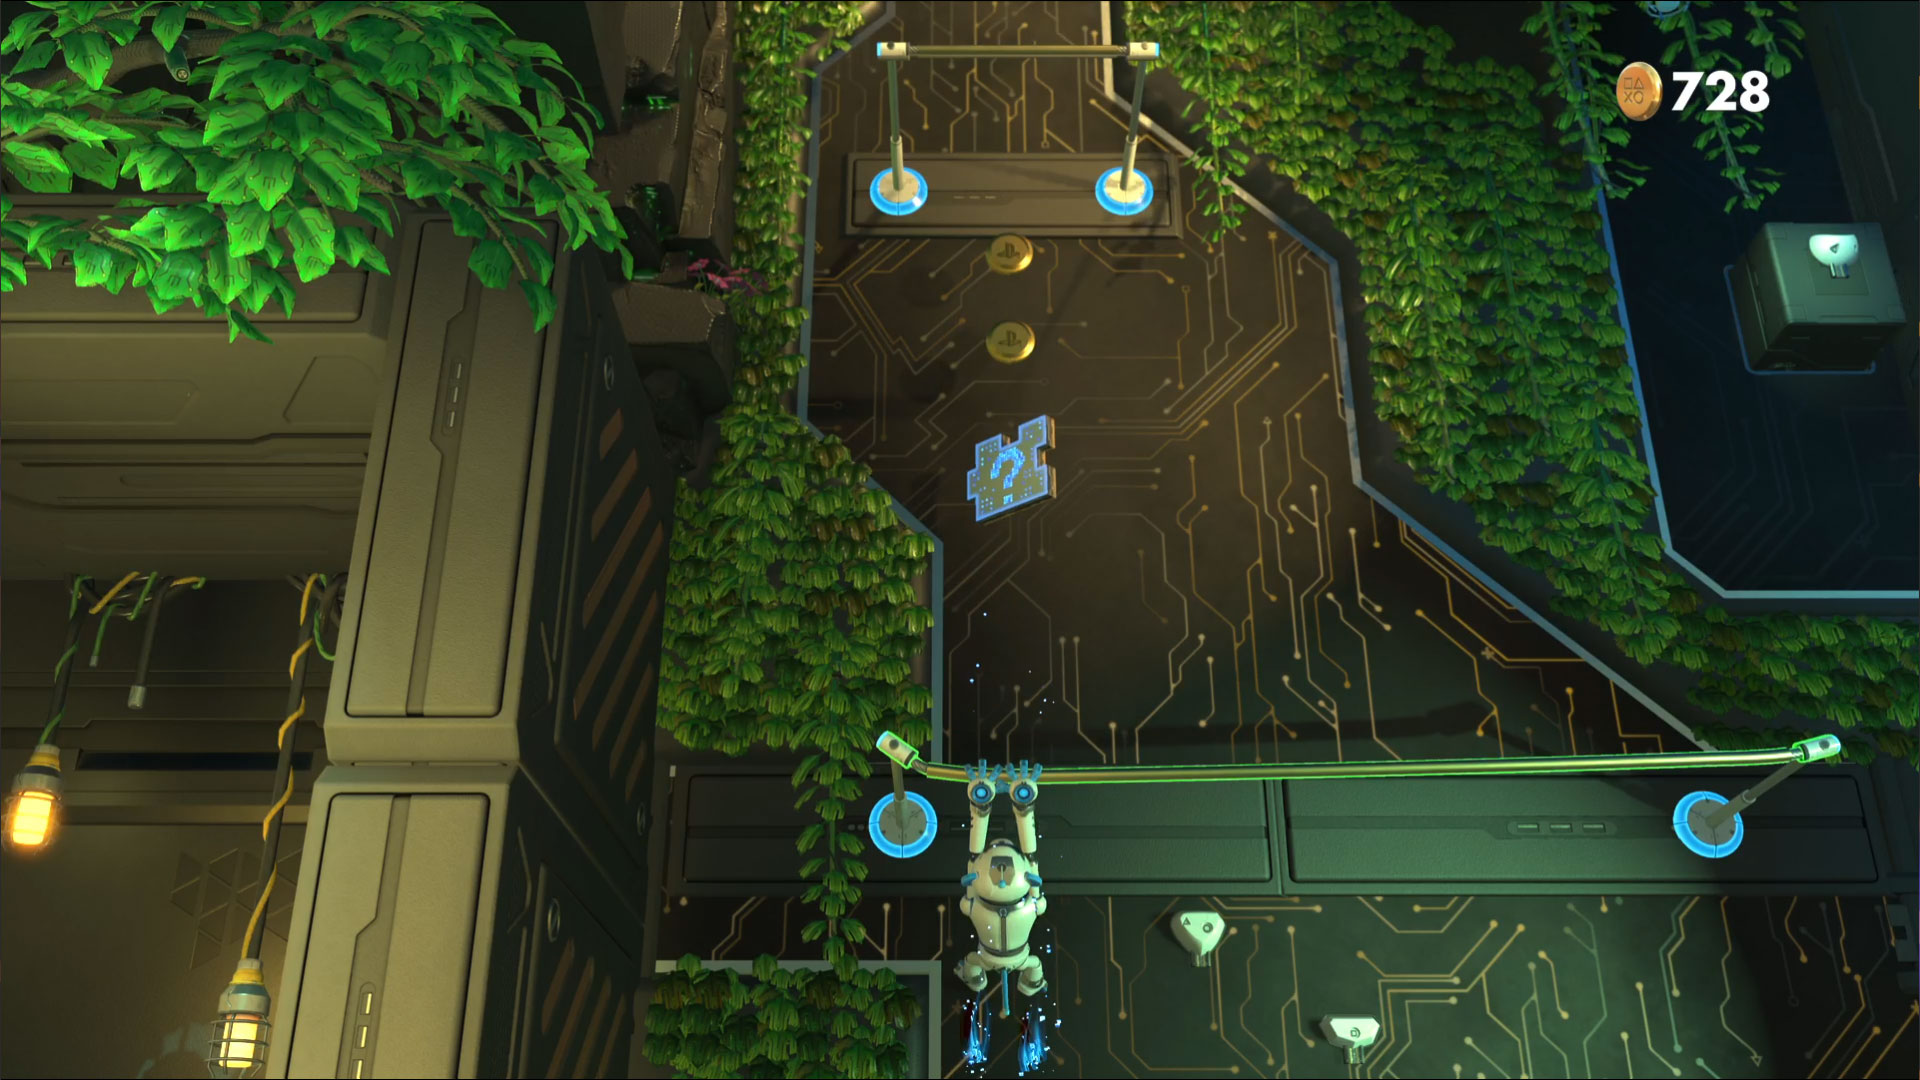
From the second puzzle piece, finding the third is just a case of working your way up the route. Swing up to the next bar, then up again to the hand holds. As soon as you lay a monkey paw on the bar above the third puzzle piece will appear between the two swing beams.
Puzzle Piece 4
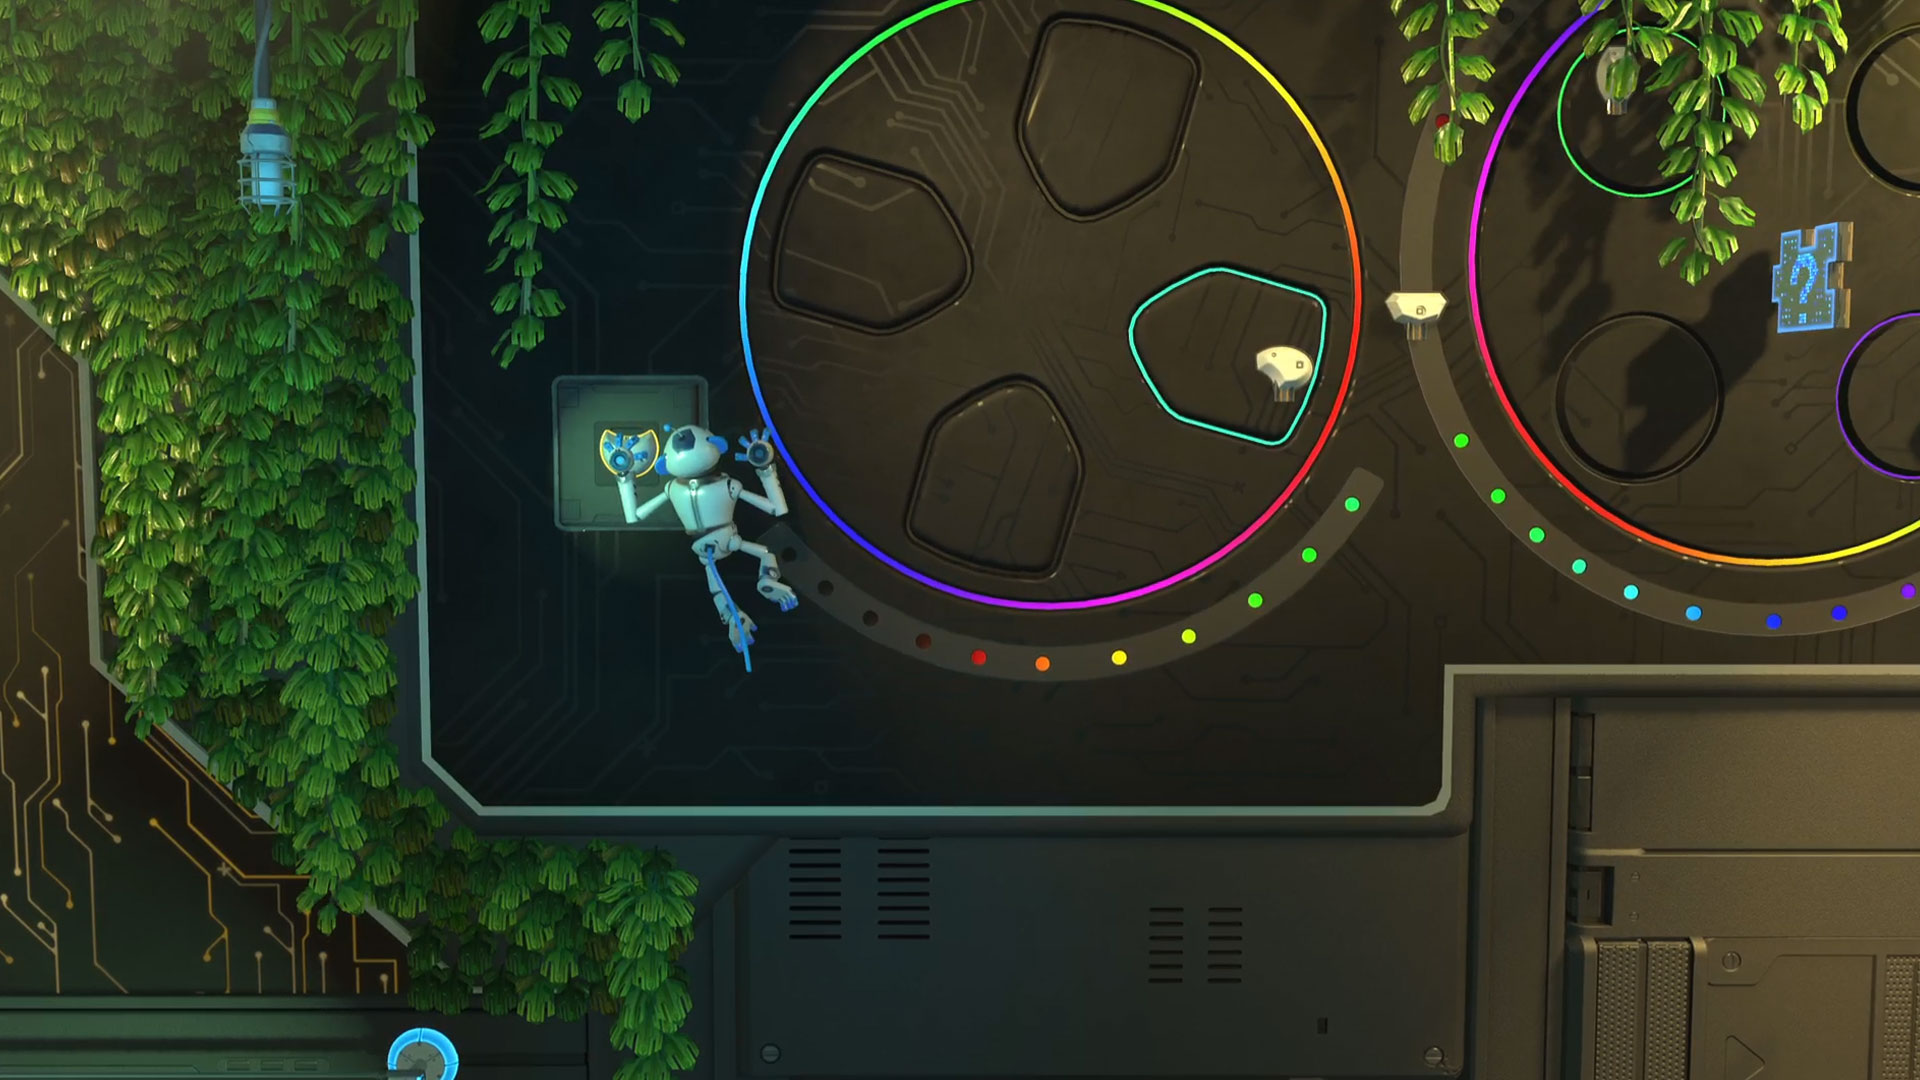
The fourth is actually just nearby here. To the right of this set of bars there is a solo white handhold, which you'll need to swing across to. Grabbing a hold of this will reveal a new section with rotating D-Pads that you can clamber across to grab the final puzzle piece for this area.
GPU Jungle - Raytrace Ruins
Puzzle Piece 1
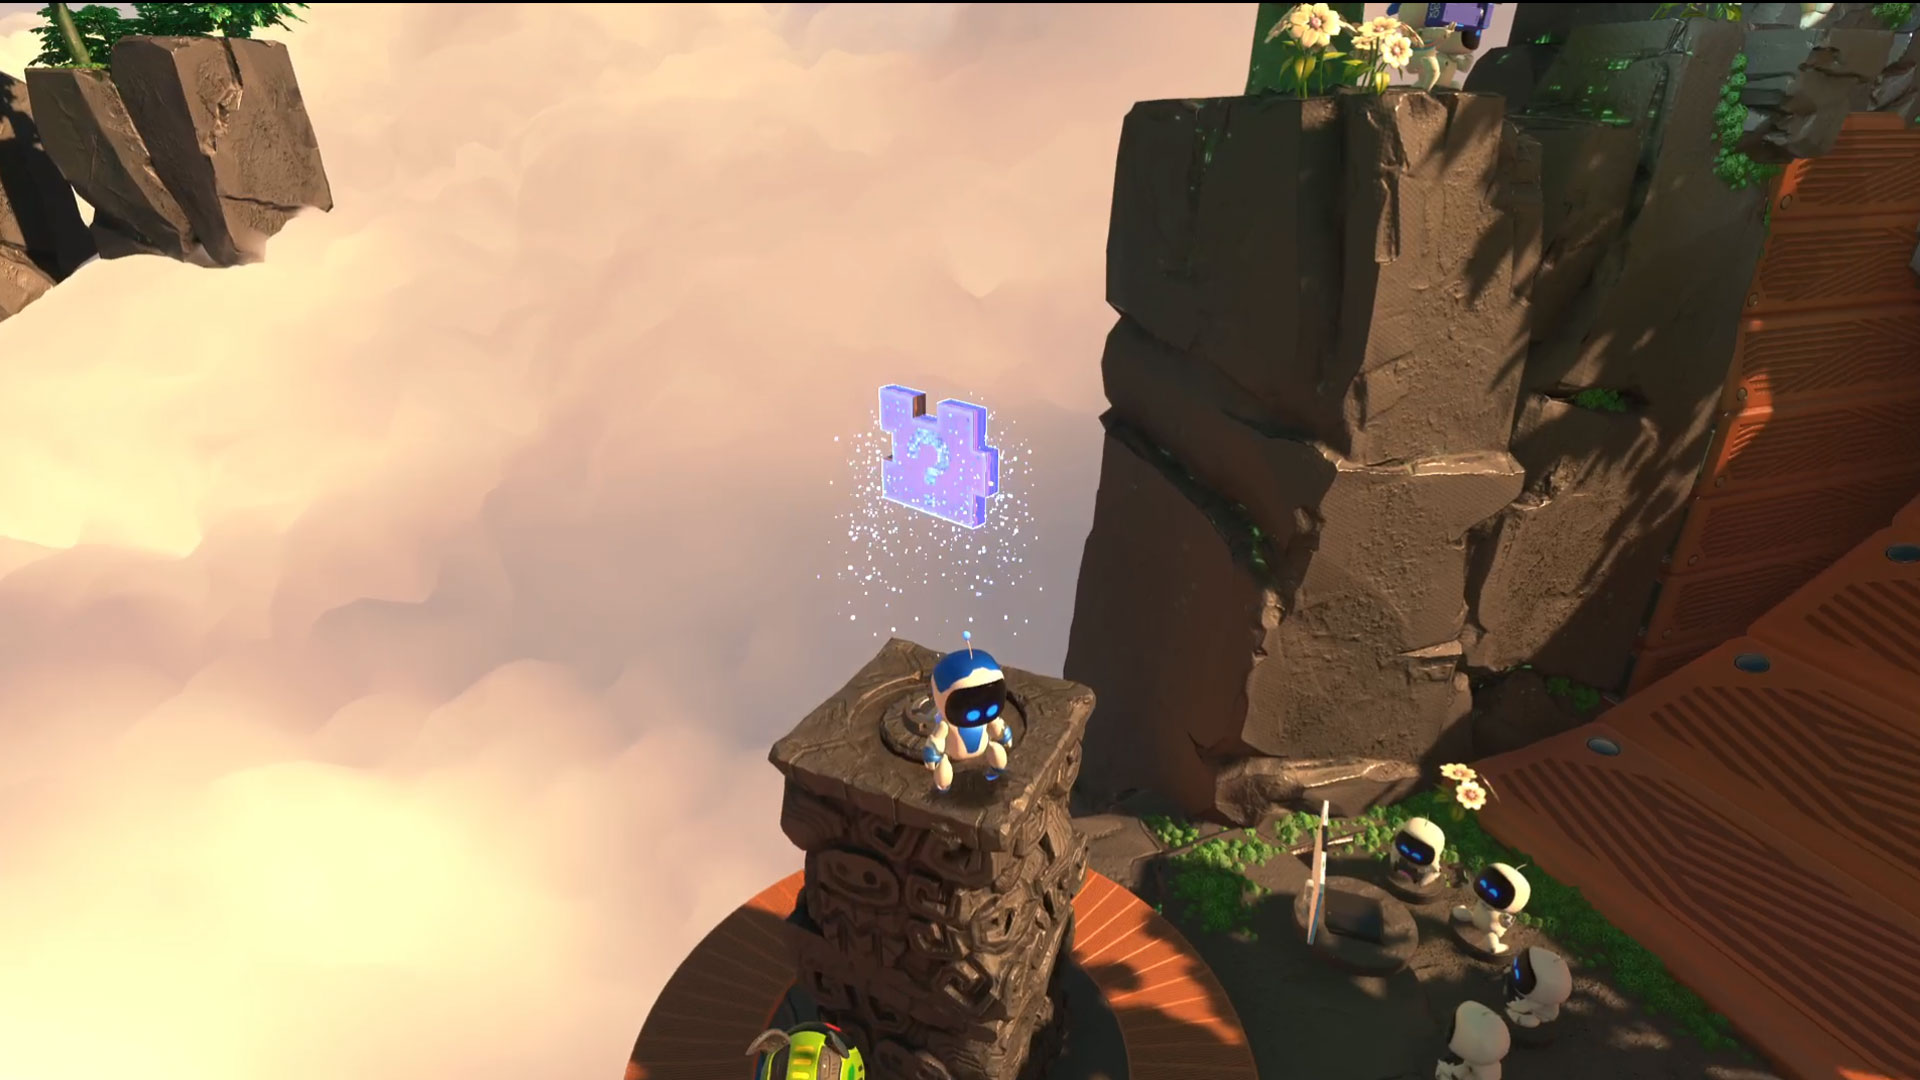
The first puzzle piece is right by the start of this level. By a group of Astro's pals playing Ninja Bots on a PS4 is a cluster of wires poking out of the ground. Pull these to reveal a totem, atop which is your first puzzle piece.
Puzzle Piece 2
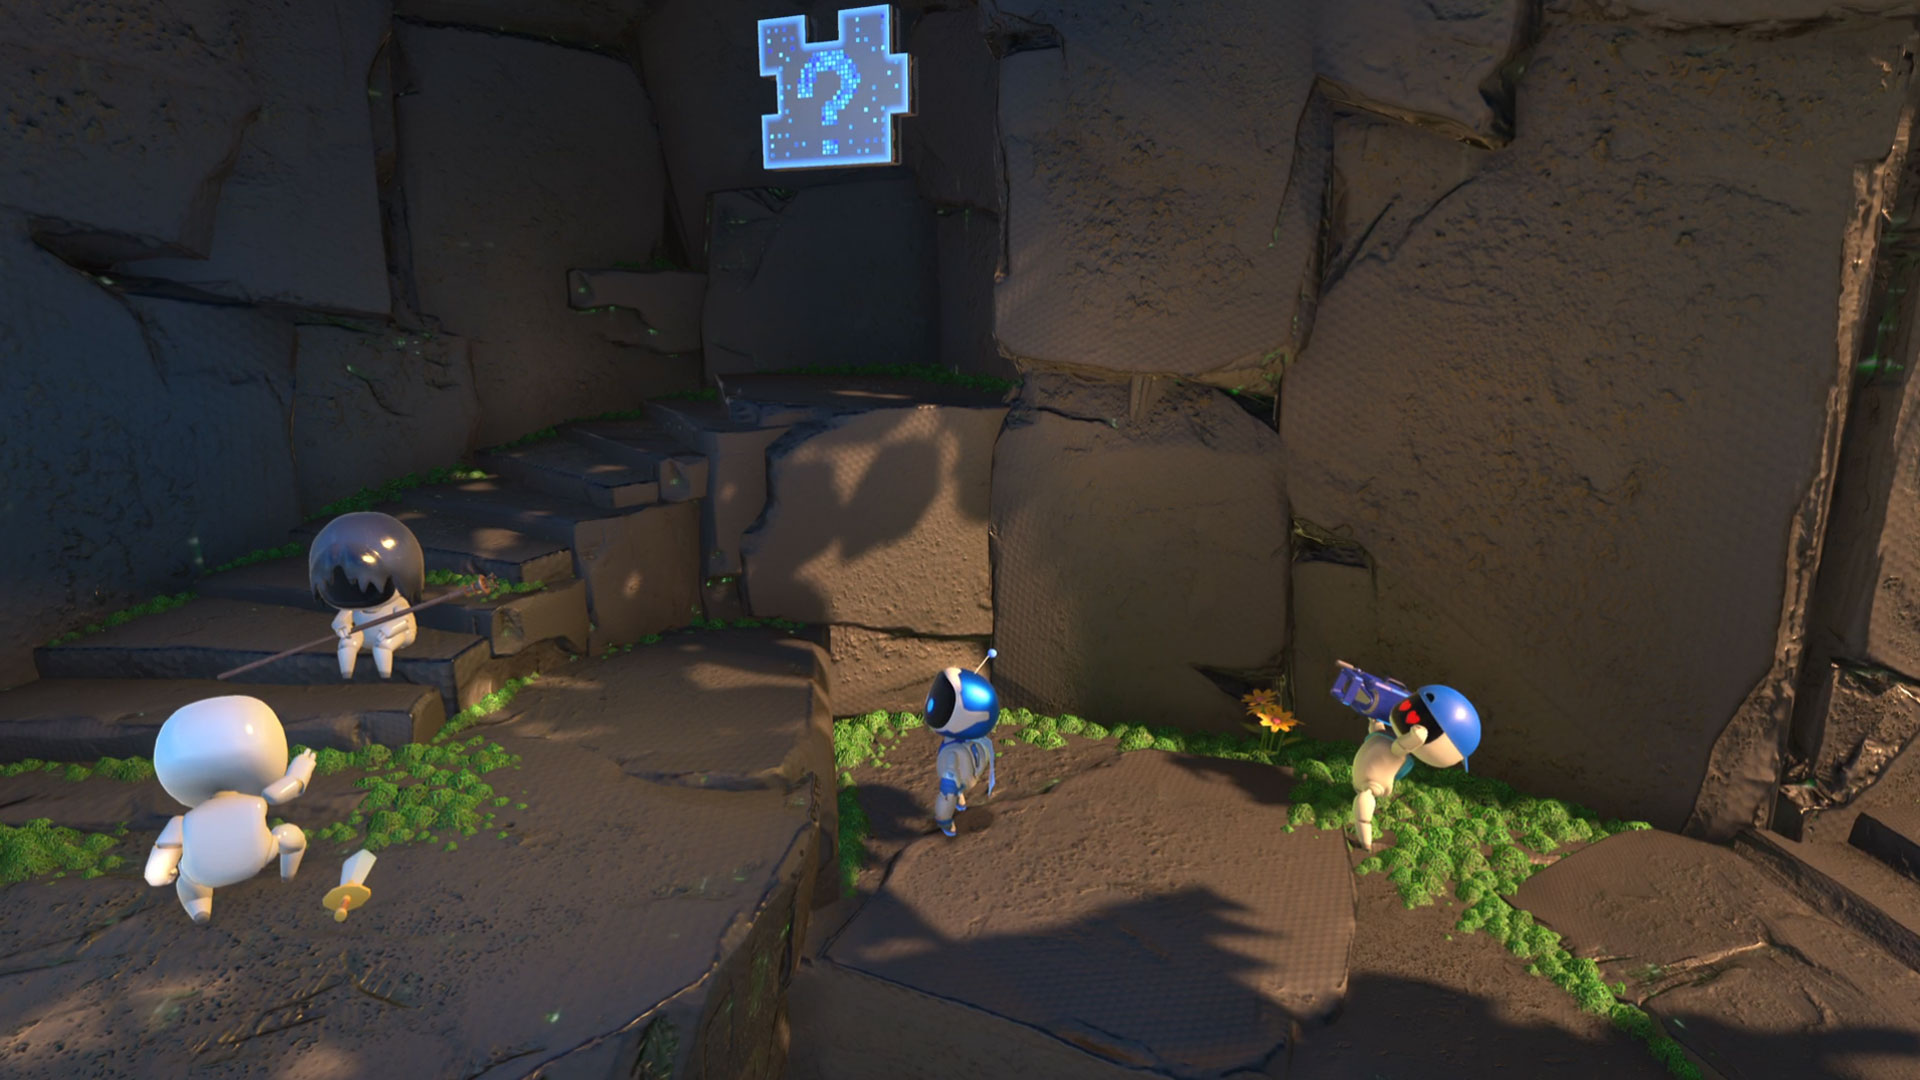
Behind the first checkpoint in this area, there's actually a little secret gangway that is easily missable. Head down the slope, and just up the steps behind the Demon's Souls tribute is your second puzzle piece.
Puzzle Piece 3
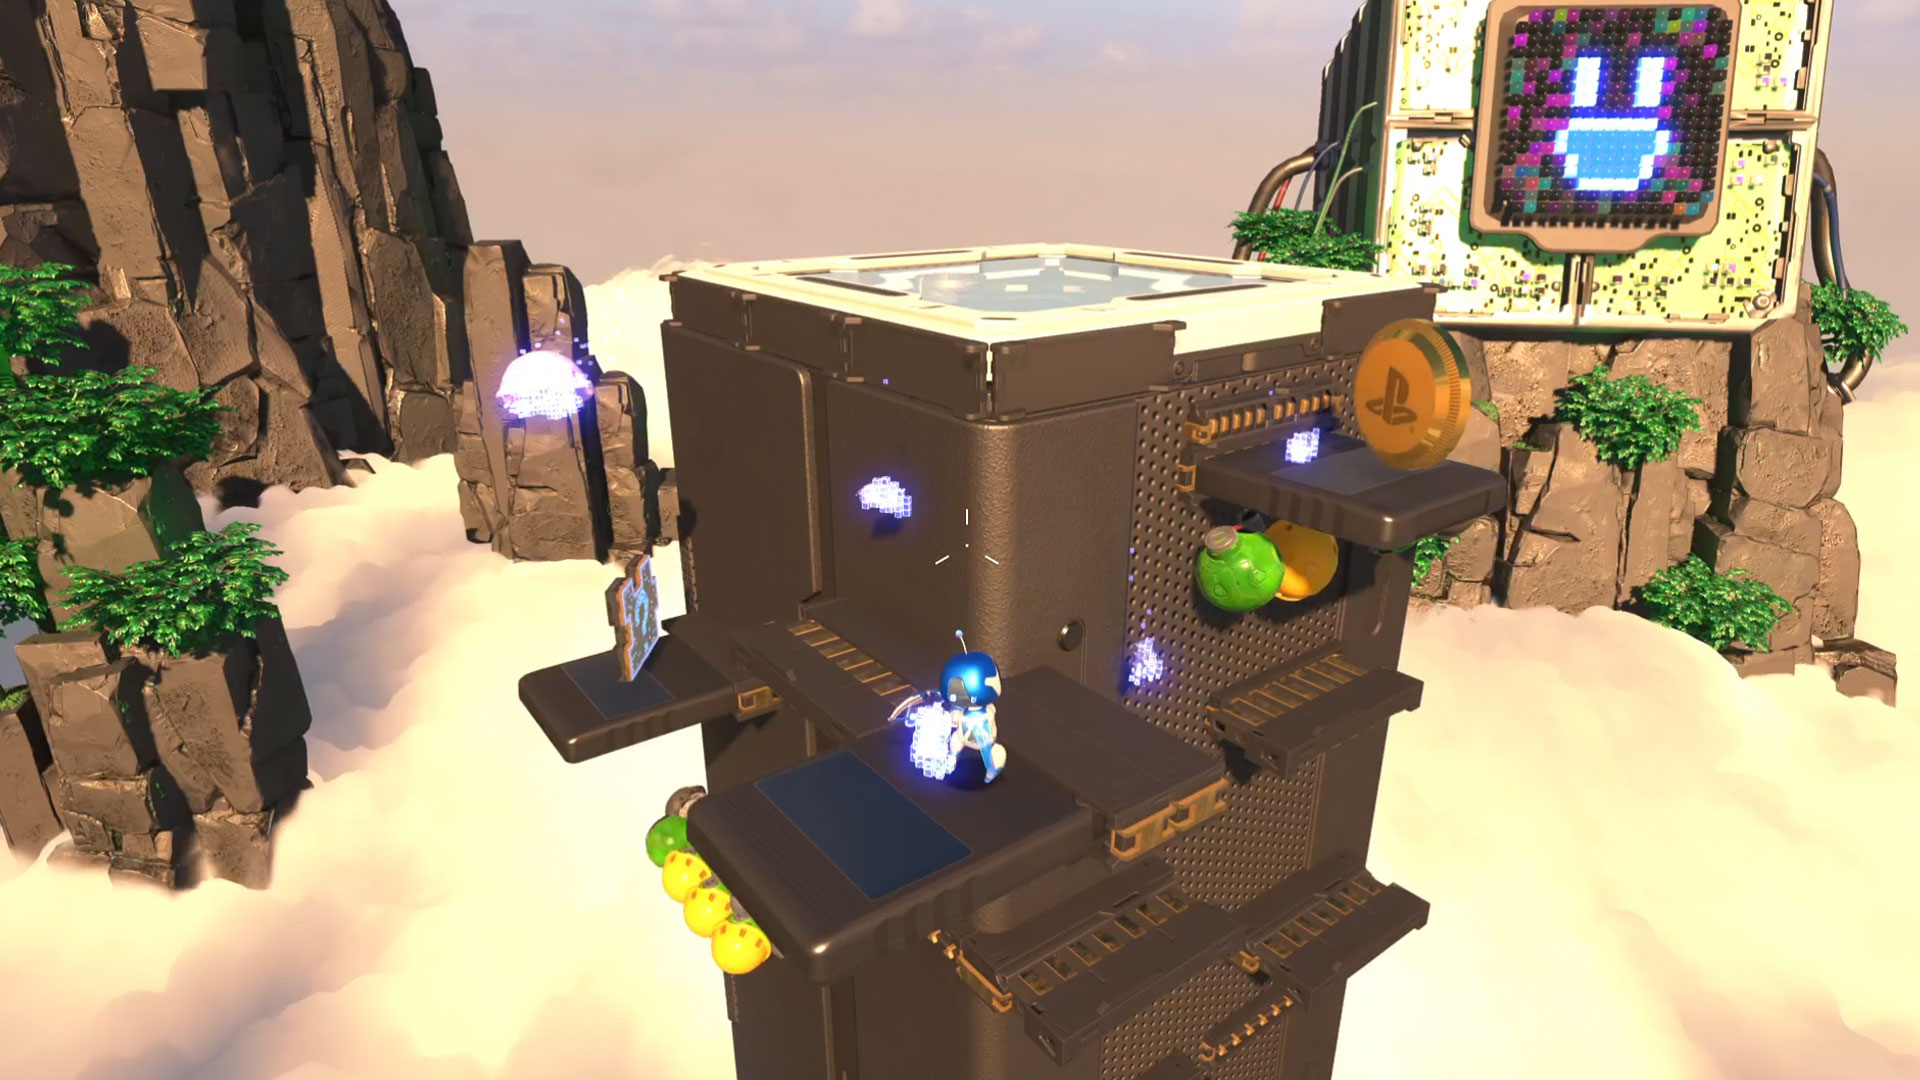
Later on, you'll find a tightrope, which, when you start crossing it you'll be blown by the wind. Jump from the middle of the rope - with the wind to aid you - to reach the platform over on the right. Hold down square to use your spin attack on the flower there to reveal a whole new column. Climb this, and the third puzzle piece is on a platform near the top.
Puzzle Piece 4
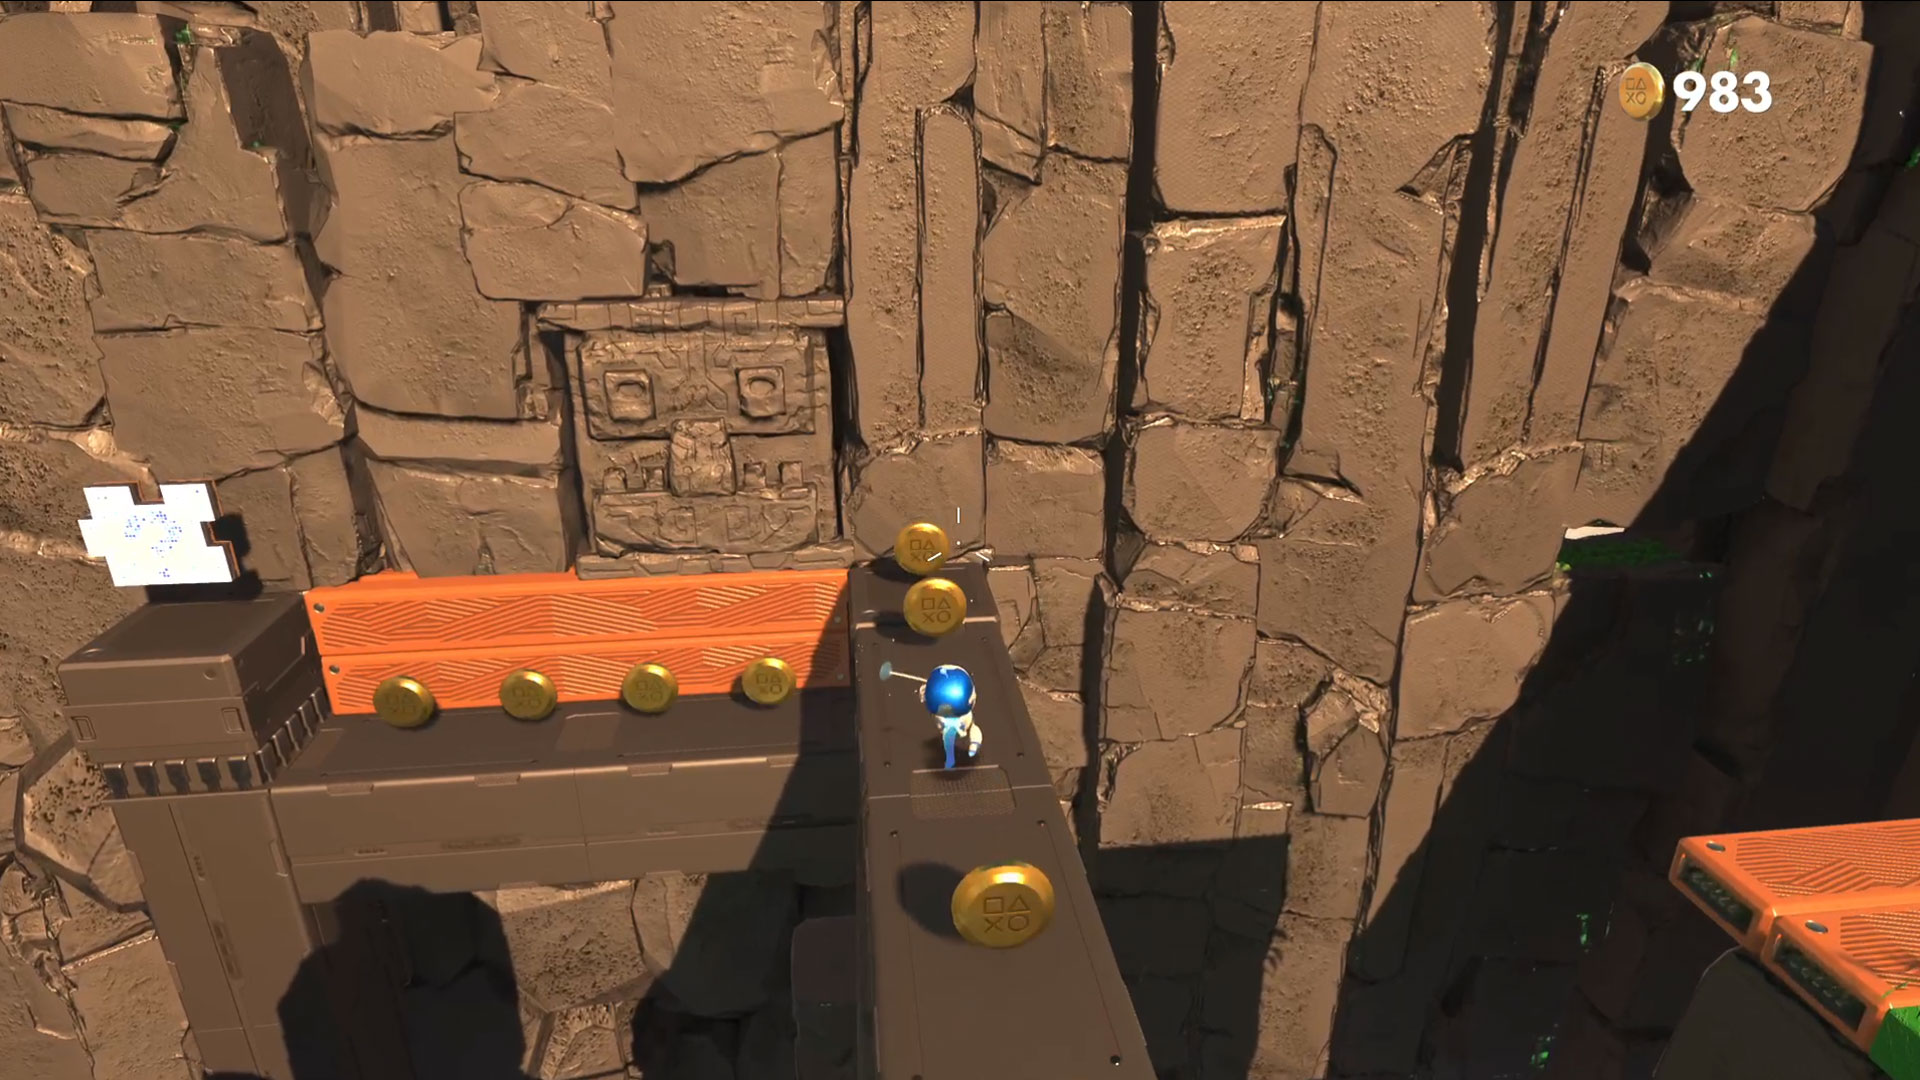
Once you've defeated the dragon, you'll be able to work your way to the end of this area. However, before you completely cross the cable to the next part, take a look through the gap in the cliff to your right. Use your bow and arrow (don't worry, there's a replacement under the wires next to the checkpoint if you've lost yours) to hit the angry face target within the hole from the cable. This will release a new area that holds the final puzzle piece for this section.
GPU Jungle - Mt. Motherboard
Puzzle Piece 1
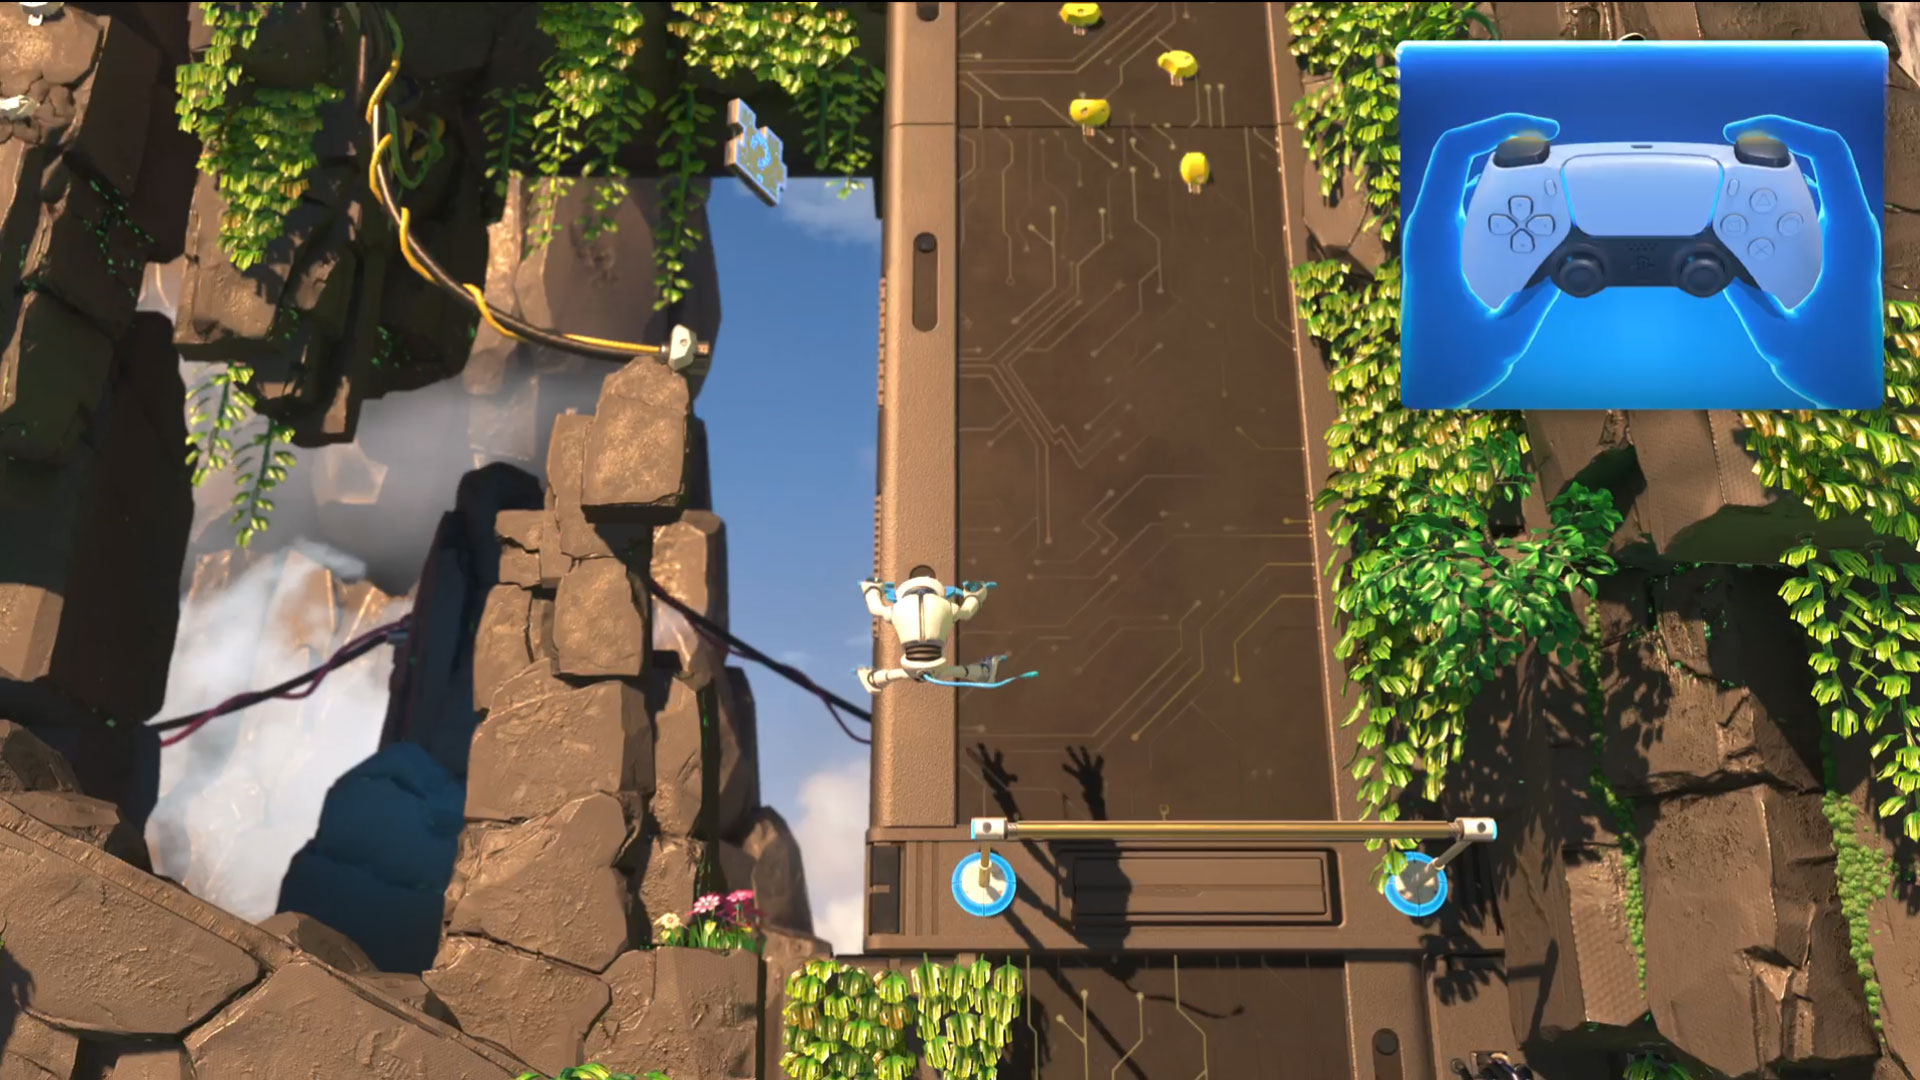
More monkeying antics from the Mt. Motherboard area, and the first puzzle piece isn't too far into this traversal piece. After you've navigated the first rocket, the first puzzle piece can be swung to up above.
Puzzle Piece 2
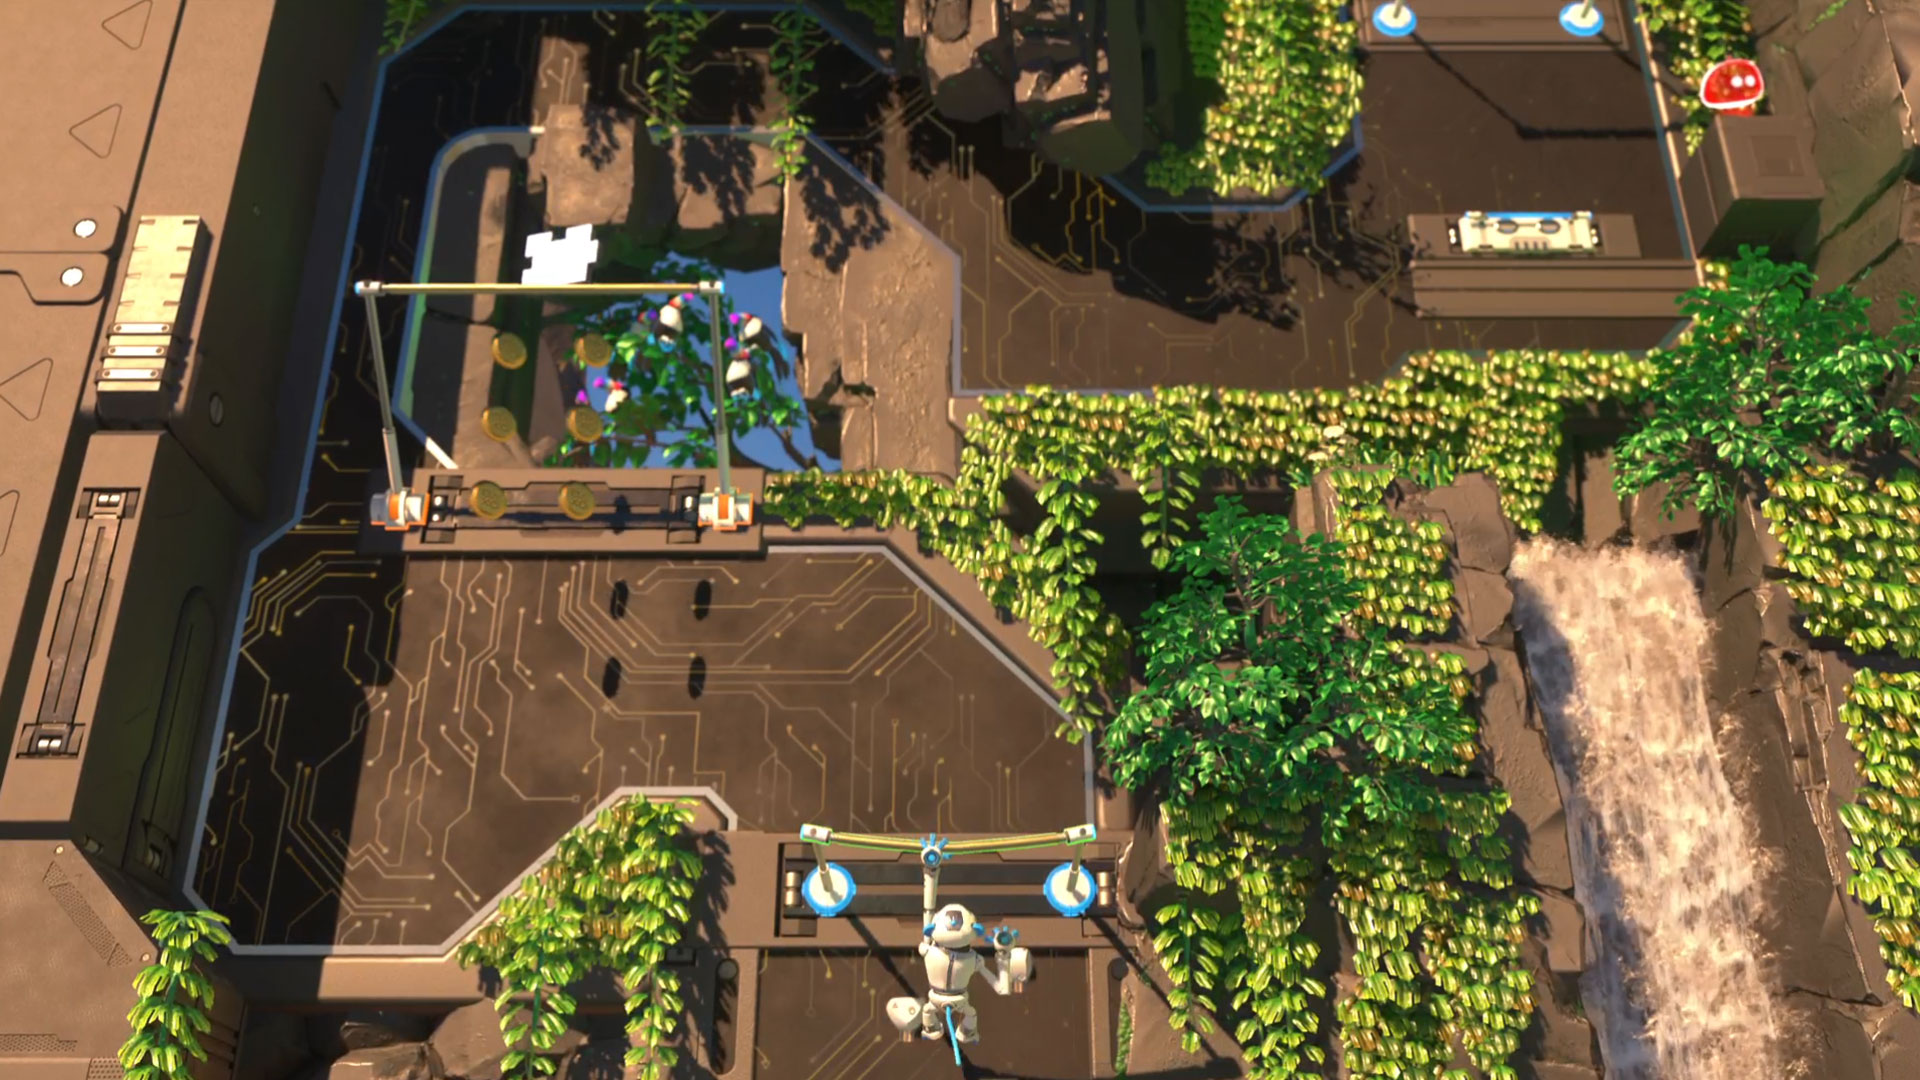
Follow the swing bars up and up, and you'll find the second puzzle piece not too far away, again in plain sight.
Puzzle Piece 3
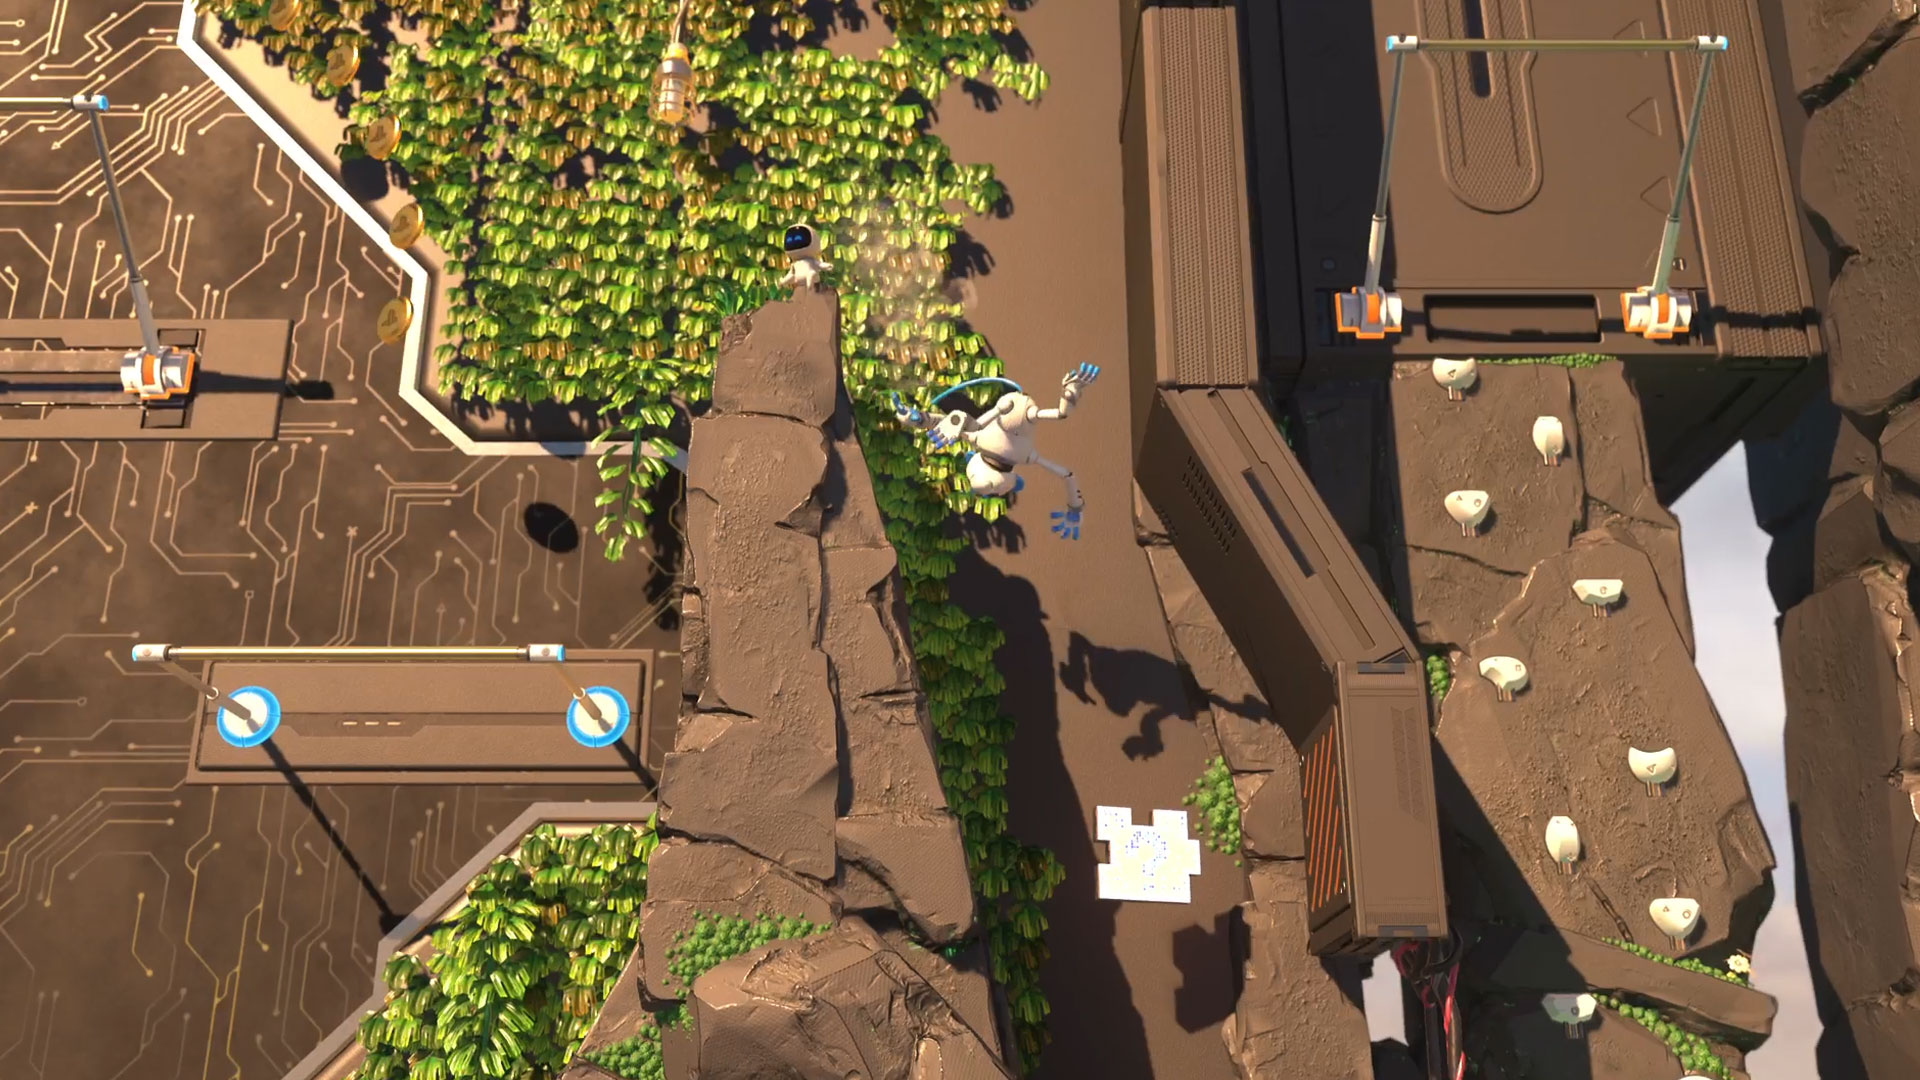
After the section where you have to move across handhelds on a rotating cylinder, you'll reach a checkpoint. From here jump up to the second swing bar, but as you move off from there go right and fall down the chasm to collect the third puzzle piece.
Puzzle Piece 4
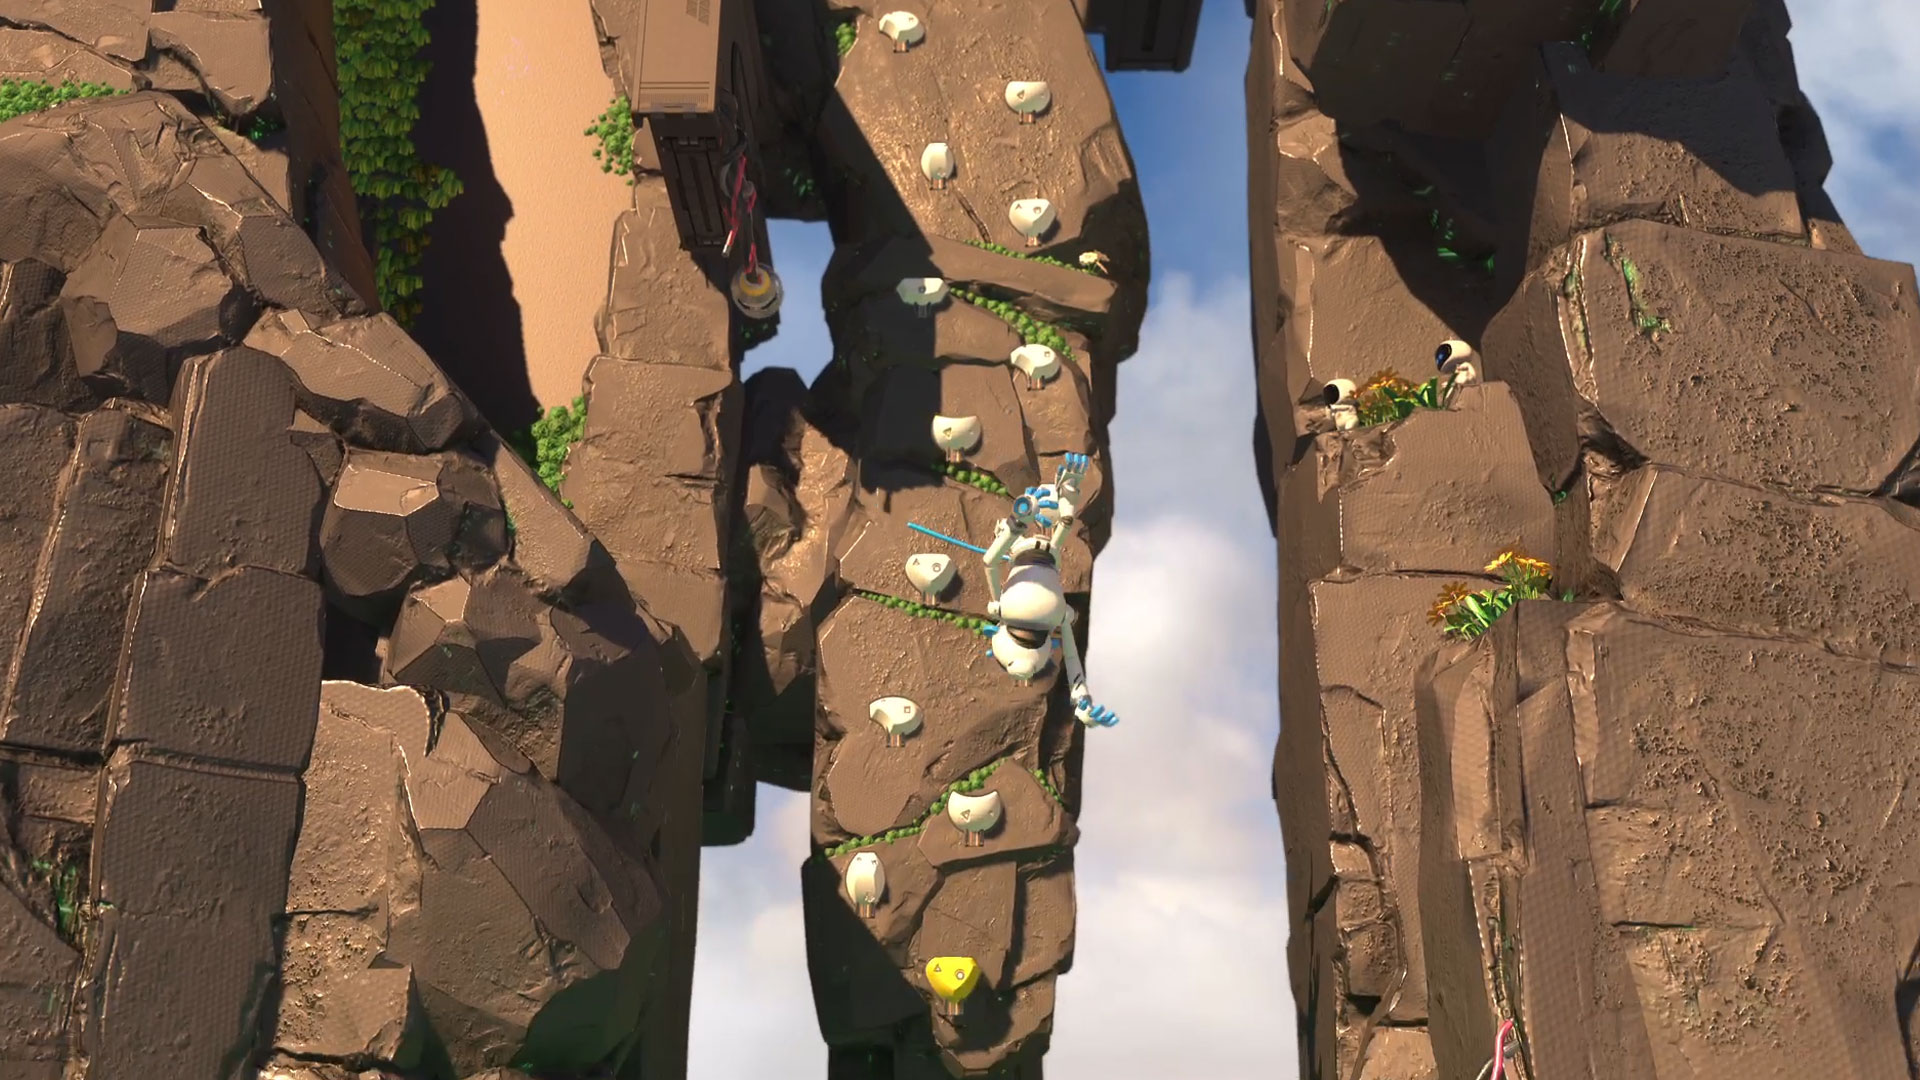
Continue down this hidden area from puzzle piece three, as the fourth is also hidden quite carefully in this area. There are handholds that lead out of this secret passage, and the very bottom of these is yellow. Usually, this means it'll give you a coin when you grab it, but here, it's the fourth puzzle piece. Sneaky!
Memory Meadow - Gusty Gateway
Puzzle Piece 1
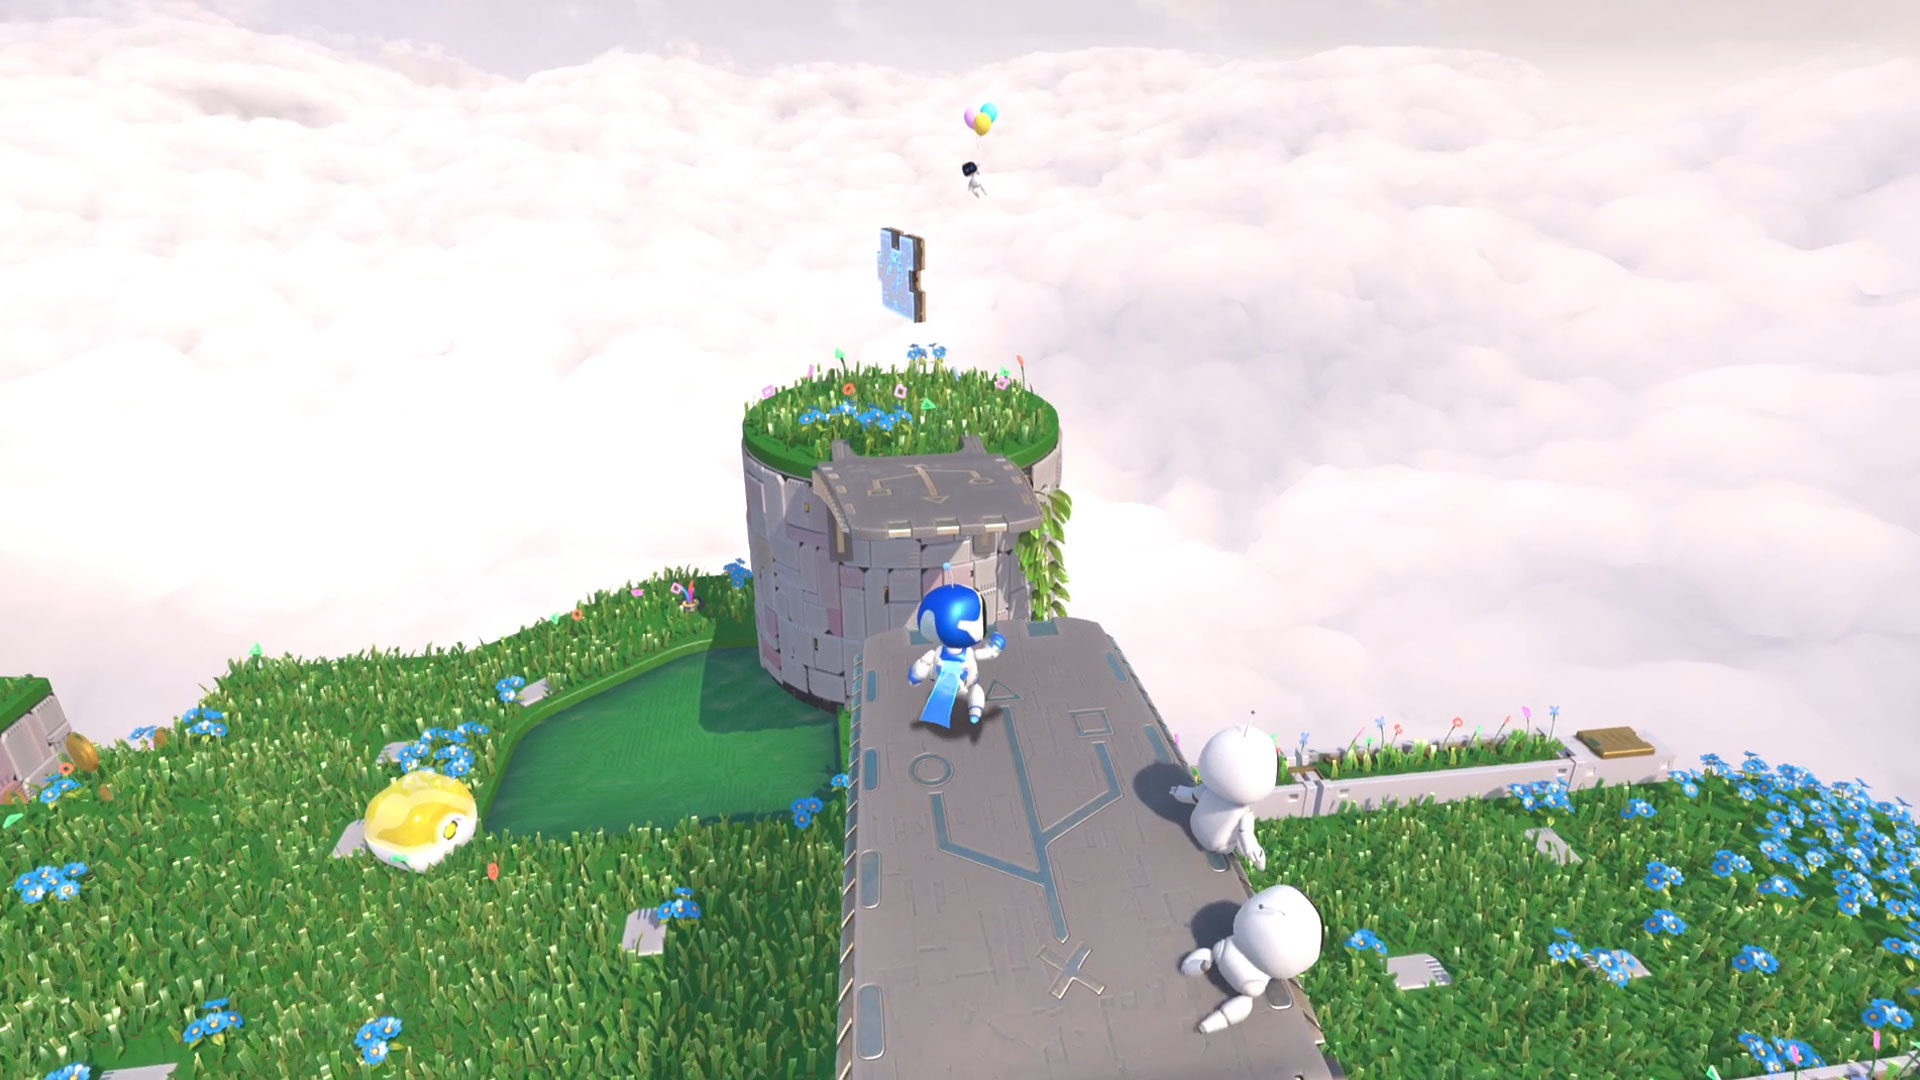
In this very first area with the cats and flowers, there's a little overhead archway you can easily reach via the tightrope over to the left. Go up here, and leap across the little gap to get your first puzzle piece in this area.
Puzzle Piece 2
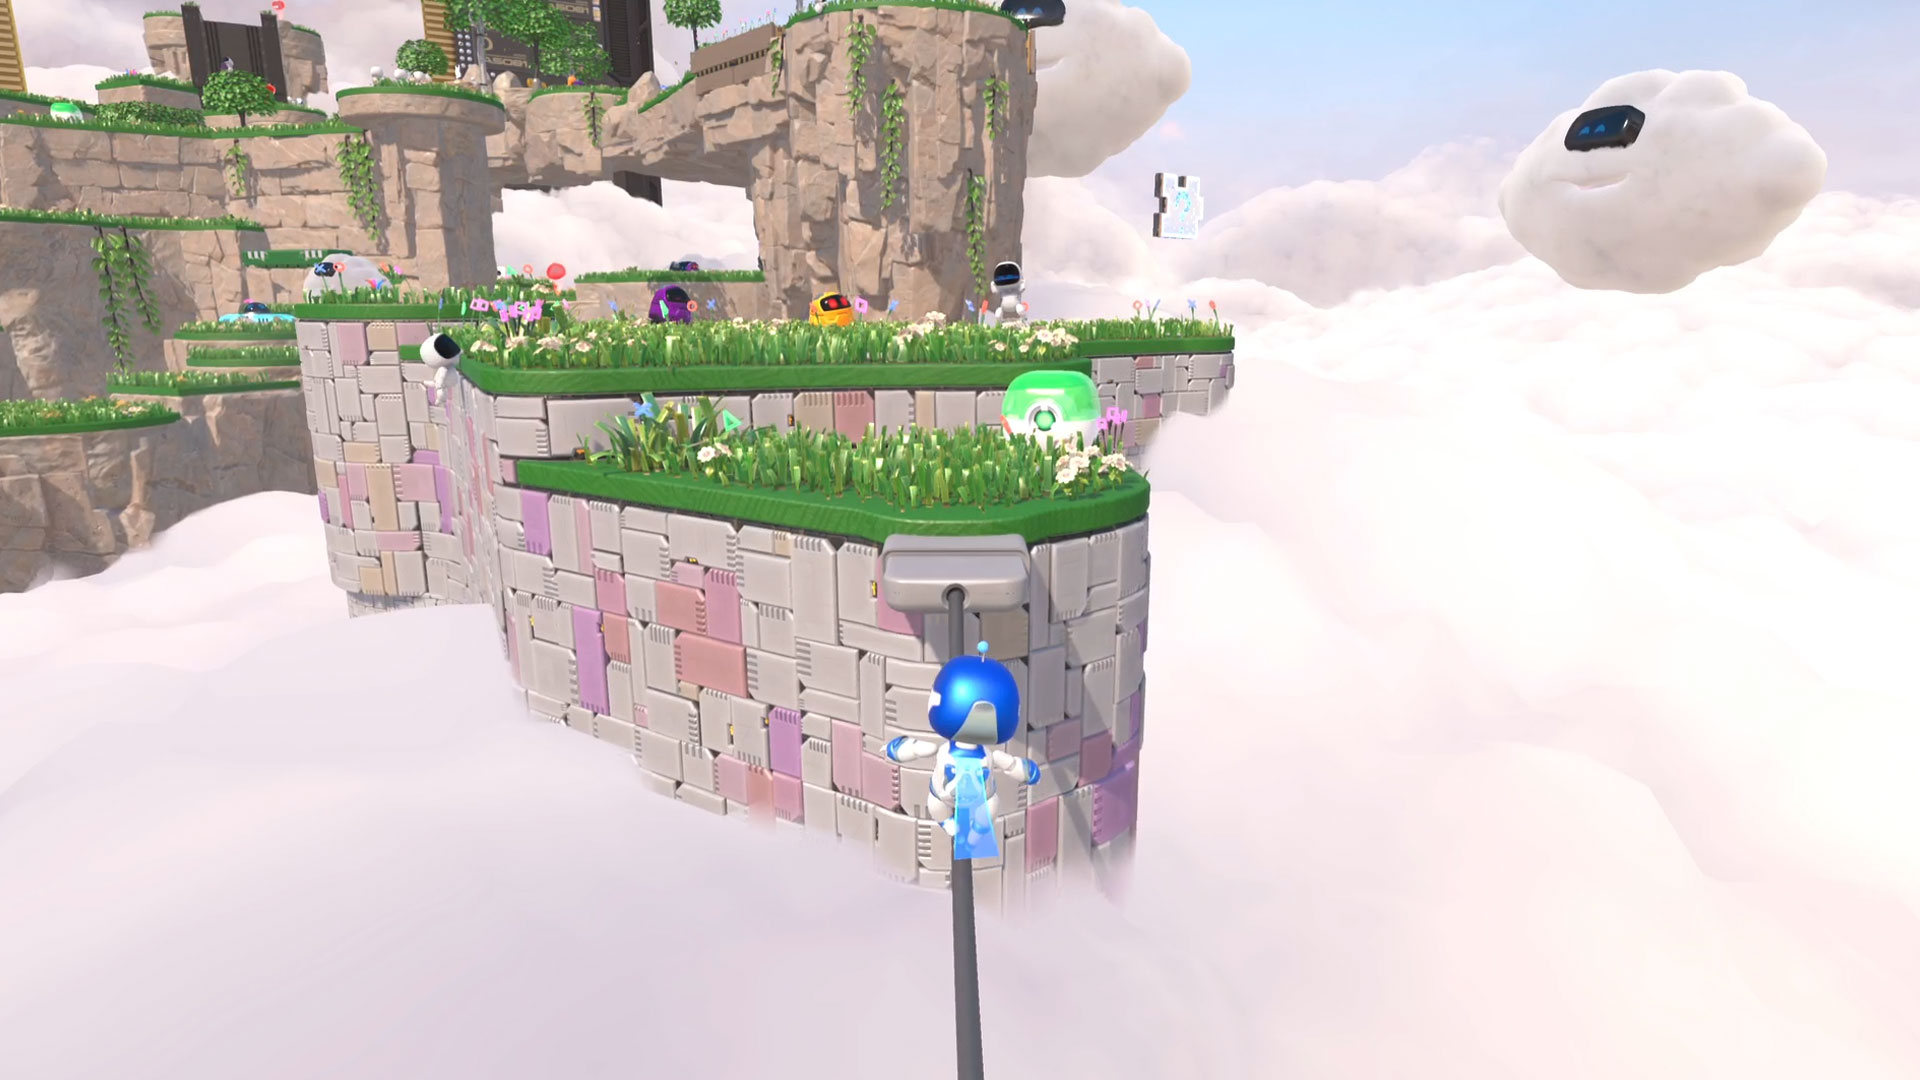
From the first area, cross the tightrope to a second cluster of grassy platforms. There's a cloud there blowing a gale, but on the outcrop that's closest to it is your second puzzle piece.
Puzzle Piece 3
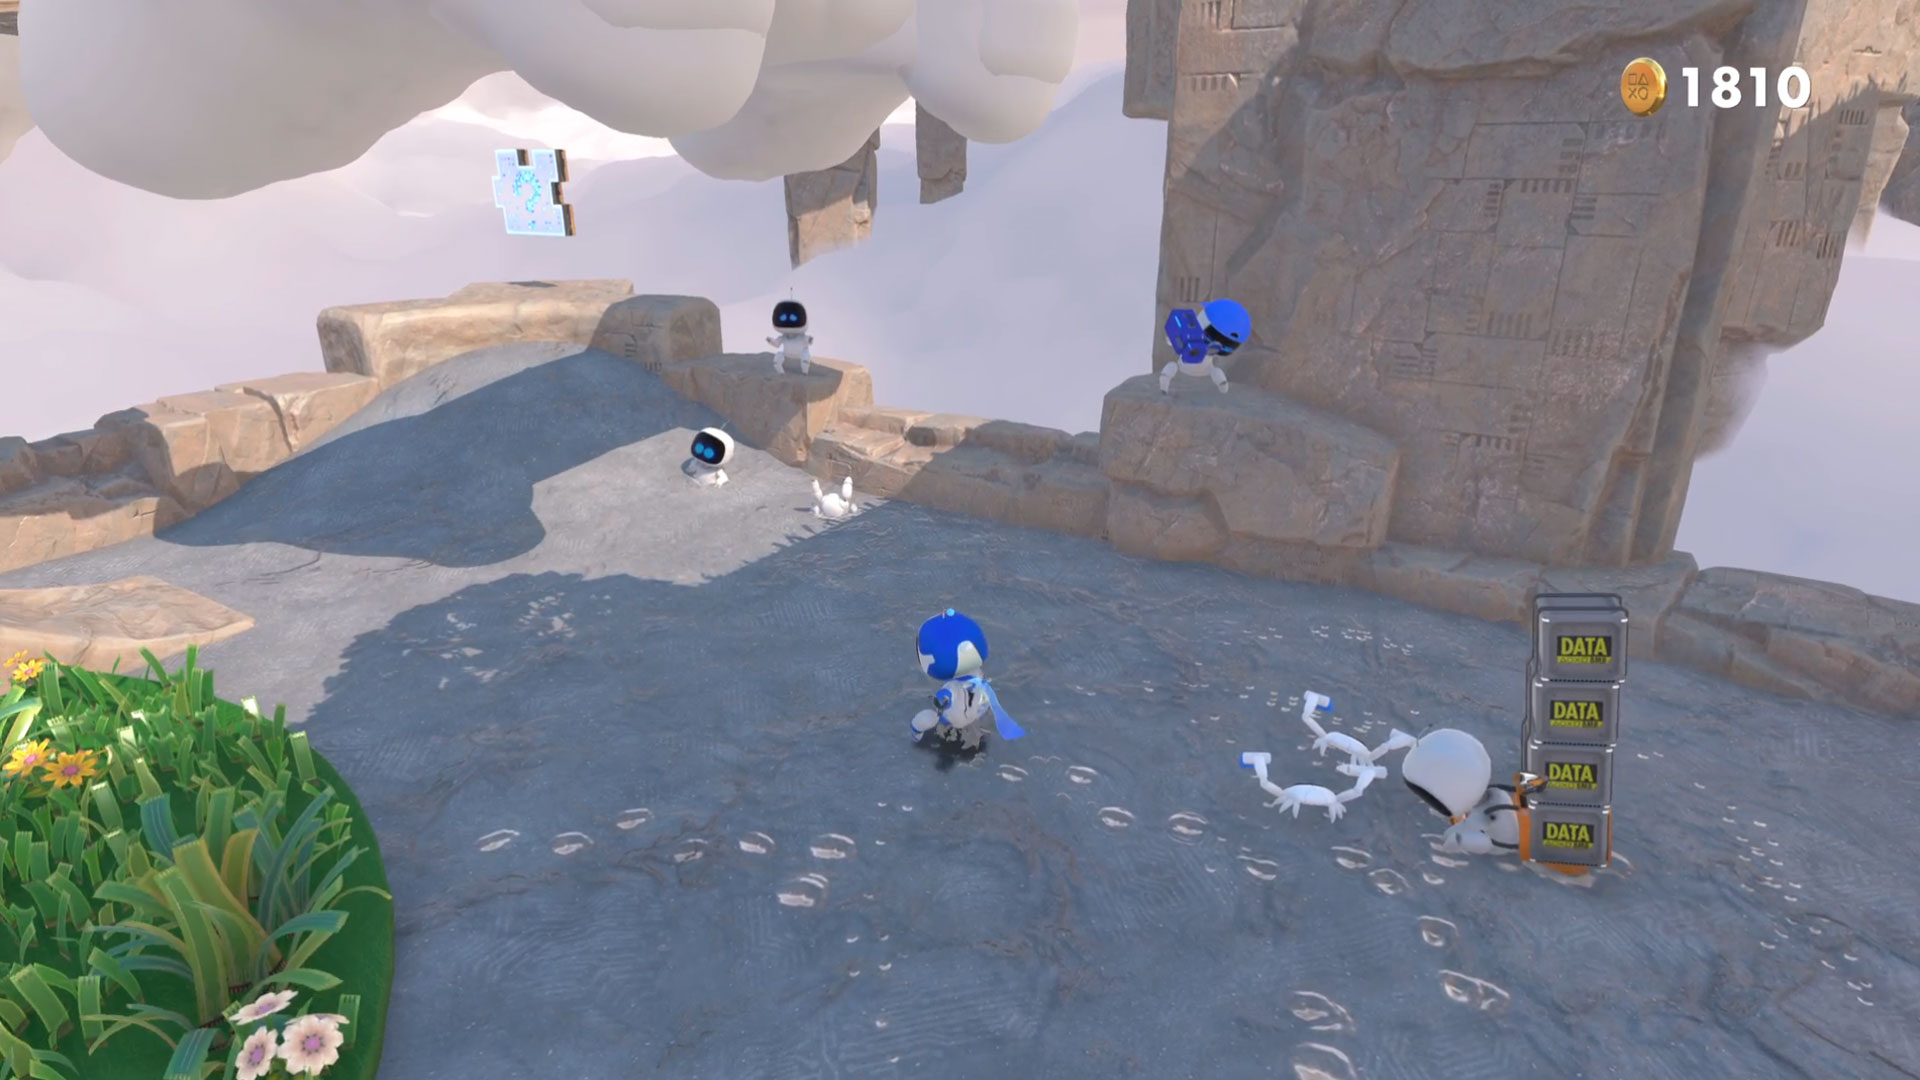
From here follow the level around until you reach a second clay pit area. At the opposite corner to which you arrive is the third puzzle piece just sat there spinning, waiting for you. And right near a Death Stranding reference too!
Puzzle Piece 4
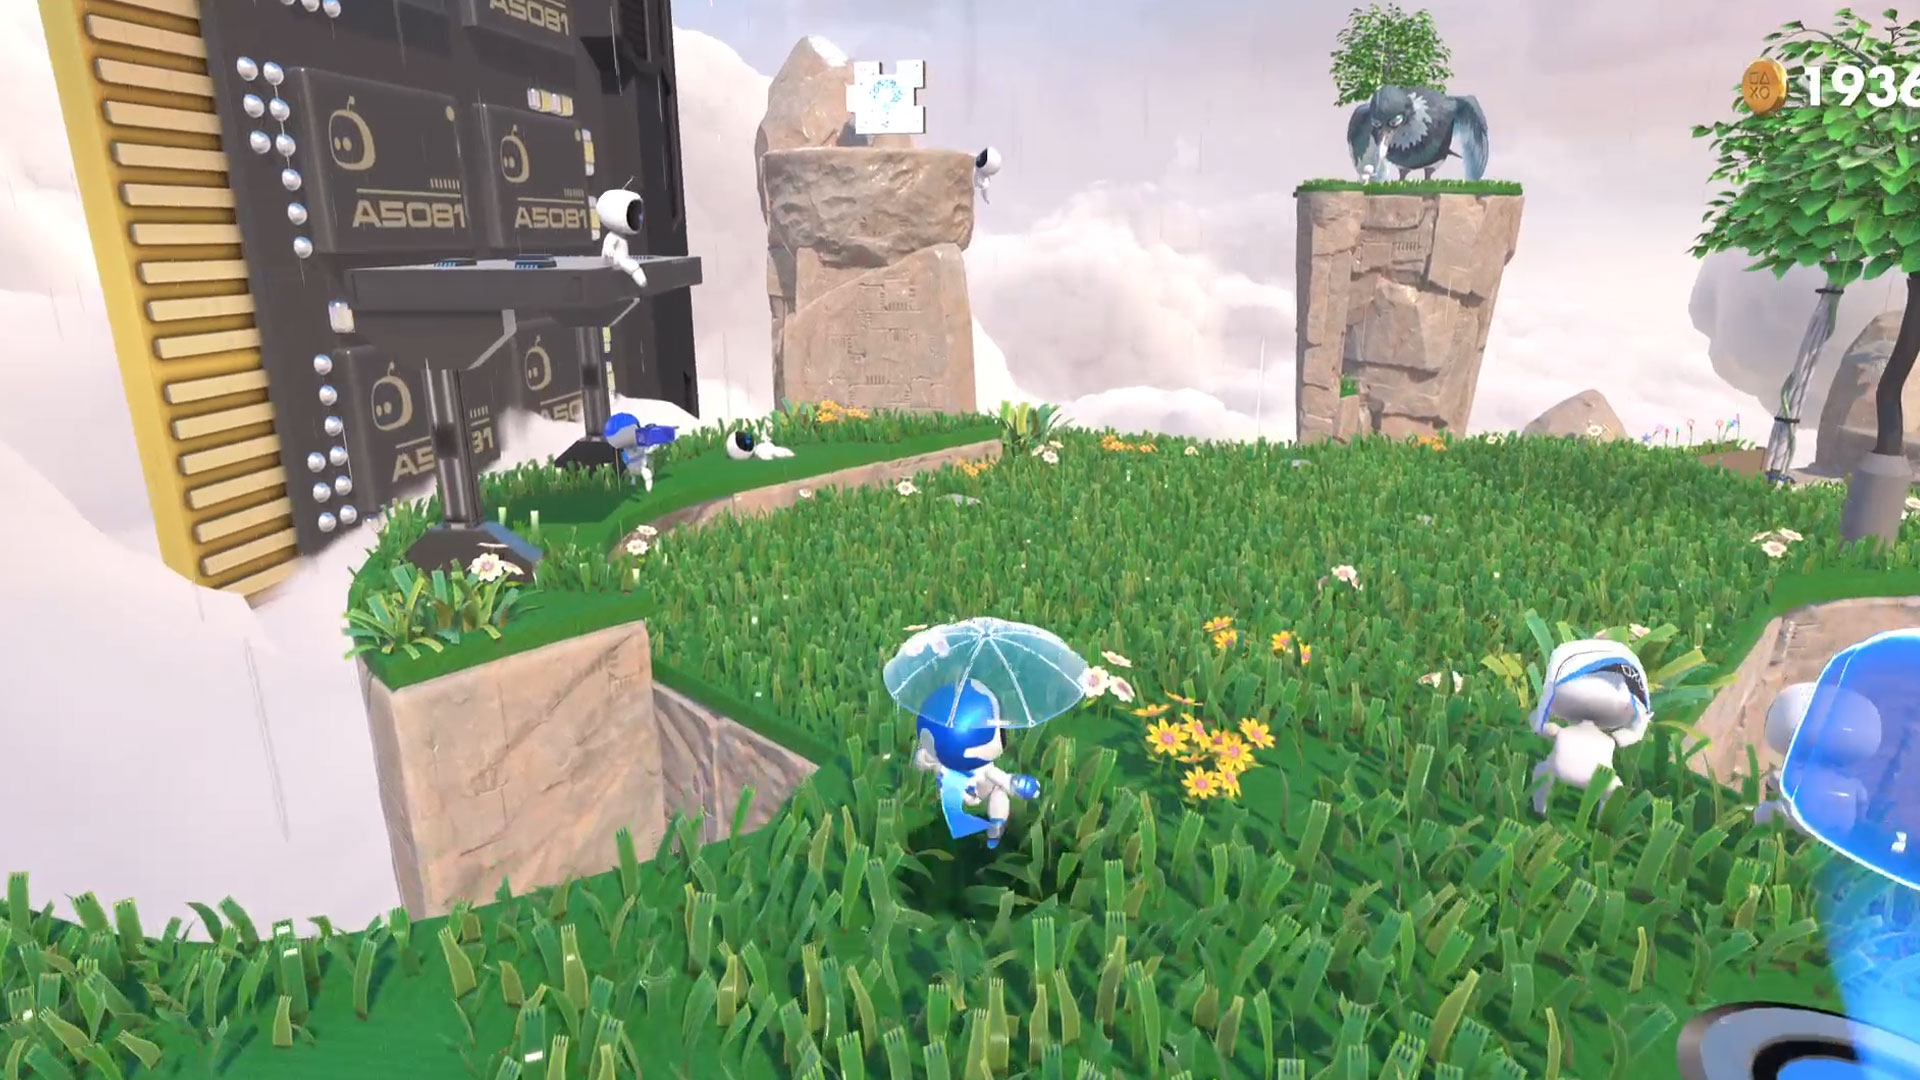
When you reach the later part of this area, it'll start to rain. For the final puzzle piece, head to the back of the first rainy area to find a kind of shelter, with a bot sitting atop of it, and a Heavy Rain reference just beneath it. (Hint, stand below the shelter for a bit yourself to unlock a secret achievement.) Get on top of this shelter, and then hop over to the tall platform to its right for the final puzzle piece.
Memory Meadow - Fastlane Fields
Puzzle Piece 1
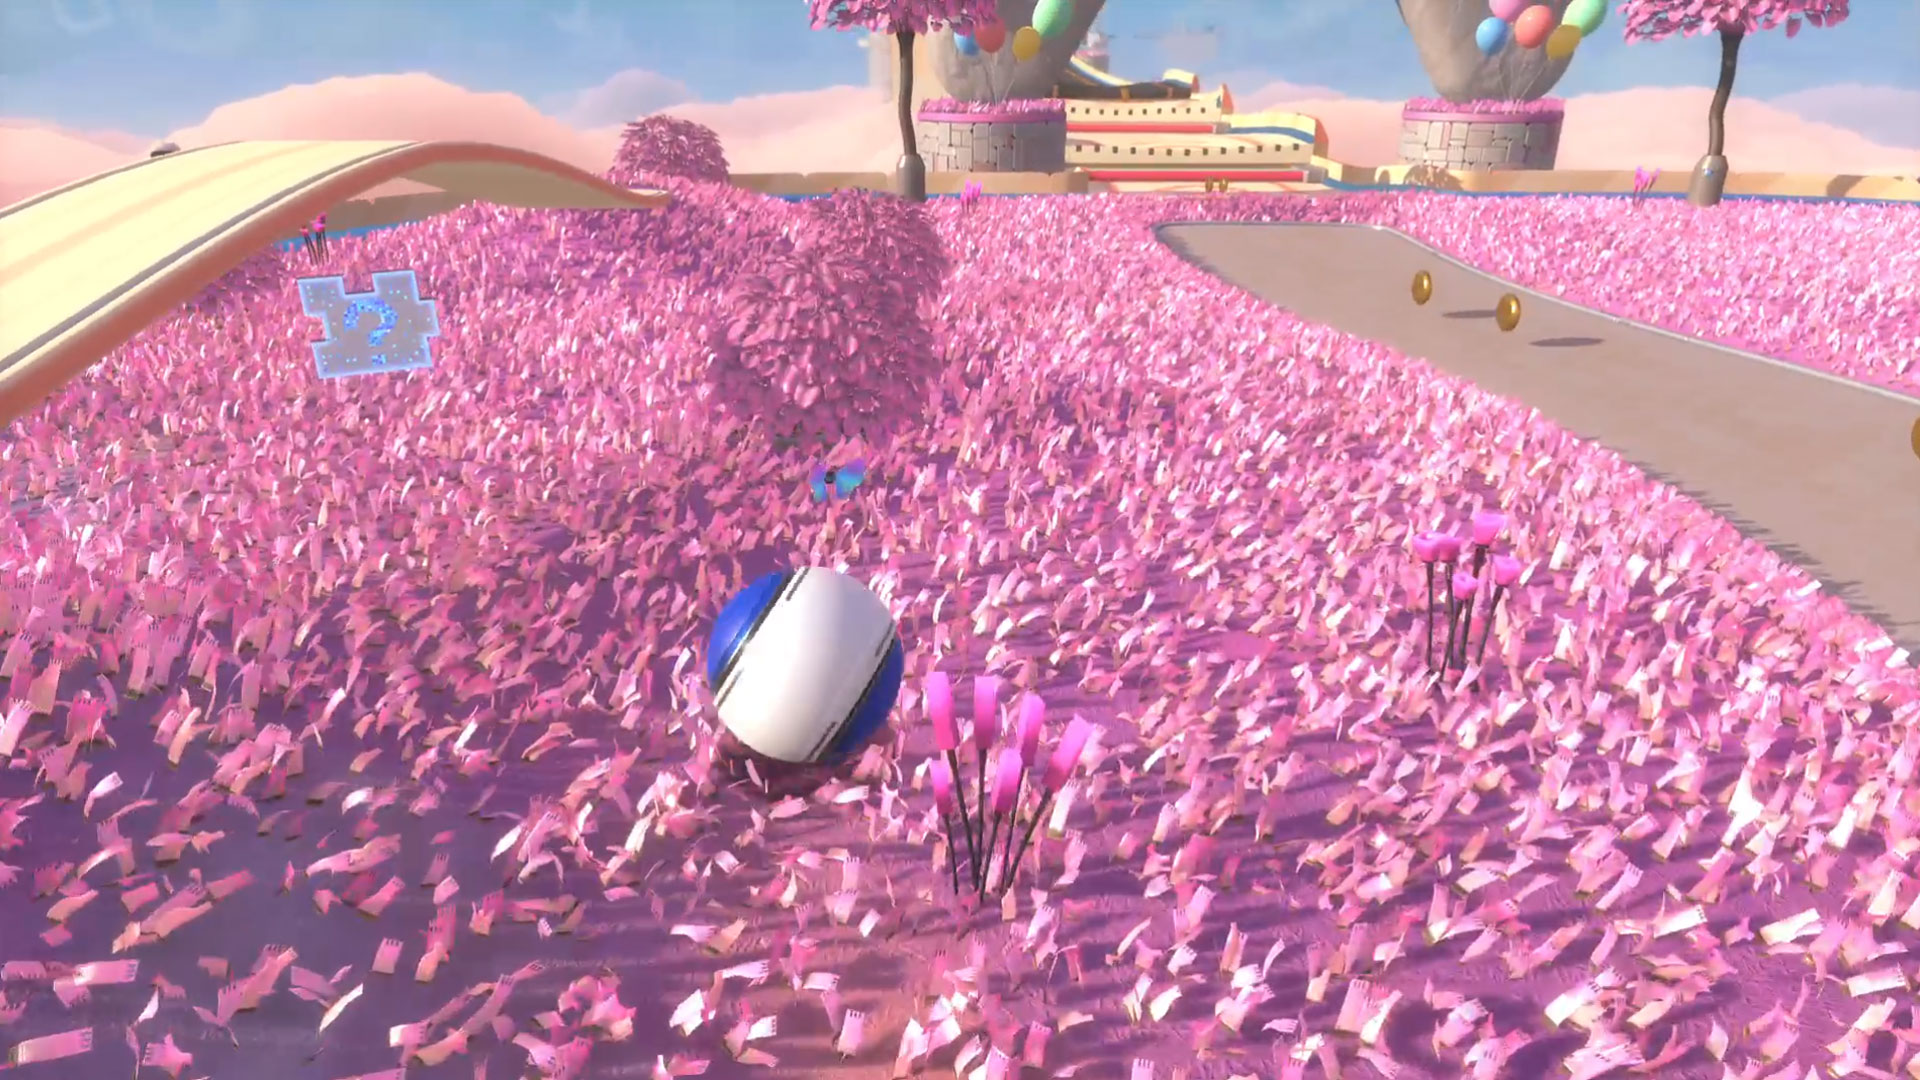
When you've first become a ball and catapulted yourself into the pink grassy field, look for the second bridge on the left-hand-side of this area. Underneath is the first puzzle piece.
Puzzle Piece 2
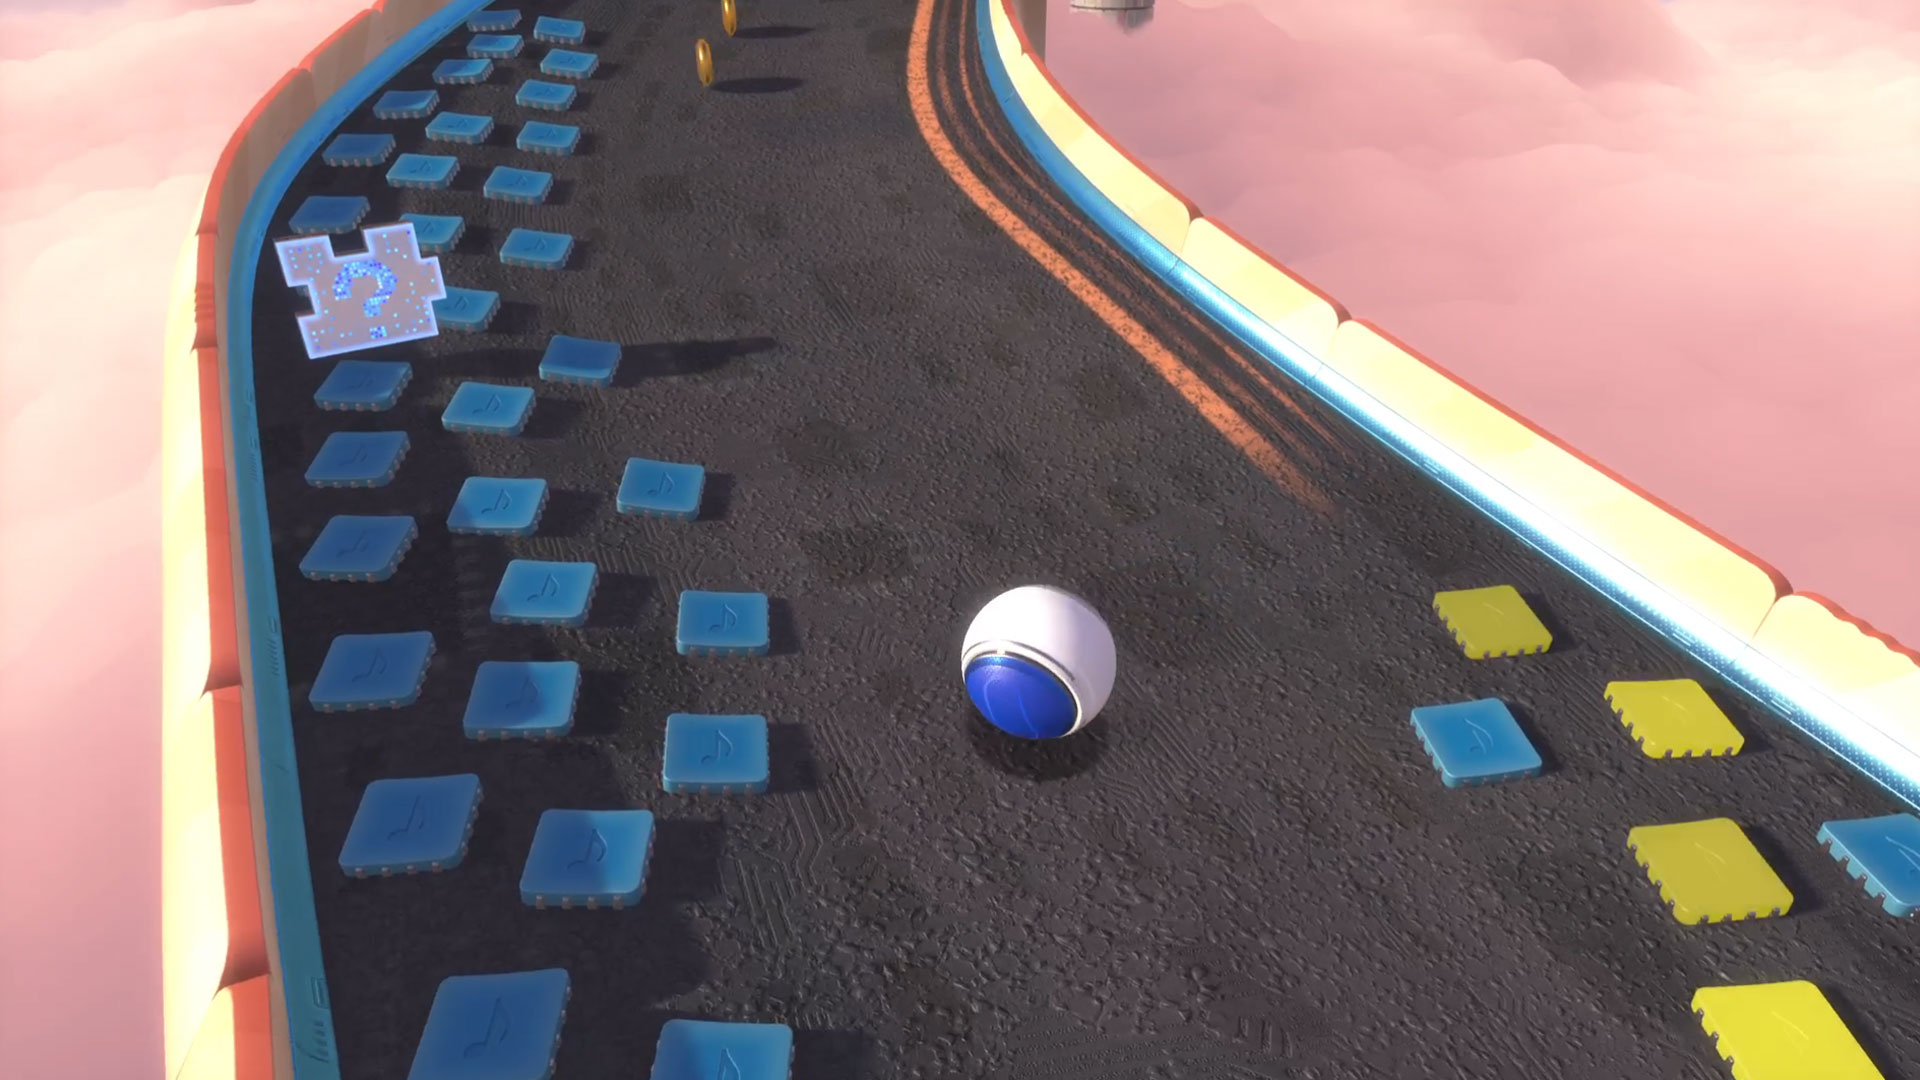
The second puzzle piece is just in the next section along the tarmac road. It's on the left-hand-side atop some musical buttons.
Puzzle Piece 3
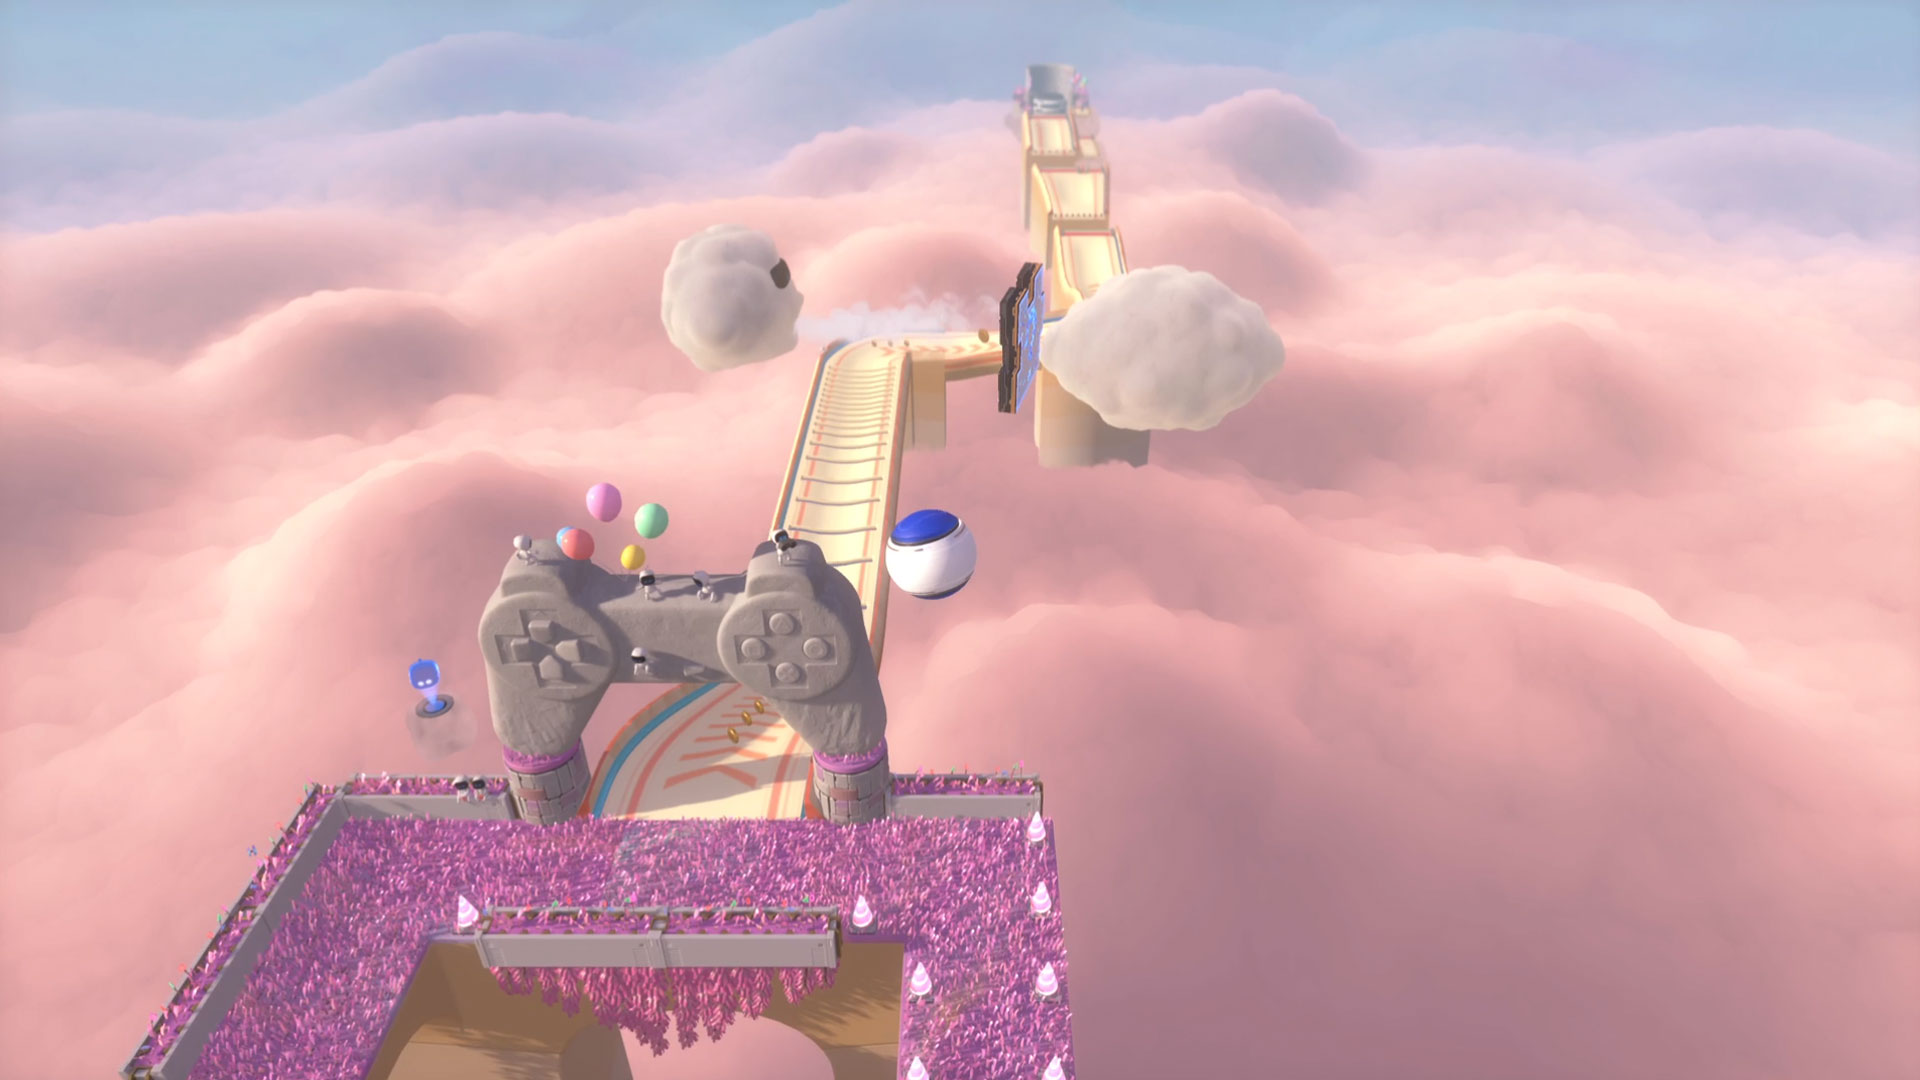
Just before you head through the concrete PlayStation One controller onto the speedway in your ball, go right and backtrack on yourself - along the path marked with cones - and bounce on the striped platform. Way up high above it is the third puzzle piece.
Puzzle Piece 4
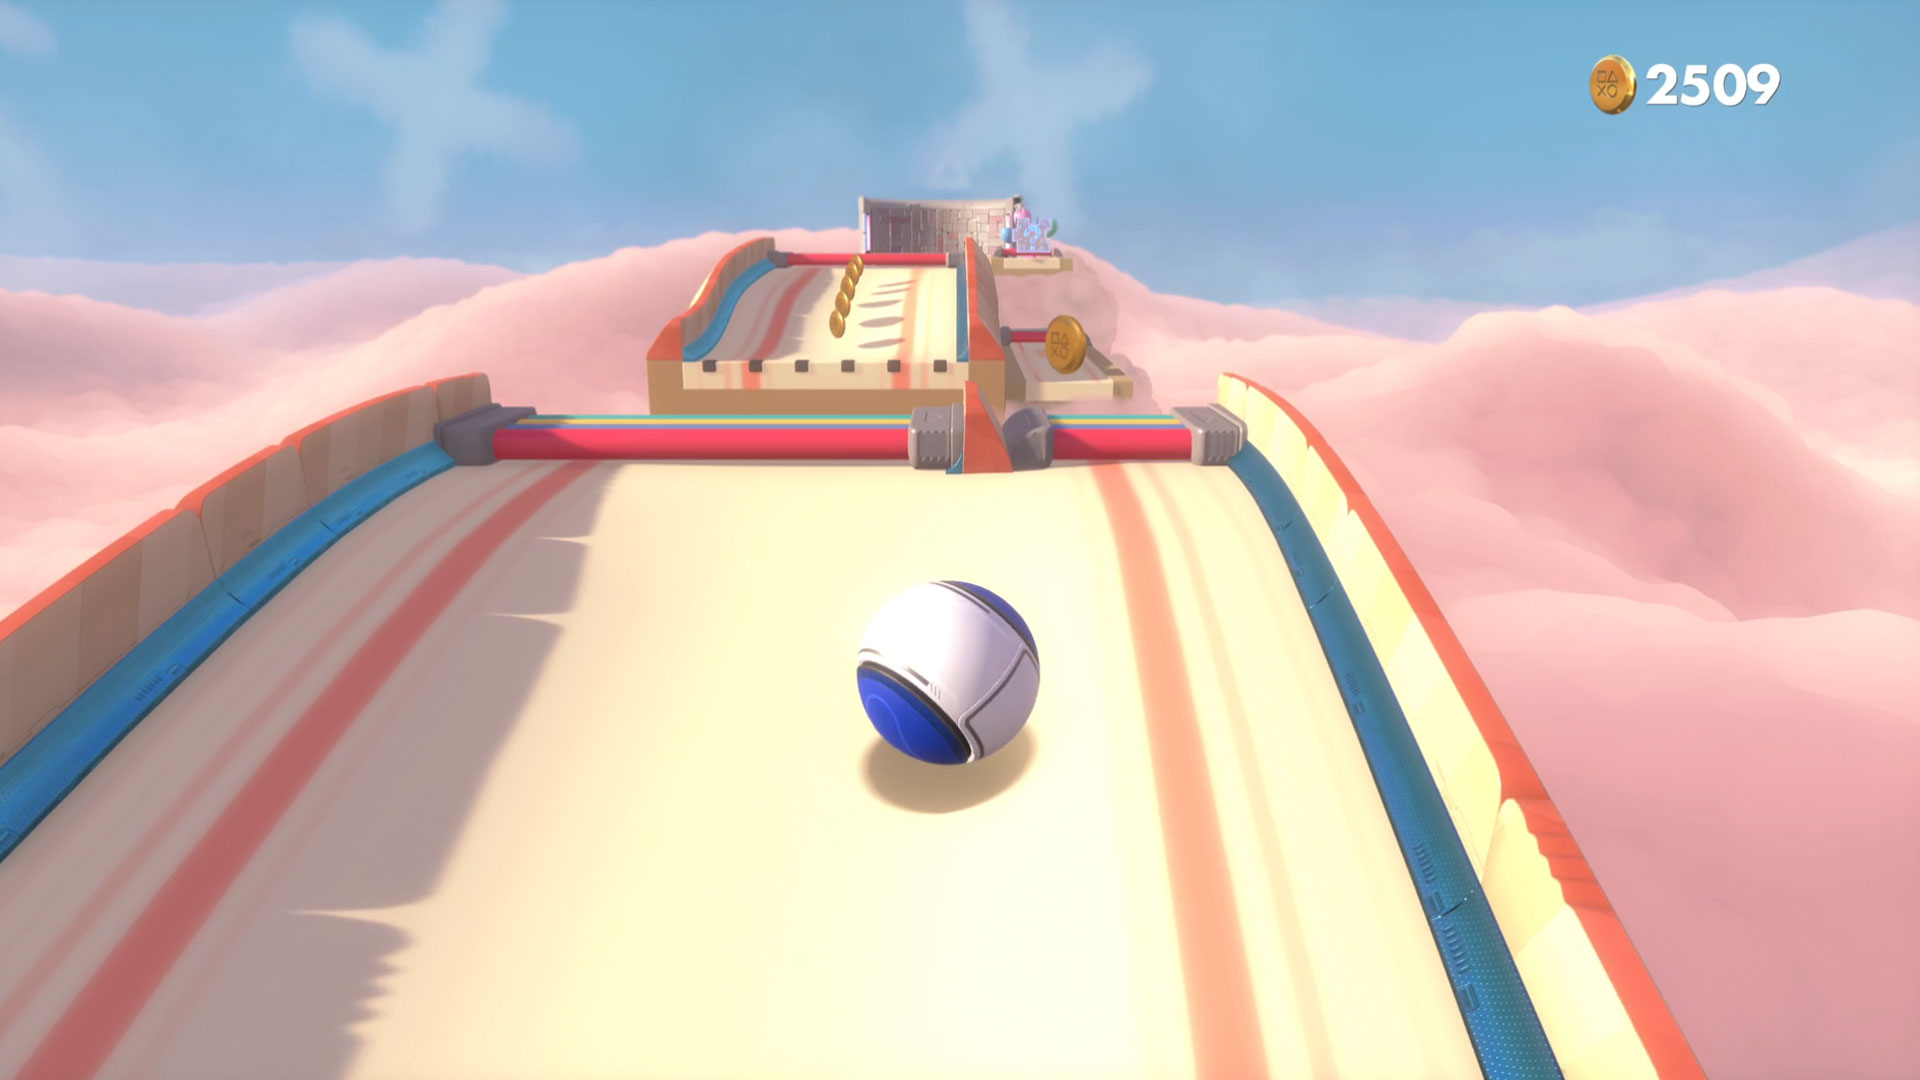
The fourth puzzle piece is easily missable if you misaim your ball, so when you reach the last section of this area take it steady. Pass under the PS1 pad arch and make your way onto the speedway itself. Just after the section with the cloud, the track splits into two. Keep right, and the puzzle piece is along this track.
Memory Meadow - Electrocloud
Puzzle Piece 1
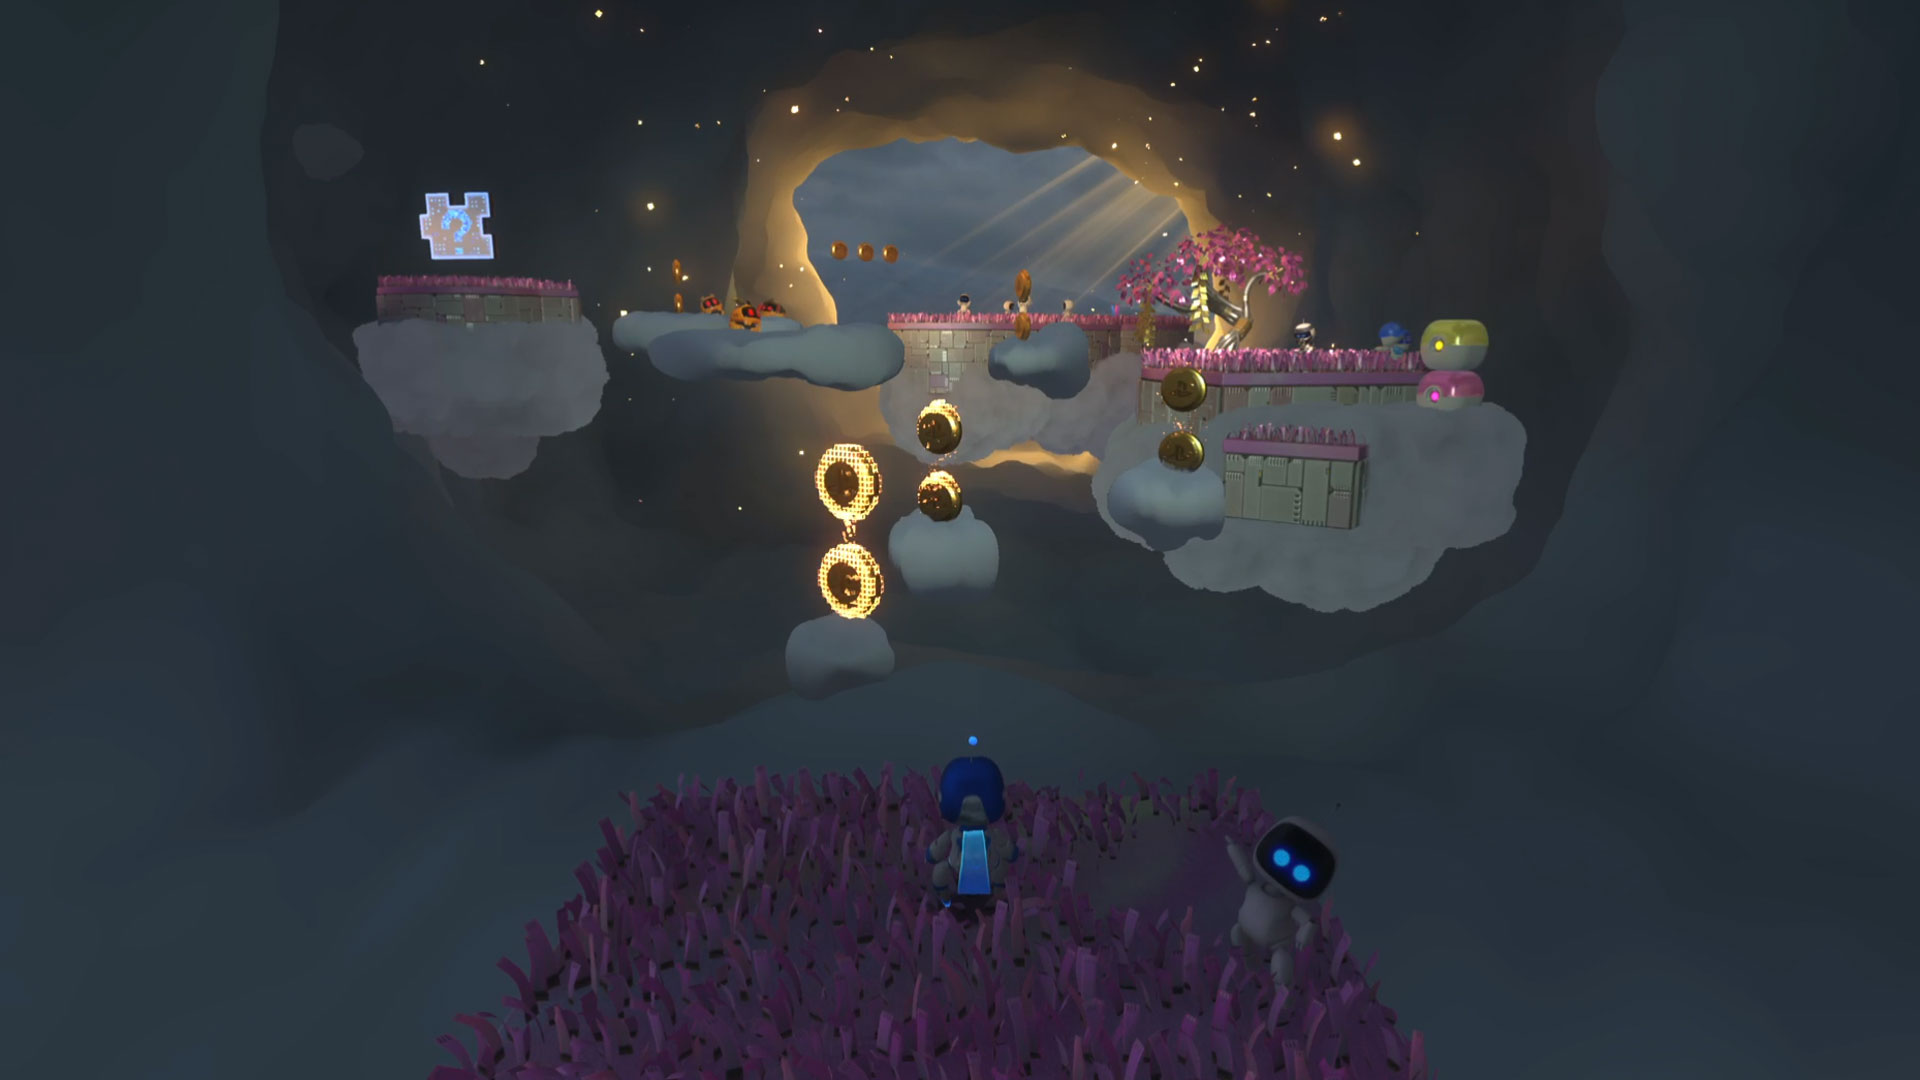
From the starting area, bounce across the two cloud platforms to reach the first checkpoint; use the jump pad and then pull on the wires to reveal some platforms that allow you to reach the next area. Here, drop down behind the yellow coin box to a hidden bouncer that'll fling you up to a platform with a spinner that you can blow embedded in the clouds.
Doing this will reveal a hidden sundrenched area behind the clouds, along with the first puzzle piece.
Puzzle Piece 2
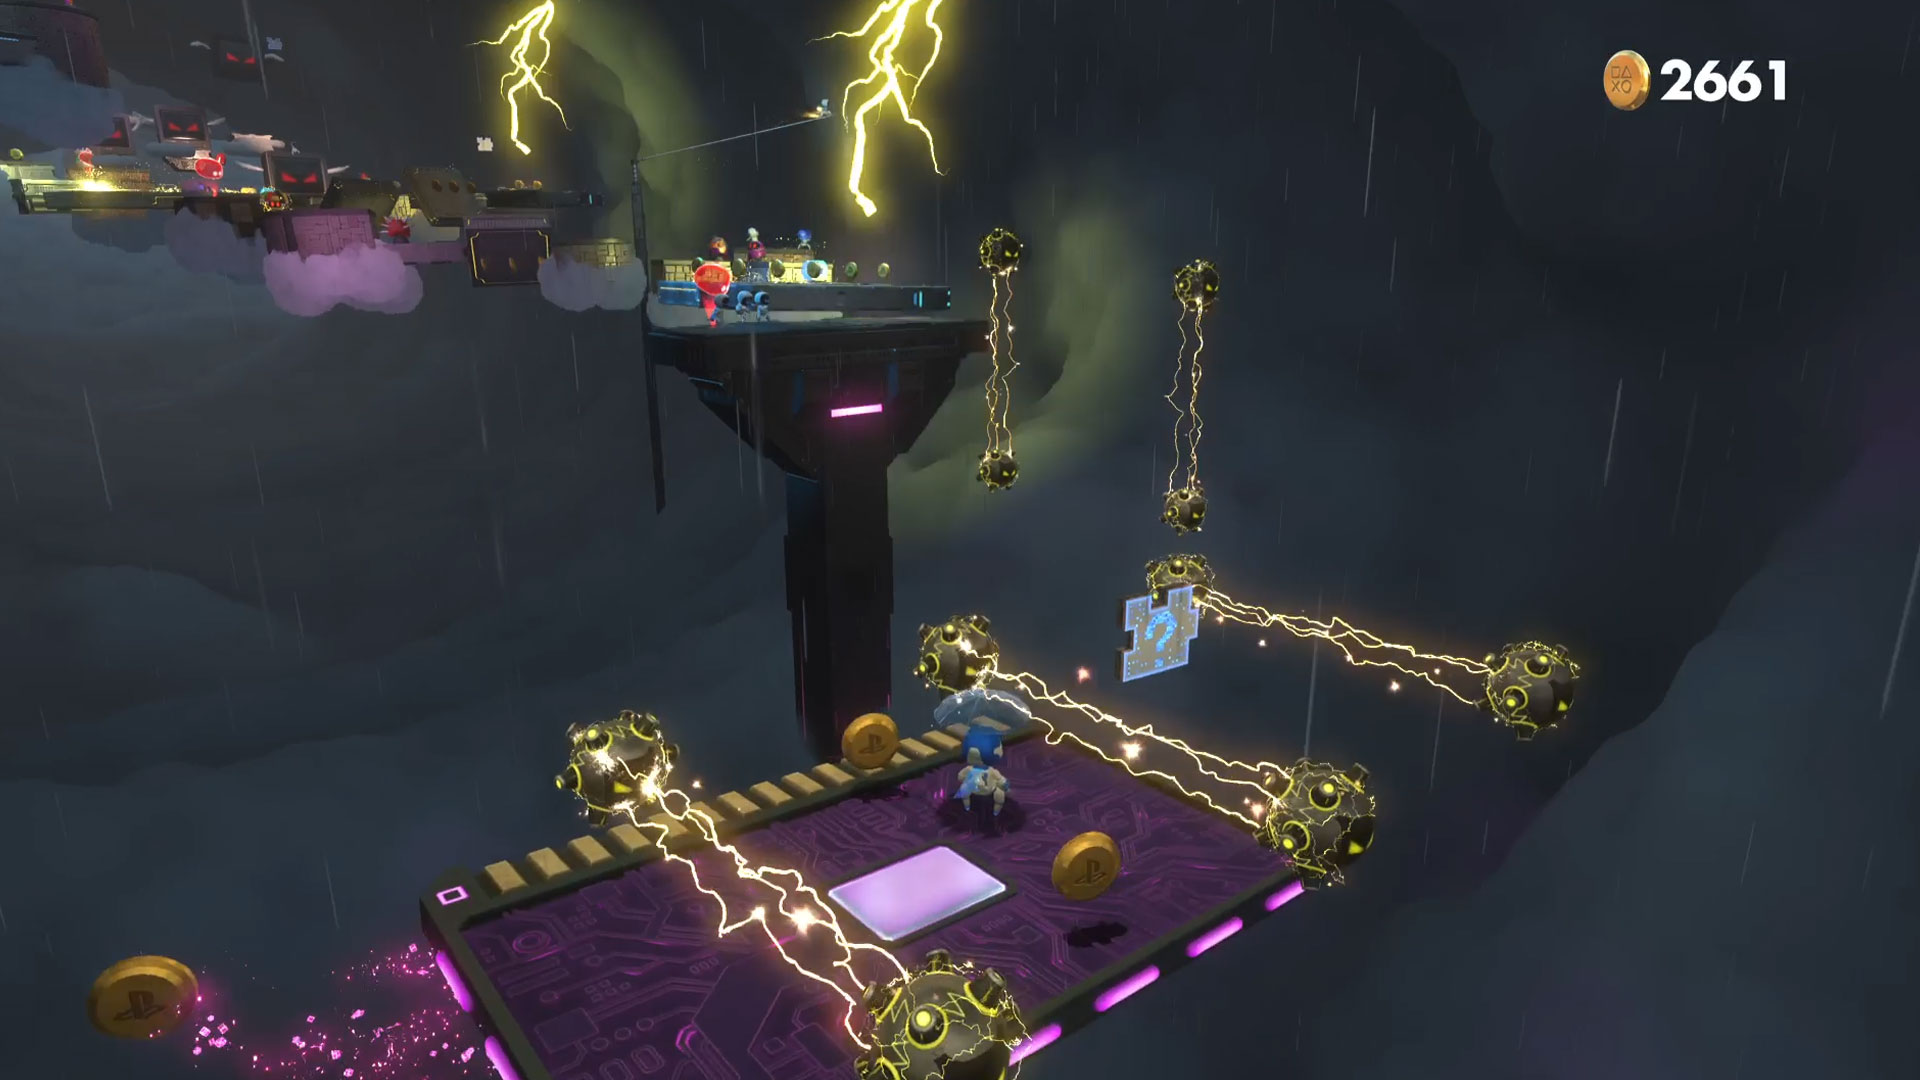
Straight after this section, you'll ride a glowing pink motherboard-esque platform and have to avoid some electric barrier. Leap between them, and the second puzzle piece is among the gaps.
Puzzle Piece 3
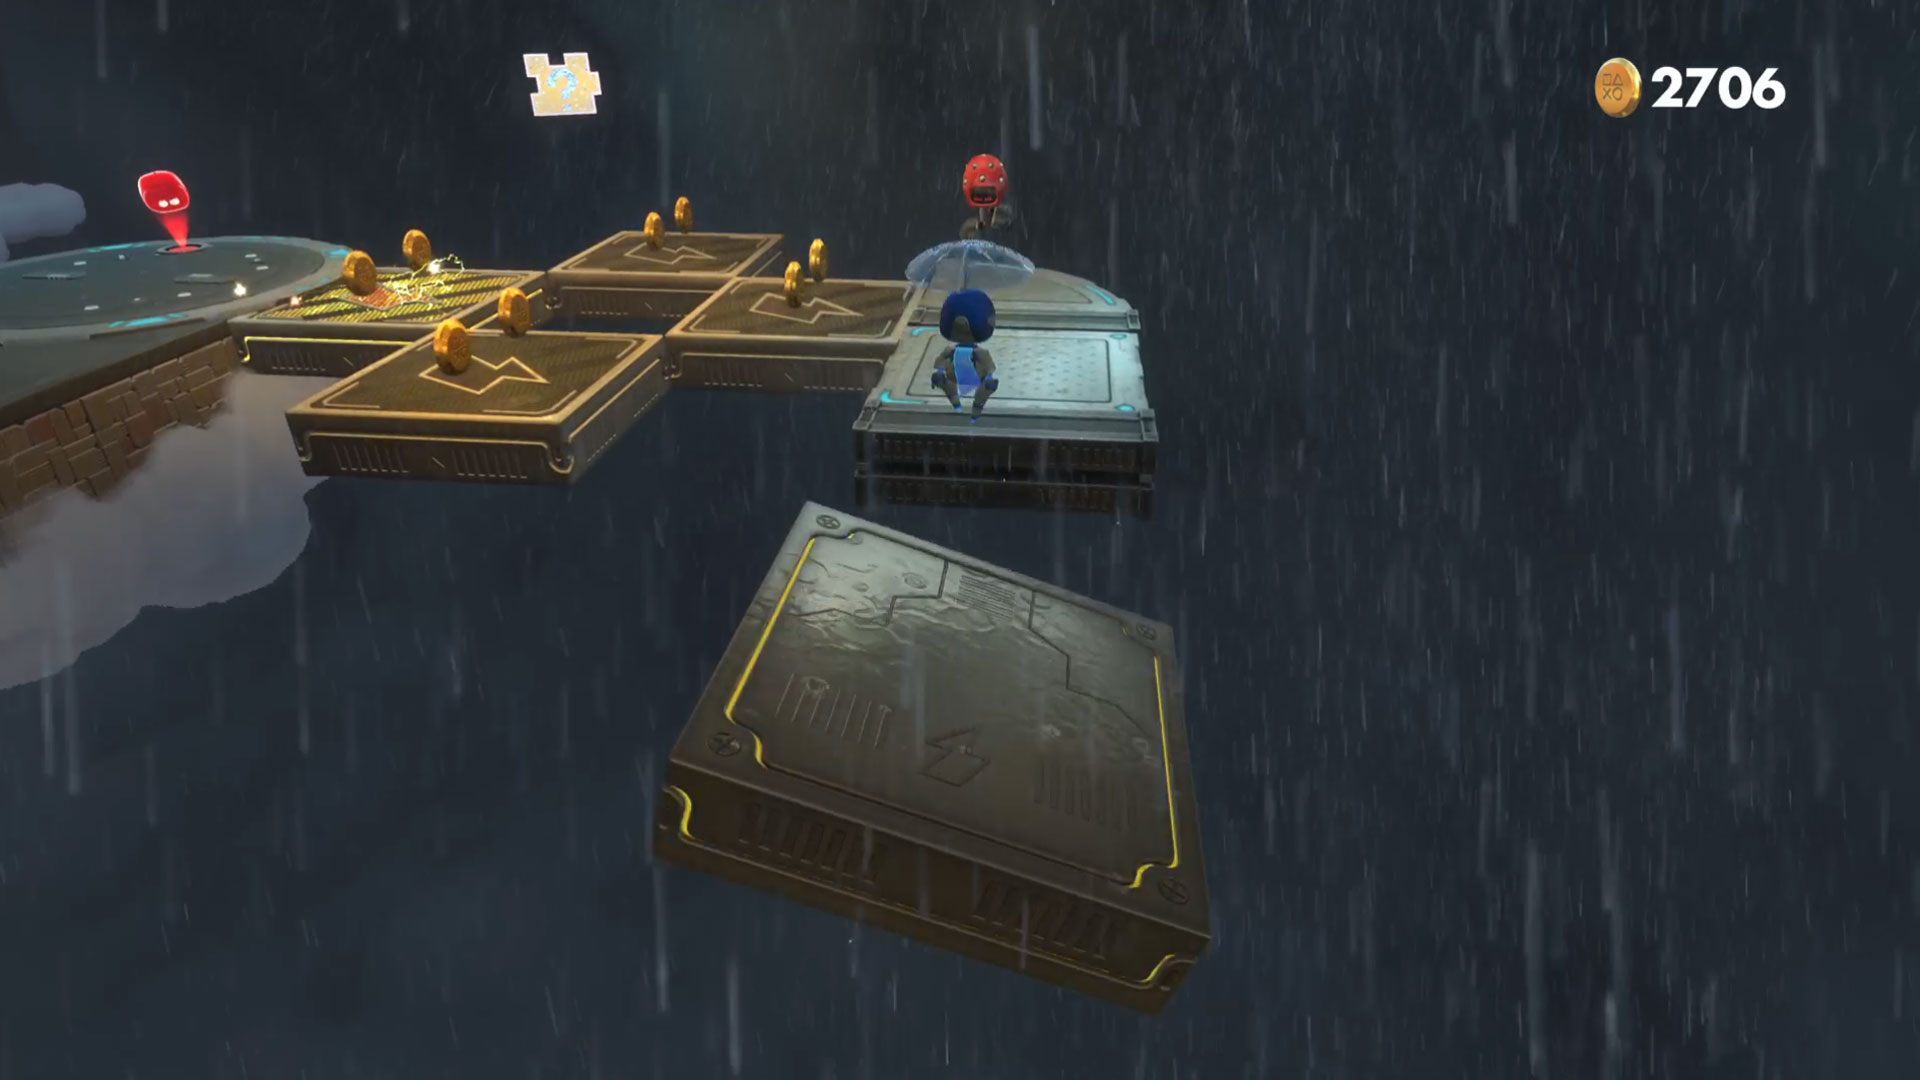
The third puzzle piece is also fairly obvious - and also surrounded by electricity. Work your way through the level and you'll reach a point where you're asked to navigate flipping platforms where one side is sparking with power. Jump across the third two, and then there's a block of four. The third puzzle piece is suspended in the middle.
Puzzle Piece 4
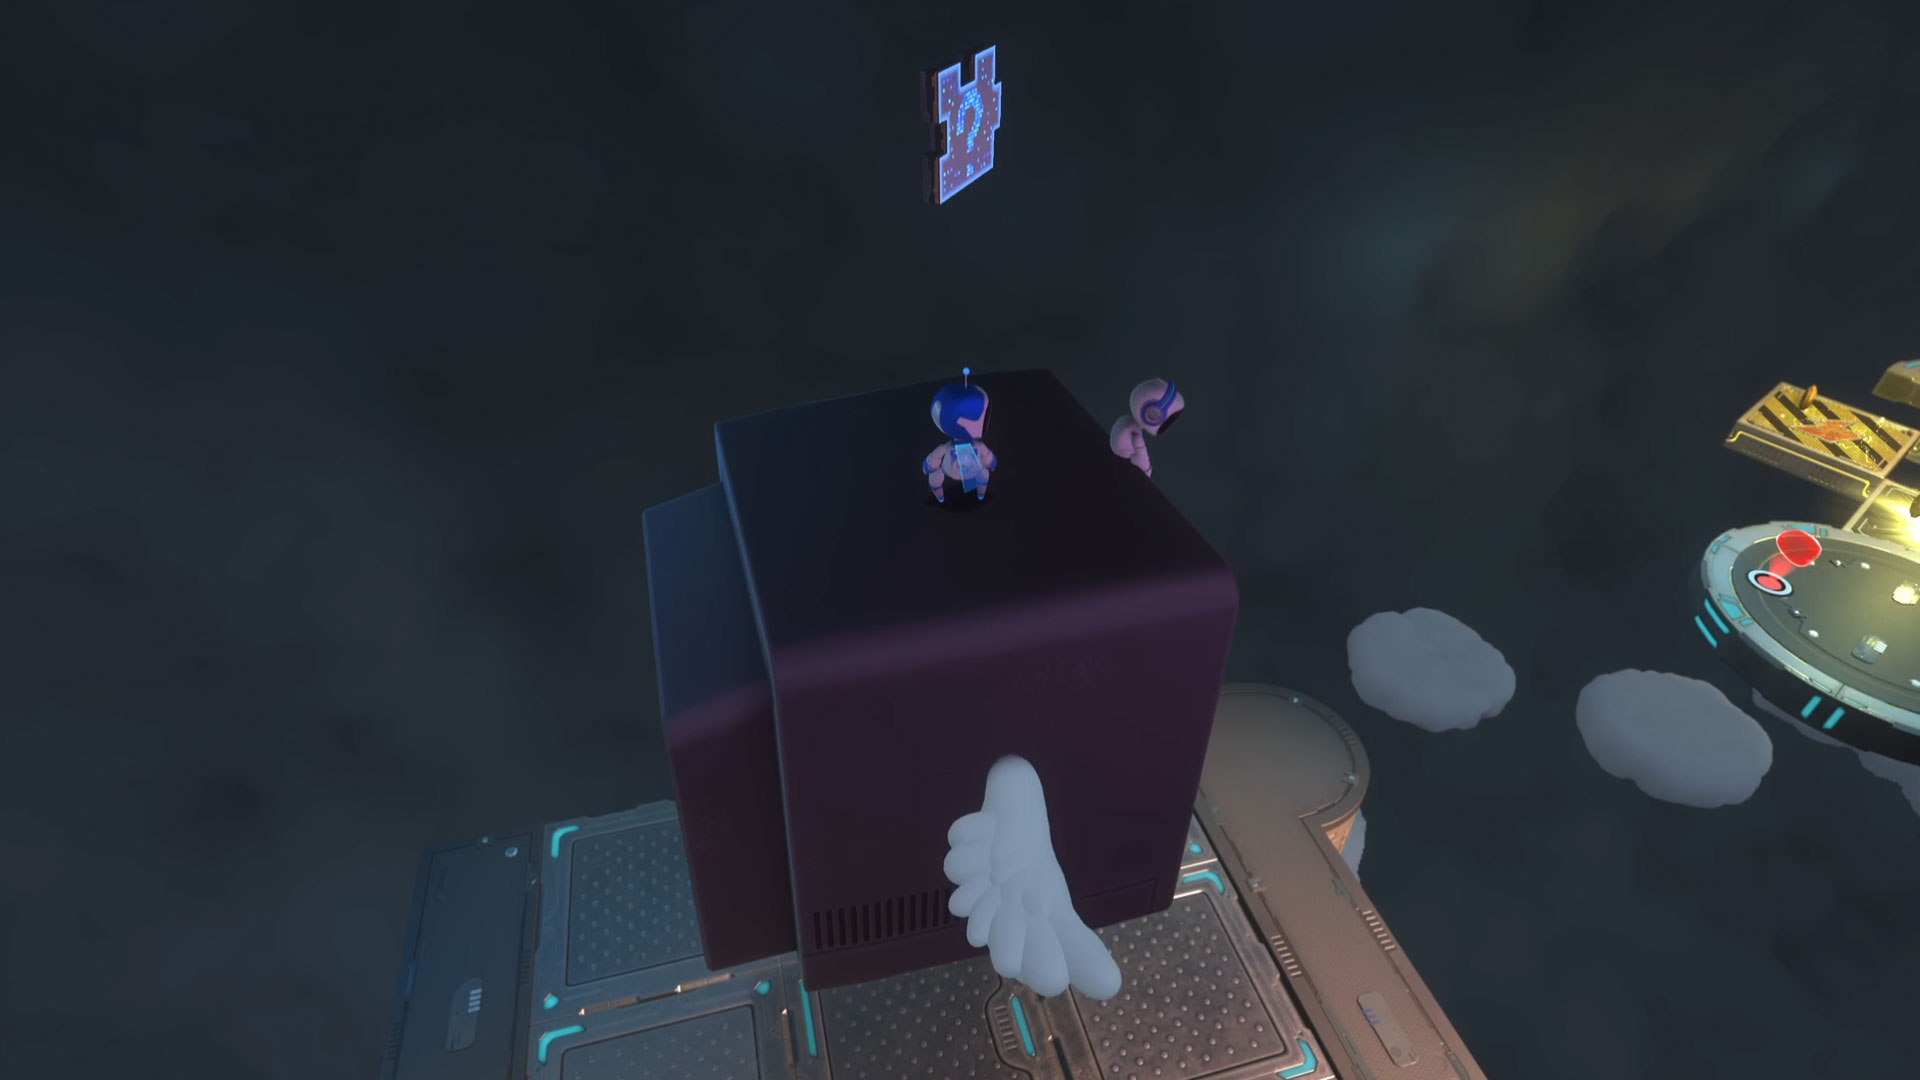
Later on in the level - right near the end - there's a section where you need to jump between platforms that also happen to have giant blocks dropping down on them. Well, before you tackle that, turn back on yourself at that checkpoint and jump across the cloud platforms. From here you'll be able to jump on top of the giant TV as it drops, and when it raises up you'll be able to grab the final puzzle piece.
Memory Meadow - Bumper Broadway
Puzzle Piece 1
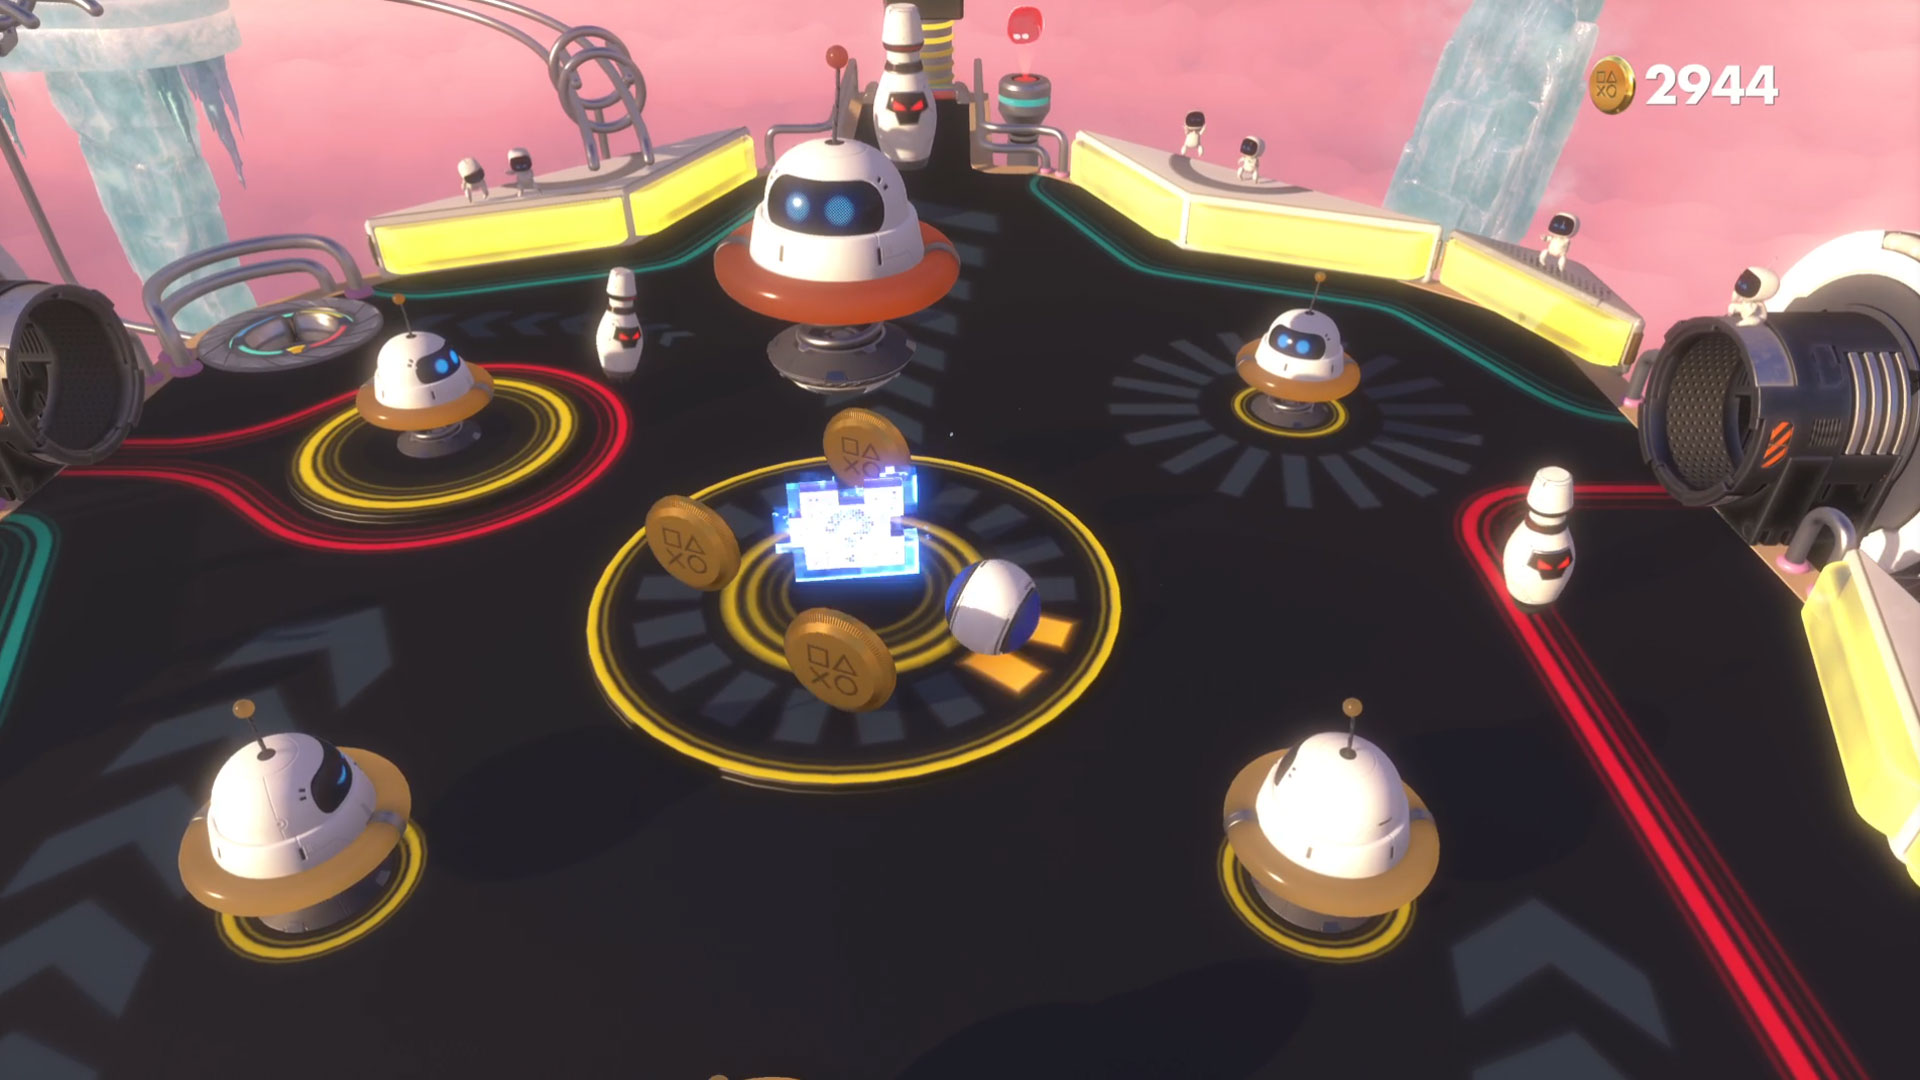
In the pinball section, take a moment to knock down all of the pins circling around the bouncy enemy in the top centre. Doing so will make it rise up to reveal the puzzle piece underneath.
Puzzle Piece 2
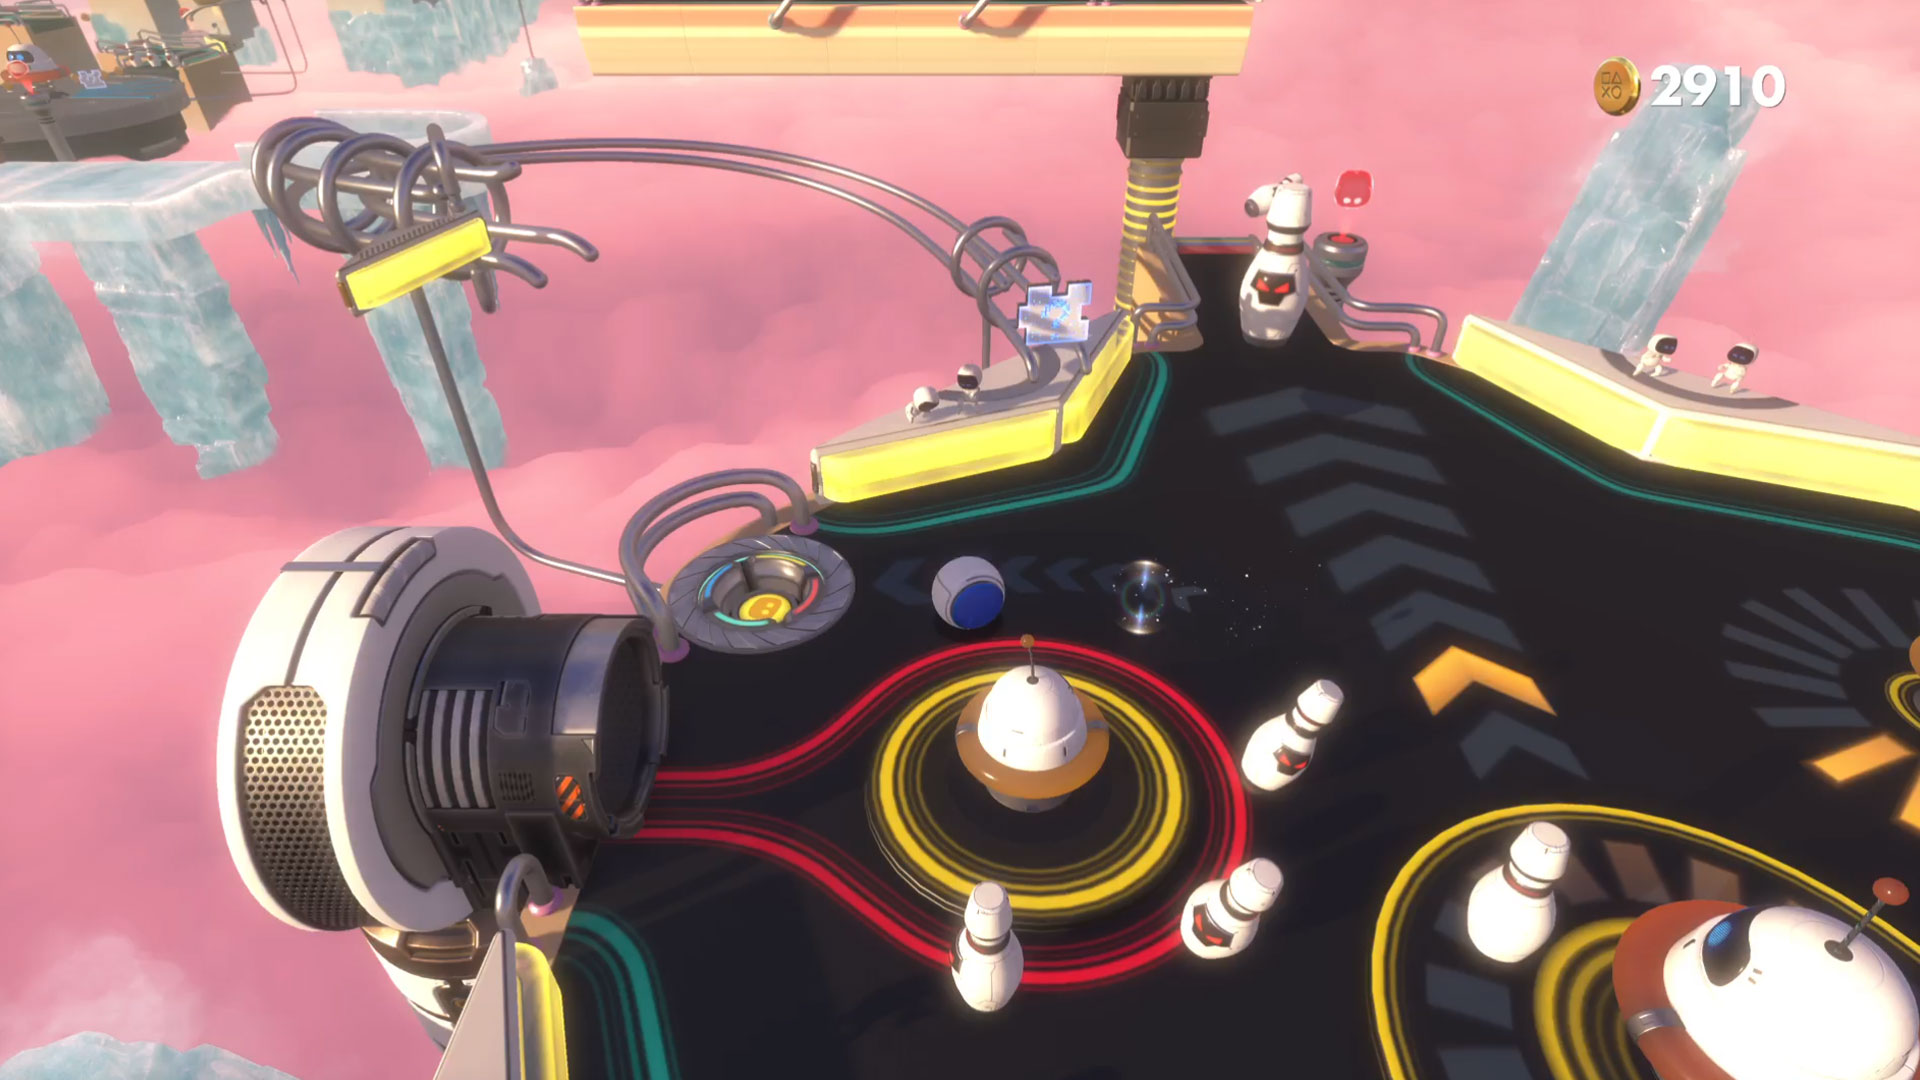
Still in the pinball section, just up and to the left of the first puzzle piece is a little button. Get yourself wedged into that and you'll be launched onto a run with the second puzzle piece at the end.
Puzzle Piece 3
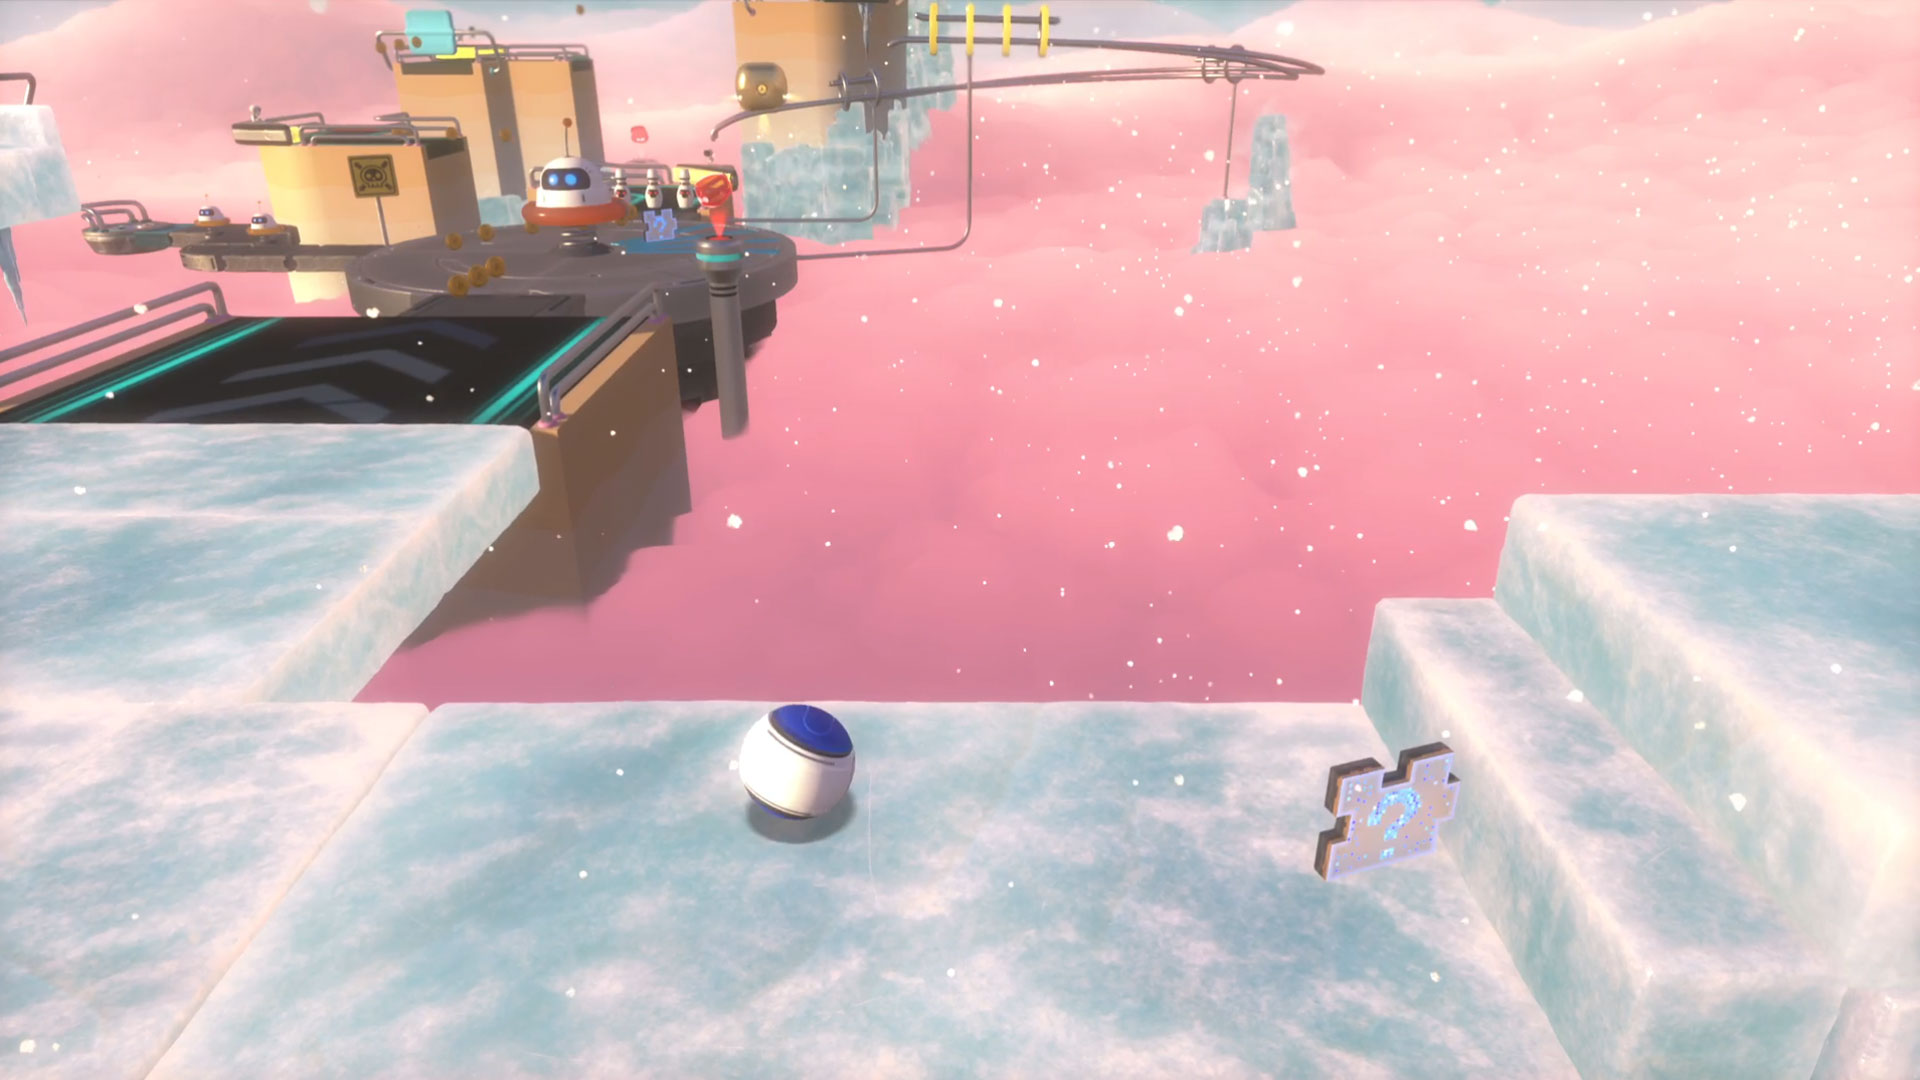
After the pinball section, you'll roll down a pathway that's made of ice. Tucked into the edge of the last steps is the second puzzle piece. All you need to do is roll back and get it.
Puzzle Piece 4
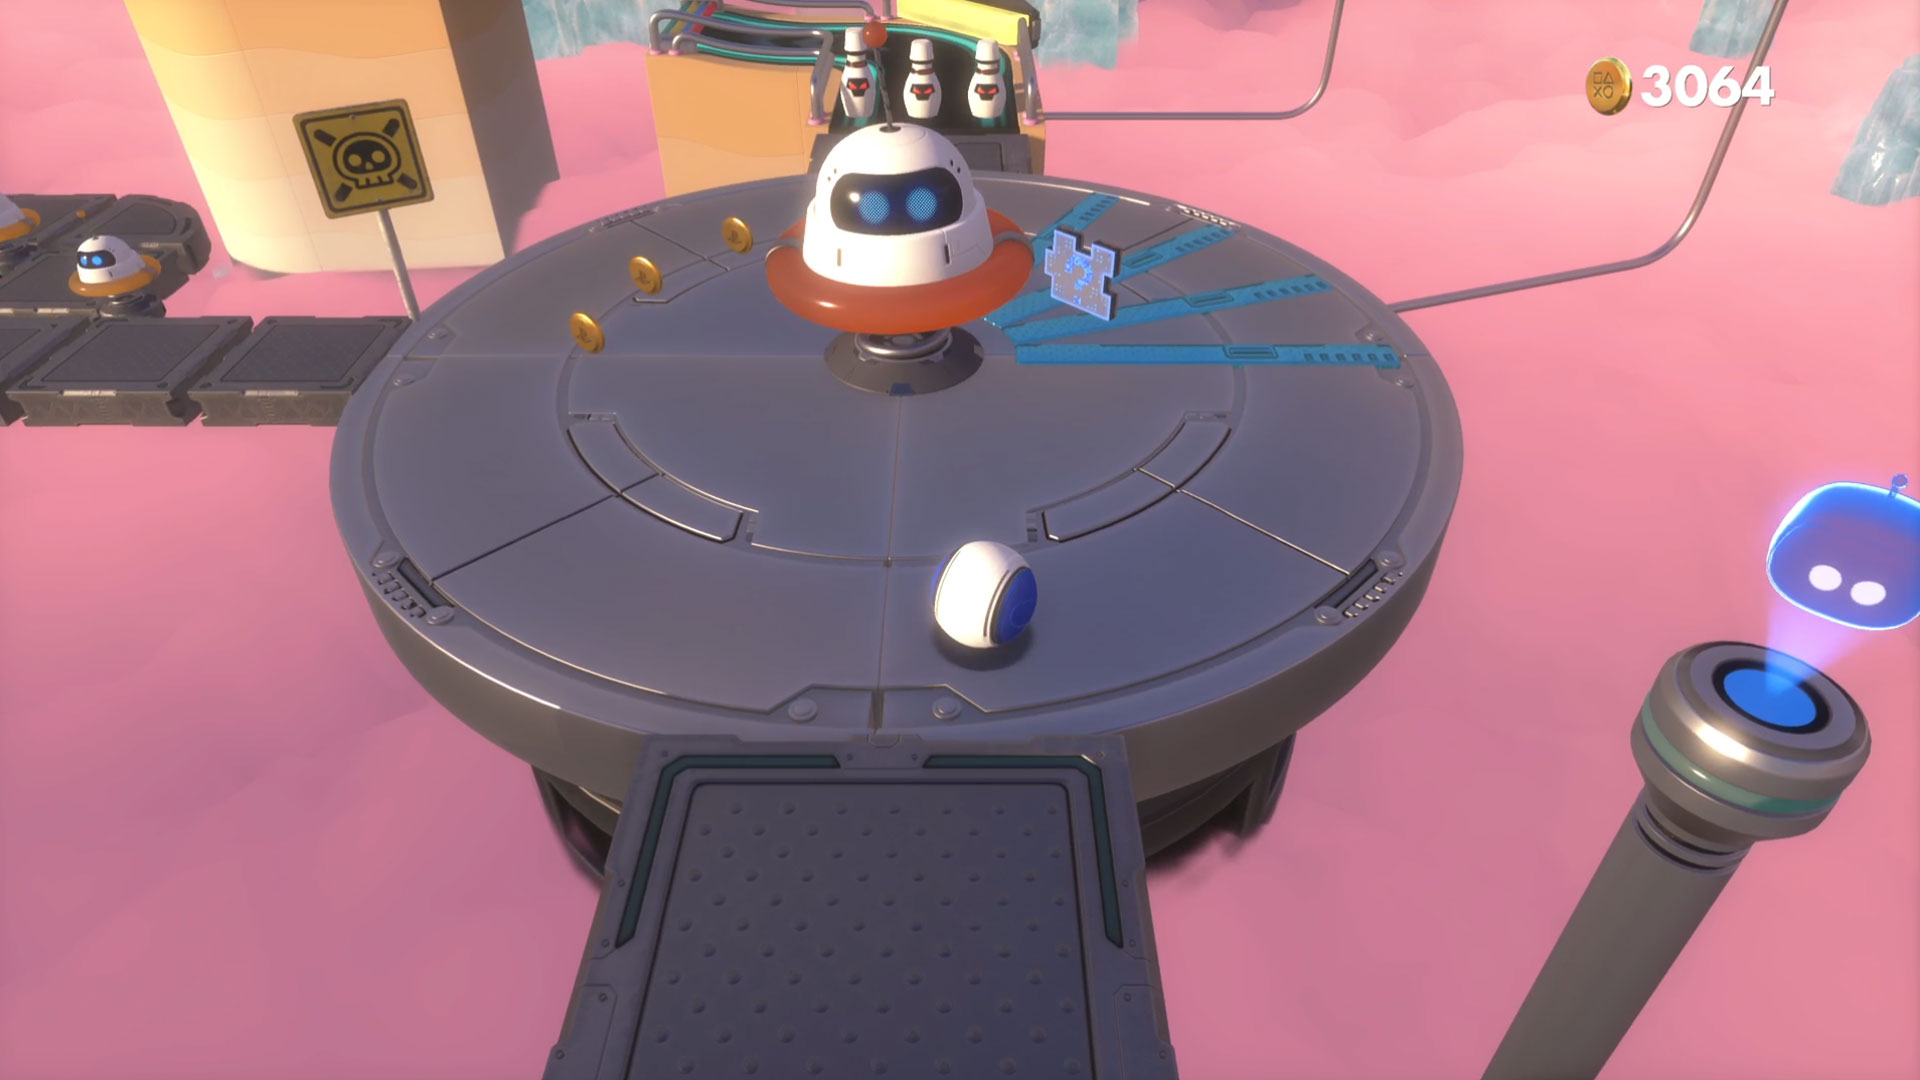
The next one is just ahead, lurking right underneath another bouncy enemy on the circular platform just beyond the ice-path section.
SSD Speedway - Turbo Trail
Puzzle Piece 1
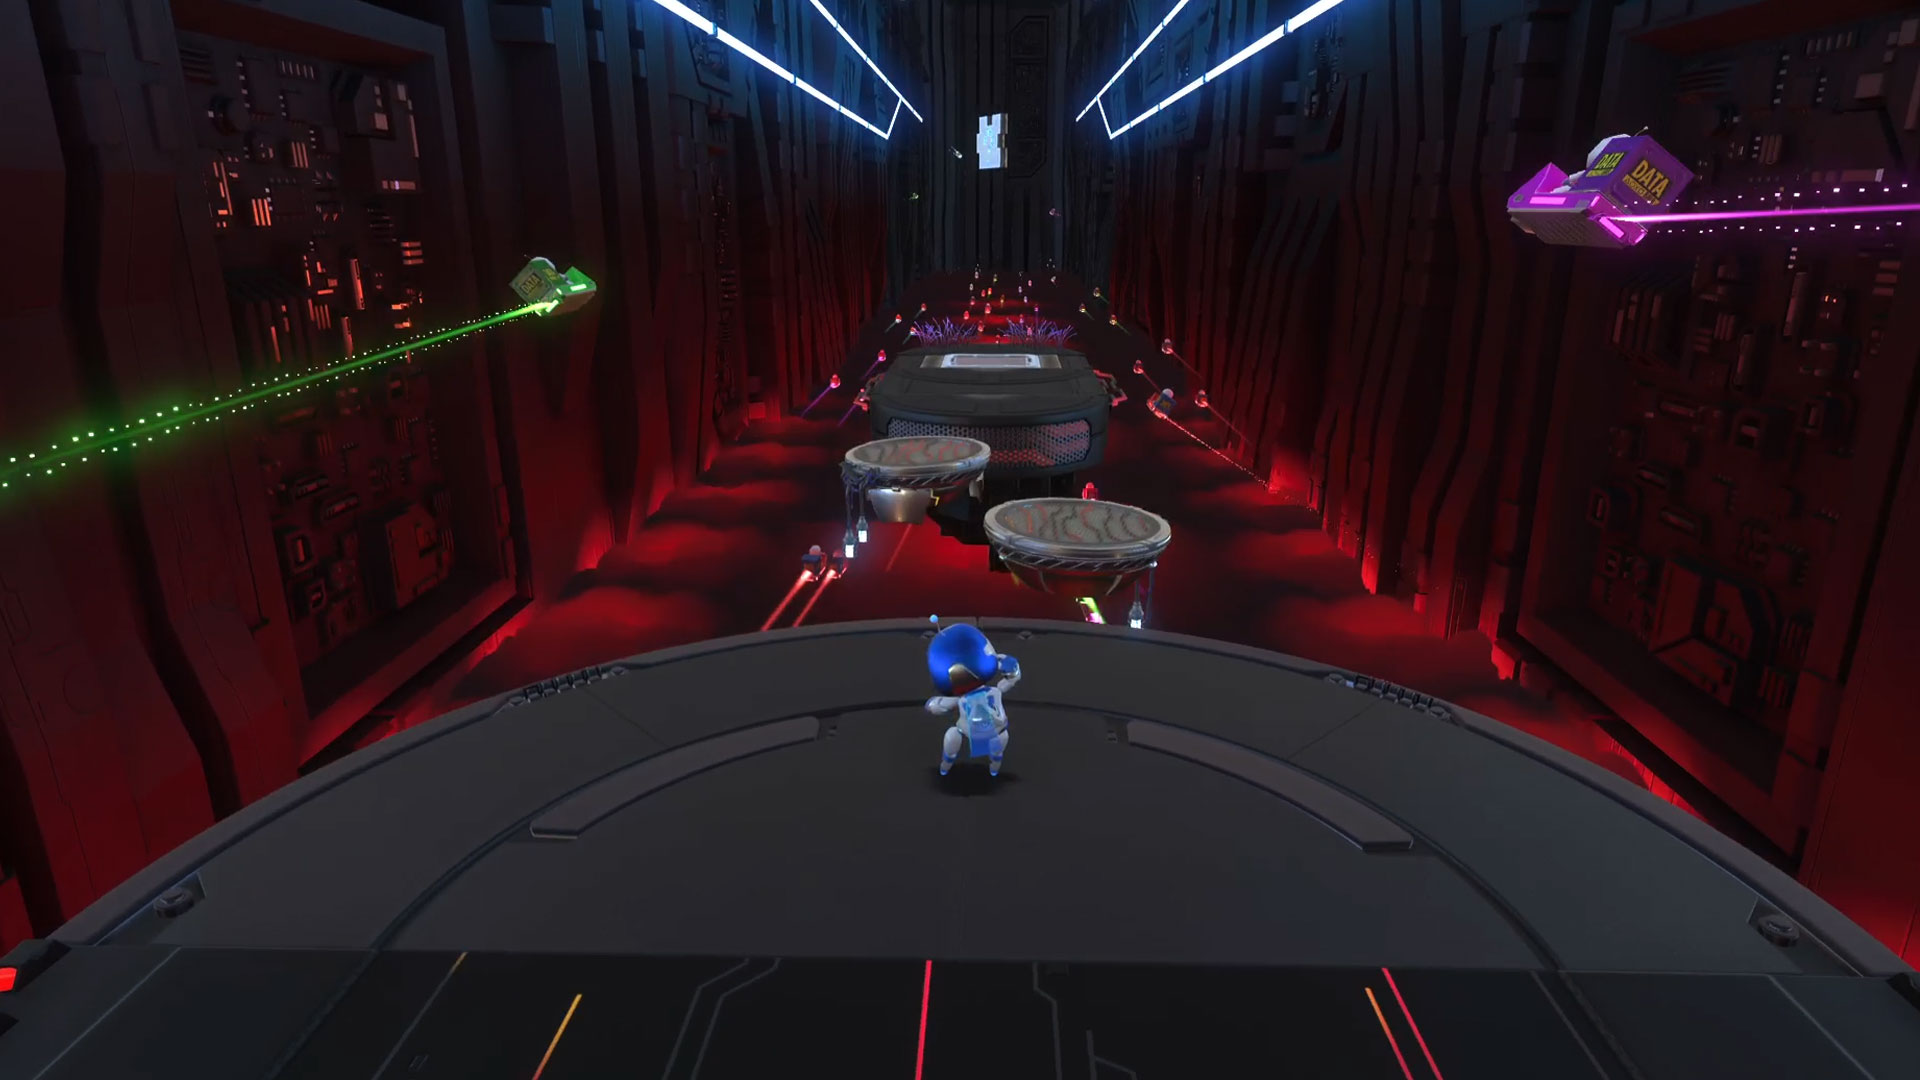
It's that old adage of "It's Behind You!" for this one, as at the very start of the level, if you turn back around 180-degrees you'll spot a duo of moving platforms leading to a third static, larger one. Get yourself over there, and then use your jump thrusters to smash the glass you'll find embedded in the platform. This'll reveal a jump pad that you can use to reach the first puzzle piece.
Puzzle Piece 2
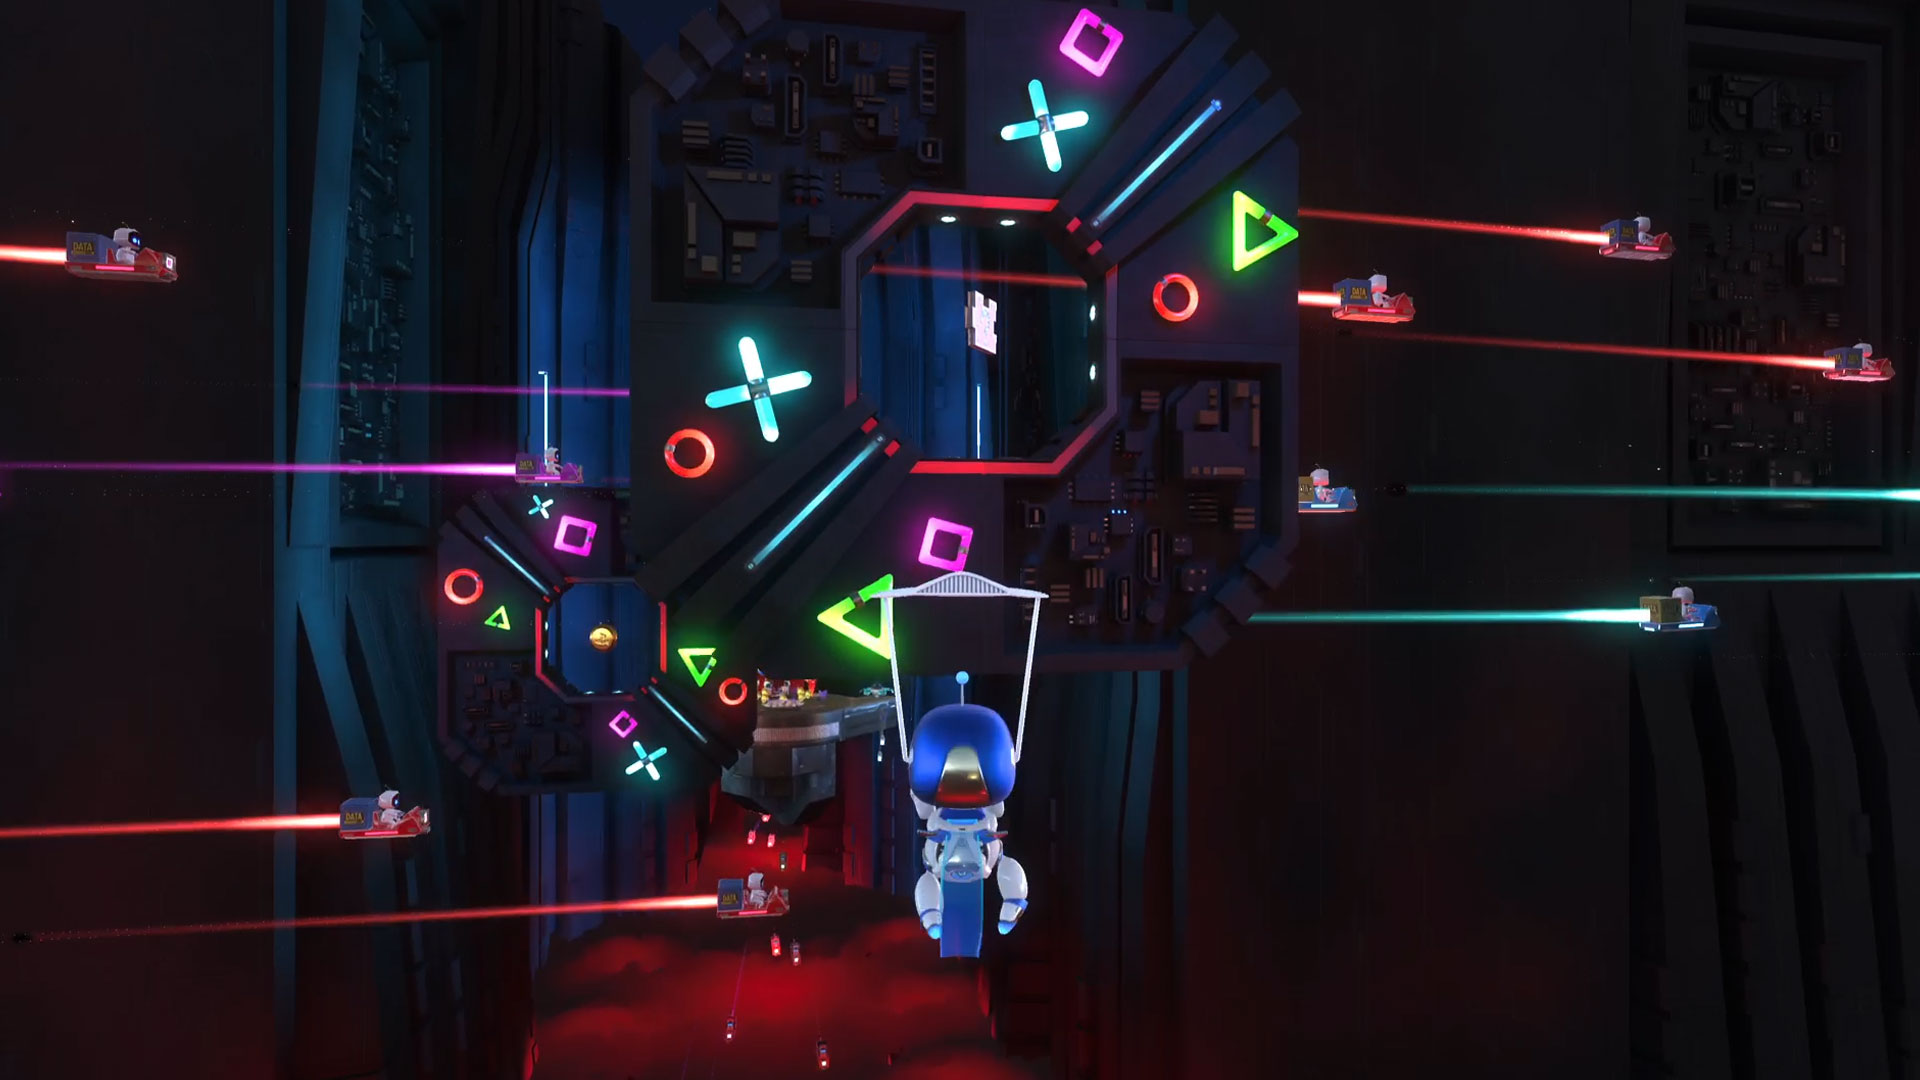
The second time you become a glider in this section, you'll want to aim in the centre of the massive PlayStation icon-adorned rings that appear as the second puzzle piece is right in the centre of the first one.
Puzzle Piece 3
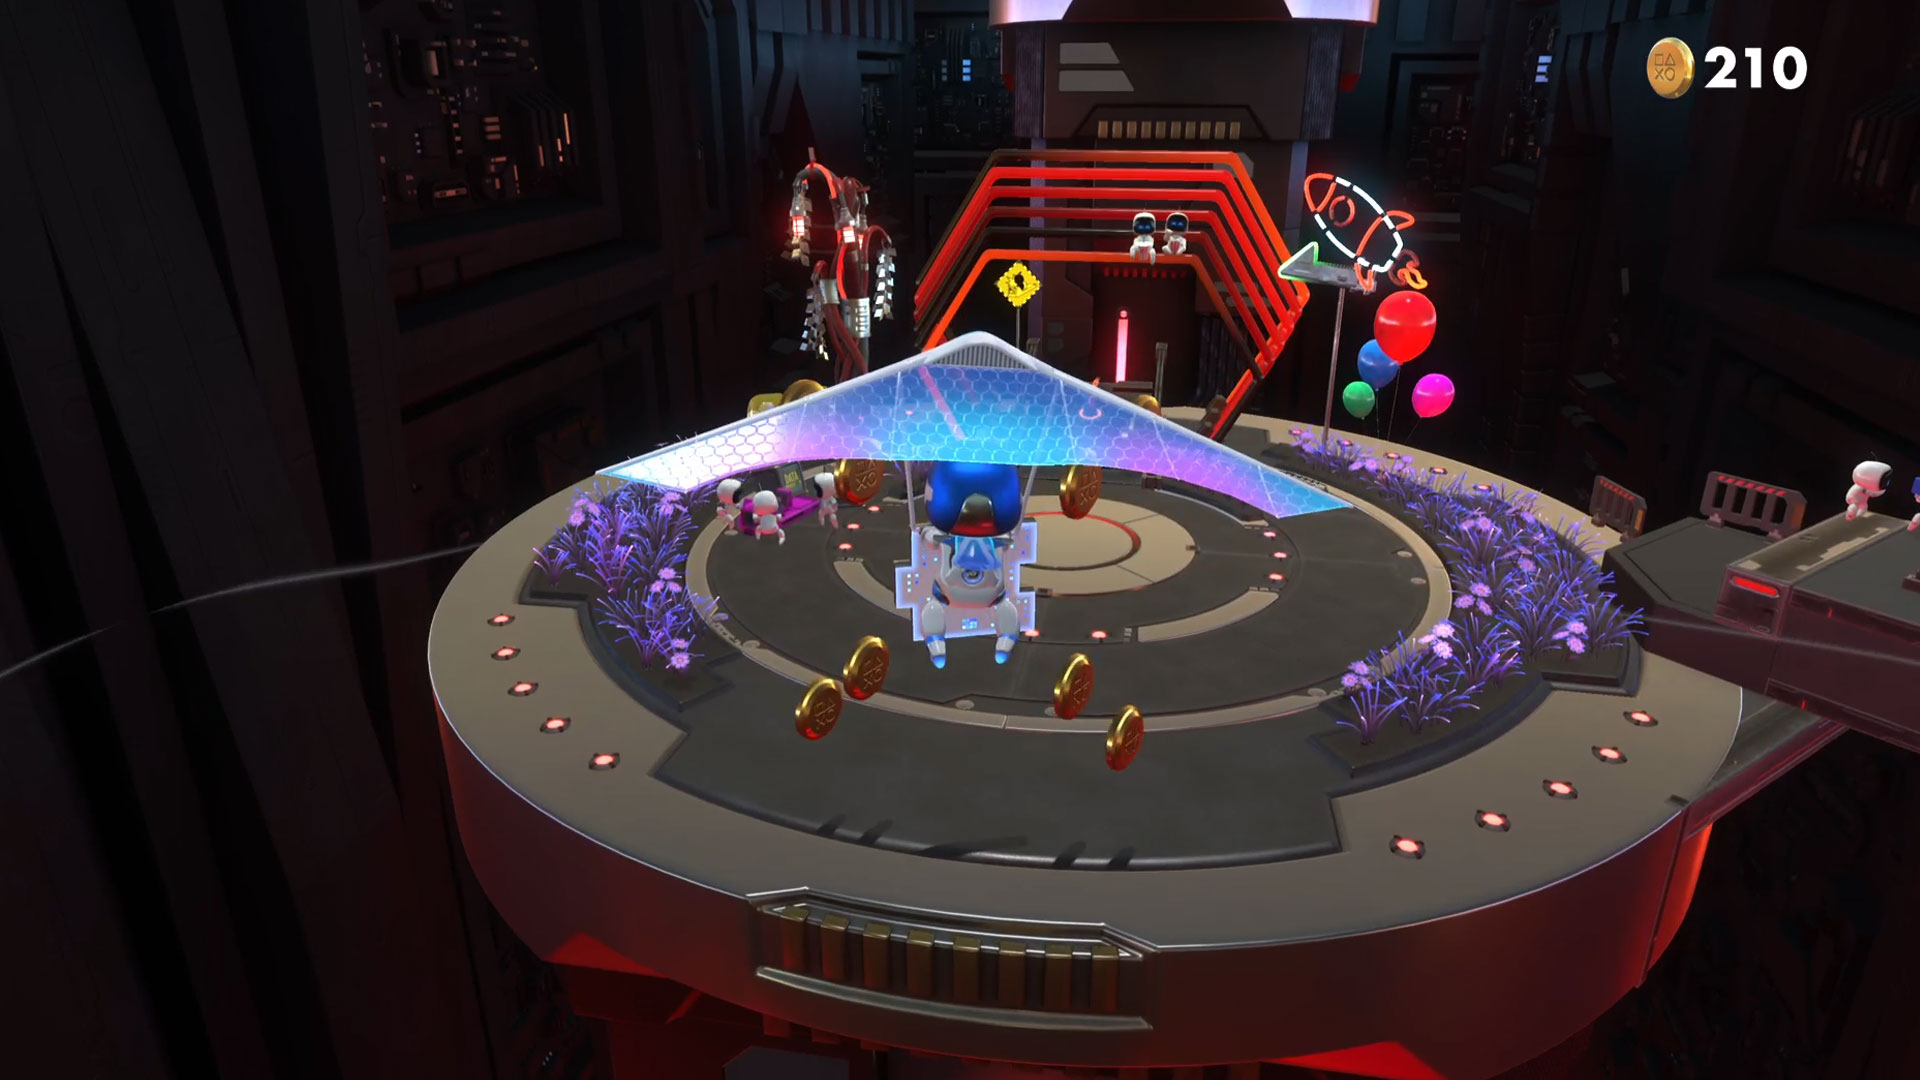
The third puzzle piece is just before the platform you land on at the end of the third (and final) glider section. So make sure as you're gliding in that you aim your descent well to collect it.
Puzzle Piece 4
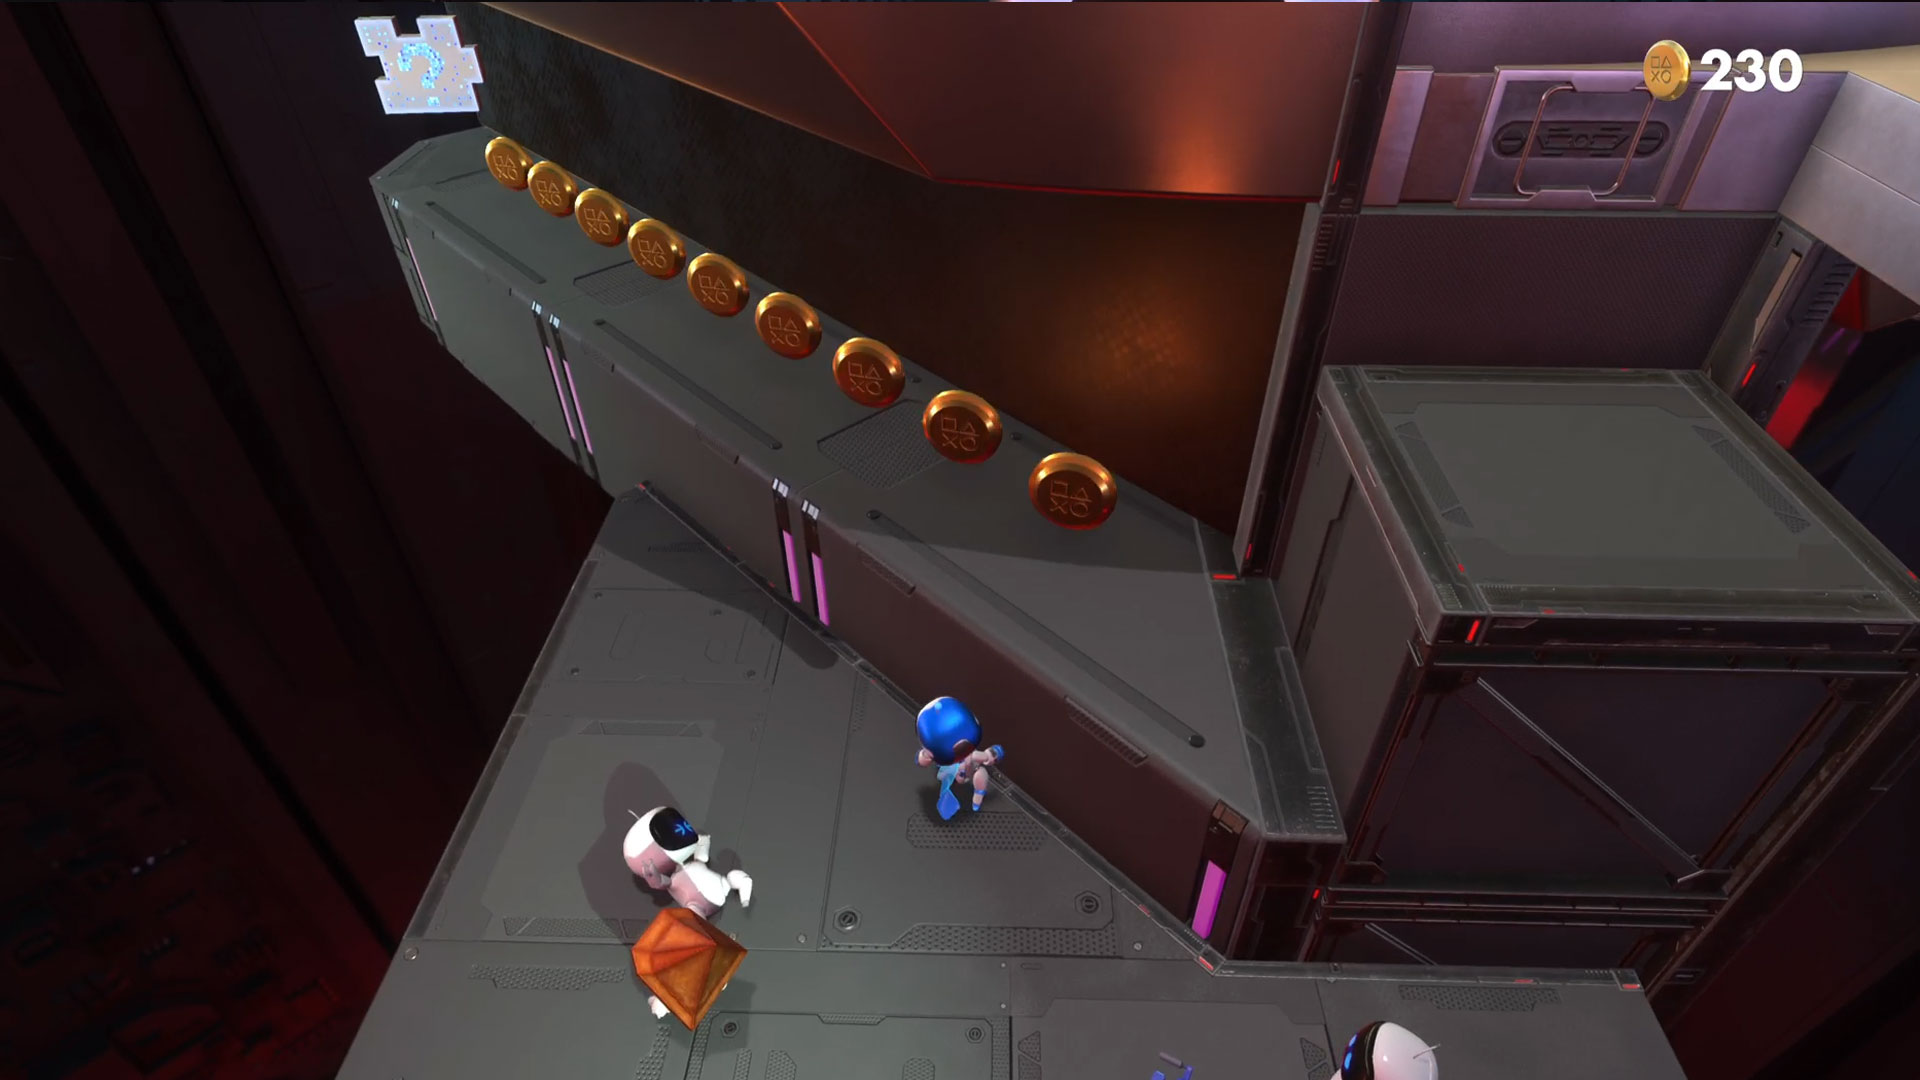
The final puzzle piece in this section is below this very same platform (the one before the rocket). Just to the left of the big tree by the neon archway, there's a little set of steps leading down to a platform below. There's a thin alcove and the fourth puzzle piece is at the end.
SSD Speedway - Caching Caves
Puzzle Piece 1
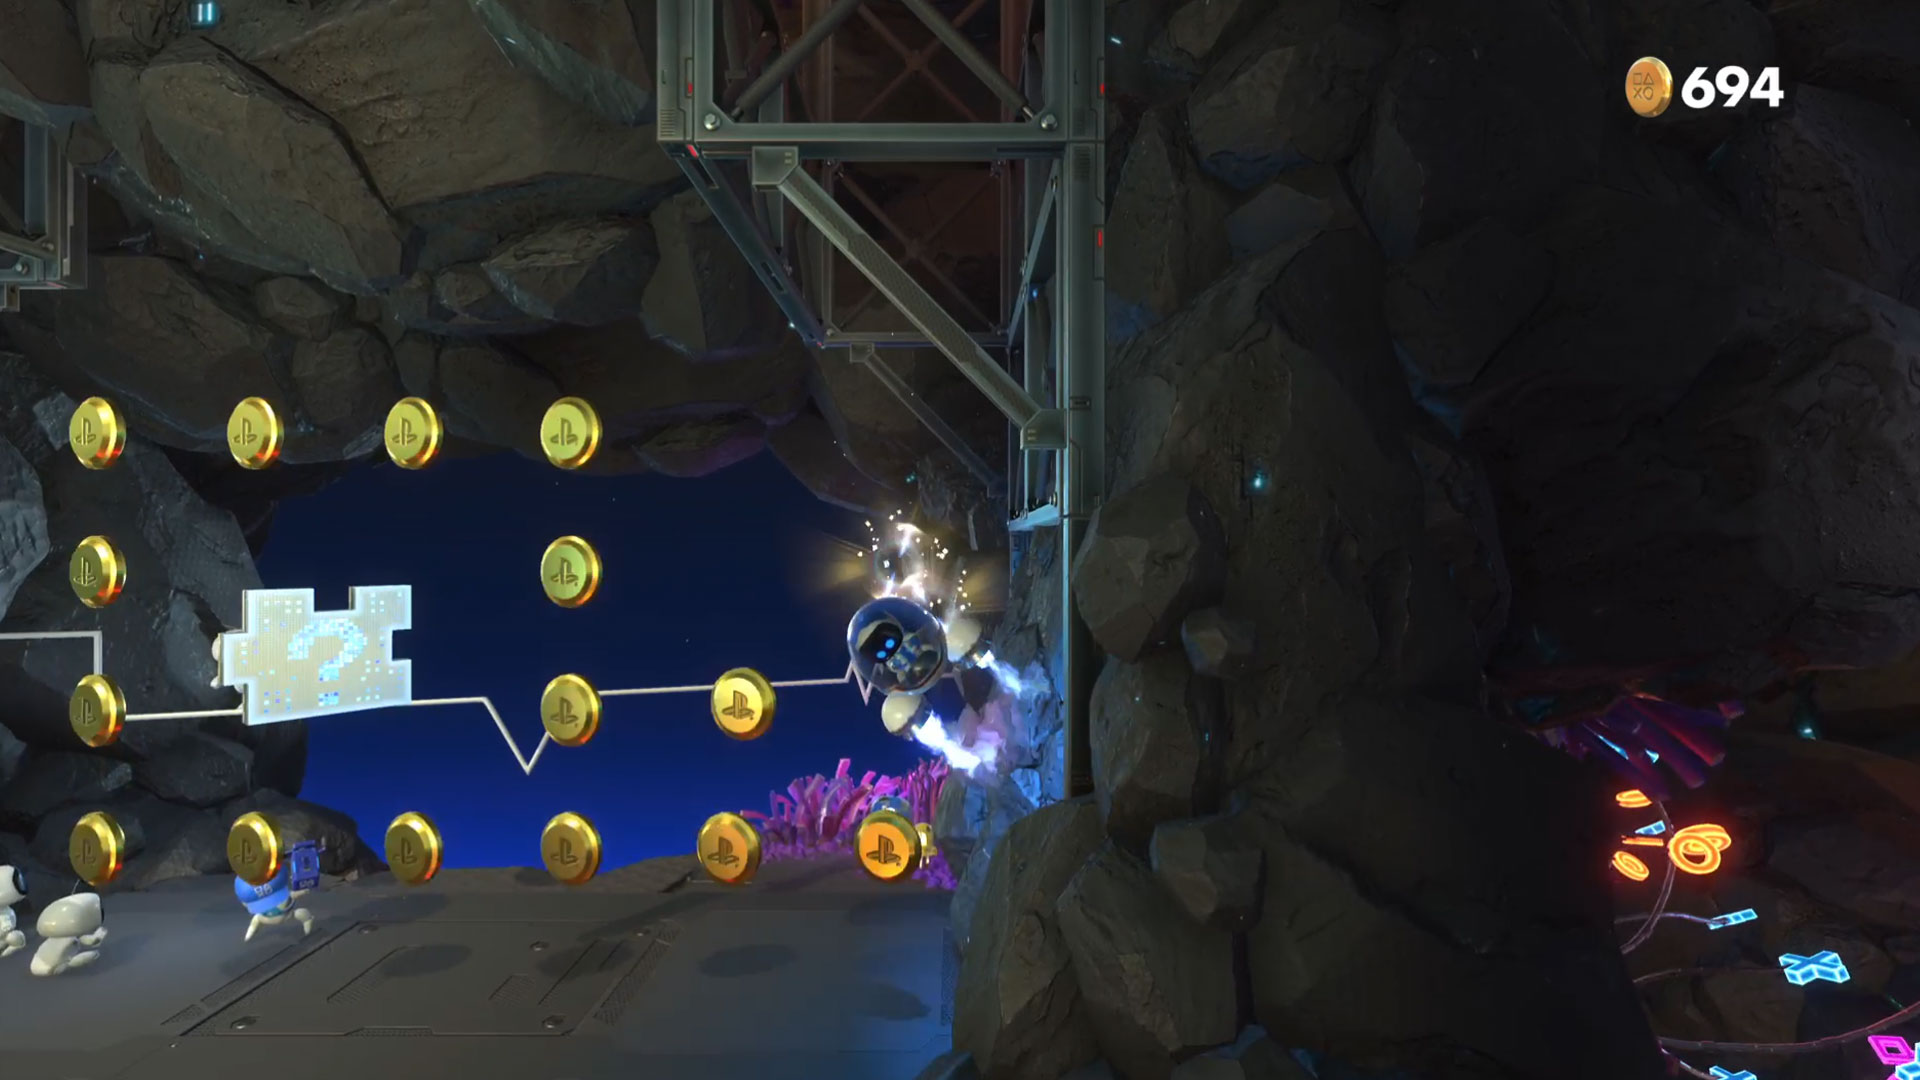
After you've turned into a rocket, make your way to the first checkpoint. Immediately after here there's a place where you can drop down just to the left. It's handily marked with coins, so just drop down here and collect the first puzzle piece.
Puzzle Piece 2
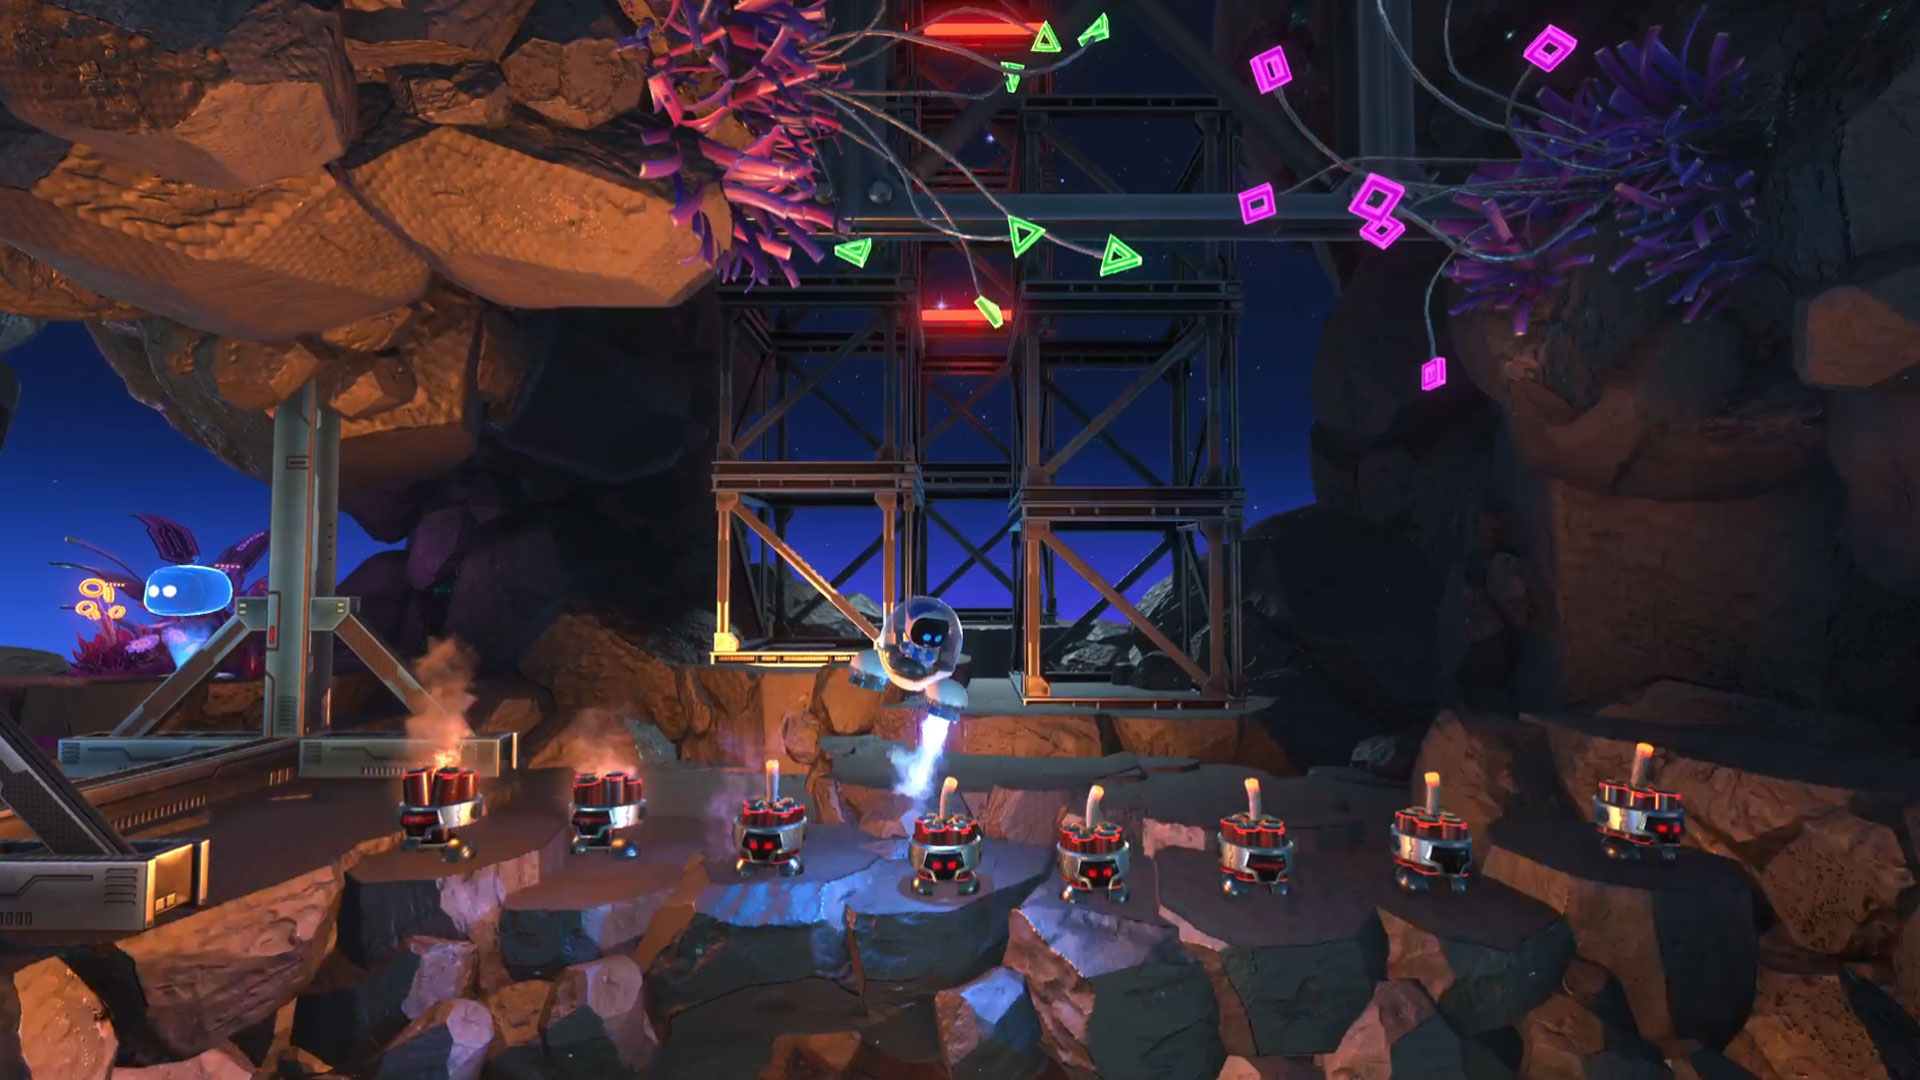
Keep going in this first rocket section until you see a line of little bombs along a rocky section. Use your rocket jets to light their fuses causing them to explode, which will reveal a secret area hidden below. In here you'll find plenty of coins along with the second puzzle piece.
Puzzle Piece 3
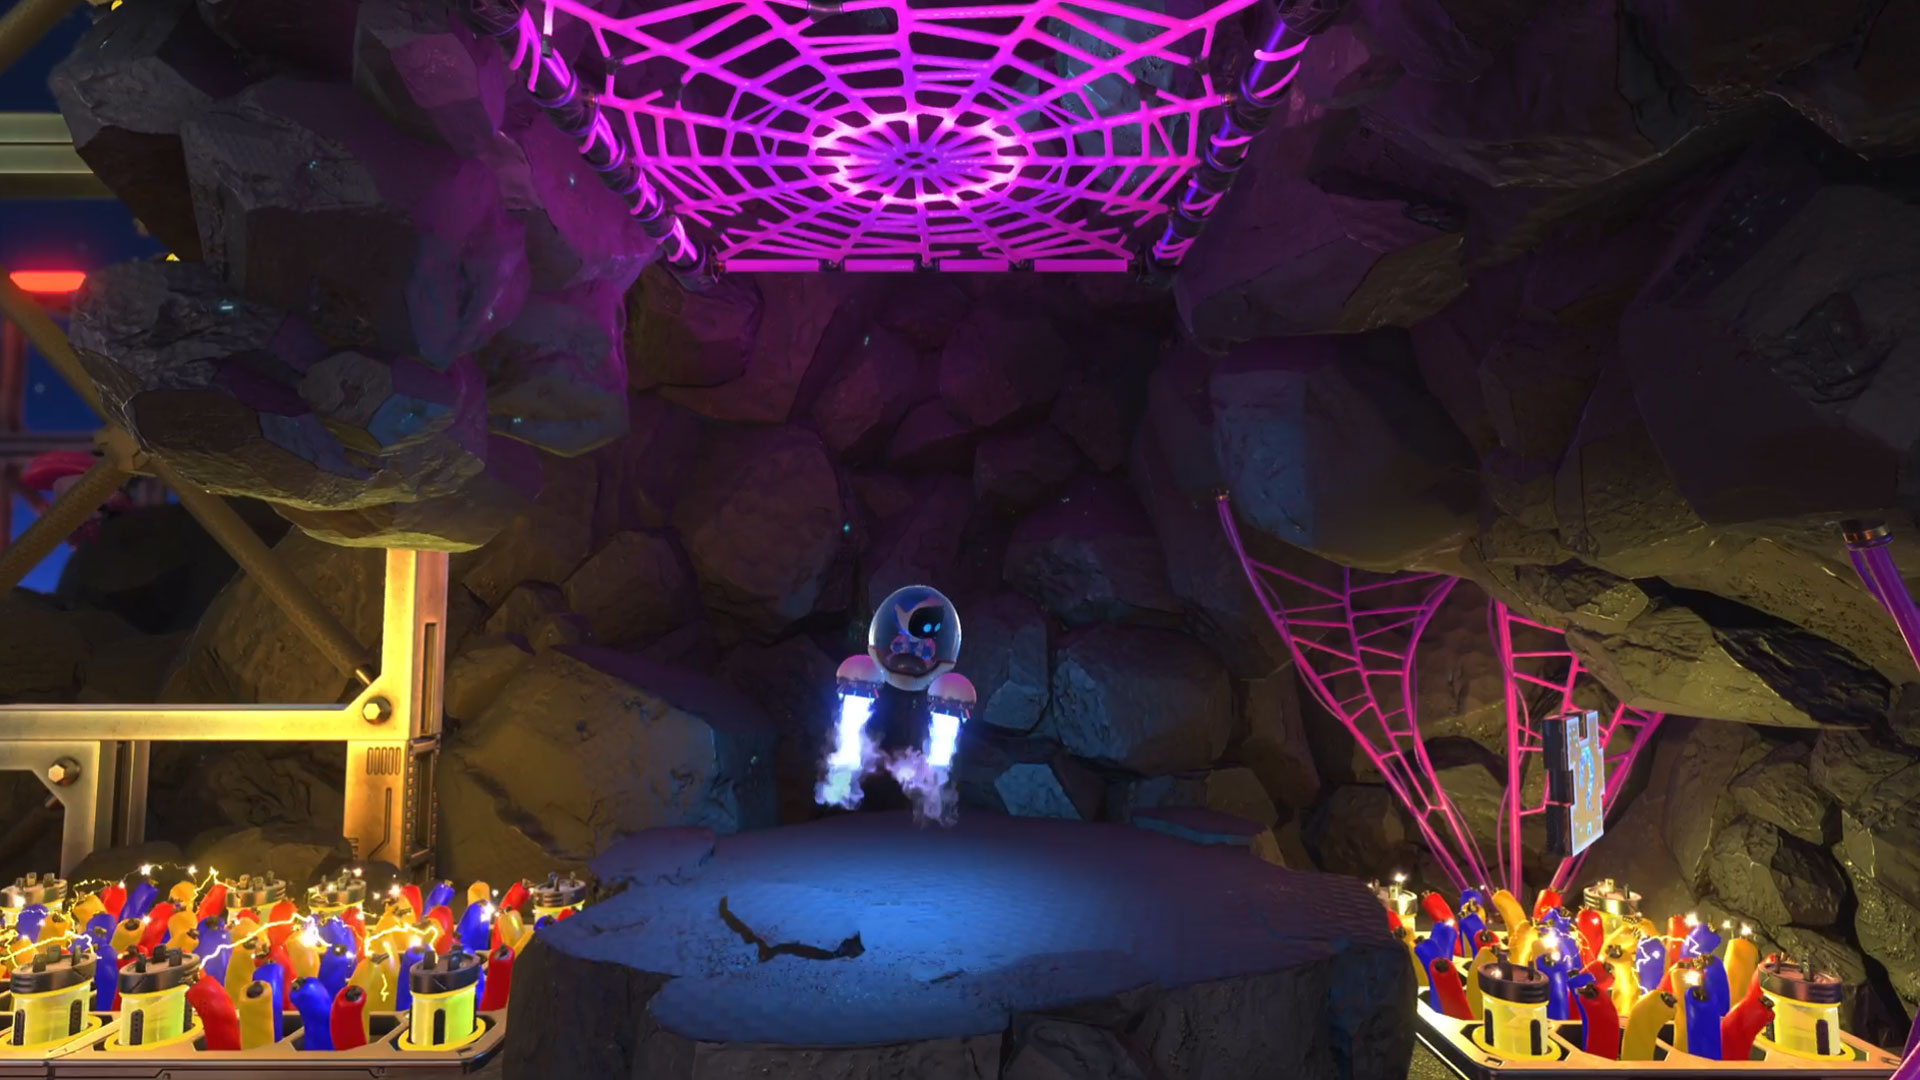
For the third piece, from that secret area of the second, follow the course around through two sets of electrified wires. As you see the third set, head down and right to another hidden area. Above you is a spider-web, but carry on to the right for your third puzzle piece.
Puzzle Piece 4
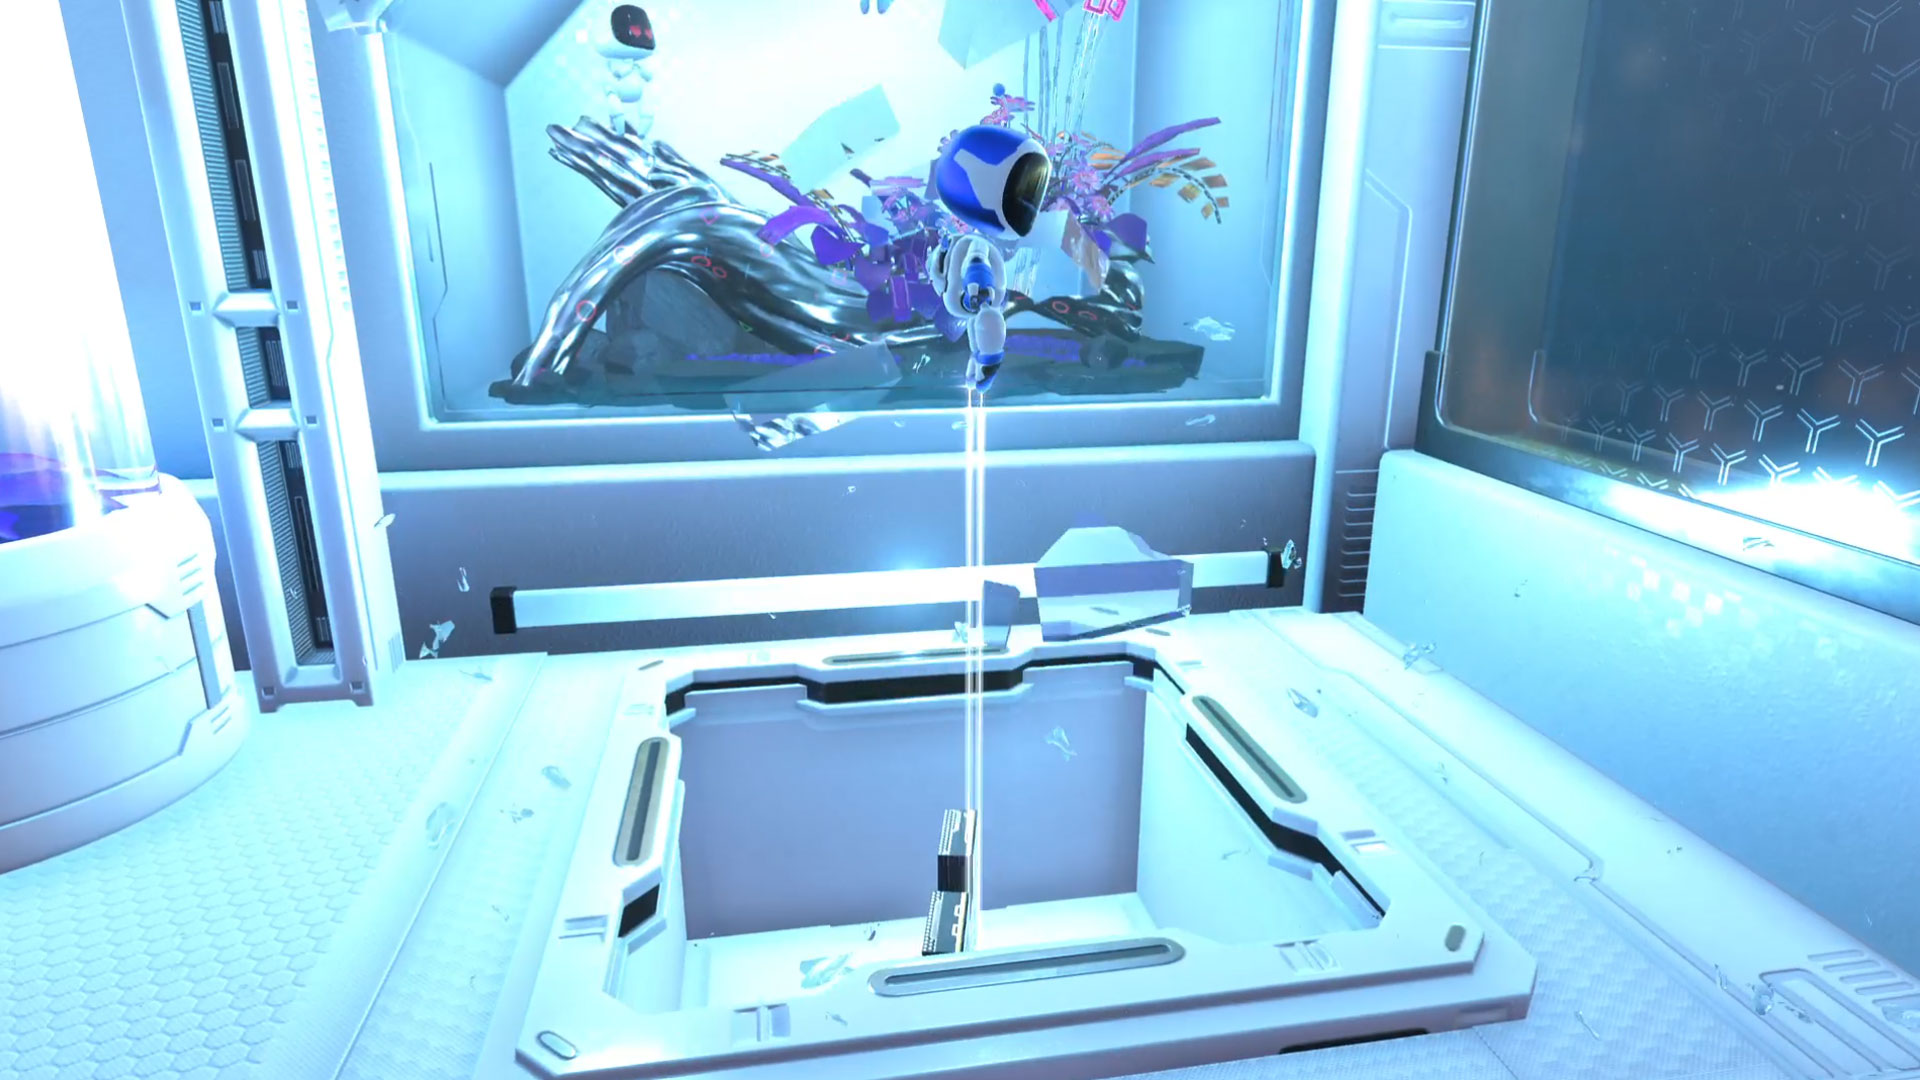
The last puzzle piece in this section is just after you give back the rocket suit. From that very platform, drop down to the ground below and use your jump thrust to smash the glass in the back right-hand corner of the room to grab the puzzle piece.
SSD Speedway - Deep Dataspace
Puzzle Piece 1
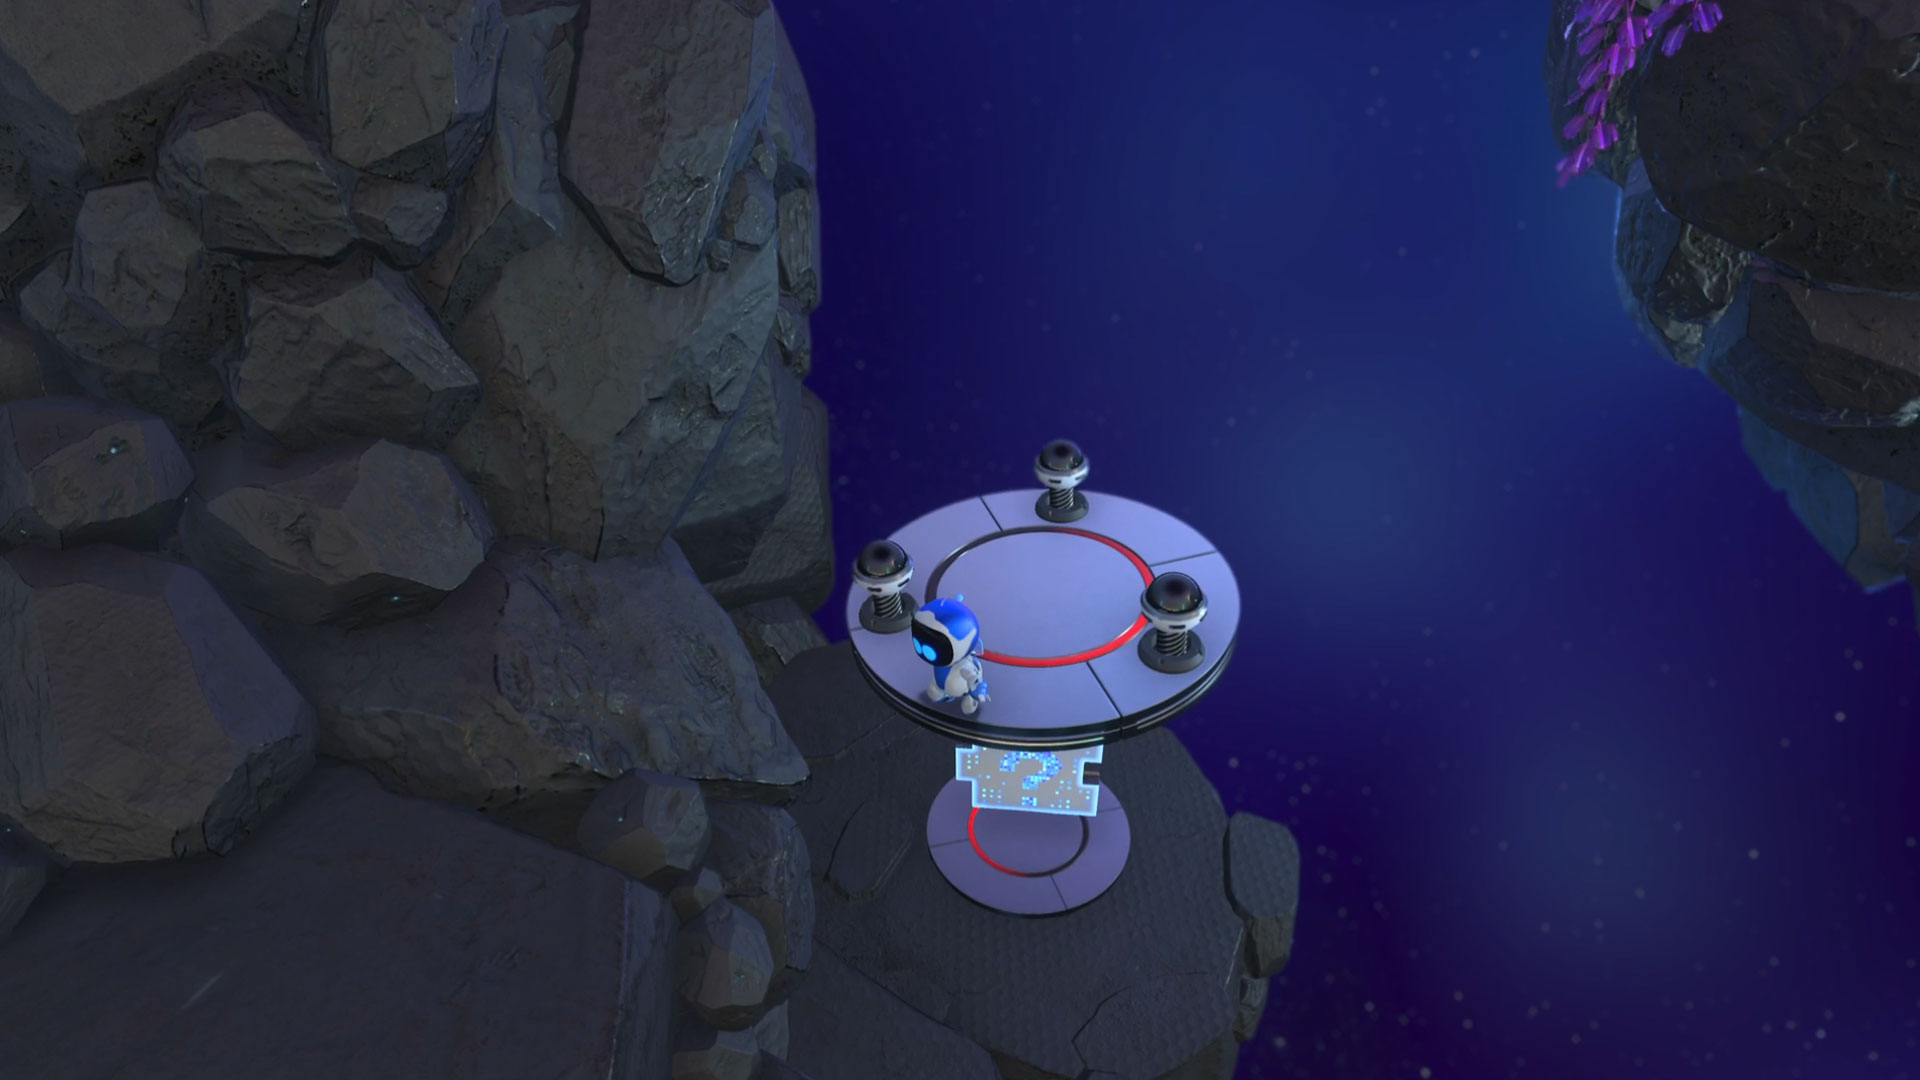
The first puzzle piece is right by the starting point for Deep Dataspace. From the start, head over to the left-hand side and there's a metal circular platform with three flowers on it. Stand in the middle and unleash your spin attack on all three simultaneously to cause the entire platform to rise, revealing the puzzle piece within.
Puzzle Piece 2
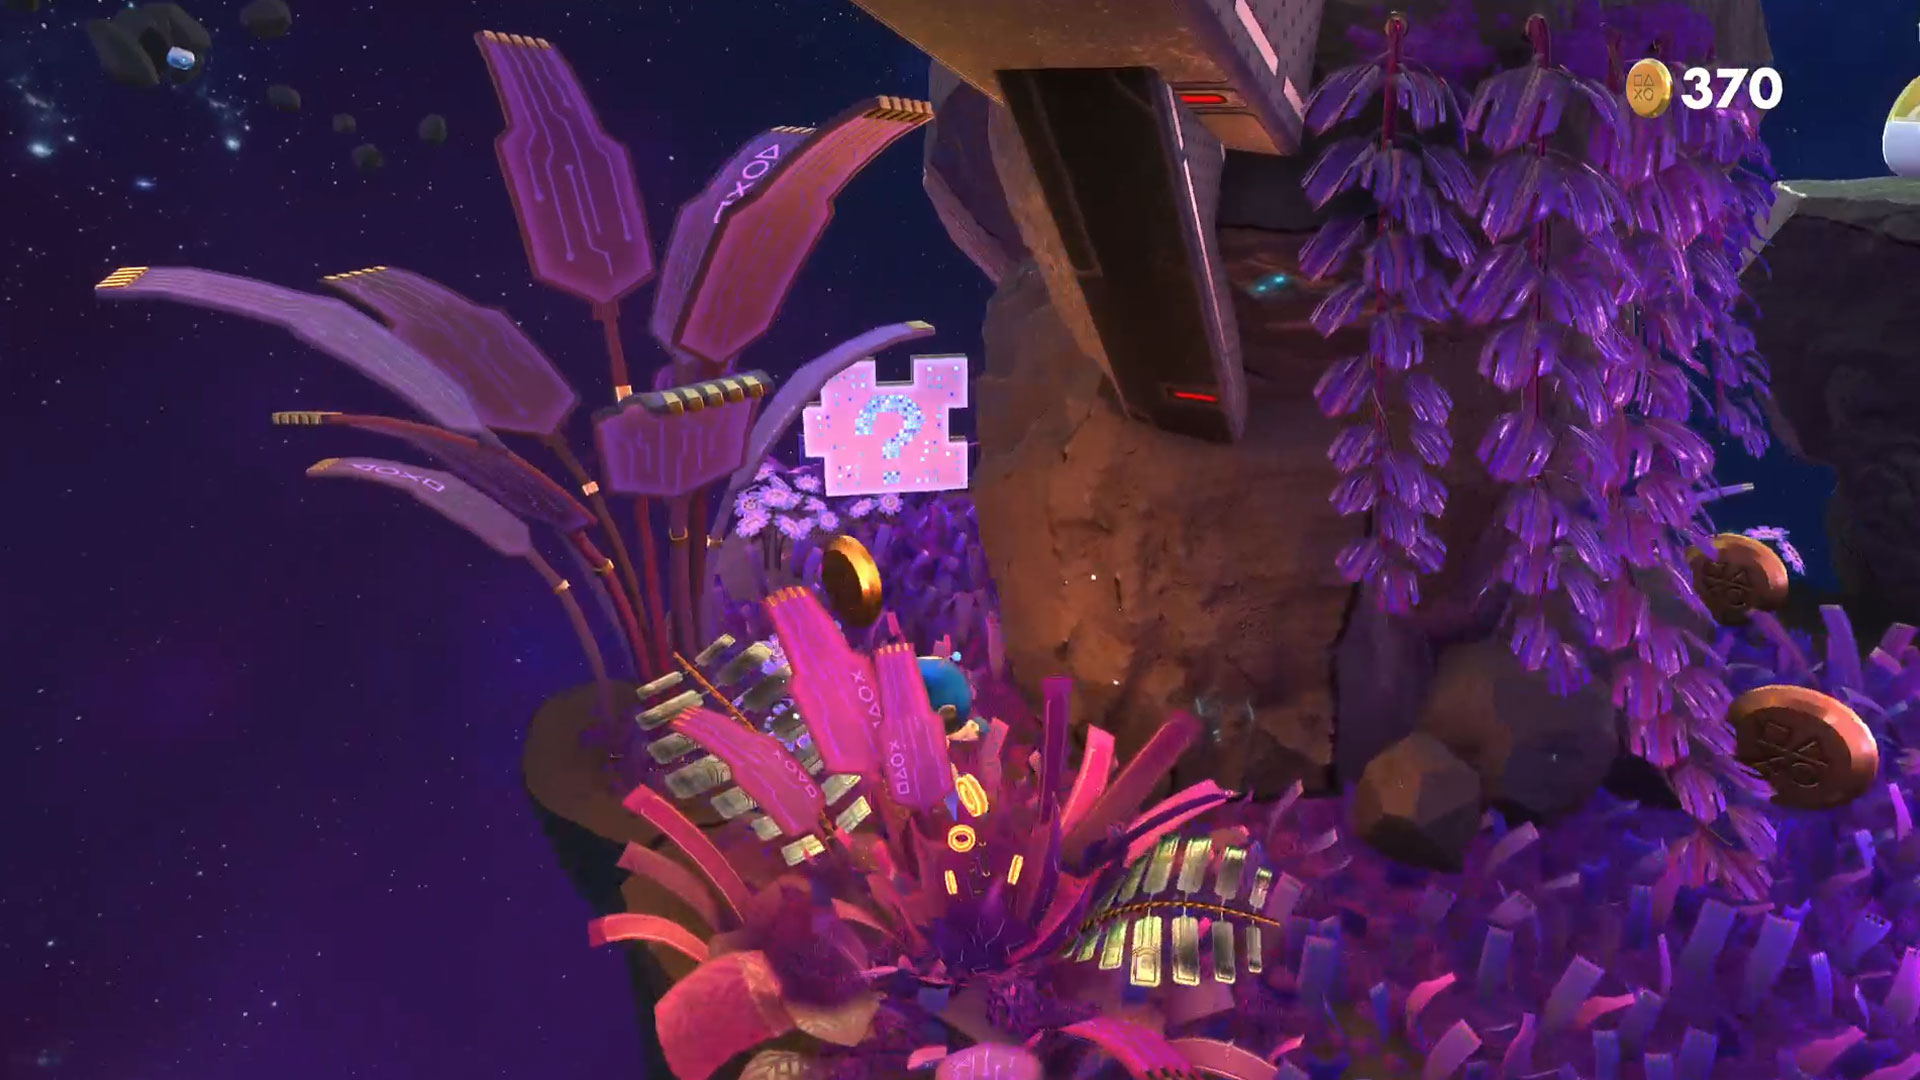
The second puzzle piece is actually also in this starting area. Straight opposite the starting point, look at the gangway leading between two platforms. Under here there's a little cluster of grass and plants. In here, behind the platform, is your second piece.
Puzzle Piece 3
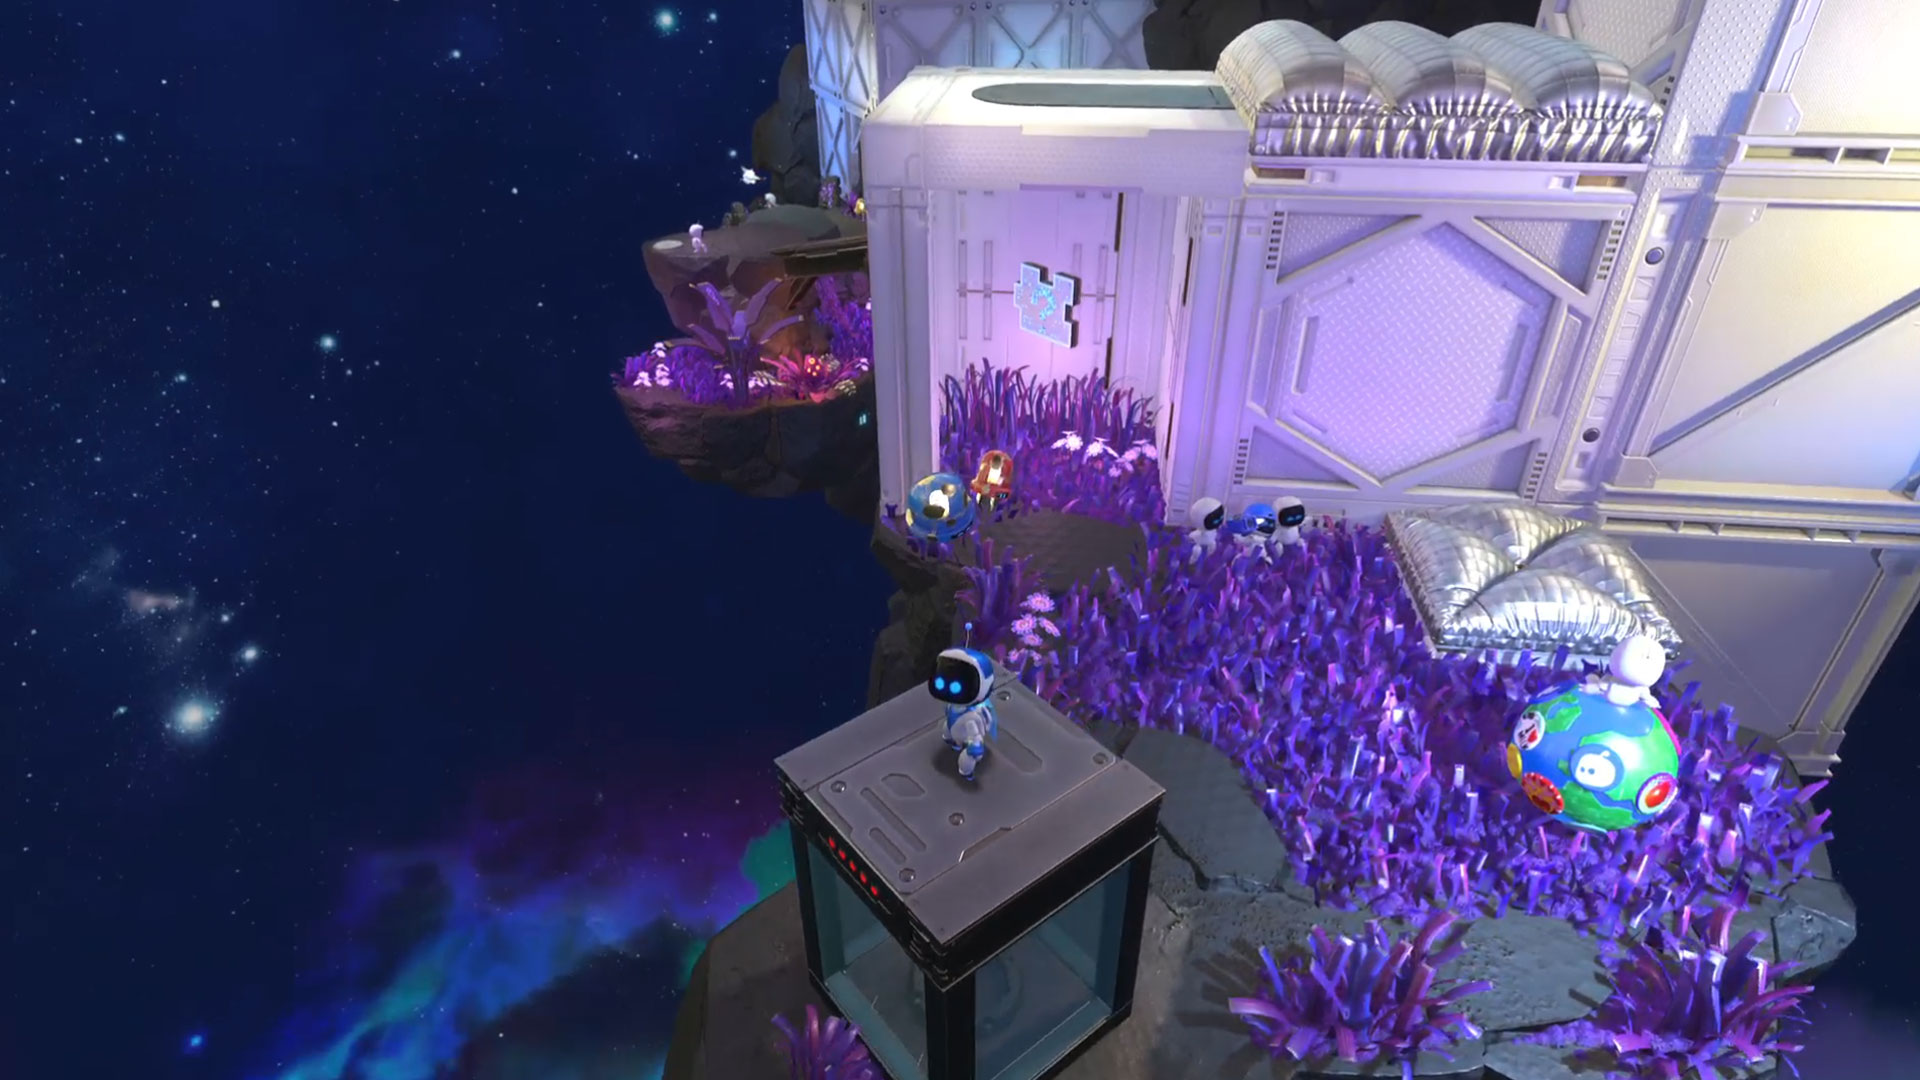
The next puzzle piece is hidden in the back of the gigantic block you need to jump up using the bouncy house-esque scaffolding. Head up to the top of this platform and then drop down to the platform on the other side. Spin your camera around, and it's nestled in a little alcove inside the block itself.
Puzzle Piece 4
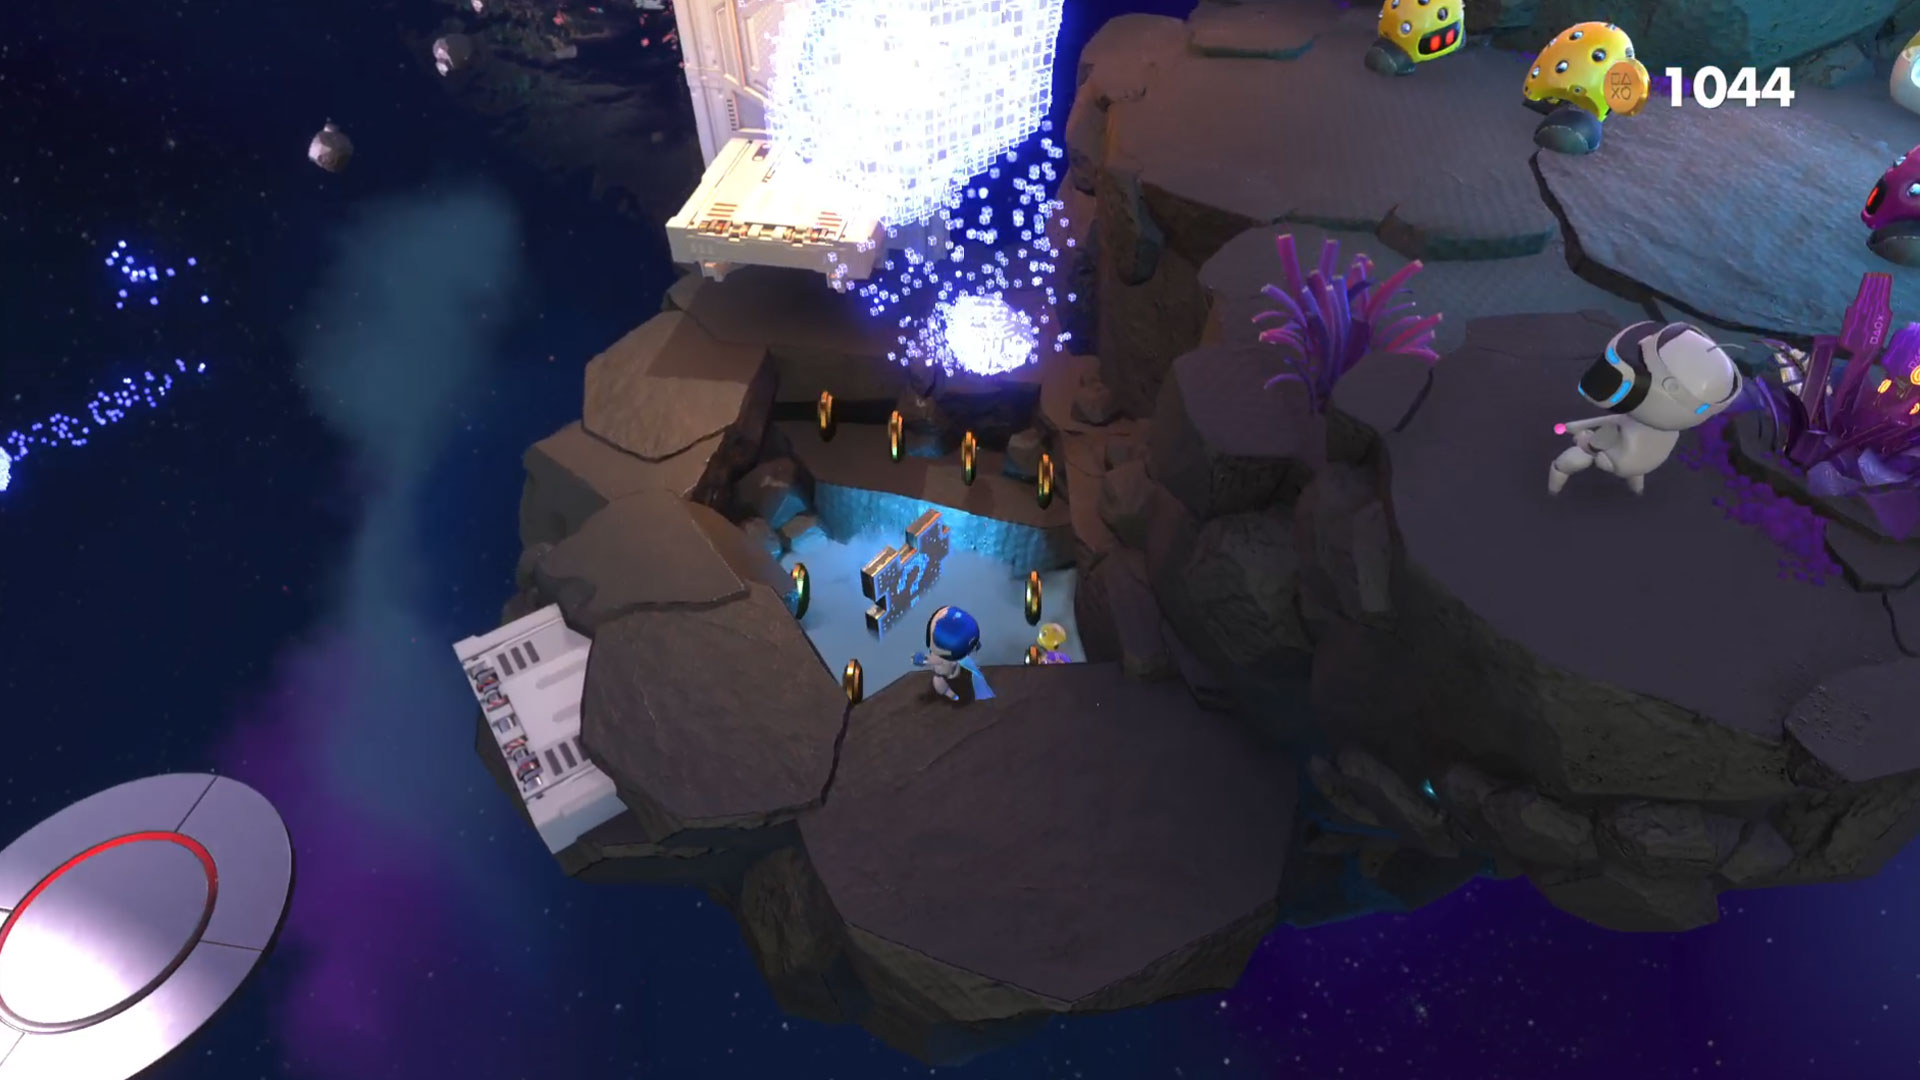
From the checkpoint located on a small circular platform covered in purple grass, jump across to where there's a bomb enemy next to an odd white structure. Use your jump boosters to light the bomb's fuse, and get out of the way while it explodes. It'll blast away the ground beneath it, revealing the third puzzle piece.
SSD Speedway - Orbital Obstacles
Puzzle Piece 1
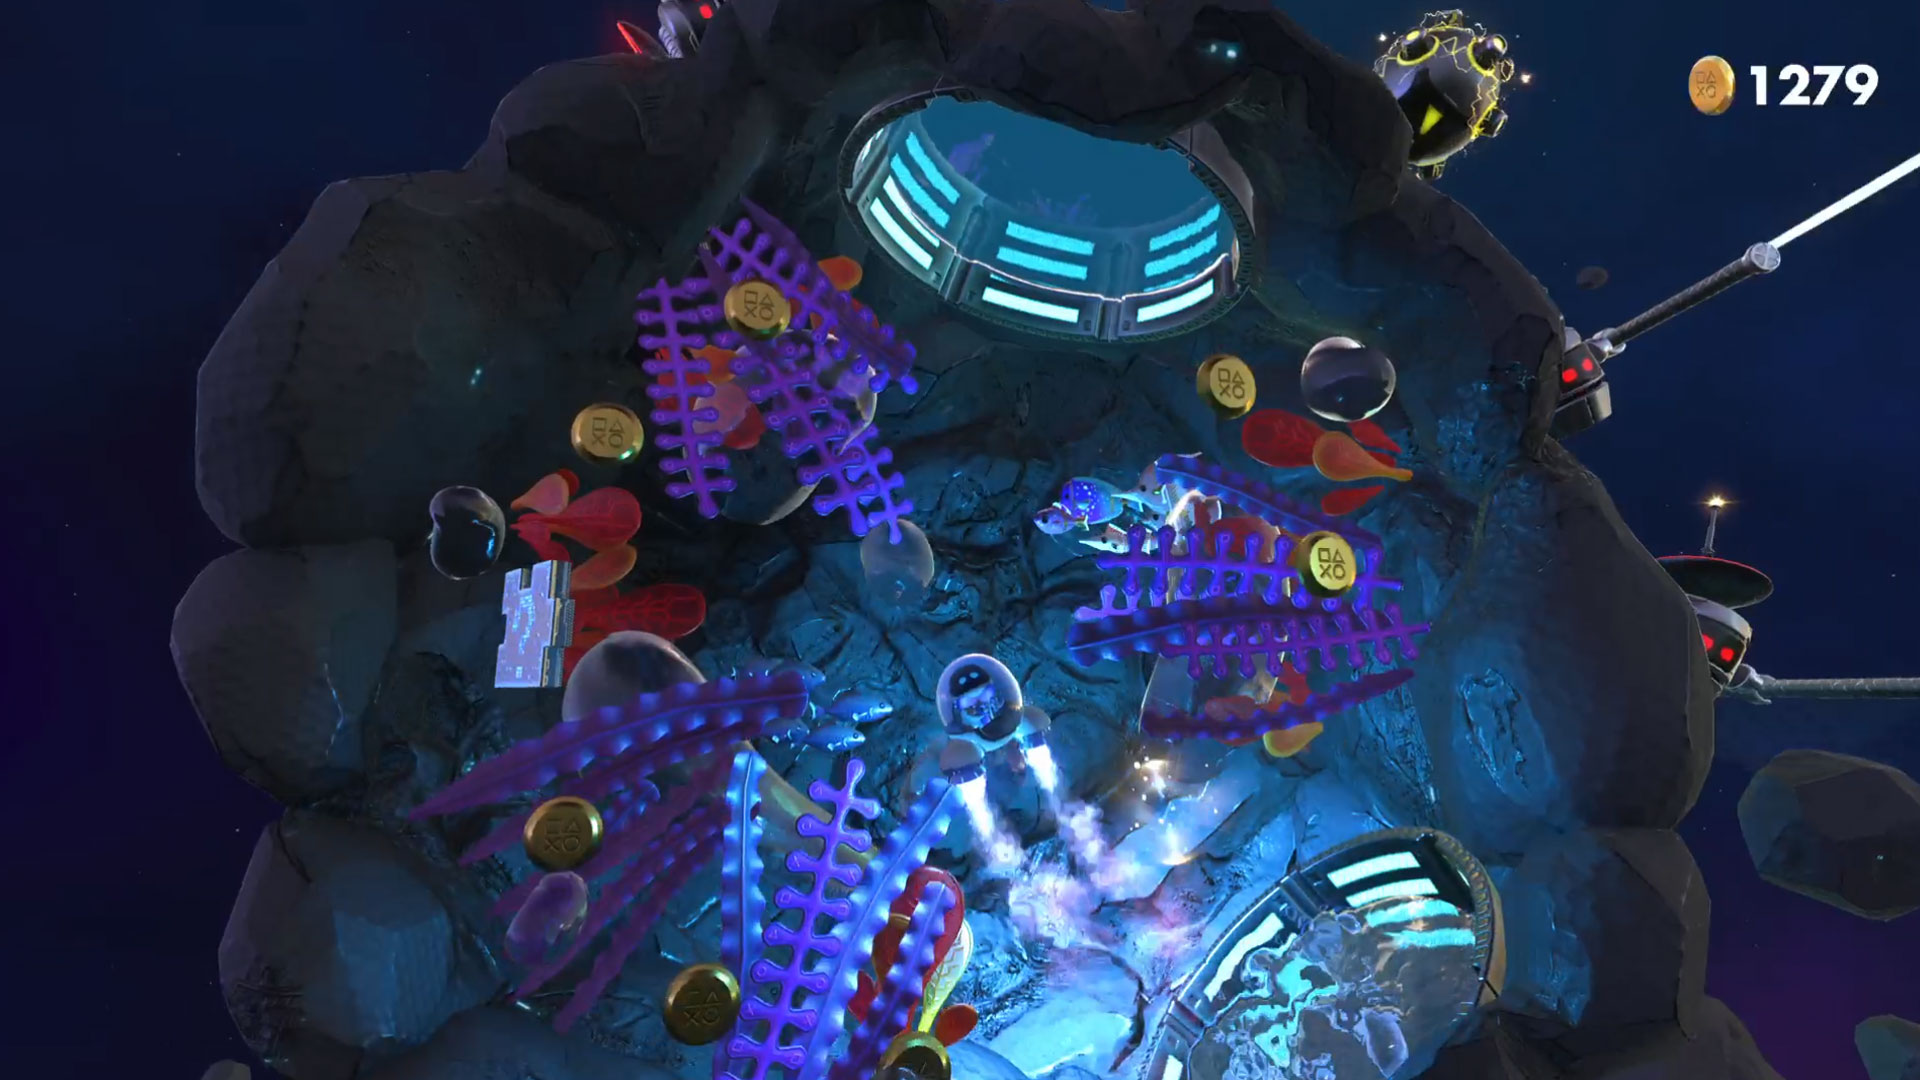
The first puzzle piece is on the journey itself. Soon after you start exploring this area, you'll have to enter an asteroid via a little circular portal. The inside is filled with water, but on the left within is your first puzzle piece.
Puzzle Piece 2
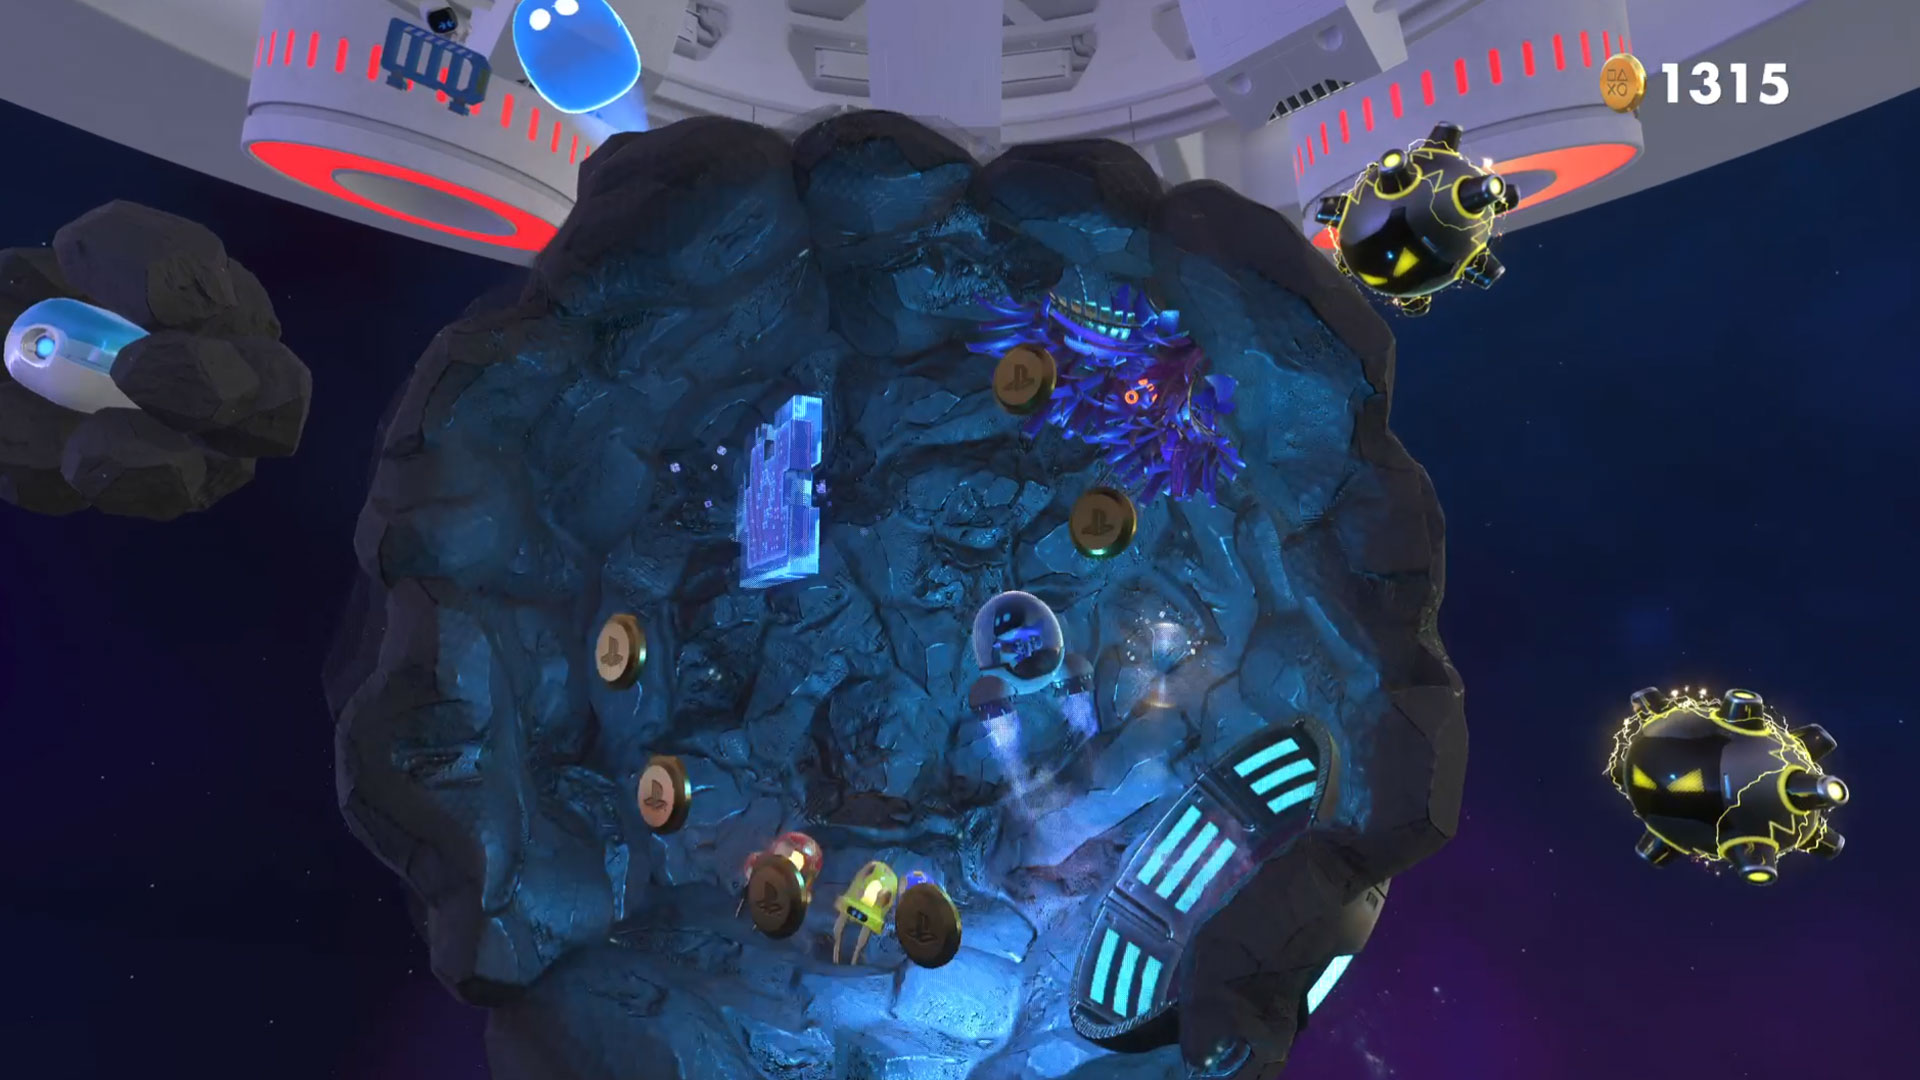
The first checkpoint for Orbital Obstacles is on another asteroid shortly after you find the first puzzle piece. From this checkpoint head down and right, and once you've navigated past the electric spike balls you can actually get inside this asteroid too. Inside is your second puzzle piece.
Puzzle Piece 3
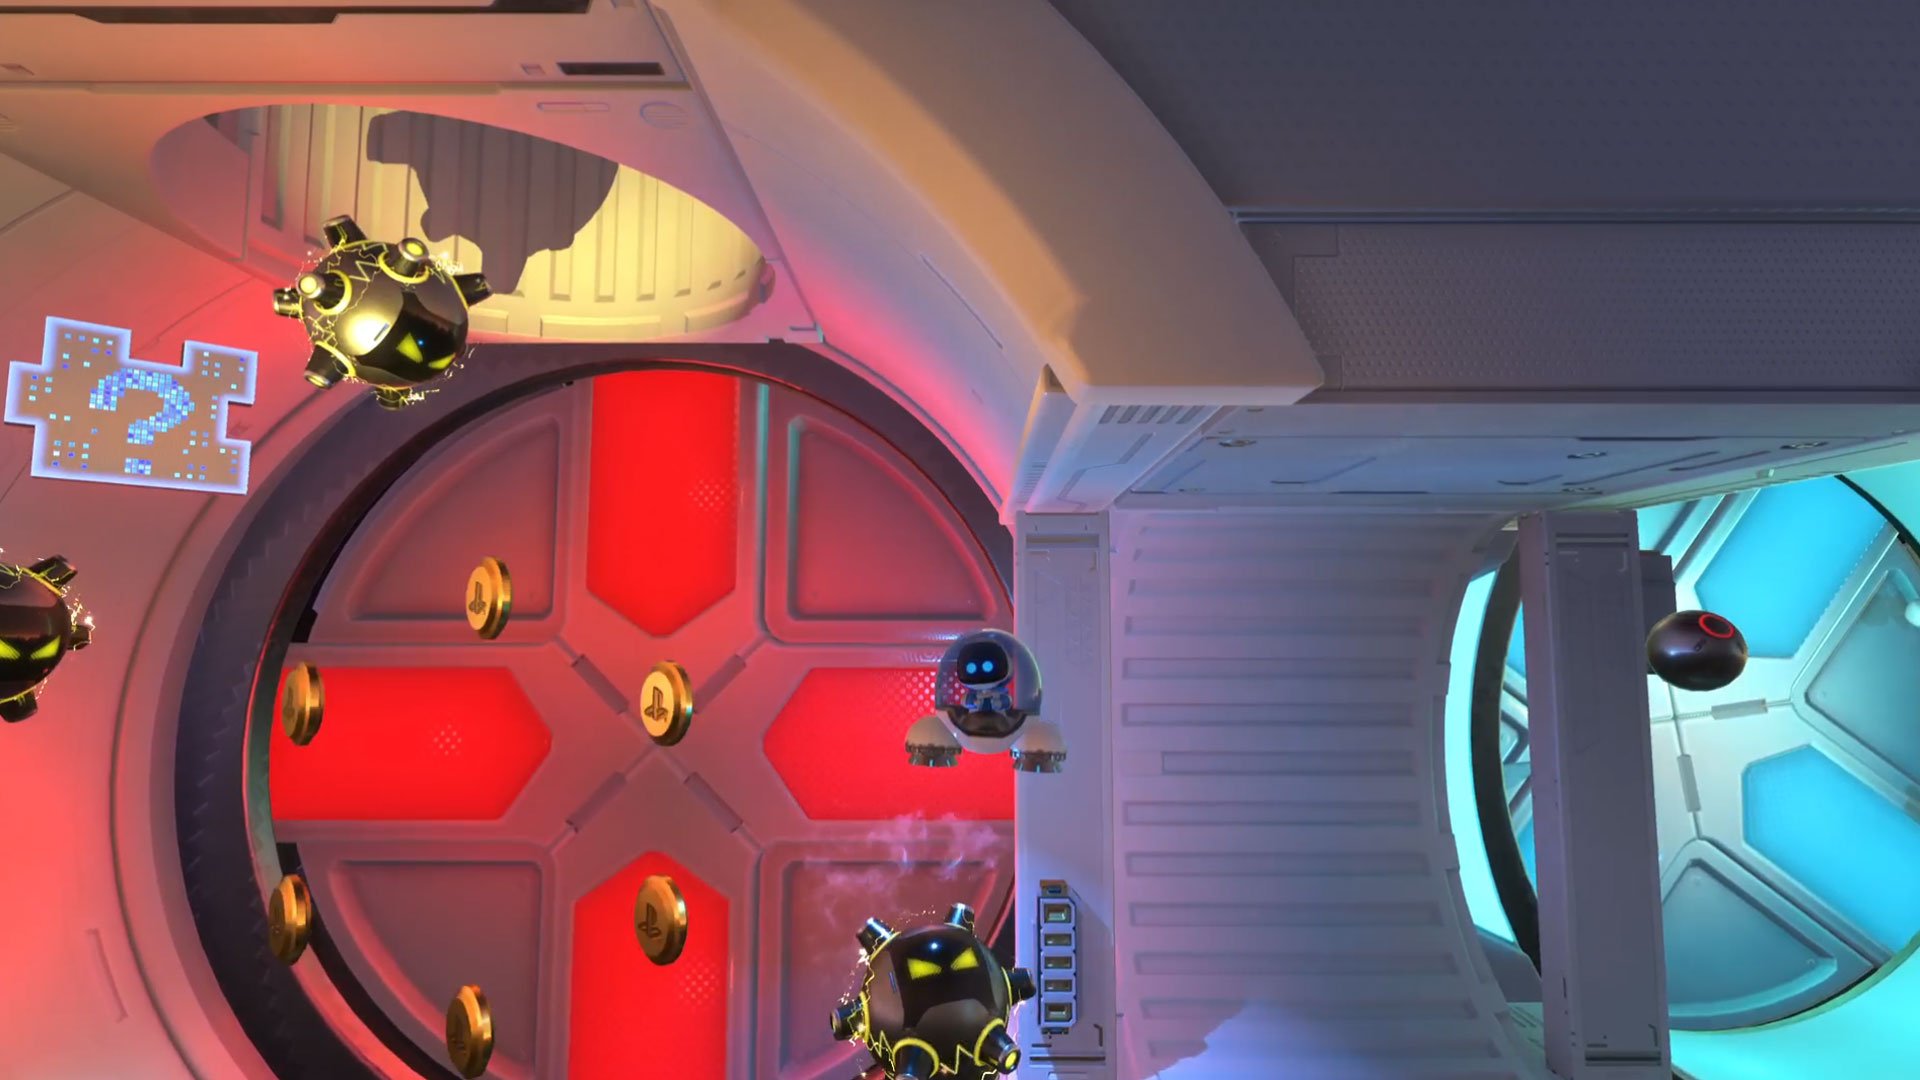
Inside the spaceship itself, get through to the checkpoint just after an extended sequence with exposed wiring panels (it has a turret enemy right next to it on the left). From here, keep going left until you see the third puzzle piece.
Puzzle Piece 4
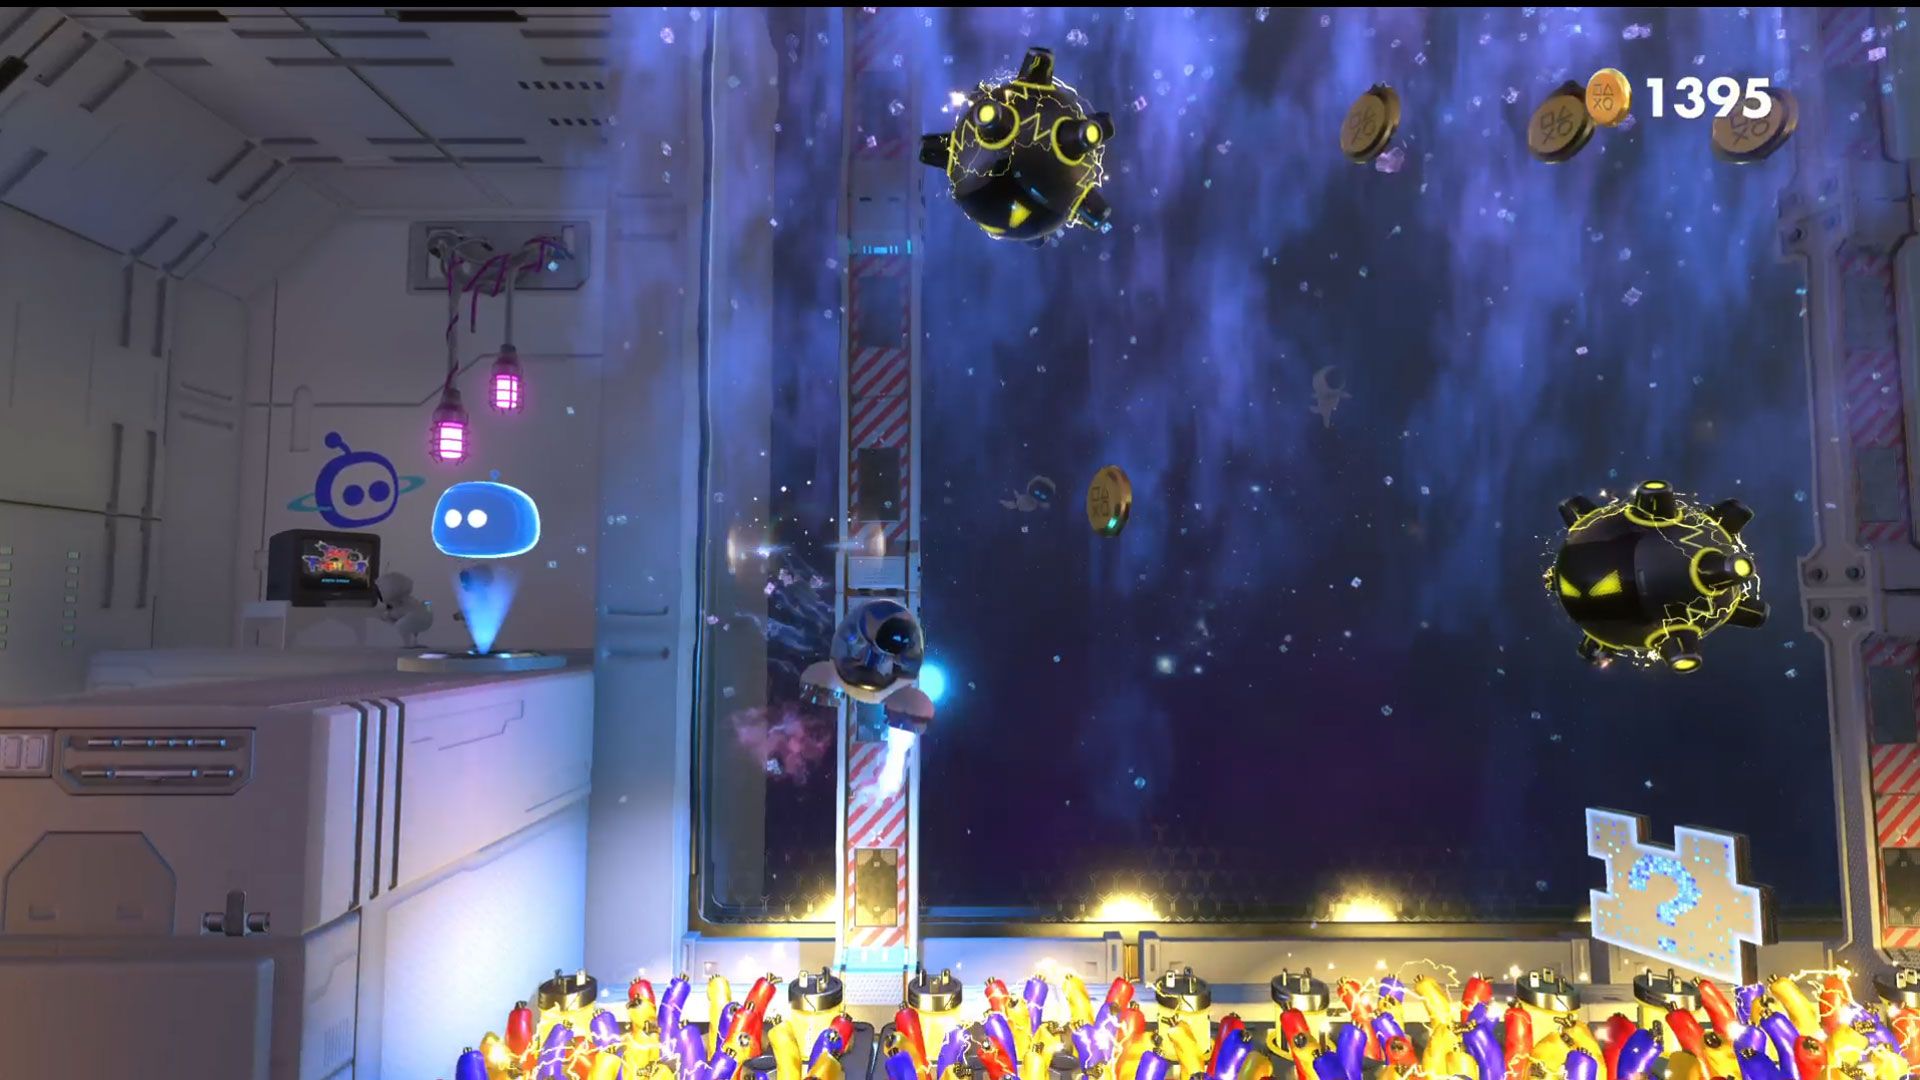
The final puzzle piece for this area is just beyond the checkpoint you reach after navigating the tube with the exposed wiring and the fans. You'll see it suspended between an electric enemy and more exposed wiring just there for the taking - with precision jet movement of course.
Weekly digests, tales from the communities you love, and more

Sam Loveridge is the Brand Director and former Global Editor-in-Chief of GamesRadar. She joined the team in August 2017. Sam came to GamesRadar after working at TrustedReviews, Digital Spy, and Fandom, following the completion of an MA in Journalism. In her time, she's also had appearances on The Guardian, BBC, and more. Her experience has seen her cover console and PC games, along with gaming hardware, for a decade, and for GamesRadar, she's in charge of the site's overall direction, managing the team, and making sure it's the best it can be. Her gaming passions lie with weird simulation games, big open-world RPGs, and beautifully crafted indies. She plays across all platforms, and specializes in titles like Pokemon, Assassin's Creed, The Sims, and more. Basically, she loves all games that aren't sports or fighting titles! In her spare time, Sam likes to live like Stardew Valley by cooking and baking, growing vegetables, and enjoying life in the countryside.
