One of the things you’ll learn while playing the main game is that getting familiar with the new game mechanics is essential to being successful. This certainly carries over to the Deniable Ops and Co-Op modes. The Last Known Position (LKP) and Mark and Execute systems are critical to getting through most of these modes. Please keep in mind that these tips are suggestions, not golden rules, and you may be forced to improvise.

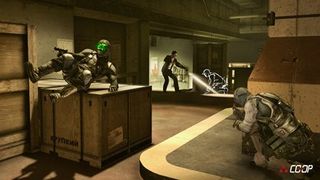
Above: "Secret Agent Casper's been spotted!"
• If you’re being pursued by the enemies, whether by a slip up or going in gung ho, always make use of the LKP system. It’s very easy to lure enemies into positions that are advantageous to you by leaning out of cover, shooting someone in the head in plain sight and then retreating through the shadows to another location. This can be used for any number of purposes ranging from drawing enemies into close range for a clear Mark and Execute, luring them into range of your mines or to simply move around and outflank them. You’re limited only by your equipment and your imagination.
• Speaking of the Mark and Execute system, this ability is almost hilariously overpowered when used properly. If you’re using your silenced pistol then you will be able to take out up to three people (via upgrade) without alerting anyone nearby to your actions. Carefully mixing up your hand to hand attacks to recharge the skill while taking out enemies will allow you to wipe out an entire room of enemies by yourself without alerting a single guard.

Above:Mark your enemiesto keep tabs on them.
• There's one other thing that might take some getting used to. Jokingly this could be called the “Mark but don’t Execute” system, but that’s essentially what you want to do. Since you can’t really move with the Sonar Goggles on, you’ll want to use them when you’re hiding behind cover. Now mark all of the enemies you can that are near you. This will allow you to track their movements by the marks above their head and removing much of the need to constantly use the Sonar Goggles. After that you’ll only need to use the Sonar when you’re in cover and scouting the level, or when you need to see which direction the enemy is facing.
• While playing these maps is simple, mastering them is hard. Enemy placement is going to be a huge issue as well as learning all of the key areas of a map. Choke points, alternate routes and turret locations are all things that you should be keeping your eyes open for. Missing out on these can come to bite you in the rear if you find things not going according to plan, as each of these are relevant in different game modes. For example alternate routes will help you during Infiltration since you want to avoid enemies like the plague. Turret locations are important in Hunter as forgetting where one is and bumbling into it is a death sentence.

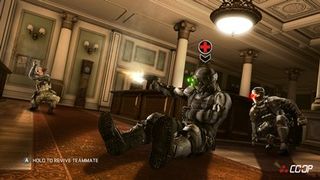
Above: "Uh-oh looks like you've been shot, don't worry, I've got a syringe full of PRESS-A right here."
• To help with learning the game, turn off the time limit and keep it off. There’s no reason for you to have to deal with the frustration of the time limit until you know what you’re doing. This is a great way to test yourself later on once you know the maps, enemy placements and have a better idea of how to handle the game. Unless you’re really good at Splinter Cell you’re going to take at least fifteen to twenty minutes per stage, and rushing yourself isn’t going to help with learning the maps and enemy placement. Once you’ve got that information down, then feel free to start timing yourself.
• This guide does not take into account individual P.E.C. builds so that’s entirely up to the player. Going with more gadgets works very well for Hunter and Infiltration mode while going for more ammo and armor can help out during Last Stand and Face Off.
• Play solo to begin with! If you don’t know the maps, then you’re not going to have any idea how to proceed through the level. Learn how to handle yourself before foisting your “talents” off on other people. Otherwise you’re just going to encourage them to quit the game before completion and just generally leave everyone involved annoyed. Spare everyone the grief and practice solo before going online.

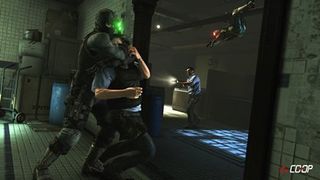
Above: Create a distraction before striking.
• When you finally do have the capabilities to play co-op with someone it’s time to learn how to handle marking and executing with them. Since all marked enemies show up to both players be sure to mark lots of people so that you can track them all through the walls without use of Sonar Goggles. Also when one person is executing marked targets the other player can jump in on it, taking a free shot at one of the marked targets for free. This works well when you’ve got people marked that are out of reach for one person but not the other. Doing this efficiently will enable you to track and then systematically remove enemies in very short order.
• As a final thought it’s not always helpful to shoot out lights in the path you’re using. This will often make the enemies jittery and nervous, causing them to be more alert or move away from their starting position. More importantly this will cause them to turn on their flashlights. This just serves to make it more difficult to sneak up on them and is actually counterproductive. Instead try to blow out lights in areas where there are no enemies, preferably areas you’ve cleared. This gives you somewhere to retreat to in case you’re spotted and/or reinforcements arrive.
