How to solve the Horizon Forbidden West Relic Ruins puzzles and collect the ornaments
This is how to beat the Horizon Forbidden West Relic Ruins
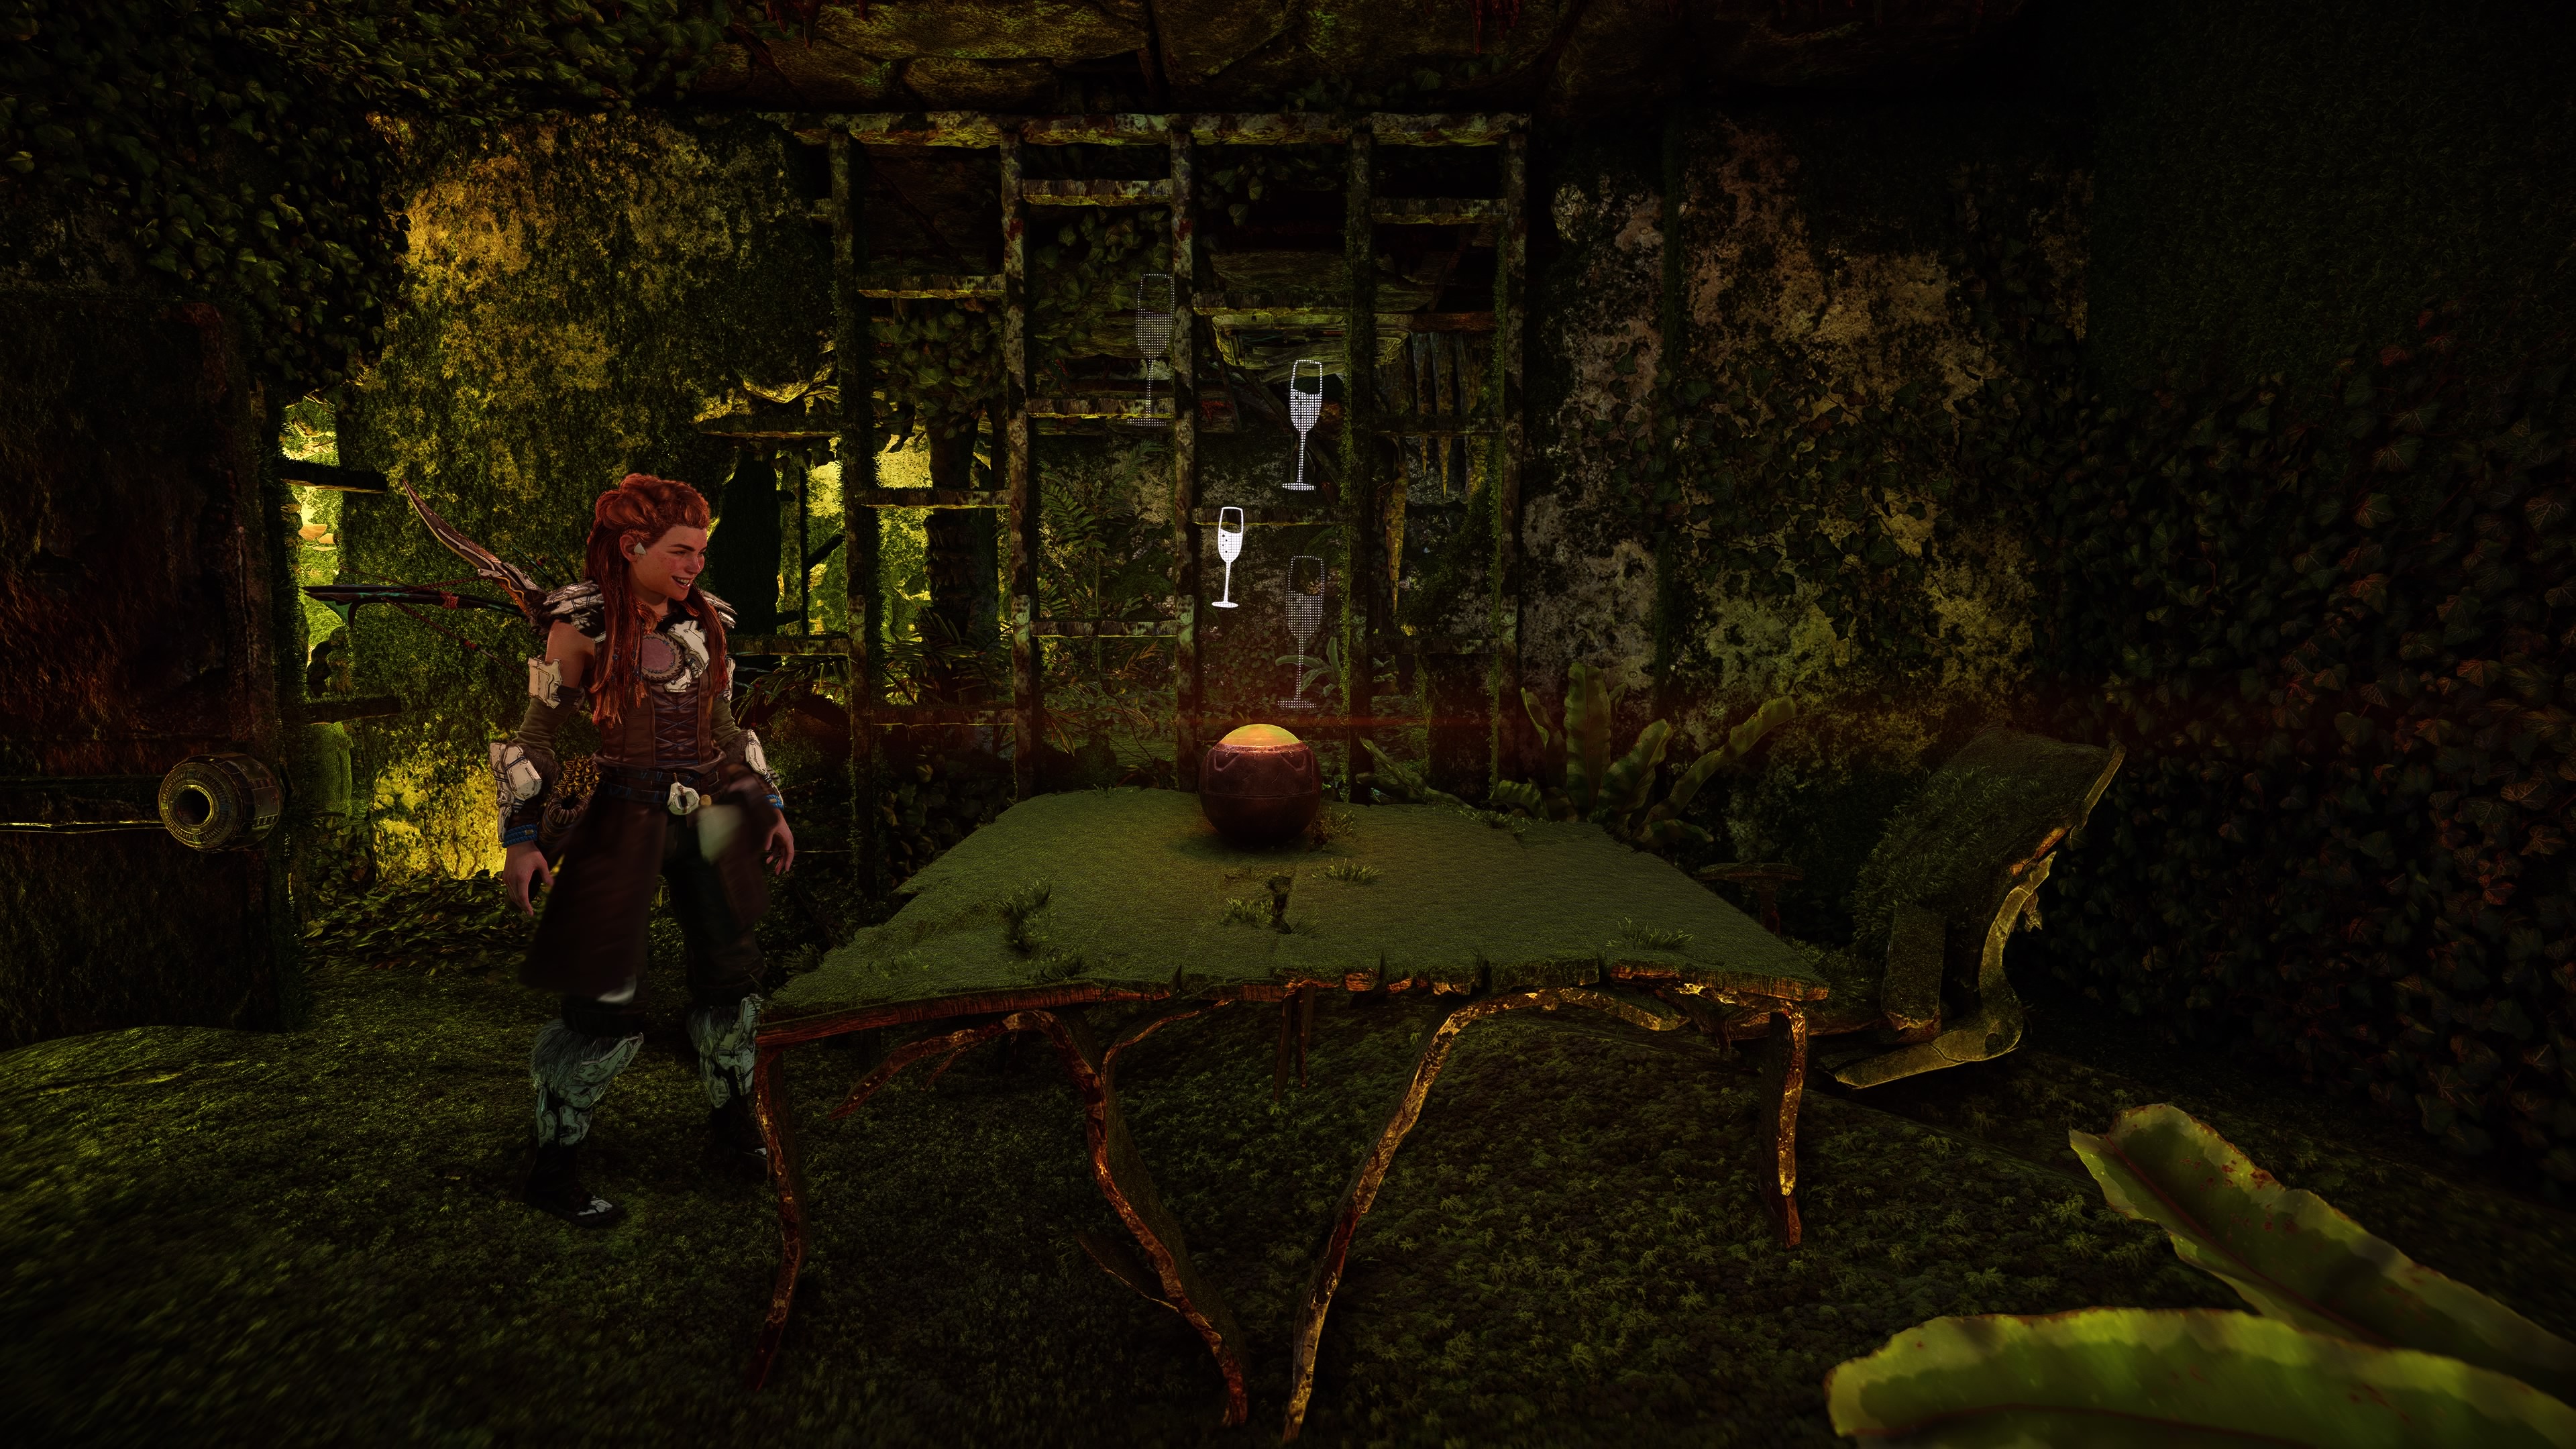
Horizon Forbidden West Relic Ruins are cute little self-contained puzzles, and by solving them you'll obtain Ornaments. Those are the holographic remains of the Old Ones, and you'll ultimately be able to trade them in to receive an impressive light show within Las Vegas. Although there are a total of nine Ornaments to gather up, you'll collect one of them via a side mission given by Stemmur at Hidden Ember, which leaves you with eight Relic Ruins around the map to discover in Horizon Forbidden West.
It's worth noting that you'll need a few story-gated special abilities to solve all of the Relic Ruins listed here - specifically the ability to clear Horizon Forbidden West red crystal growths and open Horizon Forbidden West Metal Flowers. You may also need door codes that you can discover by scanning Datapoints in the area, and the documents for these can be found in: Settings > Notebook > Datapoints > Relic Ruins.
Here's where to take your Ornaments and how to solve all of the Horizon Forbidden West Relic Ruins puzzles.
What to do with the Ornaments you find at the ruins
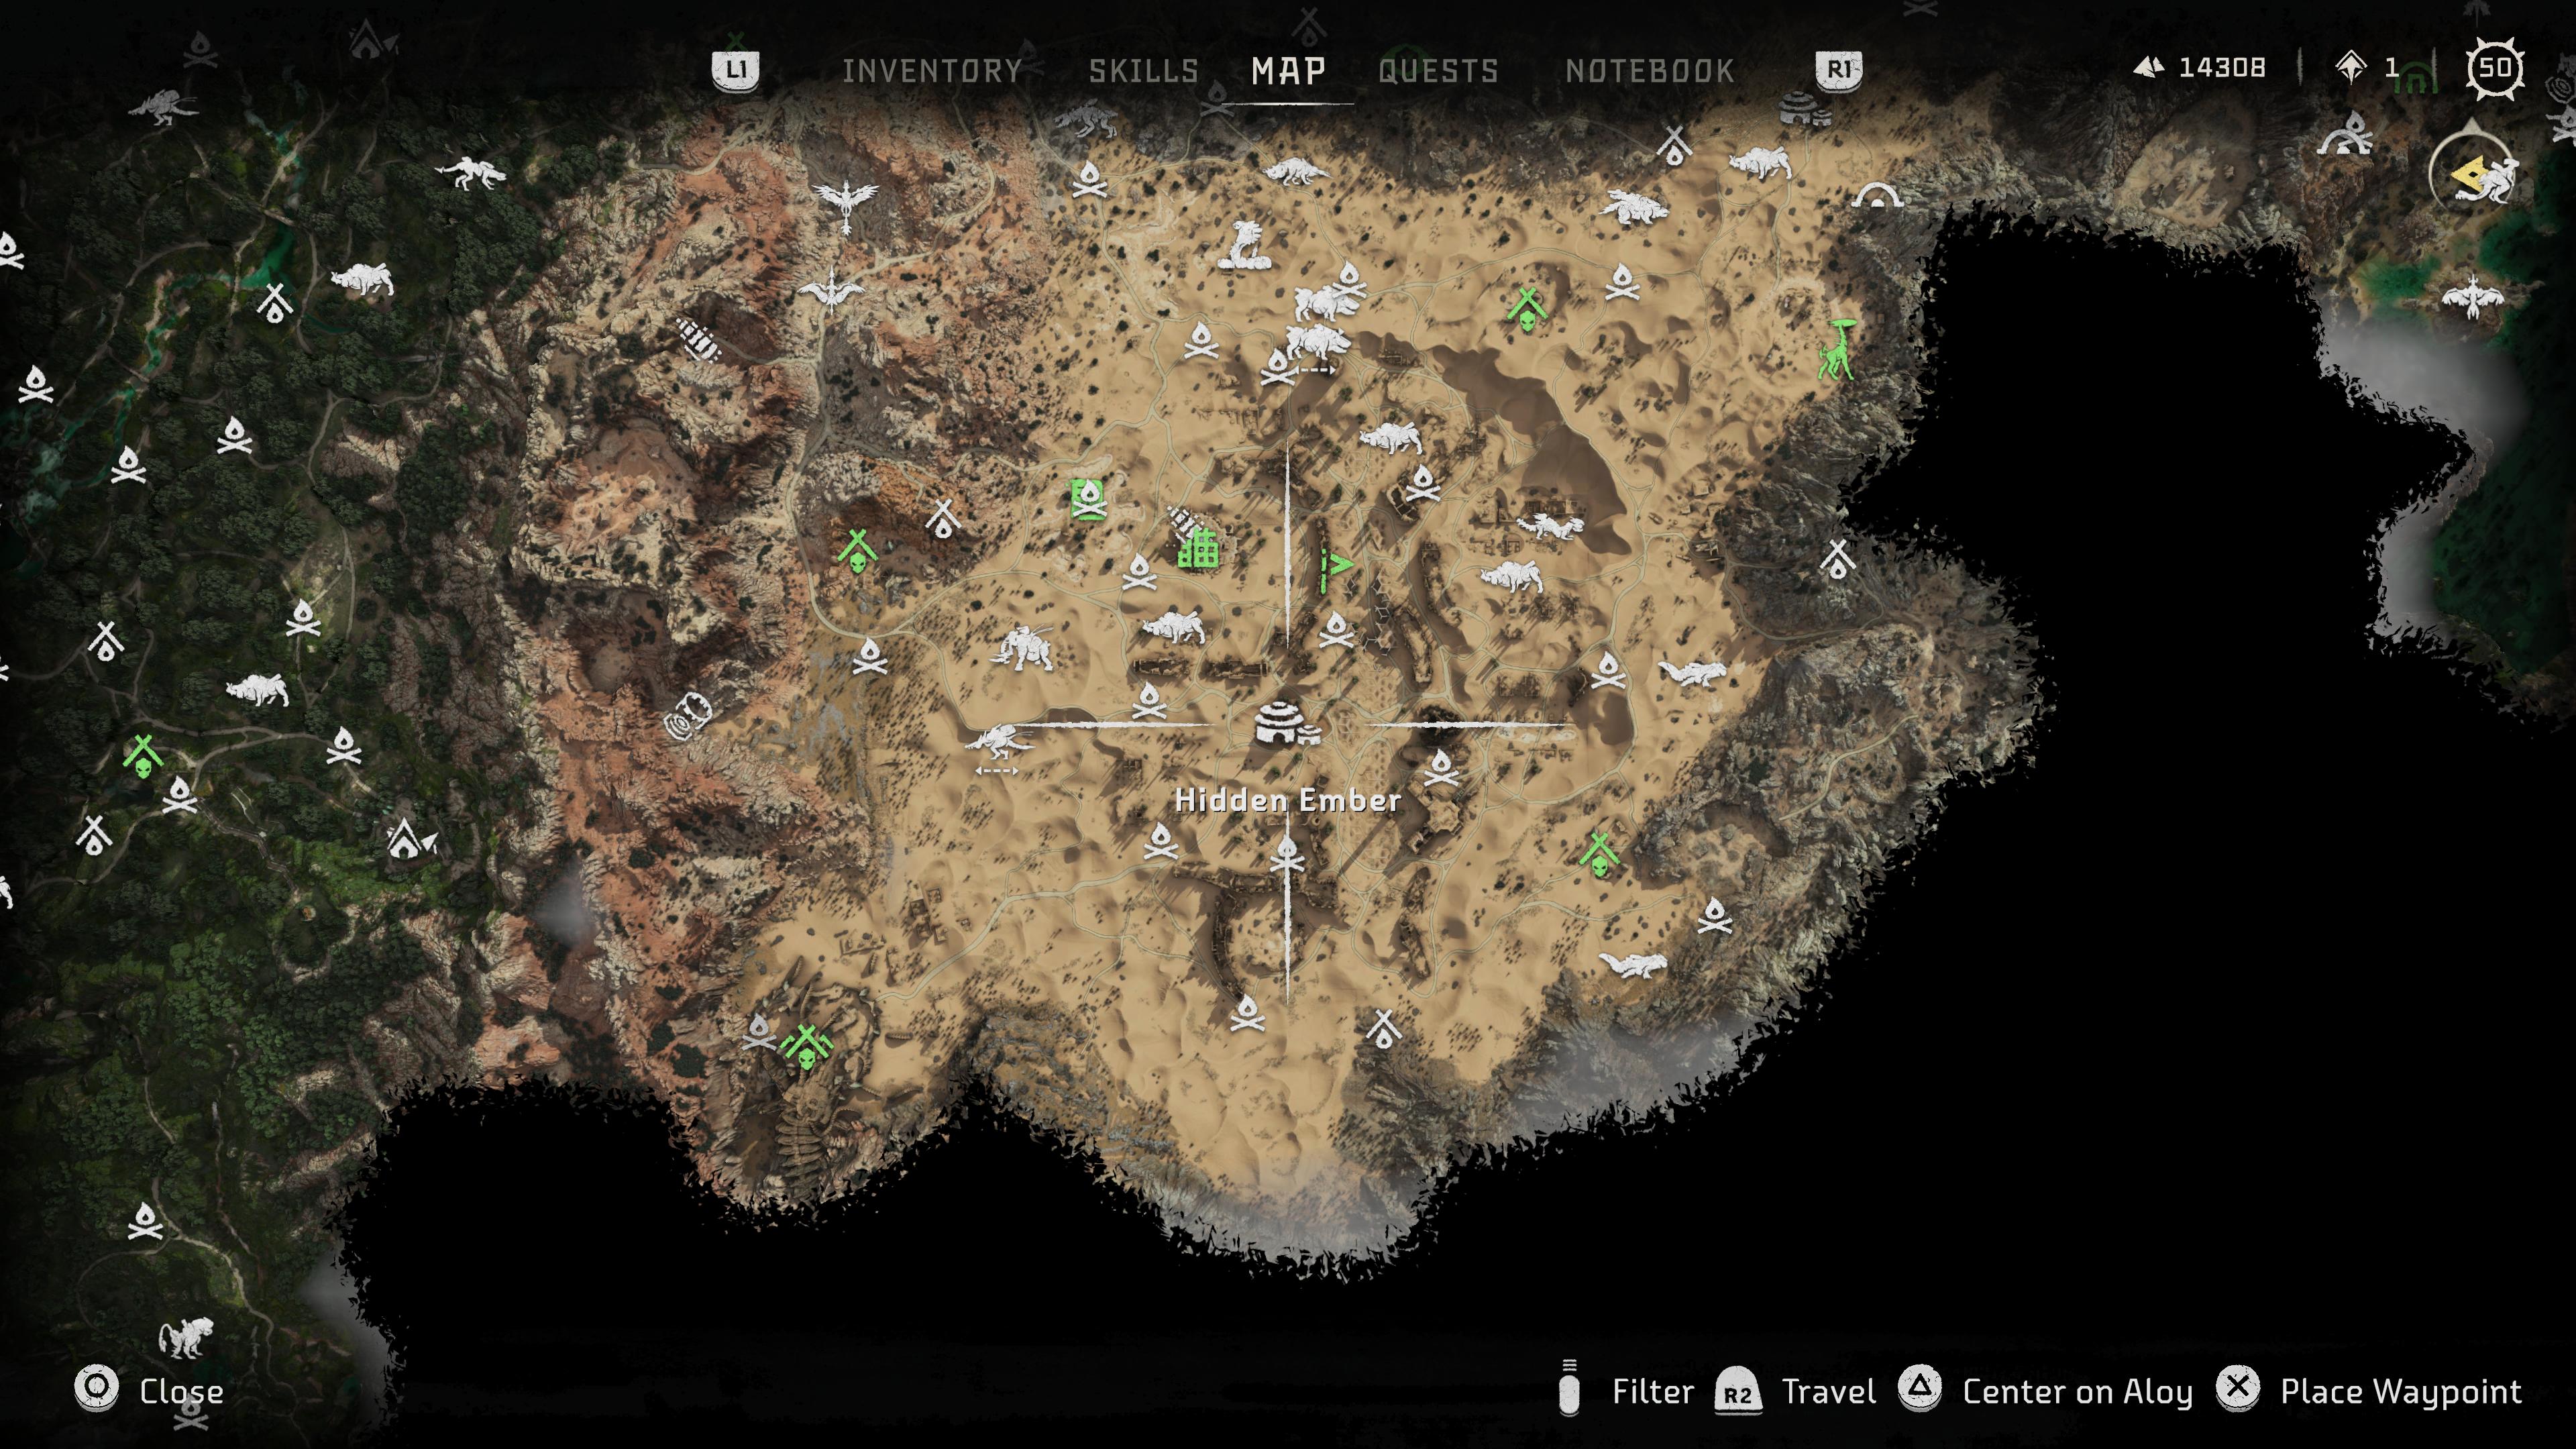
You can turn in the Horizon Forbidden West Ornaments that you find at Hidden Ember, which is the camp in Las Vegas. On the second floor of the building - post-Poseidon main mission - you'll find the storyteller, Stemmur, who'll take your Ornaments from you and turn them into a beautiful light show.

Once you've handed them all in, Stemmur will reward you with the Ancestor's Return Shredder Gauntlet, which is one of the best Horizon Forbidden West weapons.
The Daunt
Horizon Forbidden West Relic Ruins: The Daunt
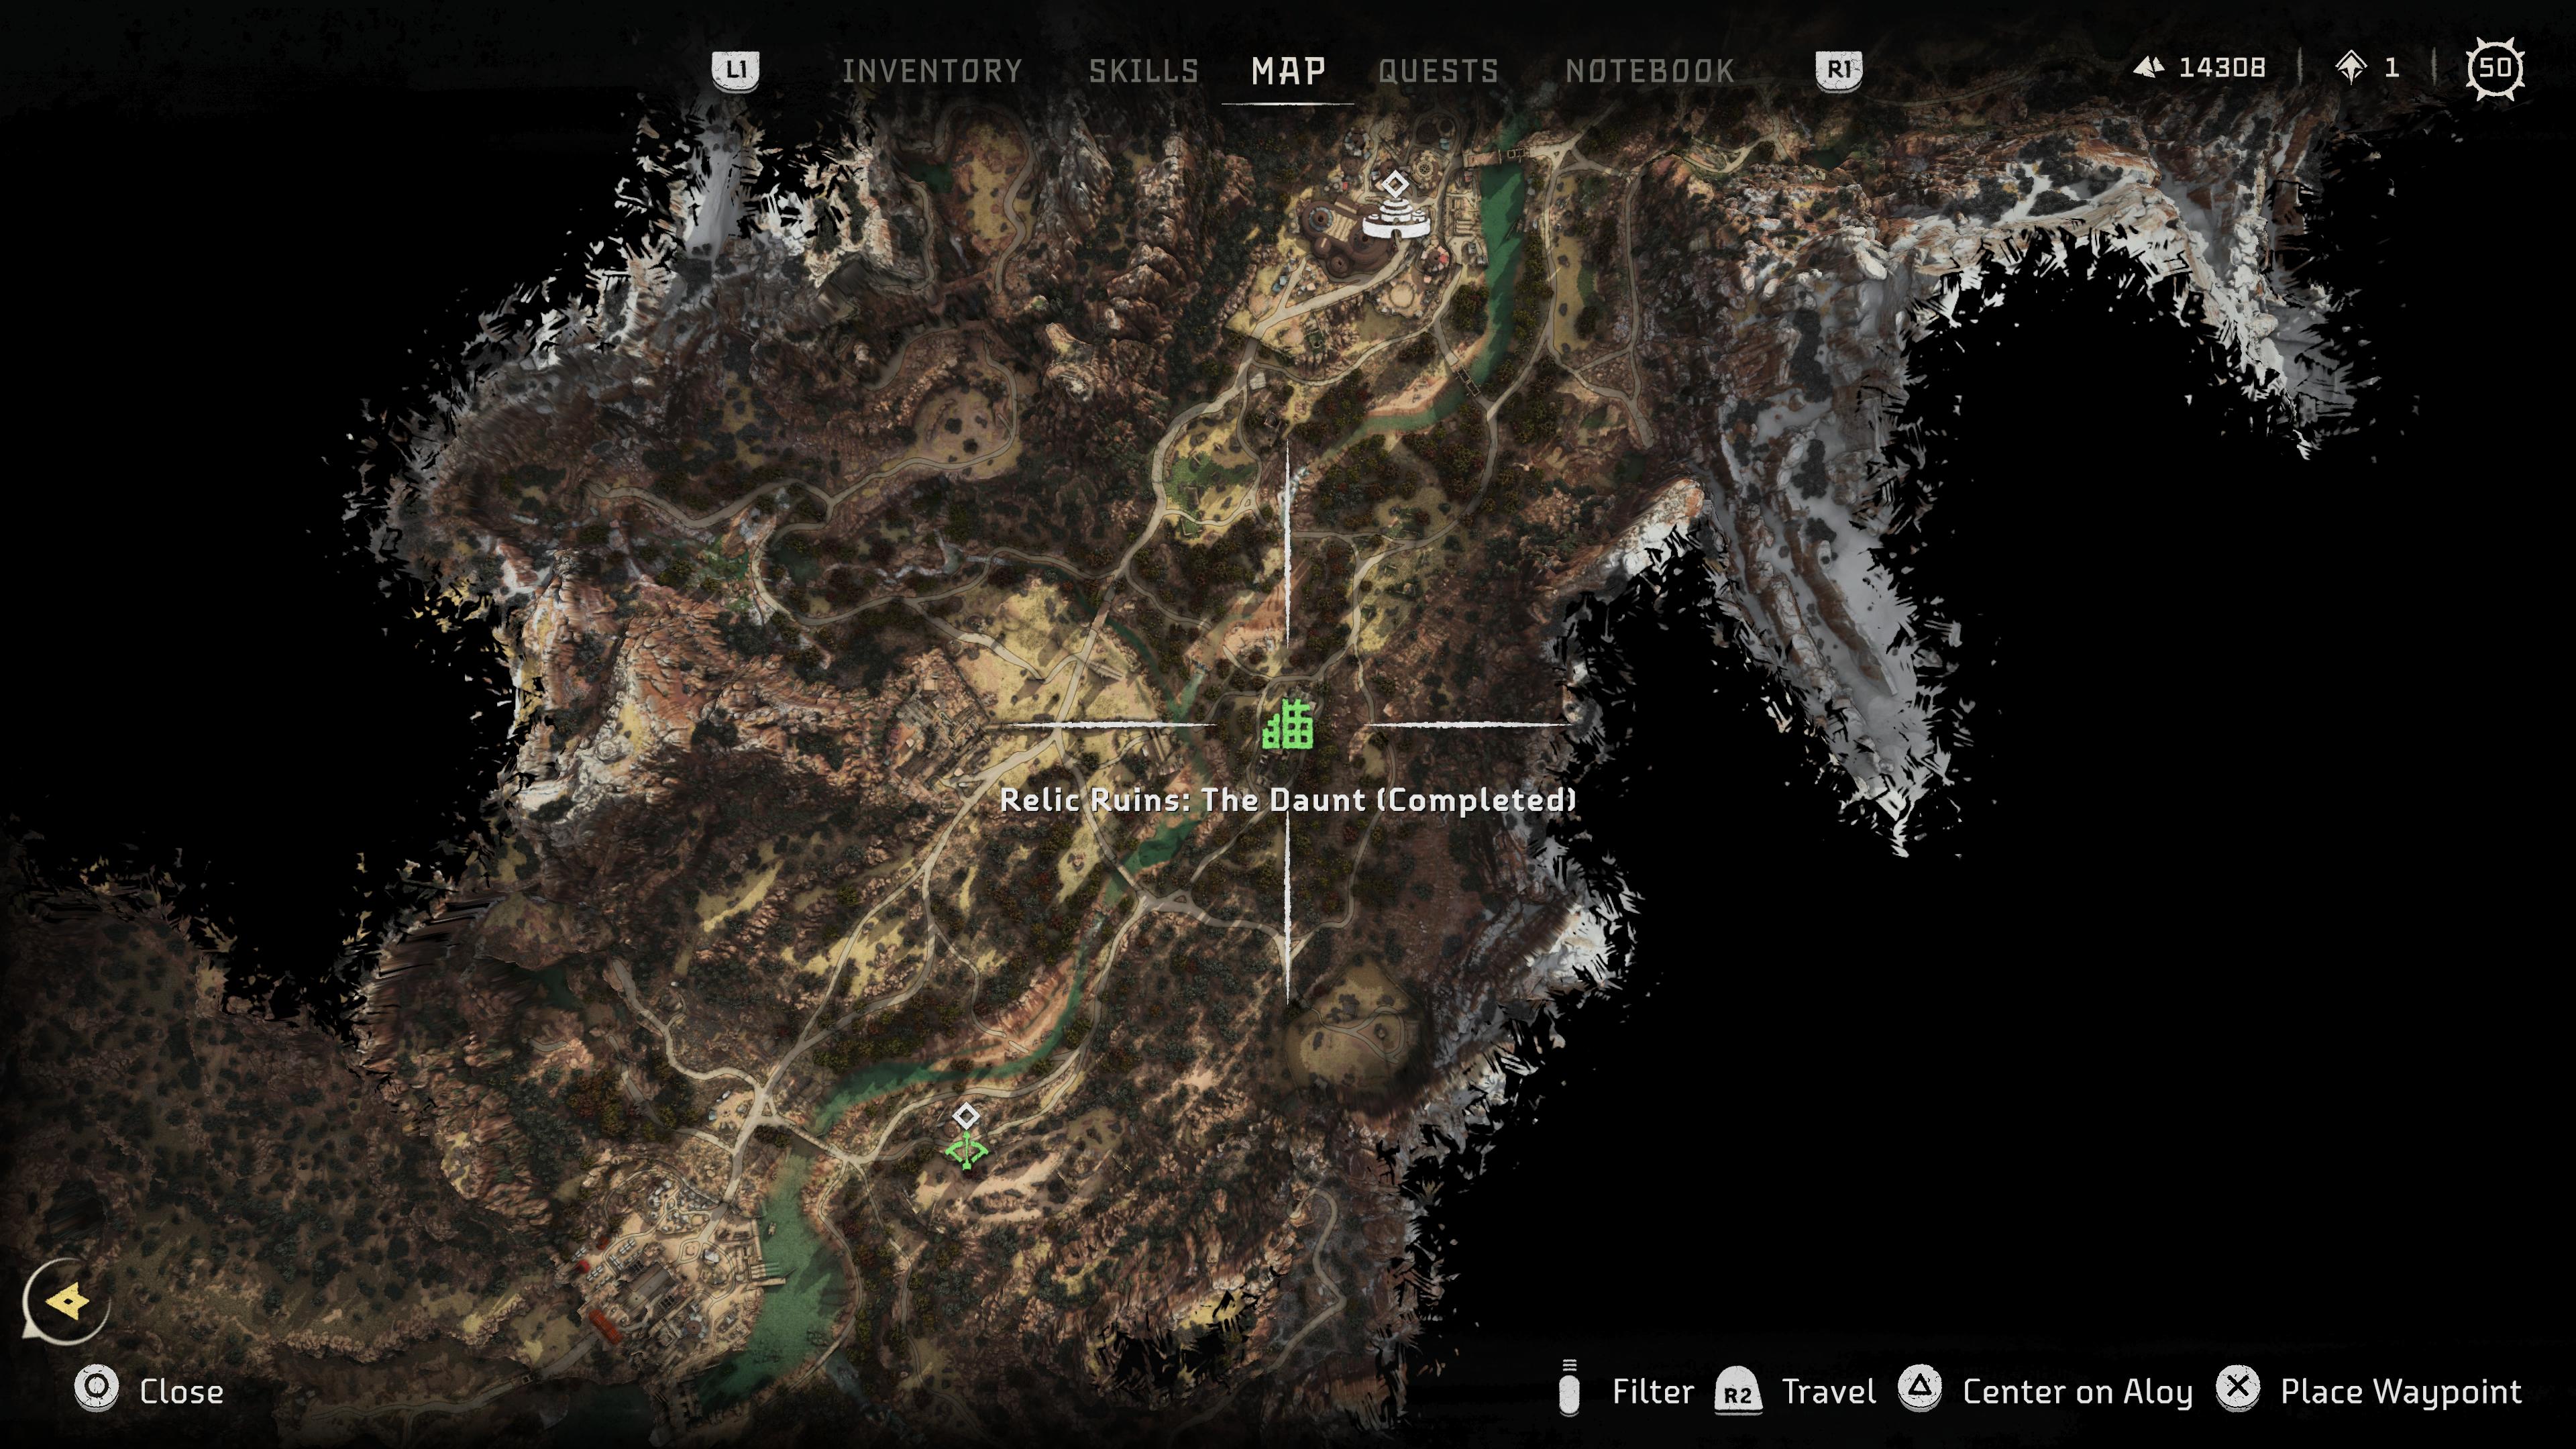
Abilities required: None
- Pull the metal crate to the centre of the space so you can reach the yellow circular handhold that's right near the locked door and access point.
- From here, go beyond the door to the balcony and head left. Leap over the gap, and continue until you reach a door on your left. Drop down into the room beyond.
- Scan the datapoint on the floor nearby, which will give you the code for the locked door (1705)
- Use your grapple to pull down the Metal Crate from the small room above, and then use it to reach the room you've just pulled the Metal Crate from. There's a box you can search beyond, but you can also use the height to then use your grapple hook on the beams and metal hatch that are opposite.
- Jump down and then push the crate so you can reach the beam you've just gained access too, and then go through the metal hatch. Drop into the room beyond.
- In here, use your grapple on the blue metal cross on the wall to open up a route to the previous room, then turn to drop down into the hole that's in this room.
- You'll walk through a short passage and before the end, look up to discover another metal blue cross. Use your grapple on this to make the ceiling collapse.
- Head back up to the upper floor, and use your grapple to pull the metal crate from the previous room through the hole in the wall and down into the gap in the floor you've just made.
- Drop back down to the floor below, and drag the metal crate to the opposite site of the room where there are some yellow beams you can climb up. One will break, which is why you need the crate.
- Climb all the way up to the structure's roof, and then drop down to the balcony that's just to the left of the roof. (It's a little weirdly laid out and doesn't always feel like it's the obvious route, but it's here:
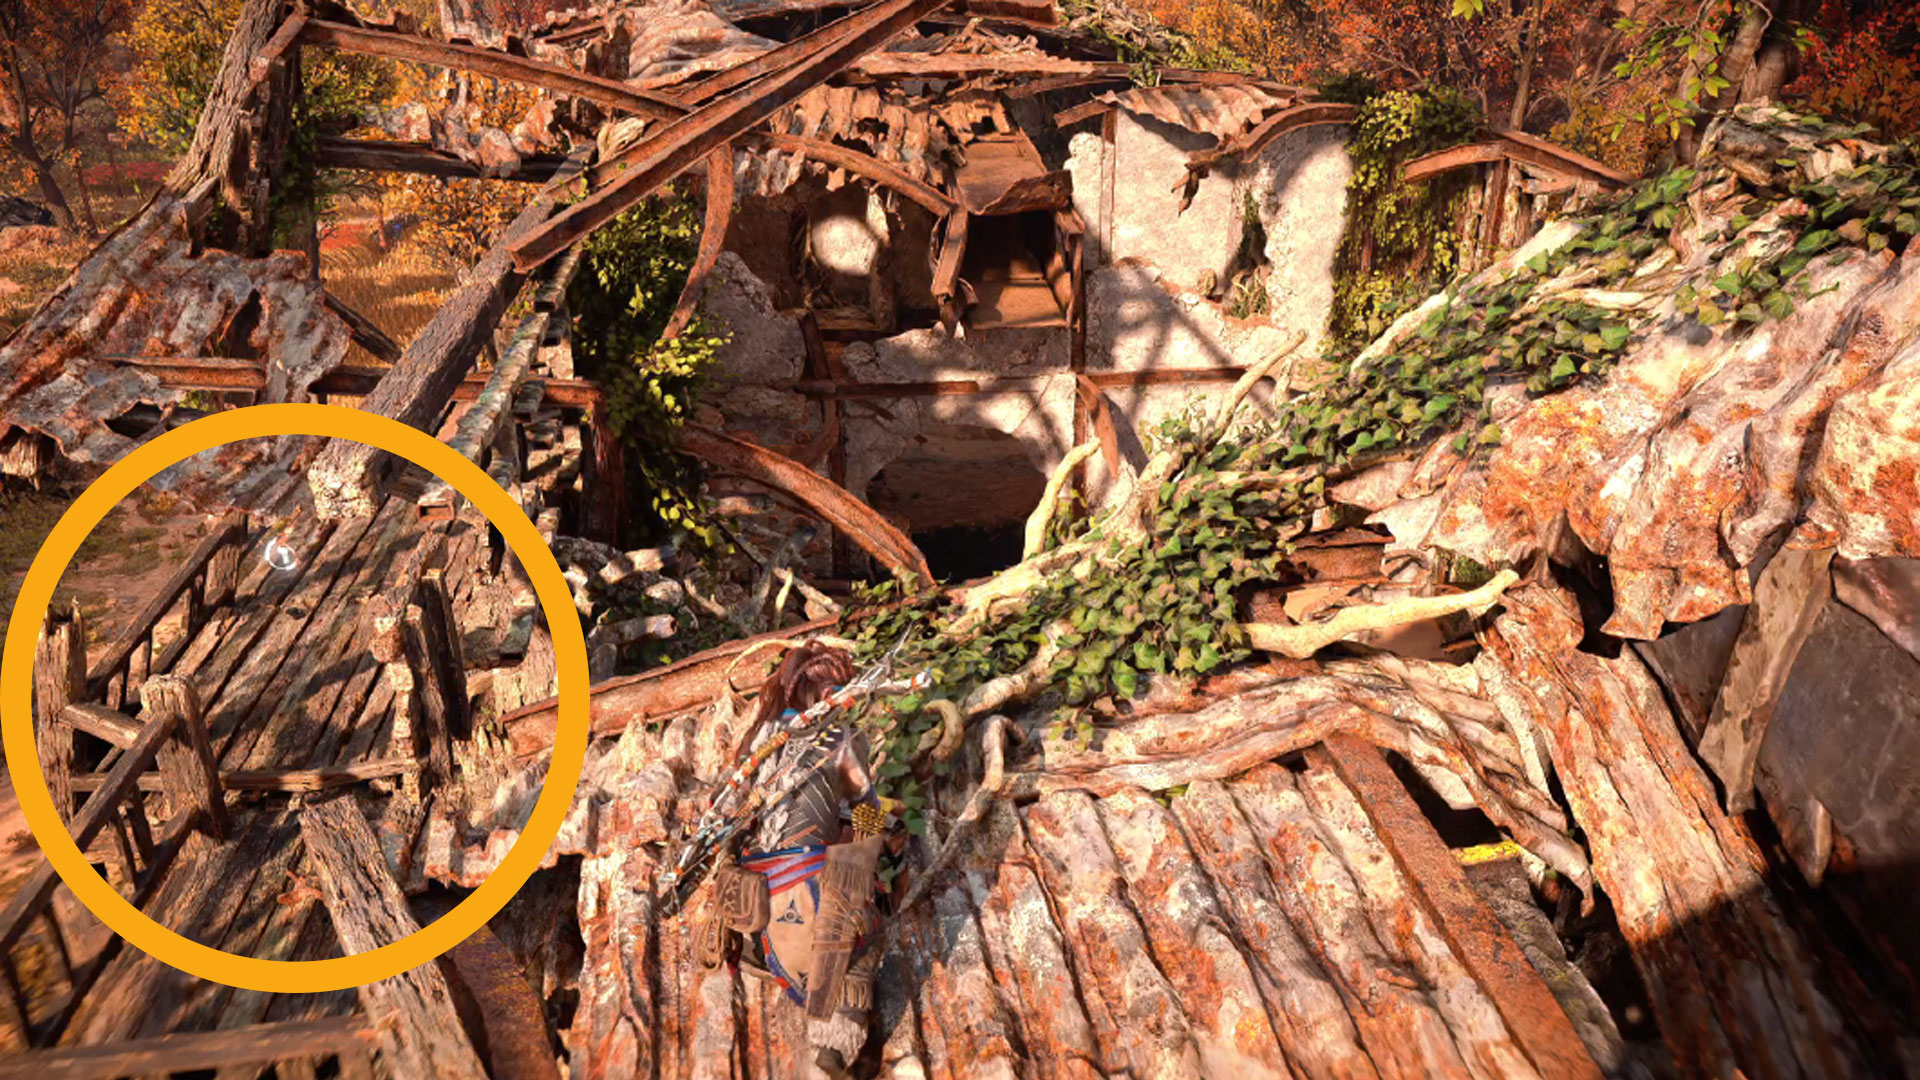
- On this balcony, you'll find the access key you need (a Hotel Room Key).
- Go to the end of the balcony and use the yellow bars to climb up in order to work your way back to that very first room (or just drop down from the balcony and avoid the climb)
- Climb from the Metal Crate that's still here to reach the locked door. Use the key on the access panel, then you'll need to use the code from the Datapoint earlier to unlock the door - 1705. The Ornament can be grabbed from within the room you unlock.
No Man's Land
Horizon Forbidden West Relic Ruins: No Man's Land
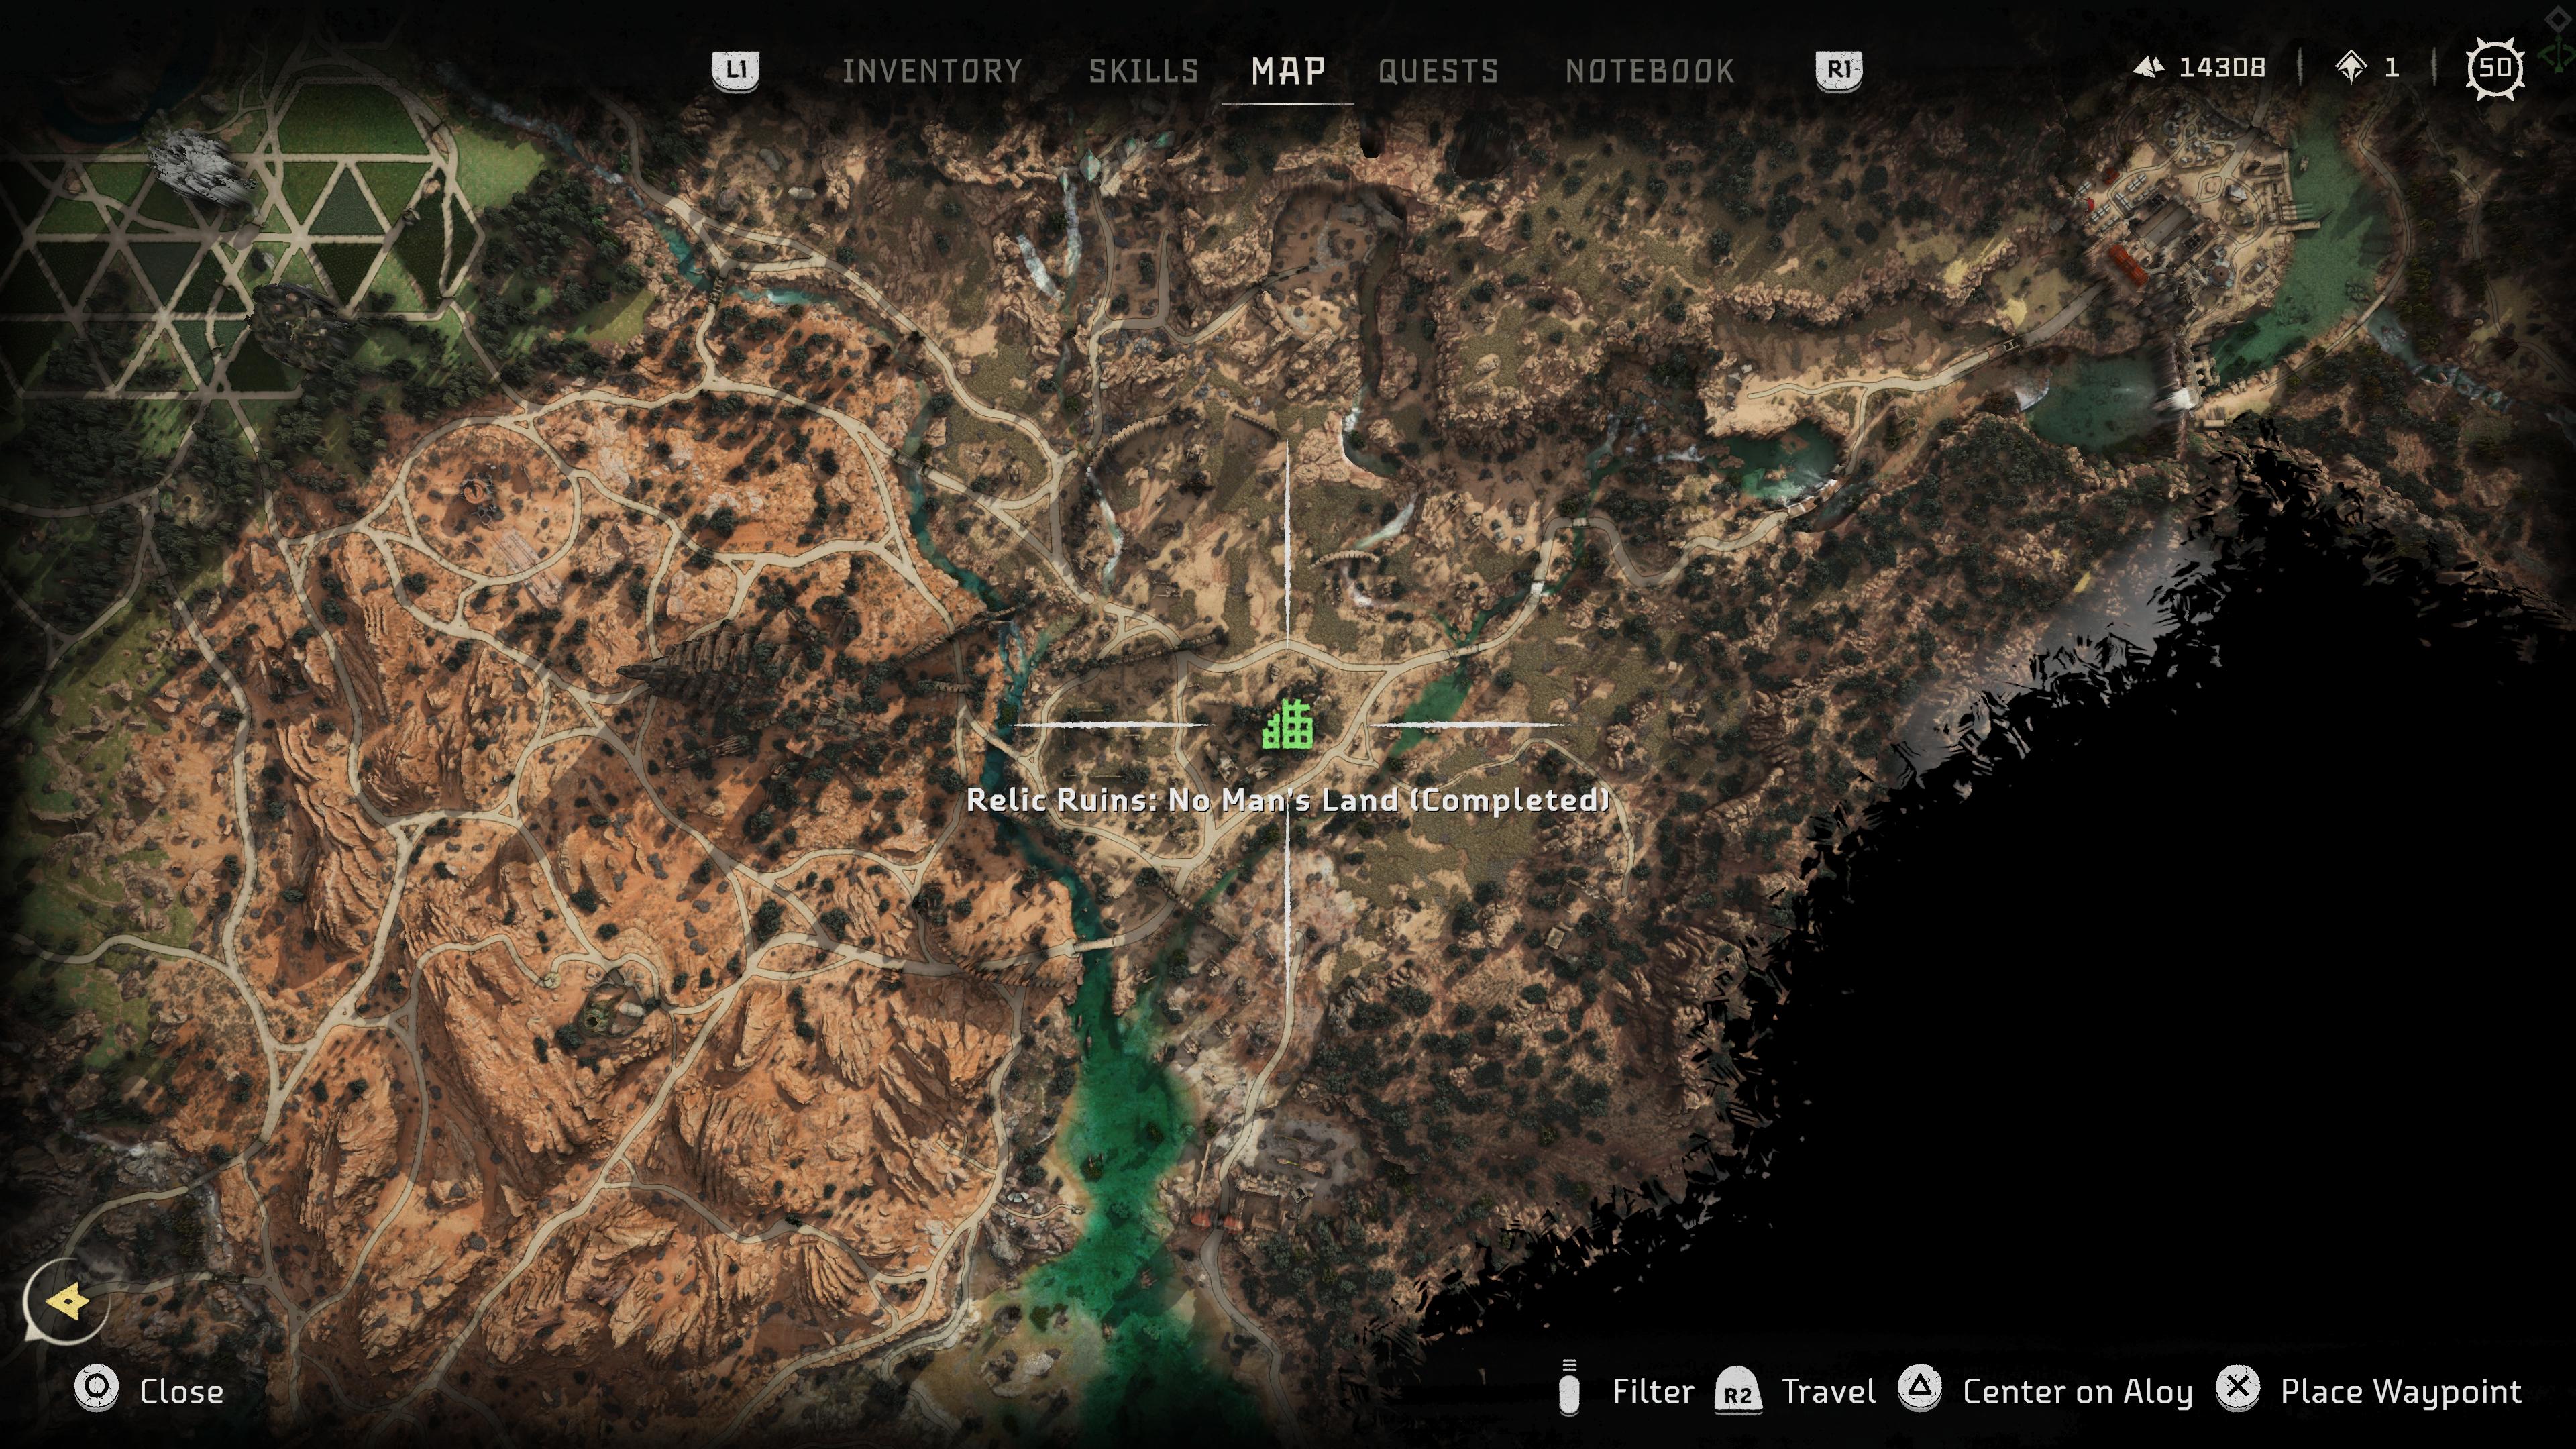
Abilities required: Firegleam
The layout of this one isn't easy, and nor is the initial premise, but we'll get there together.
- Start out in the area that's kinda surrounded by walls, and there's a metal box stuffed in an alcove. There's also a grate on the wall that you can open with your grapple hook, which you can do now but is basically just used for a shortcut that you won't really need.
- Pull out the box and use it to help you reach the areas above and head over to a wall that has Firegleam on it.
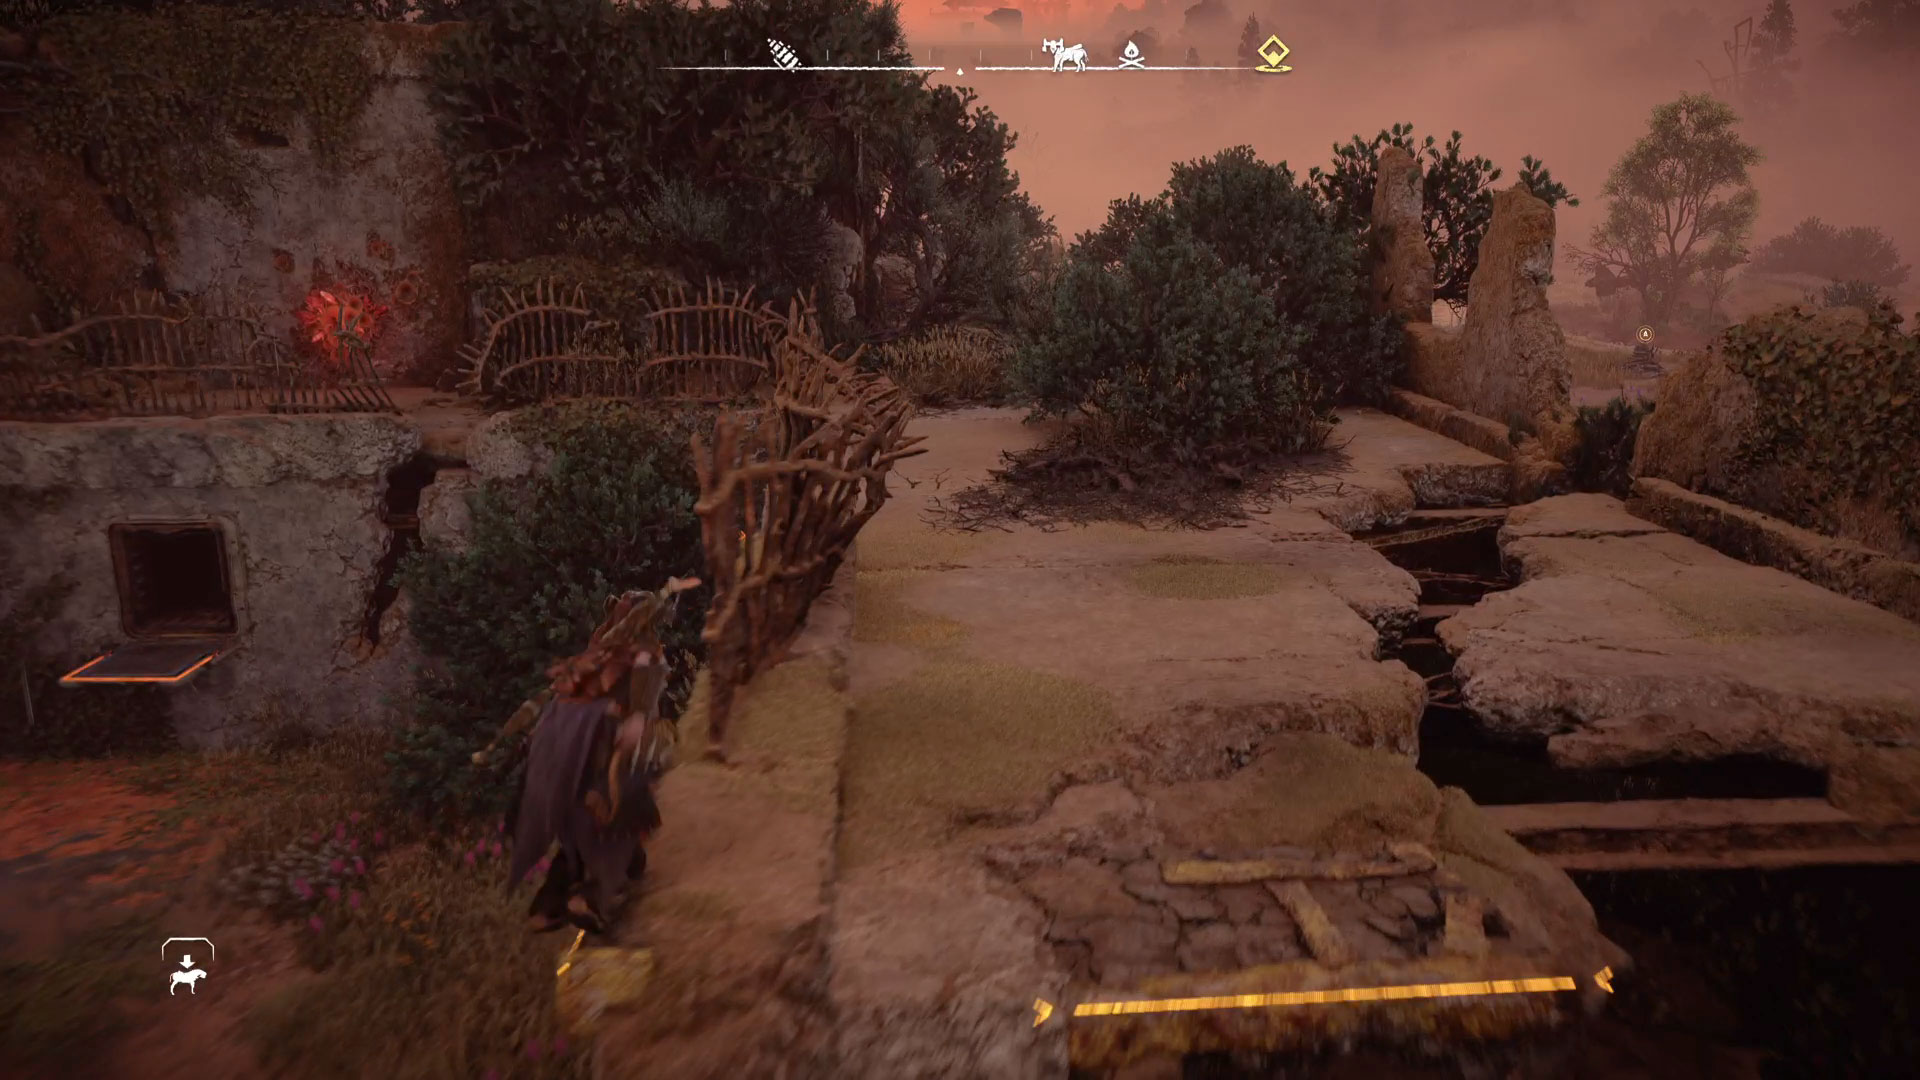
- Behind the Firegleam wall is the main room that you'll need to figure out, complete with two battery points on either side of the water. One is used for charging, and the other unlocks a nearby door (that's the one near the Datapoint).
- Drop down and use your grapple to free the wall held together by the blue metal cross.
- Head through and follow the corridor around, and then you'll see another wall with Firegleam on it. Inside the room you'll reveal by exploding the Firegleam is a battery.
- Carry this battery back to the room with the door in it, but instead put the battery in the socket on the opposite side of the water to the door, which is where it'll get charge.
- The next bit is figuring out how to get the battery from there to the door without the battery touching the water and shorting out. So, while facing the charging station, turn to your left and look up. You'll see a metal crate up on a platform.
- Use the grapple point above your head to reach the higher level and then work to free the crate and drop it to the water level below.
- You can then place your charged battery on top of the crate to transport it safely across the water, and then use it in the power port to power the door on the upper floor.
- Next, take your crate and push it to the wall between the two power points, where there are some yellow handholds (one of which, you guessed it, will break when you initially try to climb).
- Clamber on up to the door, and use the code that's hidden in the Datapoint beneath to input as the code (2204).
- Inside the door is your Ornament (Emergency Pit Stop), and an easy exit back into the Forbidden West.
Restless Weald
Horizon Forbidden West Relic Ruins: Restless Weald
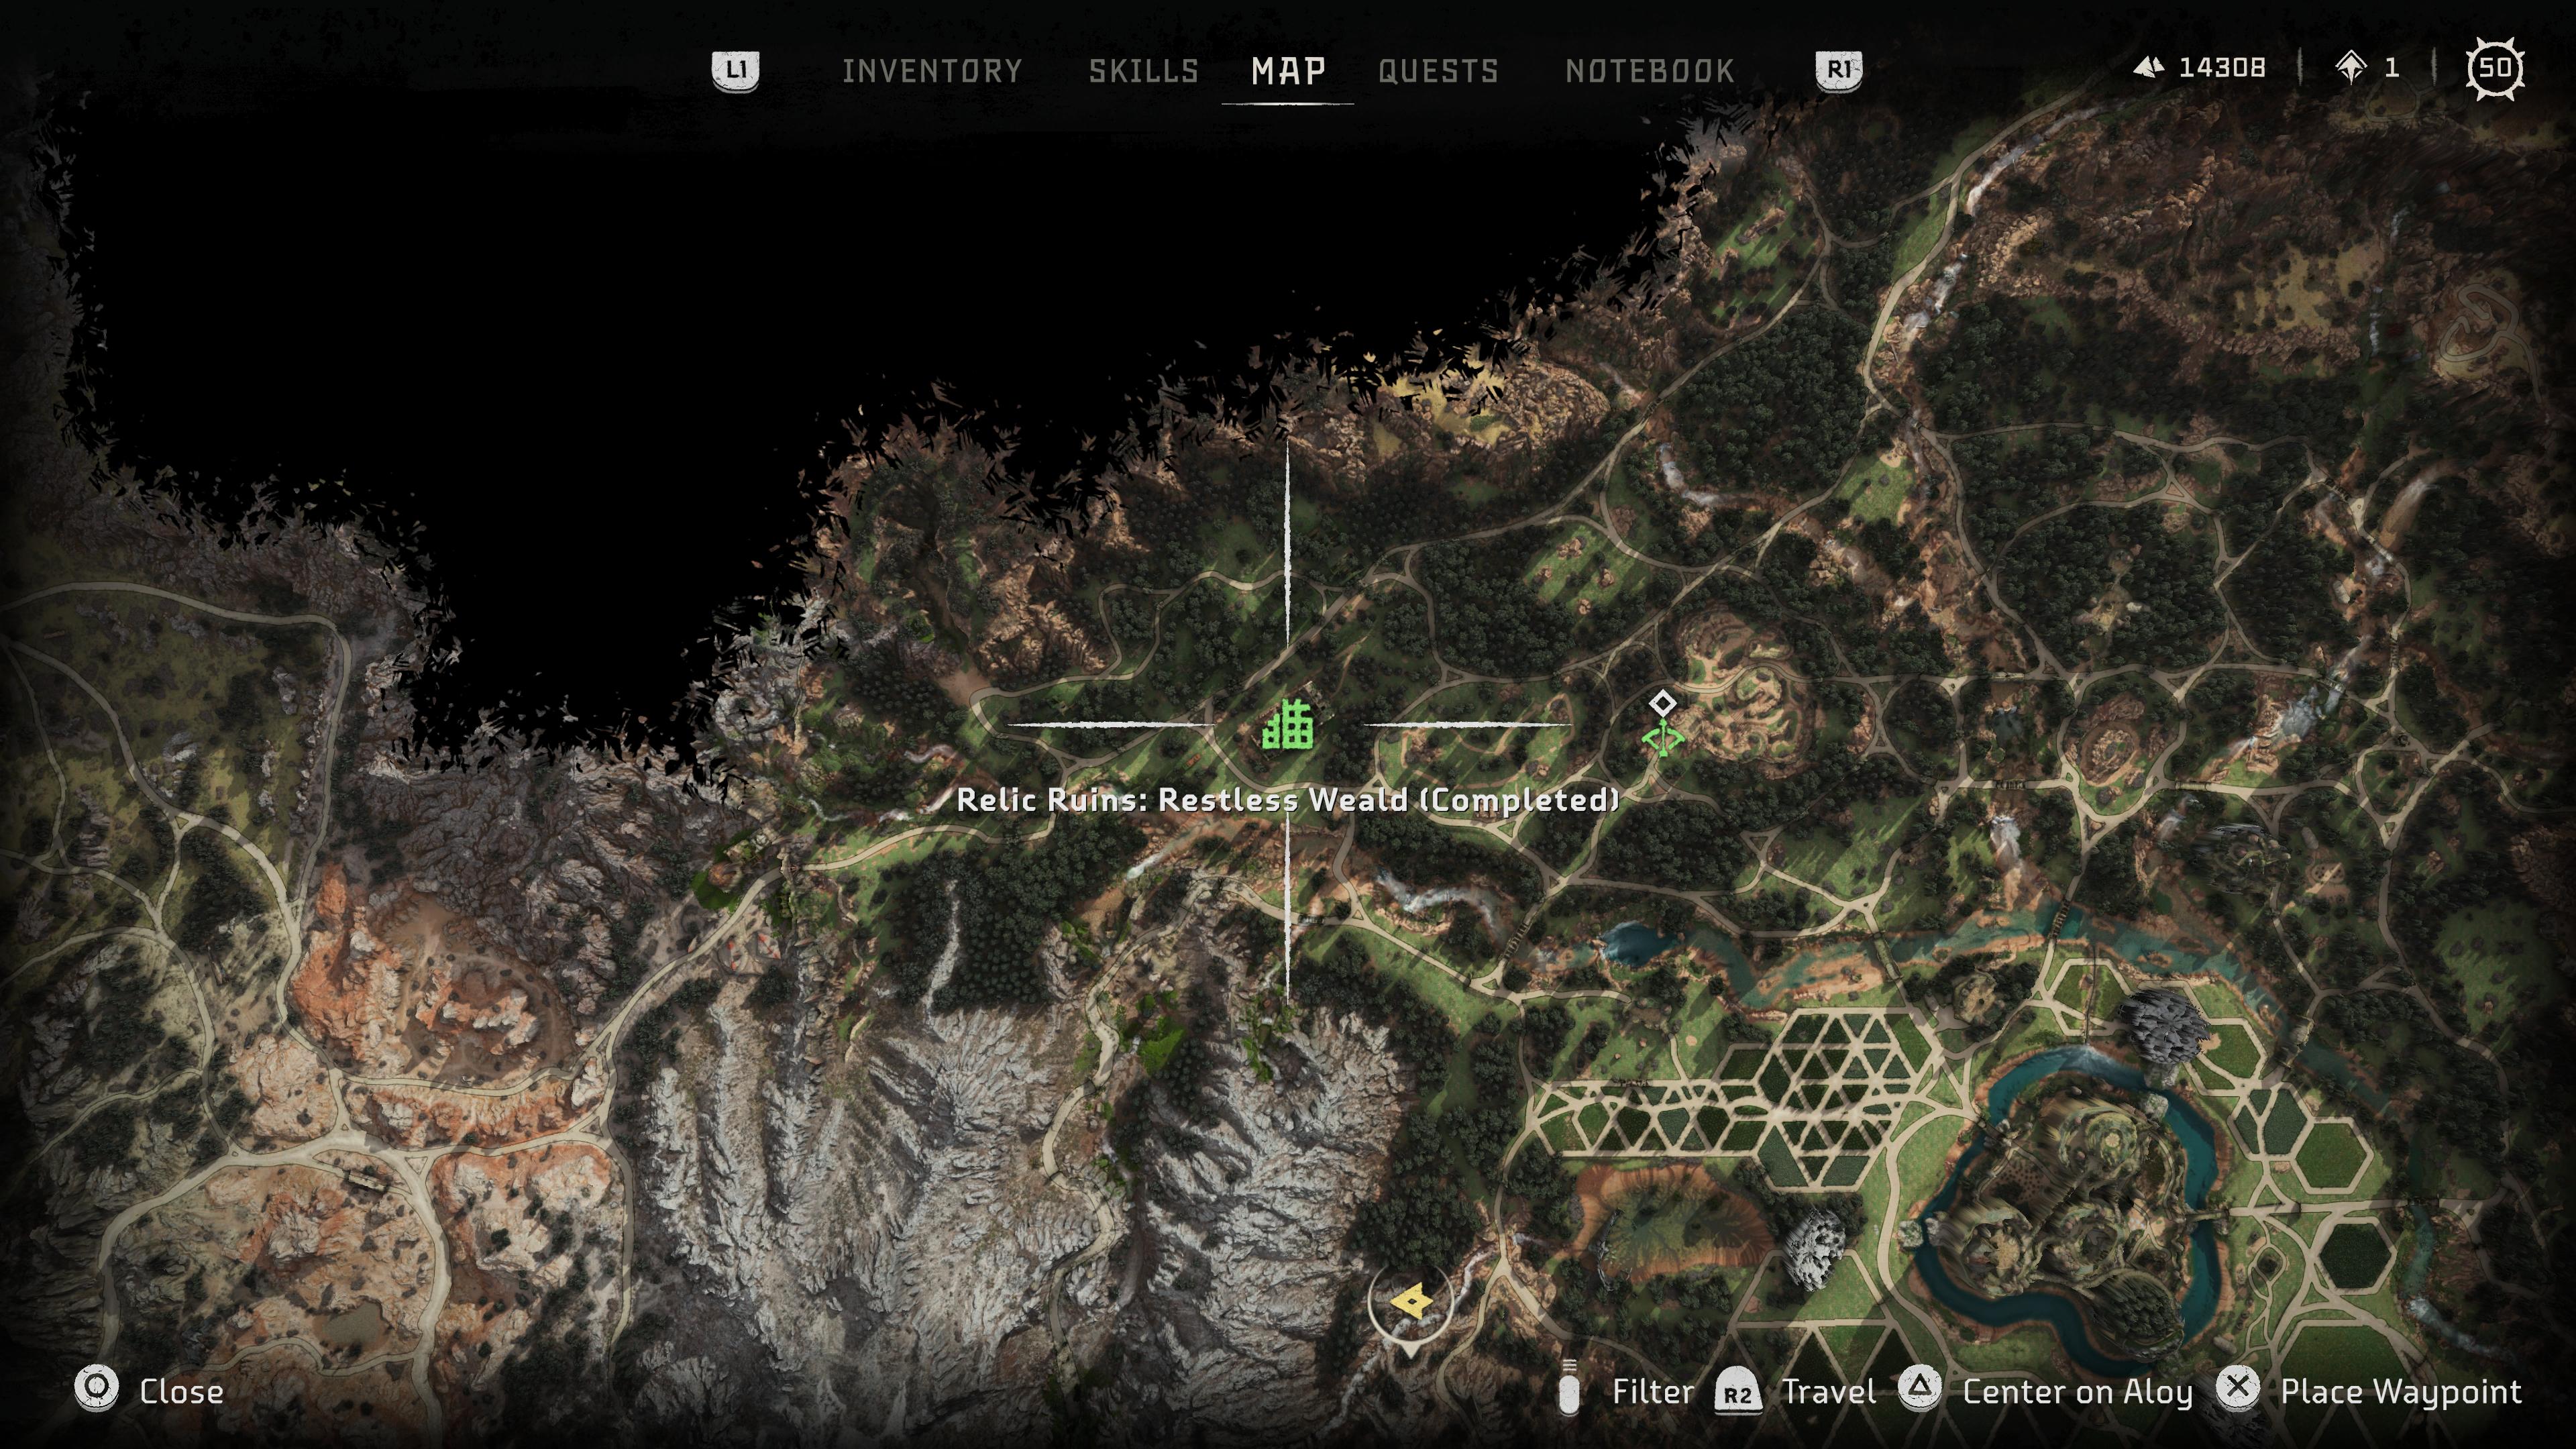
Abilities required: Firegleam
The Restless Weald is a really fun Relic Ruin that's not overly complicated. But will require a bit of old fashioned detective work.
- Head inside the structure and look for the ruin of a column that's got some yellow handholds on it. Shoot down the ladder that's held up by a big red triangle. You'll need this later to reach the door and key card, and is ultimately your end goal.
- For now, head around the opposite side of the ruin where you'll find a huge, old mine cart.
- First pull it along the track away from the ruin building itself until it will no longer budge. Then, go to the yellow switch by the side of the tracks and push it to "change to straight tracks"
- Then you'll be able to use the other set of tracks to push the mine cart to the end of the track. You'll then be able to climb up onto the building next to it.
- From there, run across the rope to the next building where you'll find the access key (Depot Office Key).
- Drop down and climb up to the door using the handholds and ladder that you dropped earlier.
- Next you'll need the access key code. There's a Datapoint right by the door that you can scan, which will reveal that suggests the code is the year the hotel was built, which is further corroborated by another Datapoint you can find in the room directly below this.
- If you drop down into that room and head through the arch to the right and then head right again around the side of the building, you'll see the number on the wall. However, one of the numbers has slipped, so be mindful of that when you're entering the number, which is 1923
- Go through the door that opens and then ride the rope into the room beyond. In here you'll find some Firegleam that needs to be cleared to blow a hole in the wall.
- Next go back to get your mine cart and maneuver it into that newly accessible room. You'll need to back it all the way up to the switch first, then change the track back, and then move it on.
- When it's inside, you can jump on top to reach the handholds in this room, which will allow you to reach the Ornament (Weekend Getaway) and complete this Ruin.
The Dry Yearn
Horizon Forbidden West Relic Ruins: The Dry Yearn
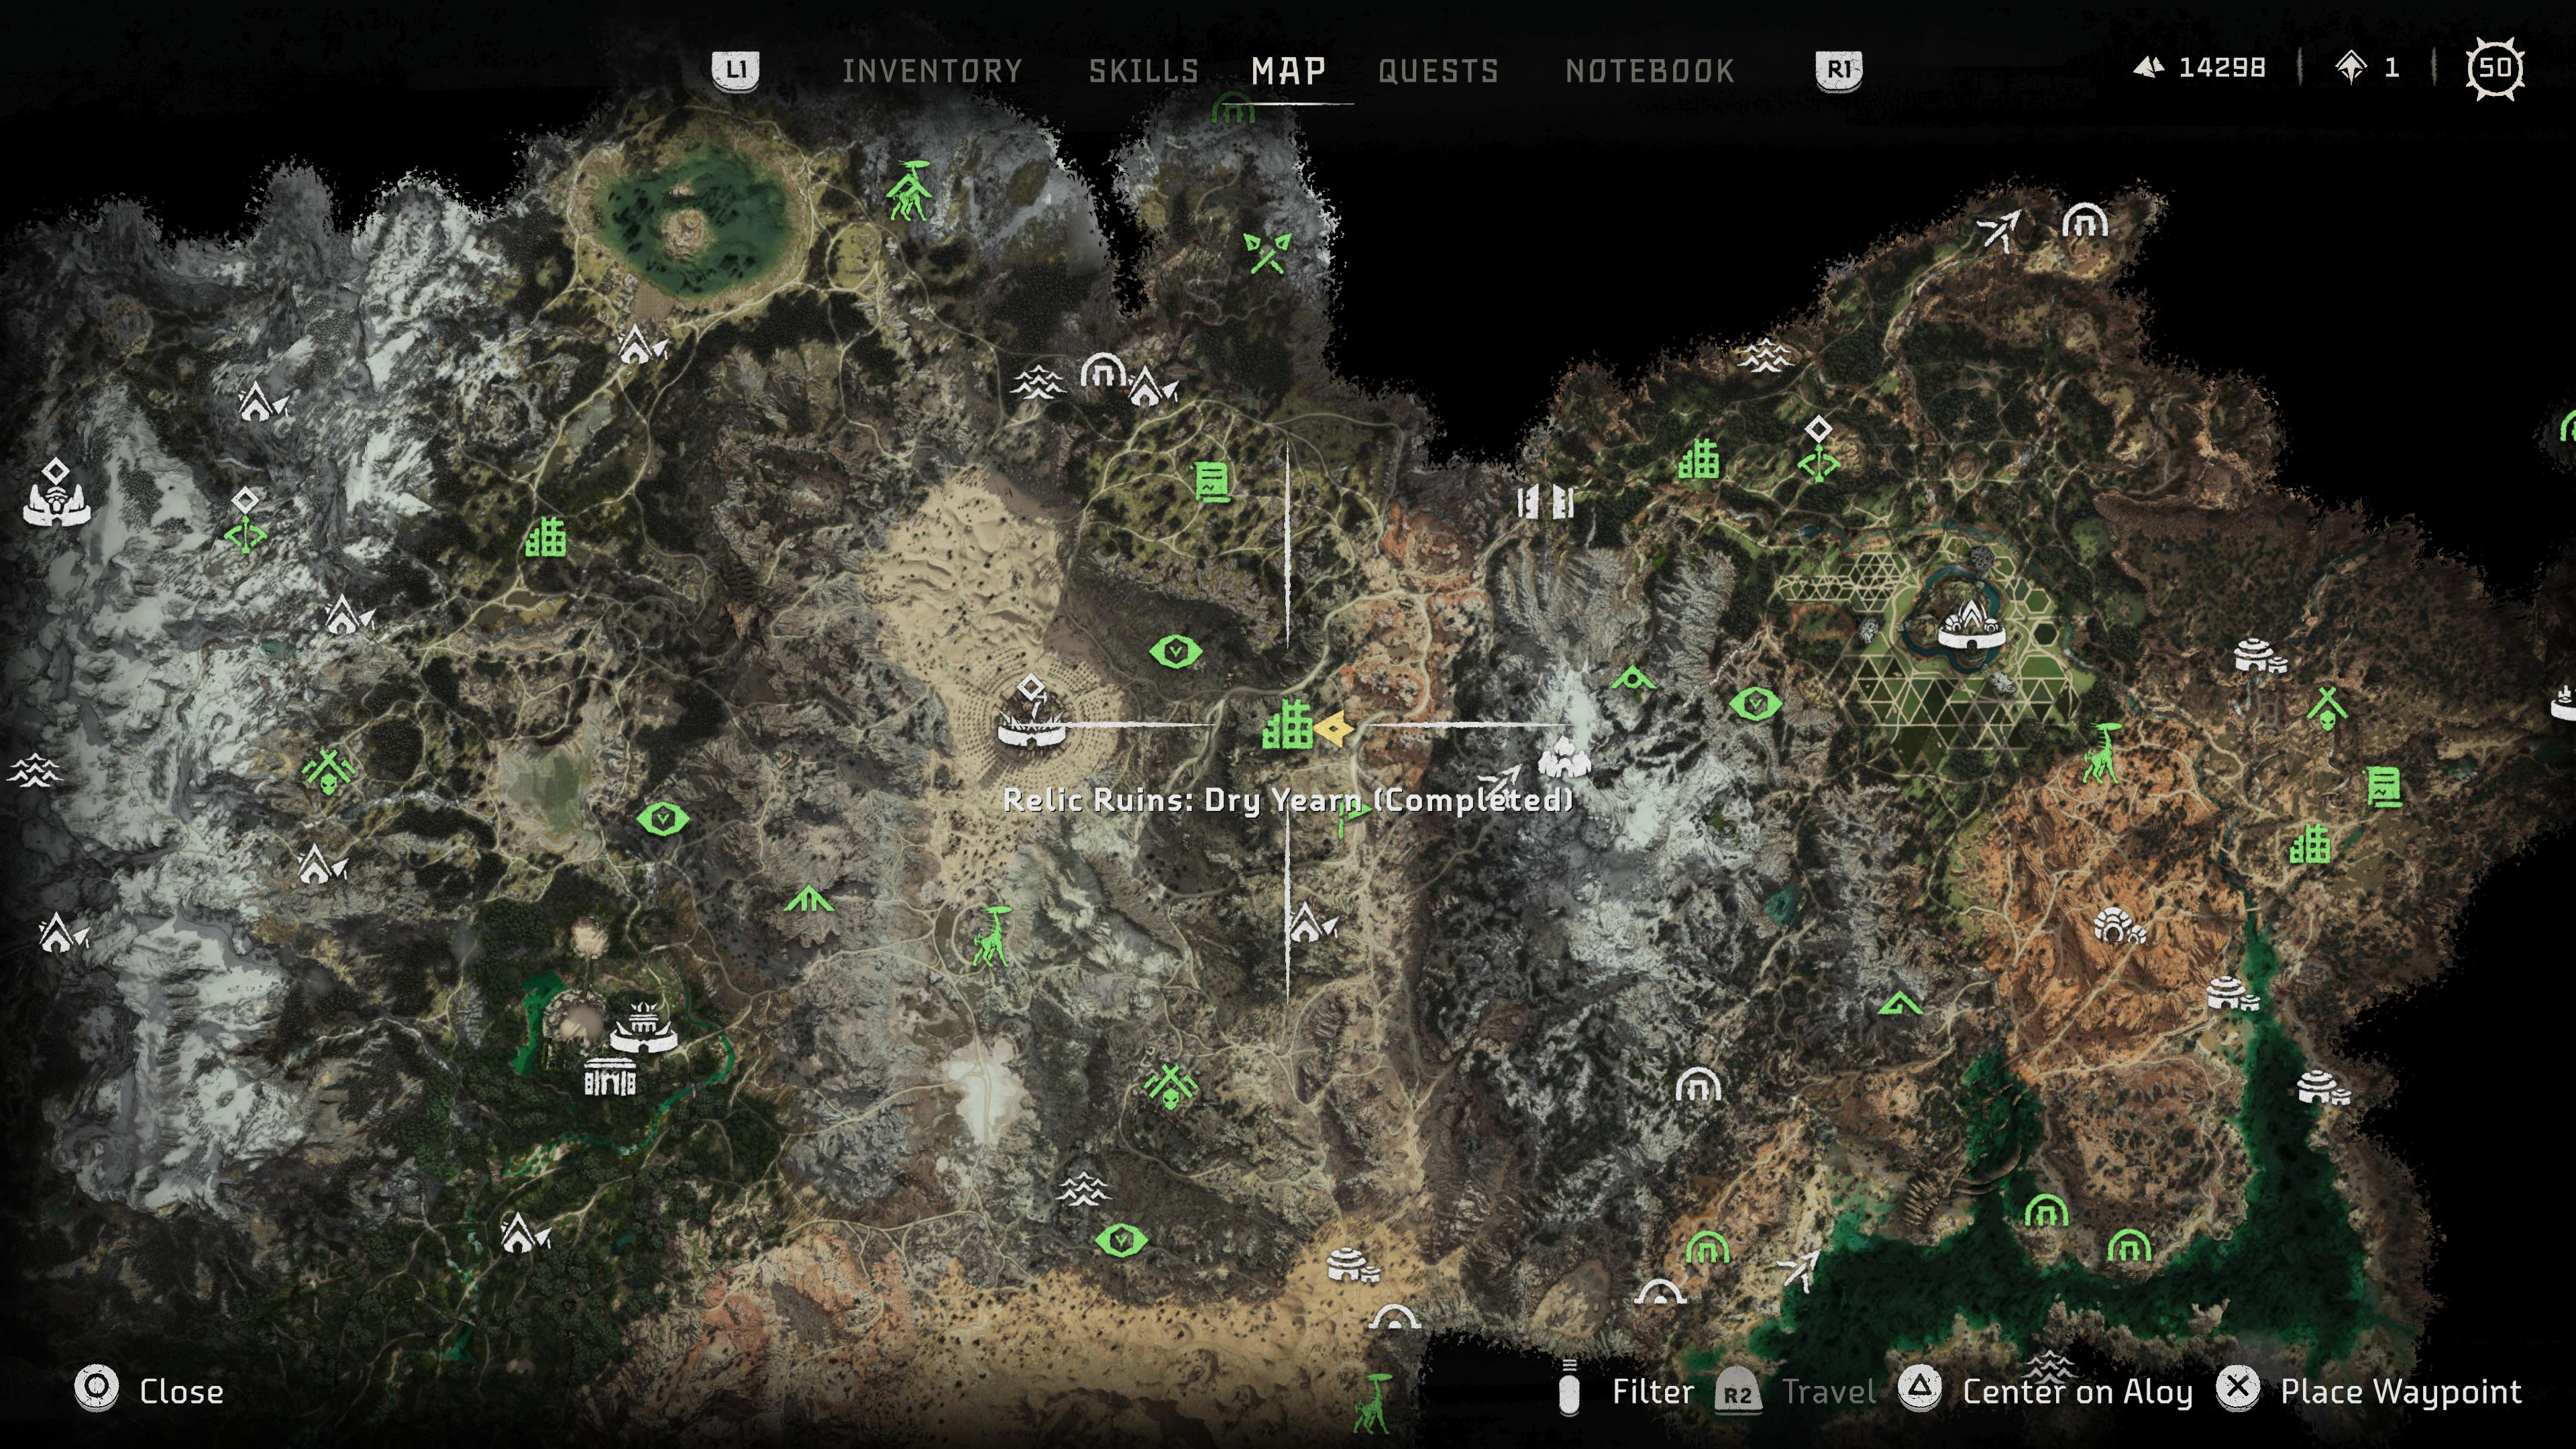
Abilities required: Firegleam, Metal Flower
Tucked up in the mountains of The Dry Yearn, this Relic Ruin needs a little going back and forth to solve, but is actually quite straightforward once you've figured it out.
- Clear the Metal Flower ivy
- Take the metal crate from the area beyond
- Push it to the end of the platform on the other side of the wall to the crate (at the end with the large metal door)
- Use the crate to jump to the platform above, where you'll find a yellow crank wheel that lets you raise the Blast Door.
- Turn the crank wheel and then move quickly to the other side of the Blast Door.
- At the end of the room beyond, use your grapple hook to loosen the debris with large blue metal cross on it.
- Inside there's an old mine caft. Grab hold of it and drag it as far as you can towards the Blast Door.
- Use your grapple to release three bars on the opposite side of the room.
- Climb on top and then shimmy up the yellow bars on this side of the Blast Door. One will break, so leap to the yellow struts that are now behind you.
- Use these to reach a platform on which you'll find the door key (the Repository Maintenance Key). You can use this on the technologically locked door on the opposite platform.
- In the room beyond the door, use your grapple to open a hatch on the wall and crawl through. You'll find yourself in a second room with some Firegleam on the wall.
- Blast through here, and you'll be on the platform by the wheel crank for the Blast Door. Turn the wheel again, and then drop down to pull the mine cart through so it sits directly under the Blast Door, stopping it from dropping all the way down.
- You can then climb on the mine cart to reach the yellow bars on the Blast Door where one broke earlier. The new height means you can access an area to the left.
- Here use your grapple on the blue metal cross on the wall to open up a way through, and then head on through.
- Then you'll be able to drop down to the platform below on the right, where you'll find the Ornament (Stanfort Days).
The Stillsands
Horizon Forbidden West Relic Ruins: The Stillsands
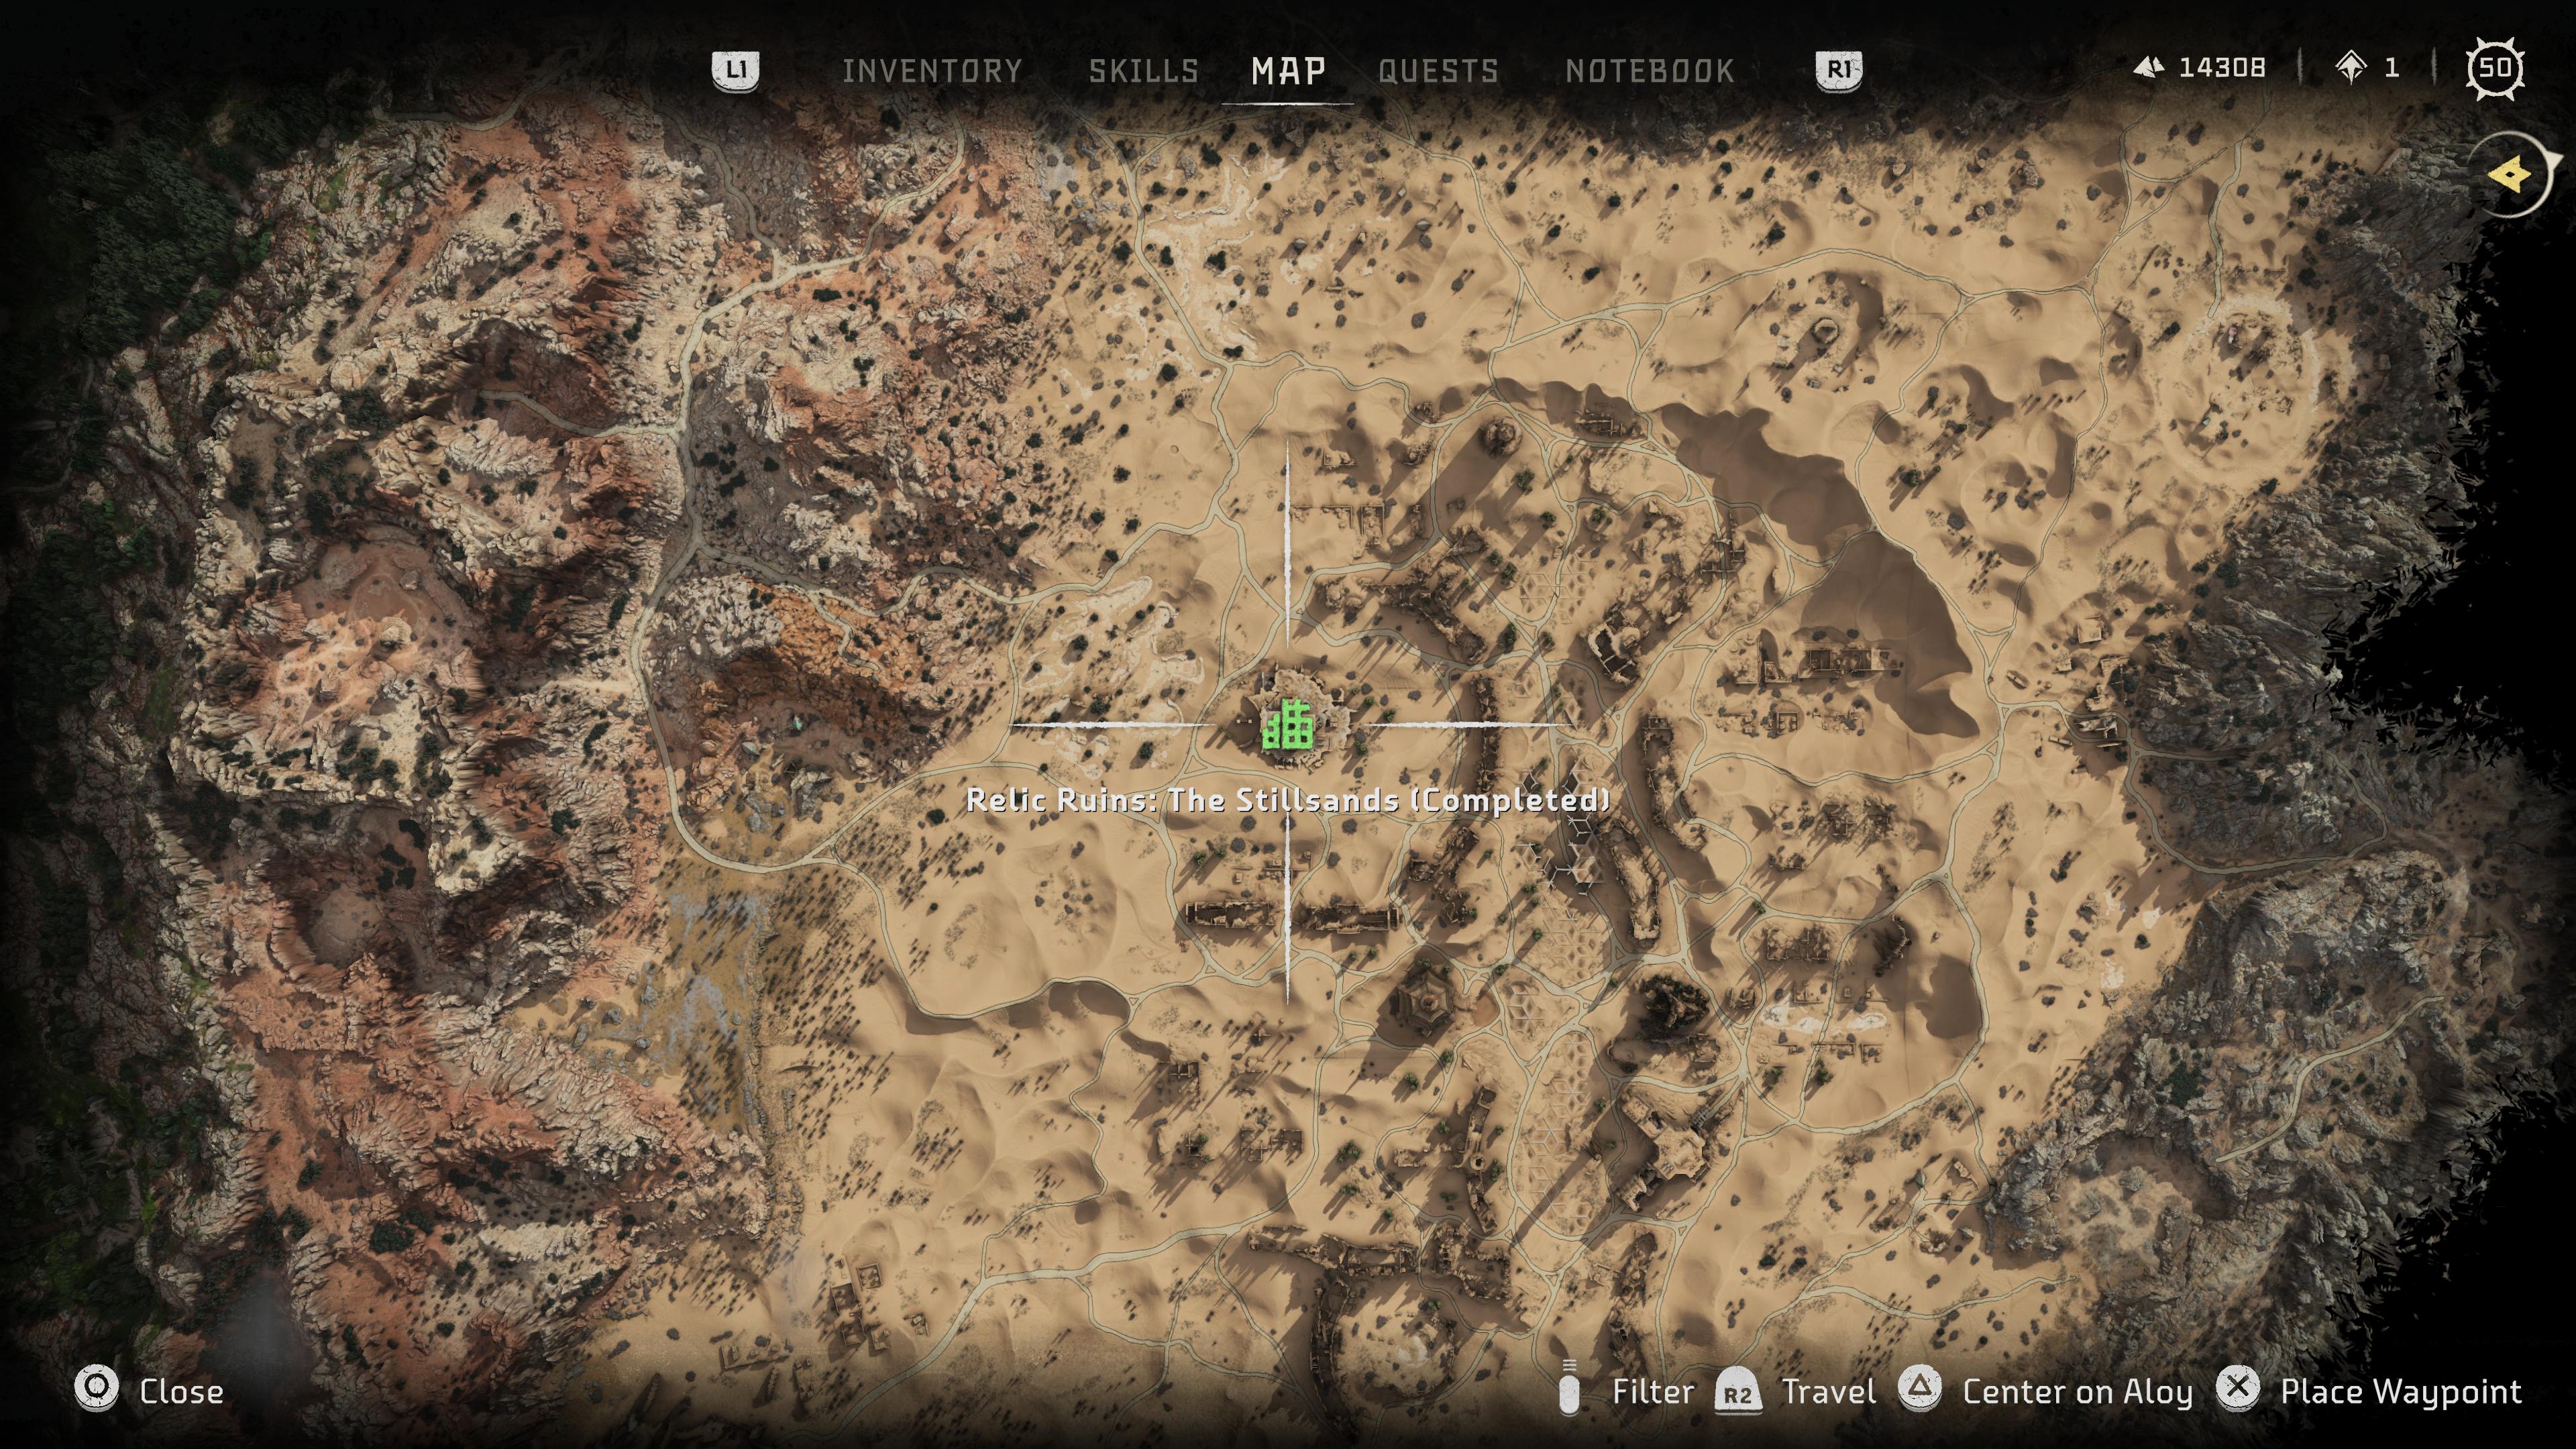
Abilities required: Firegleam
This Relic Ruin is all about adjusting the water level in an old casino, and is a very satisfying one to complete.
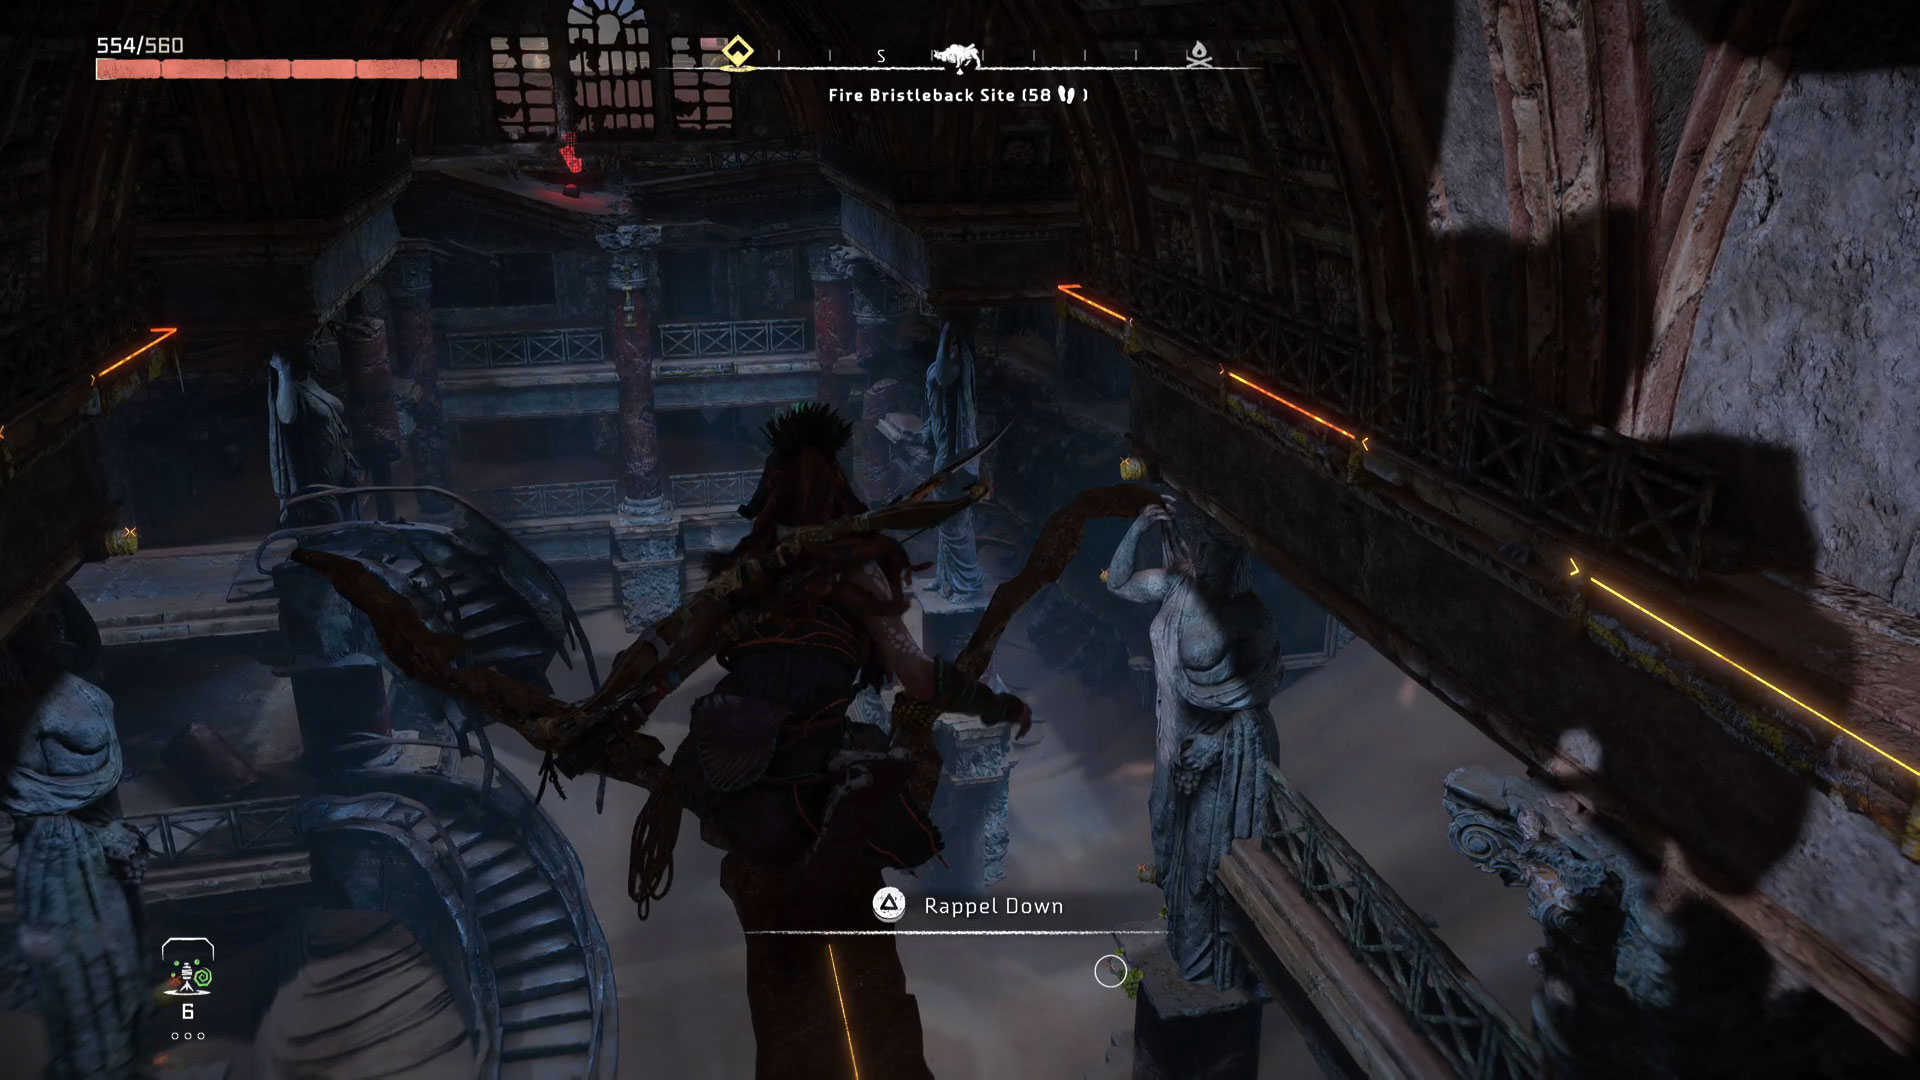
- Once you've found you way in, work your way down to the ground floor. In a corner of the room, almost directly below where you can rappel down into the room from (pictured above), there's some Firegleam you can blow up.
- Inside the room is a metal crate, and mention of a drain.
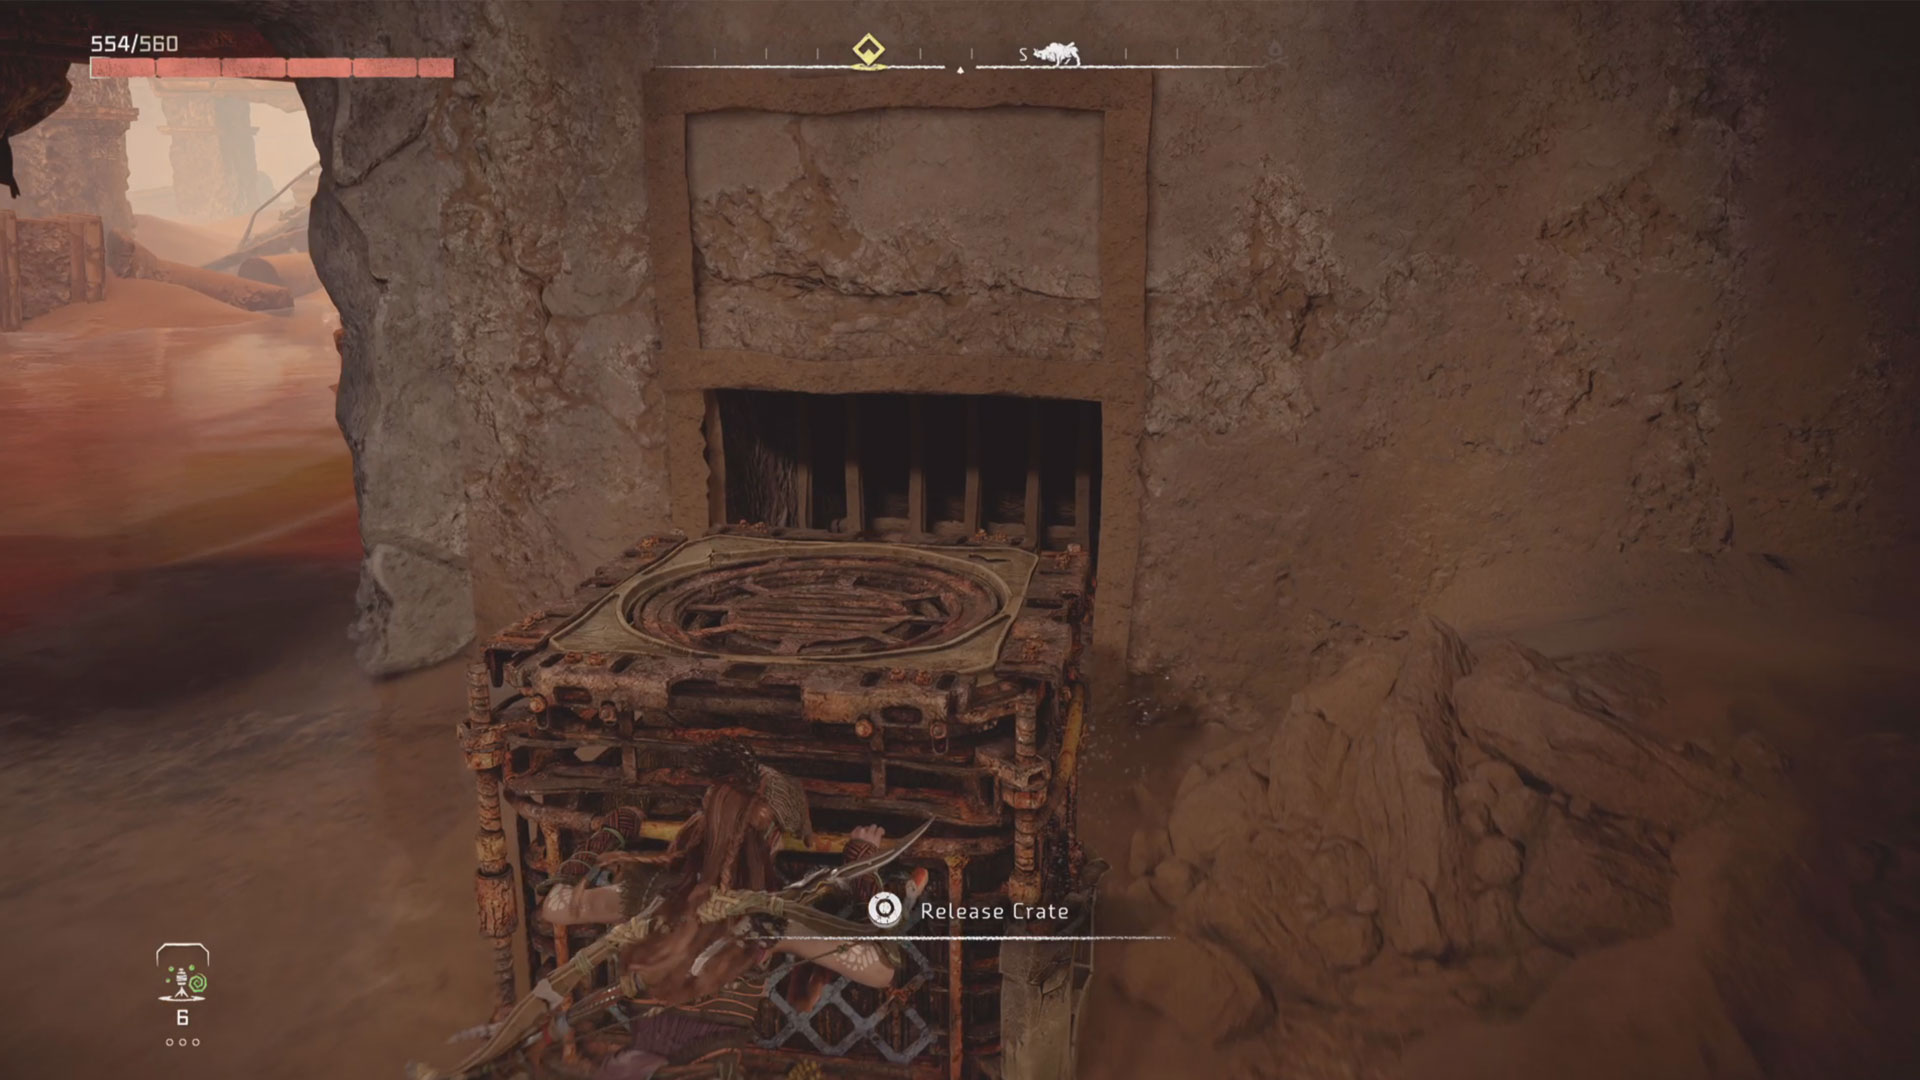
- Use the crate to climb up to the metal platform above, and then turn the yellow crank wheel to start the water.
- Then use the crate to block up the grate in the corner of the room. This will start the water rising throughout the space.
- Swim out into the main space and head over to the opposite side of the room where you'll see some steps and the access key (Store key). You can also head up the stairs and scan the Datapoint on the floor above, but there's no code required here.
- With the key in hand, swim over to the locked door and use the key to unlock it. Inside the small room beyond is another metal crate. Take it out and push it into the water outside, where it'll start floating.
- Now swim back to the room where the other metal box is covering the grate. Climb up to the platform where the yellow crank wheel is and use your grapple to pull the box out to lower the water levels again.
- When they've receded, go outside and move the other metal box and move it over to in front of the pillars at the opposite end of the room.
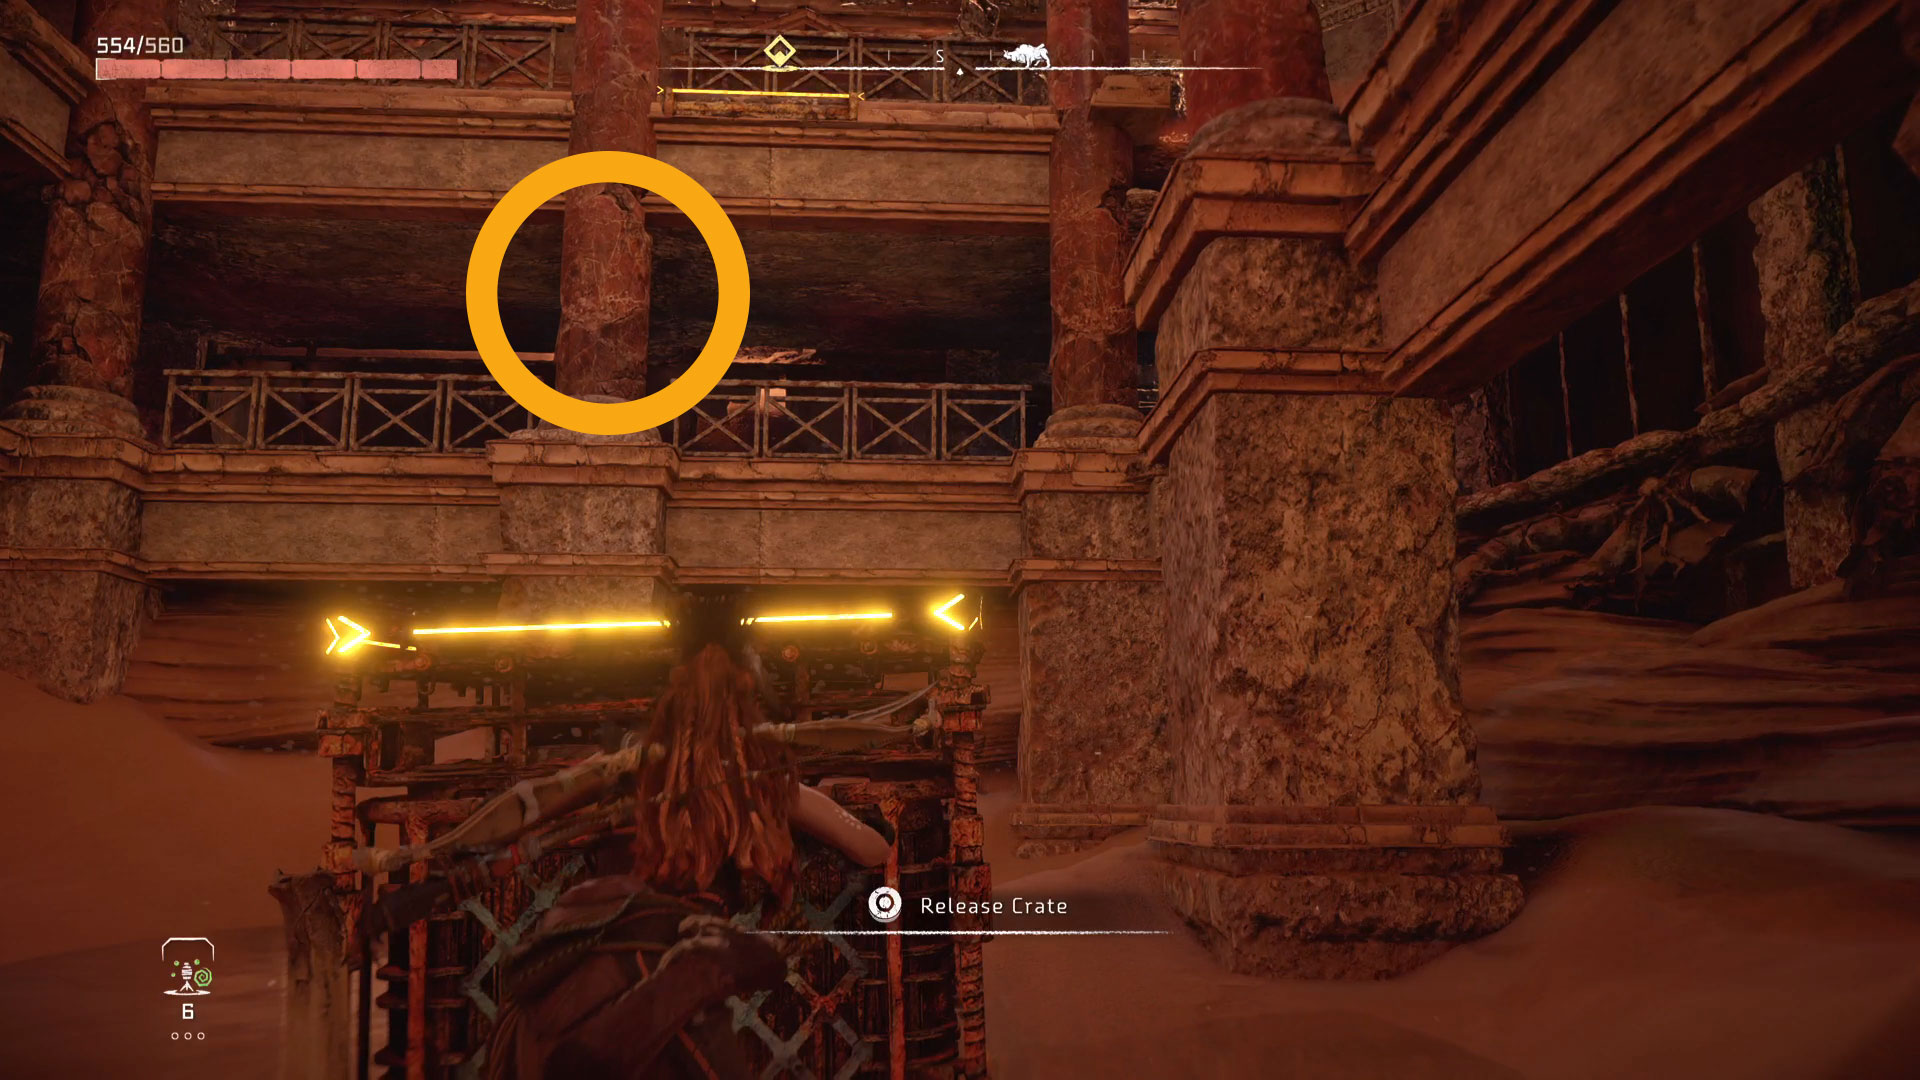
- Then go back to the drain one last time and push the box back in to raise the water levels again. You'll then be able to stand on the box you positioned by the columns to reach a yellow ladder just above.
- Work your way up to the top and you'll be able to nab the Ornament (Go Big).
Runner's Wild
Horizon Forbidden West Relic Ruins: Runner's Wild
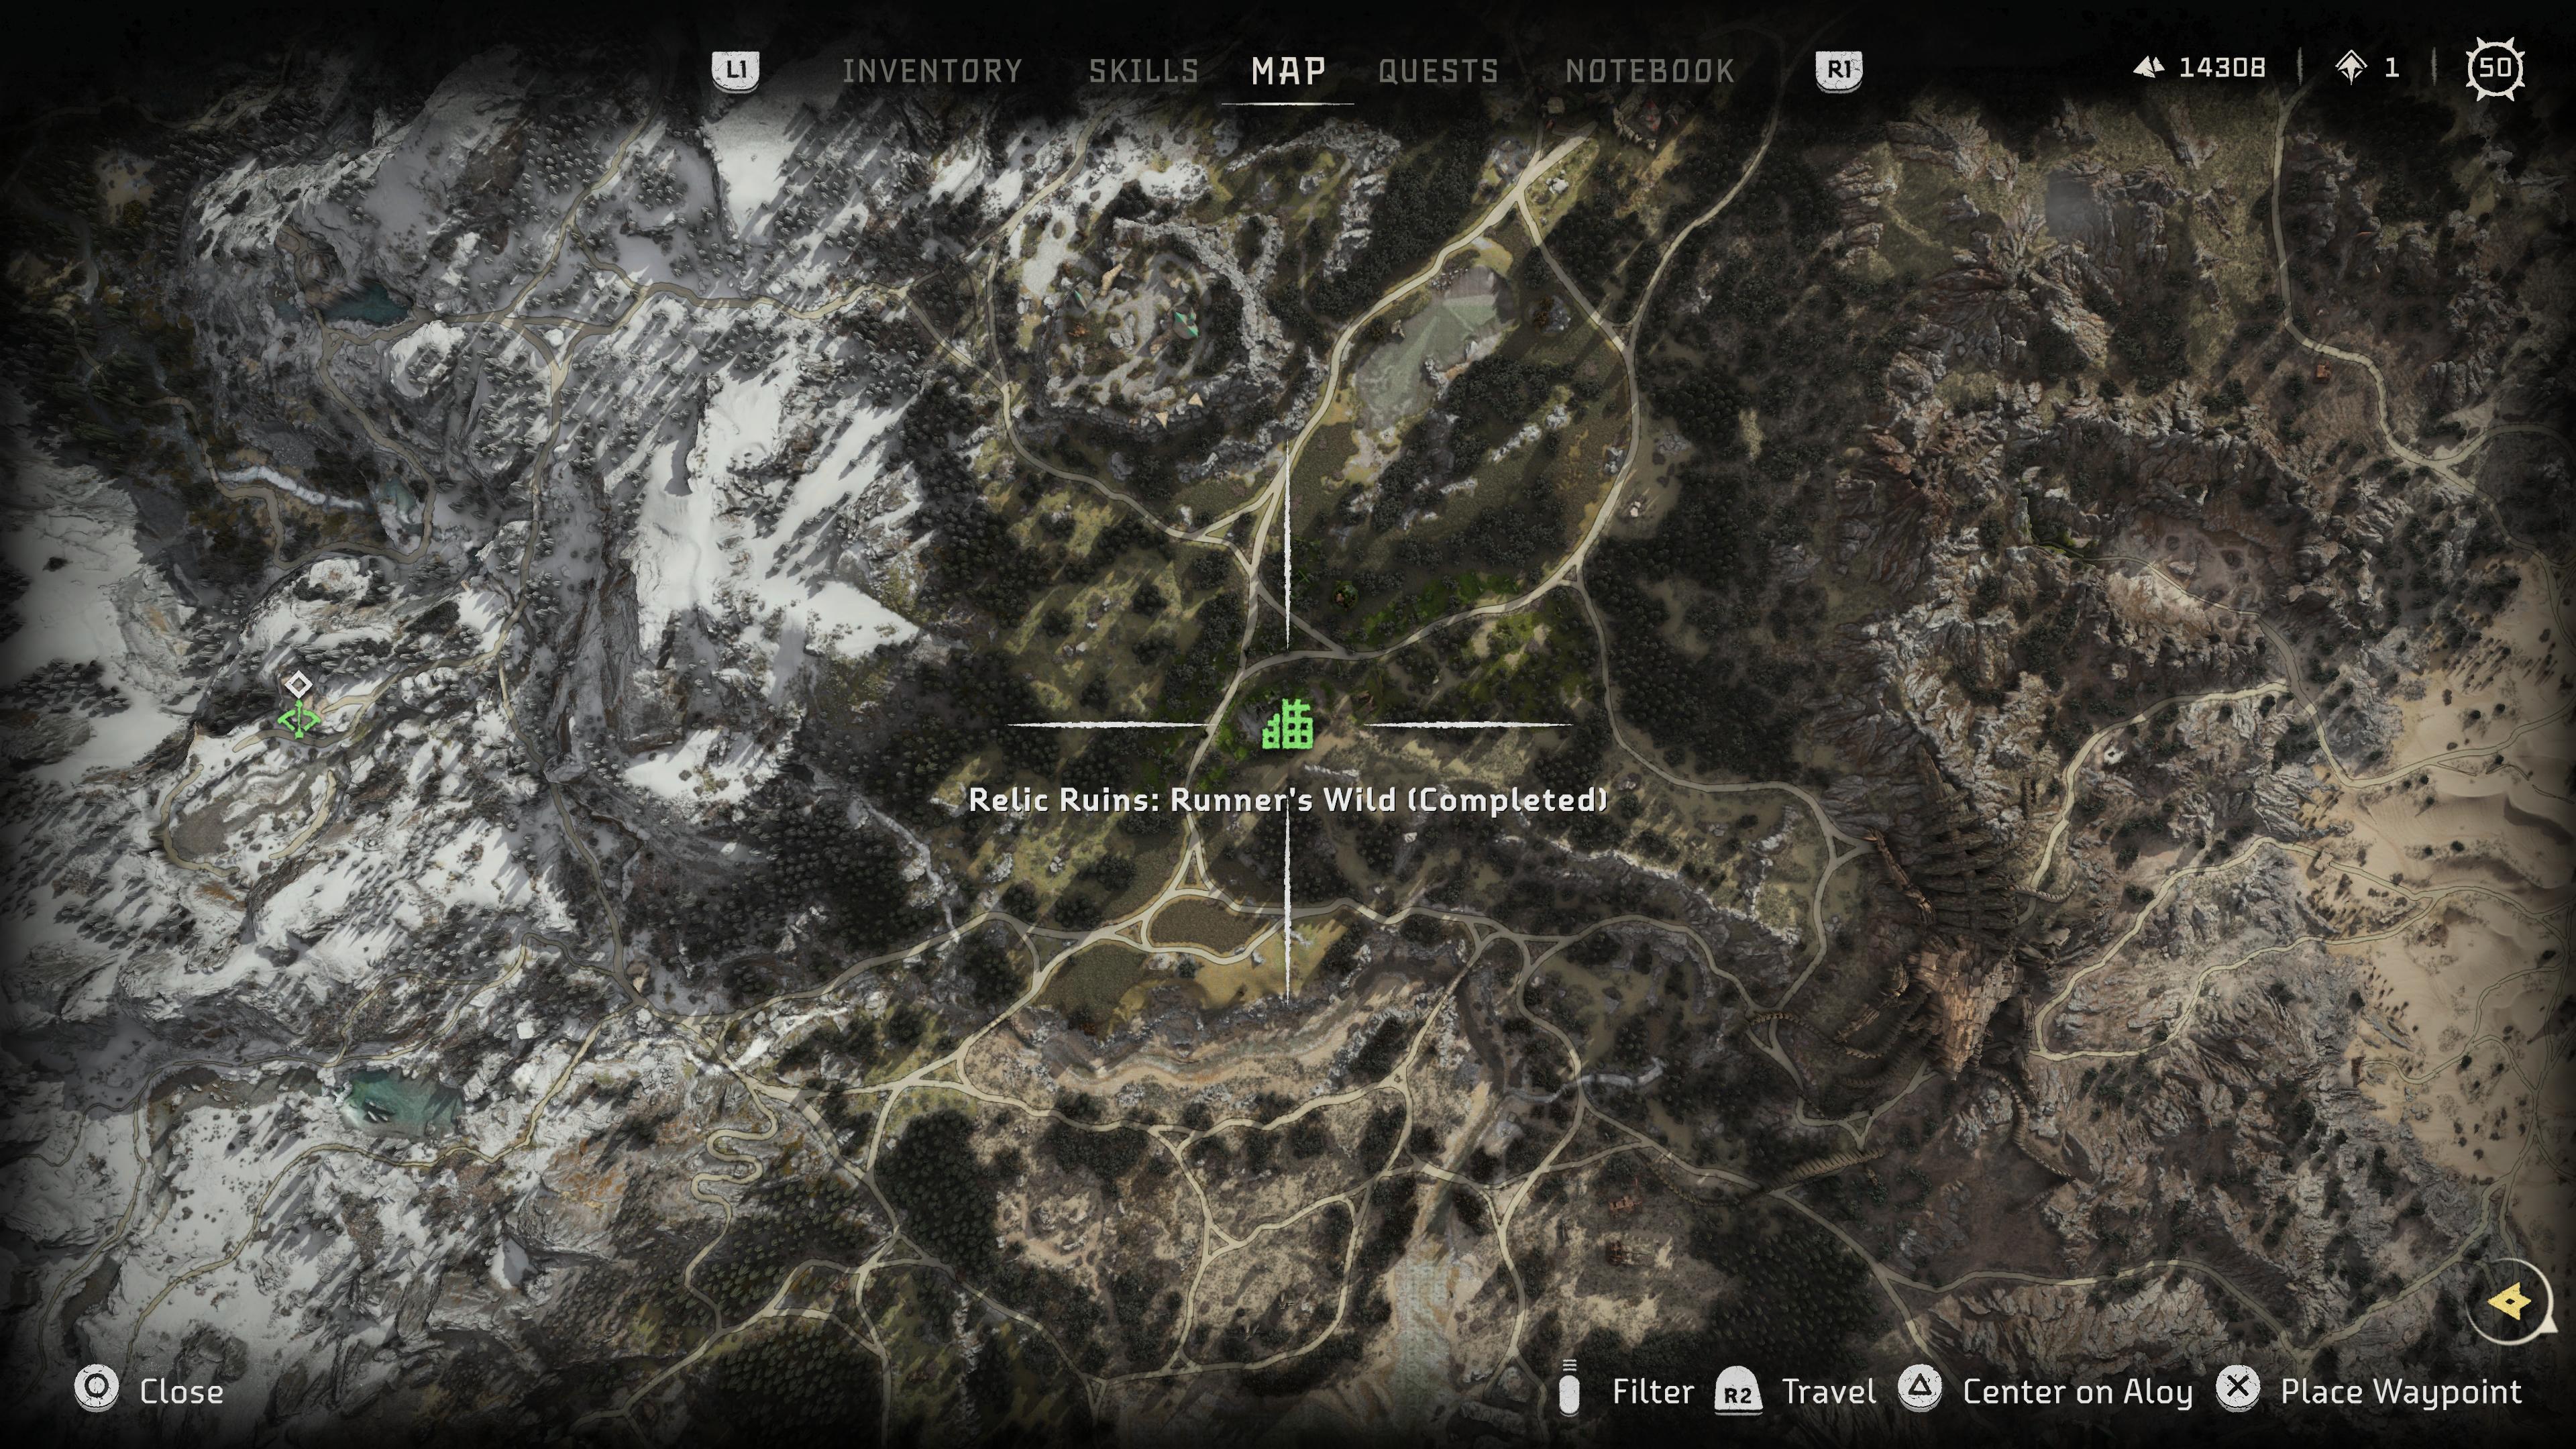
Abilities required: Firegleam,
This one is a bit of a mess with going backwards and forwards a lot, but quite rewarding when you figure it all out.
- First, look for the metal box that's sitting on top of a small concrete block. Use your grapple hook to free it and then push it so you can reach the yellow handhold that's at an angle above where the box was originally sitting.
- Climb up and from here keep climbing up and around to the left of the tower there. Then follow the handholds down until you drop into a stone room. Here's there's a Firegleam to blow up, and a blue metal cross to pull with your grapple hook. Do both.
- Grab your metal box and push it all the way through the corridor you've just created. At the end, there are some handholds up to the right, which you can use to reach the roof level of the building.
- Here there's some Greenshine to collect, but also a second crate. Push this crate onto the level below and then again to the main floor below.
- Then go back to the first crate and push it around until you can push it on top of the second crate so you've got a little stack. They'll automatically click together like they're magnetic so they can now be moved as one block.
- Push your block stack around and through the hole in the wall you made with the Firegleam. Then you'll be able to climb on top and reach the handholds here (one will collapse), and reach the wooden platform above. Grab the keycard (altar room key) and then drop down to walk around to the door.
- Thankfully there's no code needed here, so just use the key and get that door open.
- Go inside the room and then use your grapple on the metal blue cross on the wall to open up another gap.
- Then go back to your block stack and move it so it's inline with the hole you just made.
- You'll then need to go back through the door you opened so you can grapple the top block off the stack and move it independently. Push the crate through the door and up the ramp towards the tower.
- Get it alongside the tower and then climb on top. You can then reach the handholds above and climb up to where the Ornament (A Church? Really?) is sitting on a little alcove within the top of the tower.
The Long Coast
Horizon Forbidden West Relic Ruins: The Long Coast
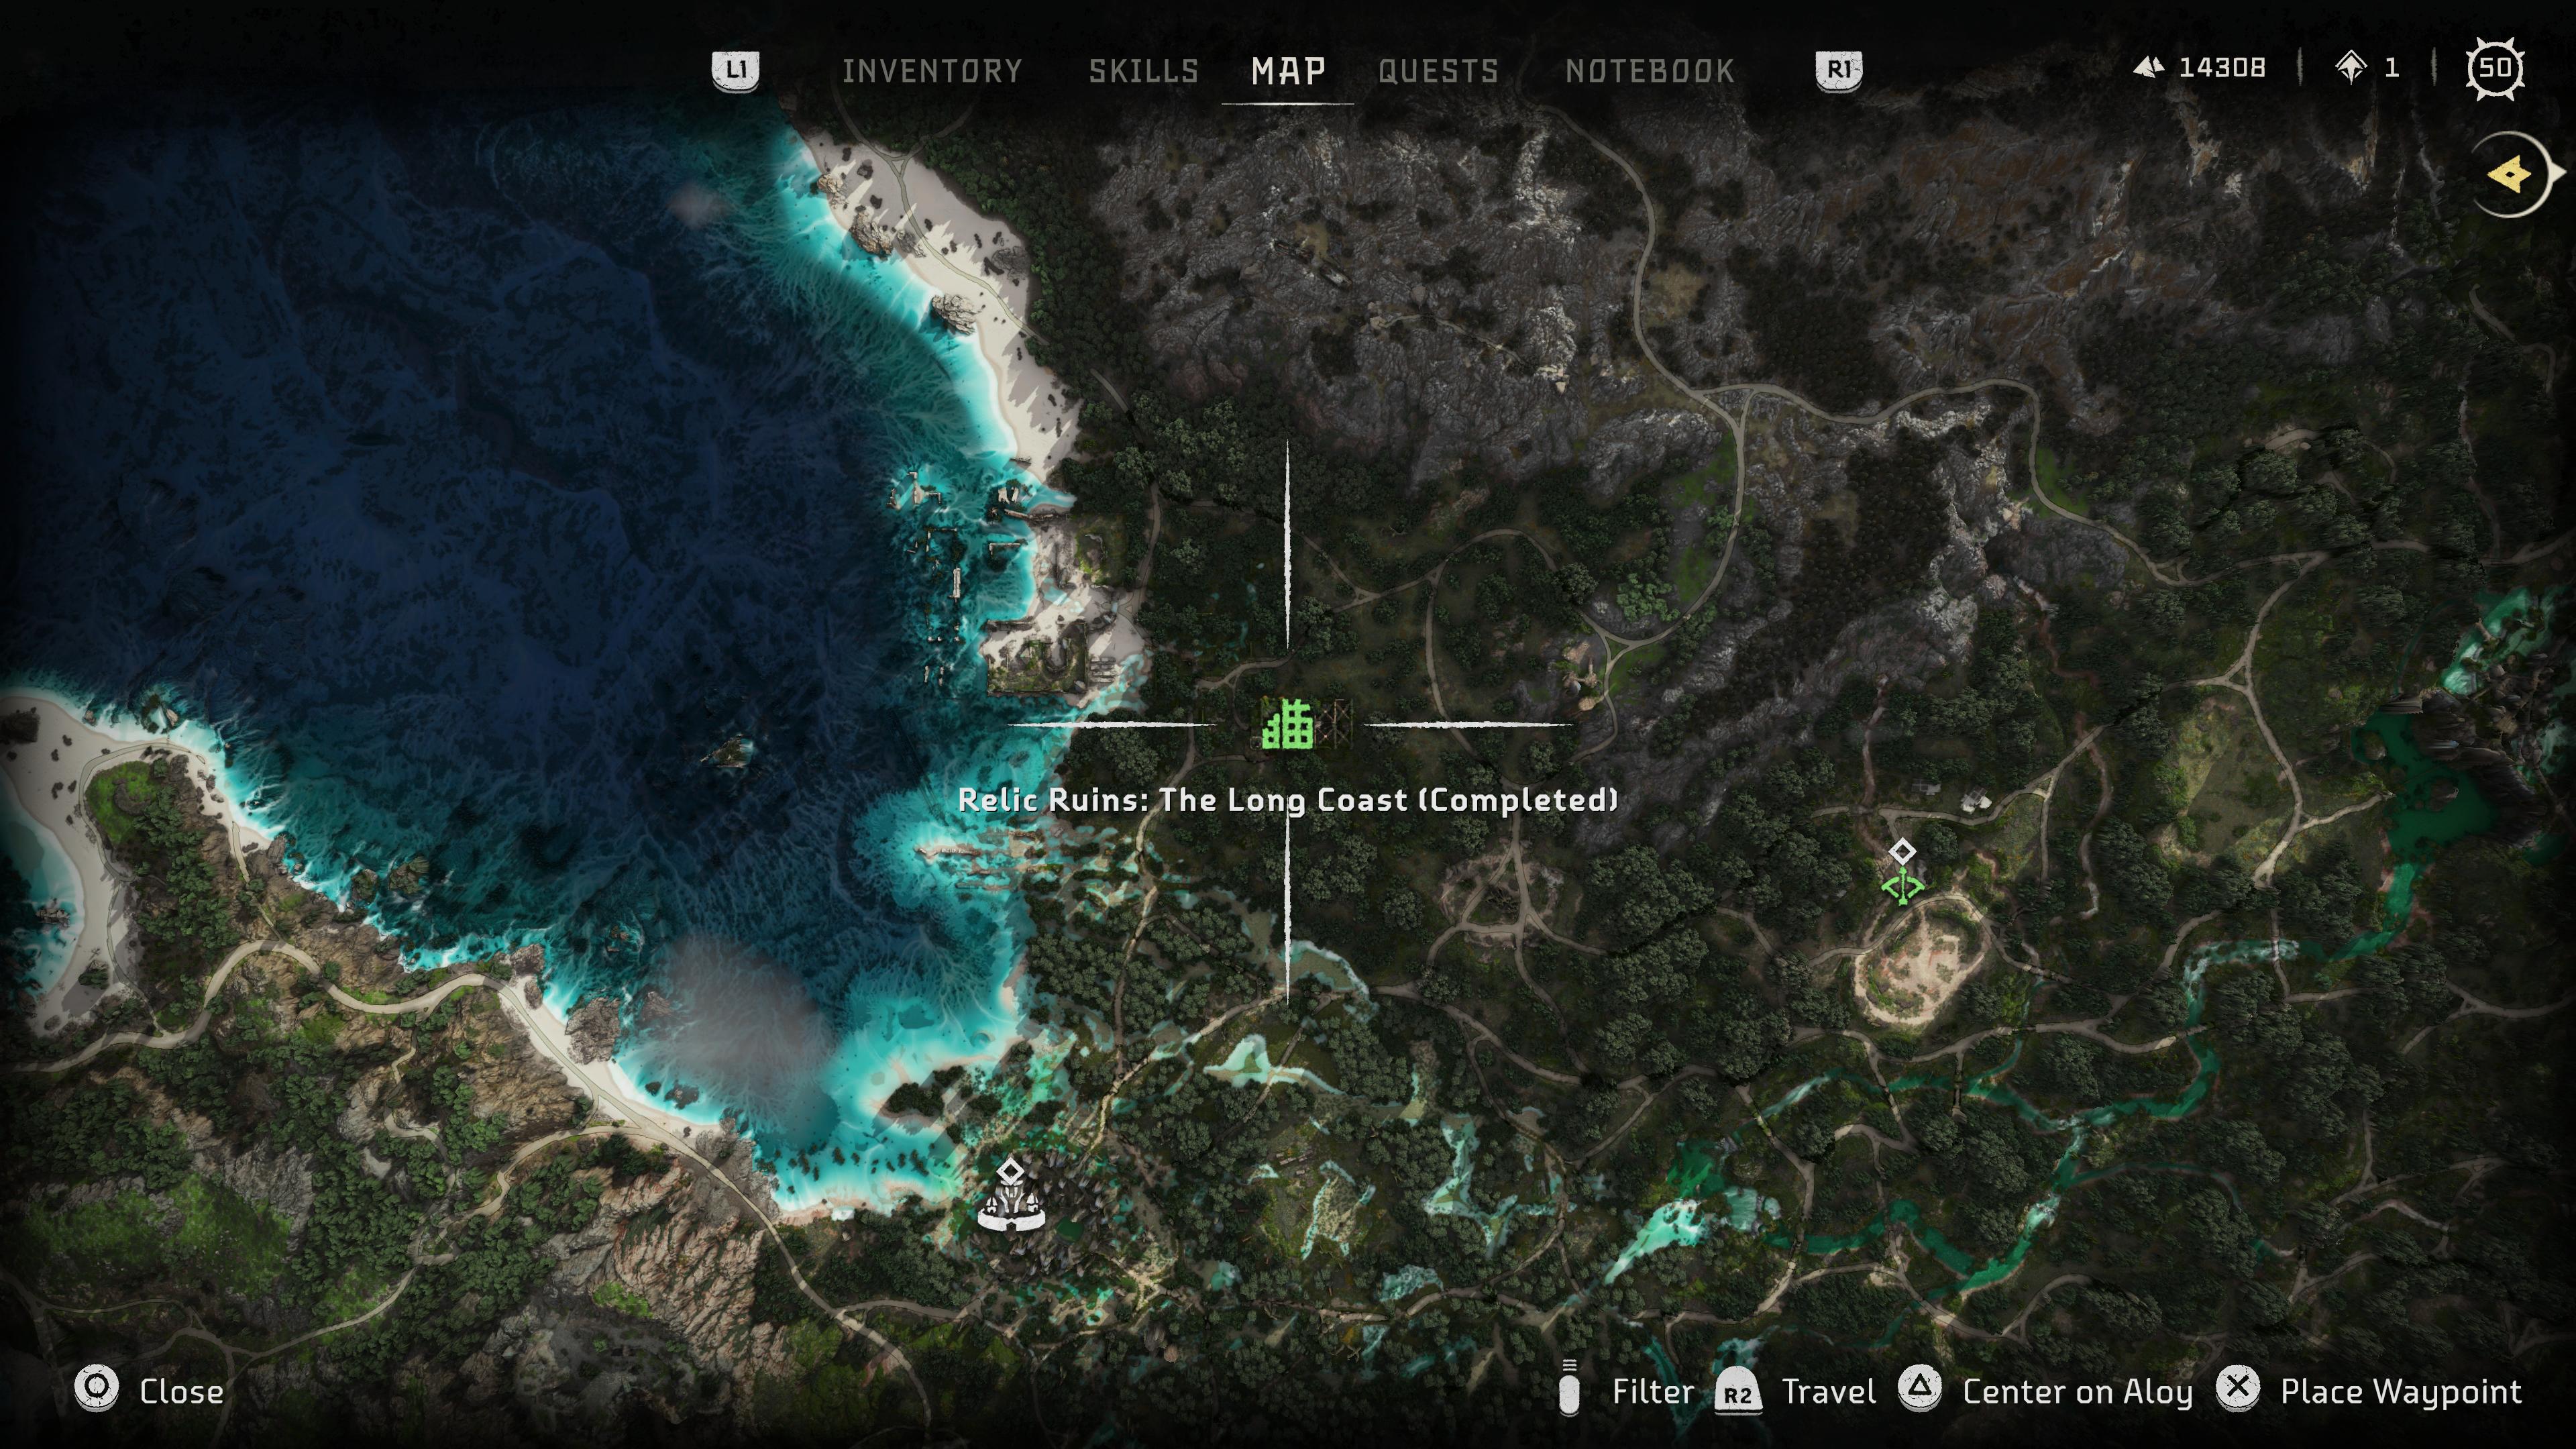
Abilities required: Firegleam
The majority of this Relic Ruin is about figuring out how to combine two boxes and an elevator. And that's more fun than it sounds.
- First, make your way into the centre of the building and find the elevator. When you're staring at the elevator, behind you and to the right is a set of stairs. Climb them and at the top you'll find a battery.
- Grab it and rush it back to the elevator as fast as you can to insert it in the power point that you'll find there. The elevator will now work.
- But before you take a trip head through the doorway that's immediately behind you when facing the elevator (to the right of the stairs).
- Cross the water and climb up the metal wall on the opposite side, and you'll find yourself in an almost scaffolding-style mess of metal beams.
- Look to this platform here, and climb up, moving across the back wall until you're able to drop into an area where there's Firegleam to explode.
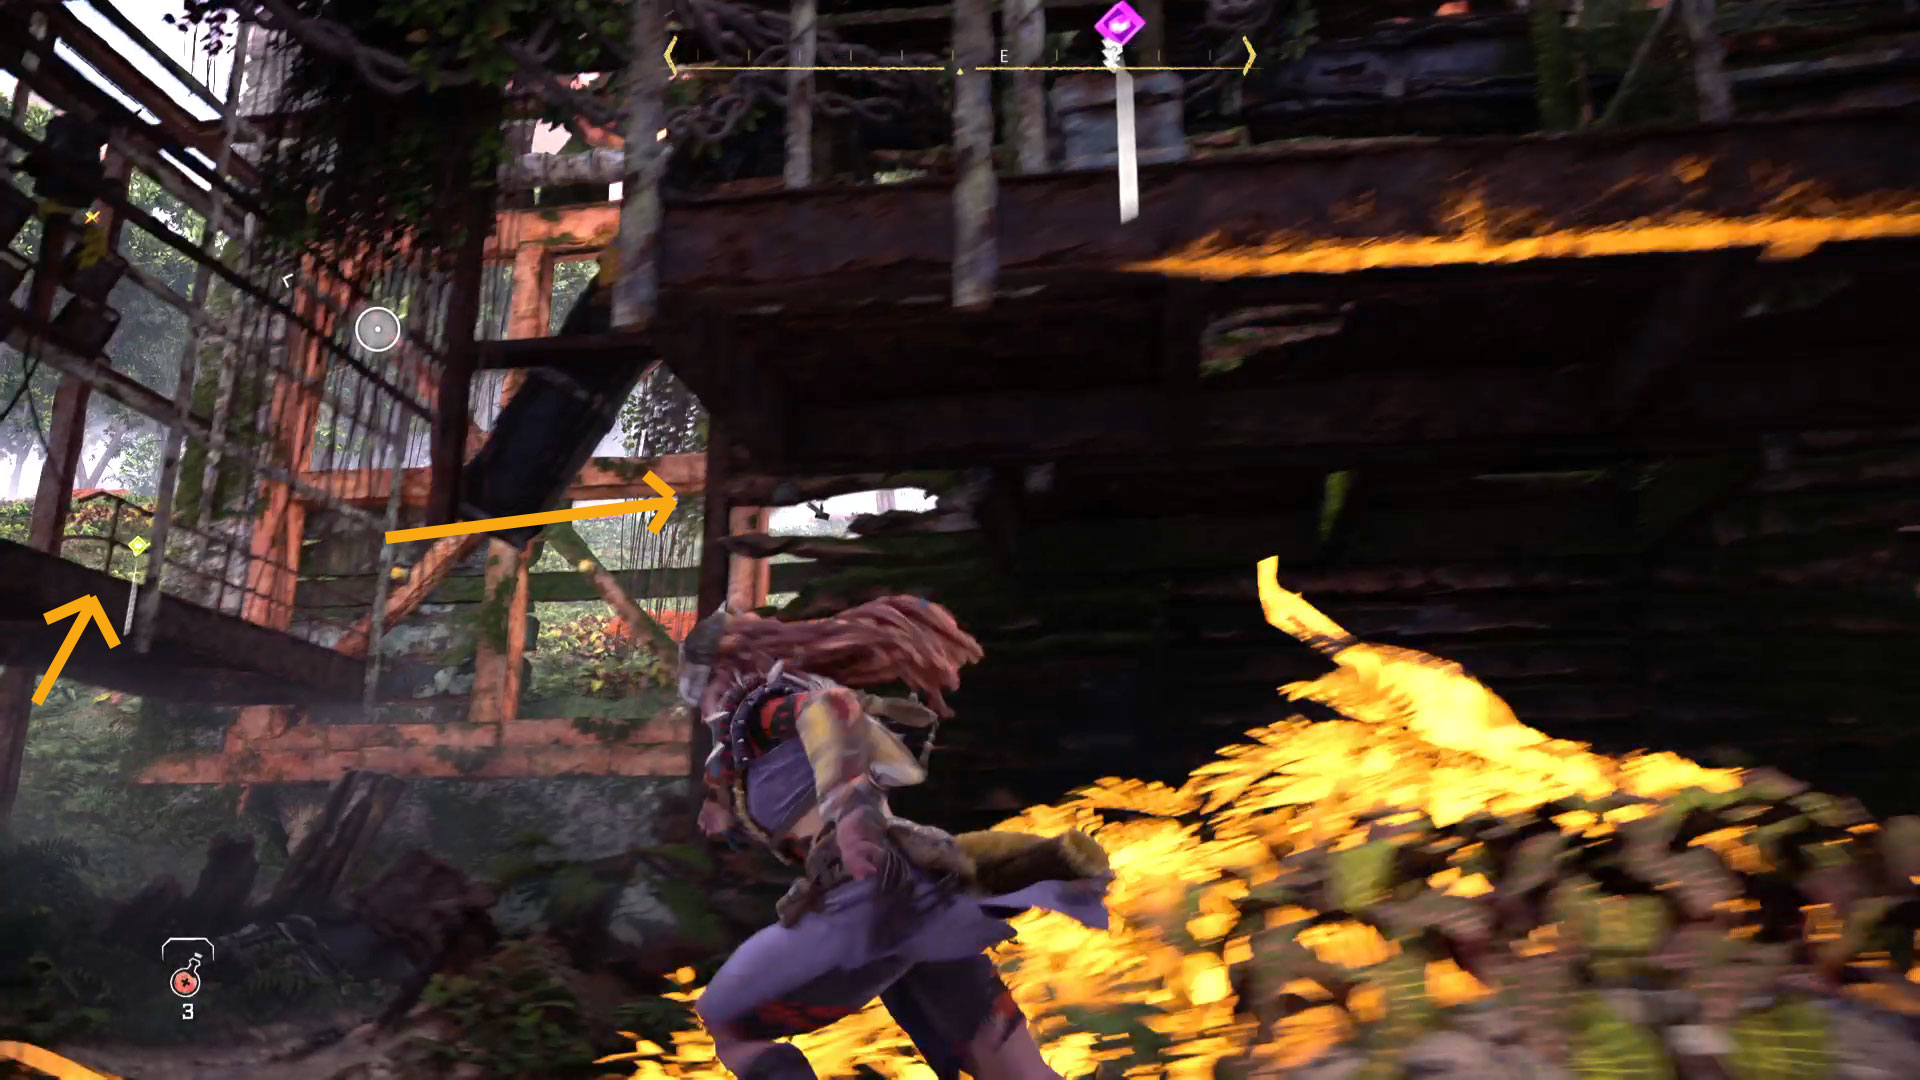
- However, rather than moving through the gap you've just created, turn around an look from the hole in the wall behind you. You'll be able to see a small switch that you can pull with your grapple.
- Pull it and then immediately move back a few steps through the Firegleam gap, and look up. An odd little machine is firing around a grapple hook point to you on a runner. You'll need to press jump and then jump again to grapple up to it, and then immediately press circle to flip to the platform behind you - all before the grapple point goes back to its origin and you'll need to pull the switch again.
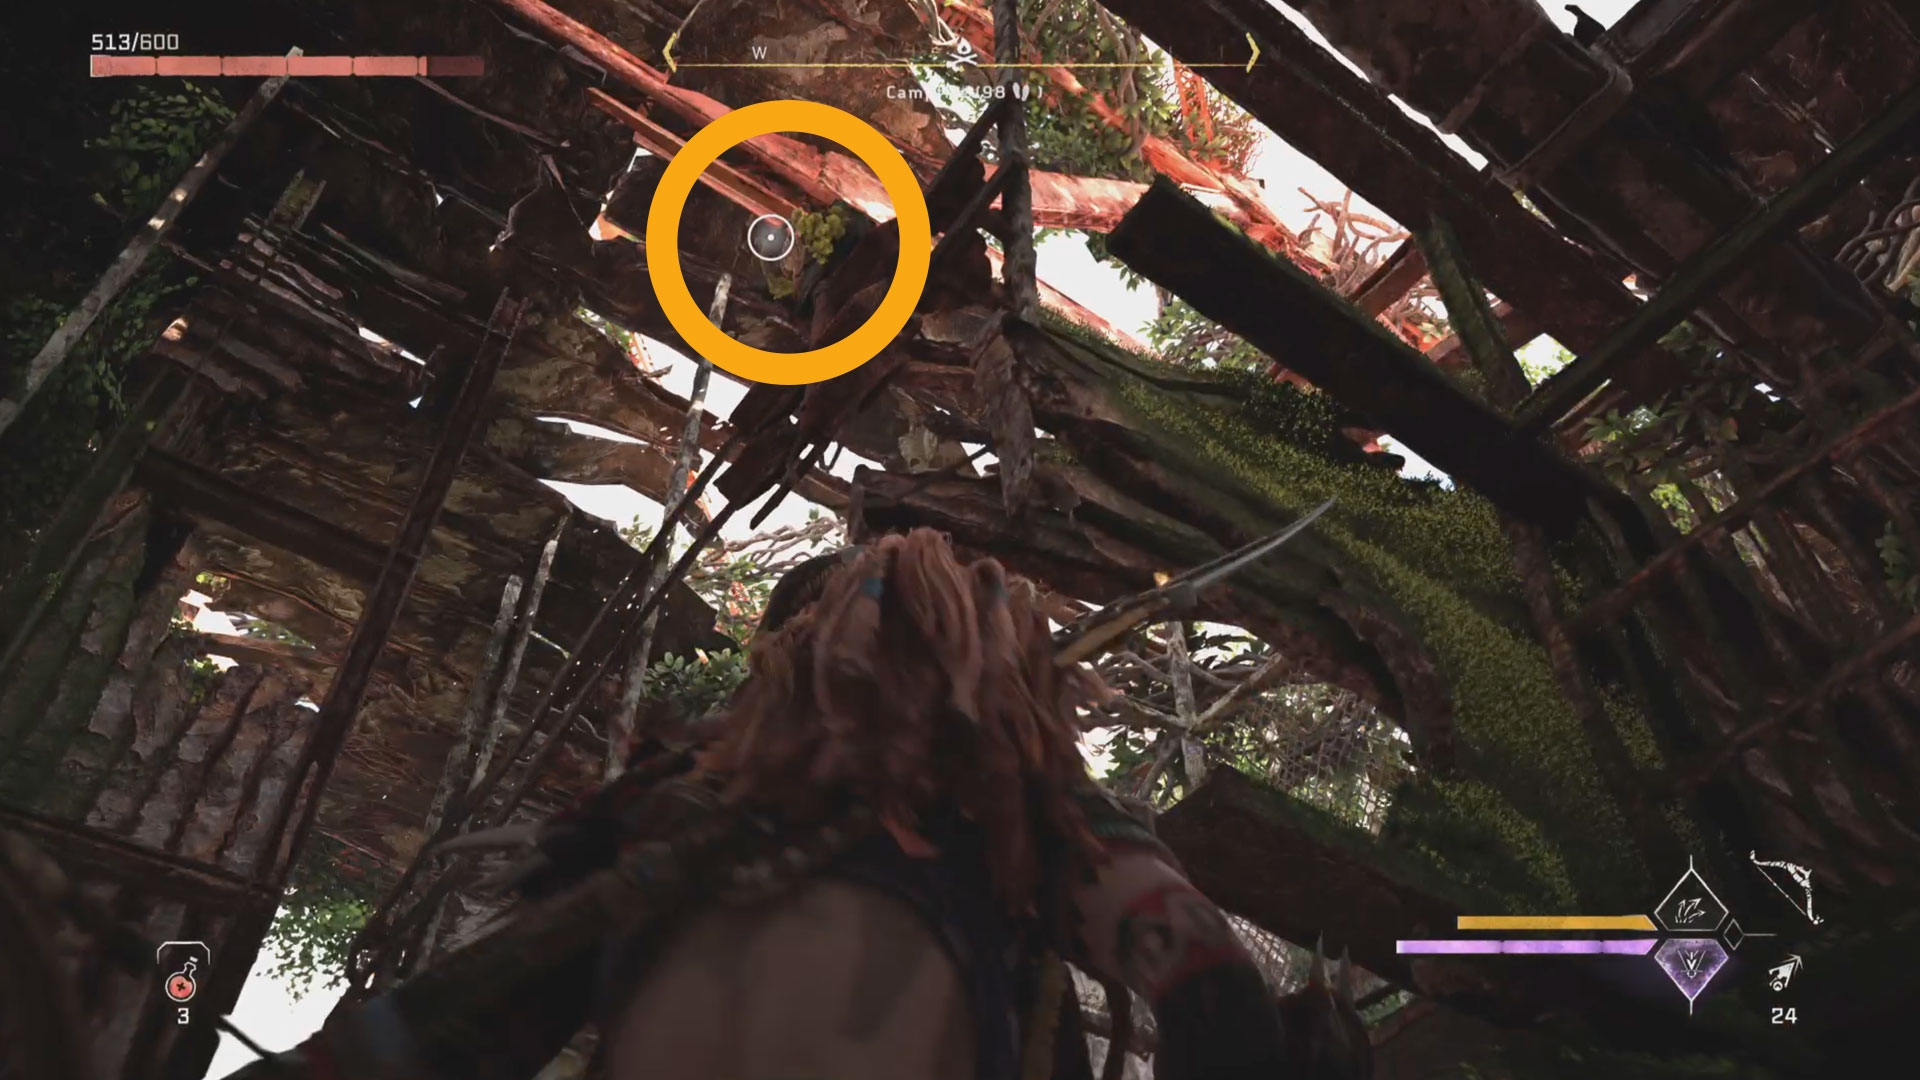
- Do that and you'll reach a platform where you'll see your first metal box. Use your grapple to pull it towards you and make it fall down through the gap.
- Next grab hold of it and pull it over to the water you crossed to reach this area. Go over to the doorway you came through a little while back and use your grapple to take the box with you. You'll want to keep moving it until you can position it inside the elevator.
- Then use your grapple hook to loosen the hatch on the ceiling of the elevator, which you'll need later.
- Next, press the elevator button and make it go up. Pull the box out onto the platform that you've now reached and then leave it there.
- Ride the elevator back down again.
- Next leave the elevator and look for these handholds that are on the side of the elevator shaft.
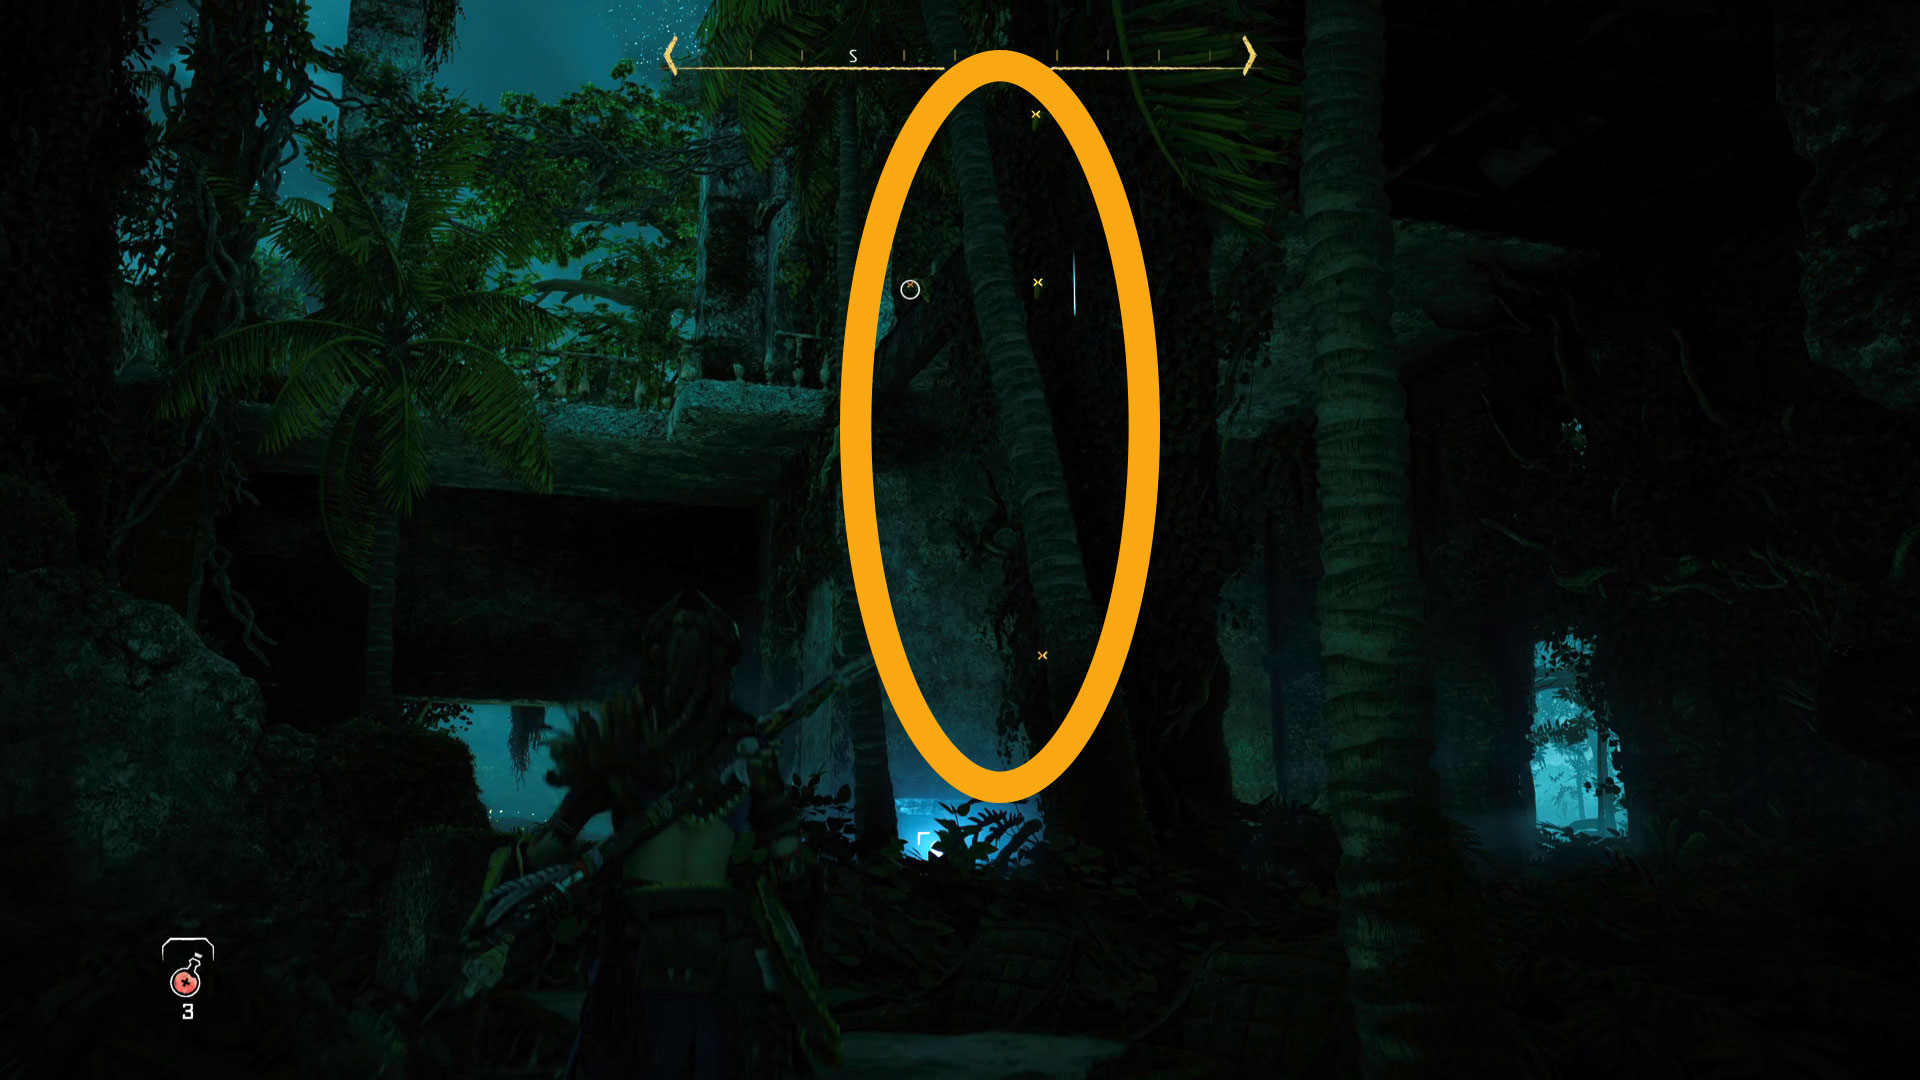
- Keep climbing until you reach a point where there's nothing left to climb. Look down and you'll see the second box that's key to solving this Relic Ruin, in what looks like a bit of an old cinema.
- Use the columns to get closer to it, and then glide over.
- In this new area you'll find some Firegleam that you can explode and that all-important second box. Grab the box and drag it through the hole you make with the Firegleam, and then push it off the edge of the platform.
- Now, repeat yourself and move this second box into the lift, but use it to climb up through the hatch above.
- Grab the box you left on the upper platform earlier and push it onto the top of the lift.
- Then, drop back down through the hatch and ride the lift up one more time.
- You can then use the lower box to climb through the hatch again, and then climb on the second box to reach the handholds above. Then all that's left to do is grab your Ornament (The Bill). You can also grab the blue metal cross with your grapple for an easy exit.
Isle of Spires
Horizon Forbidden West Relic Ruins: Isle of Spires
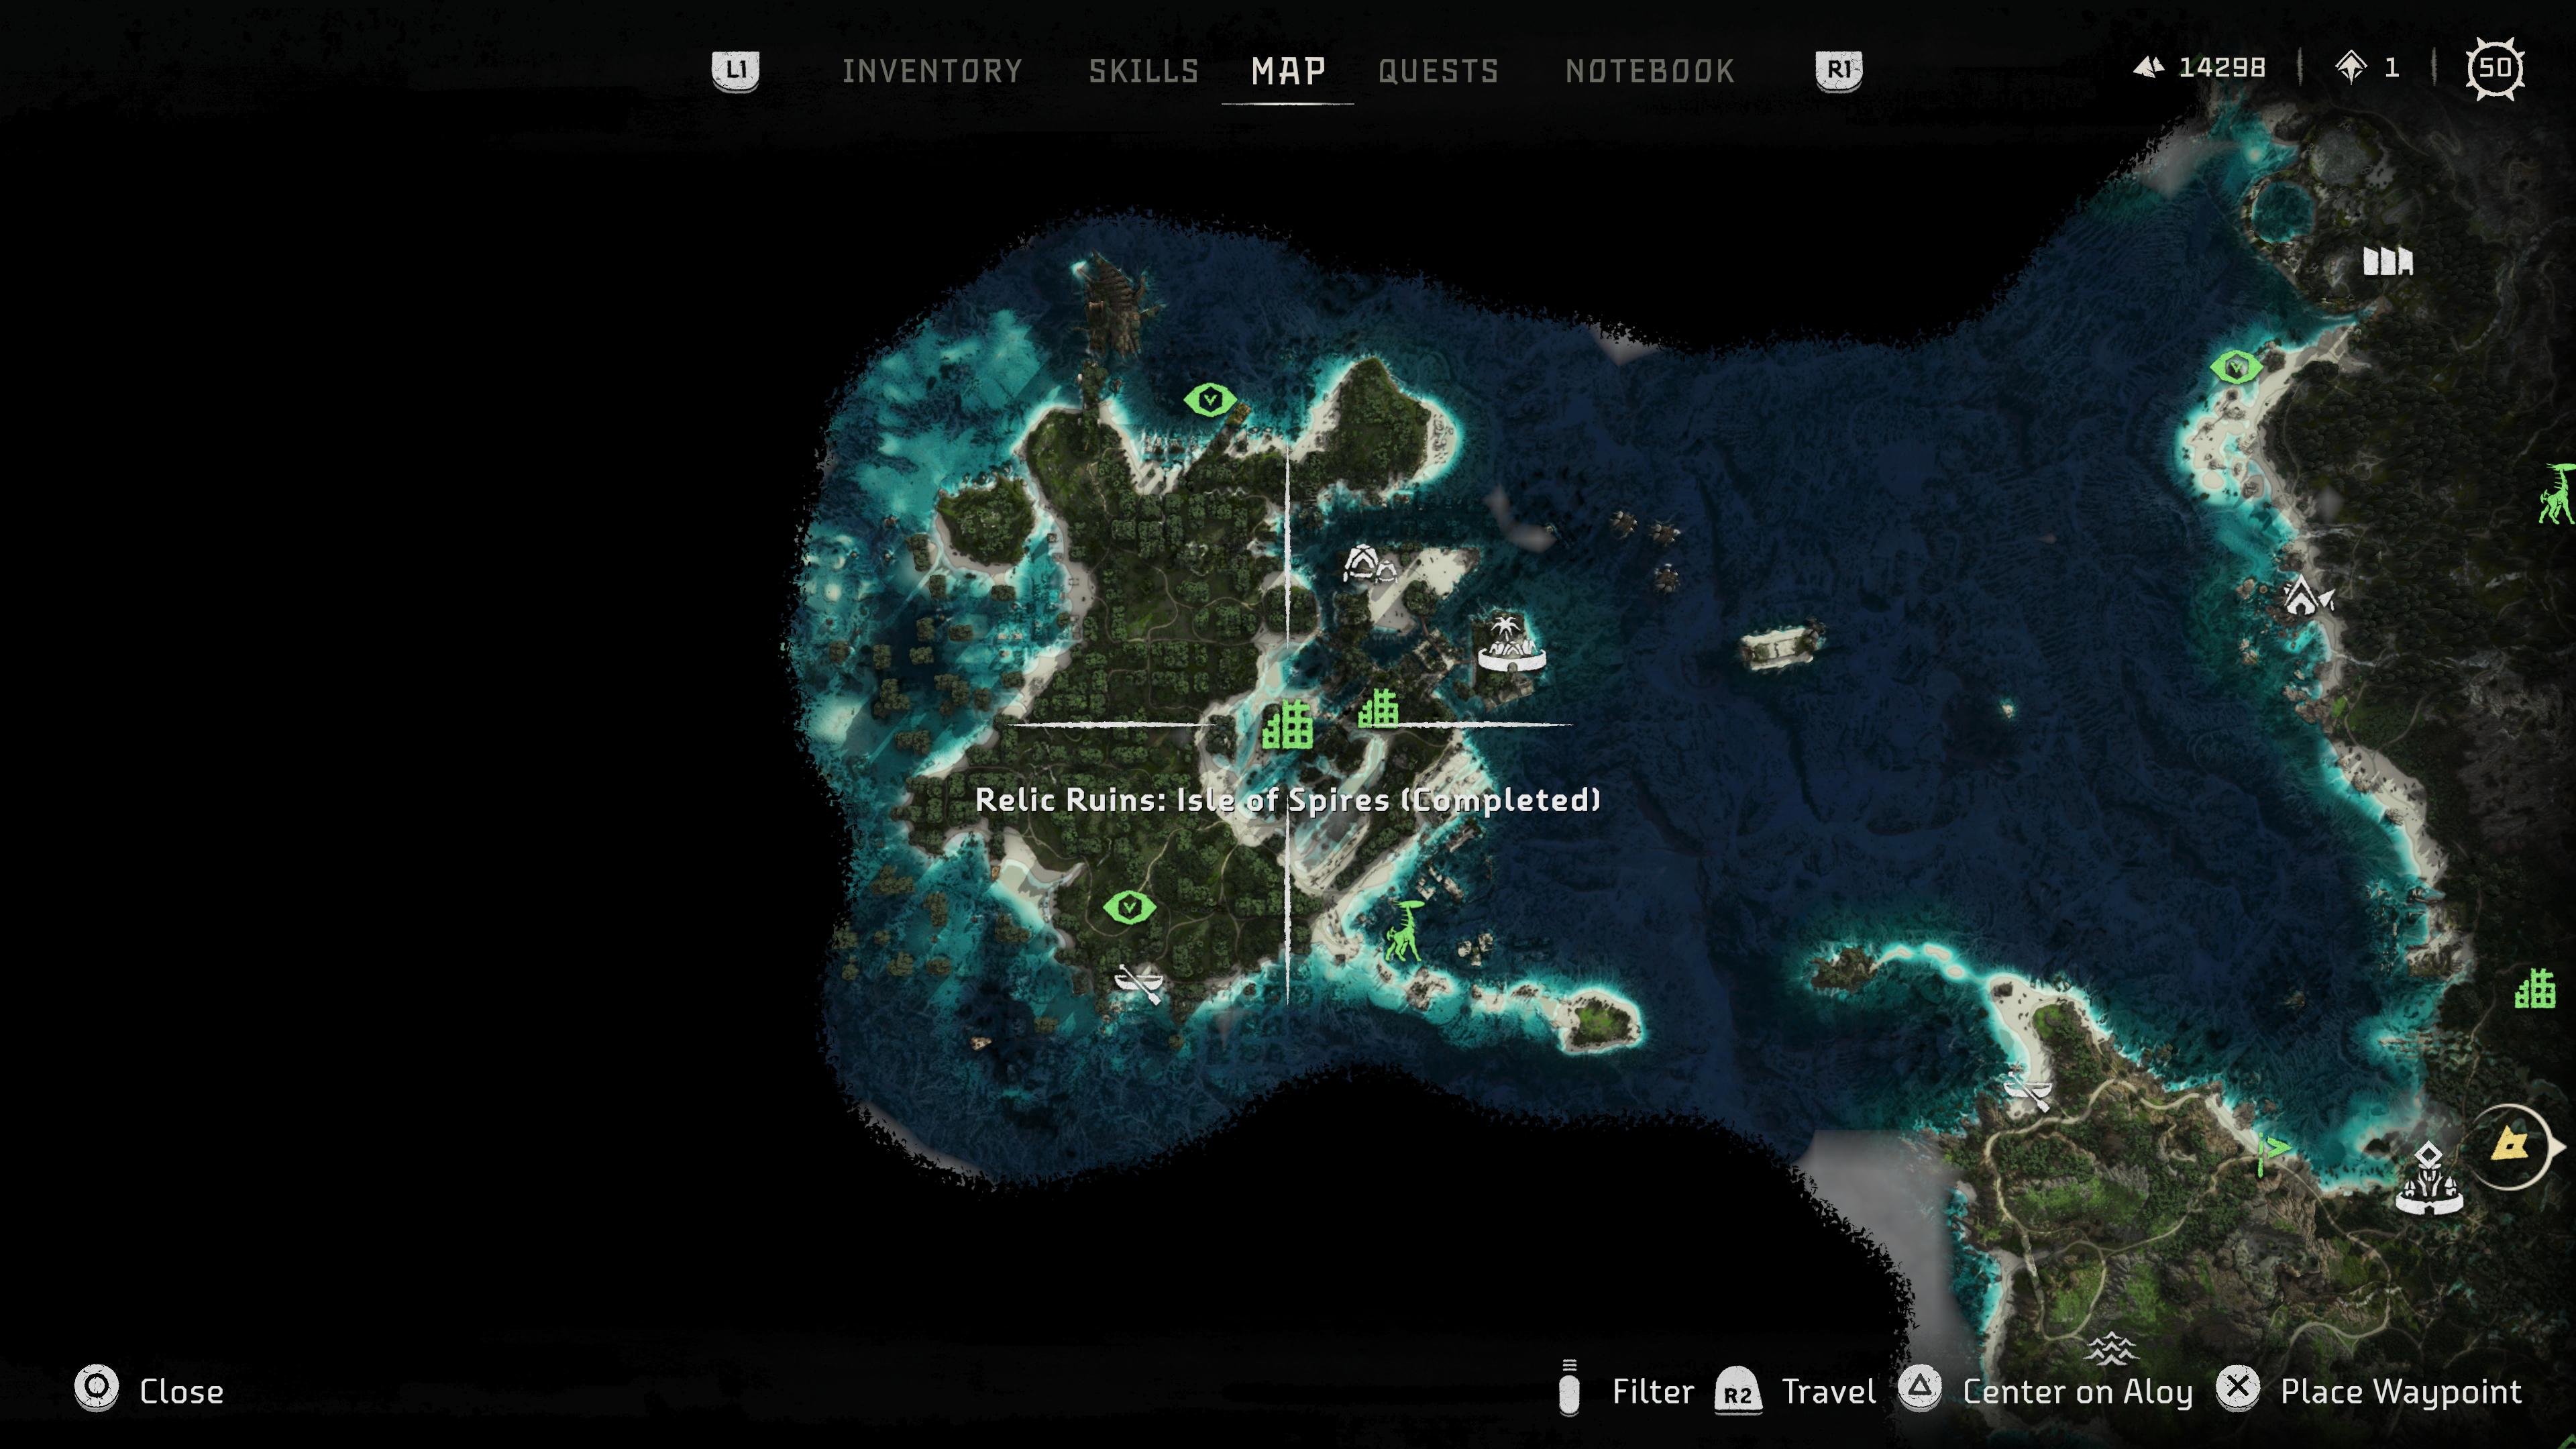
Abilities required: Firegleam, Metal Flower
Easily the most difficult and infuriating Relic Ruin of the bunch. You need two codes multiple abilities and a lot of patience to solve this one.
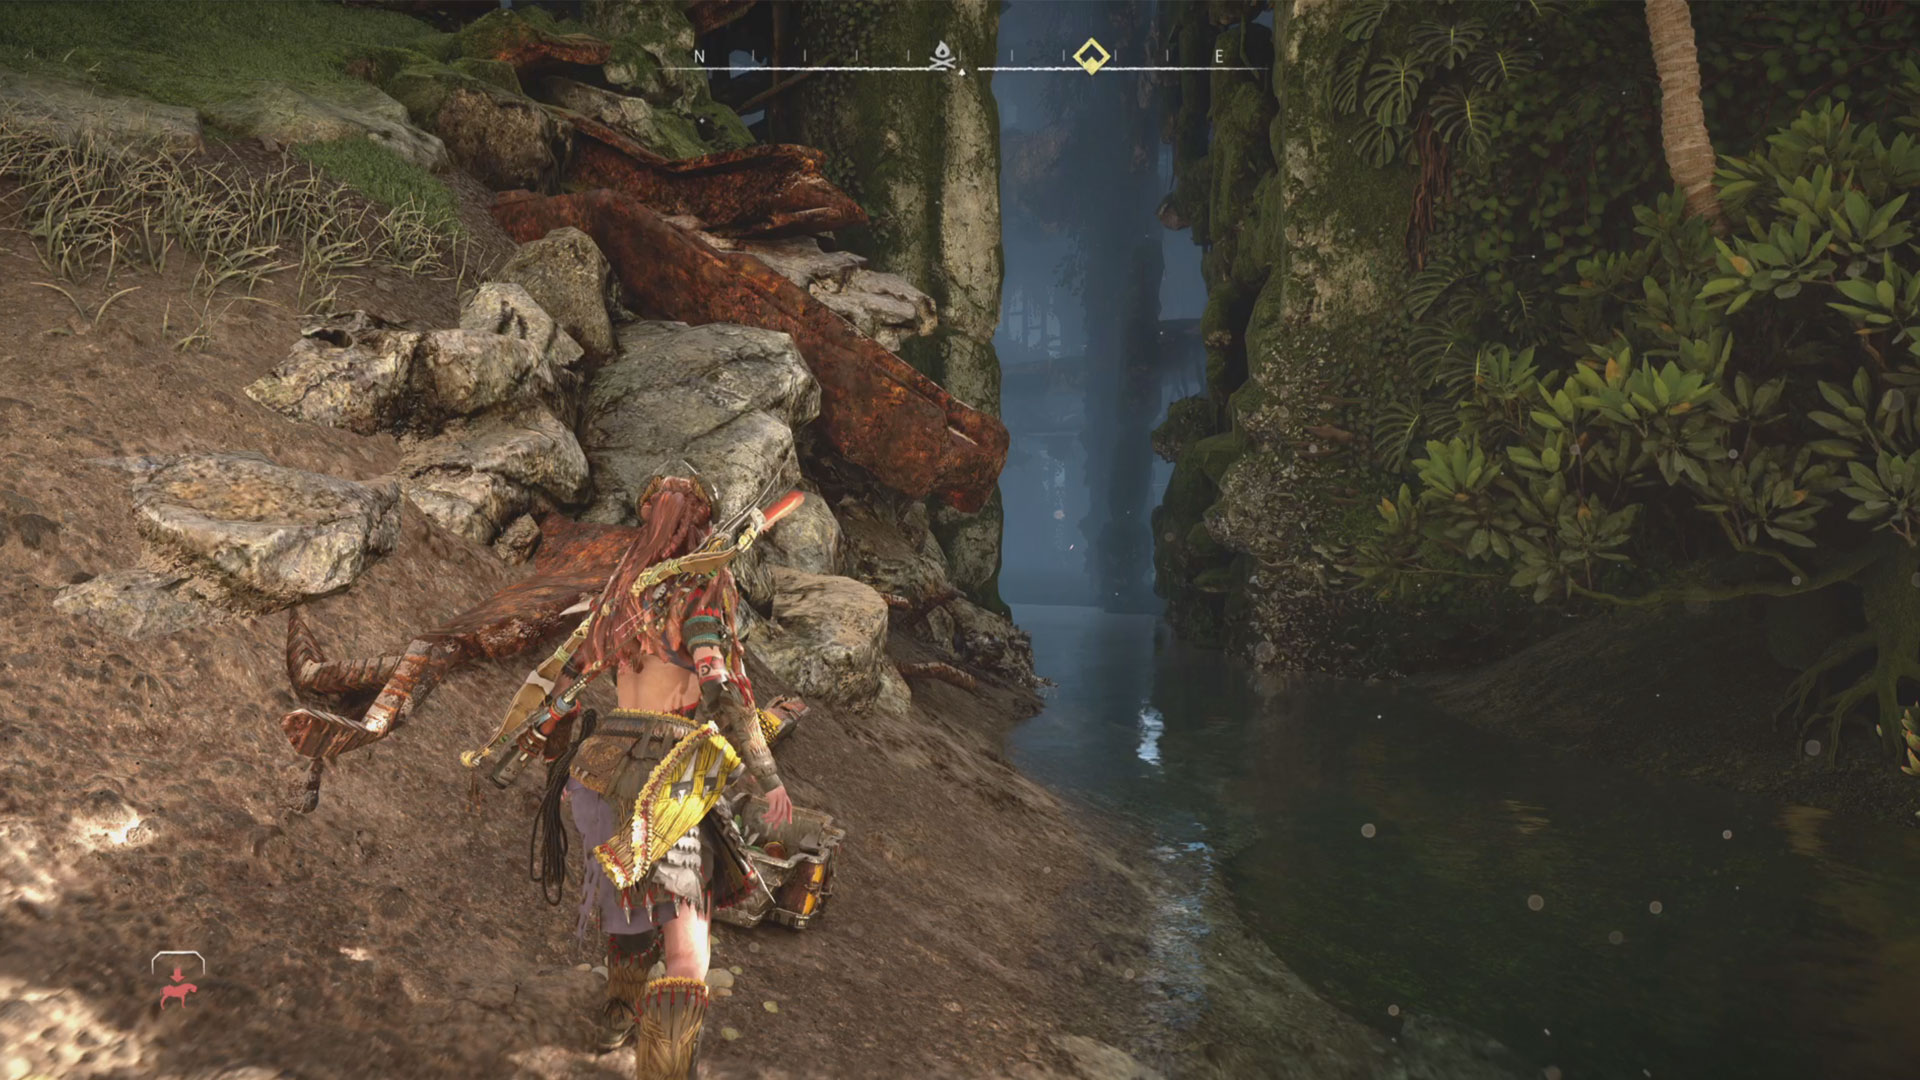
- First, find your way into the ruin itself, which is a thin crack that looks like this:
- Swim over to the locked door (behind which is your Ornament prize) and scan the Datapoint there. It'll explain that you'll need an access key and two code parts to unlock the door. One is on the 7th floor, and the other is on the 9th. Handily this door is already on the 6th floor, just to give you a sense of how the levels play out.
- To begin with, let's get the first part of the code. From the Datapoint, follow the platform around and turn right. In here you'll find a hatch on the ceiling that you can open with your grapple hook.
- But you can't climb up there yet. Instead, head back out into the main space and look for some handholds up a column that's practically opposite the locked door keeping you from the Ornament.
- Climb as high as you can until you reach a grassy platform and then glide over to teh other side to reach a handhold a couple floors above that aforementioned locked door to a new one. There's nothing much in this room beyond loot, so follow the platform to the left and perch on the pole that's jutting out.
- Opposite is a metal box, so use your grapple hook to drop it into the water below and then follow it.
- Go towards the hatch you opened earlier, and use your grapple to pull the metal box towards you, and then move it underneath the hatch.
- Climb up and in the room above scan the Datapoint that's over on the very left-hand side. You'll get a hint as to what the first part of the door code for that main door is, and you'll also need it to unlock the door in this room too. It's 2019.
- Right, now let's get the second piece of the door code. For this, you'll need to head outside and run around the exterior of the building to find these climbing points.
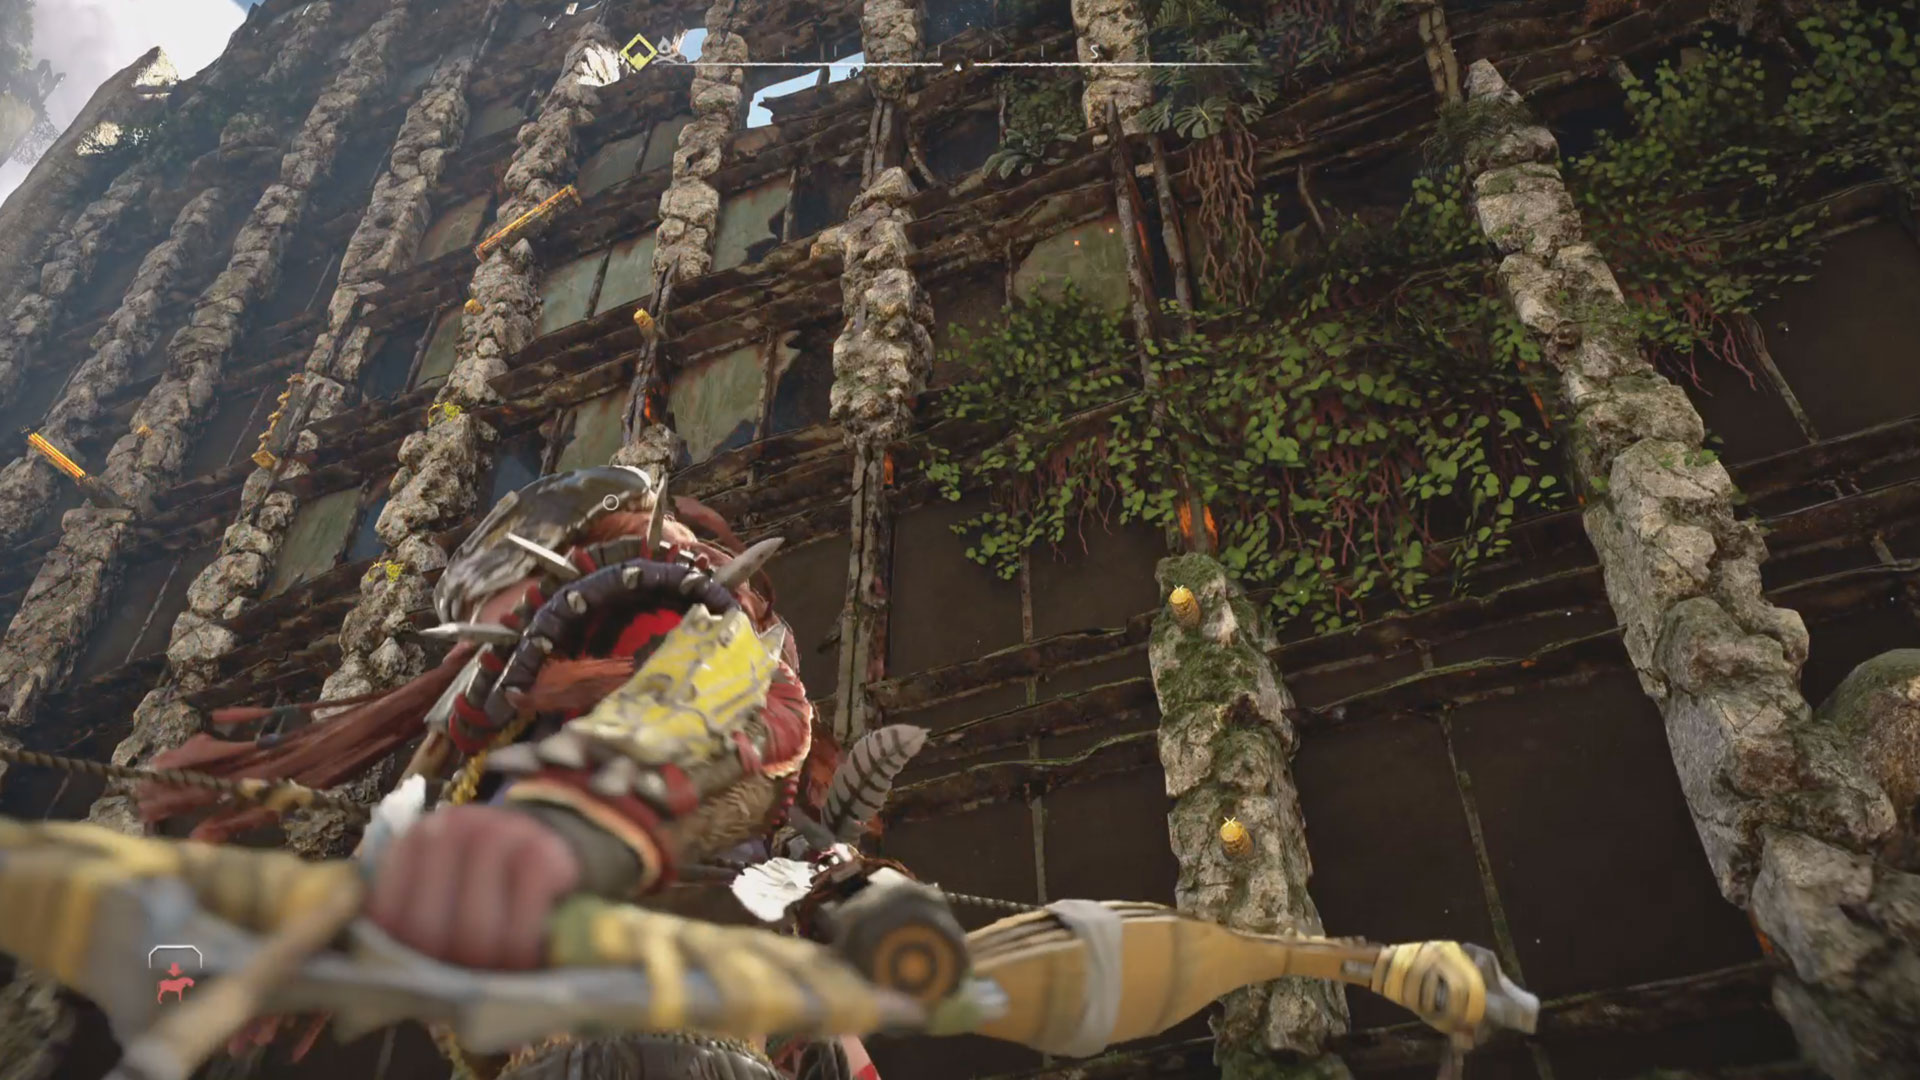
- Climb up until you can reach the platforms in the top left. Follow the little balcony around and then enter the building again through the window.
- You'll find yourself next to a duo of elevators with a battery slot in the middle.
- Head around the path to the left, and go into the first small room you see. There's a dead battery cell in here, so grab that and take it to the room on the right for now. Leave it there for a minute as that's too far from the lifts for you to carry the battery without it losing charge.
- So, from the battery charging station, go around through the door on the right, and use your grapple to open the hatch that you'll find here.
- Climb up and follow the passageway until you drop into a room with Firegleam covering the wall. Blow that up and then turn around to find a second battery charging station.
- Grab the battery from where you left it earlier and move it to this newly discovered second charging station. From here you'll be able to carry it to the lift slot without it losing charge.
- Get into the elevator and hit the button. You'll find yourself in a new area that contains another metal box and a metal flower. Here, it's very important you do three things. First, pull the metal box out of the water using your grapple hook and then move it into the elevator.
- Next, go and clear the metal flower that's across a tiny stretch of water. From this platform turn to your right and there's another small area hidden behind a metal grid. Jump in behind here.
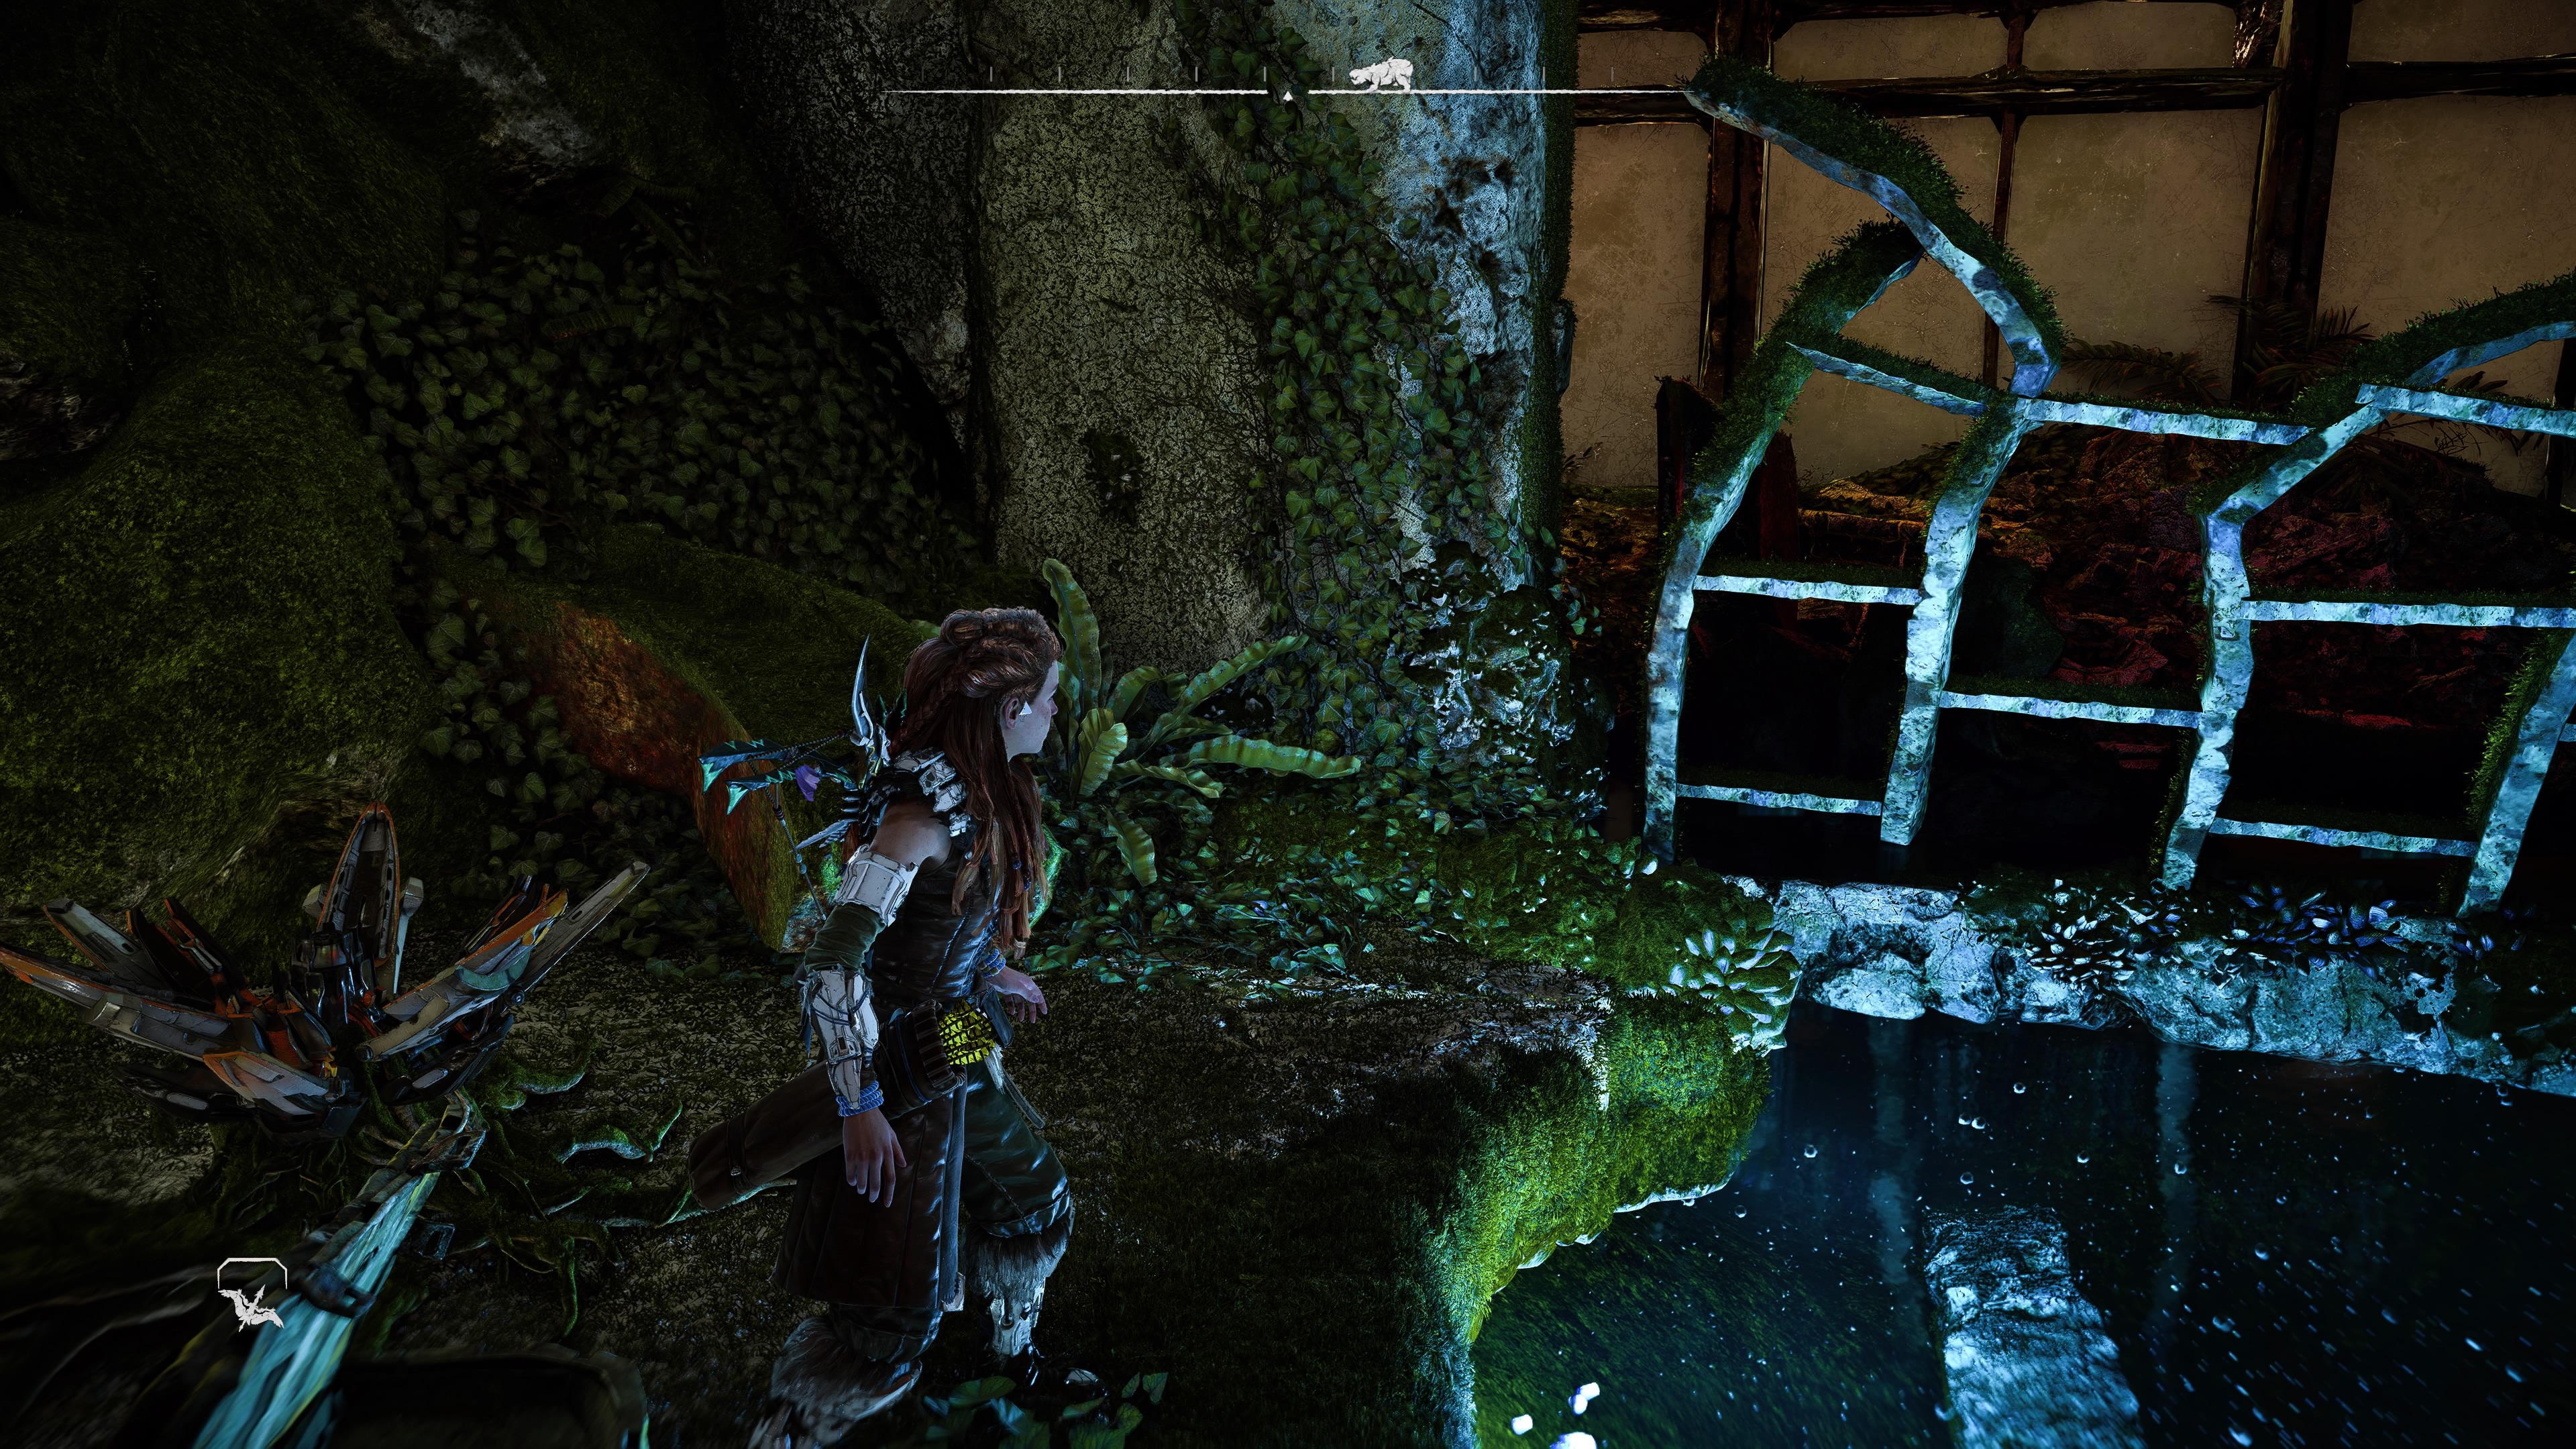
- Then look back across the platform where the metal flower was and then across again beyond another metal grid. There's a ladder here that you'll need to shoot with an arrow to release. This will be super important for grabbing the access key.
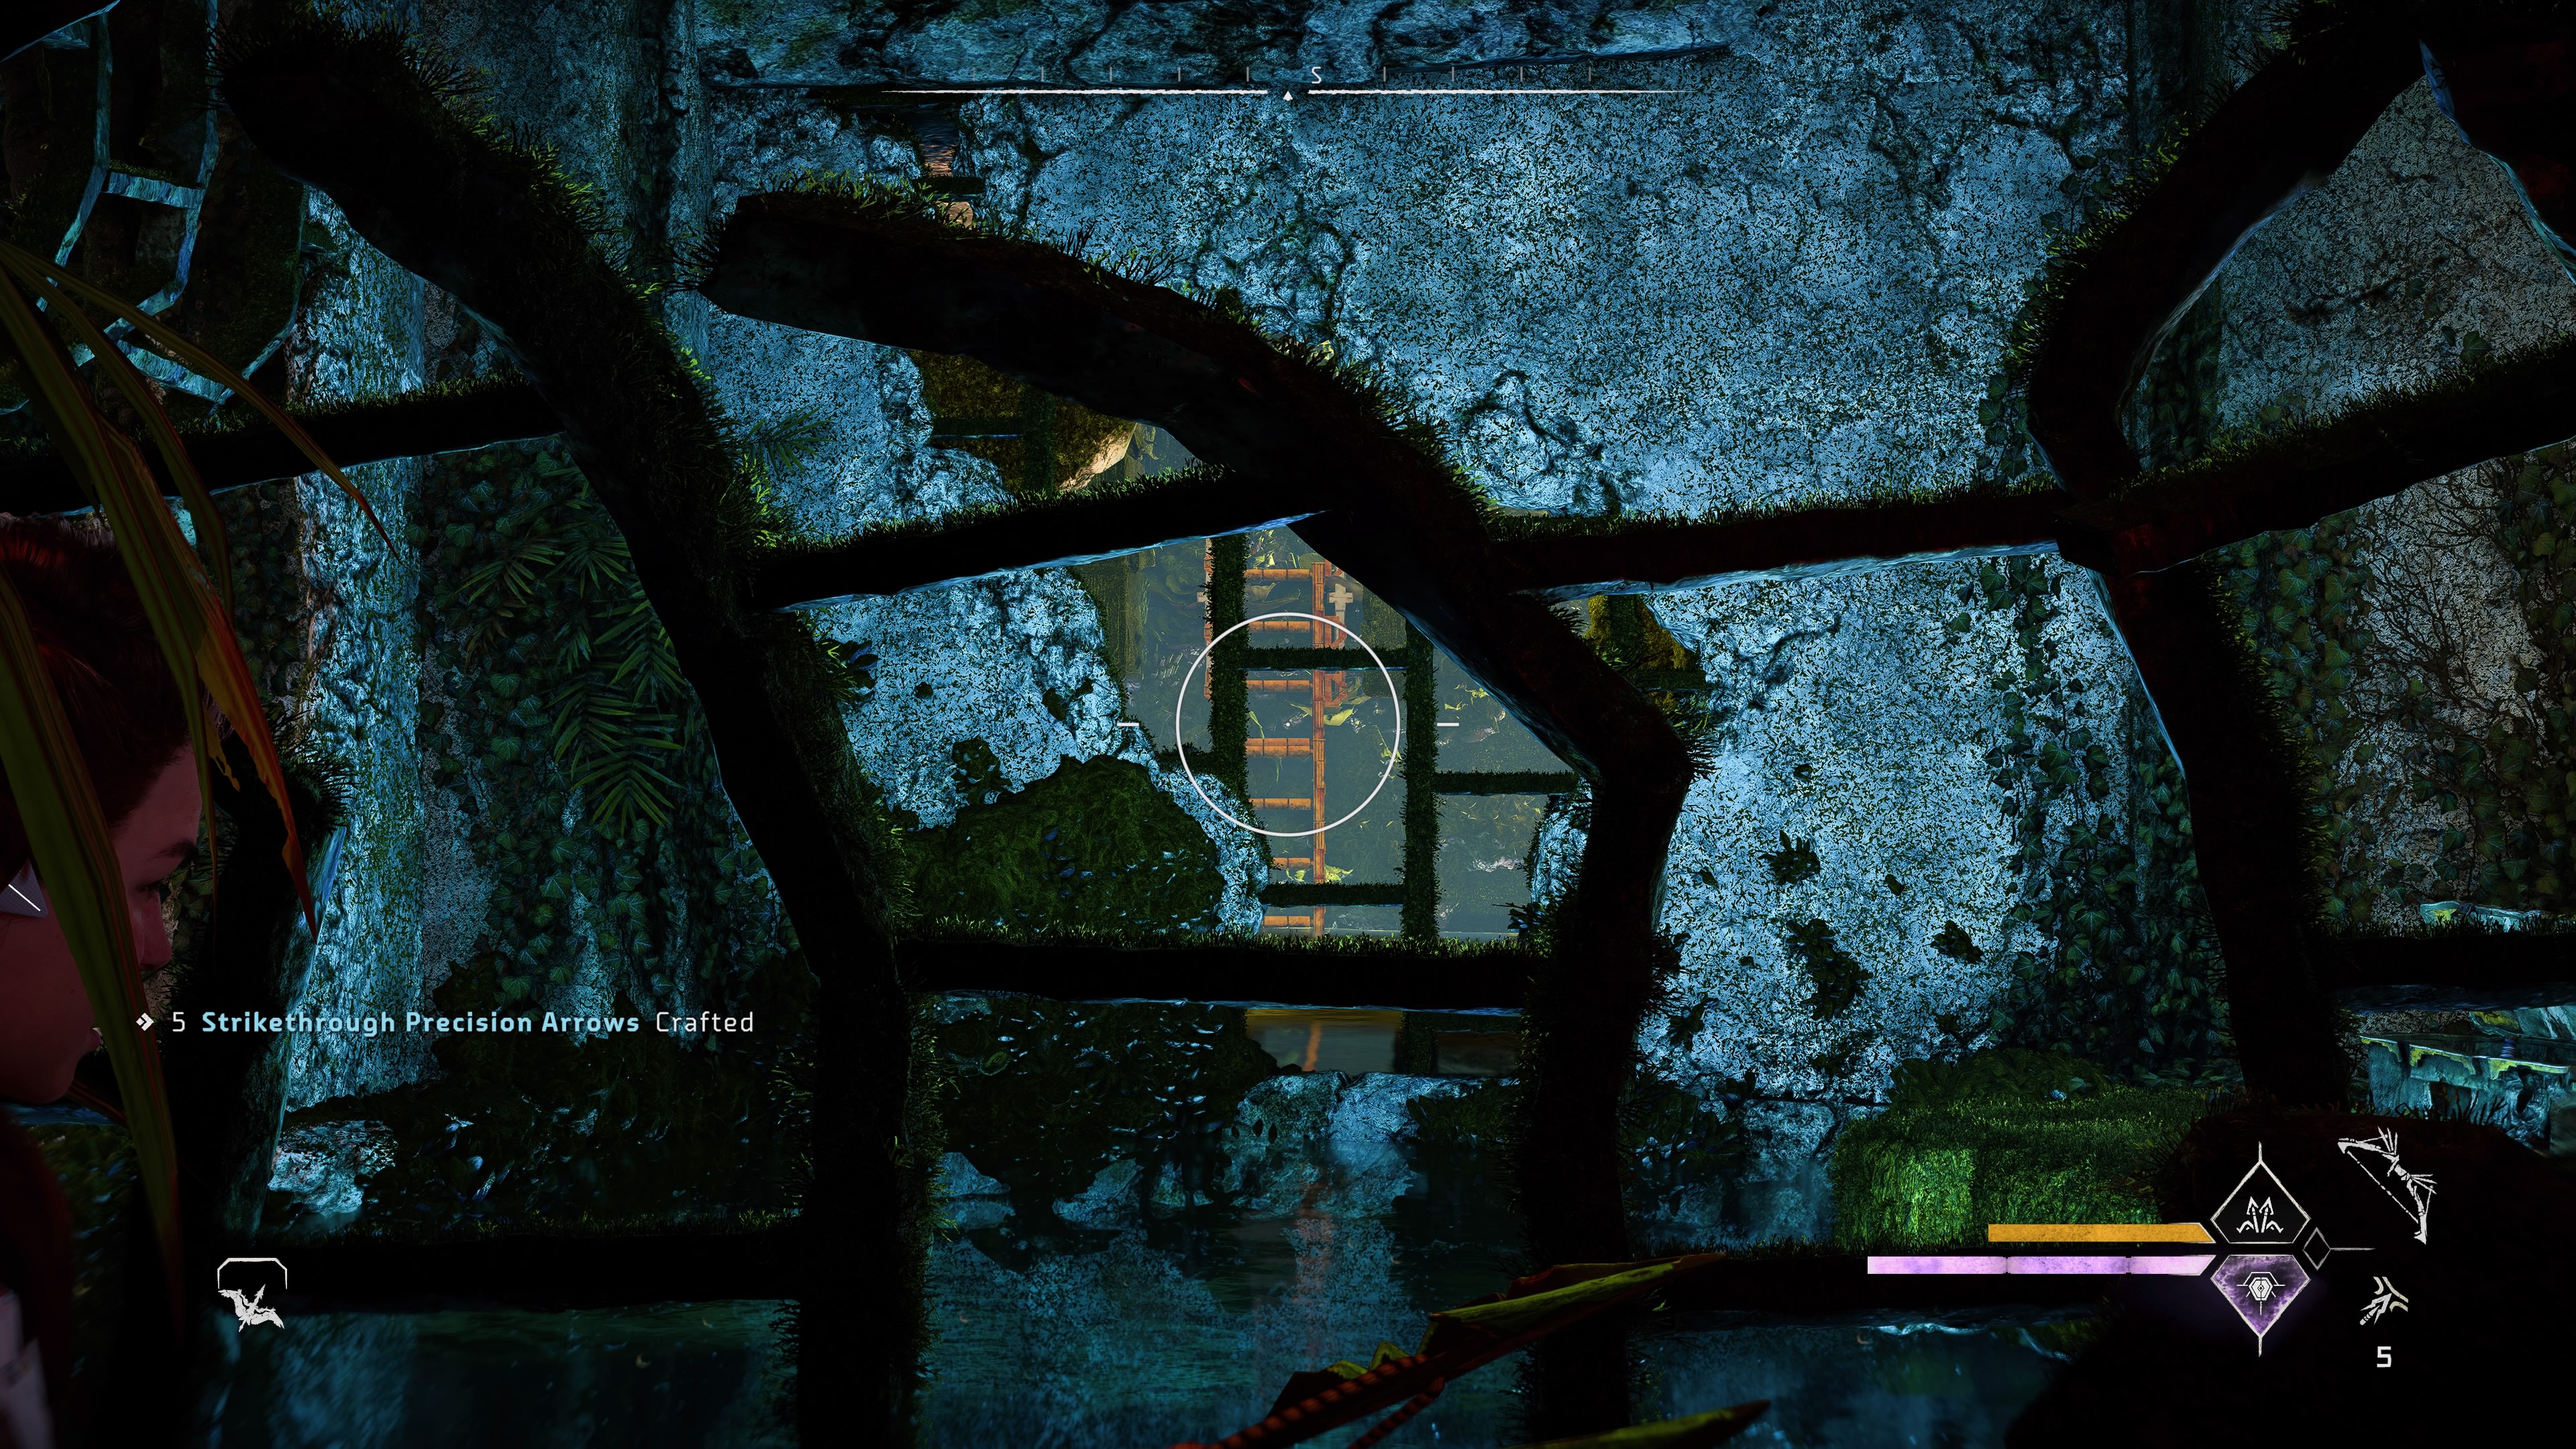
- Go back up in the lift with your metal box and then when you reach the level above you'll need to drag it out to the walkway to a point underneath a tiny platform.
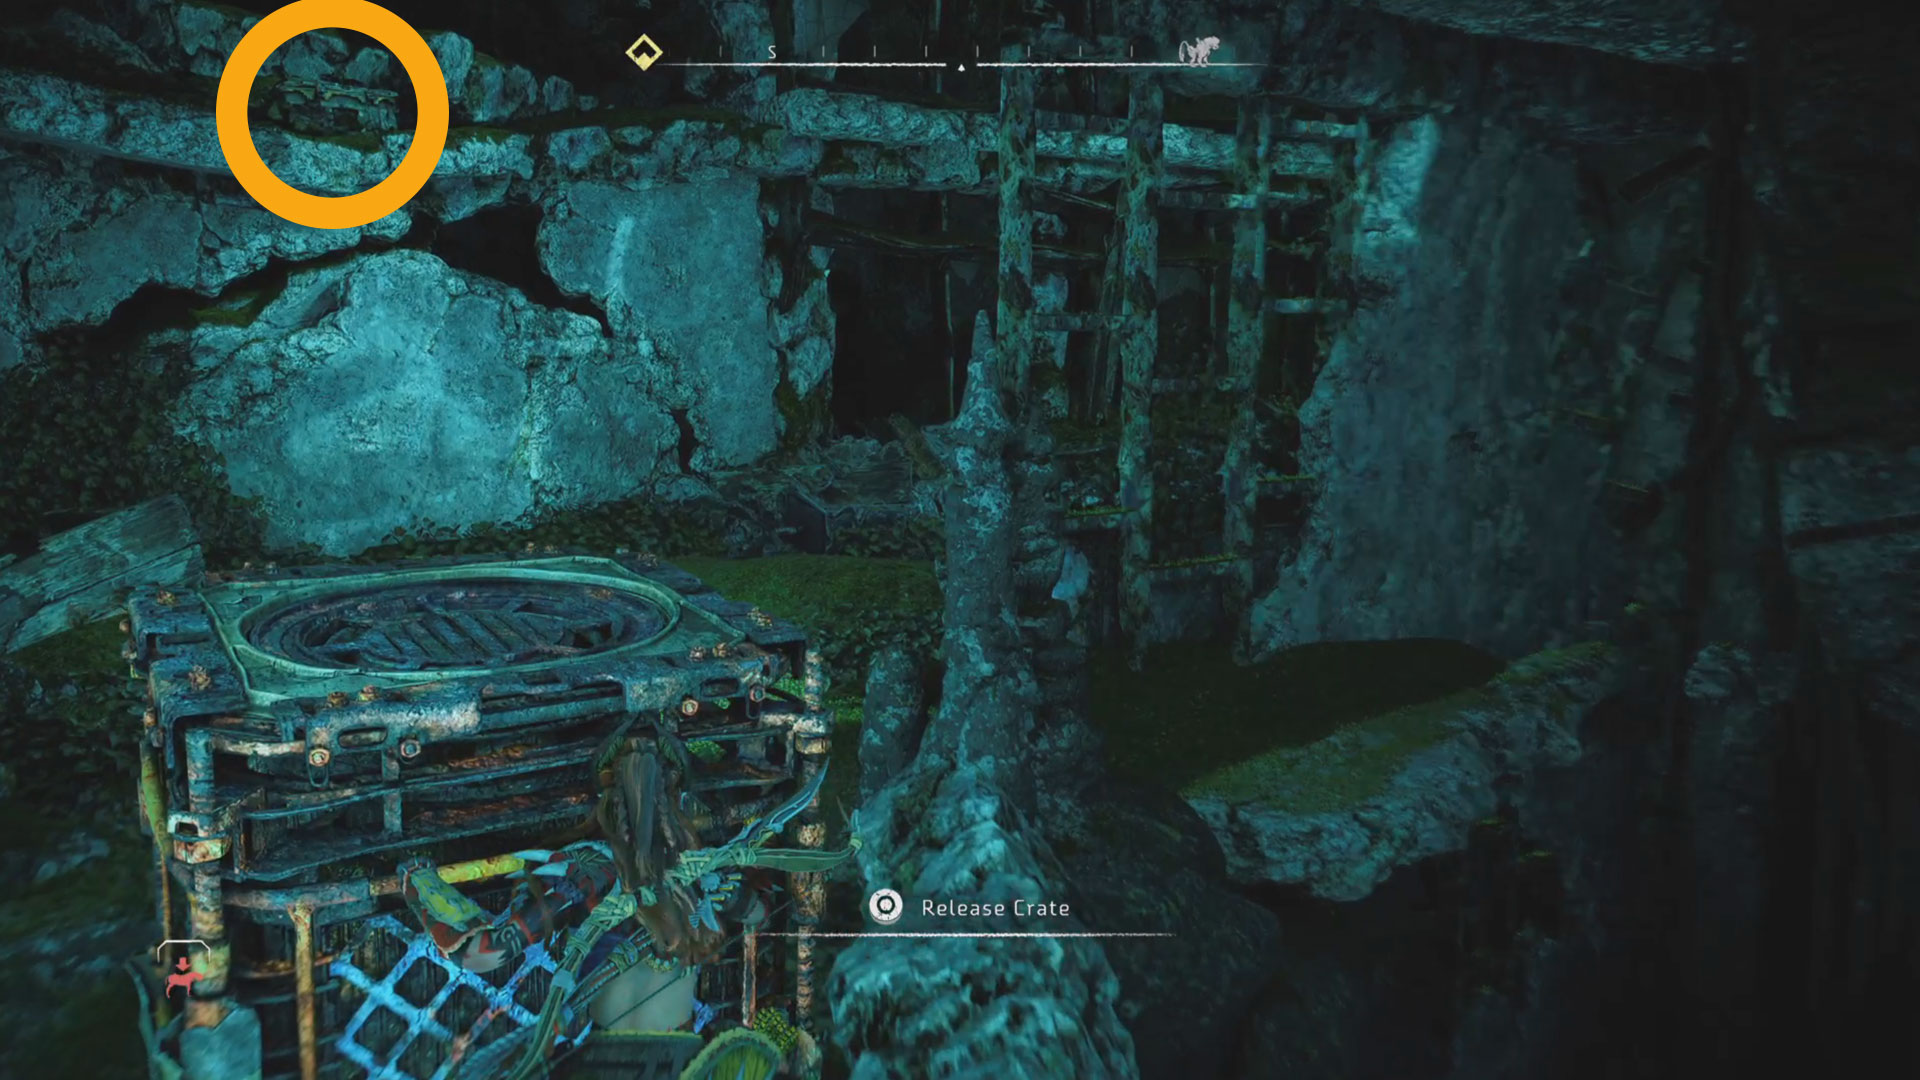
- Use the handholds to cross into another building (a purple valuables box will guide your way a little) and drop into the room beyond. There's another Datapoint in there that will give you the second-half of the access code through another (albeit slightly less cryptic) code. It's 109.
- Now you've got the full access code (2019109), so it's just the access key you need.
- From the spot where you grabbed that second code set, drop down into the main area again and you'll be near the locked door. From here, swim over to the top left-hand corner, towards the metal rubble, and then and follow the water around to the right like this:
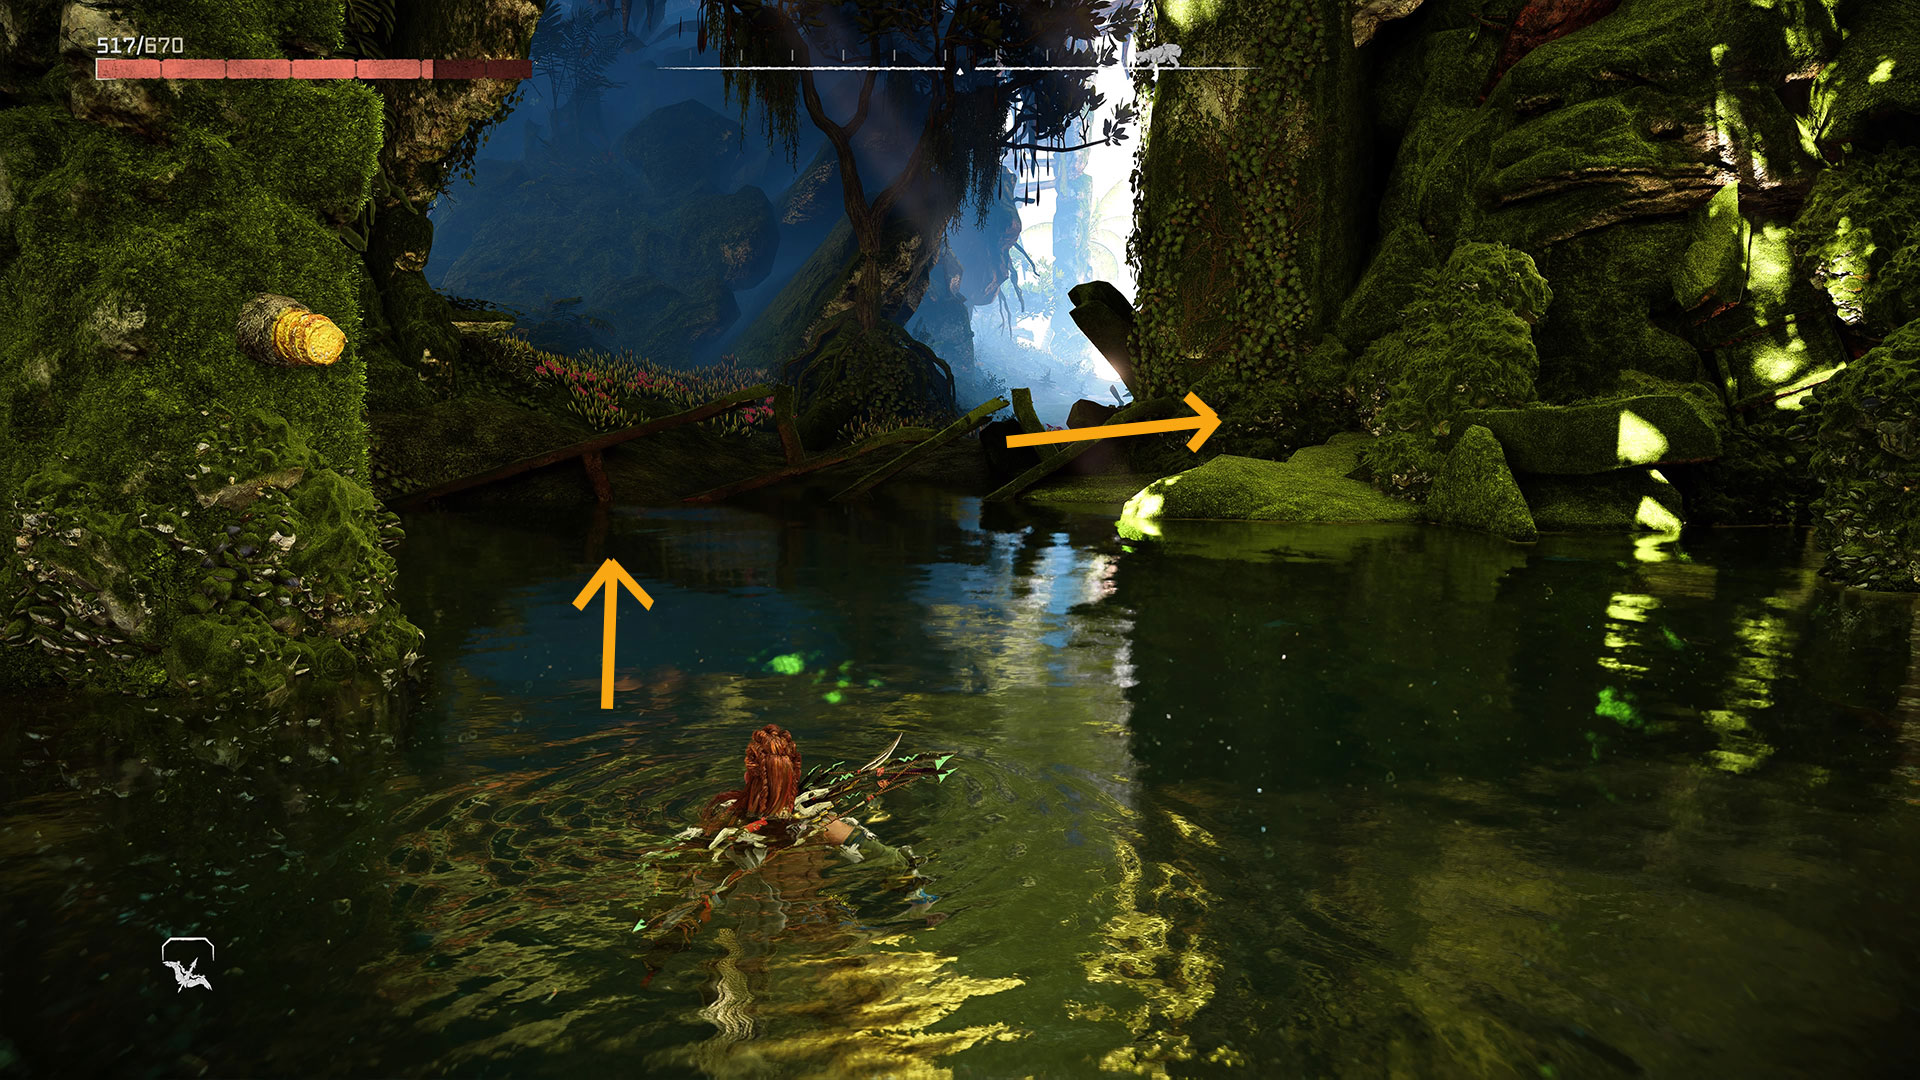
- Just a little way into this watery corridor you'll find the latter you shot down earlier on your right. Climb up it and up two more handholds above and then press circle to flip back onto a platform behind you.
- It's here that you'll find the access key, so grab it.
- There's nothing left to do now except head back to the door, use the key, and enter the access code (2109109) and finally grab the ornament.
Horizon Forbidden West tips | Horizon Forbidden West map | Horizon Forbidden West Greenshine | Horizon Forbidden West Diving mask | Horizon Forbidden West best armor | Horizon Forbidden West power armor | How to fly in Horizon Forbidden West | Horizon Forbidden West Explorer or guided mode | Horizon Forbidden West lenses | Horizon Forbidden West Tallnecks | Horizon Forbidden West Vistas | Horizon Forbidden West drones | Horizon Forbidden West Cauldrons
Weekly digests, tales from the communities you love, and more

Sam Loveridge is the Brand Director and former Global Editor-in-Chief of GamesRadar. She joined the team in August 2017. Sam came to GamesRadar after working at TrustedReviews, Digital Spy, and Fandom, following the completion of an MA in Journalism. In her time, she's also had appearances on The Guardian, BBC, and more. Her experience has seen her cover console and PC games, along with gaming hardware, for a decade, and for GamesRadar, she's in charge of the site's overall direction, managing the team, and making sure it's the best it can be. Her gaming passions lie with weird simulation games, big open-world RPGs, and beautifully crafted indies. She plays across all platforms, and specializes in titles like Pokemon, Assassin's Creed, The Sims, and more. Basically, she loves all games that aren't sports or fighting titles! In her spare time, Sam likes to live like Stardew Valley by cooking and baking, growing vegetables, and enjoying life in the countryside.


