Genshin Impact Golden Slumber walkthrough
How to unlock the Mausoleum of King Deshret
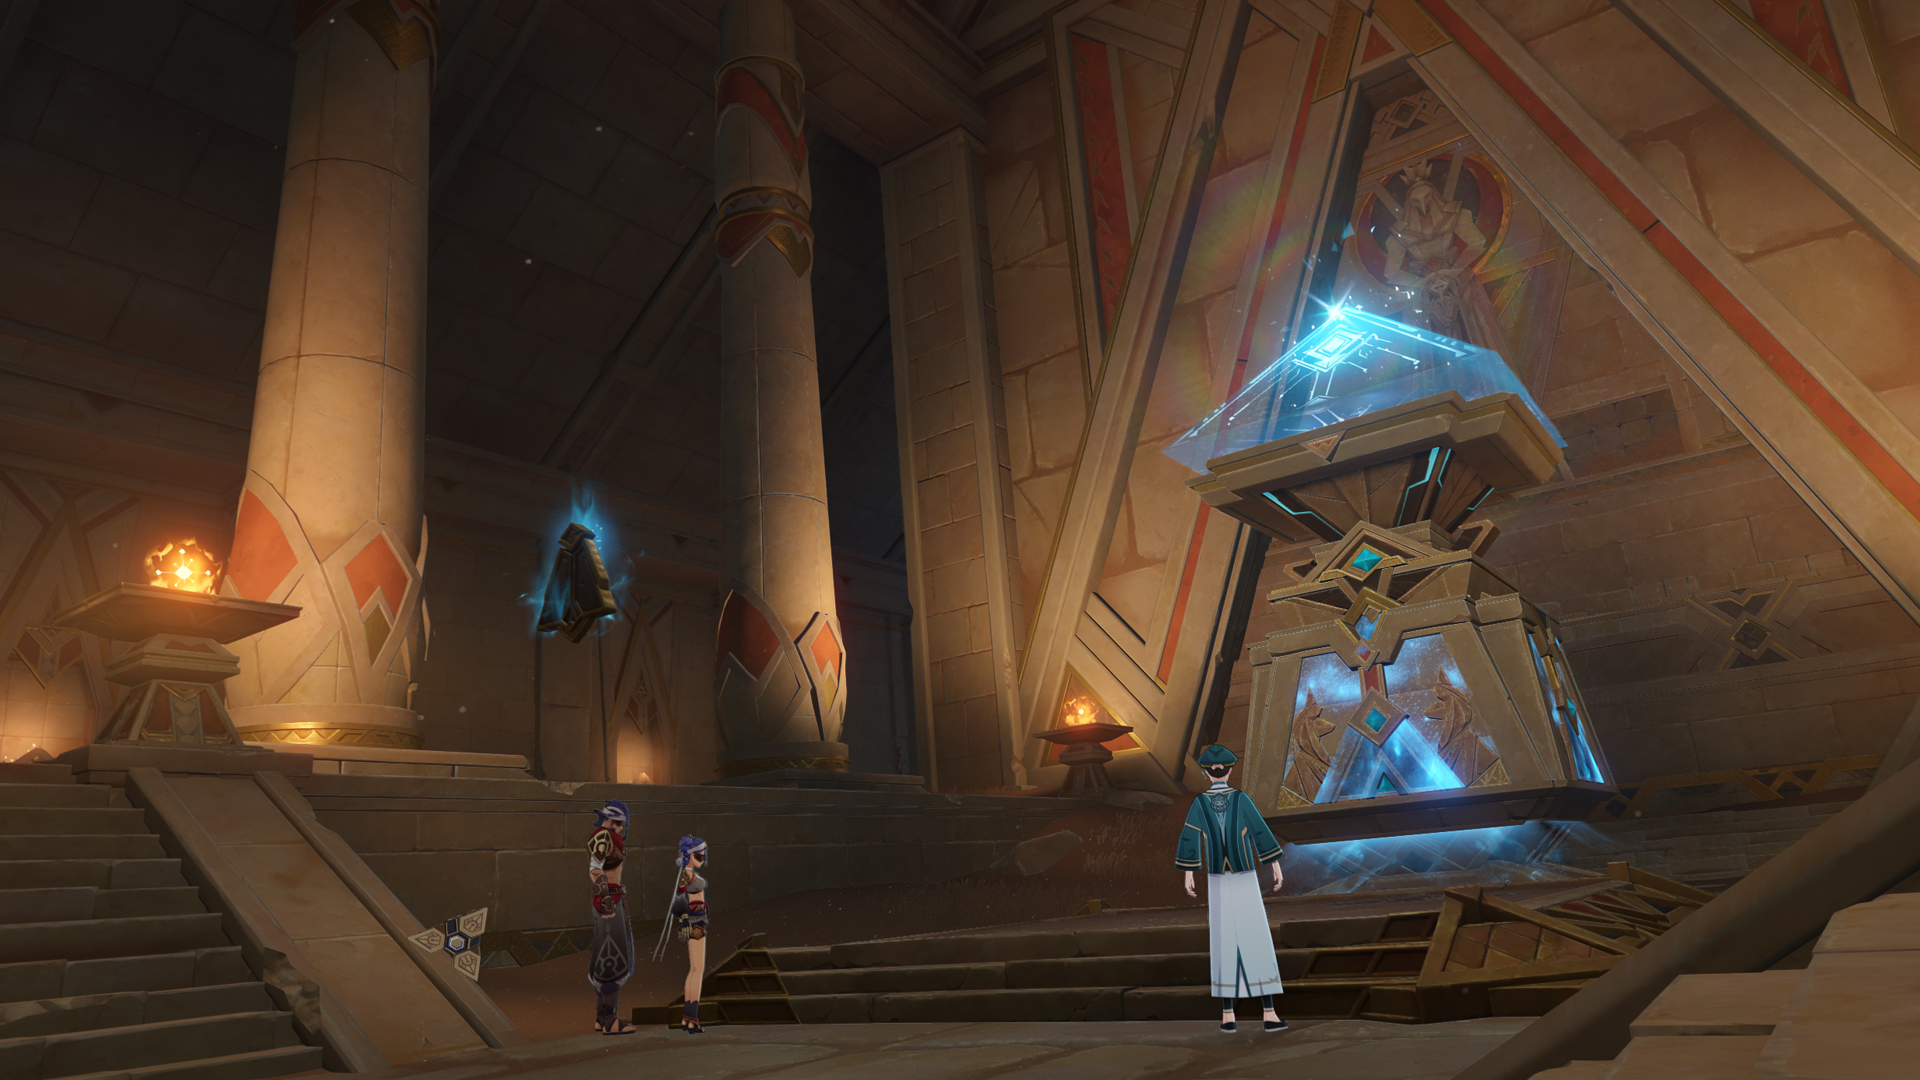
The Genshin Impact Golden Slumber quest is one of the most important World Quest series in Sumeru, as it will grant you access the Sumeru’s underground cave area. That also means that completing Golden Slumber is the key to unlocking the remaining Teleport Waypoints (via the Genshin Impact Dual Evidence mission) and the Altar of Mirages Domain. It's also a good way to find additional Genshin Impact scarabs underground in the Hypostyle Desert. Underground access will also let you access the Genshin Impact Garden of Endless Pillars dungeon.
Golden Slumber is a pretty lengthy questline. Naturally, it’s full of time-challenges and puzzles. If you need some help along the way, here’s a full Genshin Impact Golden Slumber walkthrough, from Lost in the Sands to the Khaj-Nisut dungeon.
Genshin Impact clearance message
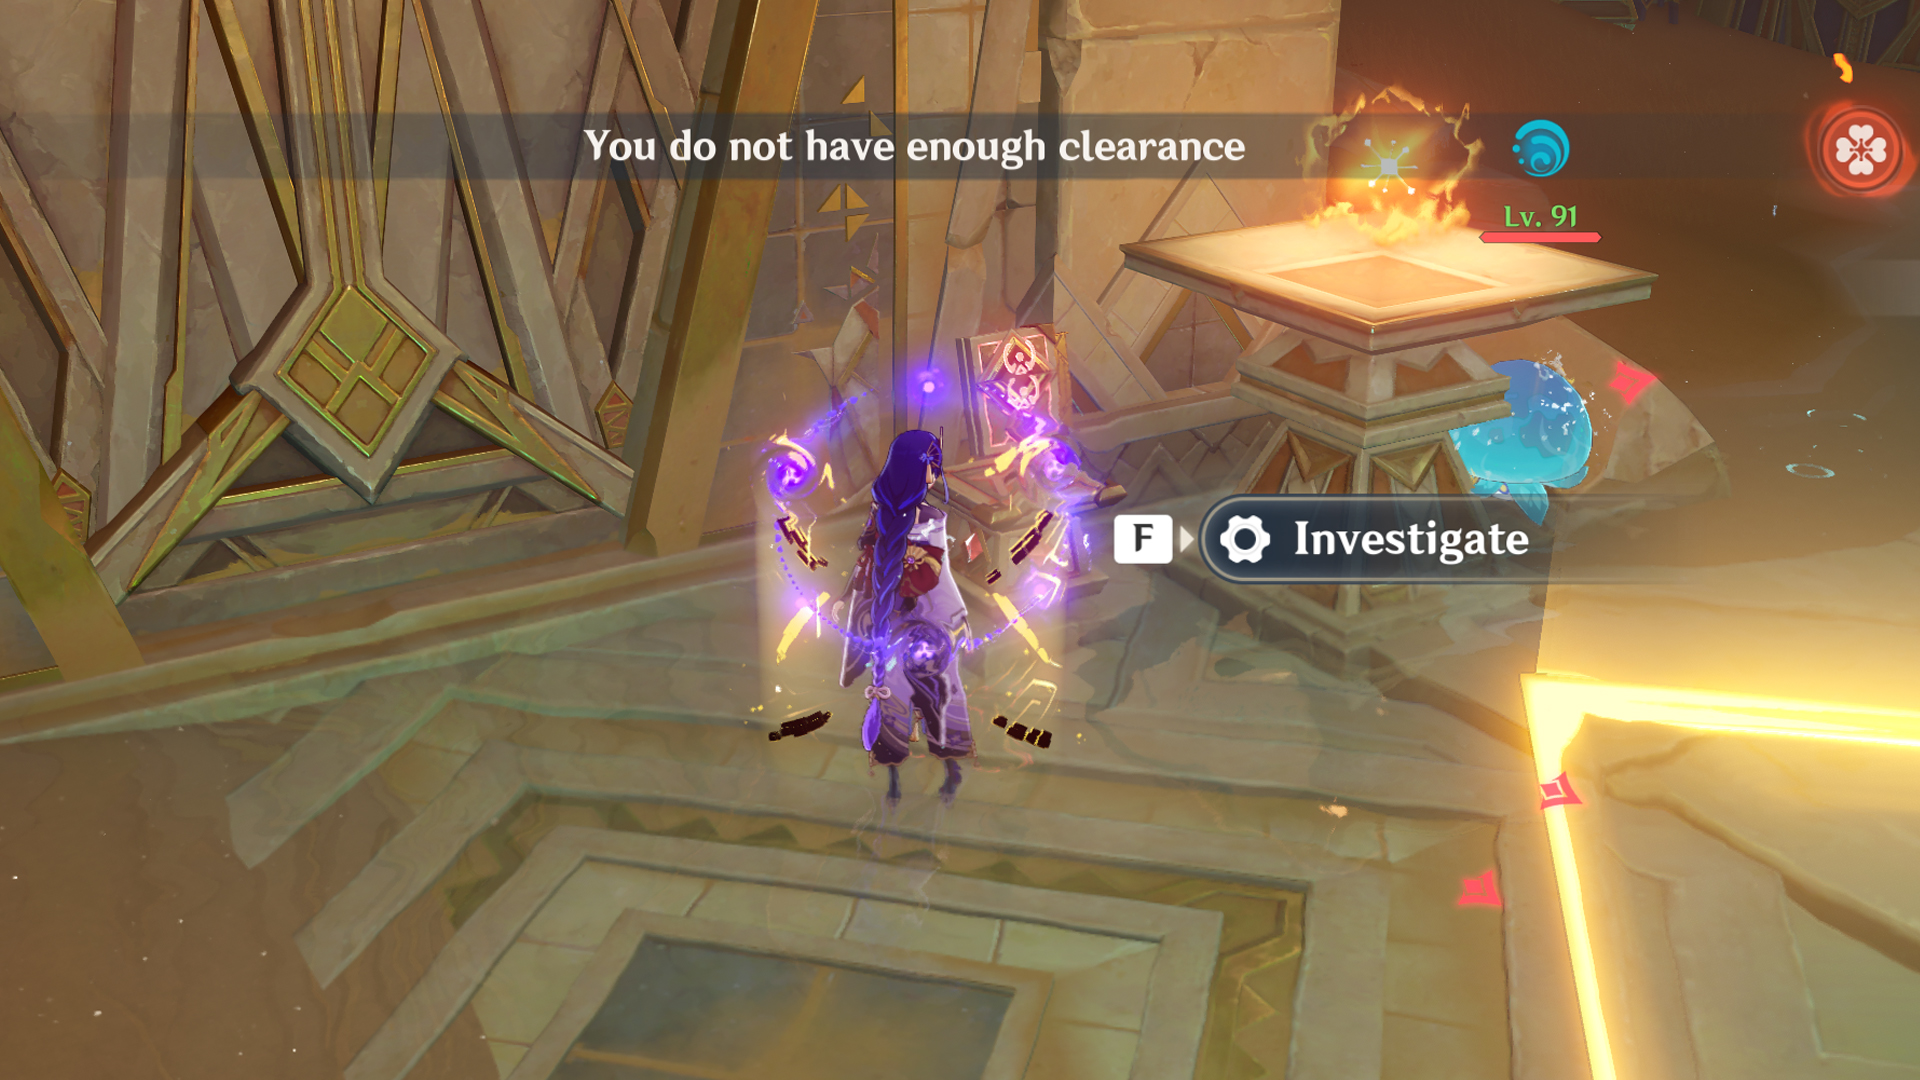
During the Golden Slumber questline, you will encounter several closed doors and sealed mechanisms that will prompt the ‘you do not have enough clearance’ message. That’s okay, you don’t need these doors or mechanisms to advance with the Golden Slumber quests. Once you’ve completed the quest, you will be able to gain more clearance.
Golden Slumber part 1: Lost in the Sands
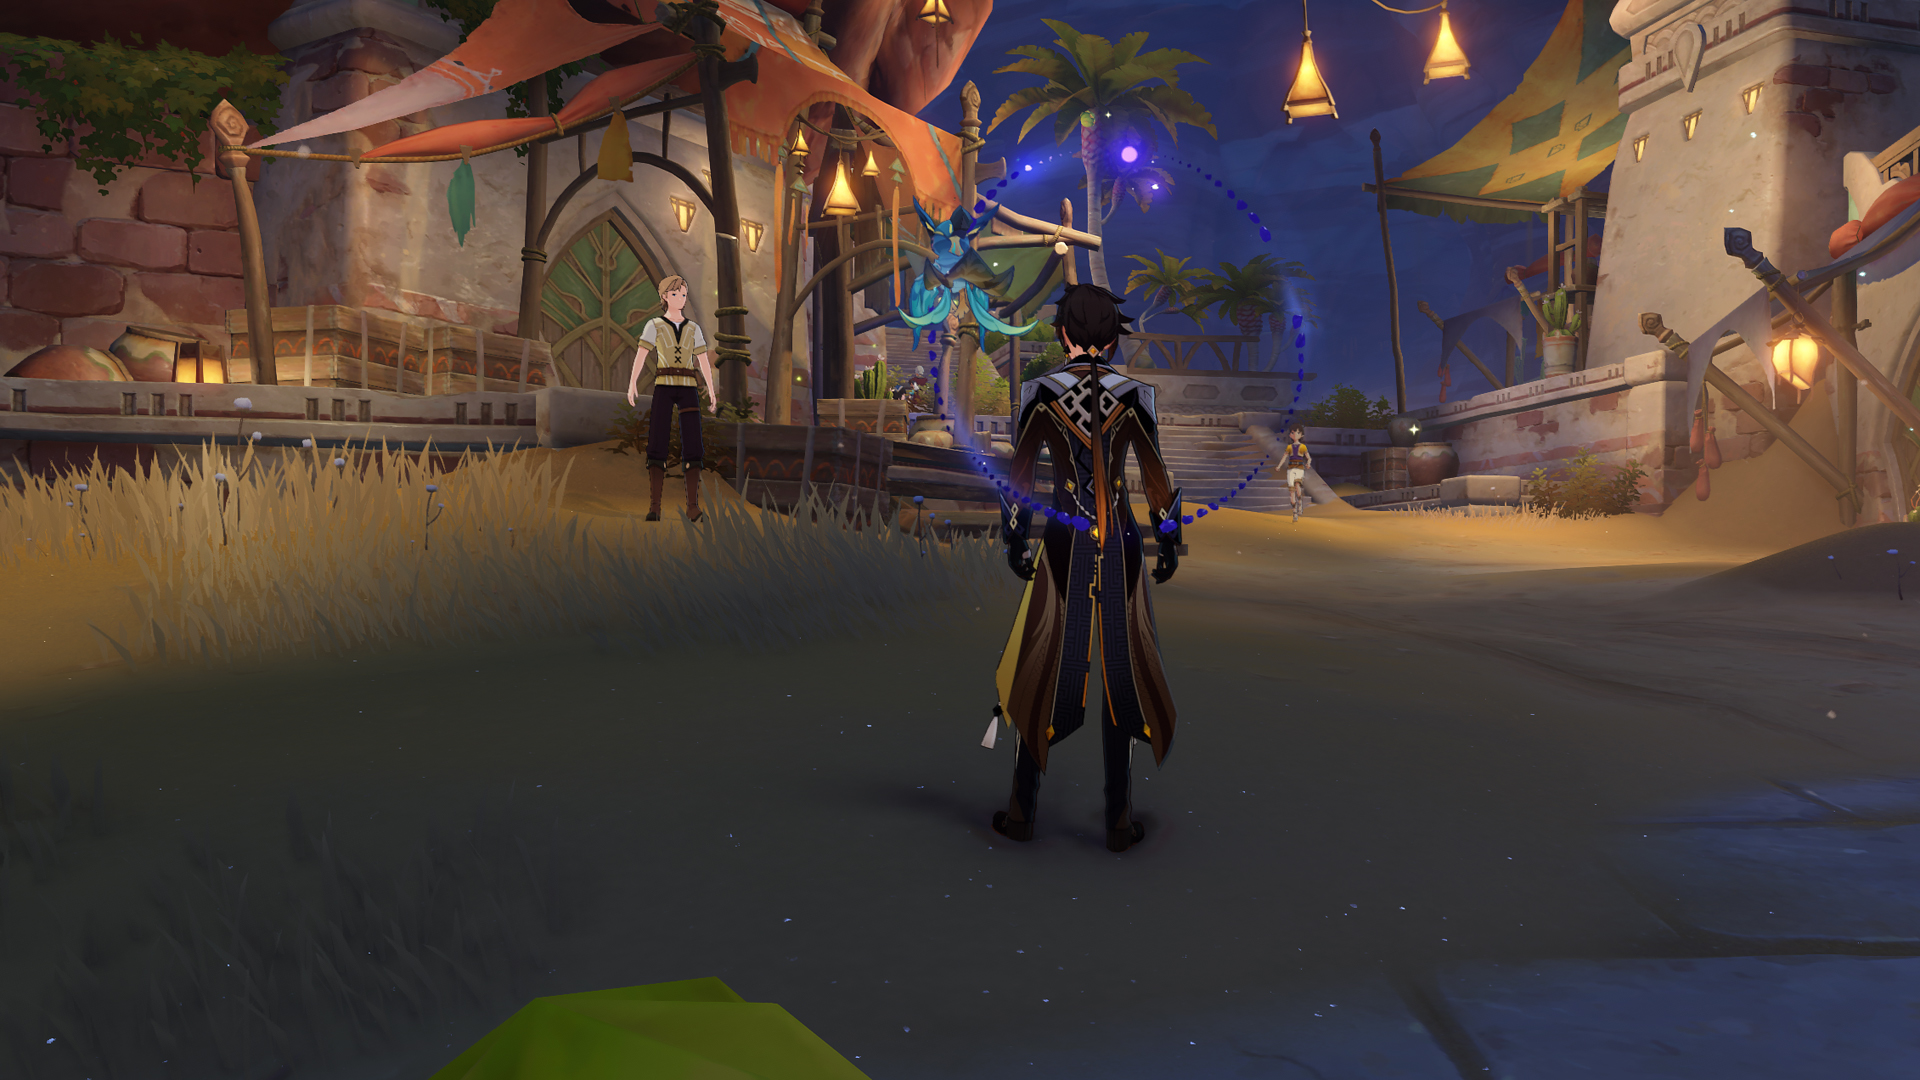
First things first; you need to pick up the ‘Lost in the Sands’ quest in Aaru Village (east part of the desert). The quest is given by an NPC called Bonifaz. If you cross the bridge into Aaru Village, west of the Statue of the Seven, you will see Bonifaz right in front of you (see picture). Here’s what to do next:
- Keep following the road while searching for the archeology team. When the quest objective asks you to ‘go down to the bottom of the pit’, you actually need to land one level above the lowest point. Talk to the NPC’s.
- Go through the dialogue until the ancient ruins opens. This will unlock a Teleport Waypoint.
- After crossing the stone bridge, use Anemo to disperse the pile of sand on the right side of the door. Interact with the mechanism to advance to the next room.
- During the ‘continue exploring’ objective, keep following the path until you seemingly hit a dead end in the large room with the statues. There’s a square tile with a Dendroculus in the left corner of the room. You need to stand in the middle of the square to activate it, and then go down.
- Light the four Pyro torches. The one on the right will only materialize after you ‘scorch’ the floating Tri-Yana Seed (hit it with either Pyro or Electro).
- Collect the Exquisite Chest and open the next set of doors with the square mechanism. Follow the path until the next cutscene starts.
- Activate the nearby square to move upwards, then investigate the strange machine. After the dialogue, go back down and speak to Jebrael.
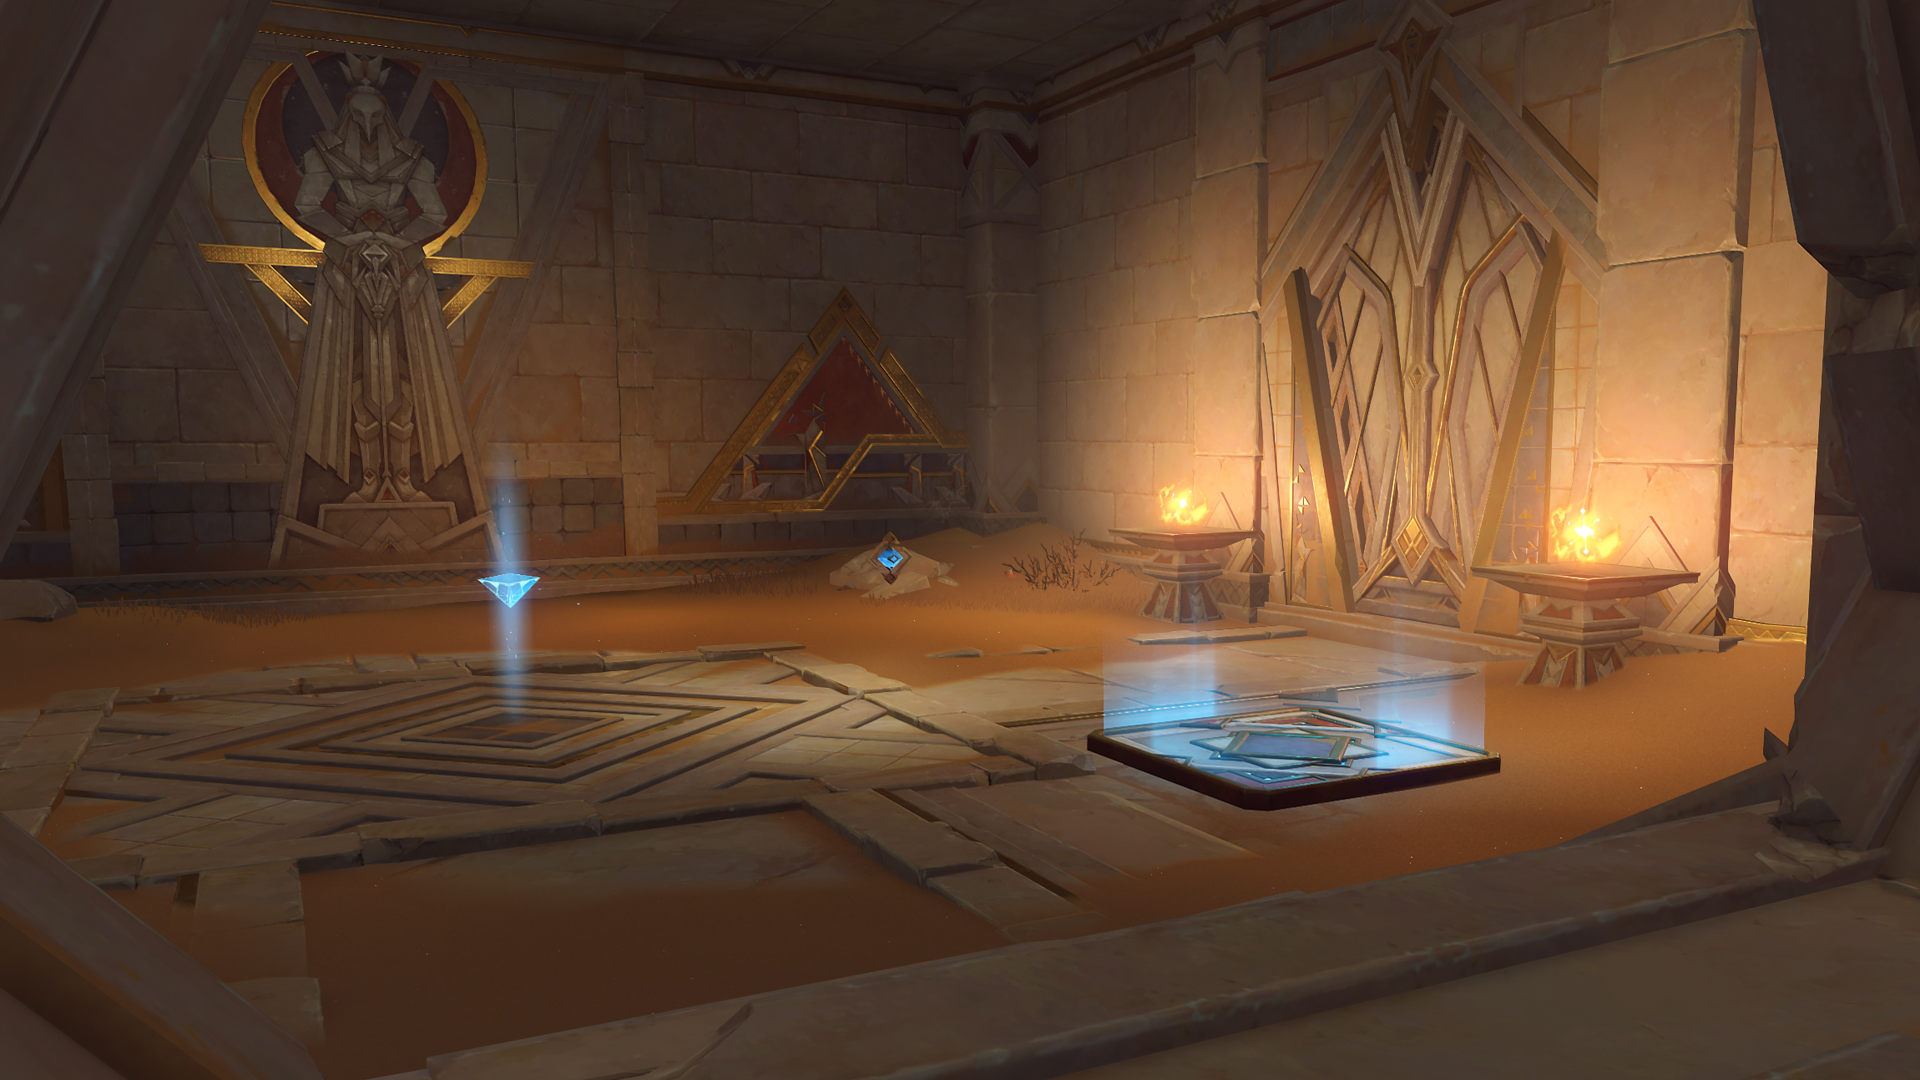
- You will receive the Scarlet Sand Slate, which allows you to pass through some of the doors that require ‘clearance’. Go back up again and use it to open the large door.
Golden Slumber part 2: Lost in the Sands puzzle

Earn some level-up materials and Serenitea Pot furniture with these Genshin Impact Fecund Blessings locations
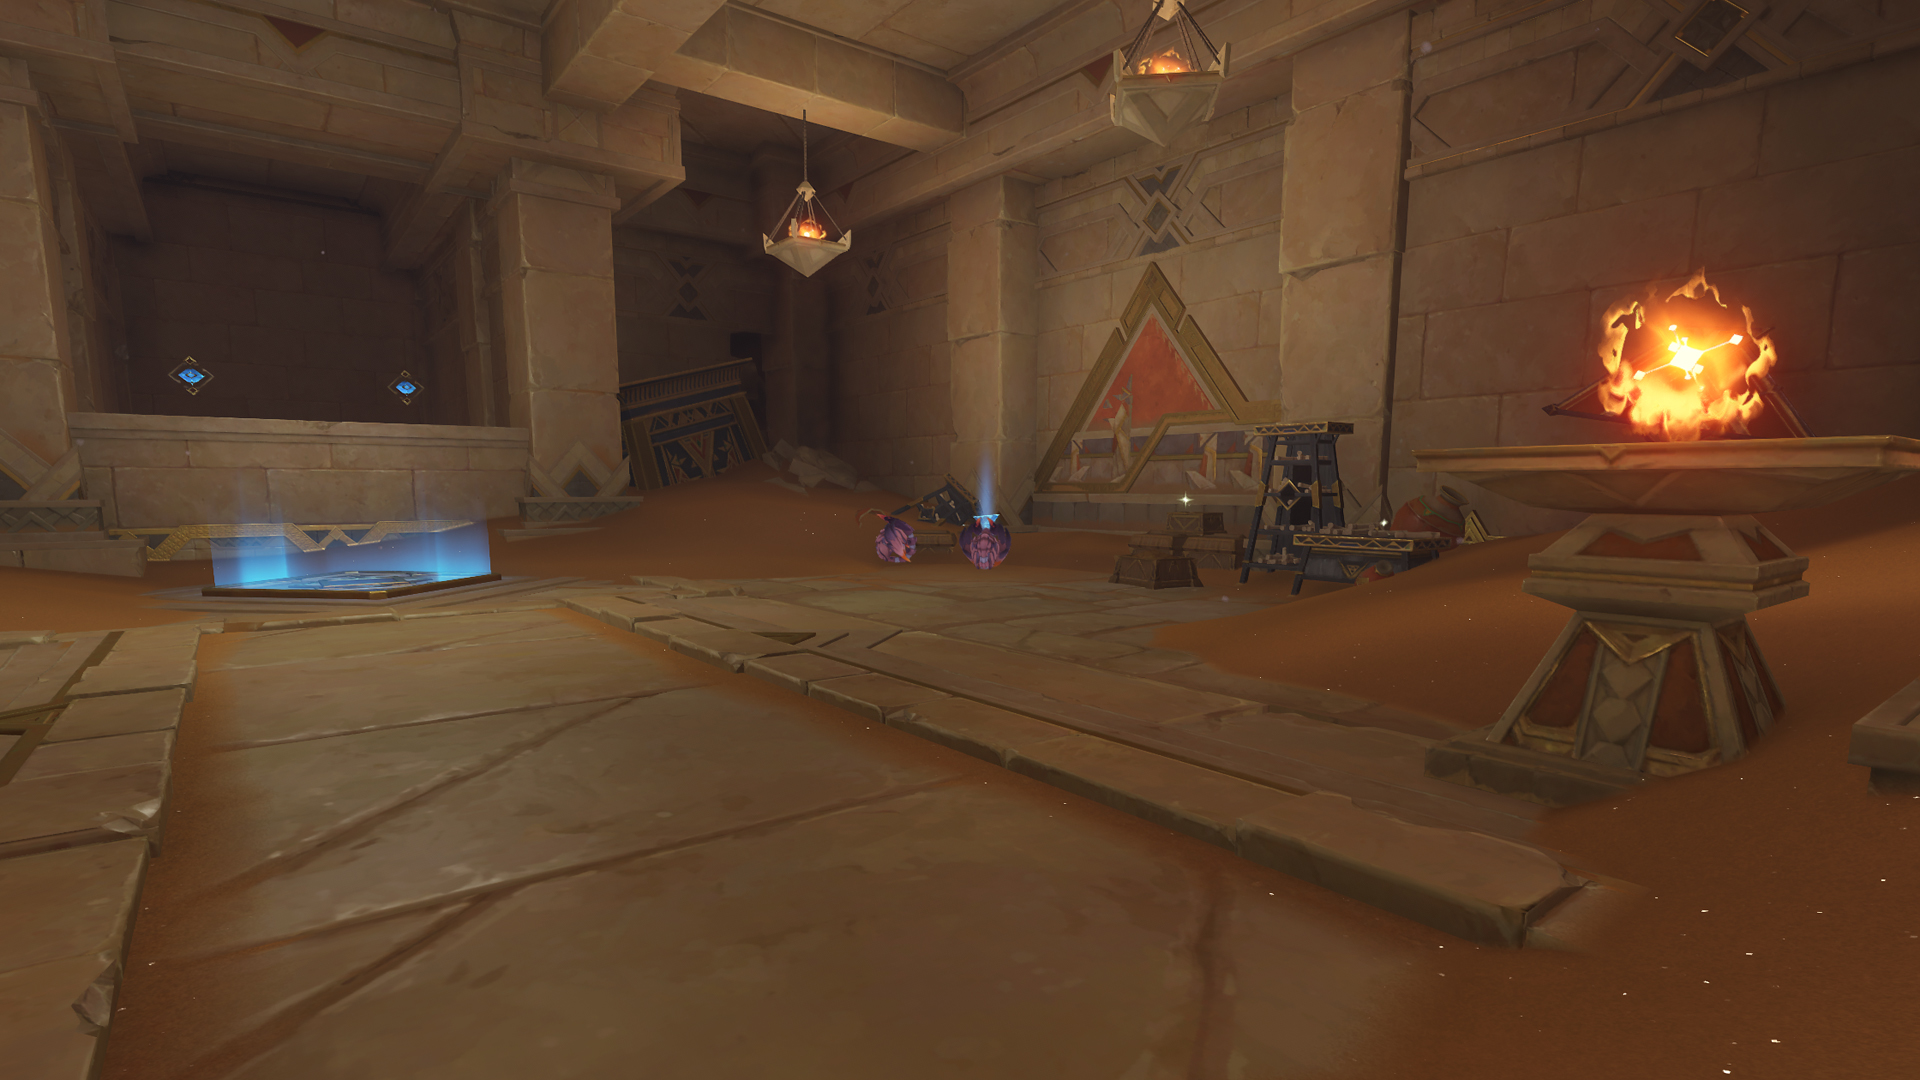
After obtaining the Scarlet Sand Slate, follow the path until you reach the room with the blue triangle (see picture). You have to complete a simple puzzle here; pick up the triangle and use it on the blue square to open the door. Do the same thing with the blue triangles in the next room, and then turn the mechanism on the left twice.
While fighting the enemies in the next room, you need to use Electro damage on the triangular ruin guard when it enters its ‘recovery’ state. After that, use the Scarlet Sand Slate to open the next door. When the objective tells you to ‘follow the direction of the wind’, you can simply follow the blue Seelie to find the exit.
This will complete the Lost in the Sands quest. To unlock the rest of the underground Sumeru map, continue with the next Golden Slumber quest: An Introduction to Indoor Archeology.
Golden Slumber part 3: An Introduction to Indoor Archeology walkthrough
- After meeting up in the Sobek Oasis, use the wind current to reach the higher cliffs. Speak to Jebrael, then go back to the Oasis.
- Enter the Khemenu Temple. When the quest asks you to proceed further into the temple, ignore the doors that you don’t have clearance to. Instead, continue ahead until you find two doors (left and right) that you can open. We’ll start with the door on the right (see picture); defeat the enemies, pick up the blue triangle on the right, then activate the square in the middle. Interact with the mechanism to spawn a blue orb, and follow it back to the previous room. Do the exact same thing with the door on the left.
- Go down to the lower level of Khemenu Temple, where you can unlock a Teleport Waypoint. After the cutscene, return to the previous room.
Golden Slumber part 4: An Introduction to Indoor Archeology puzzle
Next, you’ll find two more open doors on the left and right. Each of them leads to a puzzle:
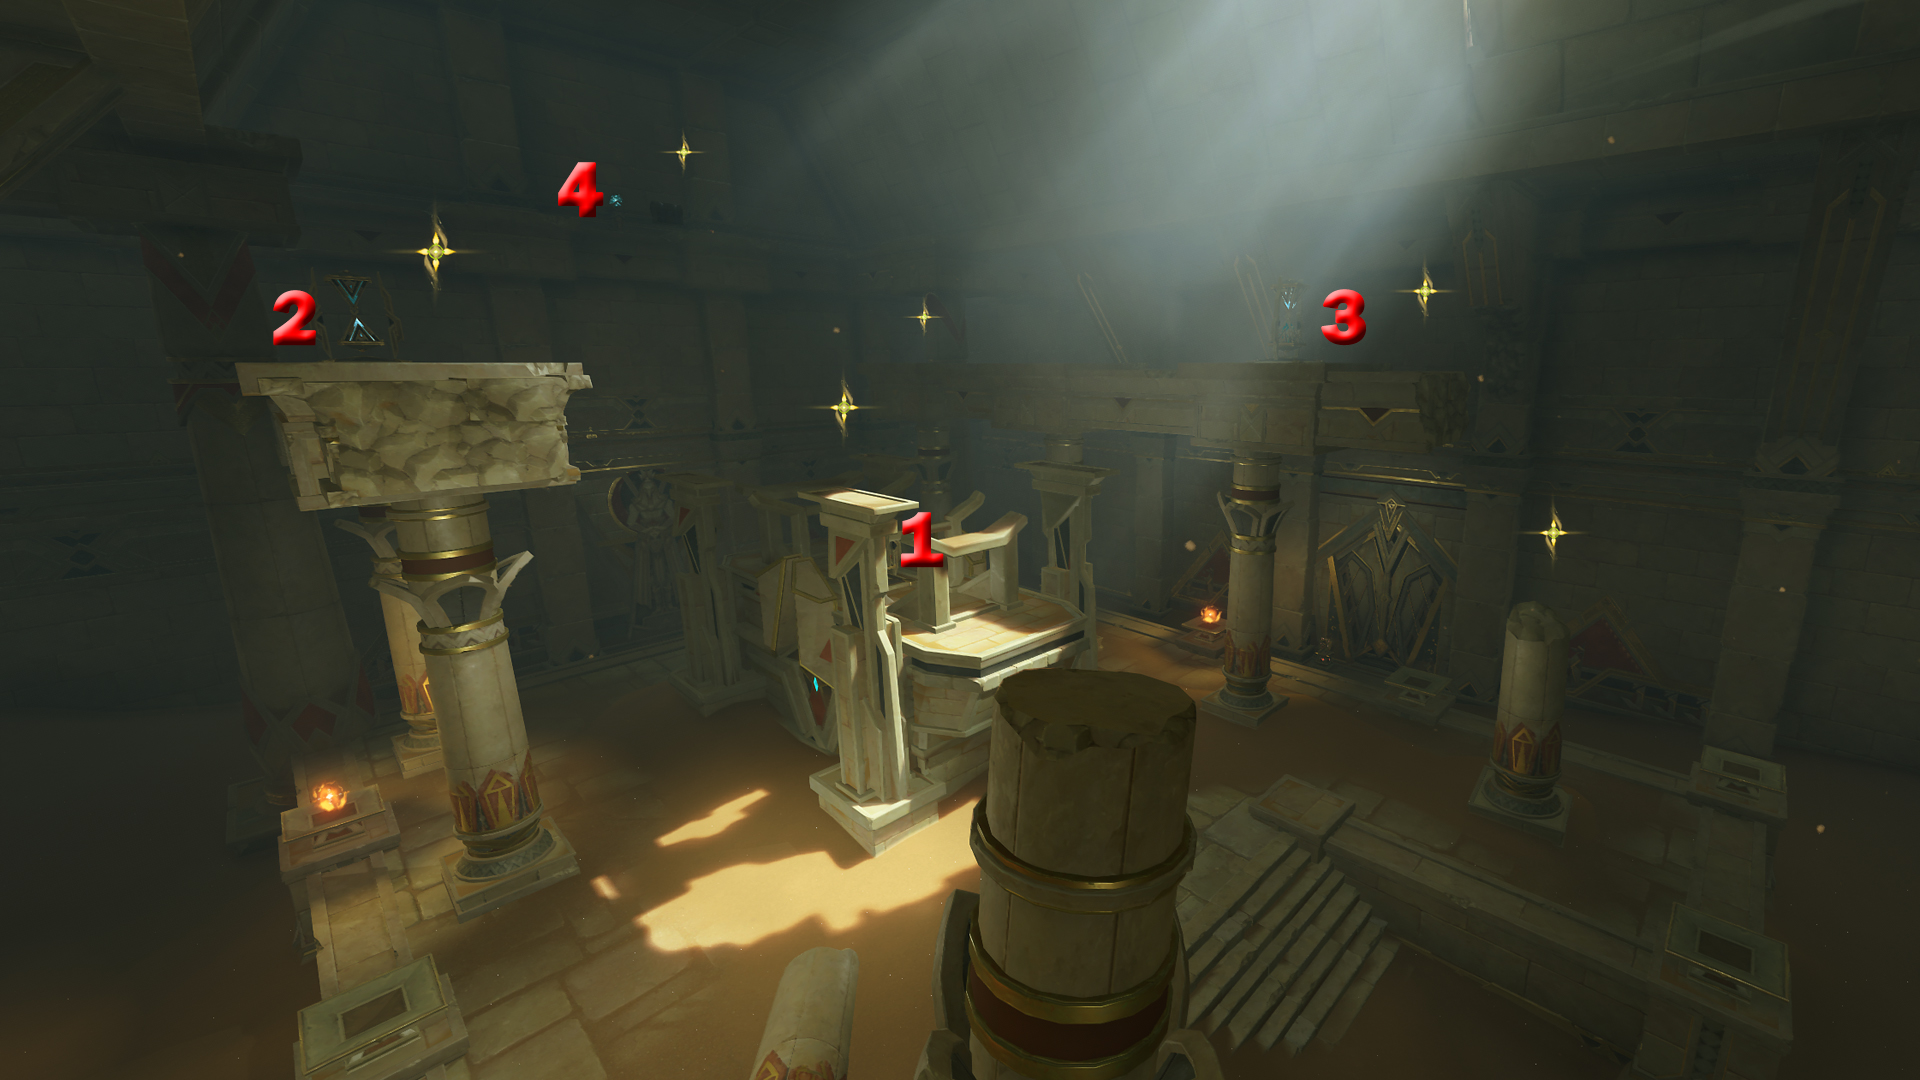
- Puzzle in the north (hourglass): follow the corridor until you reach the room as shown in the picture. Climb the stone structure in the middle, where you’ll find an hourglass (location 1). Interact with it to start a time-challenge; you have 30 seconds to reach the hourglasses on the left and right (locations 2 and 3) and activate both of them. After that, land on the invisible floor next to the chest (location 4). Interact with the blue orb behind it and guide it to the door.
- Puzzle in the south (boat): similar to the previous one. Follow the corridor until you reach a large room with a boat. Use the Four-Leaf Sigils to fly up, and activate the square with the nearby blue triangle. Guide the blue orb as you’ve done before.
After the cutscene, use the elevator to go down. Walking to the other side of the room will trigger another cutscene, which completes this part of the Golden Sands questline.
Golden Slumber part 5: The Secret of Al-Ahmar walkthrough
As you’re still underground at the beginning of the Secret of Al-Ahmer quest, use the elevator to go up. Proceed towards the Mausoleum of King Deshret, and fight the ruin enemies. Like before, you have to hit them with Electro once they enter their recovery state.
After a cutscene, you need to complete the ‘open the coffin’ objective. This Golden Slumber puzzle is quite similar to the ones before: find blue orbs in the corridors, and guide them back to the main room. Here are the locations:
- Orb 1: Take the door to the north, then open the door to the right. The orb is on a wall on the right side, next to a Dendroculus.
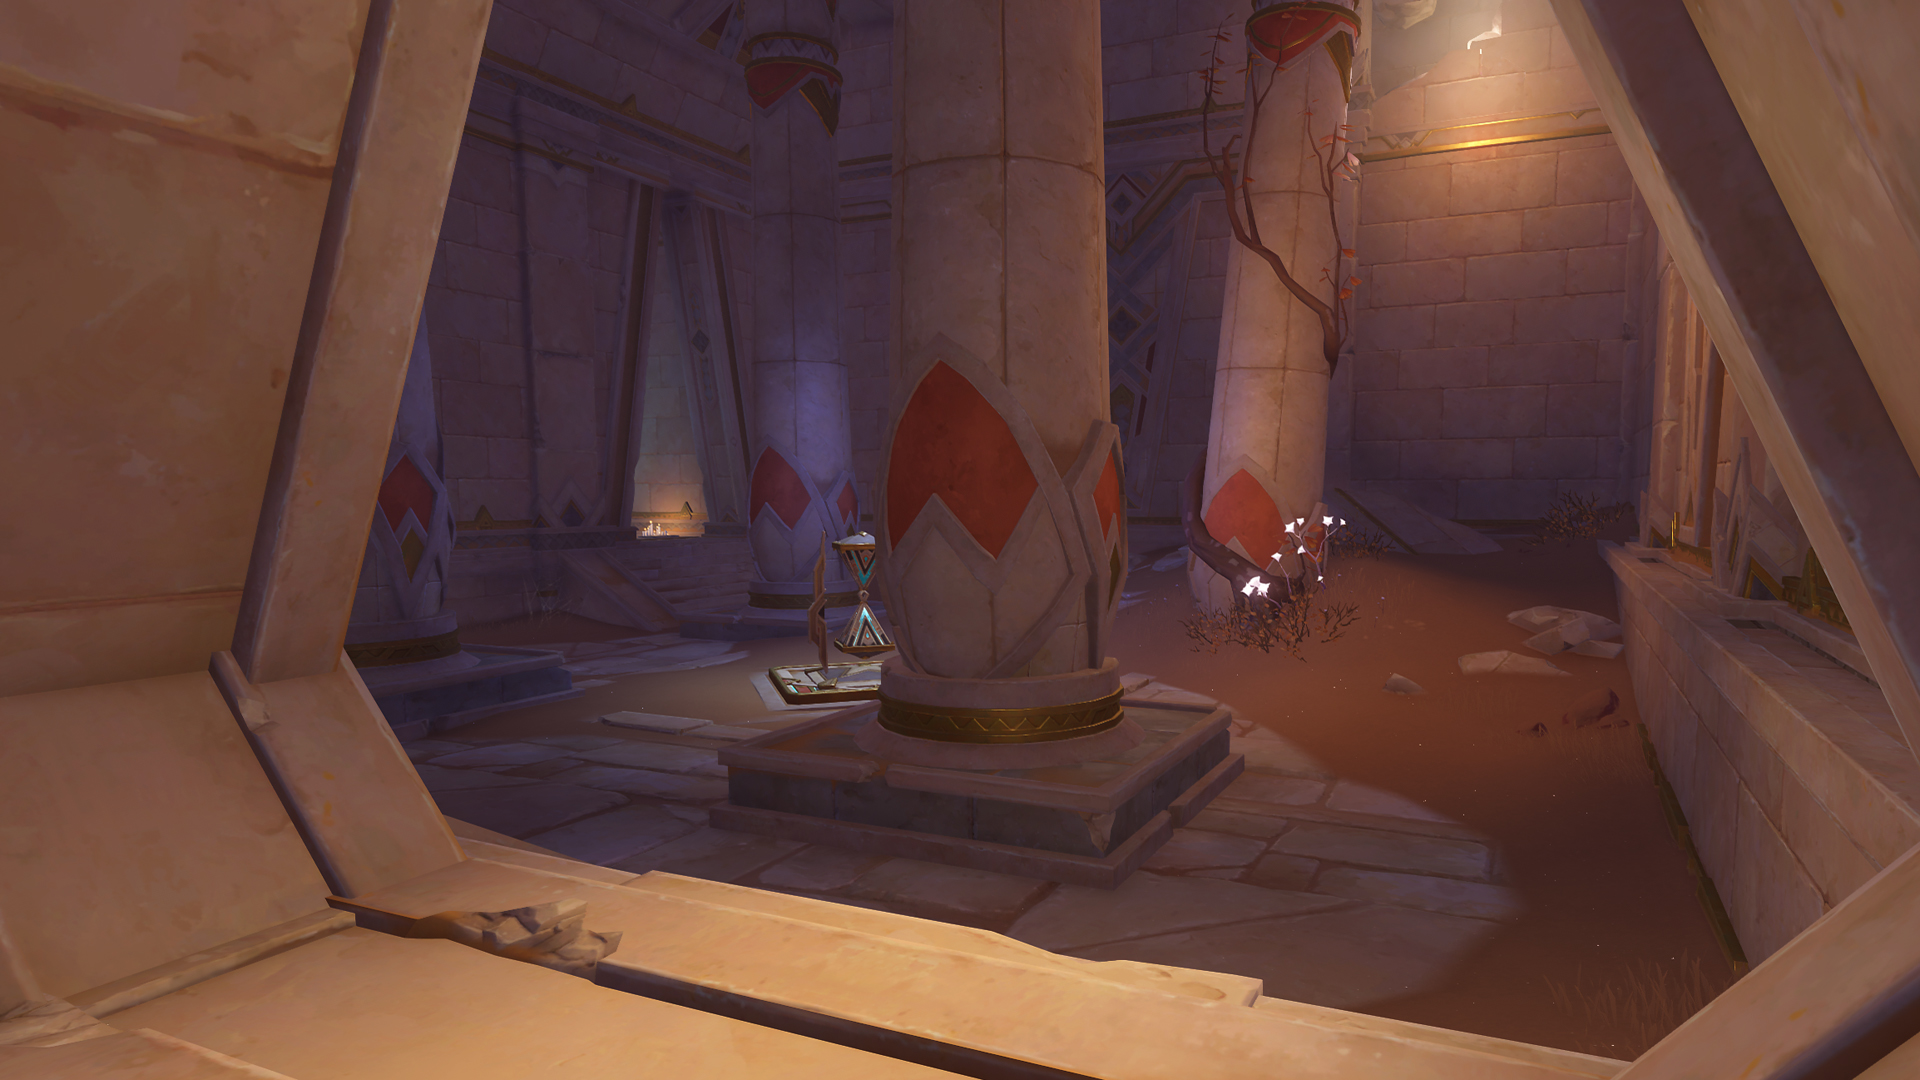
- Orb 2: Go to the room in the north again, but this time, turn left. You can activate the square to start a timed hourglass challenge, but this seems to be optional. The orb is in the area behind the second hourglass (the doorway shown in the picture).
- Orb 3: This time, take the door in the south. Follow the hallway until you reach the red mechanism, which will start a time-challenge. Collect every Dendro particle in time to reach the blue orb.
- Orb 4: Use the door to the south again, then turn left and defeat the ruin enemy. The blue orb is on a wall to the north.
After the cutscene, take the elevator upwards. This will lead you to a large underground cave area, where you’ll have to fight off the Fatui. After that, you’ll have to keep following the quest objectives, ‘search for the members of the archaeology team’ and ‘find Benben’ for quite some time.
Golden Slumber part 6: The Secret of Al-Ahmar laser puzzles
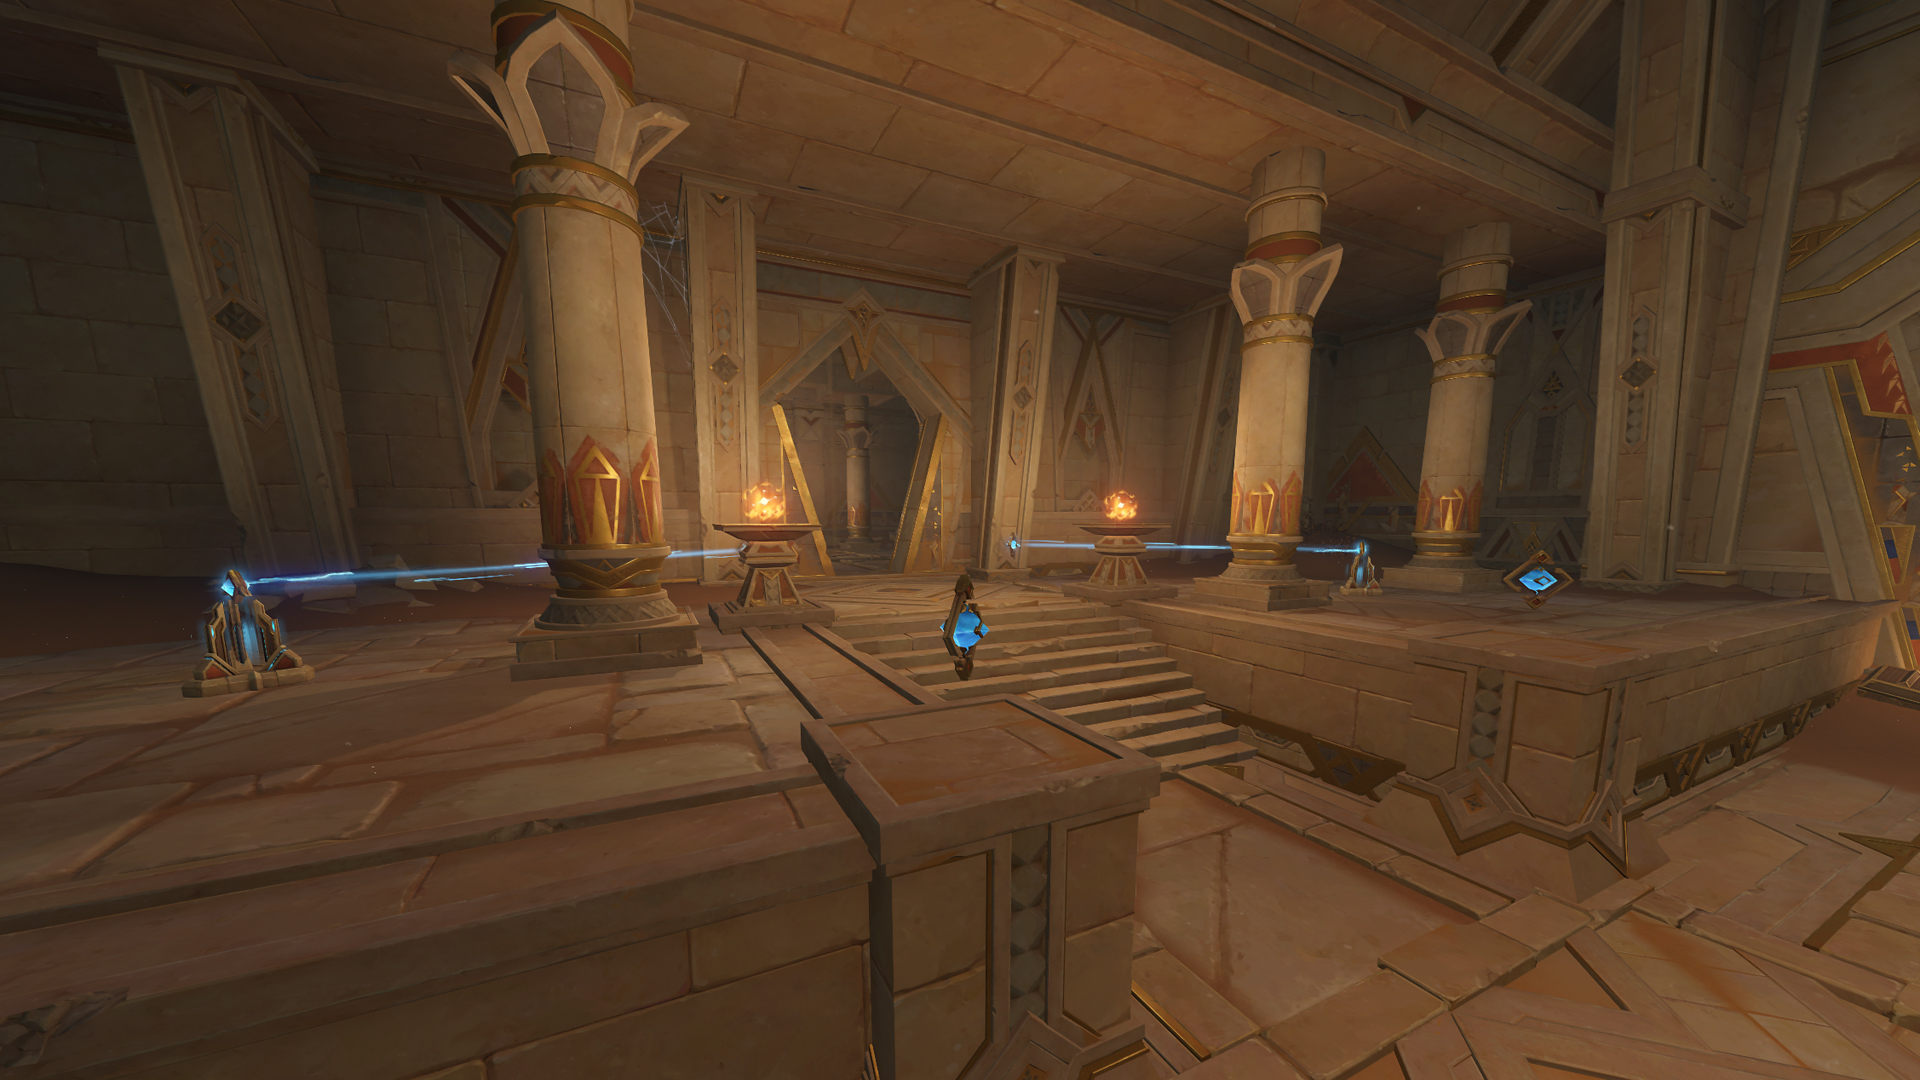
After unlocking another Teleport Waypoint and starting the ‘proceed deeper within the ruins’ objective, you will find a new room with a square mechanism and a blue Seelie. Follow the Seelie until you see a large open room with a blue laser puzzle behind it. To open the locked doors, you have to point the lasers towards the door (see picture above). The room containing a blue orb is the one on the west side. Guide it all the way back until it reaches the massive golden doors.
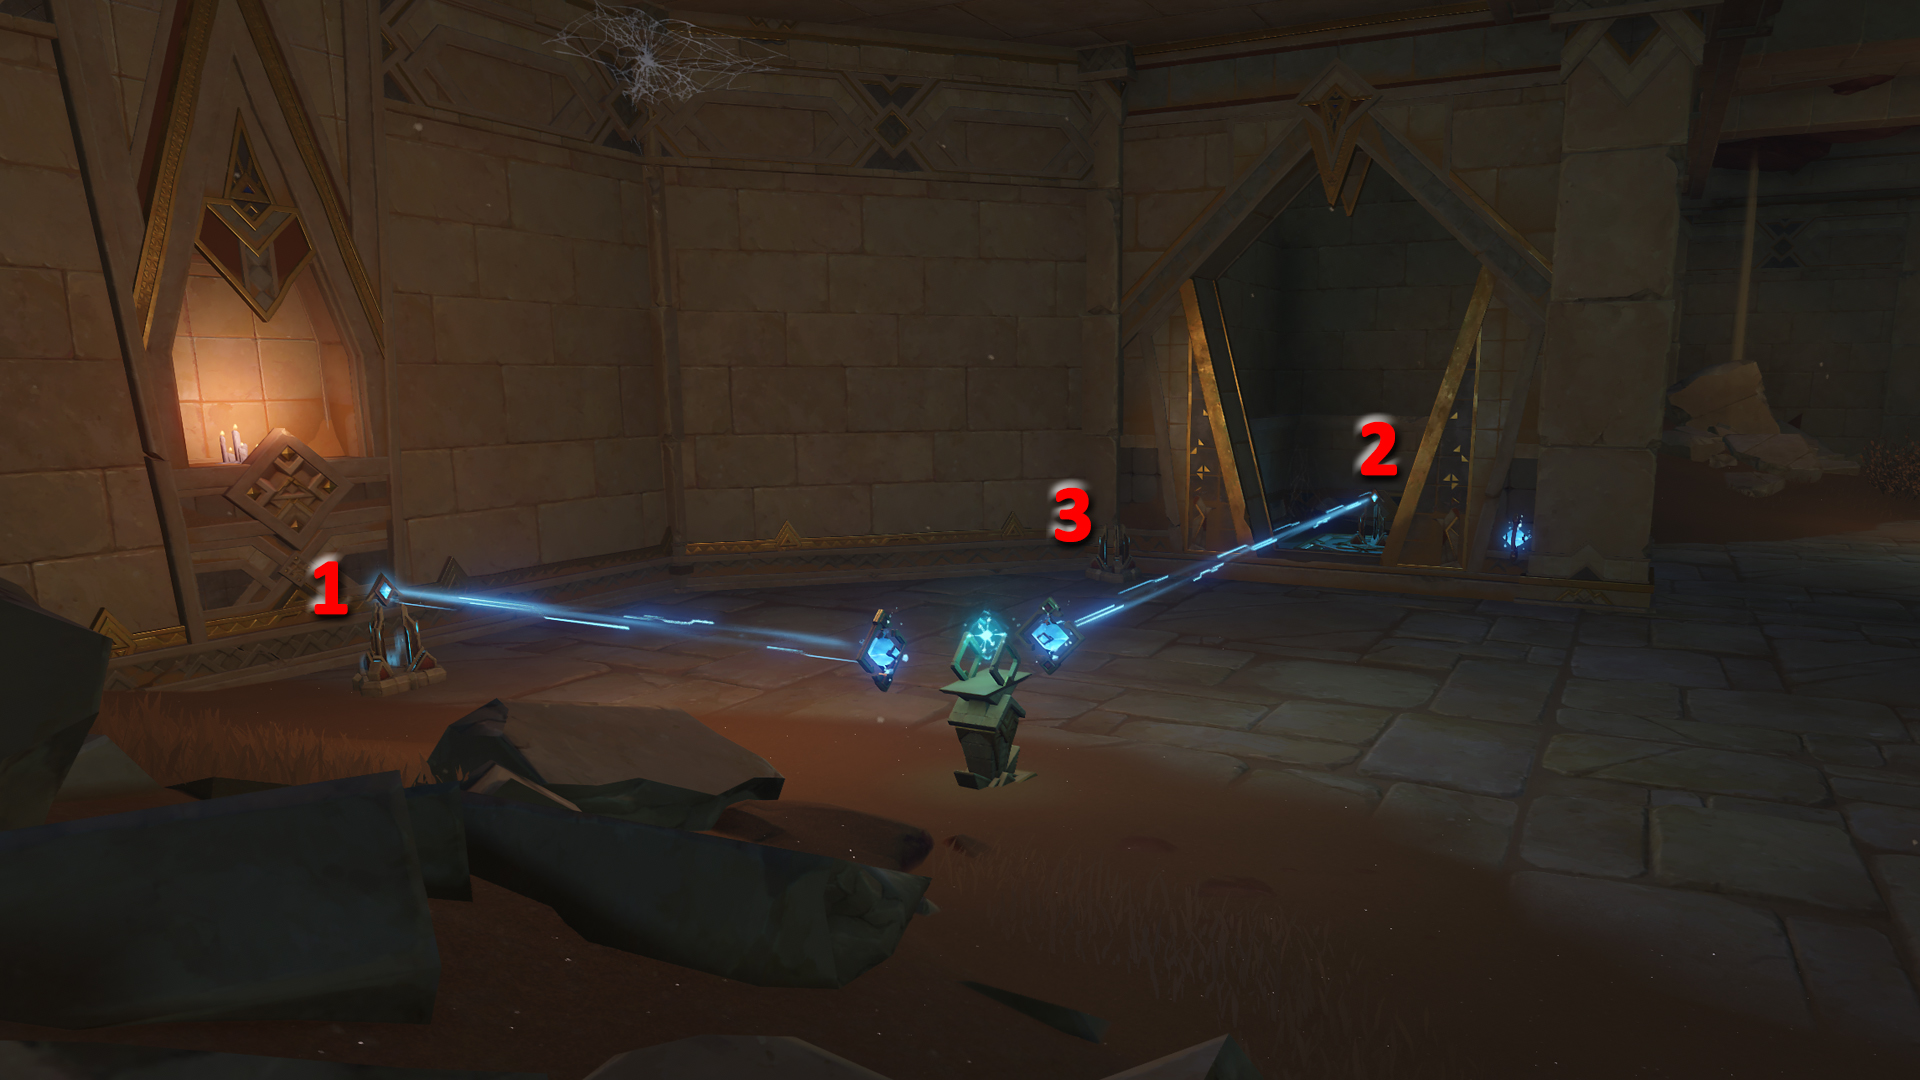
For the second orb, we’ll go back the way we came; turn your back to the massive doors, go a bit further downstairs, and then run through the tunnel in the left again. The puzzle mechanism looks complicated, but all you need to do is activate the mechanisms in the same order as the picture above. Guide the blue orb to the doorway.
Golden Slumber part 7: Dreams Beneath the Searing Sands trials
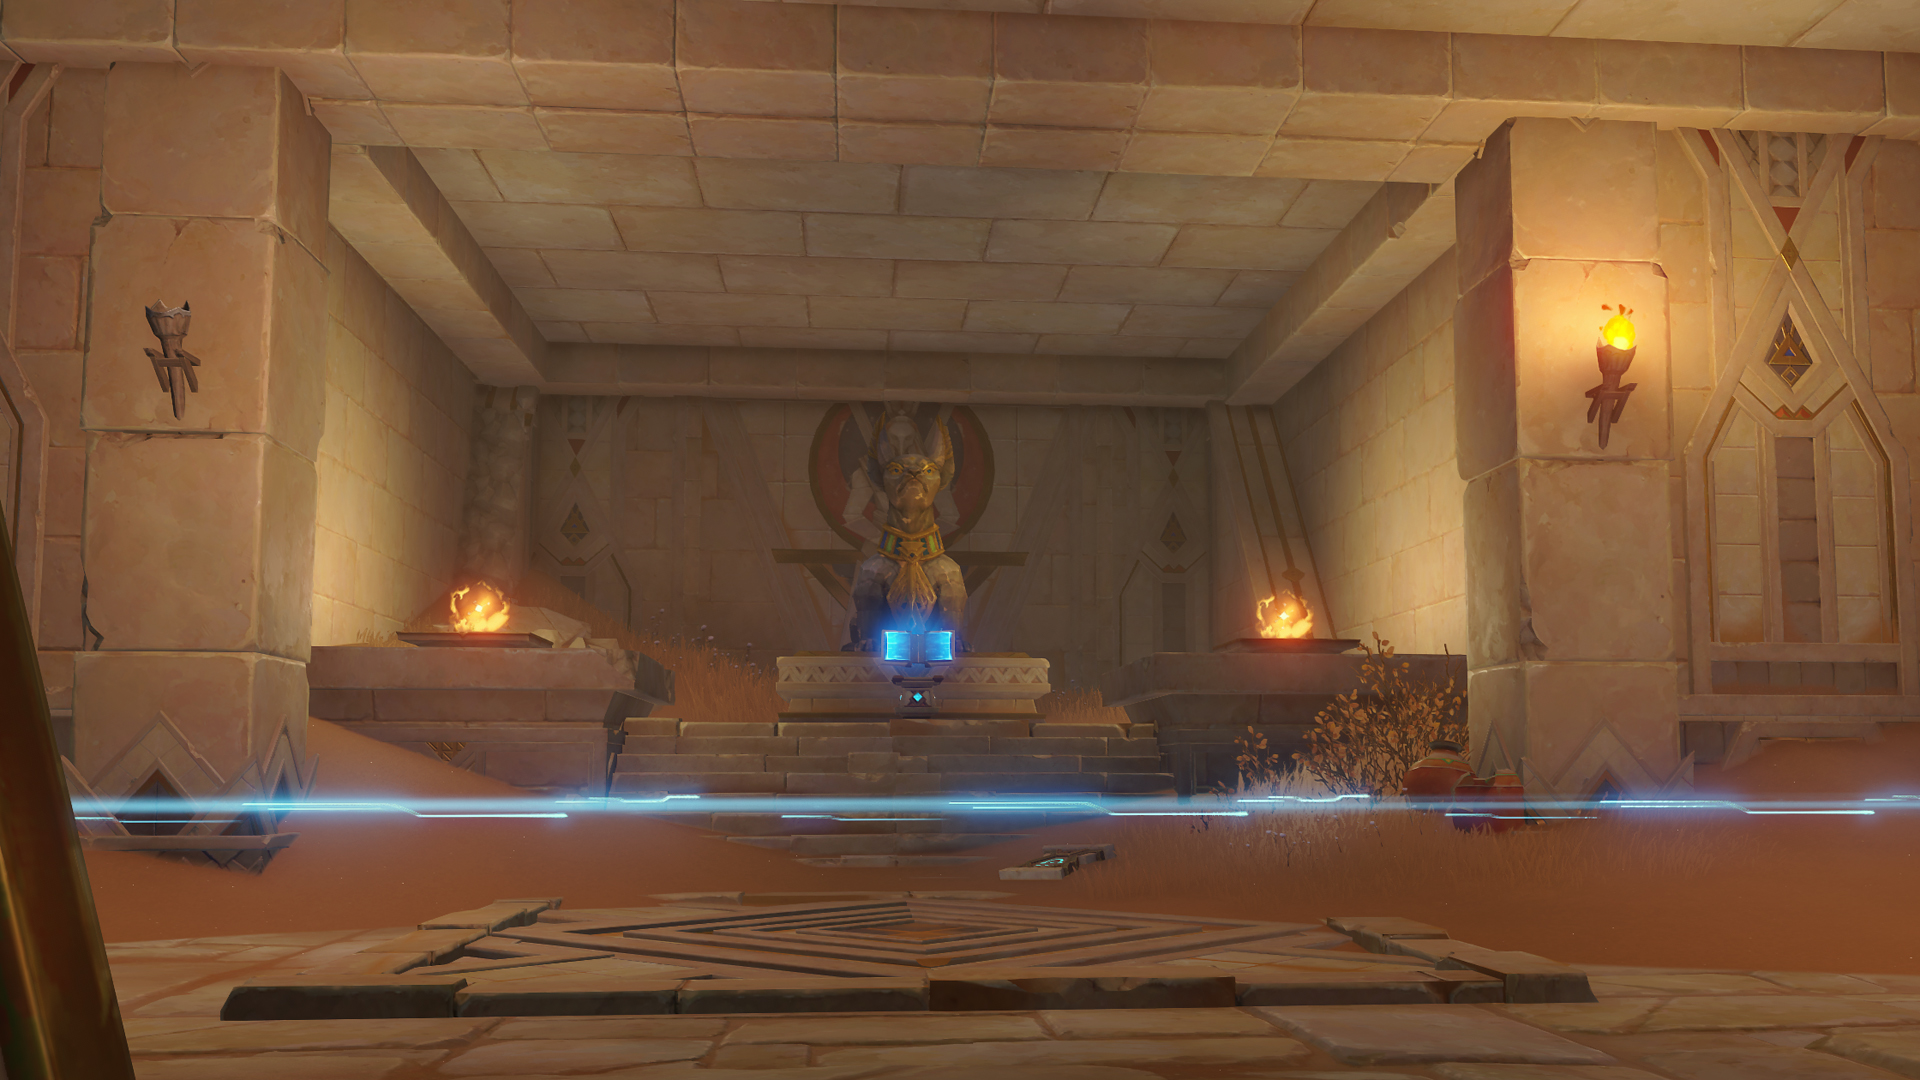
The final part of the Golden Slumber quest series starts in Sobek Oasis again. Defeat enemies as requested and follow the location marker until you get the ‘pass the three trials’ objective in Khaj-Nisut. Here’s how to solve each of them:
- Trial in the west: enter the building, then drop down through the opening with the wind current. Active the blue squares as you’ve done before. After dropping down through a second wind tunnel opening, there’s a door that requires a Keystone. You’ll find it in the room to your right. Use it on the door and continue opening chests and activating blue squares until you reach the final room, where the blue lasers are now connected as shown in the picture above.
- Trial in the north: This one is simple: start the trial inside the building and drop down through the hole on the left. Then defeat two floors of enemies (all triangular ruin guards). Bring an Electro to use during the recovery state.
- Trial in the south: Start the trial and drop down again. You will land on an invisible floor. Keep running around to find the gaps; you will have to fall down several levels before reaching the ground, where you can finish the trial.
Golden Slumber part 8: Khaj-Nisut
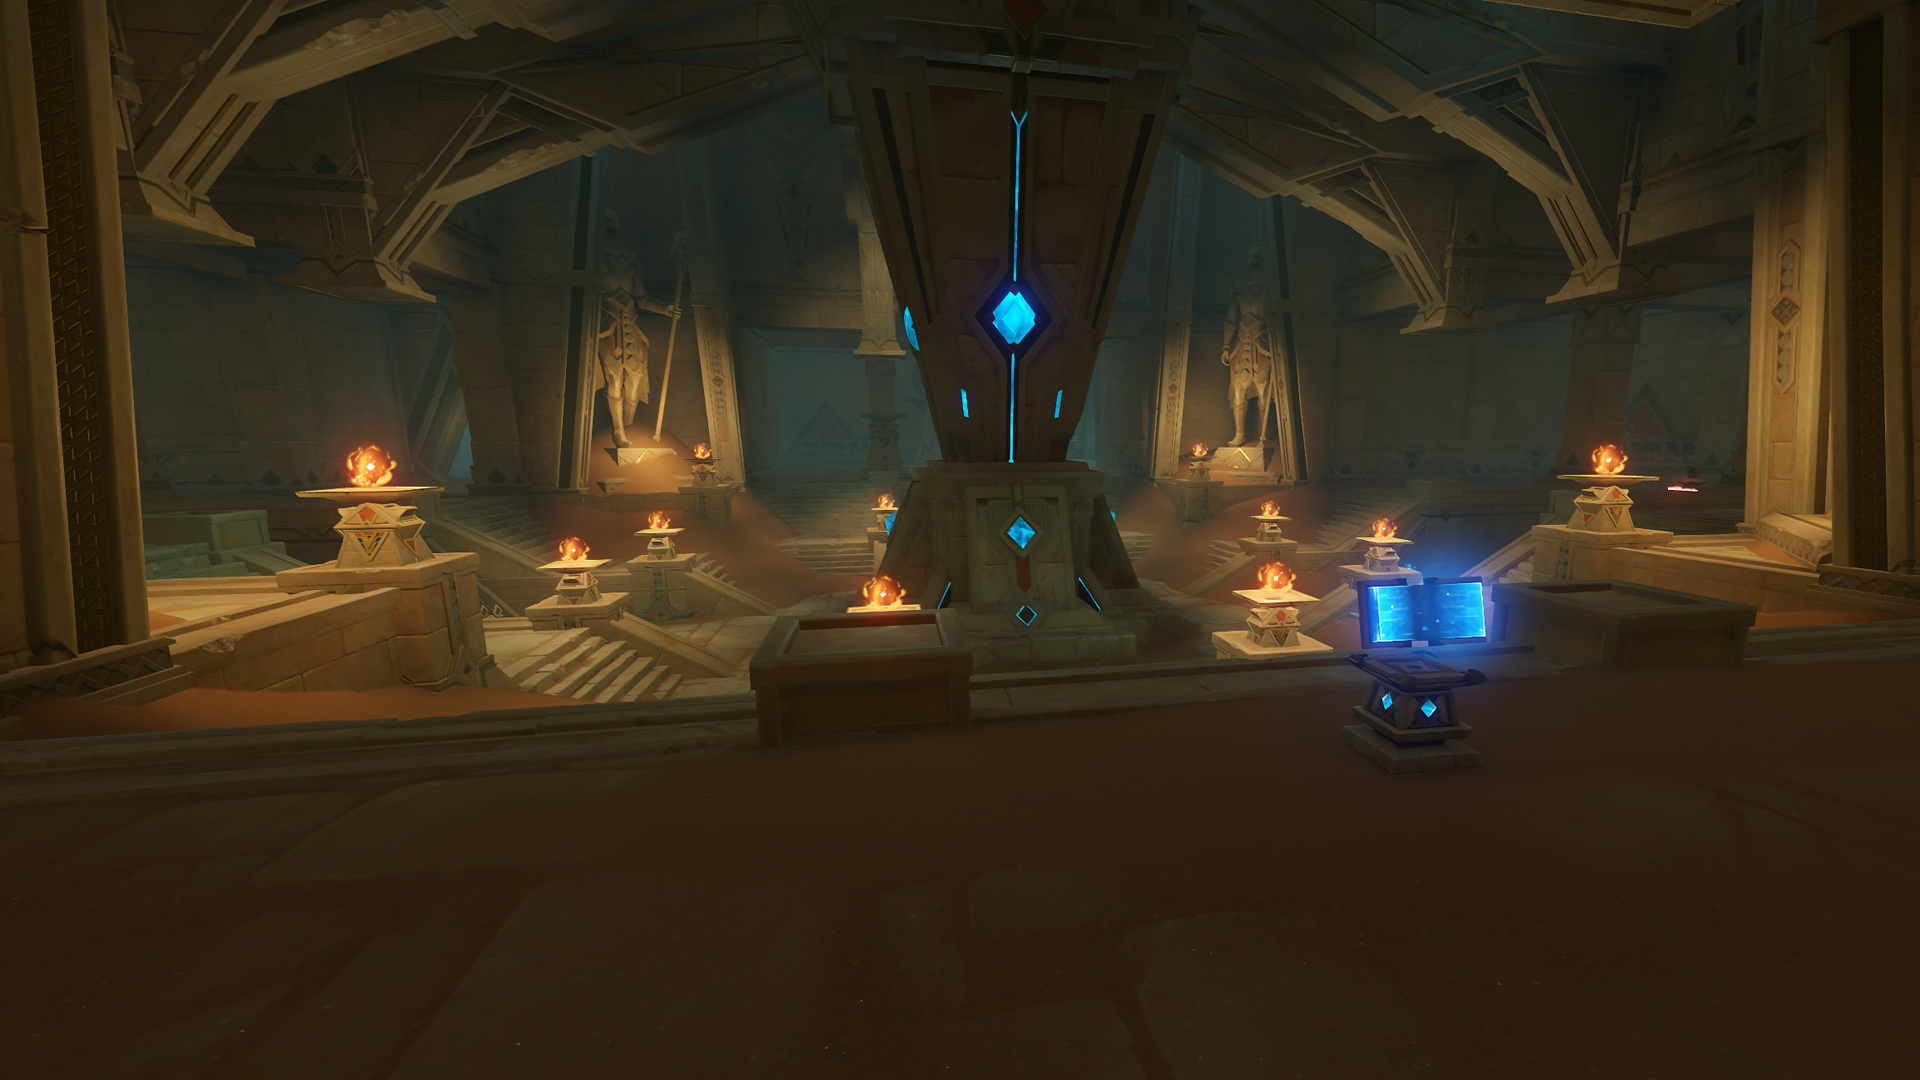
Finally, you can enter Khaj-Nisut. Descend deeper into the ruin until you find the room with the large mechanism in the centre (see picture above). To activate it, guide the three blue orbs (you can see their locations on your mini map) to their destinations.
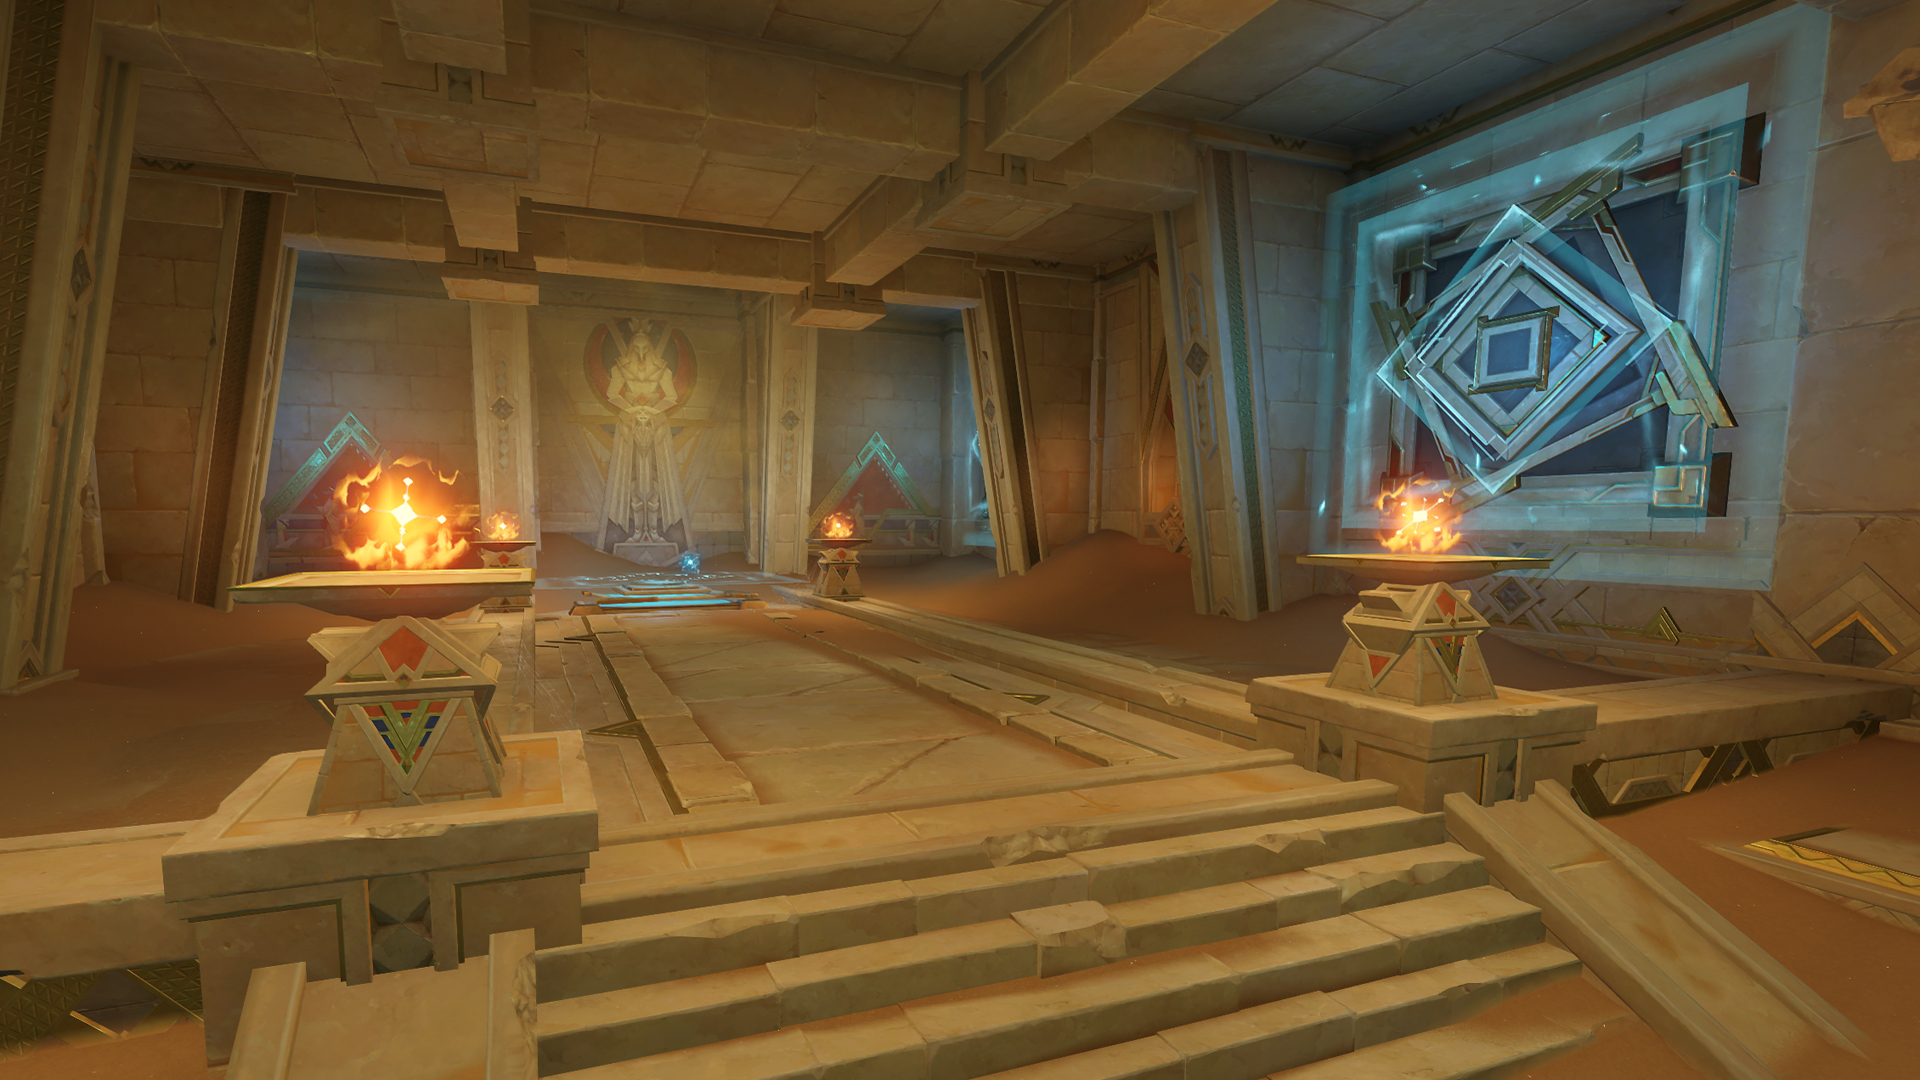
There’s one tricky part with a couple of large fans; as soon as they stop turning, move the blue orb forward. Make a stop in the middle (same position as shown in the picture above), so it doesn’t get hit by the fans.
Golden Slumber part 9: platform puzzle
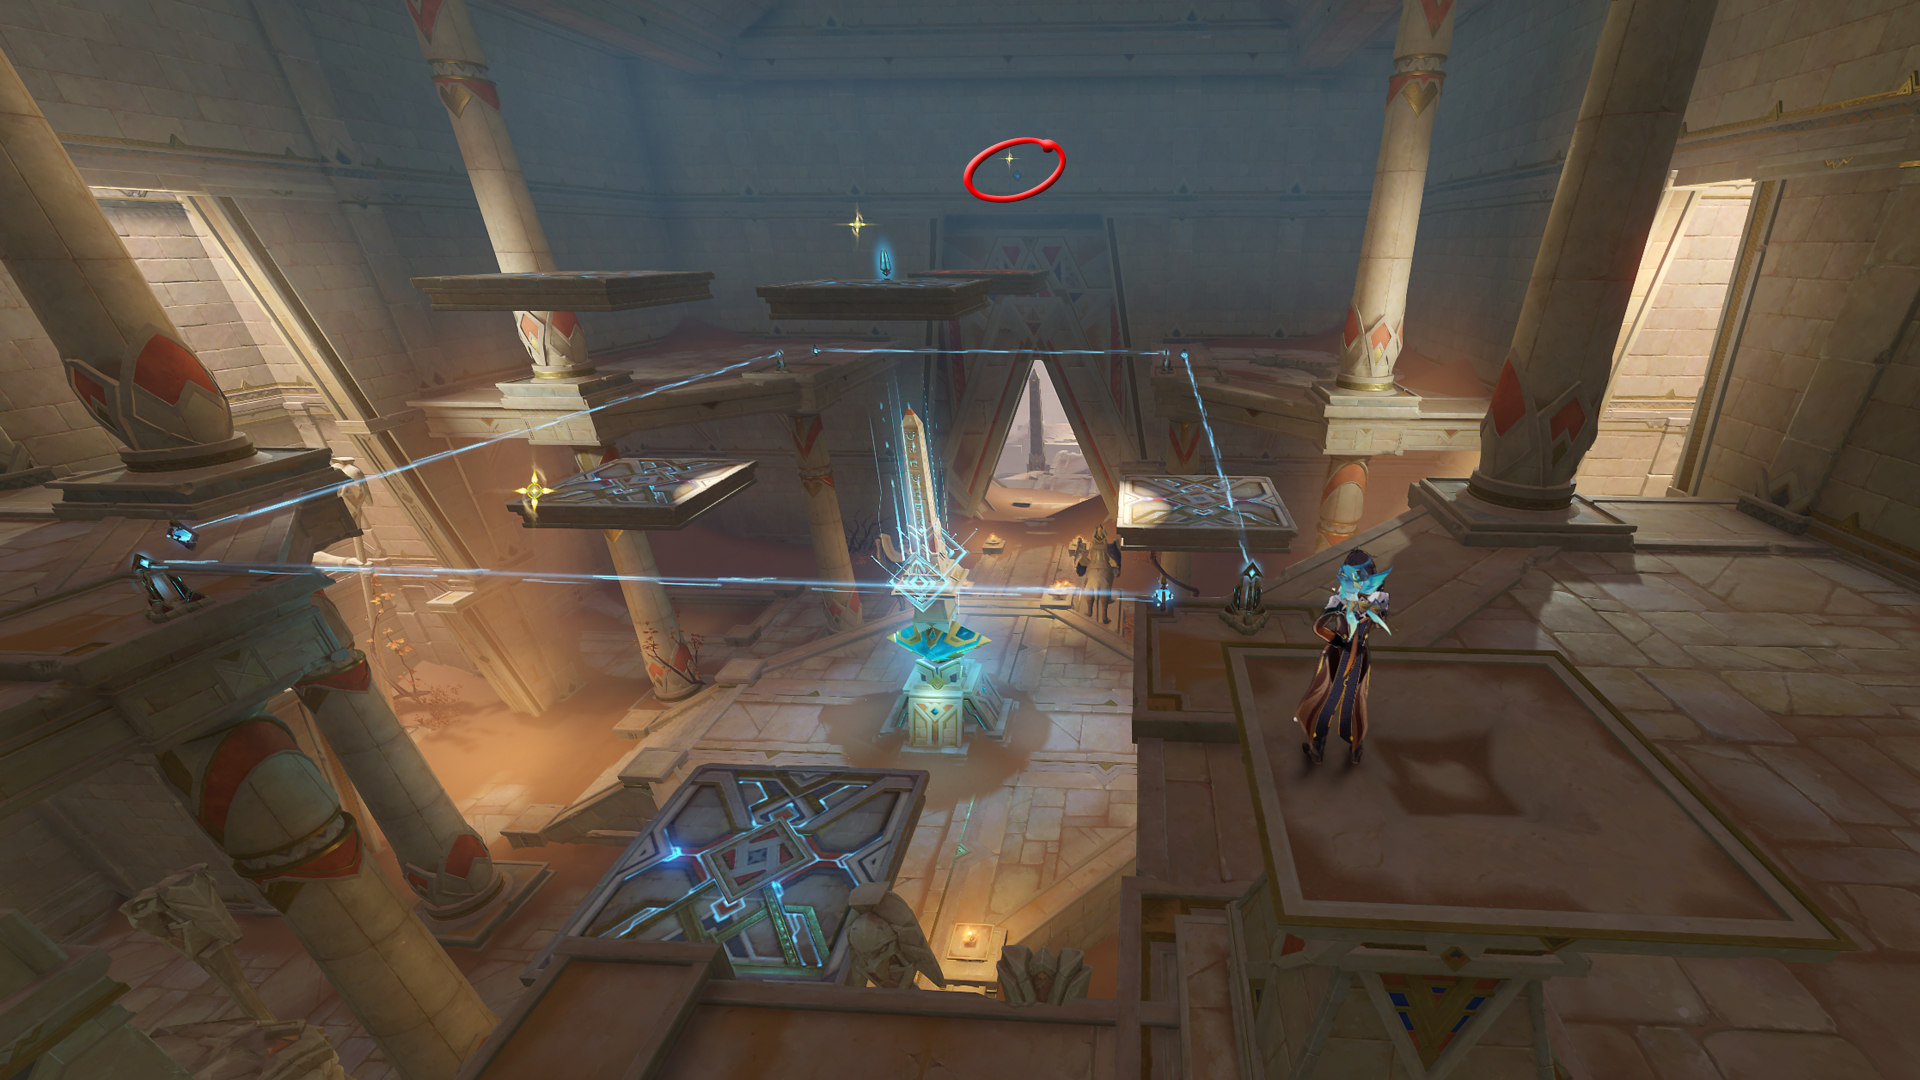
Proceed to the higher floors until you reach the ‘operate the Prism of Khaj-Nisut’ objective. Land on the middle platform and click ‘operate’ to switch the height. Click ‘switch’ to change the colour from blue to red.
Note that the middle platform only moves the ones with the same colour. Place them as shown in the picture above to solve the puzzle (the platforms shouldn’t block the blue lasers) and then use the blue button on the other side of the room (red circle).
All there’s left to do now is take the elevator upwards, go through the cutscenes, and defeat the final enemies. Beware; you’ll have to flee from Khaj-Nisut afterwards. Jump down and run towards the exit as fast as you can!
Weekly digests, tales from the communities you love, and more
I’m a freelance journalist who (surprise!) kind of has a thing for videogames. When I’m not working on guides for GamesRadar, you can probably find me somewhere in Teyvat, Novigrad, or Whiterun. Unless I’m feeling competitive, in which case you should try Erangel. You can also find my words on PCGamesN, Fanbyte, PCGamer, Polygon, Esports Insider, and Game Rant.

