All Resident Evil 2 safe codes to unlock every safe in the game
How to find every safe combination and unlock all hidden gun upgrades
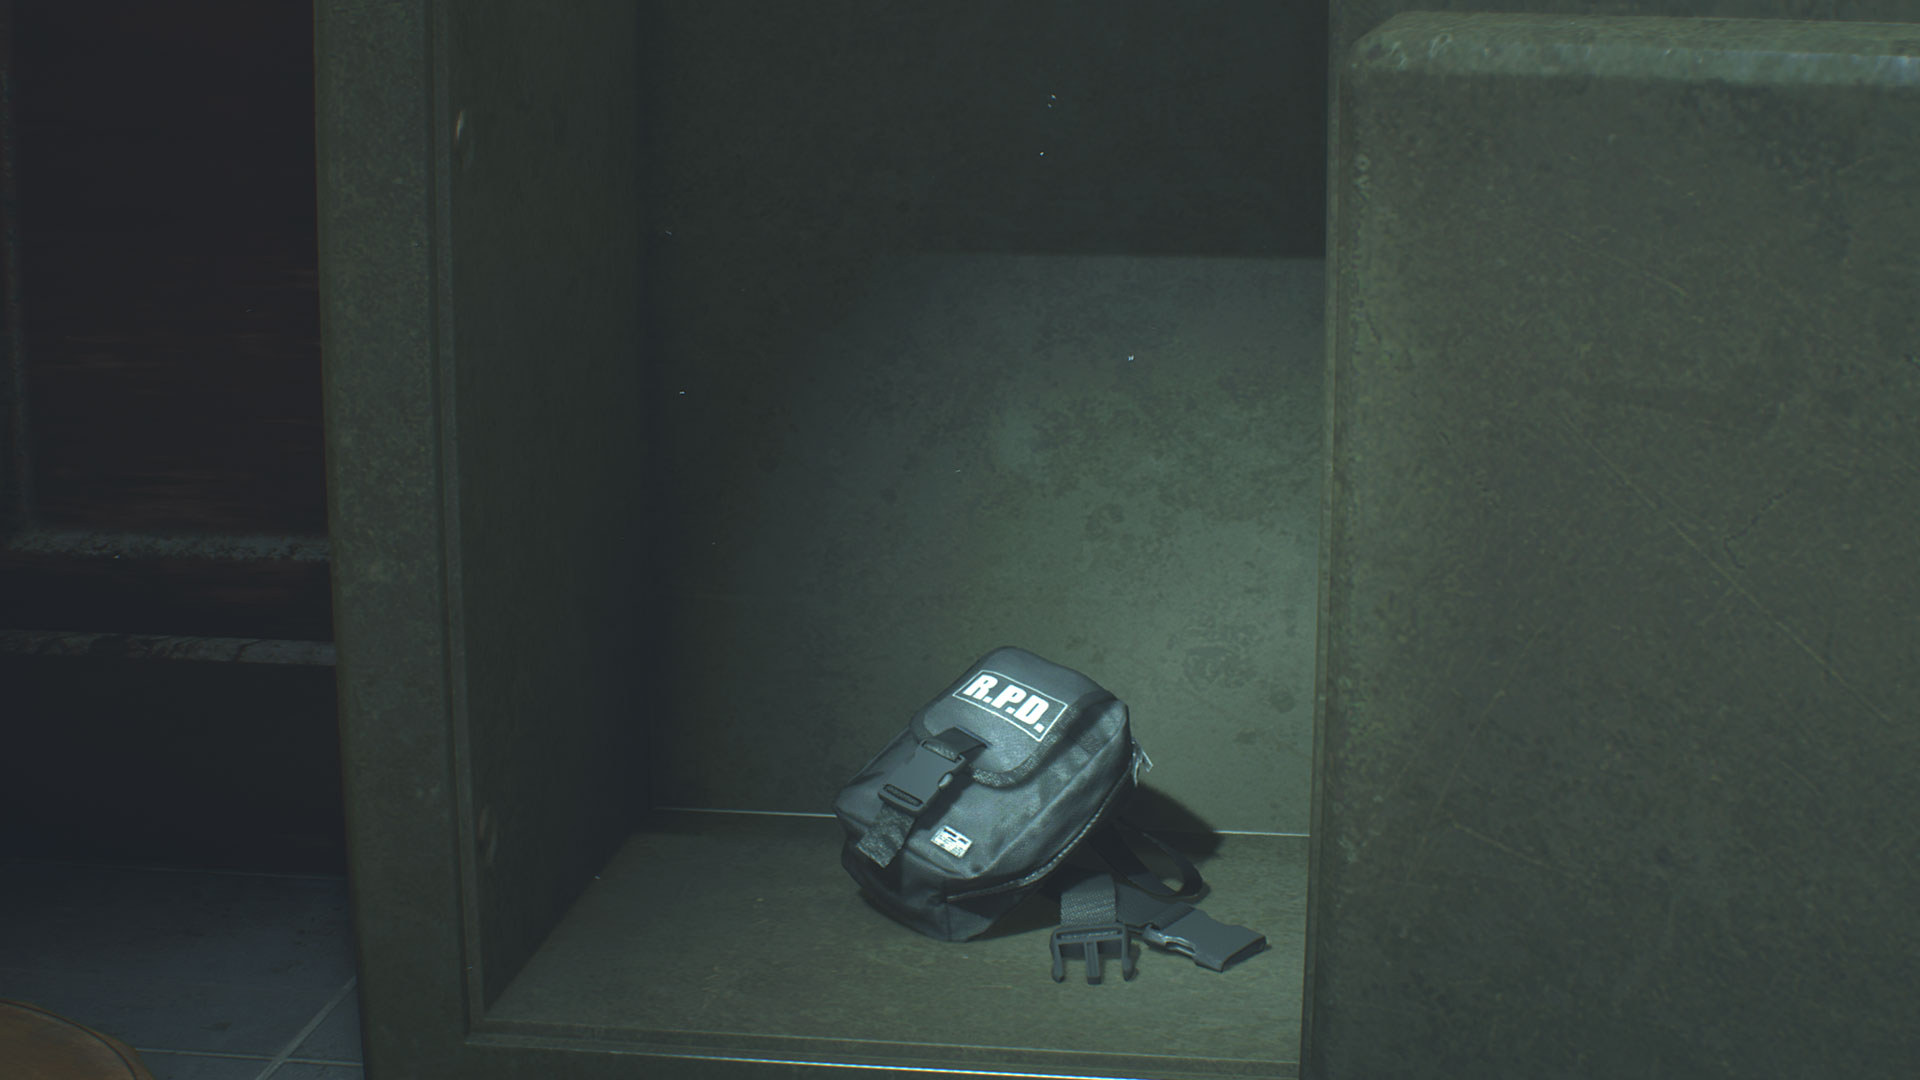
I've got every Resident Evil 2 safe codes and combination here to help you open all the different safes you can find. That includes the location of the safe and the combination which can be close but often needs a little searching out. If you just want a quick list of Resident Evil 2 Safer codes then this is what you need:
Resident Evil 2 safe code list
- Police Station West Office safe code - 9 Left, 15 Right, 7 Left
- Police Station Waiting Room safe code - 6 Left, 2 Right, 11 Left
- Sewer Treatment Pool Room safe code - 2 Left, 12 Right, 8 Left
Because the codes are fixed you don't actually have to find them to unlock a safe. But, if you do want to search them out, then we've got more details below including maps to find everything you need.
However you go about it, these are an essential part of the story, as each safe has a weapon upgrade inside that can be used to make some of the best Resident Evil 2 guns you can get. It's actually the only way to fully upgrade both Claire and Leon's signature weapons, which will in turn make progress through the Resident Evil 2 Remake more manageable. Linked to all this are the Resident Evil 2 locker code which contain extra ammo for a range of weapons.
Article continues belowAlmost as important as guns are the Resident Evil 2 hip pouches that will help you carry all this gear and ammo, so check that guide for help there with the ones you wont get from safes. However, below, we're going to look at all the Resident Evil 2 safe combinations and where to find them in more detail.
Police Station West Office safe code
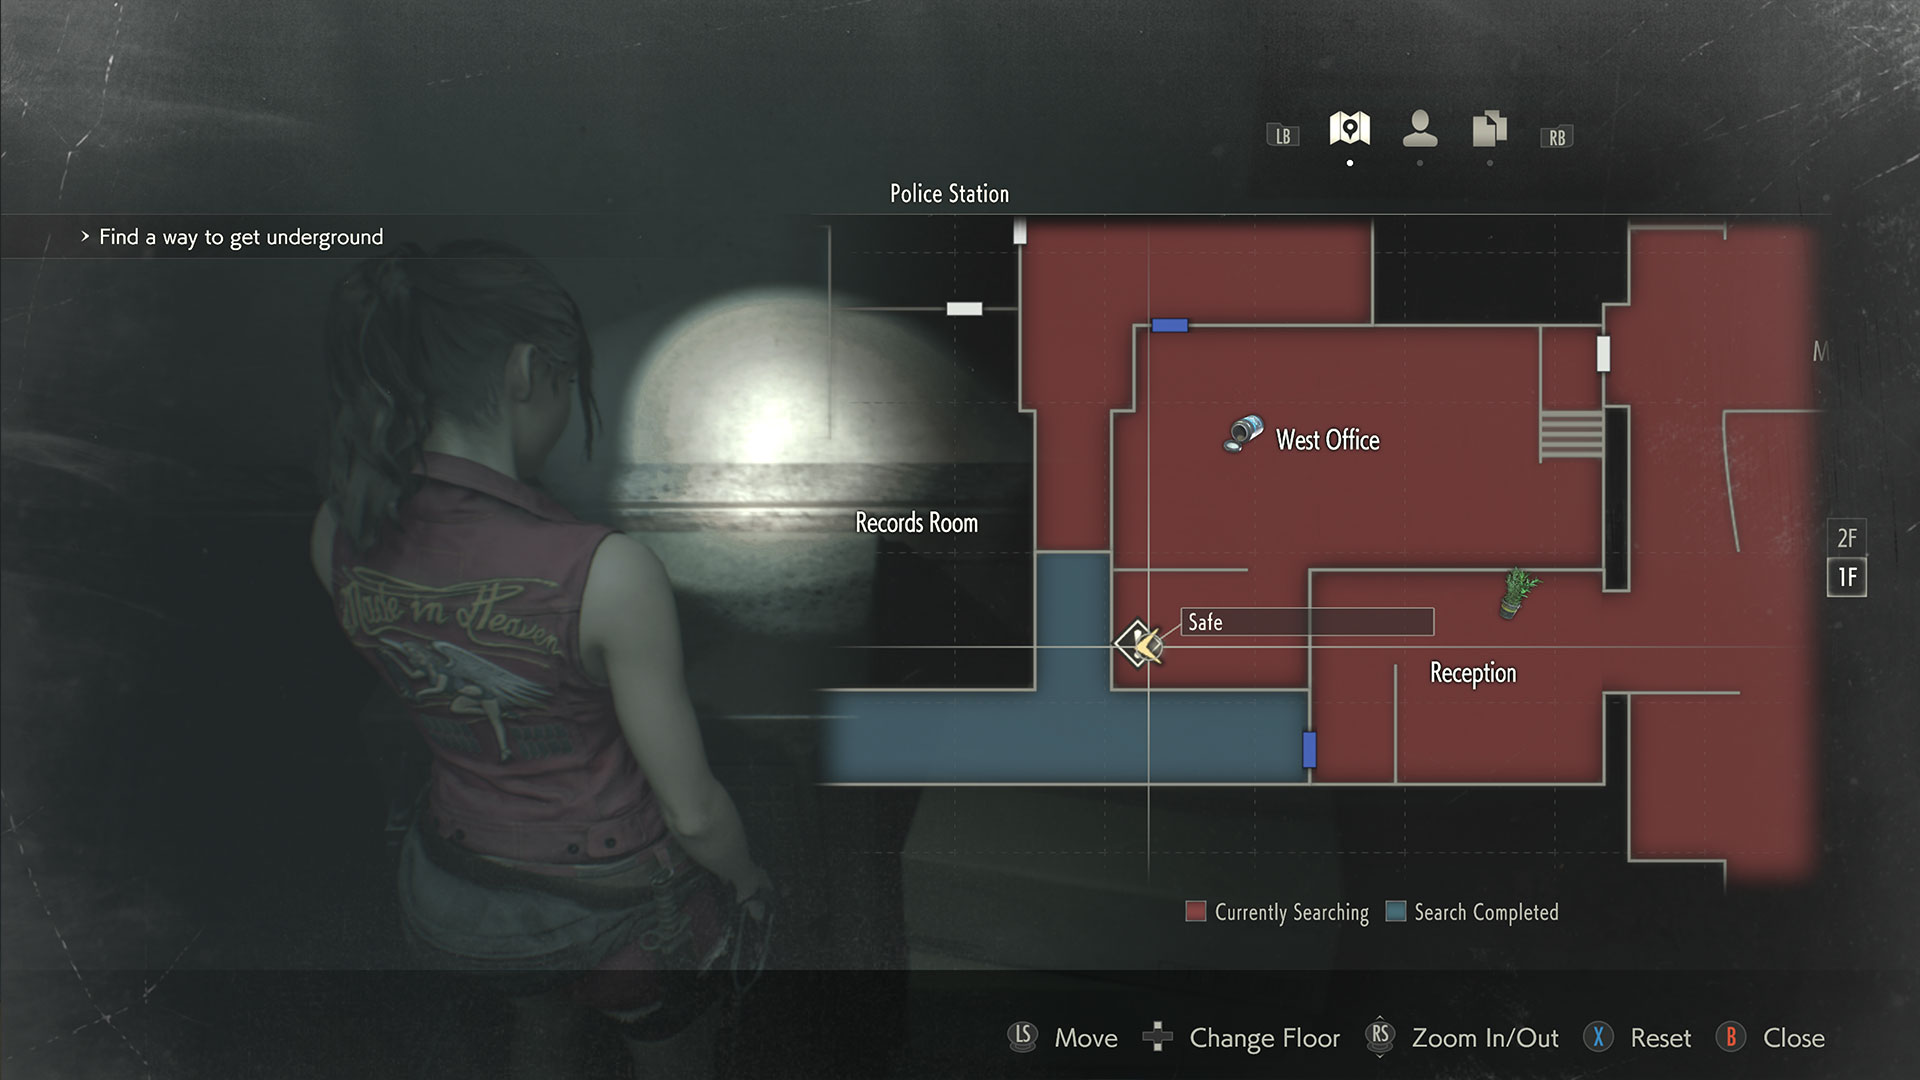
This is likely the first safe you'll find, as it’s located in one of the starting areas. On the west side of the police station, you’ll find an office aptly titled ‘West Office’ on the first floor. Head into the side-room here to find this safe in the corner. Just make sure to watch out for the lethargic zombie up against the wall.
The solution for this safe is found in the S.T.A.R.S office on the second floor of the police station, scribbled onto a post-it note on an internal memo left on one of the desks:
Safe code: 9 Left, 15 Right, 7 Left
This safe will reward both Leon and Claire with a Hip Pouch, an incredibly valuable boost to your inventory space.
Police Station Waiting Room safe code
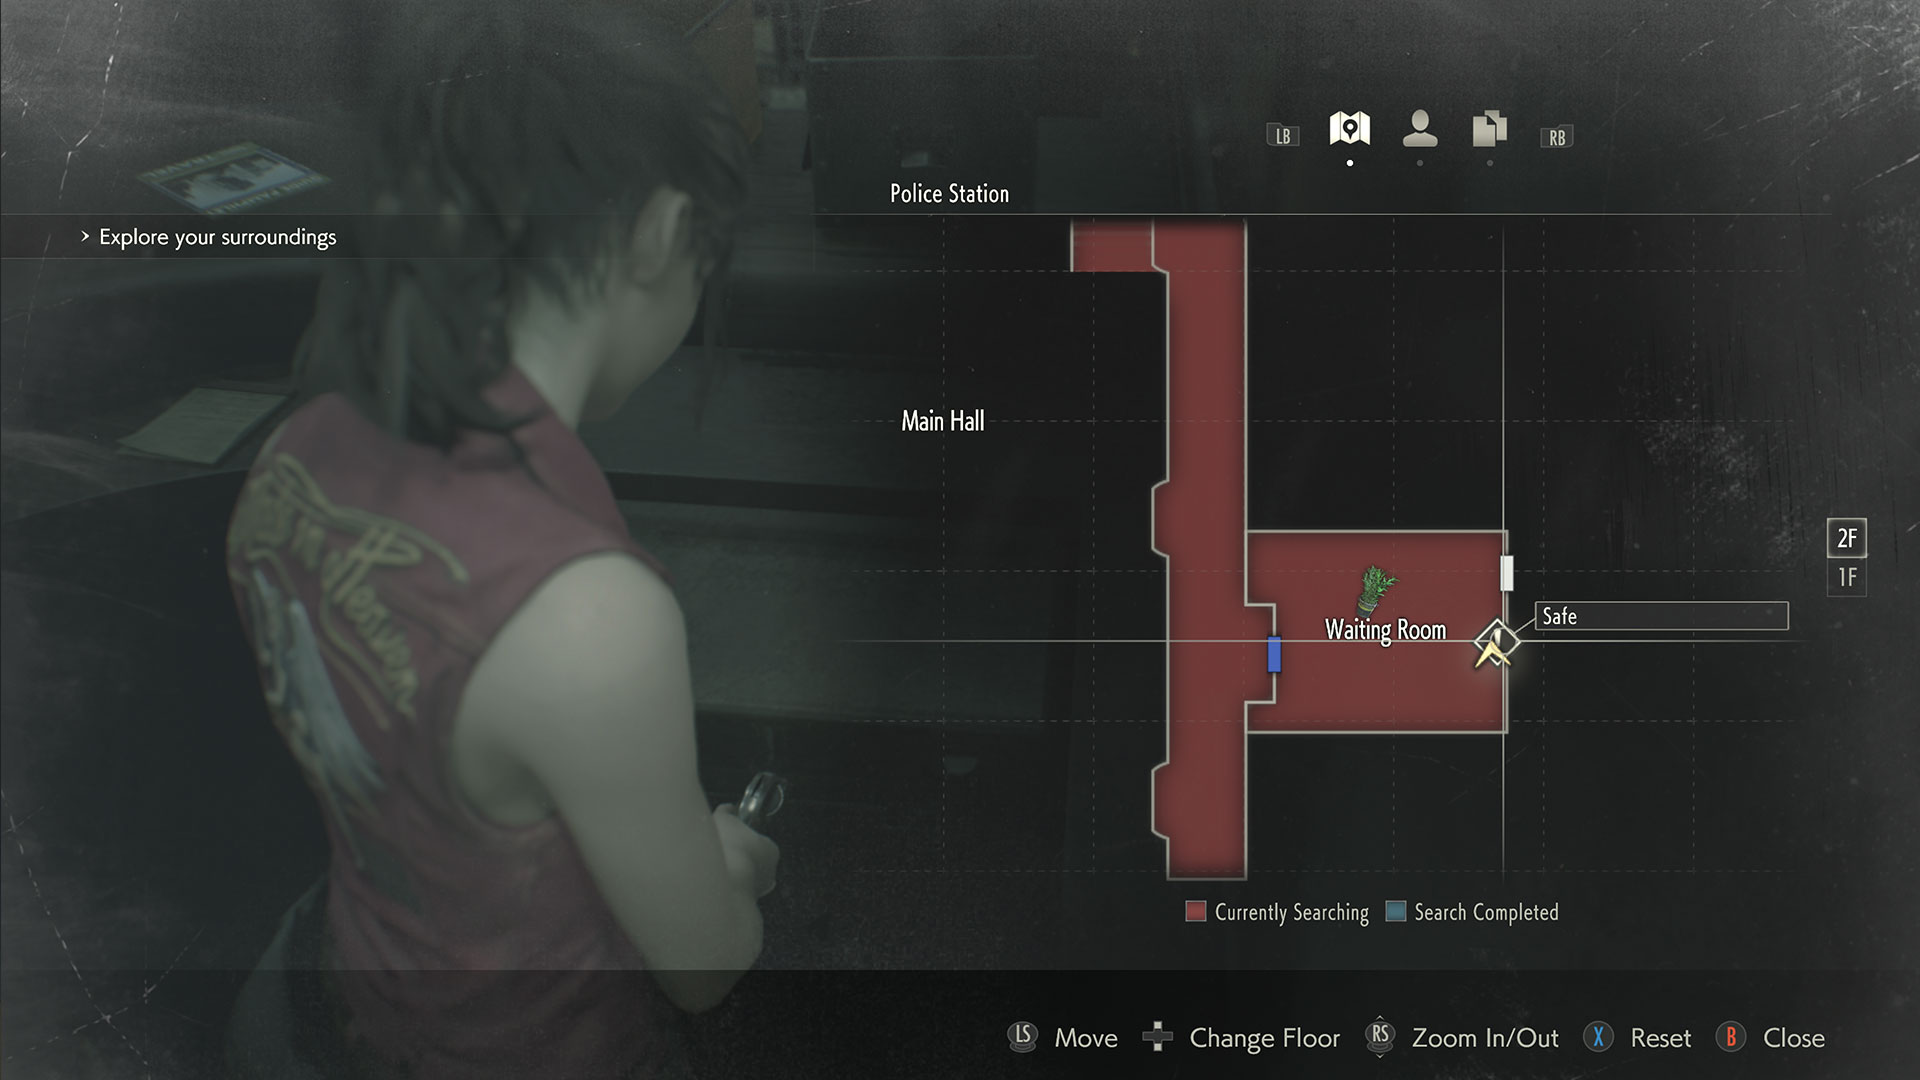
As you explore the east side of the police station you'll find the second safe in the waiting room on the second floor, your first major gateway to the east side of the building during the A scenario - check behind the desk in the waiting room and you’ll find another safe waiting for you. There are no real threats in this room, so just make sure the Tyrant isn’t following you before you try to open it.
The solution for this safe is found in the observation room on the first floor of the building, scribbled onto an RPD document on a side table:
Safe code: 6 Left, 2 Right, 11 Left
The safe will reward Leon with a Muzzle Brake for his pistol Matilda, and Claire with a High Capacity Mag for her JMB Hp3 firearm.
Sewer Treatment Pool Room safe code
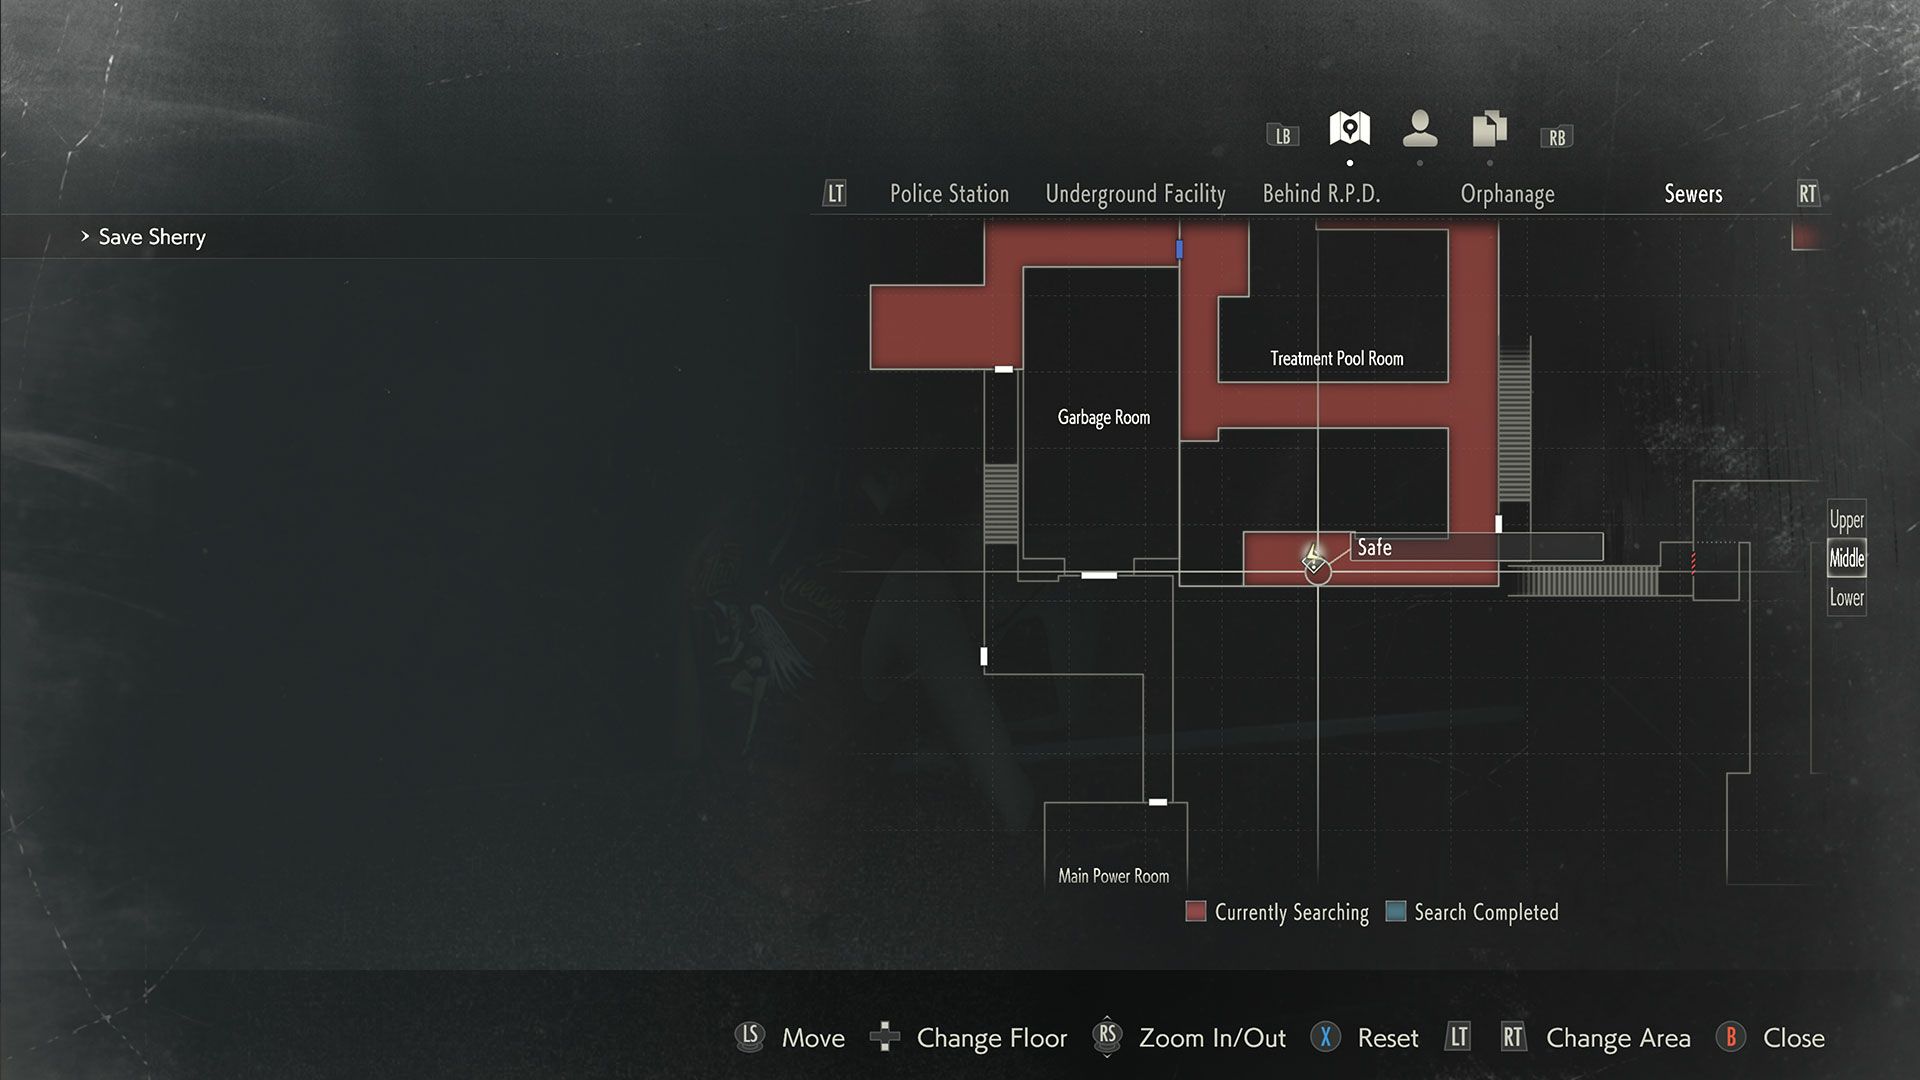
The third and final safe is found much later once you’ve entered the grimy depths of the sewers. Once you’ve reached the Monitor Room with the Resident Evil 2 chess plug puzzle, exit through the only door and cross the bridge, then head right at the end to find another safe in the Treatment Pool Room.
The solution to this safe is easy peasy. Simply look on the right hand side of the unit and you’ll see the combination written in chalk:
Safe code: 2 Left, 12 Right, 8 Left
The safe will reward Leon with the Shotgun Stock for his W-870 and Claire with a Reinforced Frame for her SLS 60.
Weekly digests, tales from the communities you love, and more
Resident Evil 2 tips | Resident Evil 2 Mr Raccoon locations | How to get the Resident Evil 2 shotgun and grenade launcher | Resident Evil 2 Film Roll locations | Resident Evil 2 key locations | Resident Evil 2 medallion locations
© GamesRadar+. Not to be reproduced without permission.
Jordan Oloman has hundreds of bylines across outlets like GamesRadar+, PC Gamer, USA Today, The Guardian, The Verge, The Washington Post, and more. Jordan is an experienced freelance writer who can not only dive deep into the biggest video games out there but explore the way they intersect with culture too. Jordan can also be found working behind-the-scenes here at Future Plc, contributing to the organization and execution of the Future Games Show.
- Leon HurleyManaging editor for guides

 Join The Community


