Gears of War 3 multiplayer weapons and maps guide
Learn how to keep all of your body parts attached with our guide to the weapons, maps, and gameplay of Gears 3 multi
Maps
Below you’ll find overhead views of each map that show spawn points and weapon locations. Weapons cycle every other round - the first map refers to the first round, and the second map refers to the second round. After the second round the weapons cycle back to round one and so on.

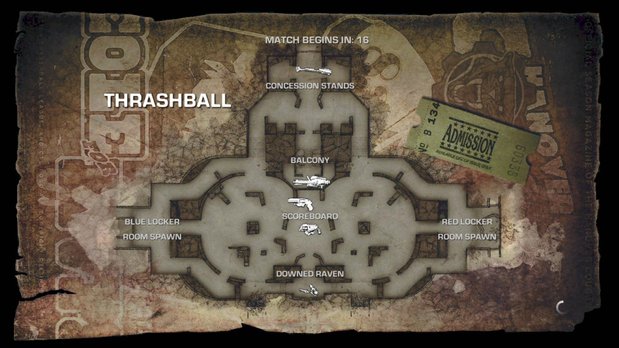
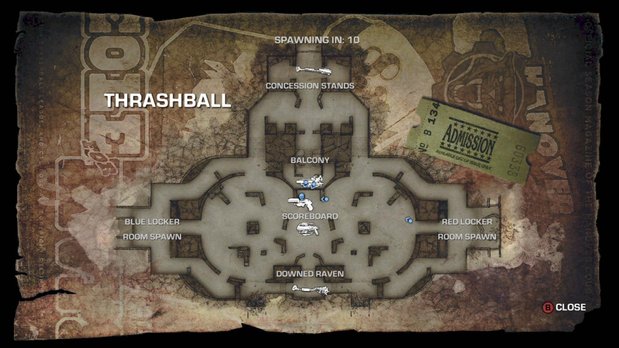
After a minute or two, the scoreboard hanging above the center of the map will lower and start dangling precariously. When it does, you can bring it down to earth by shooting the support cables. Do this only when you need to give your team some cover or when you can squish an enemy or two.
The balcony that holds the Mulcher/Mortar is one of the best places to control as a team. Just make sure to cover the stairs leading back inside as well as the paths that are blocked by rubble on either side. Enemies can’t hop over that rubble, but they can certainly shoot over it.
Always be careful when entering or exiting the concession stand area, using the camera to check for enemies. The stairs are a bad place to be caught with your pants down, since there is no cover nearby.
Stay away from the center of the field if you can help it. Yes there is a lot of cover here, but the map’s side paths allow enemies to sneak up behind you in a flash.

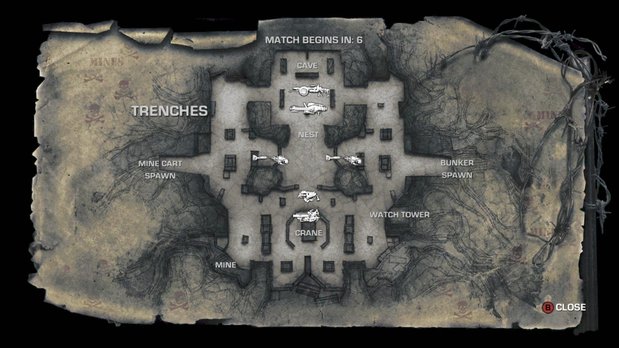
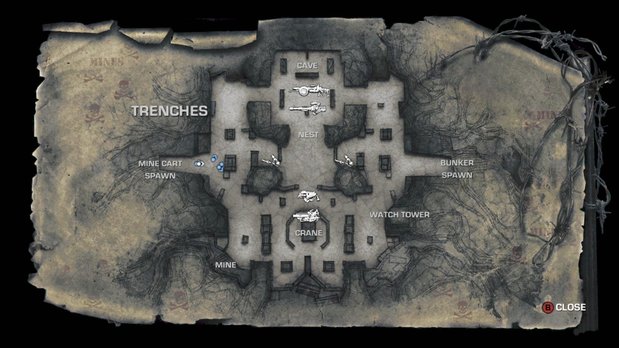
It’s a tough task since the line of sight is blocked, but you can chuck grenades from the barricaded sections along the side of the hill and light up enemies who are camping in the nest.
During the sandstorms, don’t be afraid to charge randomly with your Retro Lancer or walk around with your chainsaw up. You never know when you might run into that special someone.
Keep your eyes on the bunkers located at each side of the hill whenever you are going up or coming down. These bunkers are right near the spawn points and contain grenades, so players who’ve just died and are looking to pick up some grenades will have a clear shot at anyone on the hill.
Despite being in a very dangerous spot, the Mortar is valuable weapon in this map. If you manage to grab it, target the high-traffic paths leading from the spawn points to the center of the map. You can also clear the hill and/or nest if necessary.

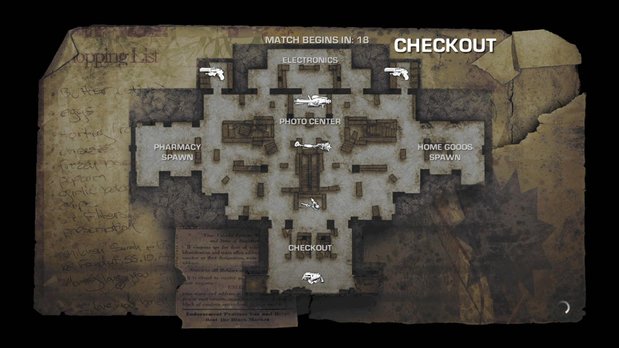
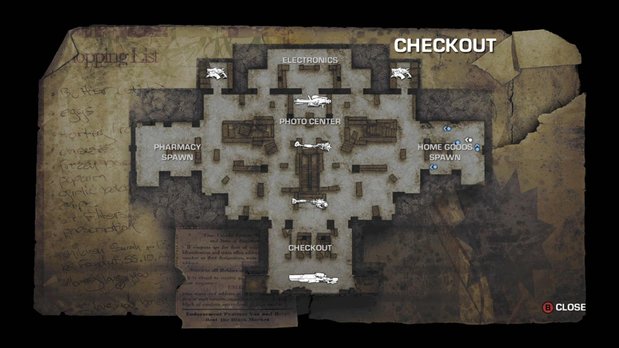
Checkout is a tight map, so short-range weapons like Retro Lancers and shotguns really dominate the action.
The checkout aisle area is where you’ll find either the Digger or the Longshot. Because of that, many players will make a rush for it. If you and your team can take over this area, use the long aisles as cover and hold out as long as possible. Controlling the Digger for long periods of time can turn the entire match in your favor!
Don’t be tempted into using the Mulcher in the exact same place where you find it unless you have a teammate or two to protect your flanks. You’re better off bringing it around to one of the entrances to the electronics section and catching enemies who are trying to come in.
Try hiding behind the tall shelves found at the spawn points. They’re usually safe areas, and you can catch people coming around the perimeter of the map if you’re patient.

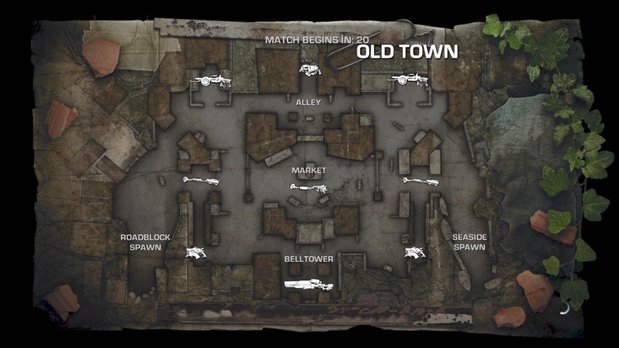
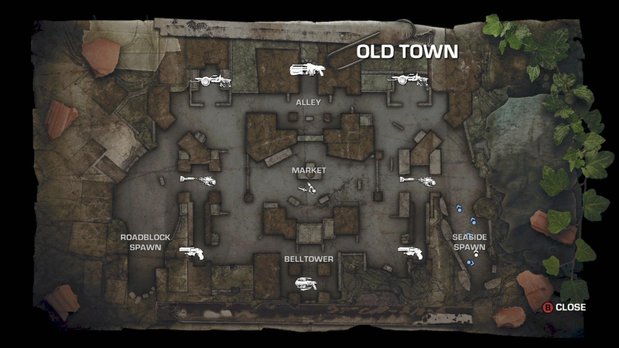
The Boomshot/Digger spawn location in the alley is a highly contested area at the start of the match. We always enjoy mopping up the enemies around these power weapons as opposed to trying to pick the guns up ourselves. As the match continues, make sure to check this area often. If you’re working as a team, consider controlling this alley as long as possible.
The bell tower area that features the Torque Bow or Longshot is usually where intense shotgun battles take place. Since the large columns provide cover, you’re mostly safe from long range weapons, but you had better be ready to fire from the hip if you want to hang out in this area.
The grenades located at the center of the market are enticing, but be aware that this spot is open to fire from four different directions (players in the alley or bell tower areas can fire on you).
It’s a great idea to use the Scorchers to defend or attack the nearby alley.

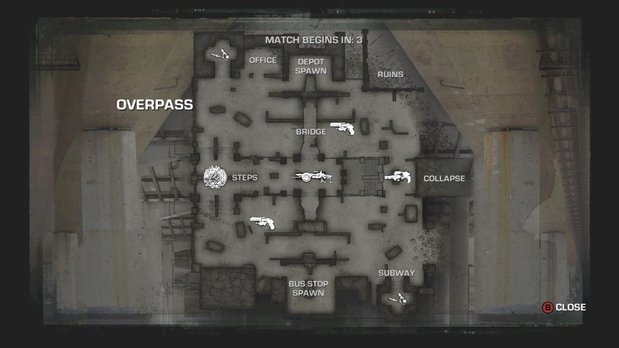
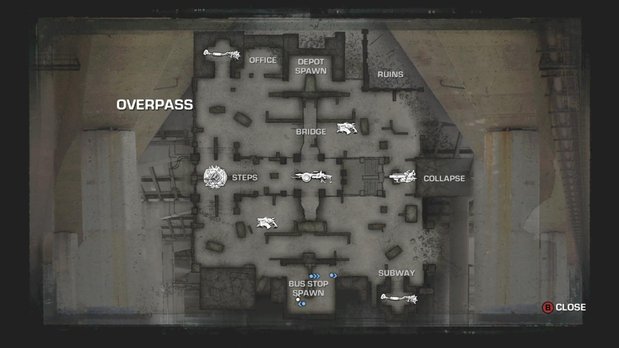
The first thing you need to know about this map is that there’s a turret on the bridge! The second thing you need to know is that the turret kinda sucks. It has poor accuracy, is out in the open, and has multiple blind spots due to its lack of 360 degree mobility. The only effective use of this turret we found is in providing suppressive fire to disrupt an enemy charge on the steps.
The steps are where you and your team want to hold out. You have a good view of most of the map, and if you get swamped from both sides you can simply fall back up the steps and force your rushing opponents into a bottleneck.
The Hammer of Dawn spawns every other round near the "collapse" section of the map. It’s great for clearing the street. On the rounds where the Hammer doesn’t spawn, you’ll find the Mortar, which can serve a similar purpose.
The Boomshield is there for a reason. Don’t just leave it alone - use it to fortify your position on the stairs.
Weekly digests, tales from the communities you love, and more
