Monster Hunter Tri: Complete monster and item drop guide [UPDATE]
Get familiar with Monster Hunter Tri's beasts, item drops and strategies with GamesRadar's handy guide/walkthrough.
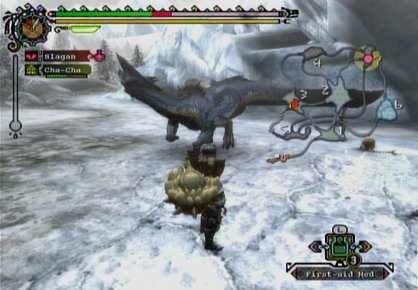
Great Baggi

Type: Bird Wyvern
Threat: 3
Weak Point: Head
Elemental Weakness: Fire
Item Drops
From Body: Baggi Hide, Sleep Sac, Baggi Scale, Great Baggi Claw, (High Rank Only) Coma Sac
Quest Reward: Great Baggi Claw, Sleep Sac, Baggi Hide, (High Rank Only) Coma Sac, Bird Wyvern Gem
Special Reward: (Destroy Crest) Leader's Crest, Sleep Sac, (High Rank Only) Coma Sac, Bird Wyvern Gem
Glitter Drop: Wyvern Tear, Baggi Scale, (High Rank Only) Great Baggi Hide
Much like the Baggi, the Great Baggi is just a suped up version of its Jaggi counterpart. Most of its moves are identical to that of the Great Jaggi. It's bite, tail whip, and charge are easily avoided. There is little warning to indicate when they're going to happen, but they don't have a lot of range, and can be dodged with a simple roll. More dangerous is its ability to spit a sleep inducing liquid on you. Get hit by this and you'll be vulnerable until you either wake up or get hit. You can imagine which is more likely to happen first.
Beyond this, the most difficult thing about the Great Baggi are the swarms of smaller Baggi constantly escorting him. Unlike the Jaggi who would pretty much just stand there and hiss while you took down their bigger brother, the Baggi really get in on the fight and can make things harder. Clear a few out if you can before tackling the Great Baggi itself.
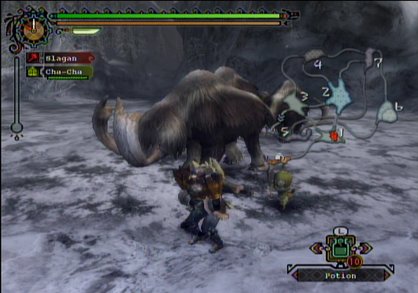
Popo

Type: Herbivore
Threat: 1
Weak Point: Head
Elemental Weakness: None Discernible
Item Drop
From Body: Raw Meat, Warm Pelt, Popo Tongue, (High Rank Only) High Quality Pelt
Very similar to the Aptonoth, the Popo is a gentle plant eater that is generally happy just to ignore you. That said, if provoked the Popo will fight back more aggressively then the Aptonoth. While the younger, smaller Popo's will flee at the first sign of danger, the bigger ones will charge you down. Even then they're not much of a threat and will go down pretty easy.
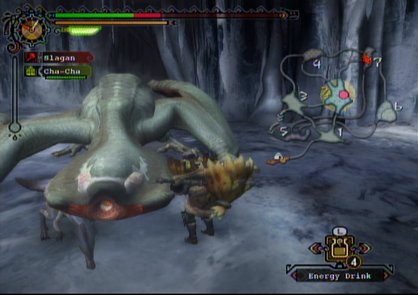
Gigginox

Type: Flying Wyvern
Threat: 4
Weak Point: None Discernible
Elemental Weakness: Fire
Gear Drop: Flabby Hide, Uncanny Hide
Item Drops
From Body: Flabby Hide, Pale Extract, Unnerving Talon, Poison Sac, Uncanny Hide (High Rank Only) Flabby Hide+, Unnerving Talon+, Fearsome Maw, Toxin Sac, Uncanny Hide+, Wyvern Stone
Quest Reward: Pale Extract, Poison Sac, Unnerving Talon, Uncanny Hide
Special Rewards: (Destroy Face/Body) Flabby Hide, Pale Extract, Fearsome Maw, Uncanny Hide, (High Rank Only) Uncanny Hide+ (Destroy Tail) Flabby Hide, Poison Sac, Uncanny Hide, (High Rank Only) Flabby Hide+, Uncanny Hide+, Wyvern Stone
Glitter Drop: Wyvern Tear, Pale Extract
The Gigginox was made to frustrate you. It has a small, agile body and is very aggressive and lethal; it's just an annoying monster to fight. Gigginox attacks you in three ways: physical attacks, poisonous attacks, and clinging to the ceiling. Its physical attacks can be aggravating because they are difficult to avoid. If you're a melee fighter you'll obviously need to get in close to do damage, unfortunately the Gigginoxhas a bunch of fast, short range moves that come with little in the way of warning. Even though its rear and its head look almost identical, learn how to distinguish between them on the fly. Do this because if you approach it from the front you leave yourself open to some fast bite attacks. When you're actively attacking watch for it to rear up on its hind portions. If it does this, get out of the way, as It will try to body slam you, which will both knock you down and eat a chunk of your health.
Gigginox's poison attacks tend to mix in with the physical attacks. The thing to watch for is the color purple. If you see anything resembling purple mist or smoke coming from Gigginox, flee. It can perform a poisonous body slam that, in addition to causing physical damage, will leave you poisoned. Avoid this as you would the regular body slam. It can also spit gelatinous balls of poison at you that will stick to the ground and eventually explode into toxic gas. This is easy to avoid and shouldn't cause too much trouble.
Gigginox can cling to walls and ceilings, which it will do frequently. It uses this in two main ways. Firstly, it will cling to the ceiling and chase you around. If you stay in one place too long it will drop down and crush you with its body. Just keep moving and you should be able to avoid it without problem. It will also stay on the ceiling and then stretch it's mouth down to trying to grab hold of and then toss you into the air. When you land, you'll be immobilized for a moment. Gigginox will then suck you into its mouth and drain your health. If you see it doing this, just stay out of range until it finishes.
Lastly, and of less consequence, Gigginox can lay egg sacks from which Giggis will emerge. These are generally easy to ignore, but if they become too numerous they can make the fight more difficult. Destroying the eggs sacks when Gigginox lays them will prevent this.
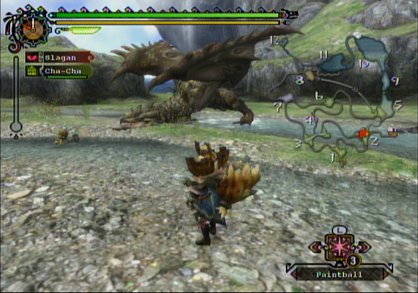
Rathian

Type: Flying Wyvern
Threat: 4
Weak Point: Head
Elemental Weakness: Thunder
Item Drops
From Body: Rathian Scale, Rathian Shell, Rathian Webbing, Flame Sac, Rathian Spike, (High Rank Only) Rathian Carapace, Rathian Scale+, Inferno Sac, Rathian Spike+
From Tail: Rathian Scale, Rathian Marrow, Rathian Spike, Rathian Plate, (High Rank Only) Rathian Scale+, Rath Medulla, Rathian Ruby
Quest Rewards: Rathian Scale, Rathian Shell, Rathian Marrow, Rathian Spike, Rathian Plate, (High Rank Only) Rathian Carapace, Rathian Scale+, Rathian Ruby
Special Rewards: (Destroy Head) Rathian Shell, Rathian Scale, Rathian Plate, (High Rank Only) Rathian Ruby, Rathian Carapace, Rathian Scale+ (Destroy Wings) Rathian Talon, Wyvern Claw, Rathian Webbing, (High Rank Only) Rathian Scale+
Glitter Drop: Wyvern Tear, Rathian Scale, Rathian Plate
Rathian looks tougher than it actually is. While it does possess a score powerful attacks, most of them are easy to avoid and Rathian itself is a bit less durable then some of the other monsters you'll have fought at this point. The key to beating Rathian is to learn the many prominent cues that precede its attacks. When up close for instance, it will illicit a high pitched screech right before performing a tail whip attack. Learn these indicators and you'll have little trouble getting out of the way.
There are some things to be cautious of though. When Rathian takes to the air, flee. Unless you're a bowgun fighter then hitting it will be impossible and its aerial charges are both damaging, and hard to avoid up close. They will also occasionally leave you poisoned. If possible aim for Rathian's head. While it obviously leaves you more open to biting and such, it is easily Rathian's most vulnerable point. If you can manage to score some good shots to its skull it will often topple over and lie incapacitated for a few seconds, leaving it open to attack.
Rathian isn't the hardest enemy you'll face, but don't let that fool you. If you're stupidly aggressive and go in guns blazing, then it will topple you. Just use your head and Rathian will go down easily.
Weekly digests, tales from the communities you love, and more
Stewart has been a freelance journalist writing for titles like GamesRadar, GamePro, IGN, UGO Entertainment, and more for over 13 years. He covers features, walkthroughs, reviews, and more in the video game space.


