Call of Duty: Black Ops 4 Zombies Voyage of Despair Easter eggs
How to find and unlock the Zombies Voyage of Despair map's hidden secrets

The Black Ops 4 Zombies Voyage of Despair Easter eggs see the Chaos crew right in the thick of it as the undead clamber aboard the Titanic on its infamous maiden voyage. Like all the Black Ops 4 Zombies maps – and all previous zombies modes in the franchise – there are plenty of Voyage of Despair Easter eggs to complete and they are not easy. This is our full Black Ops 4 Zombies Voyage of Despair guide which lists how to complete all the Easter eggs, find the Pack a Punch and Wonder Weapon, and much more.
- Black Ops 4 Zombies IX Easter eggs
- Black Ops 4 Zombies Blood of the Dead Easter eggs
- Black Ops 4 Blackout Character Missions - unlock all Zombies characters
Draining the water
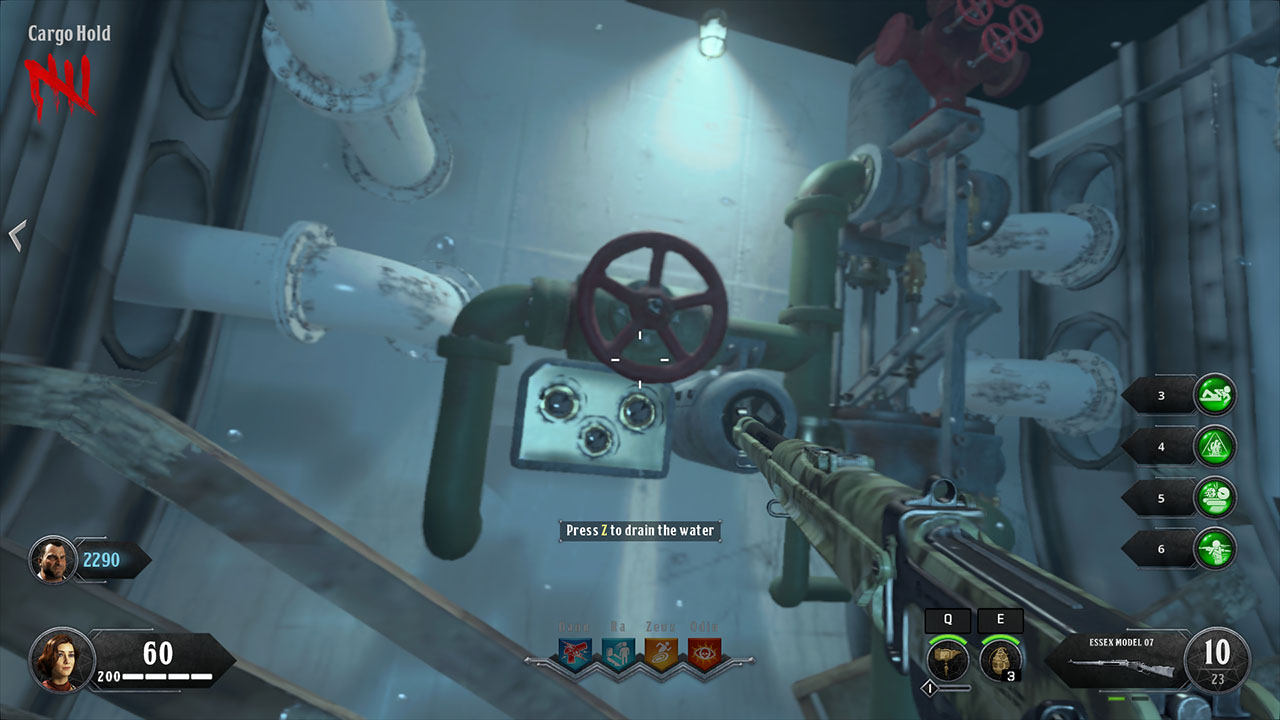
The very first thing you’ll want to do, at the same time as you go through the motions of unlocking Pack a Punch, is drain the water from the Cargo Hold and the Engine/Turbine Room. Follow the steps below in the Pack a Punch section to activate the Sentinel Artefact then, when you return to the Forecastle side and go down into the Cargo Hold, make sure you do this at the same time as the Pack a Punch pedestal.
When you reach the Cargo Hold Pack a Punch, look to your right-hand side. Against the wall should be a red handle attached to some pipes. Go up to it and interact with it to slowly drain the water from the room. By the time you come back, the water should all be gone.
When you make your way to the Turbine Room for the third Pack a Punch pedestal, swim past the pedestal to the Boiler Room. There’s an identical red handle underneath a light on the right-hand side, next to some blue pipes. Do the same thing again and the room will gradually drain all the water. Once both are complete, you no longer have to swim!
- Black Ops 4 Blackout Challenges
- Black Out 4 Dark Ops Challenges guide and how to complete them
- Black Ops 4 Blackout Character Missions - unlock all Zombies characters
How to unlock Pack a Punch
Unlocking Pack a Punch needs to be your first main aim in Voyage of Despair. It’s not particularly difficult, you just need to get from the Forecastle end of the boat to the Poop Deck. Unlock the bottom door in the Forecastle to go through the State Rooms, then keep unlocking the doors in front of you to get to the opposite end of the ship.
When you open up onto the Poop Deck, you’ll be able to see a blue light on a raised platform in the distance. That’s the Sentinel Artefact - head toward it and interact with it. When you do, an explosion will happen in the distance and you’ll see the artefact shoot a red light to the pedestal on the ground below.
This is a Pack a Punch pedestal. There’s four of them around the map. To unlock the Pack a Punch machine, you need to interact with all four, but be aware that the final pedestal you interact with is where the machine will spawn. Unlike other maps, the Pack a Punch machine on Voyage of Despair rotates between all four points but for the early rounds, the Poop Deck is actually the ideal place to have it. We’d recommend taking the fast travel from the Poop Deck back to the Forecastle then interacting with the pedestals in the following order:
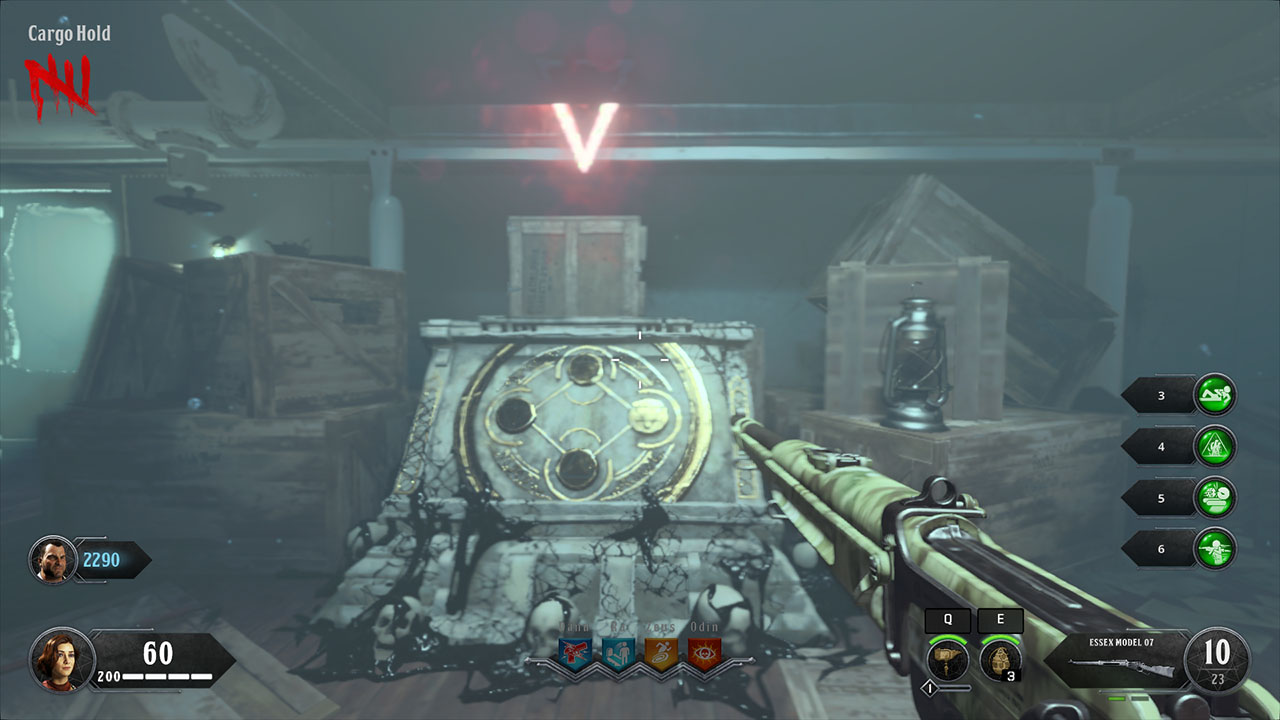
- Cargo Hold - Head to the Mail Room beneath the Forecastle and unlock the door to the Cargo Hold. Swim underwater to the very back of the Cargo Hold to find the first Pack a Punch pedestal.
- Lower Grand Staircase - The huge staircase in the middle of the ship is a great way to access each level of the boat. Head to it down the same path you travelled to reach the Poop Deck at the start, then when you reach the staircase, keep going down until you can’t go down any further. The Pack a Punch pedestal should be in front of you, shrouded in darkness.
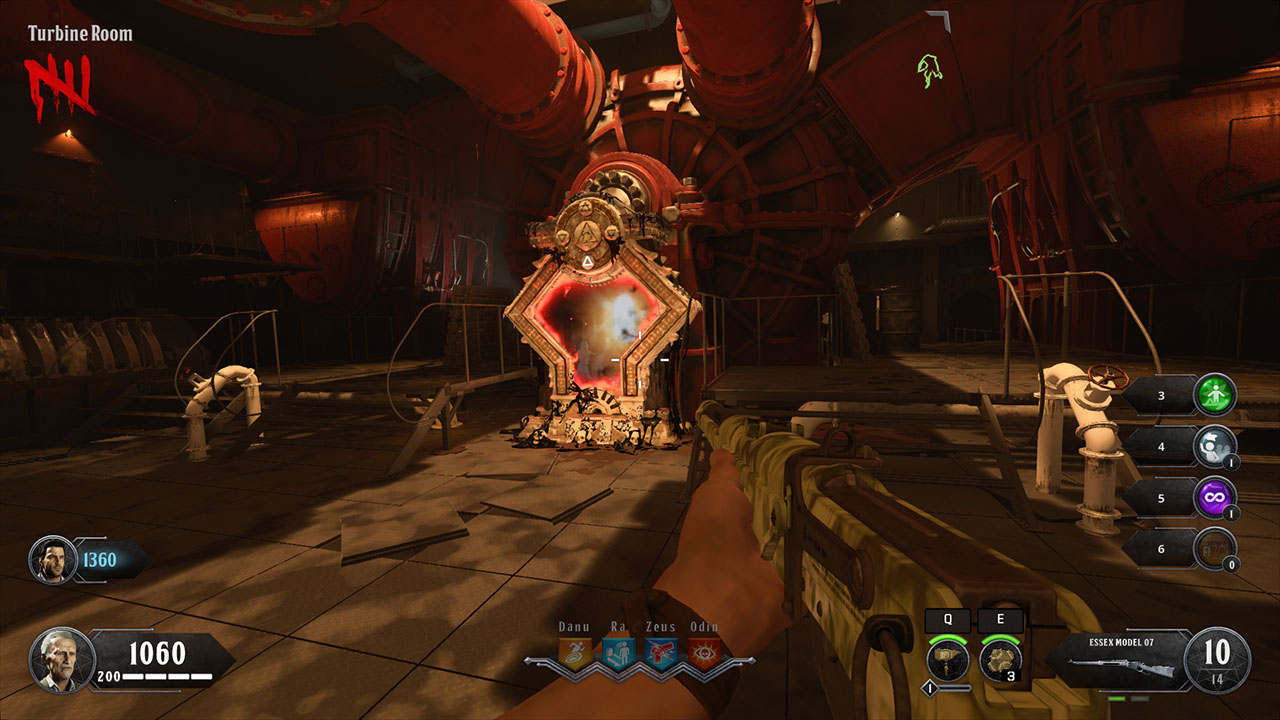
- Turbine Room - Head to the Poop Deck again but rather than going up the stairs to the very back, there should be a doorway that leads down underneath the Poop Deck. This will take you to Provisions. Open the unlocked door just past the room full of slaughtered animals and you’ll be in the Engine Room. Jump into the water and swim down to the back of the Engine Room to find the Turbine Room, with the Pack a Punch pedestal underwater next to the red turbine.
- Poop Deck - Finally, go back up to the Poop Deck and interact with the pedestal. This will cause the Pack a Punch machine to spawn there on the Poop Deck - the most accessible location of the four. It will eventually rotate to one of the other spawn points, though approaching a pedestal it isn’t at will tell you where it is.
Obtaining the Kraken Wonder Weapon
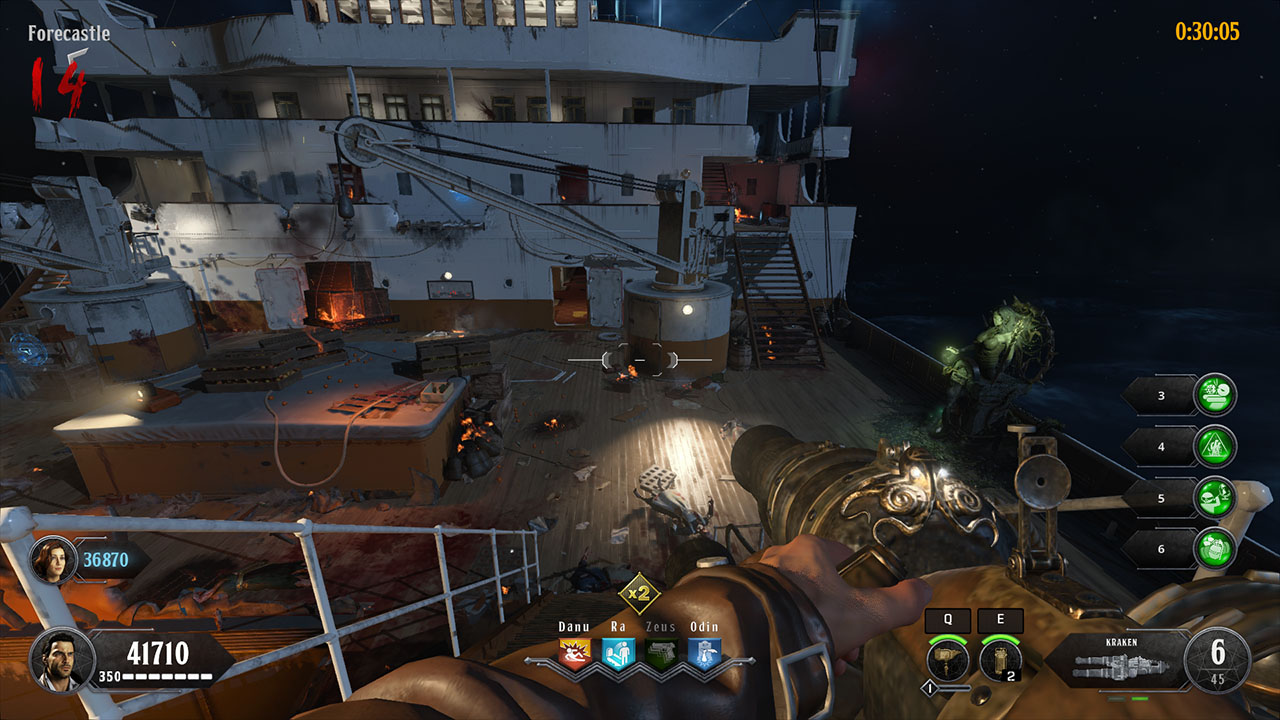
There are two ways to get the Kraken, though one is far more reliable than the other unless you’re particularly lucky.
The first method is via the Mystery Box. Of course, there’s a plethora of weapons it could give you instead so you might be there for 10 rounds wasting 950 points each time, or you could get the gun on your first try. If you’d rather obtain it for definite, you need to follow a much more complex series of steps.
First, you need to kill a Stoker by shooting its weak spots, indicated by the glowing areas. Stokers are the big fiery chaps that use shovels to fling hot coals at you, and we’ve found they don’t tend to appear until about round 10, so this method isn’t the quickest. When you kill one by shooting the weak spots, it will drop the Stoker’s Key.
Now you need to find a treasure chest on the map that can spawn in one of five locations:
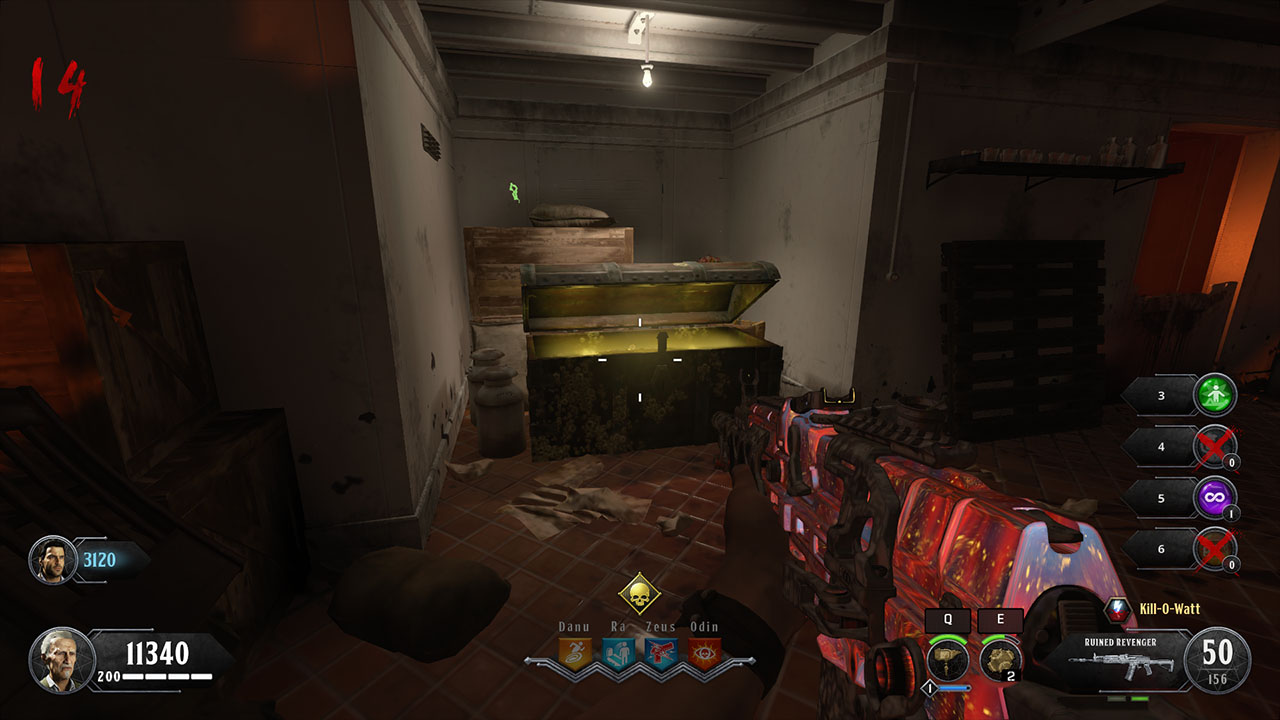
- Mail Room - The room below the Forecastle - the chest can spawn to the right of the staircase.
- Turbine Room - Take the fast travel portal from the Cargo Hold to the Boiler Room, then head into the Engine Room and back to the Turbine Room. The chest can spawn to the right of the Pack a Punch pedestal at the end of the path.
- Provisions - Head back up the stairs, the same way you unlocked the room at first to get to the Pack a Punch pedestal - the chest can spawn in the slaughter room/freezer.
- Galley - Through the Dining Hall and into the Galley, the chest may spawn in the back left corner.
- State Rooms - The final potential spawn locations is at the very back of the ground floor State Rooms, next to the door to the Millionaire Suites.
When you find the chest, you need to use the Stoker’s Key on it. You then need to feed zombies to it by killing in them nearby. It will absorb the zombie souls then, when it’s satisfied, it will vanish and teleport to one of the other four locations. Do this twice more and eventually, an item will appear in the chest.
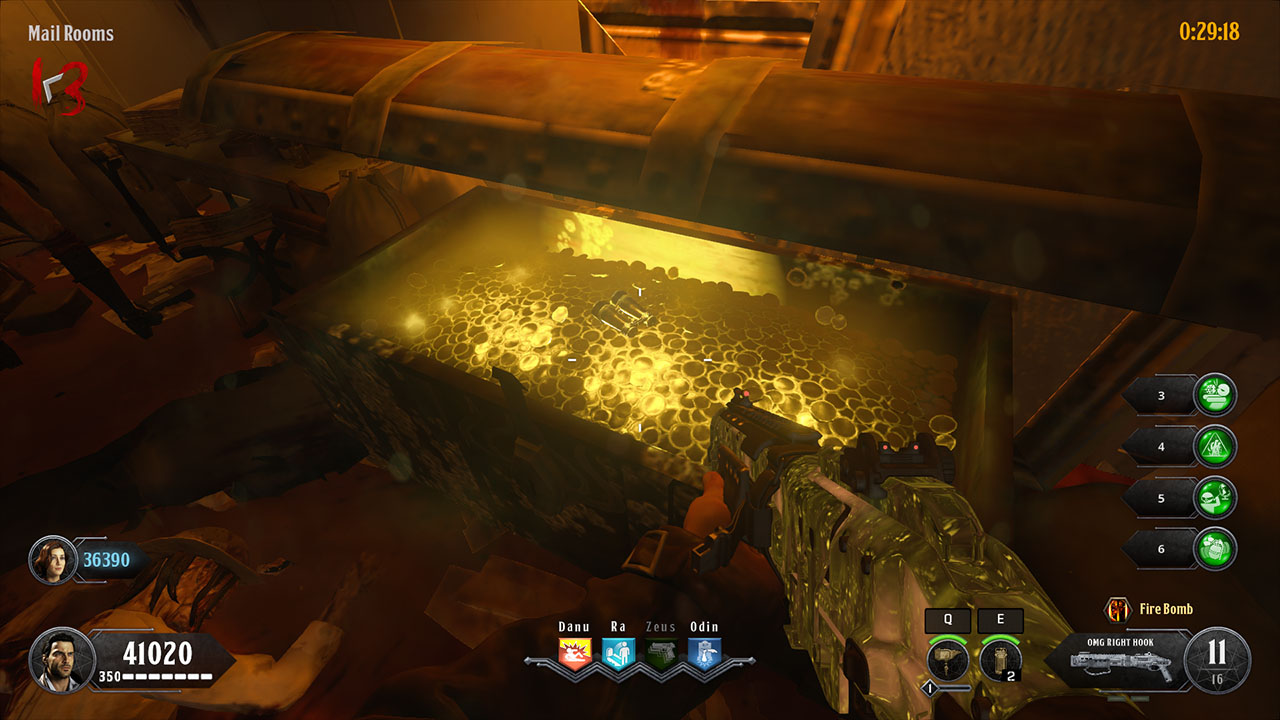
Depending on which item you got, these are the locations you need to go to:
- Binoculars - Forecastle - At the very back of the spawn area, a wooden box on the right hand side will have some binoculars on.
- Compass - Boat Deck - At the top of the Grand Staircase, take a left onto the Boat Deck and the wooden crate on the left will have a compass.
- Globe - Mid Deck - On the right-hand side of the Mid Deck, a globe will be on the wooden crate.
- Tool - Aft Decks - The Aft Decks are right next to the Poop Deck. When facing the Poop Deck, head to the left-hand side and there’s a small tool on another wooden crate.
- Telescope - Poop Deck - Finally, head to the very back of the Poop Deck to find a telescope on another crate.
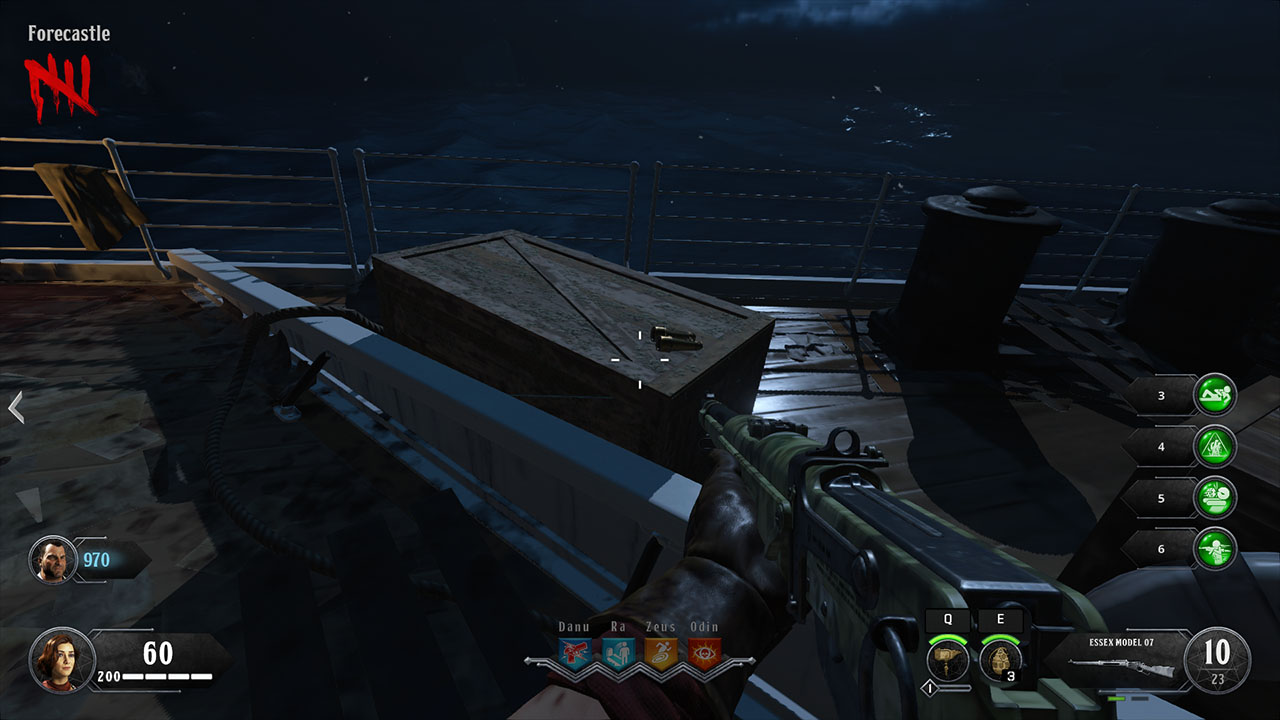
When you approach the right crate for your item, an enormous tentacle will explode out of the water and drop the Kraken Wonder Weapon on to the crate. Pretty nifty, right?
Upgrading the Kraken
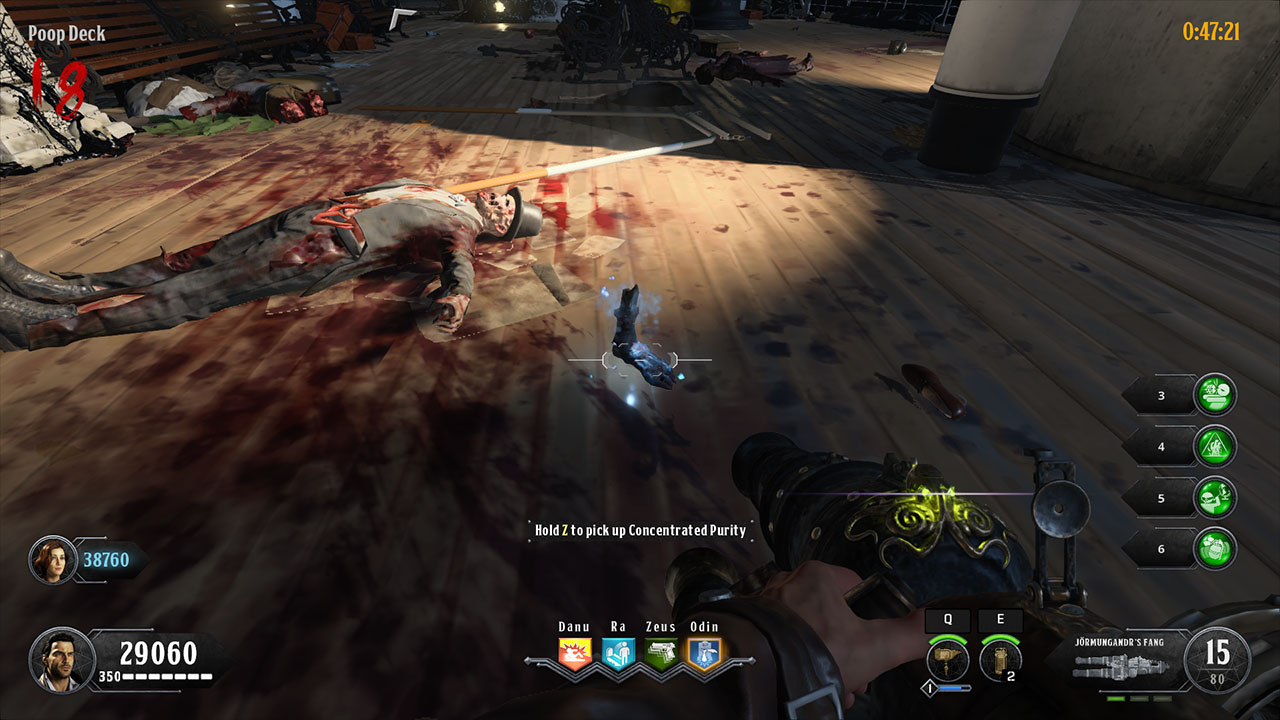
Now the Kraken Wonder Weapon can be placed into the Pack a Punch machine for a standard upgrade called the Cirein-Croin Crasher, but you can also add one of four elemental effects to the gun to turn it into one of the following: Jormungandr’s Fang, Grip of Akkorokamui, Inkanyamba’s Roar, or Breath of Leviathan.
To upgrade the Kraken or Cirein-Croin Crasher, you need to obtain four parts. Three of these parts can be found in the following areas:
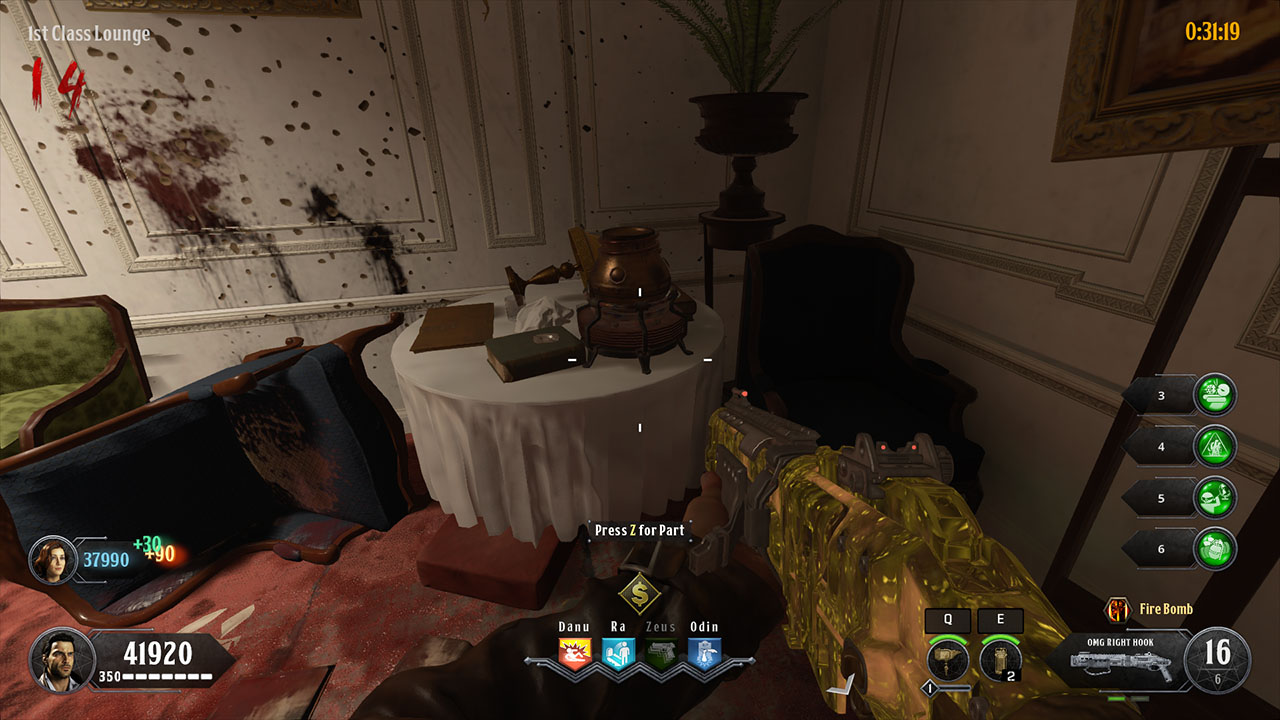
Part One
- Cargo Hold - When you’re at the Pack a Punch pedestal, turn around and the part can spawn on some crates to the left-hand side.
- Cargo Hold - Or it can also spawn toward the middle of the same area, on some other luggage.
Part Two
- Galley - At the back of the galley, on the table blocking off the fiery area.
- Galley - Head down the corridor to the opposite end, with some shelves. The part can also spawn on the left-most shelf, next to some rolled up pieces of paper.
Part Three
- 1st Class Lounge - Head to the A Deck part of the Grand Staircase. Go through the door on your right - next to the Mystery Box - then up the wooden plank used as a ramp. The part can spawn on the first table to your right.
- 1st Class Lounge - From the first spawn point, look round the corner to your left and it may spawn on another table in the room.
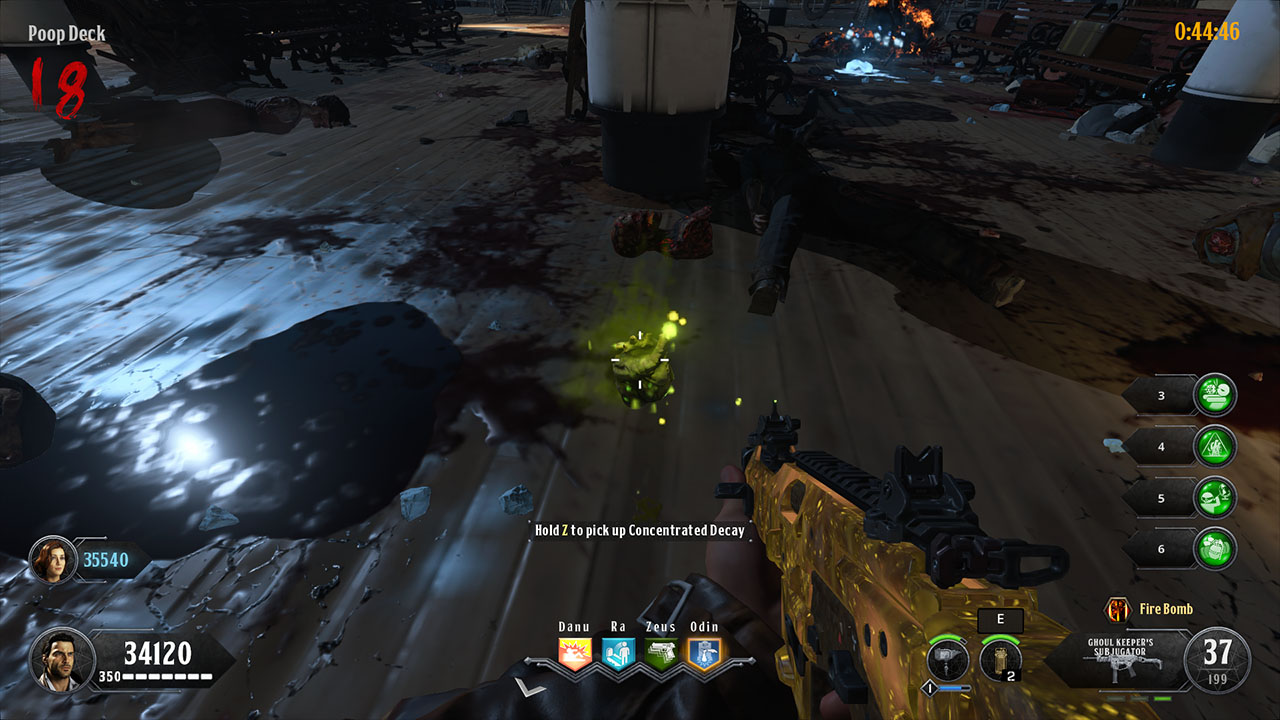
Now to get one of the four elemental upgrades, you need to kill the elemental zombies. Each time you kill one of the mutated ones, they have a chance to drop some plasma corresponding to their type - fire, ice, poison, or electric. Once you’ve got the plasma for the type of Kraken you want, head down to the Engine Room and approach the crafting table to the side of the room.
Interacting with the table with all four parts will create a Distillation Kit. It costs 6,000 points to upgrade, but you can then interact with the kit and upgrade your Kraken. You can do this multiple times, as long as you pick up the plasma each time, and it refills your Kraken with ammo. Bear in mind that later on in the main Black Ops 4 Zombies Voyage of Despair easter egg, you will need the Jormungandr’s Fang (Poison) version of the Kraken.
Building the Ballistic Shield
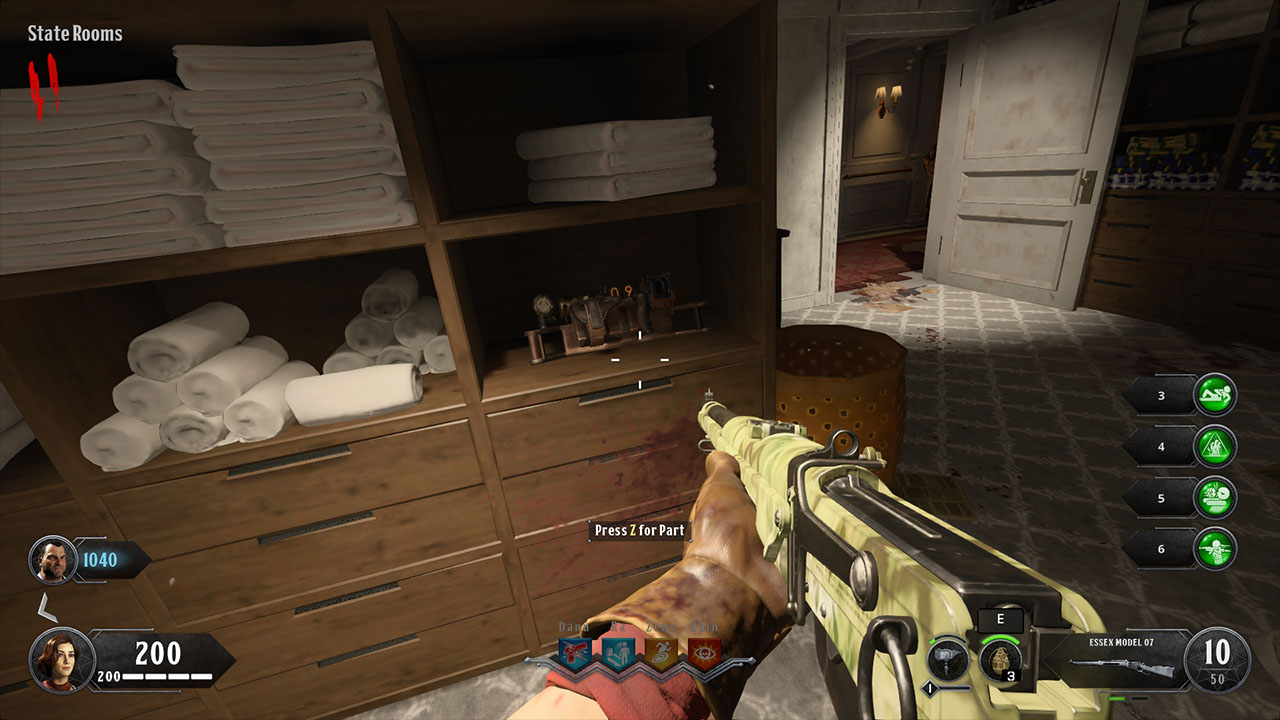
You don’t necessarily need to get the Ballistic Shield to complete the main Voyage of Despair easter egg, but it’s a great tool to have to help you survive, as it can block zombie hits and comes equipped with a very powerful automatic pistol. In order to craft the Ballistic Shield, you’re going to need to find three parts:
Part One
- State Rooms - On the ground floor, approach from the Forecastle and stick to the right-hand side. It can spawn on a rocking chair through some gaping holes in the walls.
- State Rooms - Cross over to the left-hand side and go into the laundry room. The part can spawn on a shelf next to some towels.
- State Rooms - Go into the next room in front of you with another gaping hole in the wall. It may spawn on an armchair next to a single bed.
Part Two
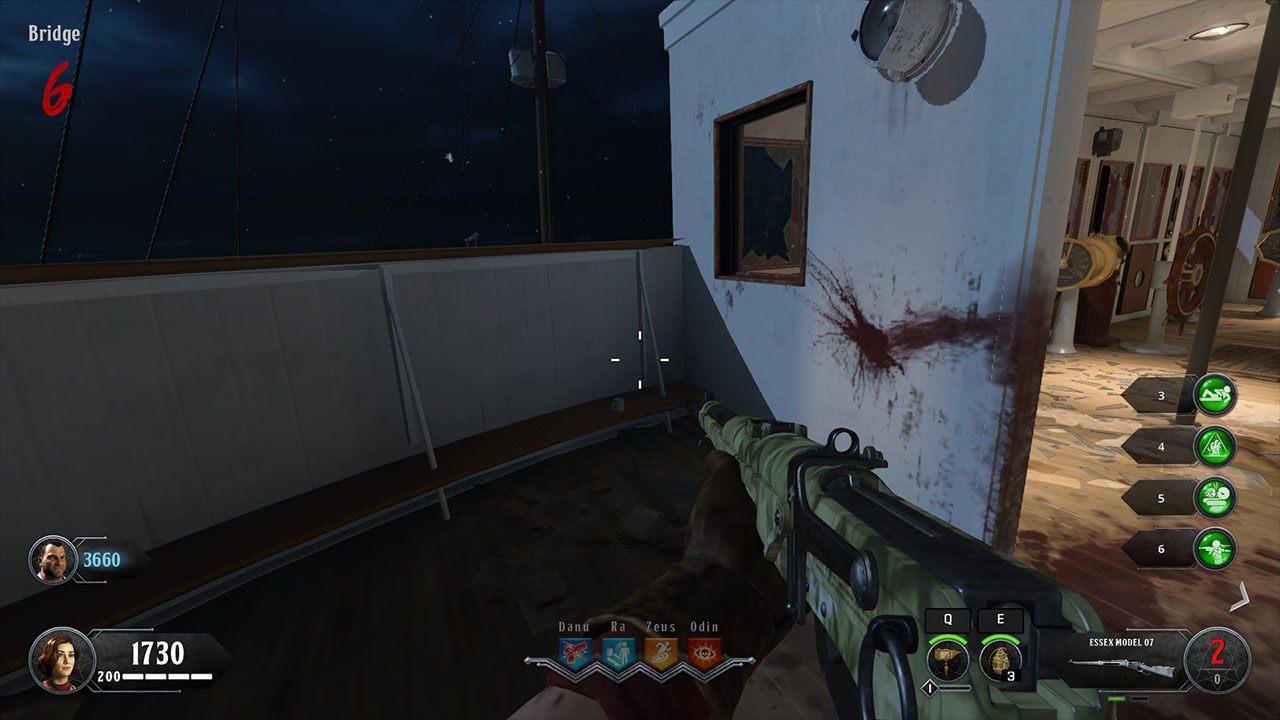
- Bridge - Go up the right-hand side stairs from the Forecastle and the first part can be on the left when you turn around, next to the smashed window looking in to the four dials and the wheel.
- Bridge - Turn around and go to the right-hand side door at the back of the bridge. A part can spawn just inside the second door, on a wooden crate on some metal beams.
- Bridge - Turn and keep going further into the Bridge. This one is impossible to miss, as it’s just sat on a handrail in the middle.
Part Three
- Provisions - From the slaughter room/freezer, head toward the door to the Engine Room but look left, and the part can spawn on the other side of a stack of boxes near the door.
- Provisions - Go to the left-hand side and to the end of the hallway. The part can spawn right at the back, in front of the inaccessible area on fire.
- 3rd Class Berths - It can also spawn in the 3rd Class Berths, right above the Provisions area. Head up the stairs and like the second part, it can spawn atop a handrail through an enormous hole in the wall.
To craft the shield, you’re going to want to head out to the Poop Deck. Just down from the Pack a Punch pedestal is a crafting bench. Build it there and, voila, you have the Ballistic Shield.
Matching the clocks and the symbols
Now it’s finally time to get to the main easter egg. This is the stage you’ll need a pen and paper for, so make sure you have those - or a similar note taking apparatus - nearby.
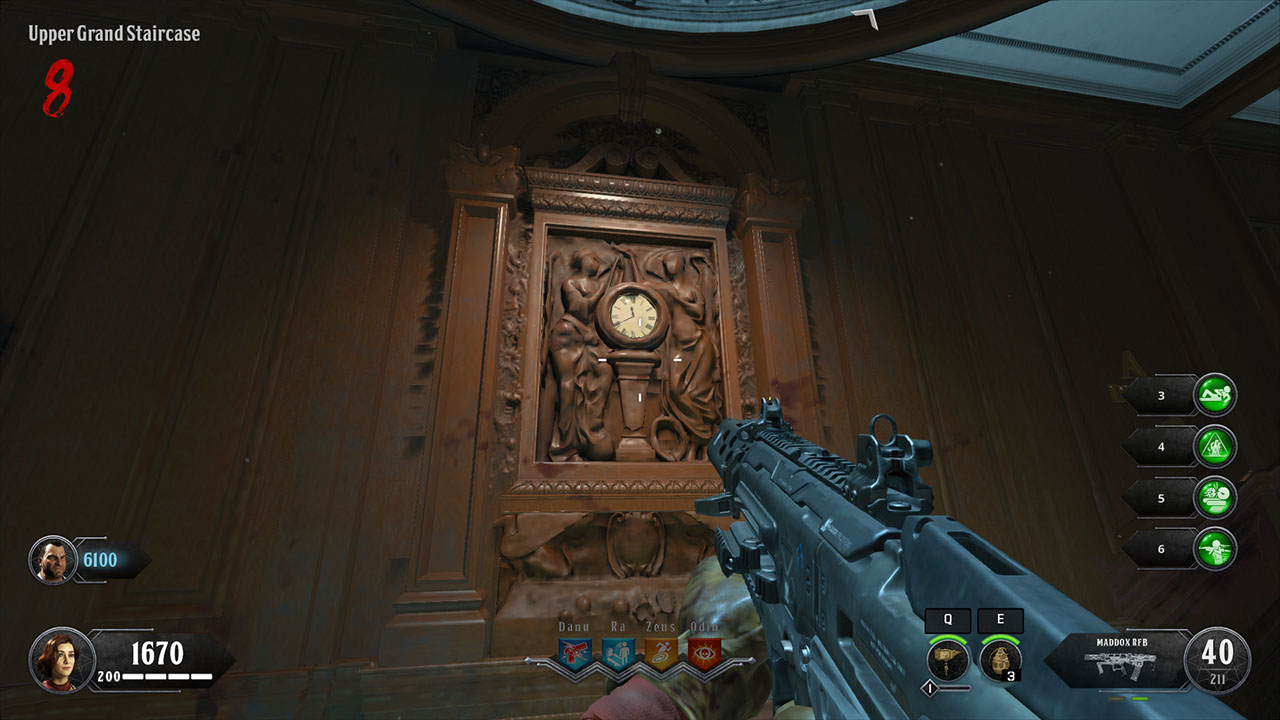
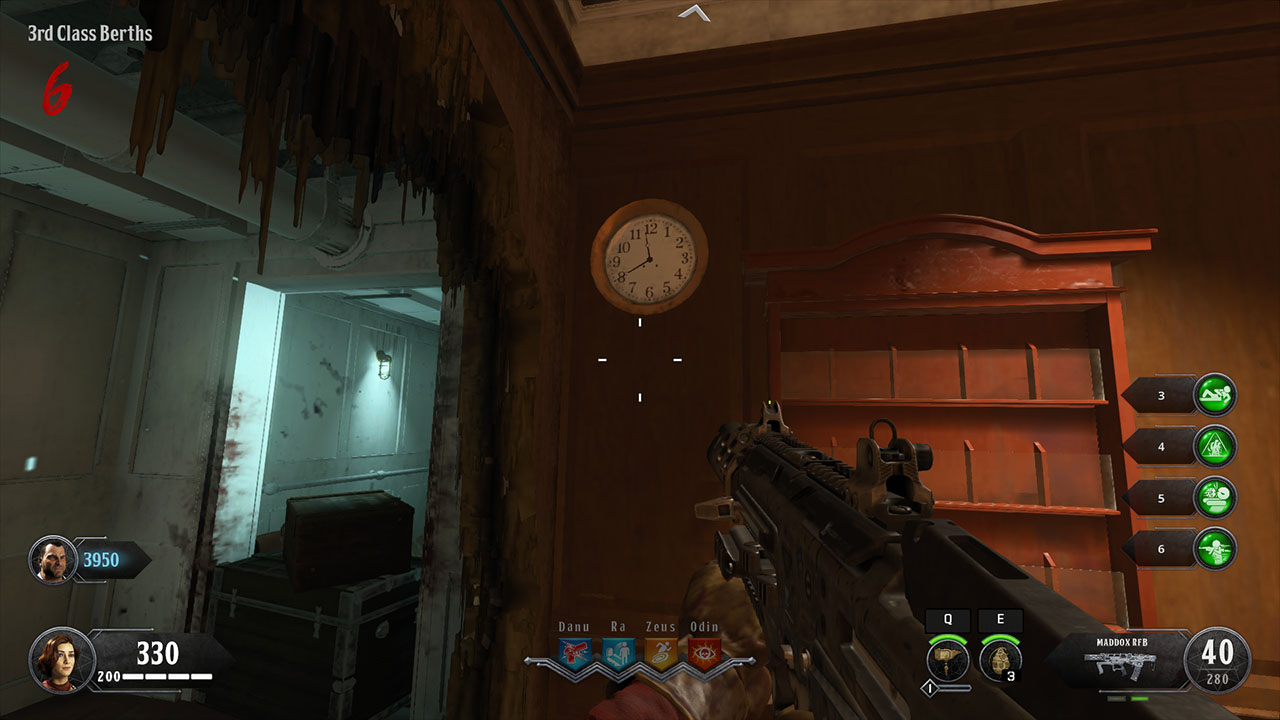
The gist of this is that there are six clocks throughout the map, and four of them will be displaying a time that isn’t 11:40. If you see a clock that has any other time on it, you need to find the nearby symbol. When you find the clock displaying a time other than the default 11:40, take note of the time, then look for the nearby symbol and note that down. The symbols are four triangles - there will be two standing up, one with a line through and one without, along with two upside down, one with a line through and one without. If you’re taking notes on your phone, an easy way to do this is to record “TIME - UP/LINE”, “TIME - DOWN/NO LINE”, etc.
Mail Room
- Clock - On the right-hand side of the doorway leading to the Cargo Hold.
- Symbol - Underneath the metal stairs leading down to the Mail Room, by the Vapr wall-buy.
Bridge
- Clock - Right above the steering wheel in the room behind the four dials.
- Symbol - Underneath the desk behind the steering wheel and to the left.
Upper Grand Staircase
- Clock - At the top of the staircase is a clock engraved into the wall.
- Symbol - Turn around and look above a closed door to the left for the symbol.
1st Class Lounge
- Clock - Above the fireplace is a small mantelpiece clock.
- Symbol - To the left of the Mystery Box spawn, the symbol is on the wall underneath a three-piece candle holder.
Galley
- Clock - On the wall opposite the hanging corpse.
- Symbol - On the side of the cabinet to the left of the clock.
3rd Class Berths
- Clock - At the foot of the stairs from the Poop Deck.
- Symbol - Turn around when looking at the clock and check underneath the stairs, behind the crates and luggage.
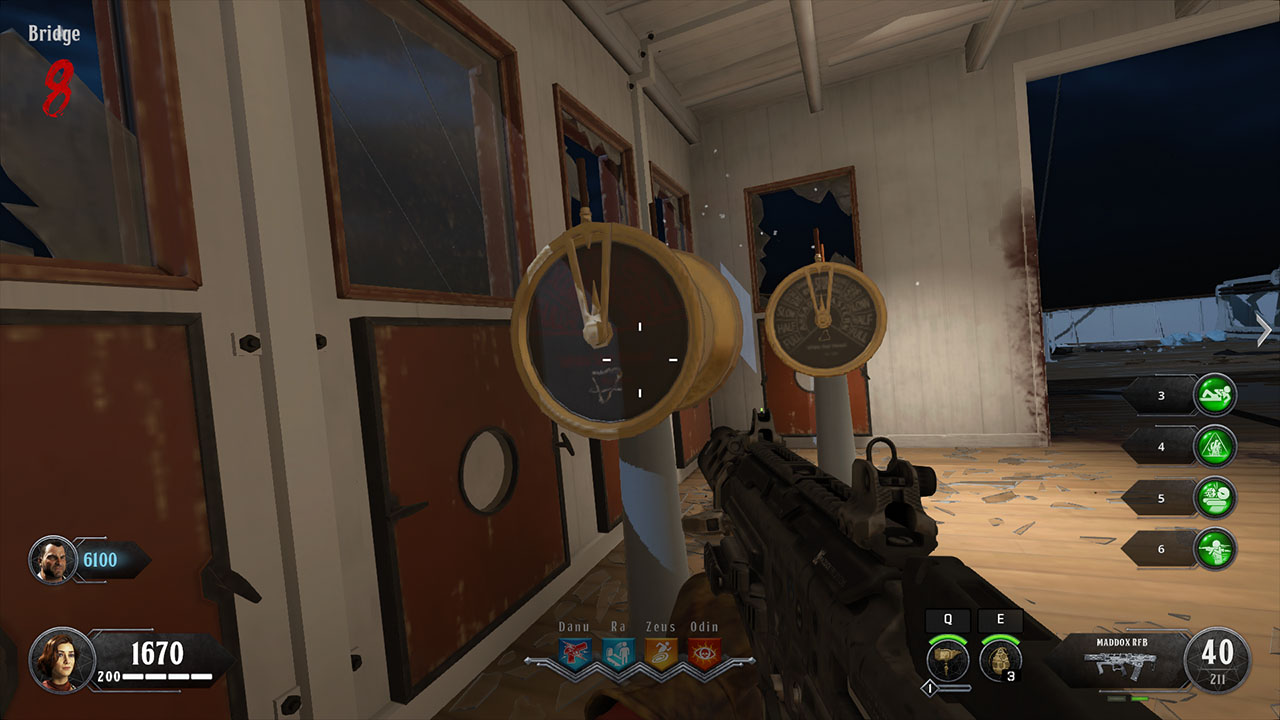
When you’ve found all four clocks and symbols, you need to go to the Bridge. At the front of the Bridge you’ll see four dials by the steering wheel. Look closely at each one, and you’ll see each of the four symbols engraved into the dials.
You need to interact with the arrow on the dials to make them point to the respective minute for each of the times. For example, if you found the UP + LINE triangle symbol by a clock that displayed the time 12:10, you need to move the arrow two notches to the right to represent the 10th minute (it moves in increments of five). Once you have correctly done that with all four times, it should lock into place.
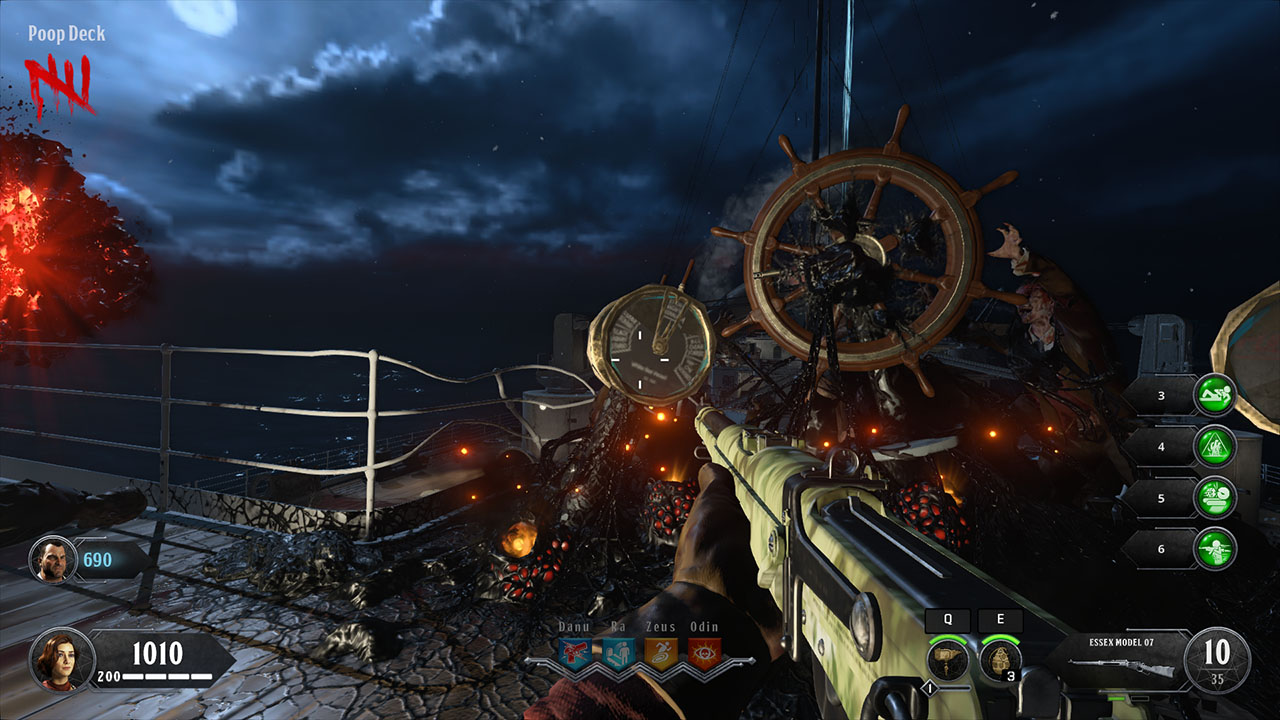
Next, head to the far end of the Poop Deck, where you interacted with the Sentinel Artefact for the first time. Next to the wheel should be two similar dials but without markings. The one on the left is for the UP + LINE symbol, while the one on the right is the DOWN + LINE symbol. You’re going to want to input the respective hours into these dials. The time starts at 12/midnight, so interact with it left to turn it down to 11, 10, 9 etc. while going right will make the time 1, 2, 3, and so on.
For the other two symbols (down + up with no lines) you need to go to the Engine Room. Go down to the lower walkways, which should no longer be flooded if you drained the water, and you’ll see four dials on the sides of a pole. When looking at all four, you want to ignore the bottom right and top left ones as they’re visibly busted. Interact with the bottom left dial for the UP symbol, and the top right done for the DOWN symbol. Treat them the same as the ones on the Poop Deck, and when they’re done, you’ve completed this stage.
Finding the outlets
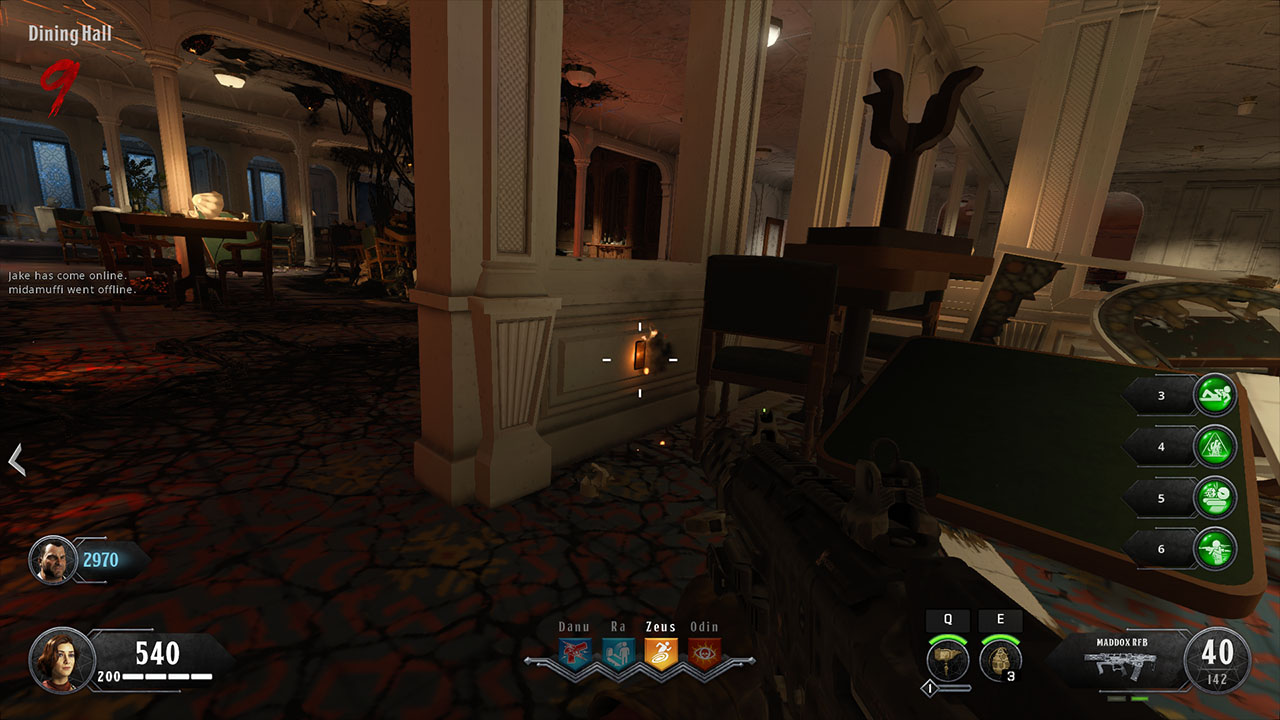
Your next job is to find four electrical outlets around the ship that will be sparking different colours. There are six spawn locations in total, so check all of these six, and four should be emitting red, green, blue, or yellow sparks.
- 3rd Class Berths - Down the first set of stairs from the Poop Deck, take a left and the outlet is on the right-hand wall.
- Aft Decks - Up the stairs from the Poop Deck and through a central zombie window.
- 1st Class Lounge - Next to the Zeus Perk Statue.
- Upper Grand Staircase - Near where the symbol spawns, to the right of the clock and along the wall.
- Dining Hall - While facing the Ra Perk Statue, turn around and walk to the right. It’s behind one of the white wooden panels segregating the room.
- State Rooms - From the Forecastle, go into the ground floor left State Rooms entrance and go left into the first room. The outlet is on the wall next to two painting.
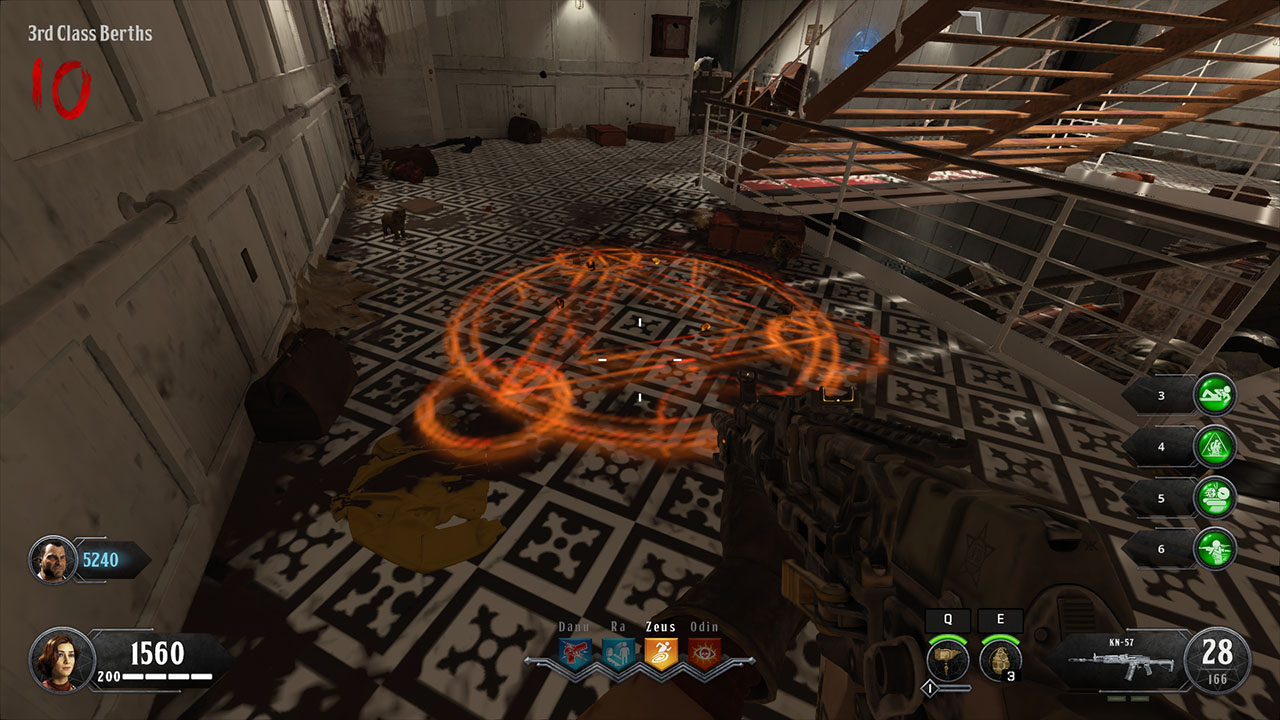
When you’ve found the four outlets sparking different colours, you need to find the respective elemental zombie for that colour and lead it there. Kill it right next to the outlet and a ritual symbol will appear on the floor. Do this for all four zombies and voila! Four ritual symbols will appear.
Now we can’t stress enough that this part needs to be done in the following order: Poison > Water > Electric > Fire. Remember which ritual symbol corresponds to each element because you need to have everyone in the game go to the Poison symbol and interact with it first. This will take you to a mini-boss fight where you simply need to survive and kill all of the incoming enemies. If you do them in the wrong order you will have to start over. When you’ve done it, you’ll be able to pick up a fake Sentinel Artefact. Do all four symbols in the above order and you’ll eventually receive the real Sentinel Artefact.
When I’ve been doing this stage of the Black Ops 4 Zombies Voyage of Despair Easter egg, it’s been slightly finicky. Sometimes the ritual symbol won’t appear on the floor for a second outlet if there’s already one ritual symbol somewhere else. For the least hassle, and to avoid running into this problem, I’d strongly recommend killing the Poison elemental, interacting with the ritual symbol, completing that wave of enemies, then moving on to the Water one, and so on.
Plugging the leaks
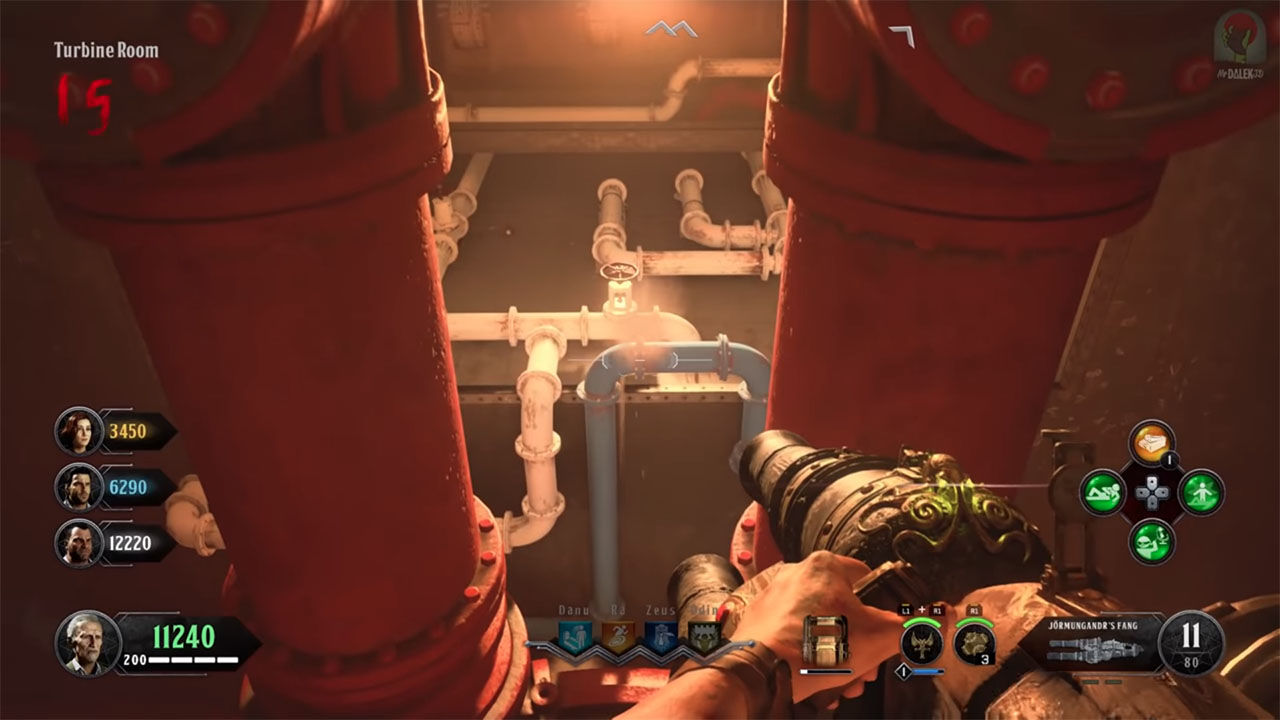
By now, you need to ensure you have the Decayed Kraken, or the upgraded version, Jormungandr’s Fang. Head down to the Turbine Room, and along the walls you’ll see leaking pipes with steam coming out. Shoot all of the burst pipes with the Poison elemental Kraken and it will fix them. You’ll know you’ve done it correctly because a kill hitmarker will show up for each one. There are nine points you need to shoot in total.
When you’ve completed all nine, the water level in the room will start to rise again (so much for draining it all earlier!). If the Pack a Punch machine was already in the room during the process, approach it and it will allow you to Pack a Punch the Sentinel Artefact. If the Pack a Punch machine isn’t in the Turbine Room, you’ll need to finish the current round, and at the end of the round the Pack a Punch machine should teleport back to the Turbine Room. Thankfully, it doesn’t cost anything to Pack a Punch the Sentinel Artefact so go ahead and do that, then make your way back outside to the Forecastle.
Finding the planet symbols
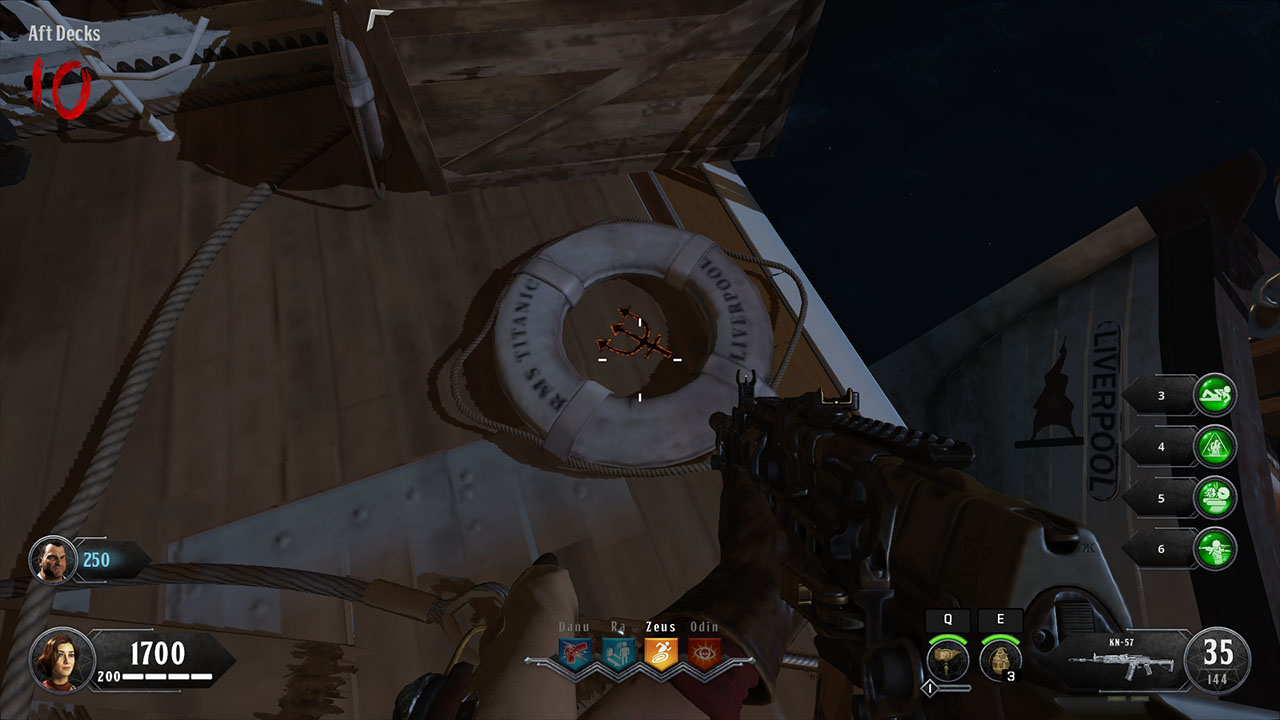
Once again, you’re looking for more symbols around the map. You may have spotted some of these markings already just through playing, but what you won’t have realised is that they each correspond to a planet. You need to find all nine symbols and interact with them in the following order. Here is where you can find all nine symbols:
- Sun - Forecastle - Right where you spawn, the Sun symbol will be at the back, on the side of the curved funnel next to the fast travel portal.
- Mercury - Mail Room - Go down the stairs to the Mail Room and the Mercury symbol is at the bottom of the second flight of stairs on your left.
- Venus - Millionaire Suites - From the Lower Grand Staircase, go into the Millionaire Suites and you’ll see the Venus symbol under the bedside table.
- Moon - Lower Grand Staircase - On a closed white door to the right of the staircase.
- Mars - Boiler Room - Approach the fast travel portal, turn around then go prone. The Mars symbol is below the floor, on the wall where the wall sticks out slightly next to a red pipe.
- Saturn - Bridge - When facing the Forecastle direction, walk past the room with the metal beams for a floor (the same room one of the Ballistic Shield parts can spawn in) and go into the next room on the right. The Saturn symbol is on the side of a cabinet next to the zombie window.
- Jupiter - Engine Room - Approach the Odin Perk Statue, turn around, and the symbol is on the floor near the stairs leading down.
- Uranus - State Rooms - Hilariously, you can find the Uranus symbol in one of the bathrooms. Opposite the MOG-12 wall-buy, go into the bathroom and the symbol is right behind a potted plant in the corner.
- Neptune - Aft Decks - Near the top of the suspended lifeboat, the Neptune symbol is inside the ring buoy marked RMS Titanic - Liverpool.
Interacting with the solar system model
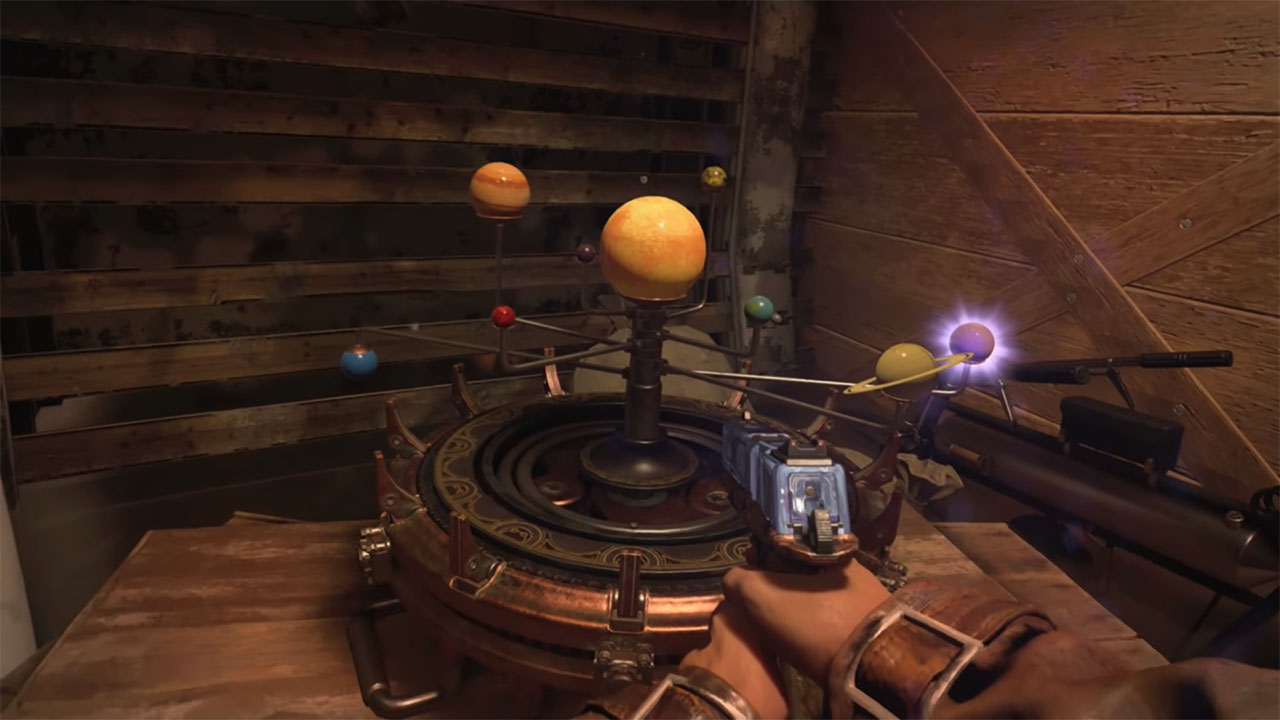
Now we need to make abundantly clear that once you start this next step, it will spawn an endless wave of zombies. Your current round will not come to an end until you either complete or fail the step. So make sure you’ve got everything you need ready, then go down to the Cargo Hold.
Look for the model of the solar system with all seven planets, the Moon, and the Sun. Interact with it, and the planets will start flashing in a random order. Make note of this order because failing this will mean you need to restart it all over again.

Head outside and look to the sky. You’ll see all of the planets, including the Sun and the enormous Moon, except for Neptune. That’s because Neptune is actually in the water, floating around and periodically appearing. You need to shoot each planet in the sky, then go to where you found the original symbol as quickly as possible. A timer starts as soon as you shoot it, so if you don’t make it in time, you have to wait another full round before you can give it another shot. Interact with each orb as soon as you can after shooting the respective planet, then your final one will always be the Sun. Before you shoot the Sun, make sure you have enough ammo and Pack a Punch weapons because you’re nearing the final boss fight.
Race against time
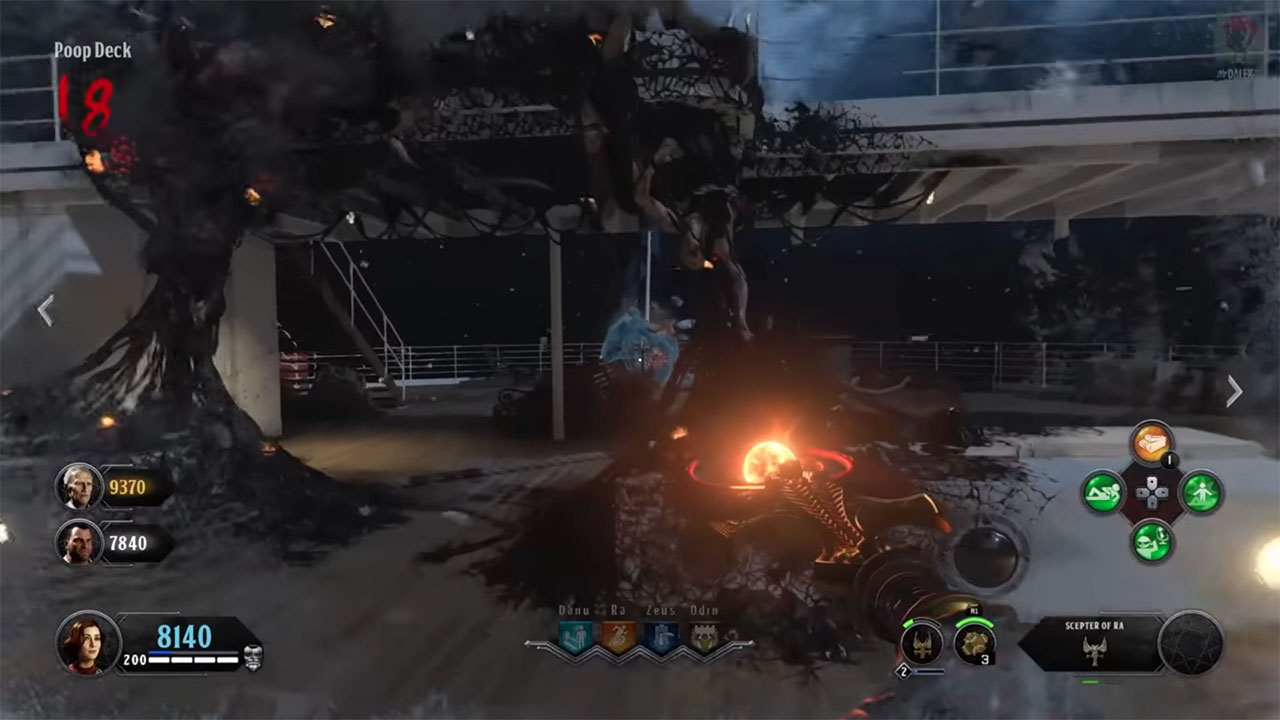
Make your way to the Forecastle and shoot the Sun from there. The orb will come and rest by the original symbol. When you have all players interact with it, the screen will flash white and a timer will begin.
Your goal is to make it to the Poop Deck as quickly as possible. The fastest route we’ve found is to take the staircase to the right - make sure you’re breaking as many of the ice blocks as quickly as possible. Once you reach the opposite end of the ship, near where you grabbed the Sentinel Artefact at the start of the game, a red symbol will appear on the floor. This is the portal to the final boss fight, so spend enough time making sure you have everything you could possibly need before you activate it. We recommend having at least one person with a Pack a Punched Hellion Salvo for the immense damage and splash radius it deals.
Eye of Odin boss fight
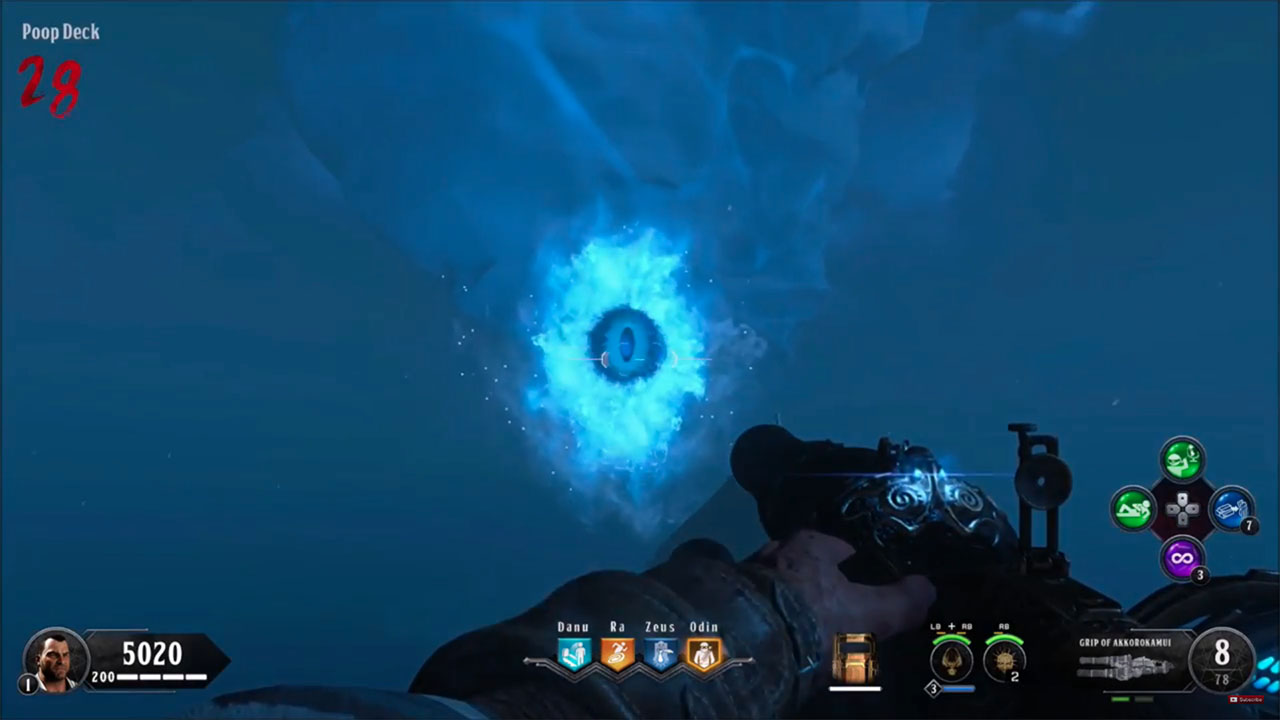
As soon as everyone interacts with the red symbol, you’ll be teleported into the water. Swim as fast as you can to the nearby tree and interact with the Sentinel Artefact found nearby to teleport back to the boat. When you get to the boat, the Eye of Odin will appear.
Don’t shoot at the Eye yet because you can’t deal any damage to it. Instead, kill all the enemies that appear; Stokers, Elemental Zombies, Blightfathers, the lot of them. When you’ve survived the first wave, you’ll be teleported to the Engine Room.
Do the same thing again in the Engine Room - shoot at all the enemies that appear, but don’t bother shooting at the Eye because it’s still invulnerable. Once again, as soon as you’ve killed all the enemies, you’ll get teleported to the State Rooms.
Now, in this third phase, only normal zombies and Stokers should spawn. The Eye of Odin will also start firing a bright blue beam at you which will freeze you if you get caught in it. The only way to escape the ice is to melee out of it. When the Eye is firing its laser, shoot it in the pupil to deal damage. This is where the Hellion Salvo comes in handy, because of how much hurt it deals.
Once you’ve dealt enough damage to the eye, you’ll be teleported out again, this time to the Promenade Starboard Deck. The Eye of Odin will be flying around the ship in the water - keep shooting it with the Hellion Salvo again to deal as much damage as possible.
The final place you’ll be teleported to is the Poop Deck, and for this phase you need someone with the Kraken. Keep shooting the eye with the Hellion Salvo at first, then, eventually, it will go to the very back of the Poop Deck and start a charging animation. In order to get it to stop charging, shoot it with the Kraken. The Ice upgraded version is more effective than the other elemental types for this, but it’s still doable without. If you fail to stop it charging, the Eye of Odin’s resulting attack will down every single player that isn’t using the Dying Wish perk. You need to stop if from unleashing its charge attack three times. Once you’ve done it the third time, the Eye of Odin will be defeated and the final cutscene will commence. Congratulations - you’ve completed the Black Ops 4 Zombies Voyage of Despair easter egg!
If you're done with Zombies after all of that, why not check out our Black Ops 4 Blackout tips?
Weekly digests, tales from the communities you love, and more
Give me a game and I will write every "how to" I possibly can or die trying. When I'm not knee-deep in a game to write guides on, you'll find me hurtling round the track in F1, flinging balls on my phone in Pokemon Go, pretending to know what I'm doing in Football Manager, or clicking on heads in Valorant.
