Empire: Total War
We clock up some hands-on time with the latest code of Creative Assembly's epic RTS
Horse-drawn cannons allow for the rapid deployment and movement of your artillery. Whereas shifting artillery was previously akin to pushing a bear up a downward escalator, cannons can now be moved to a new location in seconds. Placing them intelligently is also paramount. This became painfully apparent when we sent a cannonball scything through the spines of dozens of our own troops standing directly in front of our artillery. It was a flash of military genius to rival even Field Marshal Haig’s brilliant WWI strategy of marching thousands of men towards German machine-guns.
With the Brits advancing up the steep gradient from three directions, we wheeled our cavalry around their left flank in a bid to drive a wedge through the heart of their forces. Our men bayed a war cry that mingled with the stampeding hooves of their mounts, charging for glory with swords outstretched, racing past an abandoned farm before collapsing en masse as a group of garrisoned enemy snipers parted them from their brains as they rode past. This was going to be tougher than we thought.

Moments like these proved Creative Assembly’s commitment to ensuring that Empire’s AI is a marked improvement over the irritatingly predictable and moronically static opposition tactics we often witnessed in Medieval II. Where troops once attacked in a single tide they now spread out and probe, searching for gaps in our lines to divideour forces.
Still smarting from the loss of half our cavalry and with the advancing Brits tenderized by some well-placed cannon balls, we ordered our troops to open fire. A cloud of smoke formed from 500 musket puffs as balls of lead cut into the enemy ranks. Scores of Redcoats dropped. The bombardment continued, each volley reducing the enemy’s forces by 10 and sometimes 20 men. The two armies traded salvos as they closed, each volley more devastating than the last. With a single mouse click we changed our troops’ attack orders to melee and sent a sea of blue uniforms sweeping down the hill at the enemy.
Zooming into the action revealed a previously unmatched level of battlefield realism and detail, with each motion captured soldier actively seeking out an opponent before engaging in a mortal shoving and stabbing match. Men toppled into the mud, squirming with terror before receiving a deft bayonet jab to the windpipe. After a titanic, 20-minute struggle the tide turned our way with the enemy hightailing it thanks in no small part to a bullet to the British general’s head that broke his men’s morale. With the real-time battle ended, it was time to test out the campaign map. Once again, while initially familiar to any Total War veteran, the first impressions proved deceptive with further probing revealing some subtle nuances.

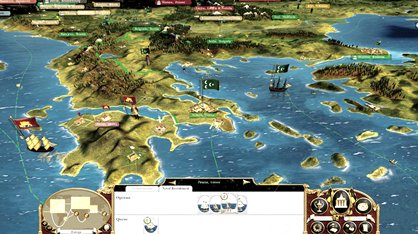
One of the most fundamental transformations was how regions were pocked with settlements. While the capital city remains the heart of each one, a series of smaller towns also make up your holdings. A region can still only be captured by conquering the capital, but you now have other options too. With the Battle of Bunker Hill successfully navigated, we advanced our troops into enemy territory, only to find the Brits firmly entrenched inside the towering walls of the region’s key city. But with the outlying towns only lightly defended, we channeled all our efforts into attacking them instead, strangling the region’s income and forcing the hiding enemy into the open for a face-to-face confrontation.
Weekly digests, tales from the communities you love, and more


