Black Ops Cold War Outbreak Easter Egg guide
Radio locations, maps and more for the new Call of Duty Outbreak Easter Egg

This Cold War Outbreak Easter Egg guide will guide you through this zombie challenges (and we've also got a Cold War Forsaken Easter Egg guide and Cold War Mauer Der Toten Easter Egg guide too if you're looking for that). As COD Zombies go this Outbreak Easter Egg is a tough one and involves a lot of tricky steps that don't always make sense and definitely aren't something you're likely to work out on your own. This Outbreak Easter Egg guide will walk you through every step and make sure you get what needs to be done, done.
With that in might, make sure you read the walkthrough through first before trying anything as there are fairly complex things to do and you don't want to be working stuff out while you're also fighting an undead hordes at the same times. There's a long journey to completion ahead of you and really don't want to fumble the whole thing an hour or two in. In this COD Cold War Outbreak Easter Egg guide, we’ll walk you through completing all the step required with maps and images to keep you on the right track as you battle to clear this Black Ops Cold War Outbreak mode, step-by-step.
Black Ops Cold War best guns | Cold War Zombies Firebase Z Easter egg | Black Ops Cold War Zombies guide | Black Ops Cold War Zombies Easter Egg walkthrough | The best guns in Cold War Zombies | How to upgrade DIE Shockwave in Cold War Zombies | Firebase Z Wonder Weapon
Starting tips
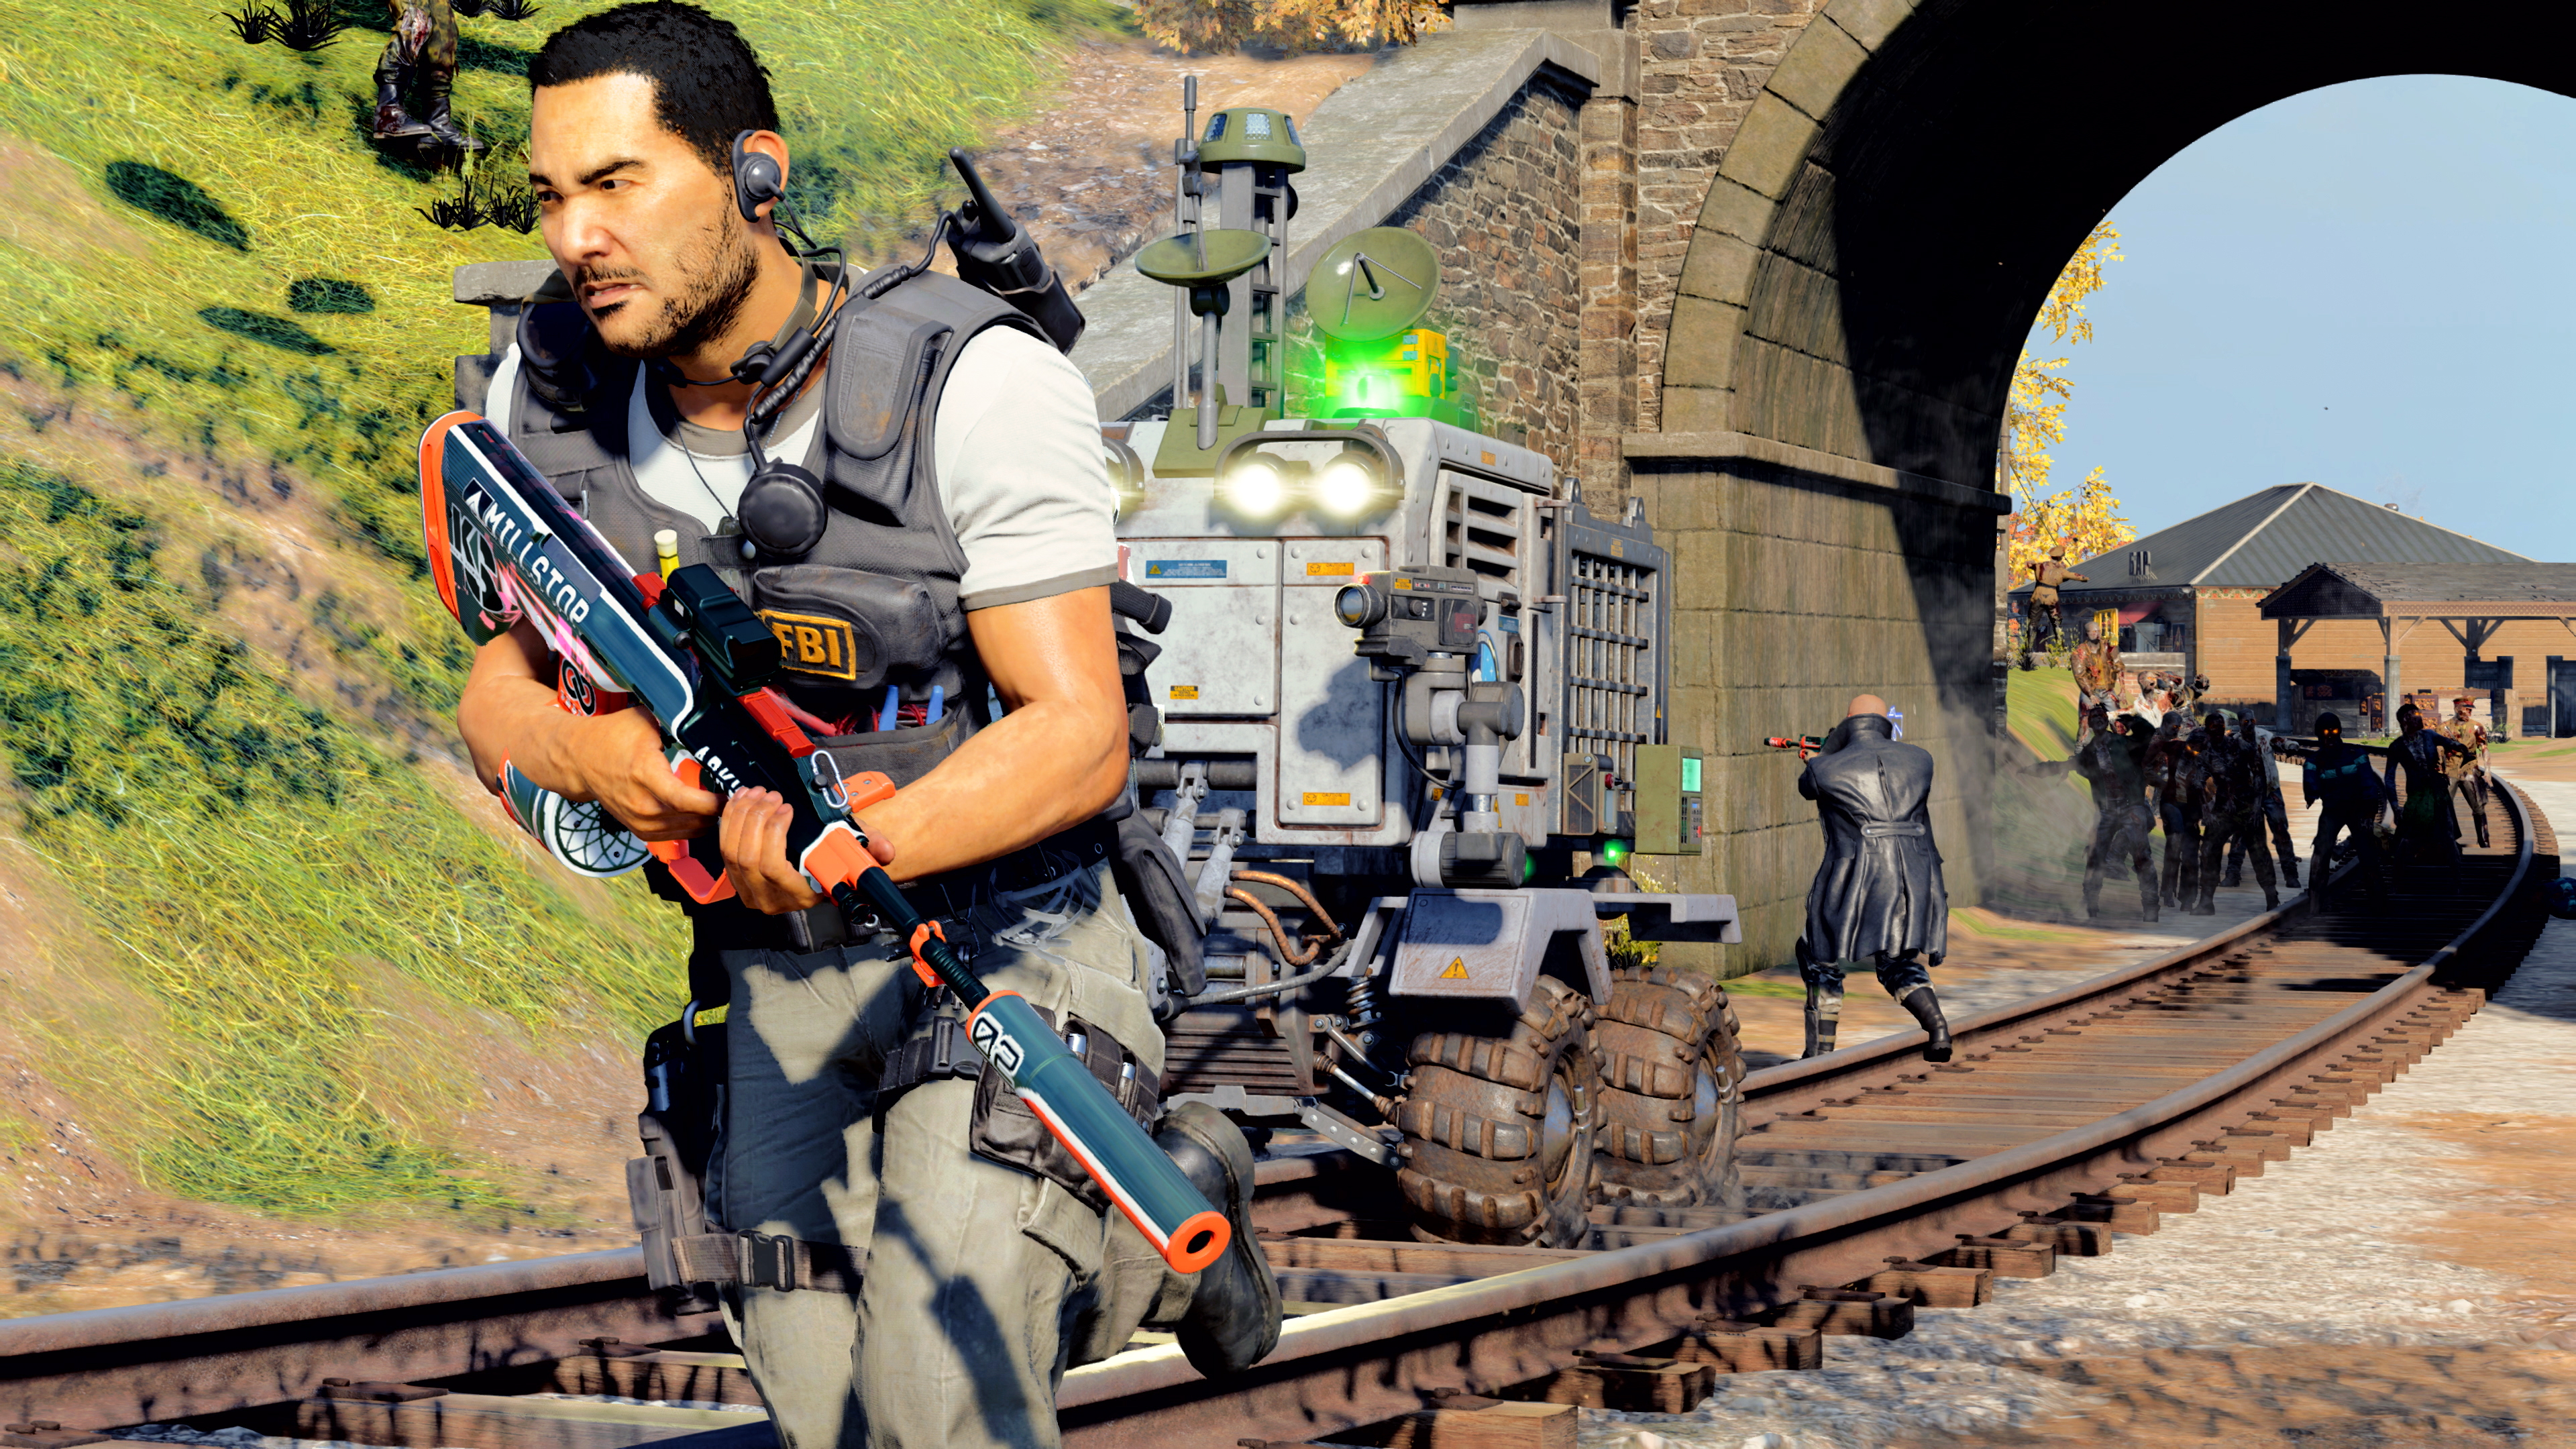
Before jumping in, there are a few things you should be aware of with the Outbreak Easter Egg. For starters, you’ll want to have a decent understanding of how Outbreak works. If you aren’t familiar, play a few rounds and get used to the World Tier system that changes as you warp between maps.
Speaking of maps, the entire Outbreak mode consists of a rotation of random maps, which complicates the Easter Egg. In this Cold War Outbreak Easter Egg guide we’ll detail specific locations across all maps since your rotation will be different from ours.
Finally, we highly advise attempting this with at least one other player. It’s totally doable Solo, but is immensely challenging. Towards the end of the Easter Egg, there are steps that are made much easier by splitting up the tasks. We also recommend coming equipped with fully maxed out perks, as well as the Ring of Fire and Frenzied Guard Field Upgrades.
In terms of weapons, we highly recommend an assault rifle and shotgun combo. Our loadout consisted of the M16 and the Hauer 77, so use these weapons or similar ones when you try the Easter Egg. Below are the steps for completing it.
Step 1: Play until you get to World Tier 3
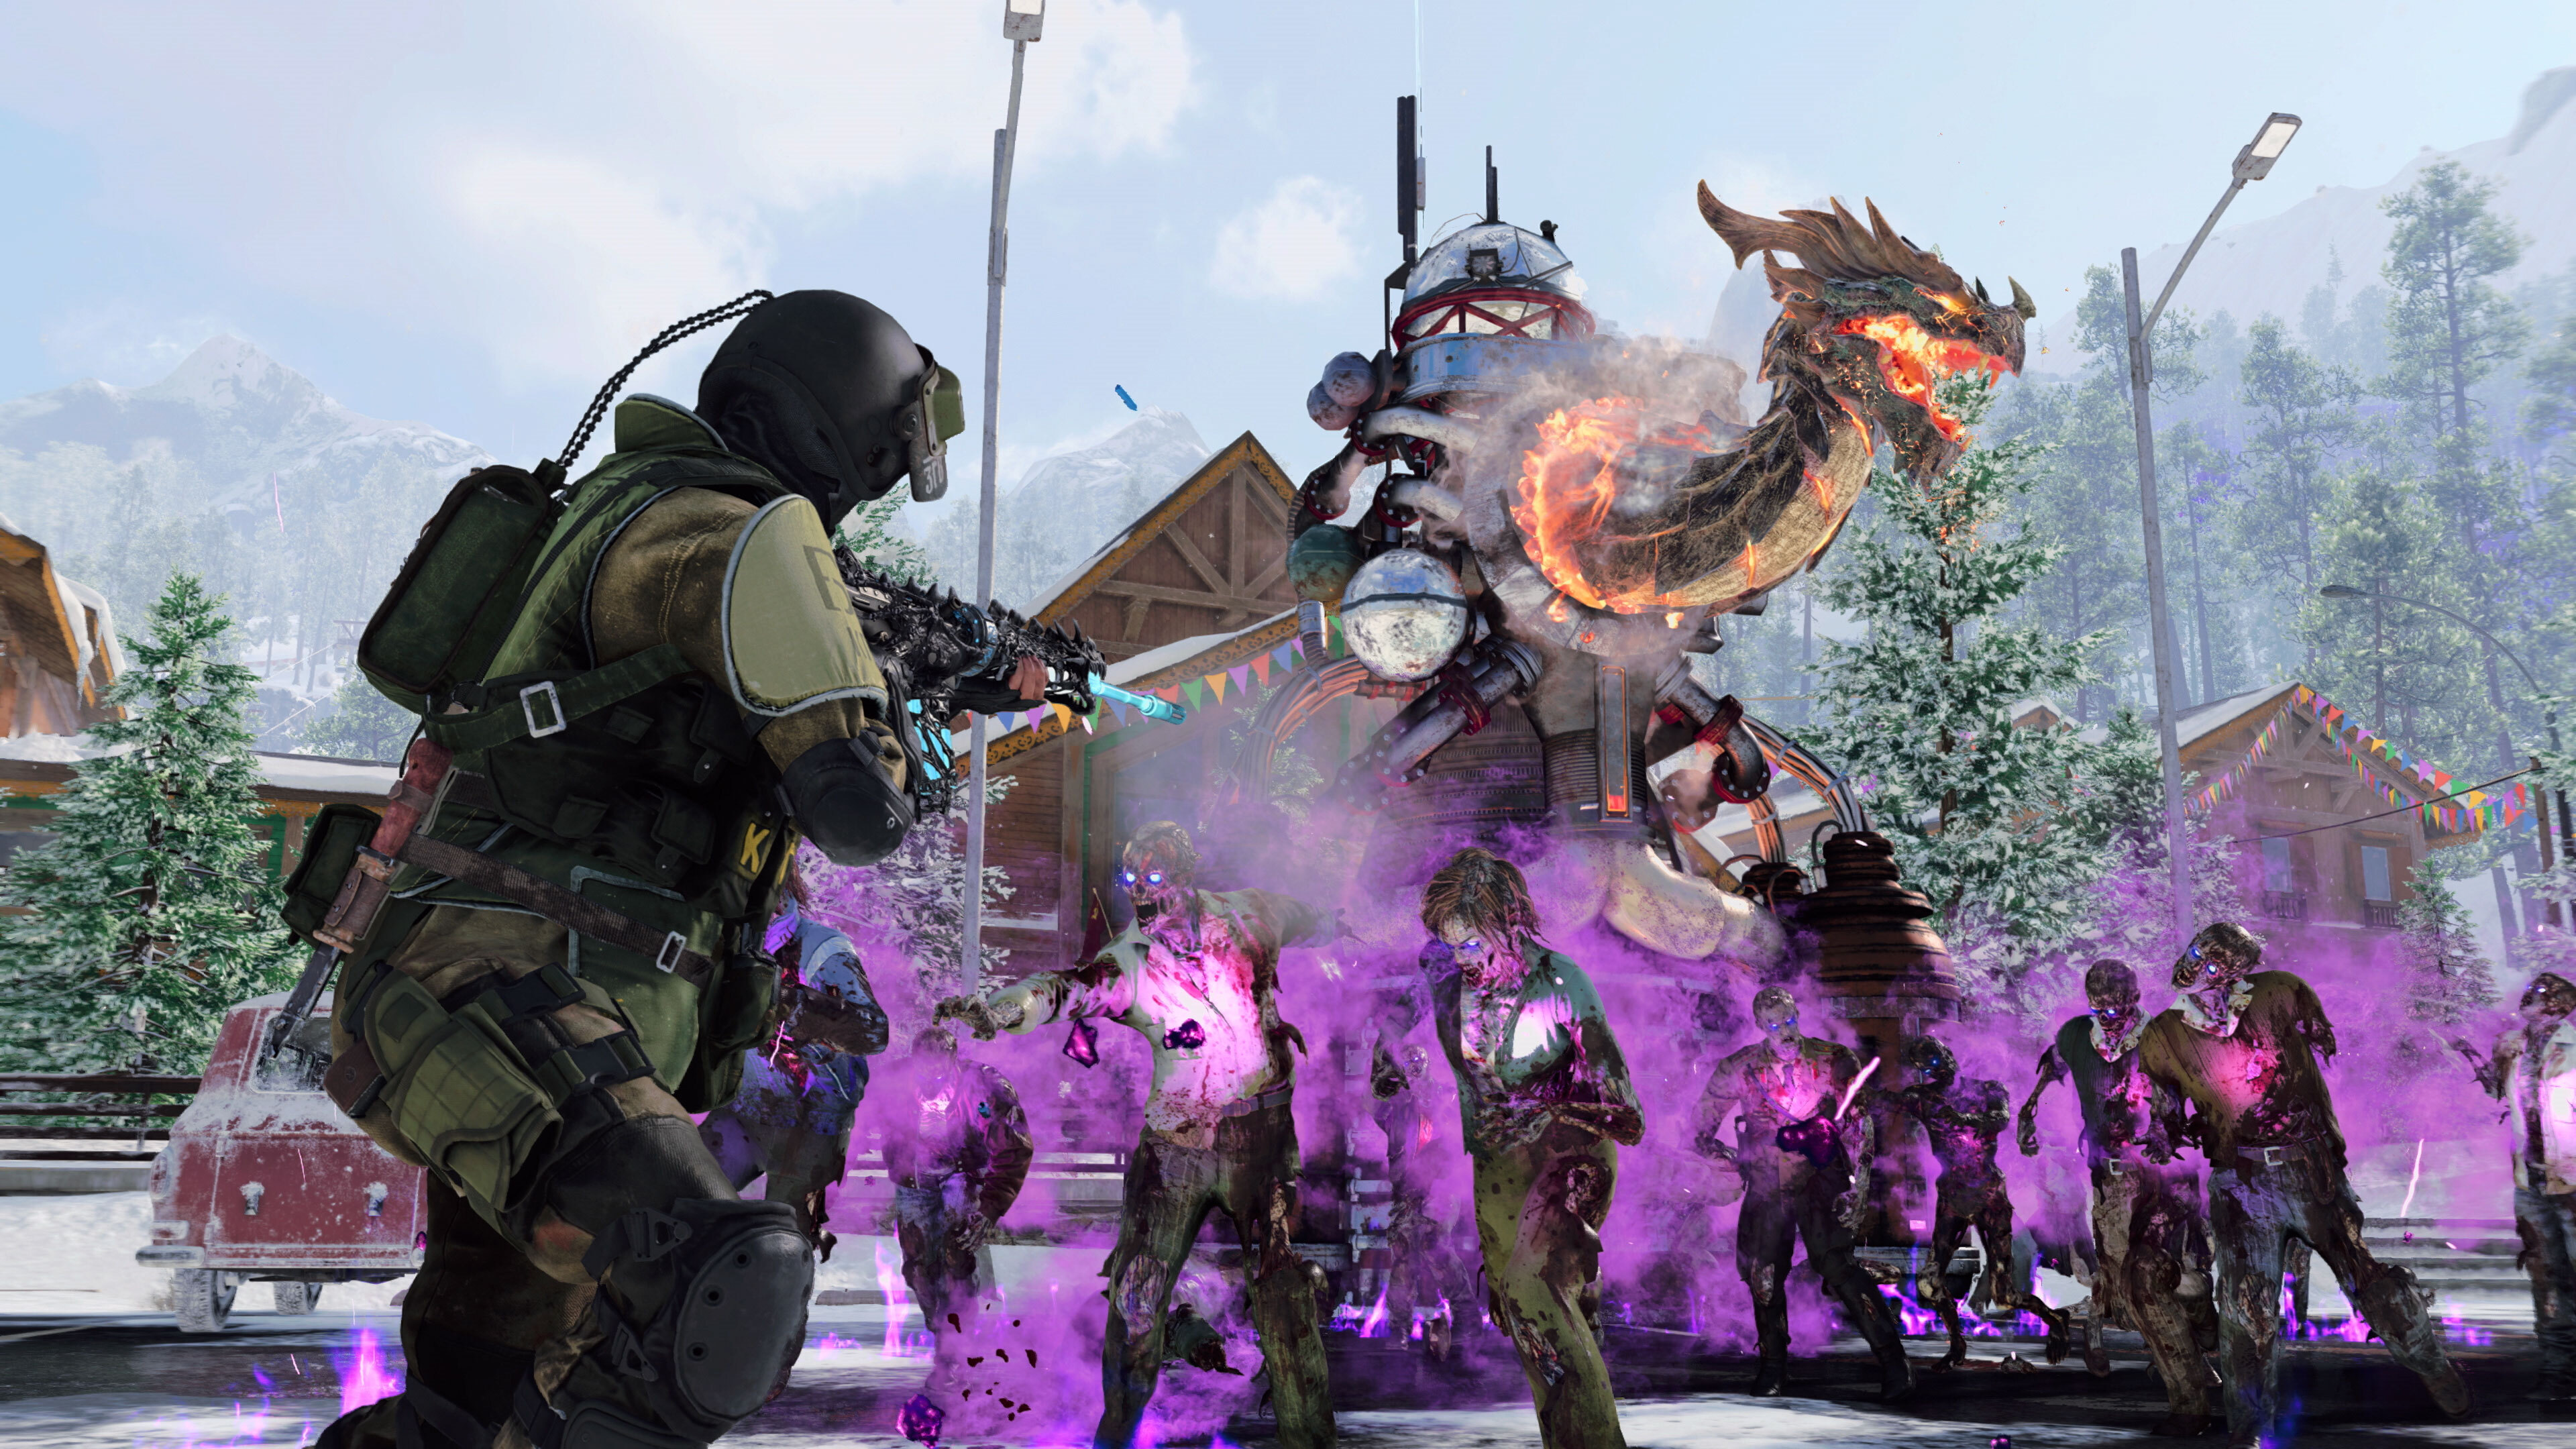
Start the run by playing normally, completing the objectives shown on your map to initiate the anomaly. Before you go through the anomaly, you should prioritize completing the three side quests on your map indicated by an orange icon. Your goal within the first couple World Tier levels of the Cold War Outbreak Easter Egg is to get geared up as much as possible.
This means having a powerful loadout, a lot of points, perks, and upgraded weapons. Essentially, this is the preparation phase, so use it to obtain all the gear you’ll need. We advise upgrading your weapons as much as you can via the Pack-a-Punch machine.
Step 2: Locate the radio
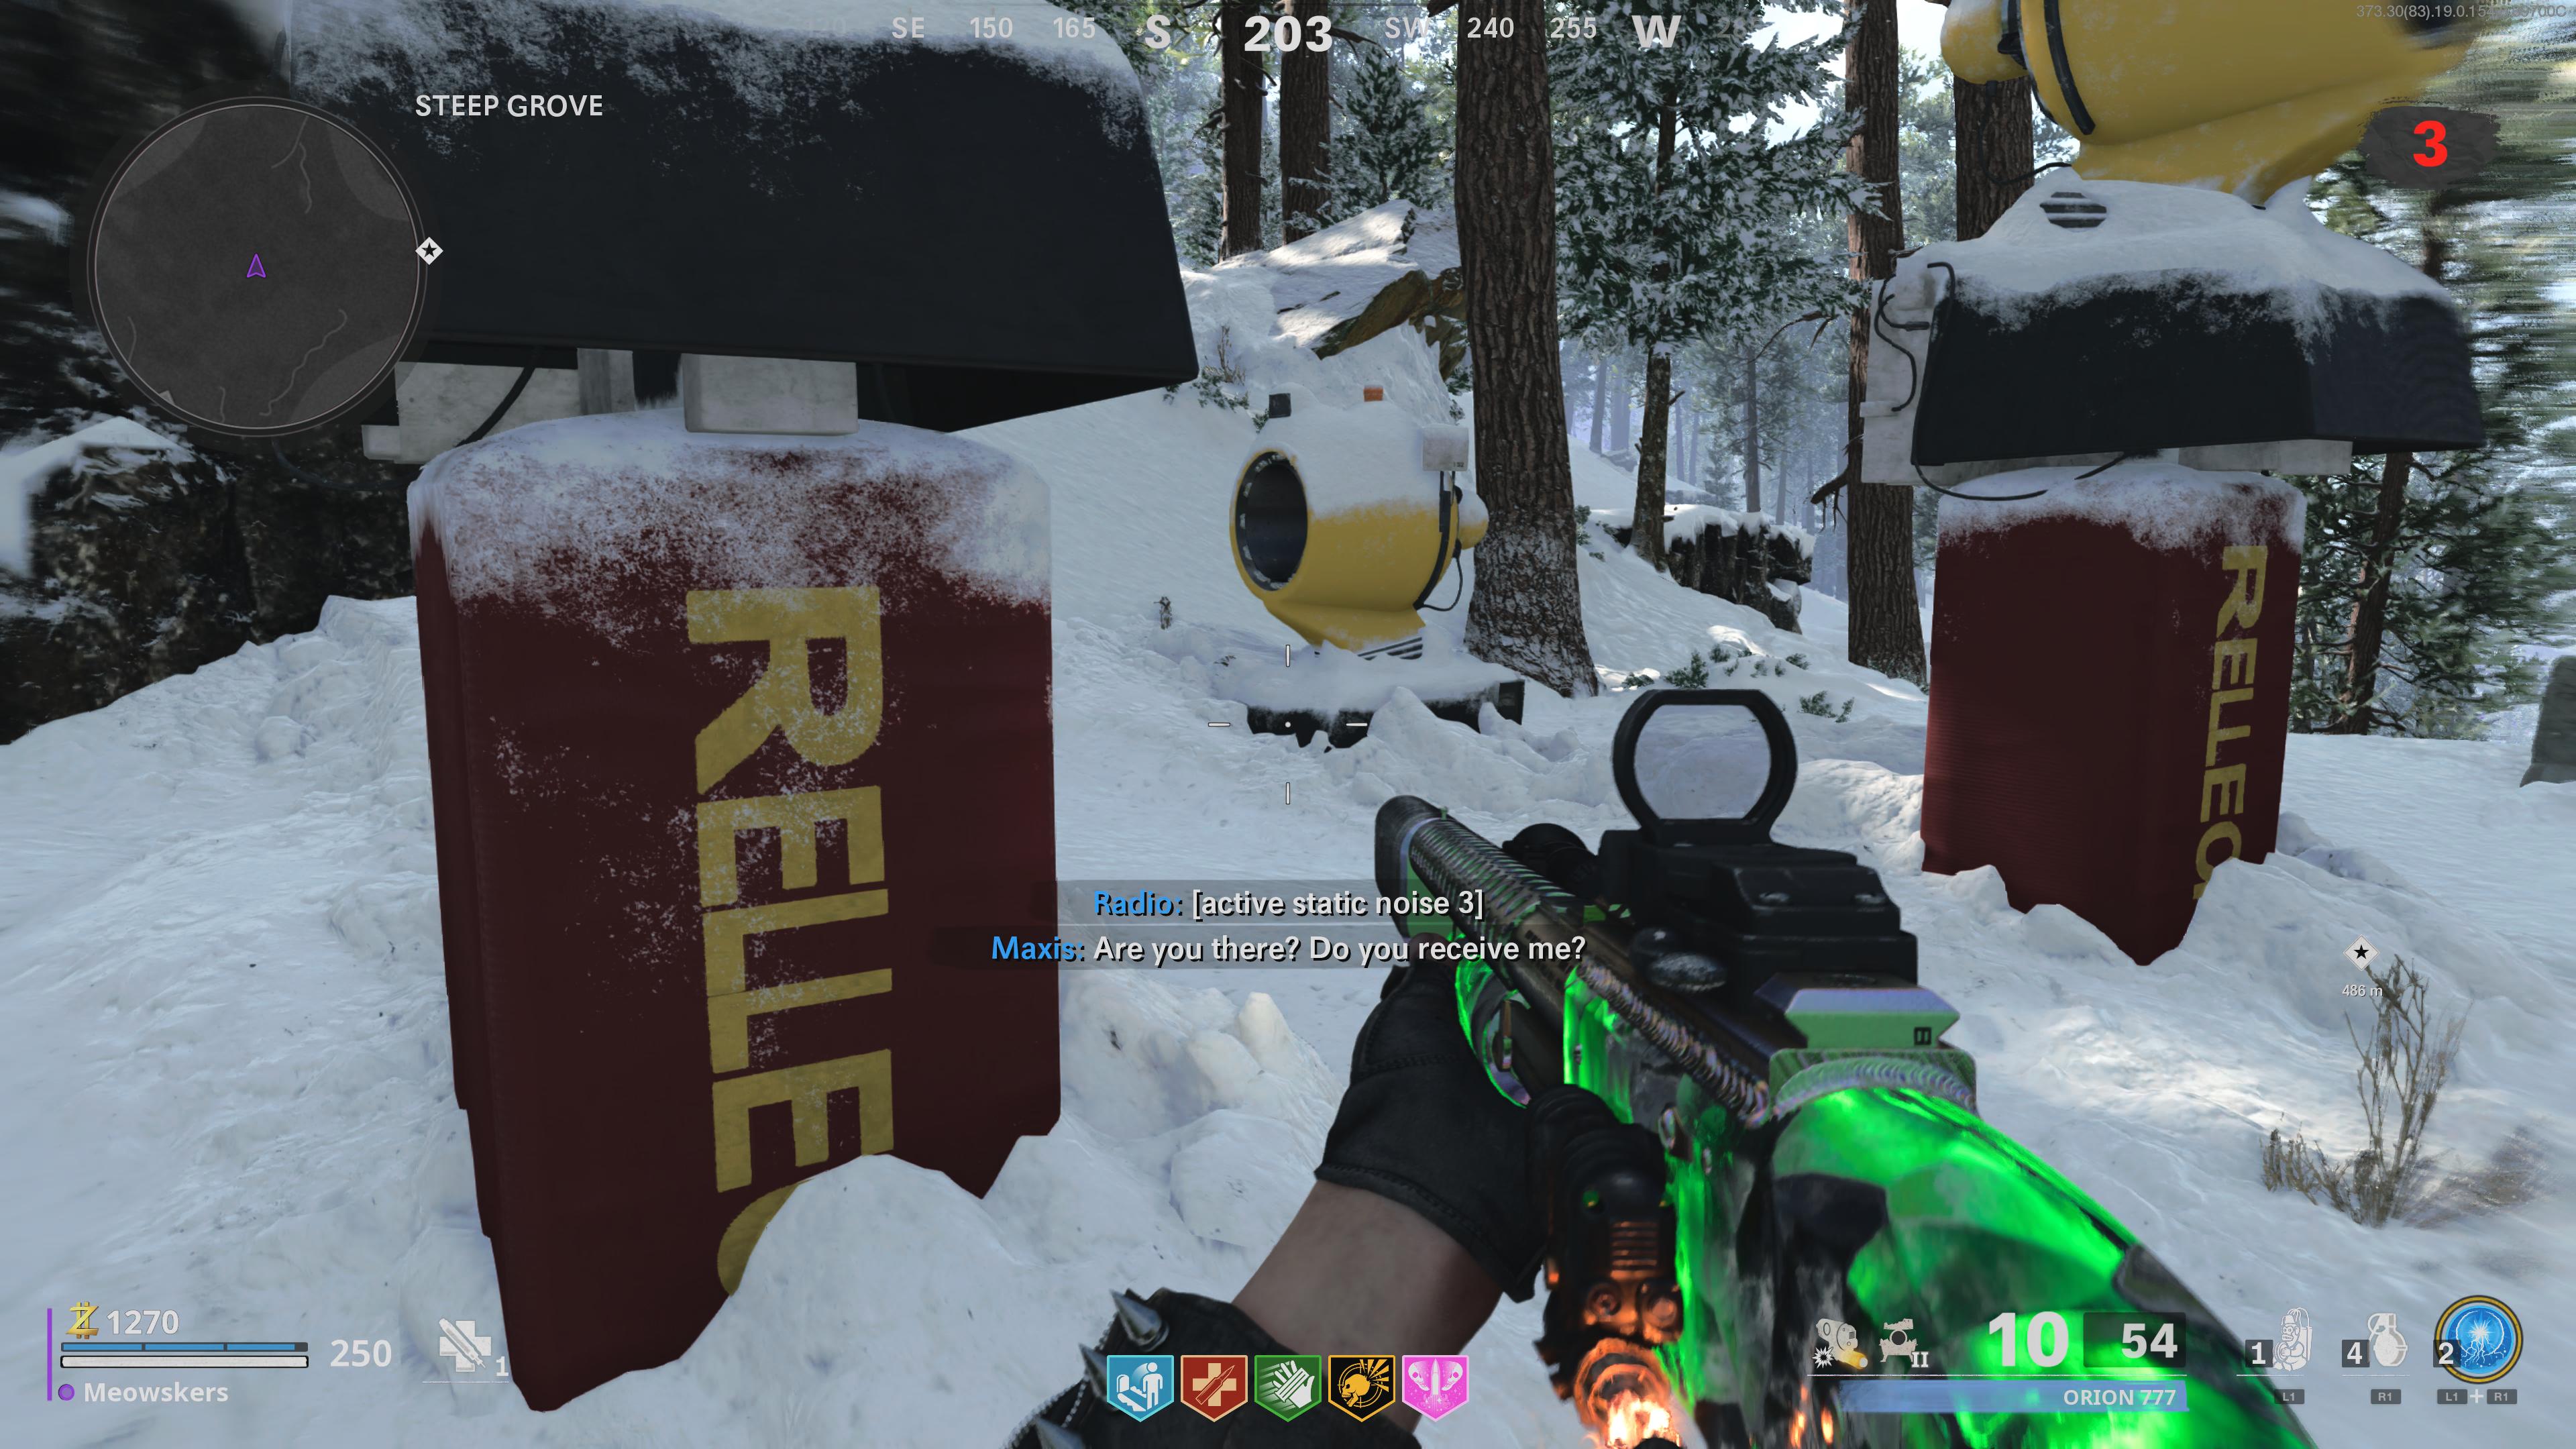
Once you’ve arrived at the next map on World Tier 3, your goal is to find a hidden radio. The good news is that the Cold War Outbreak Easter Egg radio you need appears in a fixed location across all five maps. Do note that these are unmarked radios, so don’t confuse them with the marked ones.
Interact with the radio, and it will trigger a horde of zombies, so make sure you’re prepared for the battle by stocking up on shields, perks, and upgraded weapons beforehand.
Below are the locations of all the radios across each of the five maps:
Alpine radio location
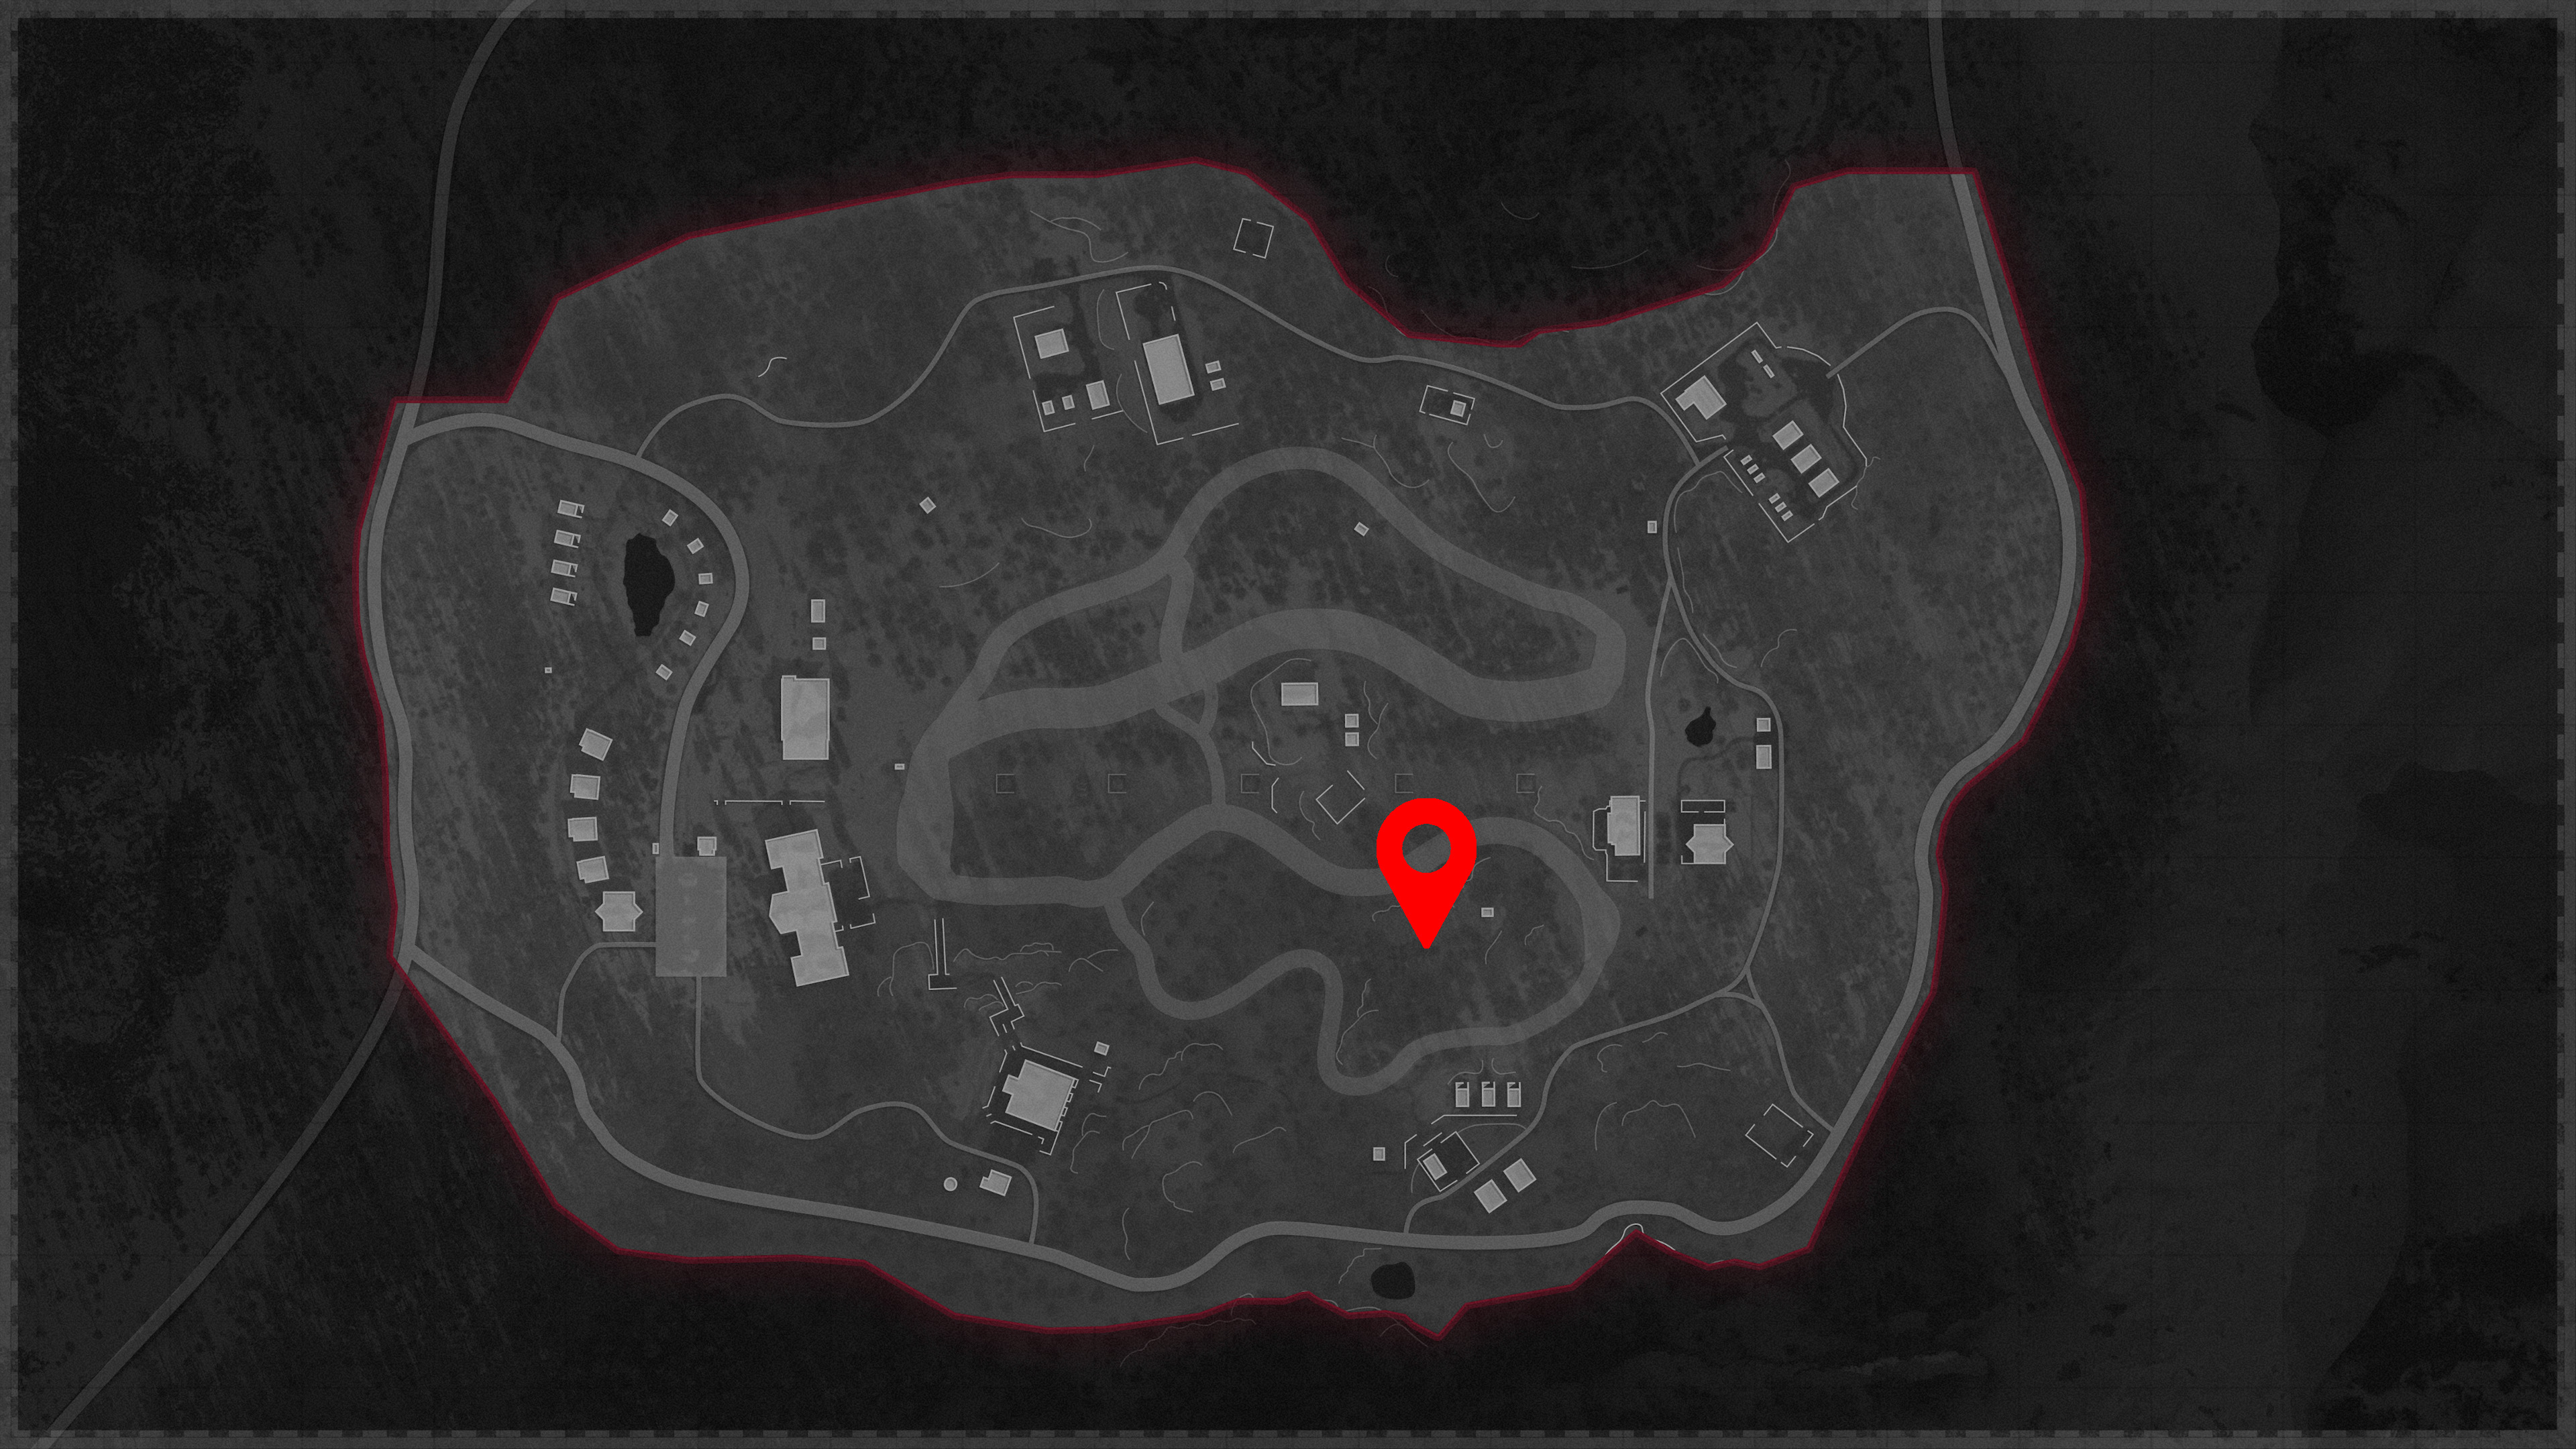
Duga radio location
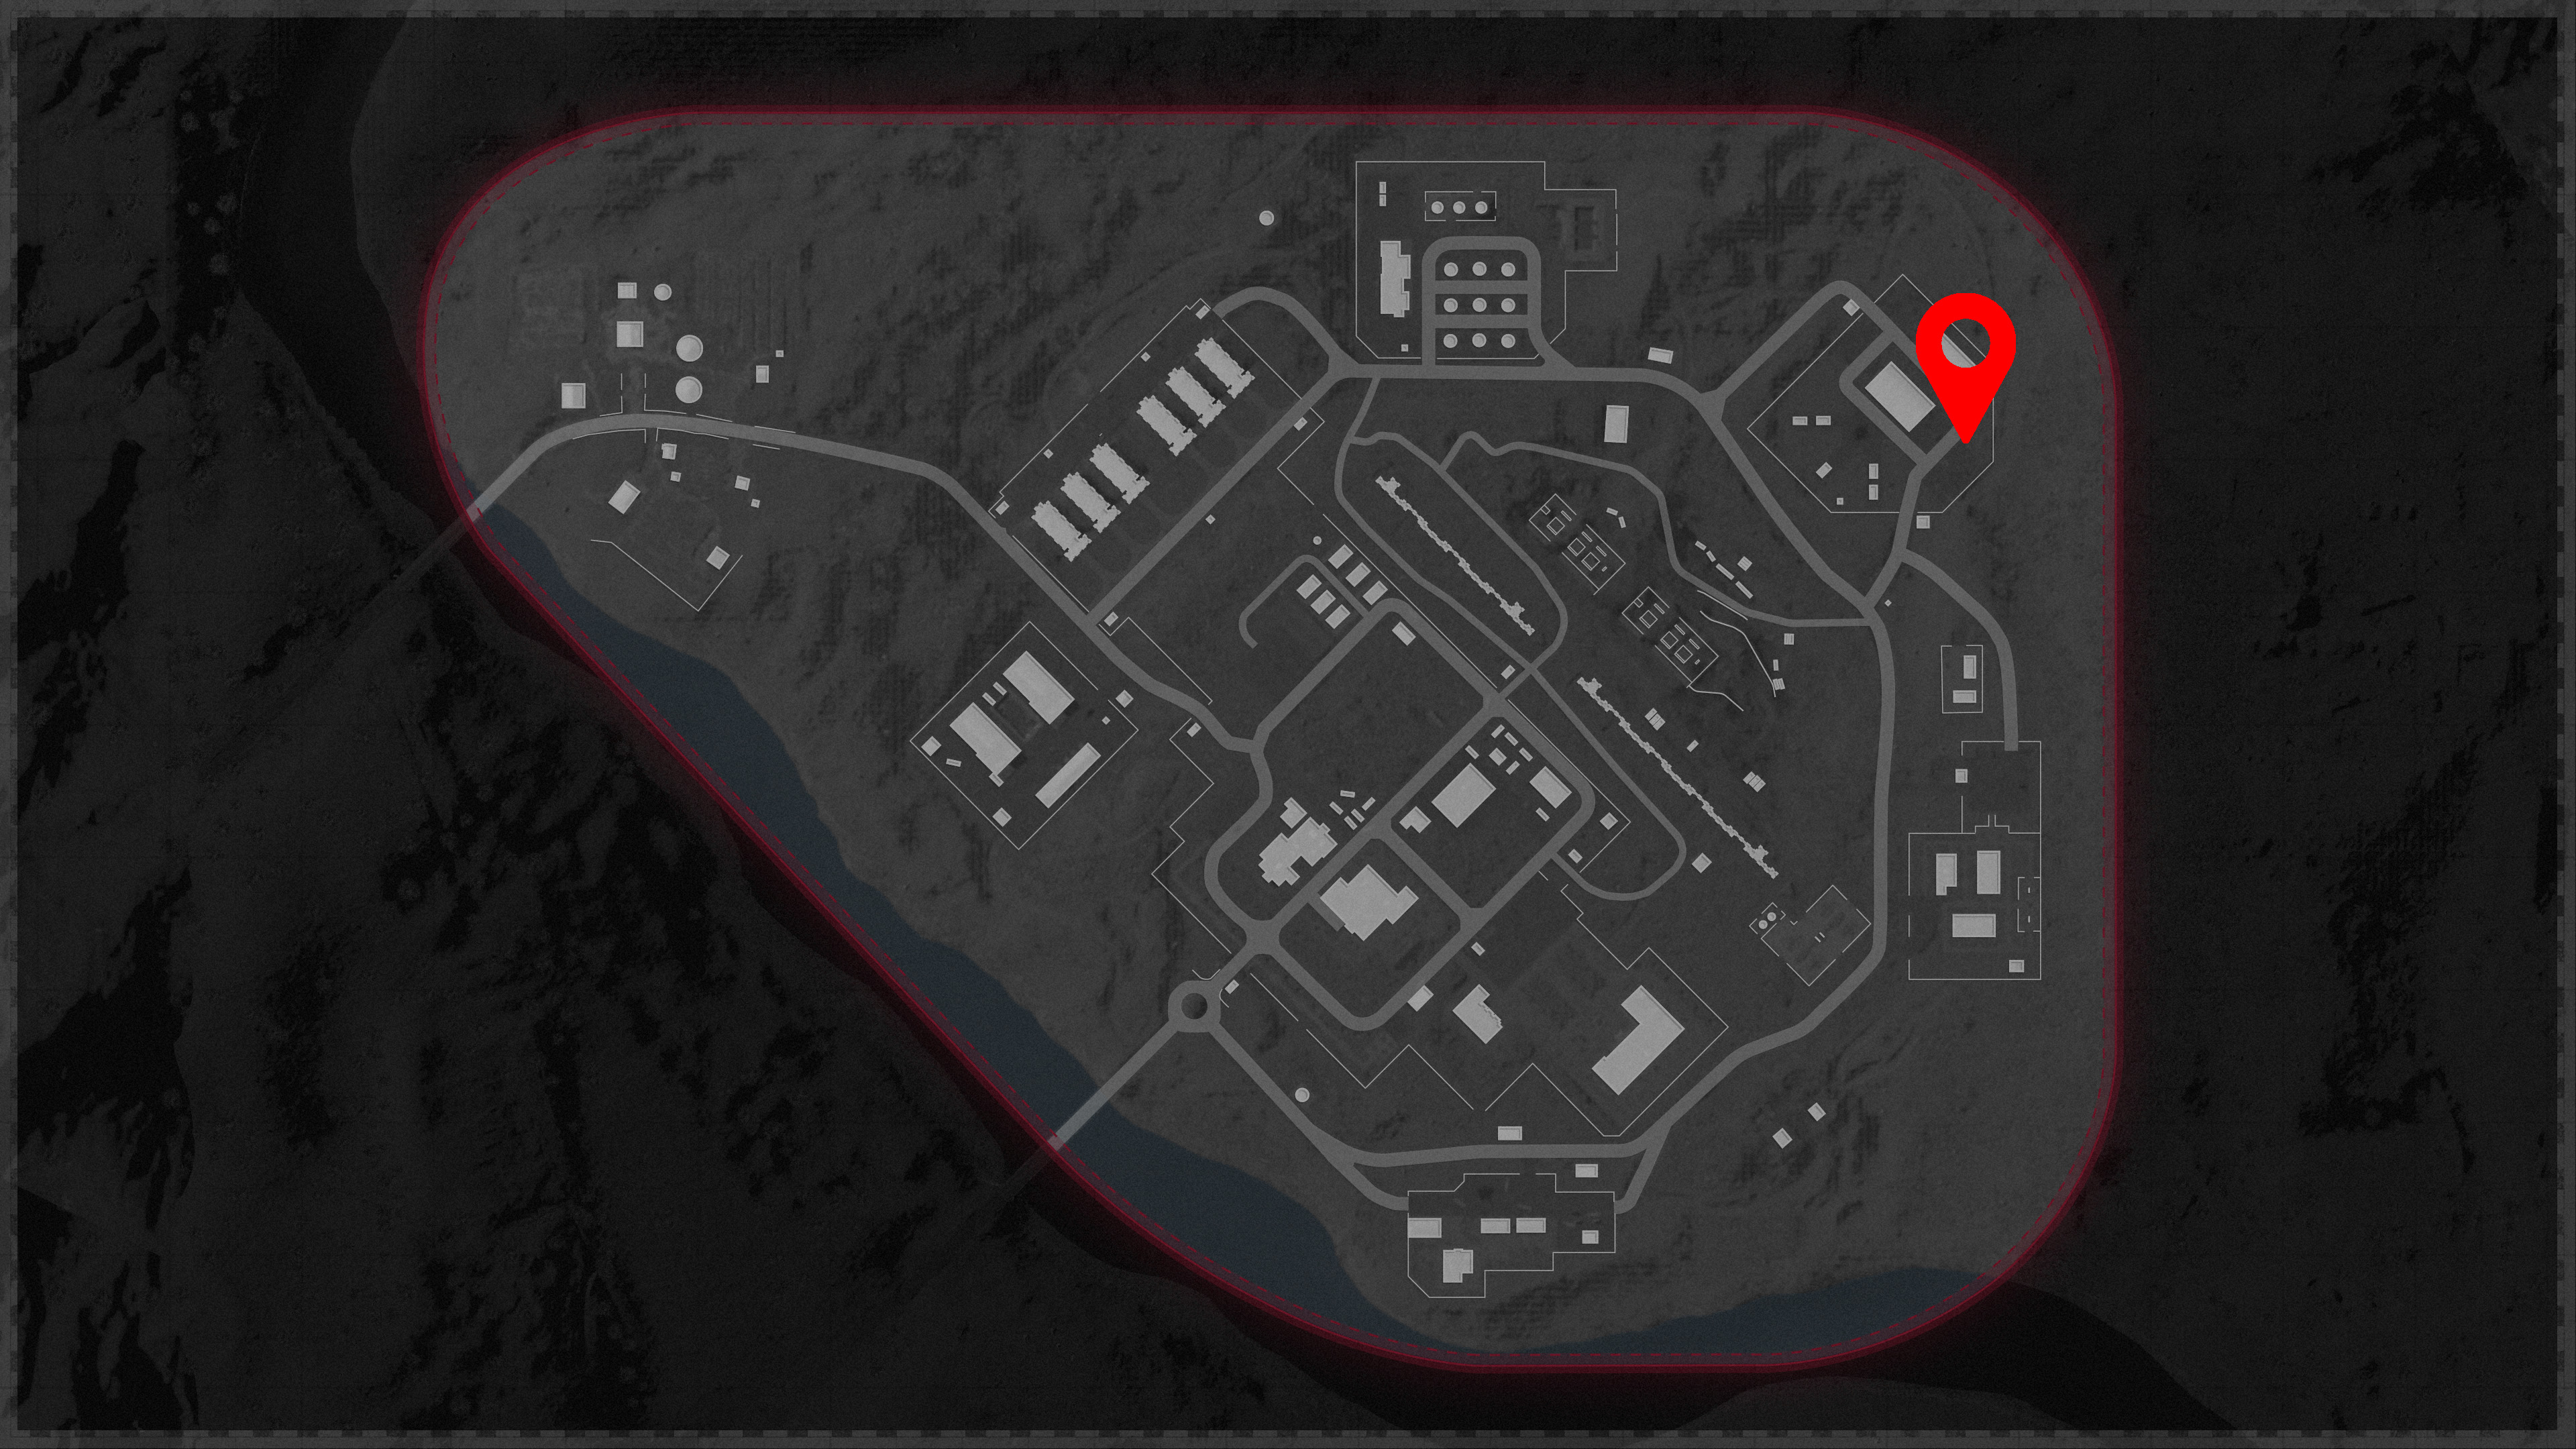
Golova radio location
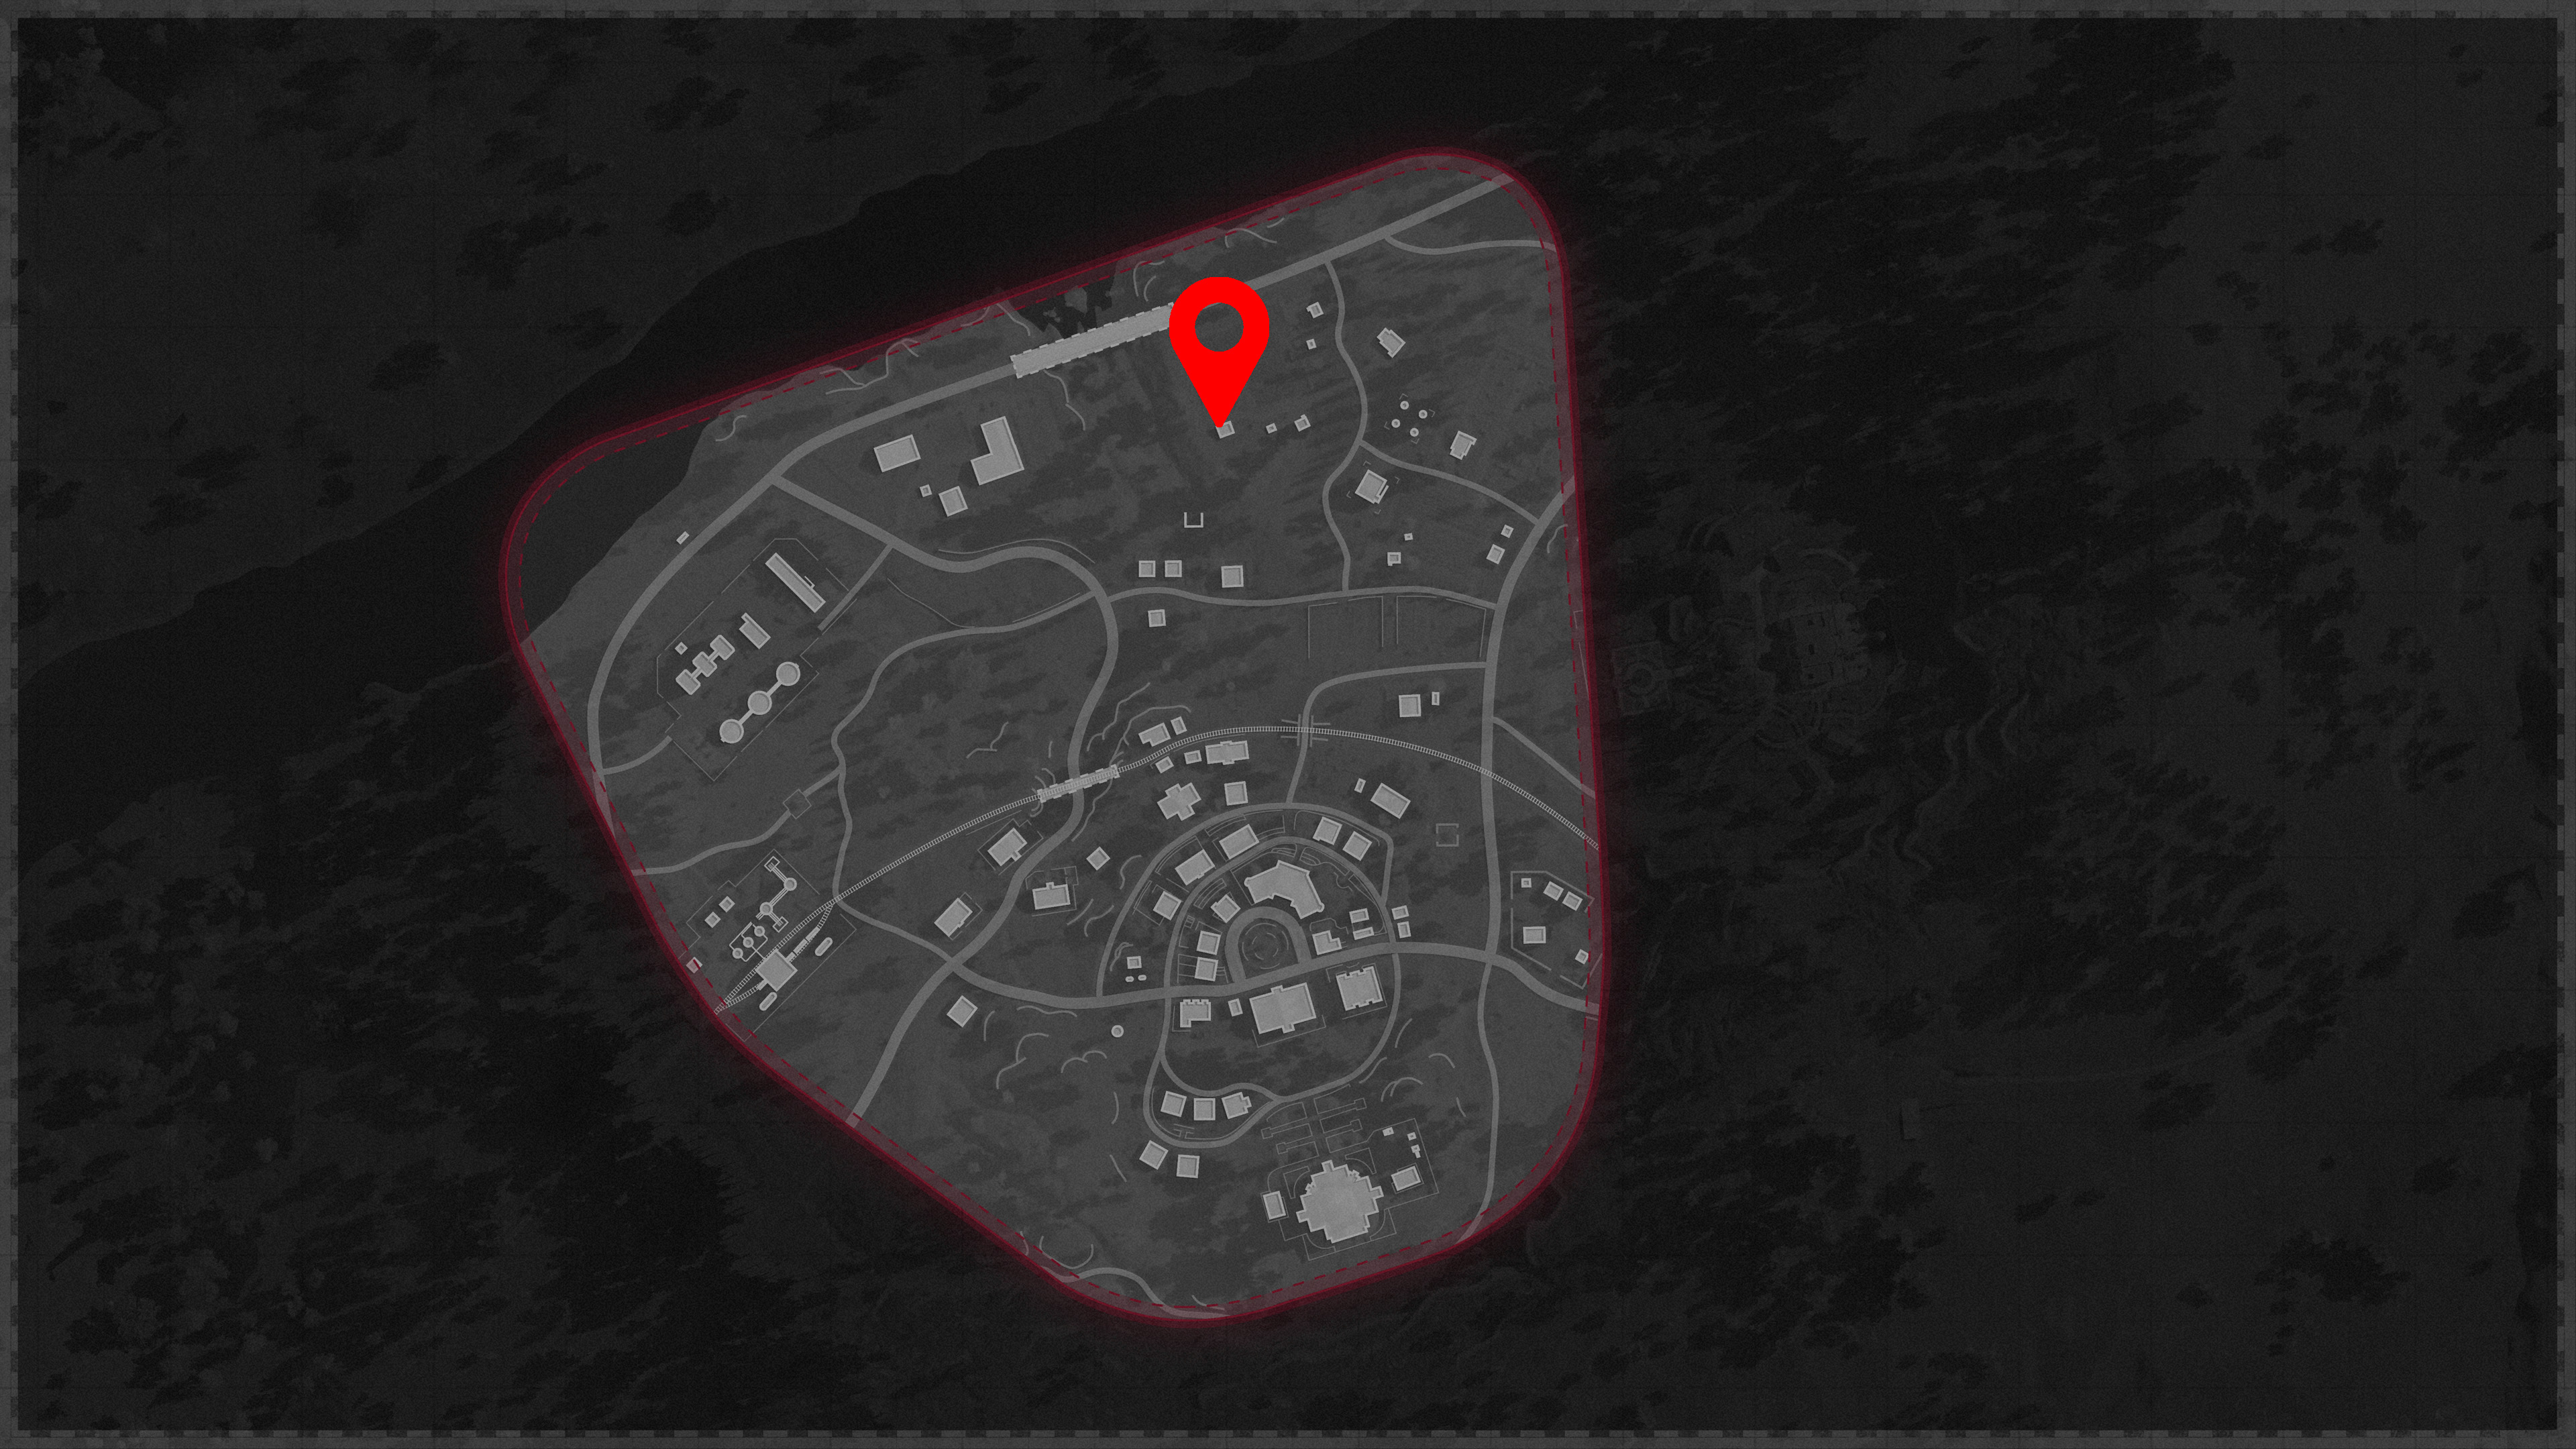
Ruka radio location
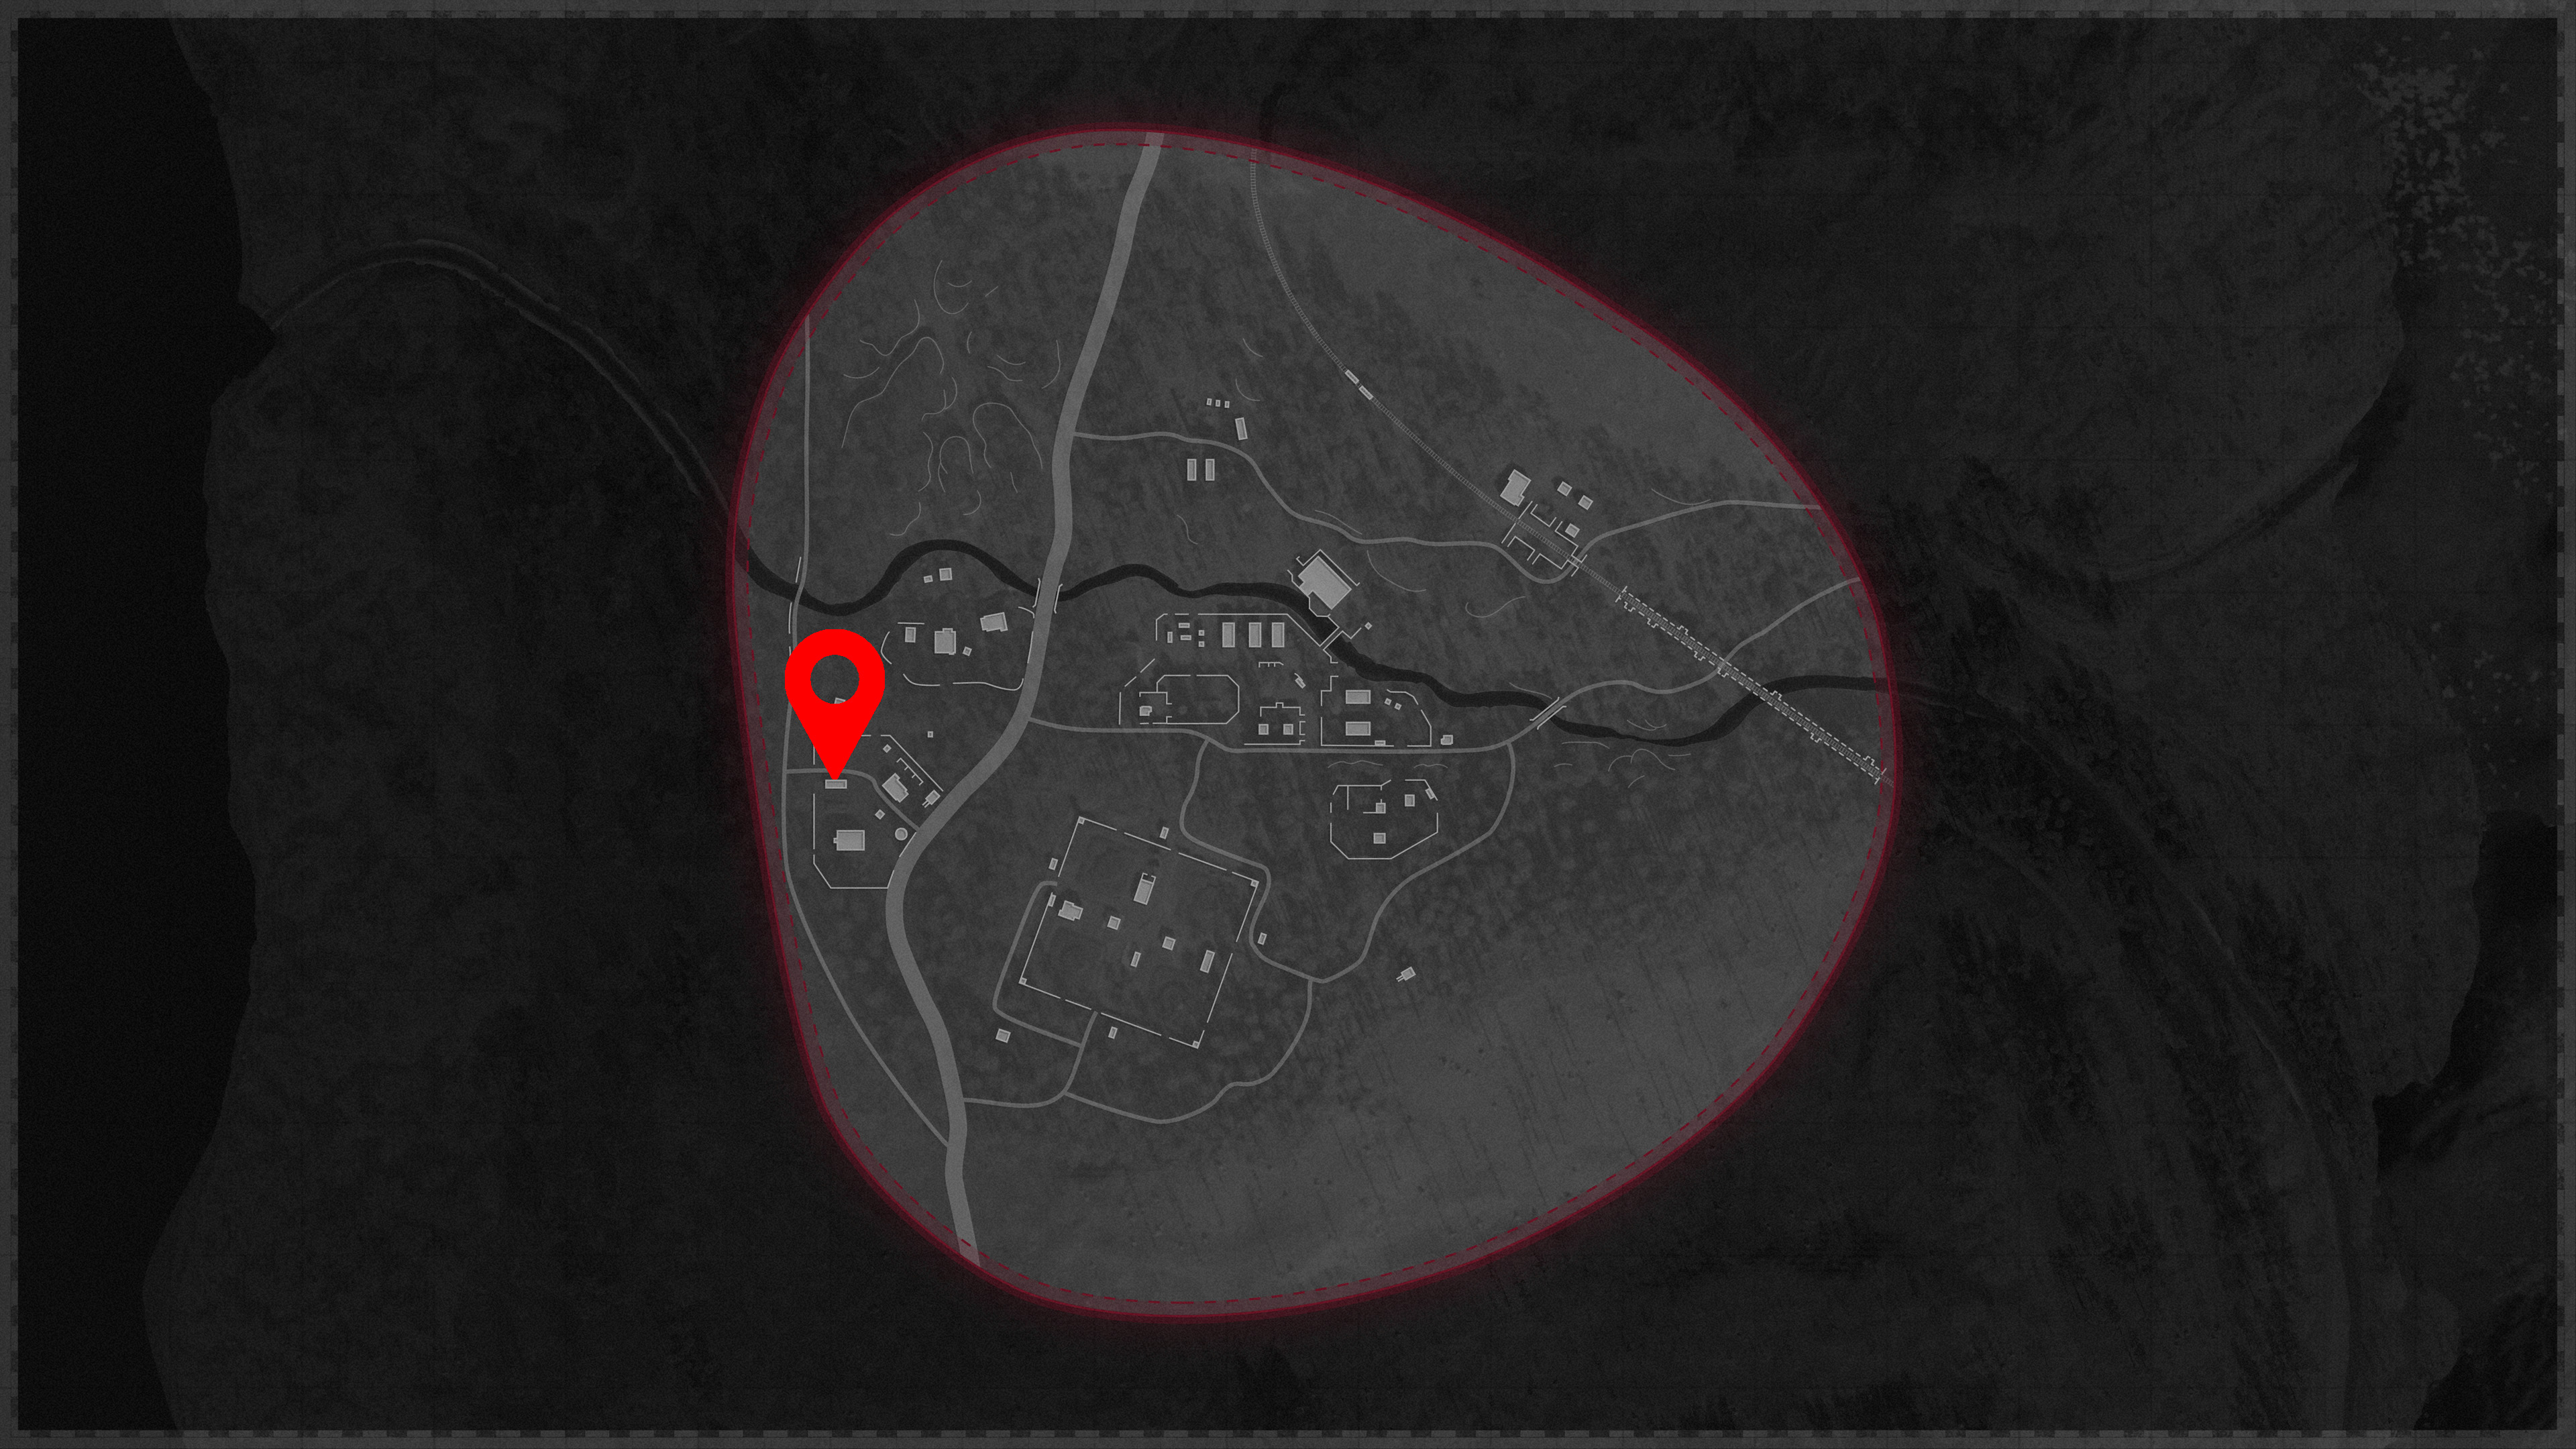
Sanatorium radio location
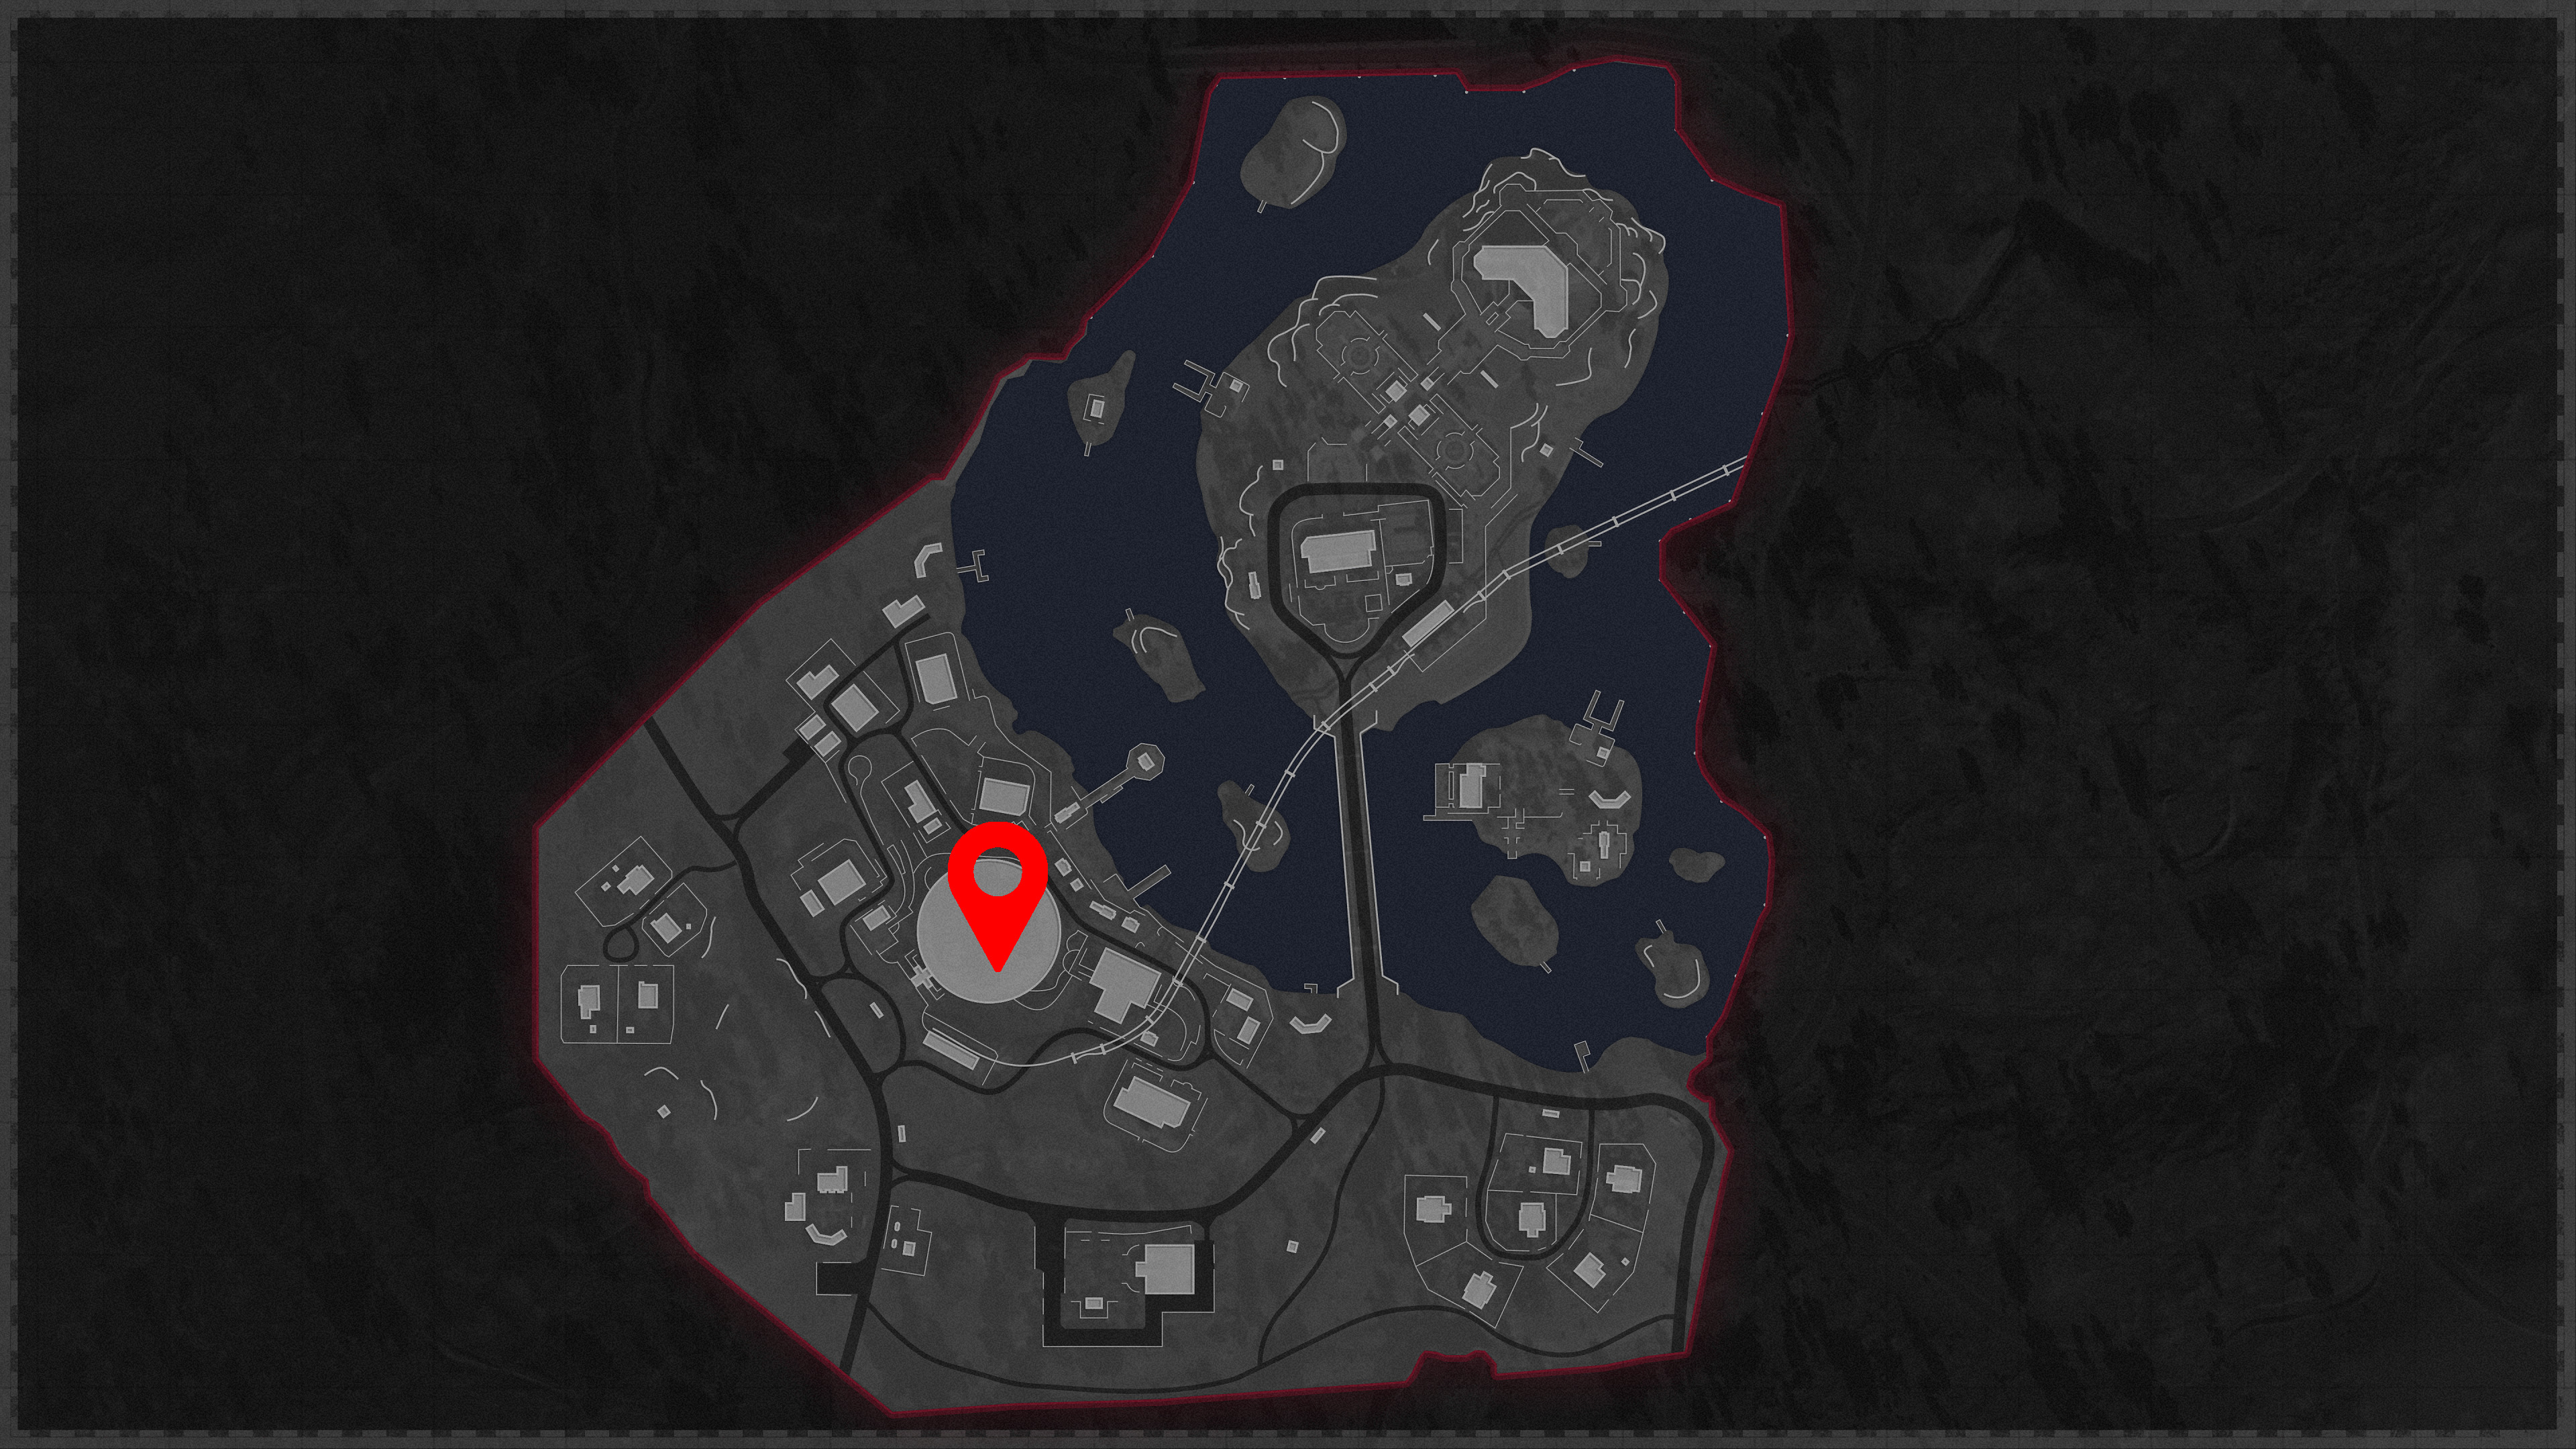
Step 3: Match three more radio frequencies to the one you just activated
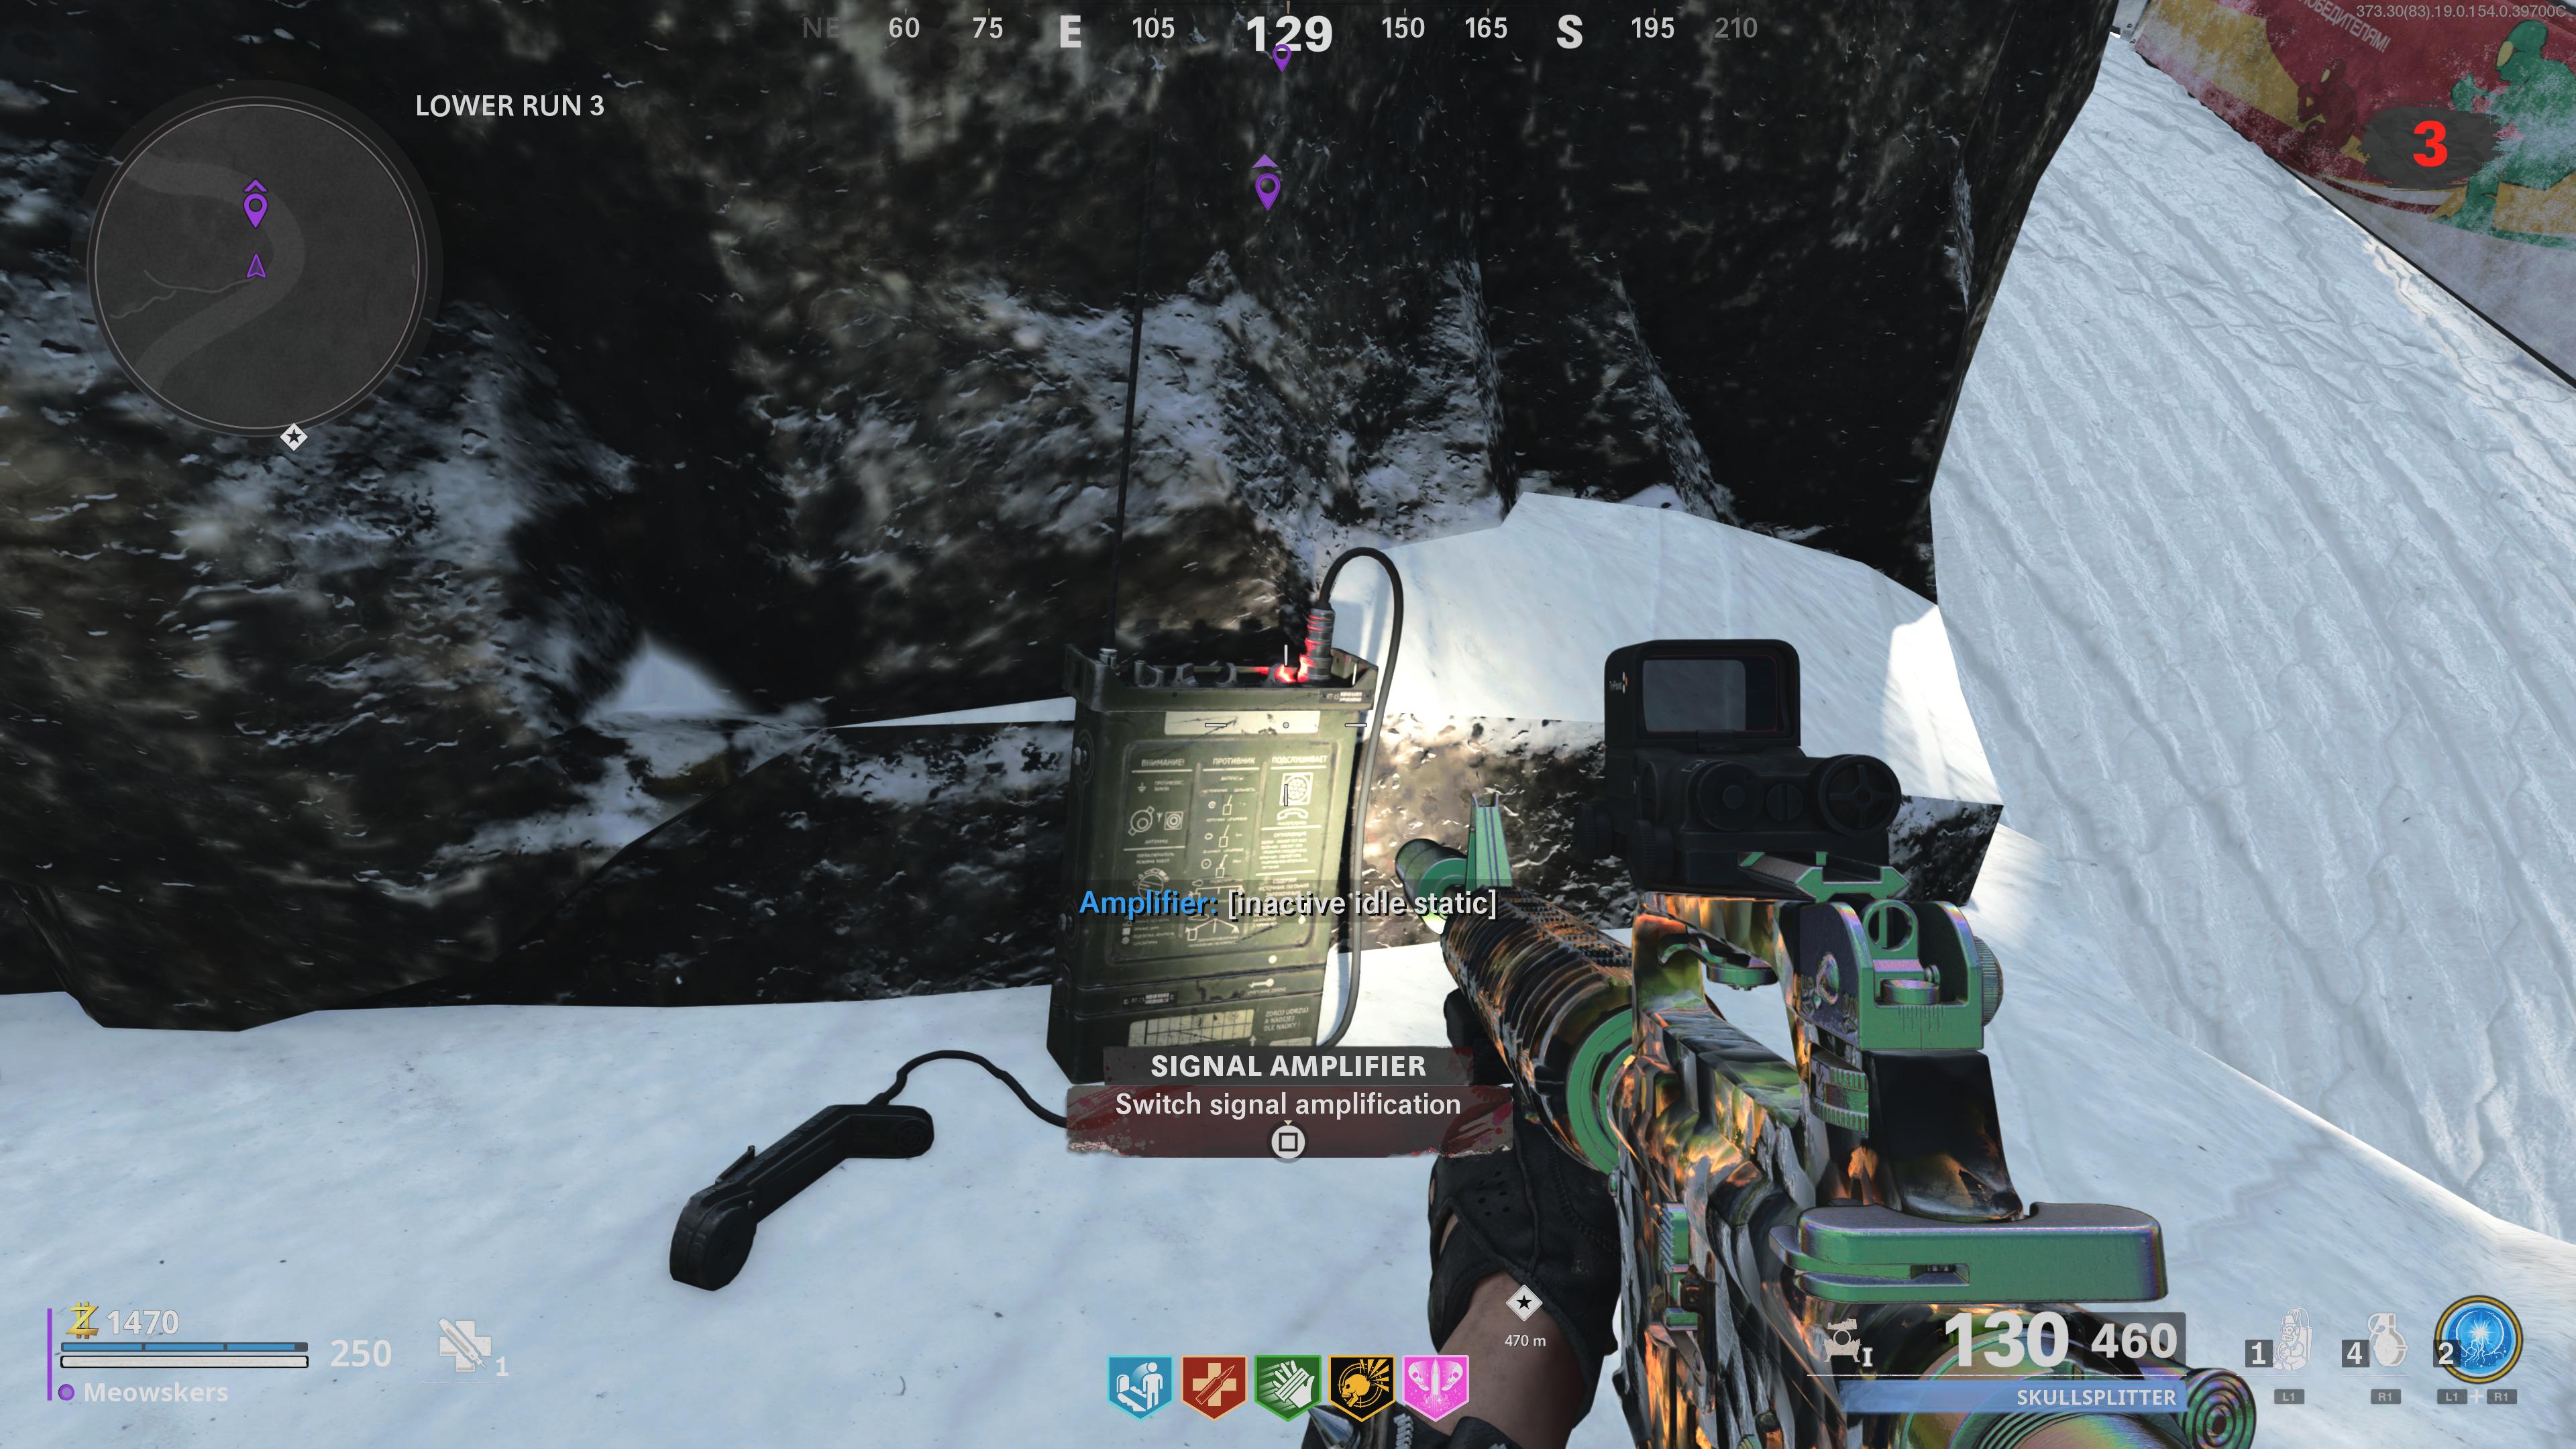
After you’ve defeated the horde, you’ll need to interact with three more radios that are scattered around the map near the first radio. What you need to do is tune the frequencies to match the first radio you’ve activated. With subtitles on, you can tell what the frequency is. For example, ours was “active static noise 3.” This means you must tune the next three radios to the third frequency. You do this by interacting with the radio multiple times. Keep switching between the frequencies to get to the desired number.
It seems there are more than three around the map in the Cold War Outbreak Easter Egg, but we’ll list the locations of three known radios for each. After you’ve activated all three additional radios (four if you count the first one), then head back to the original radio and interact with it to reach the next step.
Alpine three radios locations
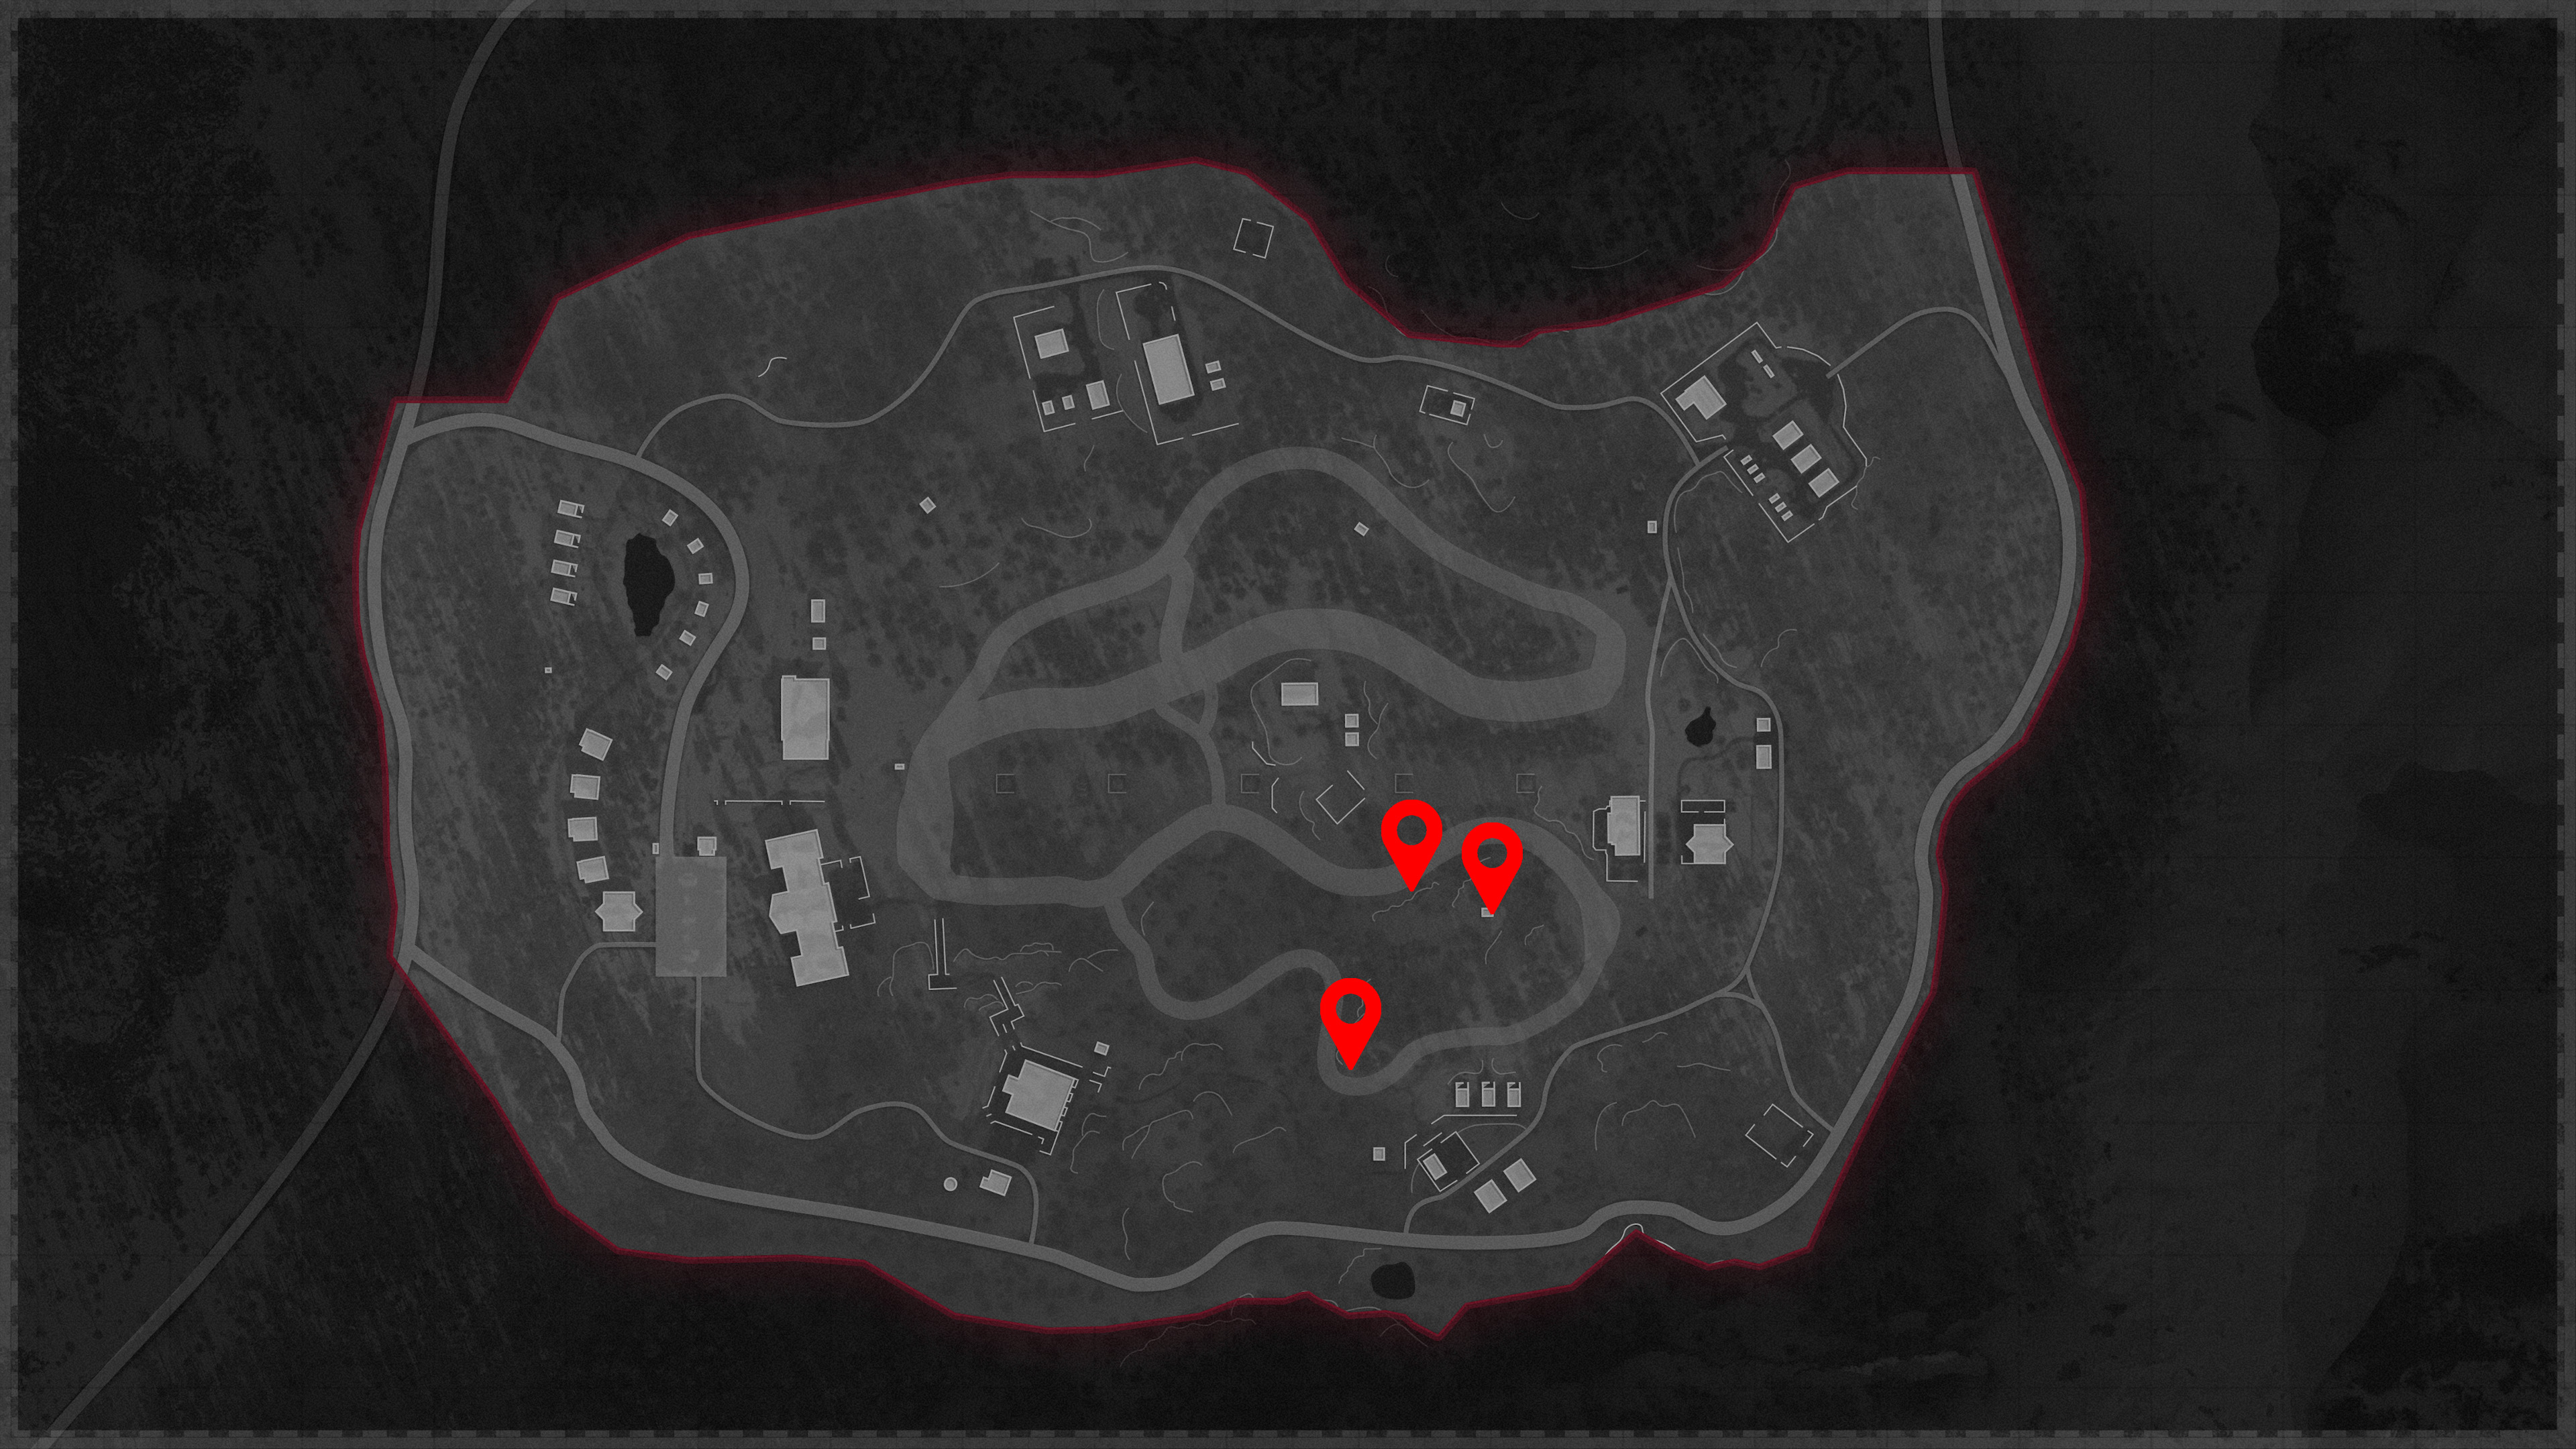
Duga three radios locations
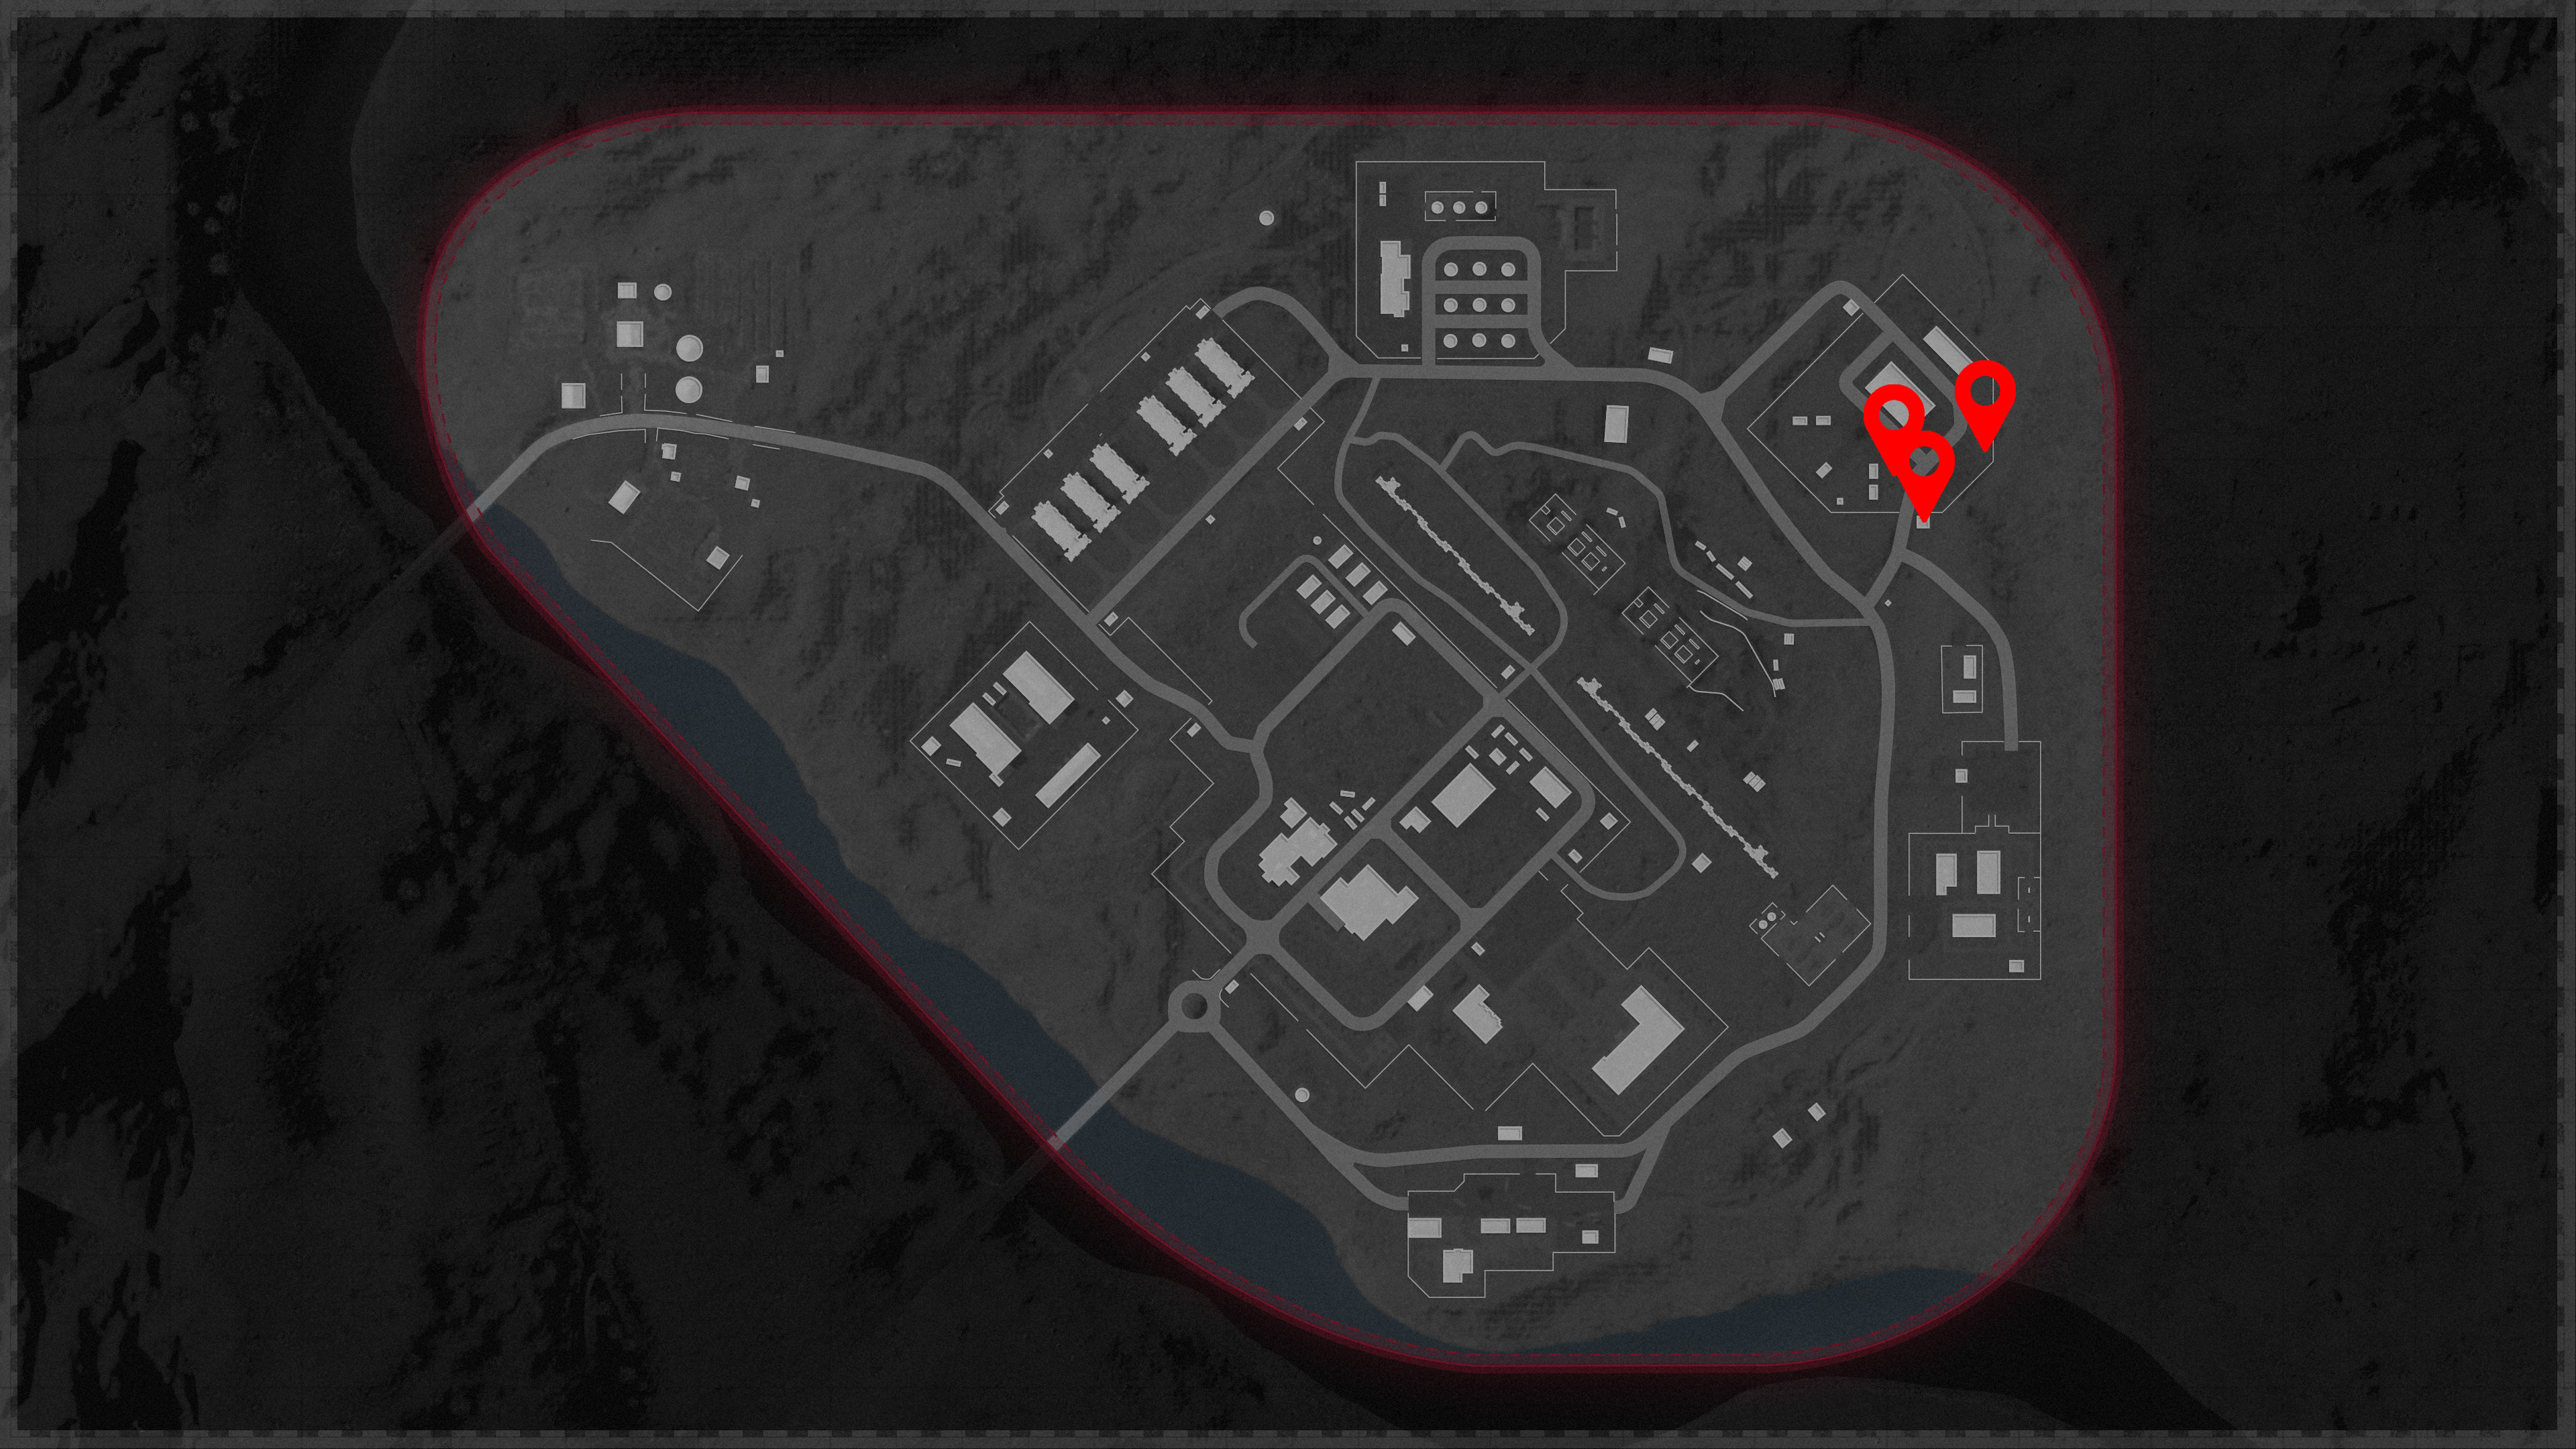
Golova three radios locations
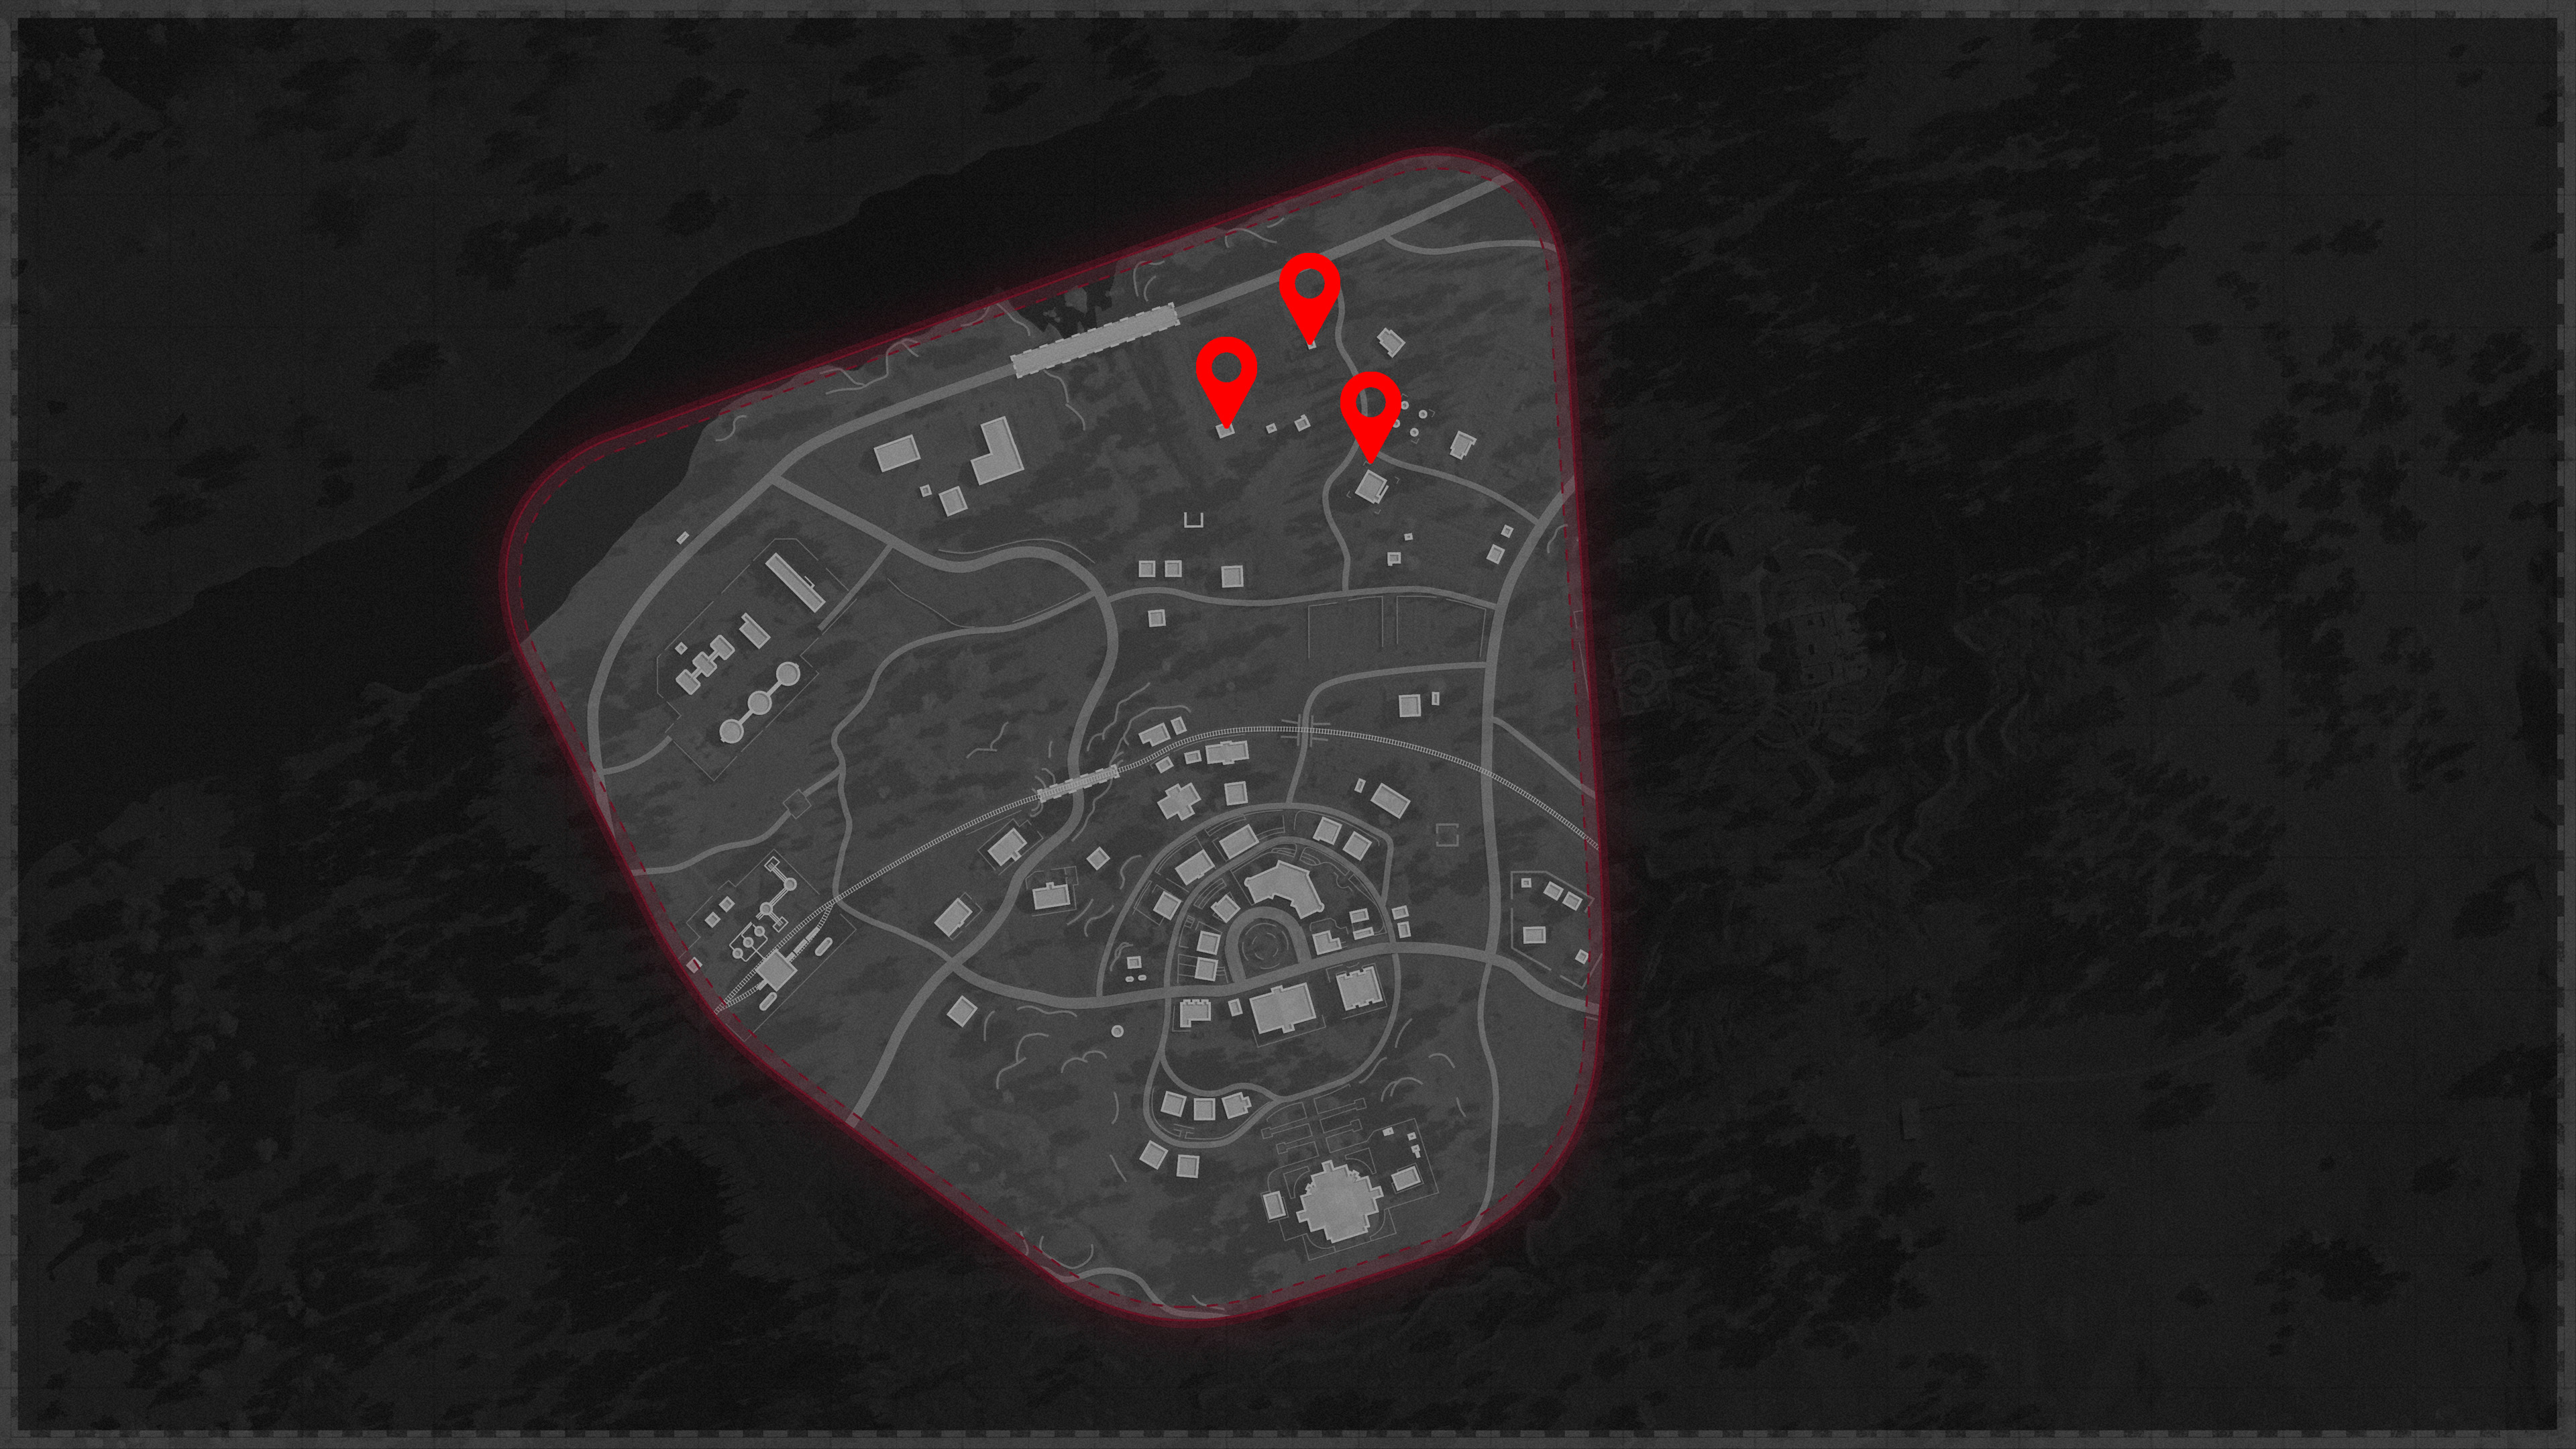
Ruka three radios locations
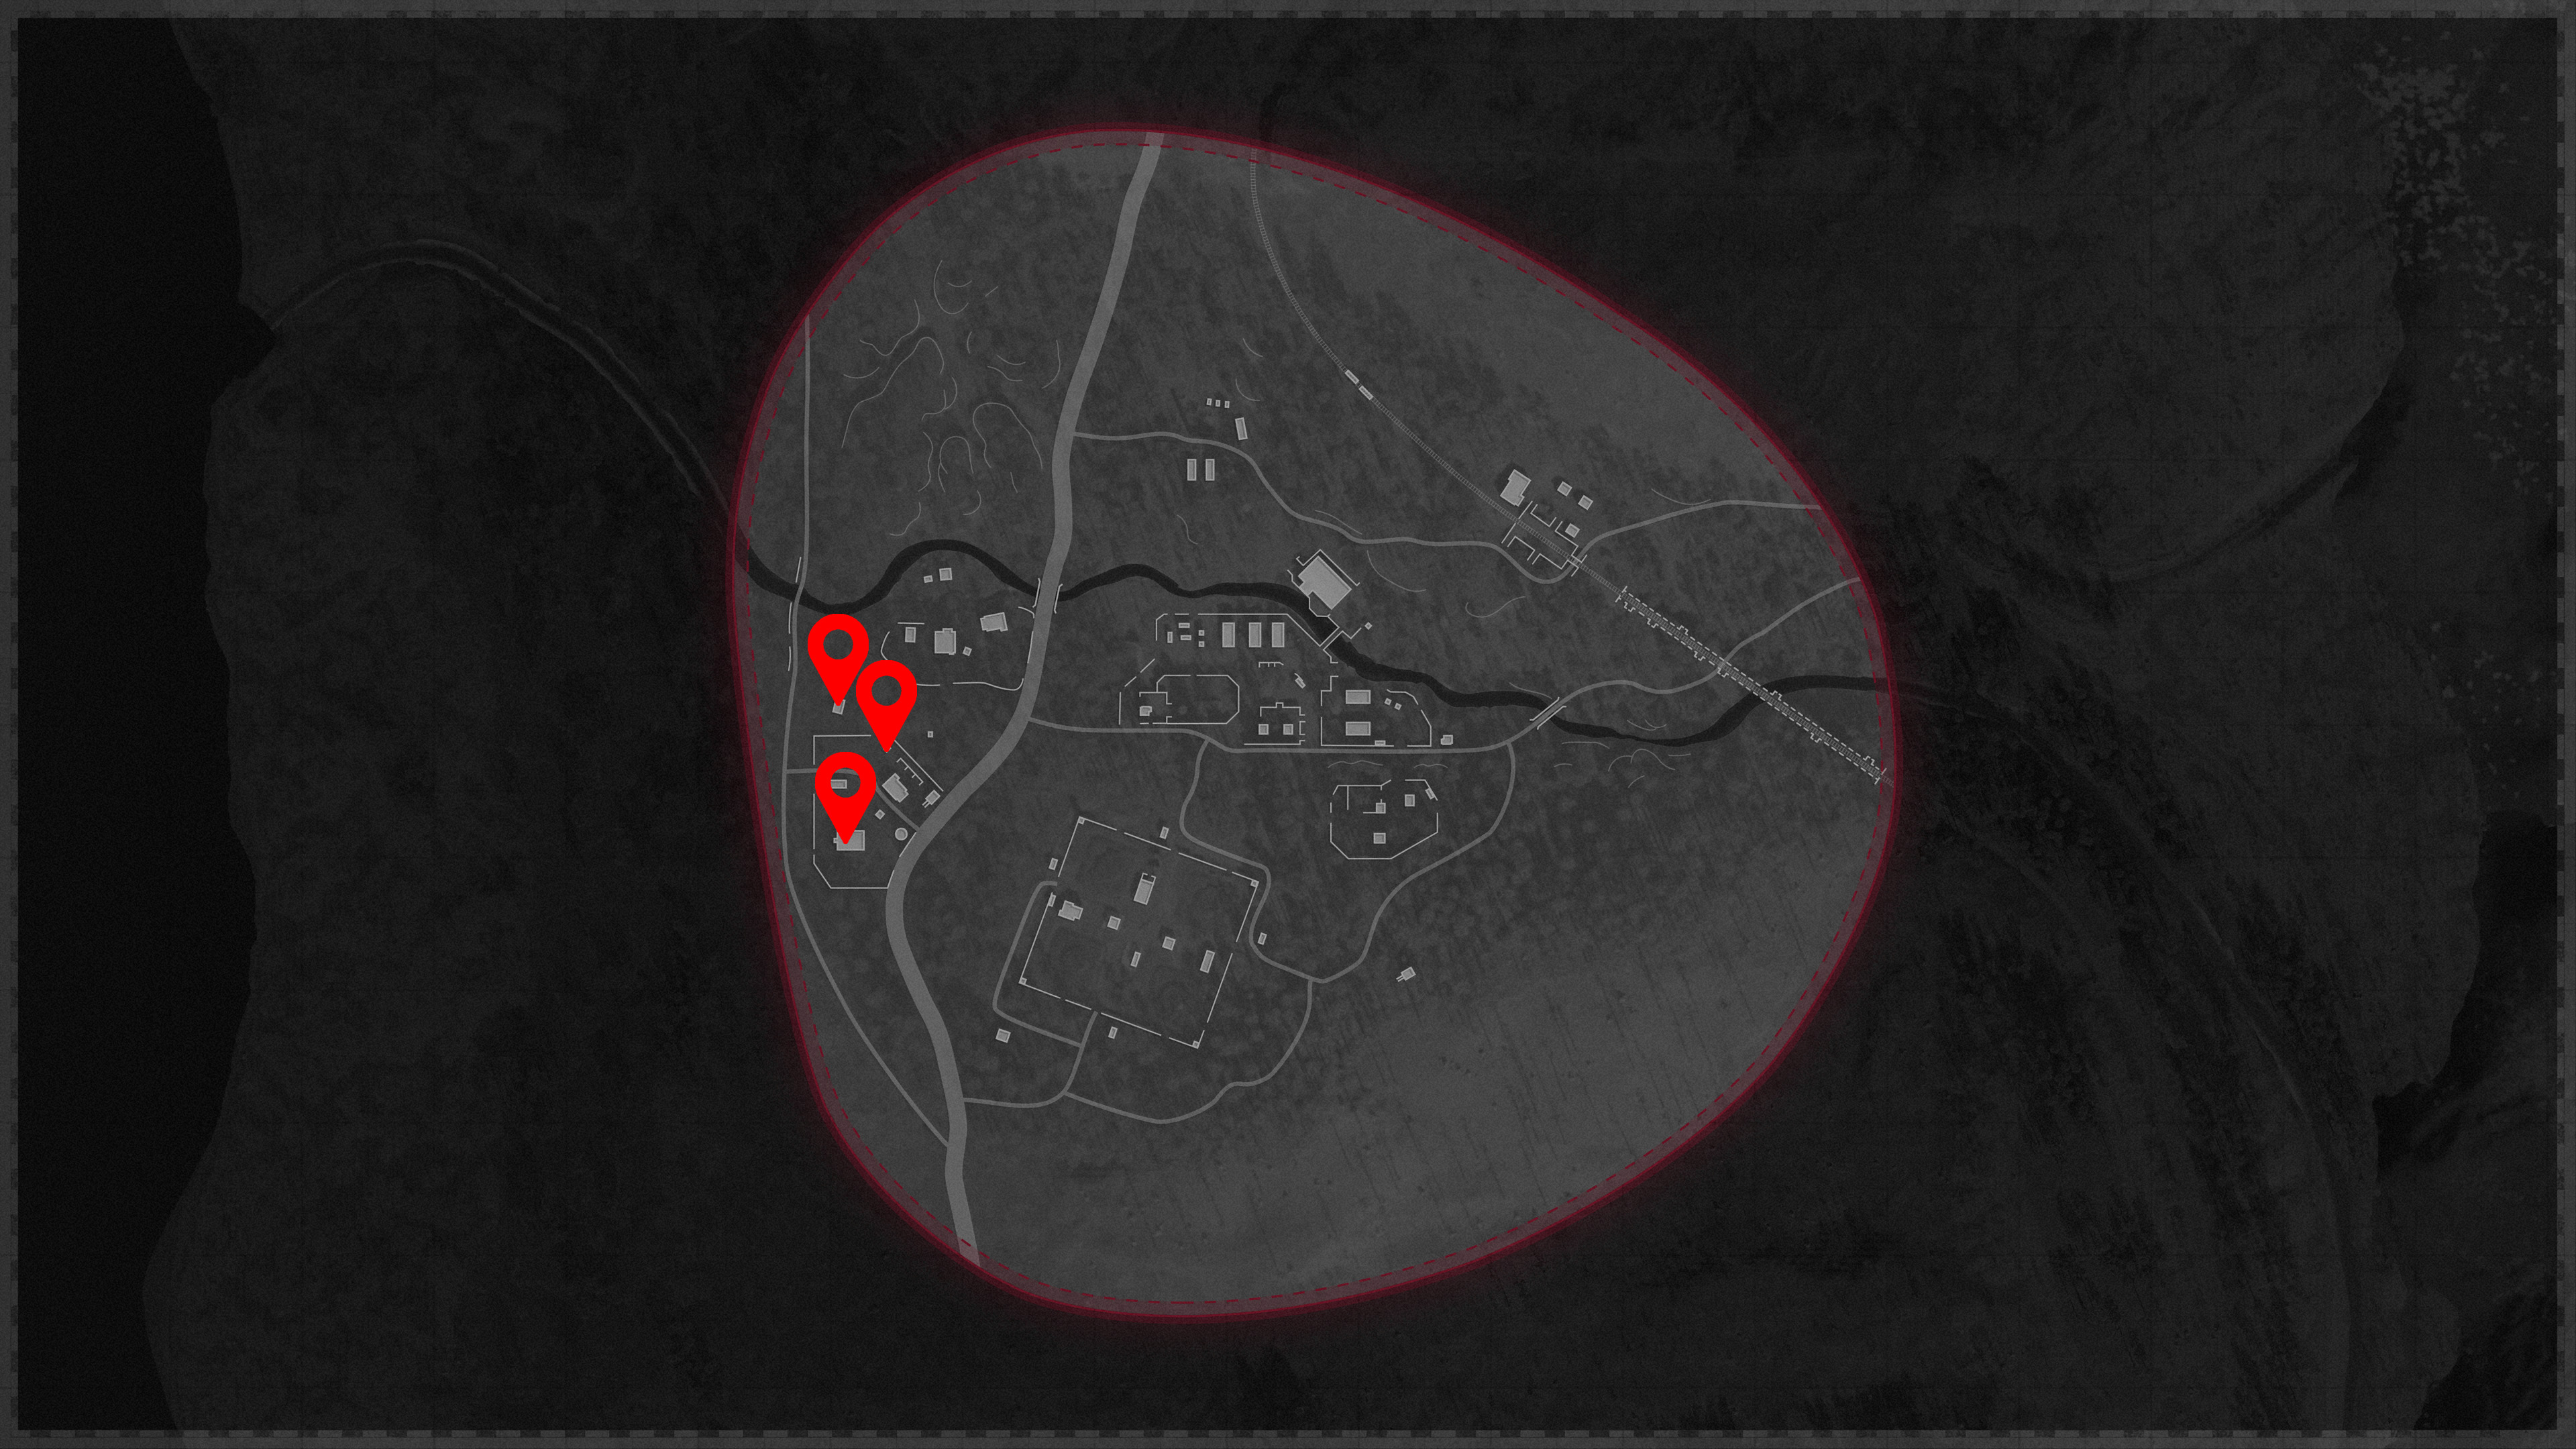
Sanatorium three radios locations
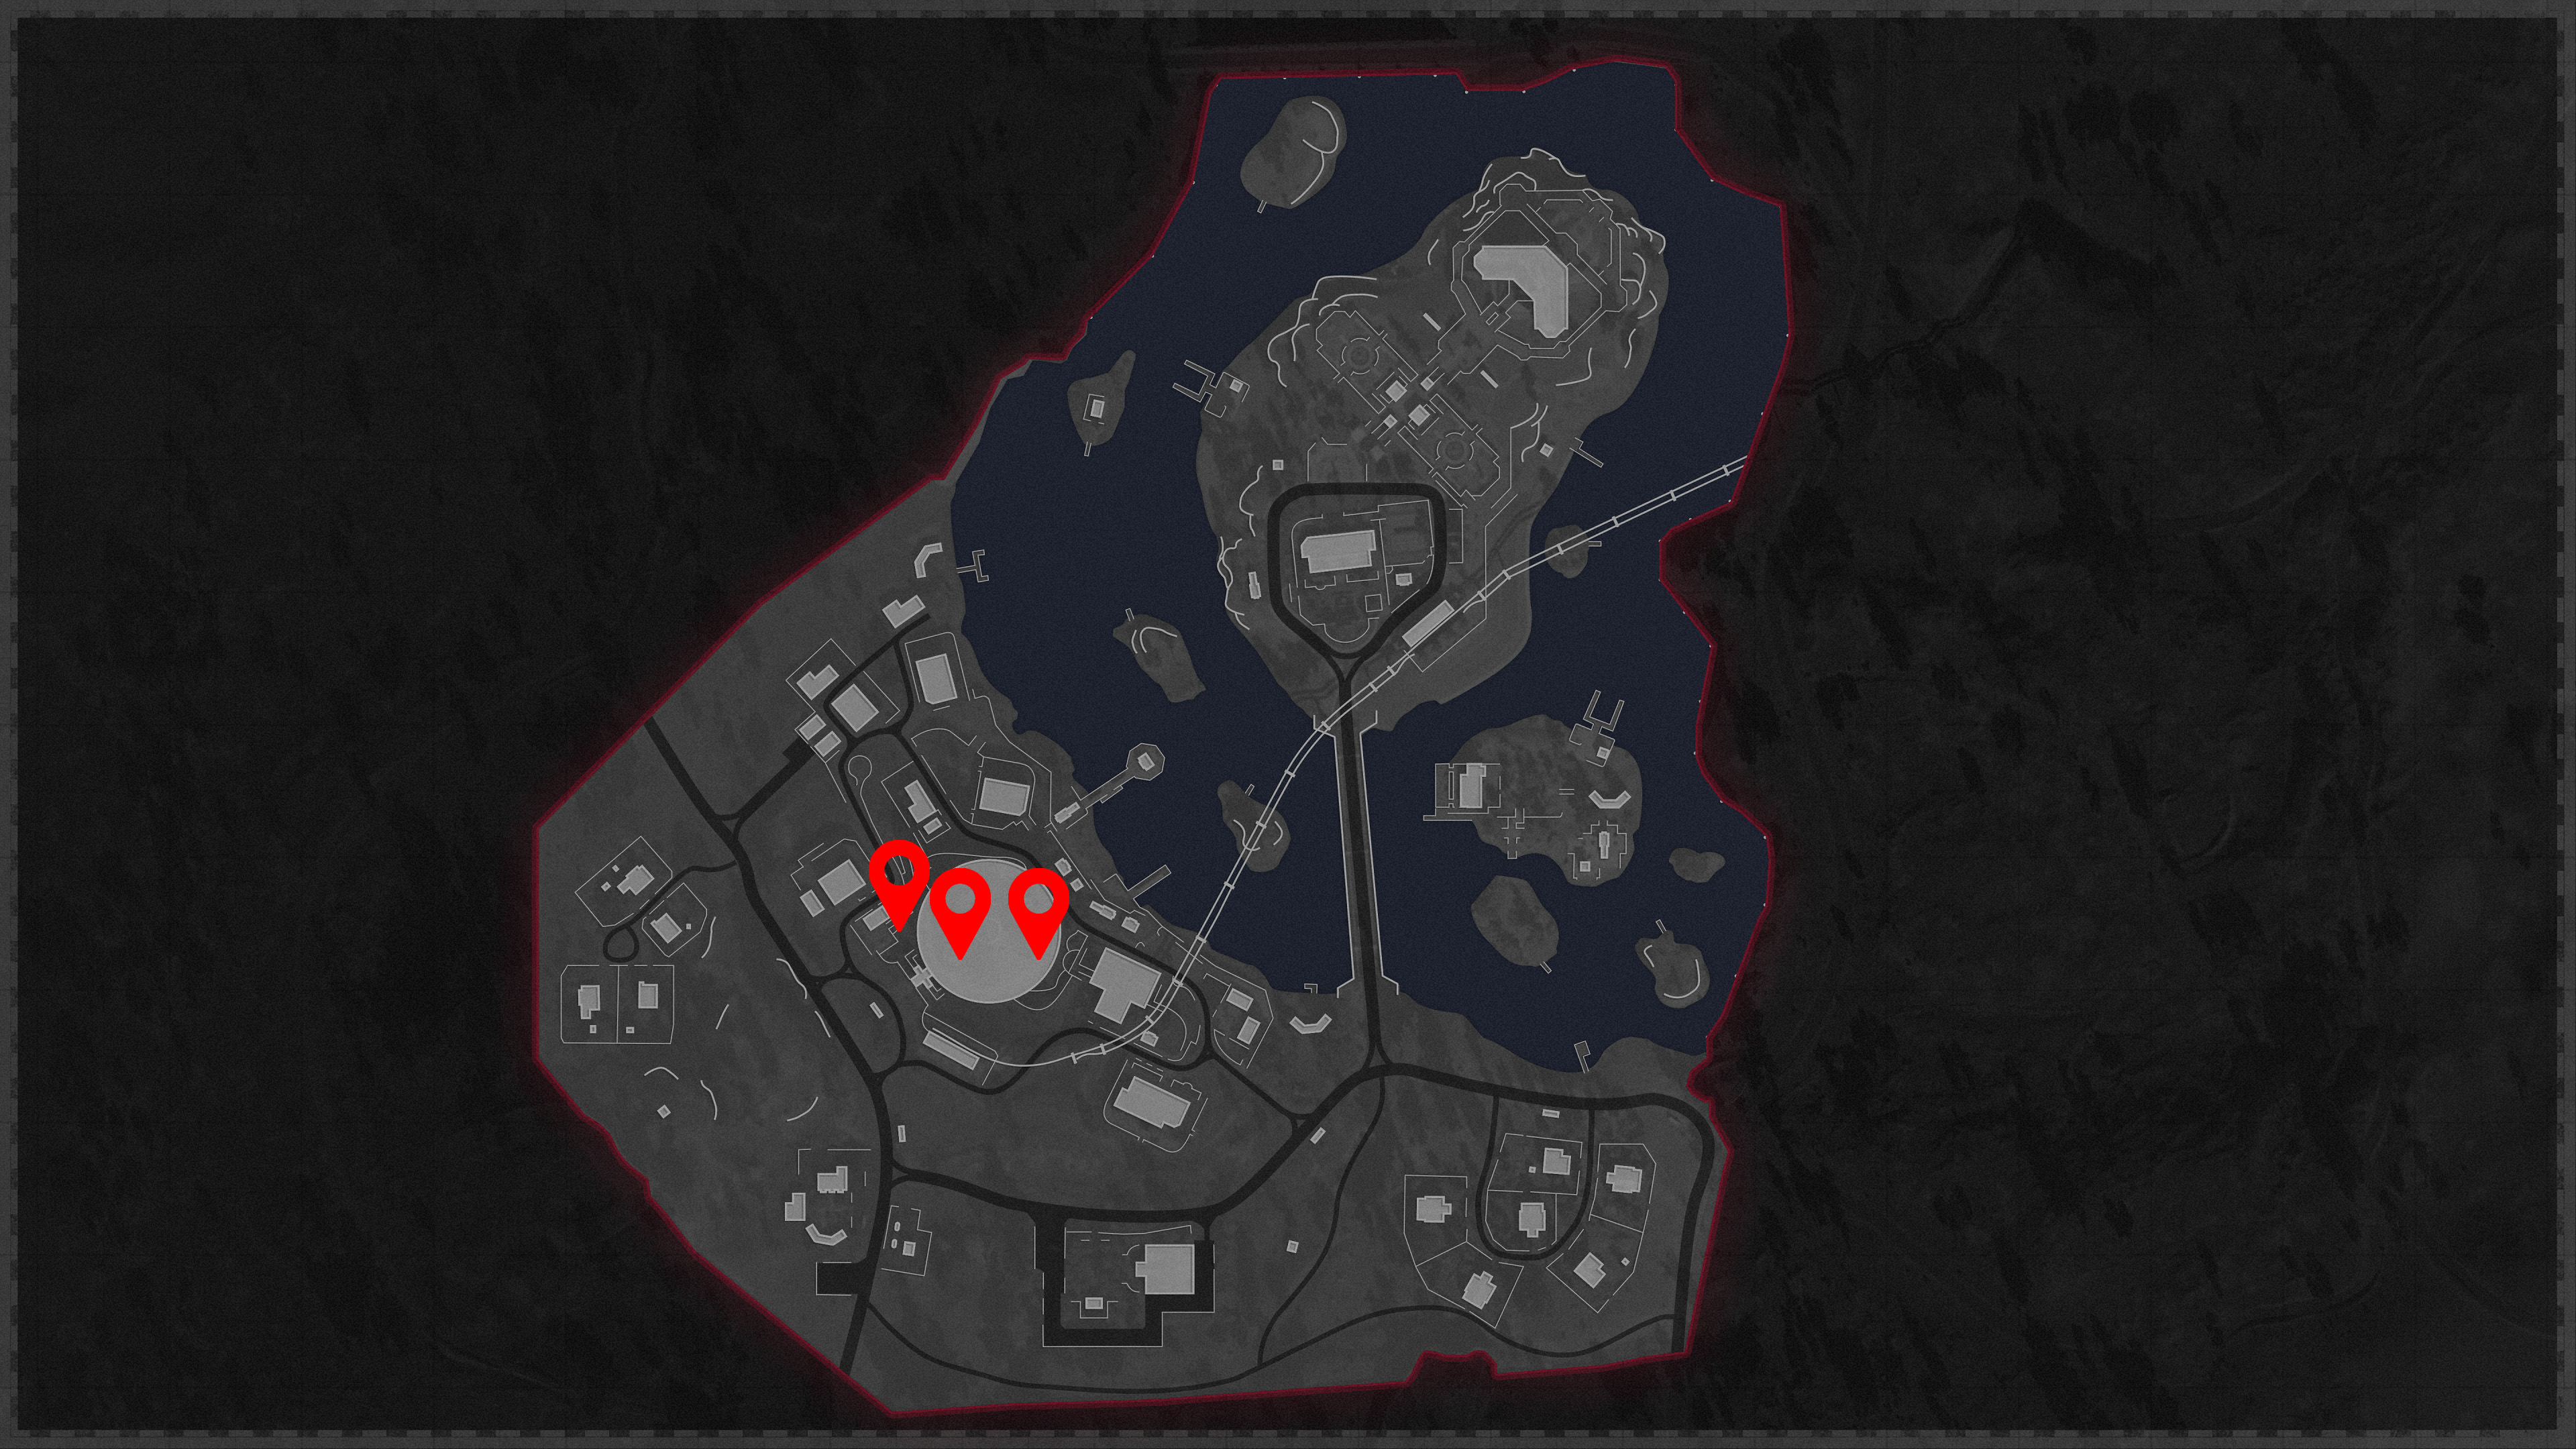
Step 4: Call Maxis
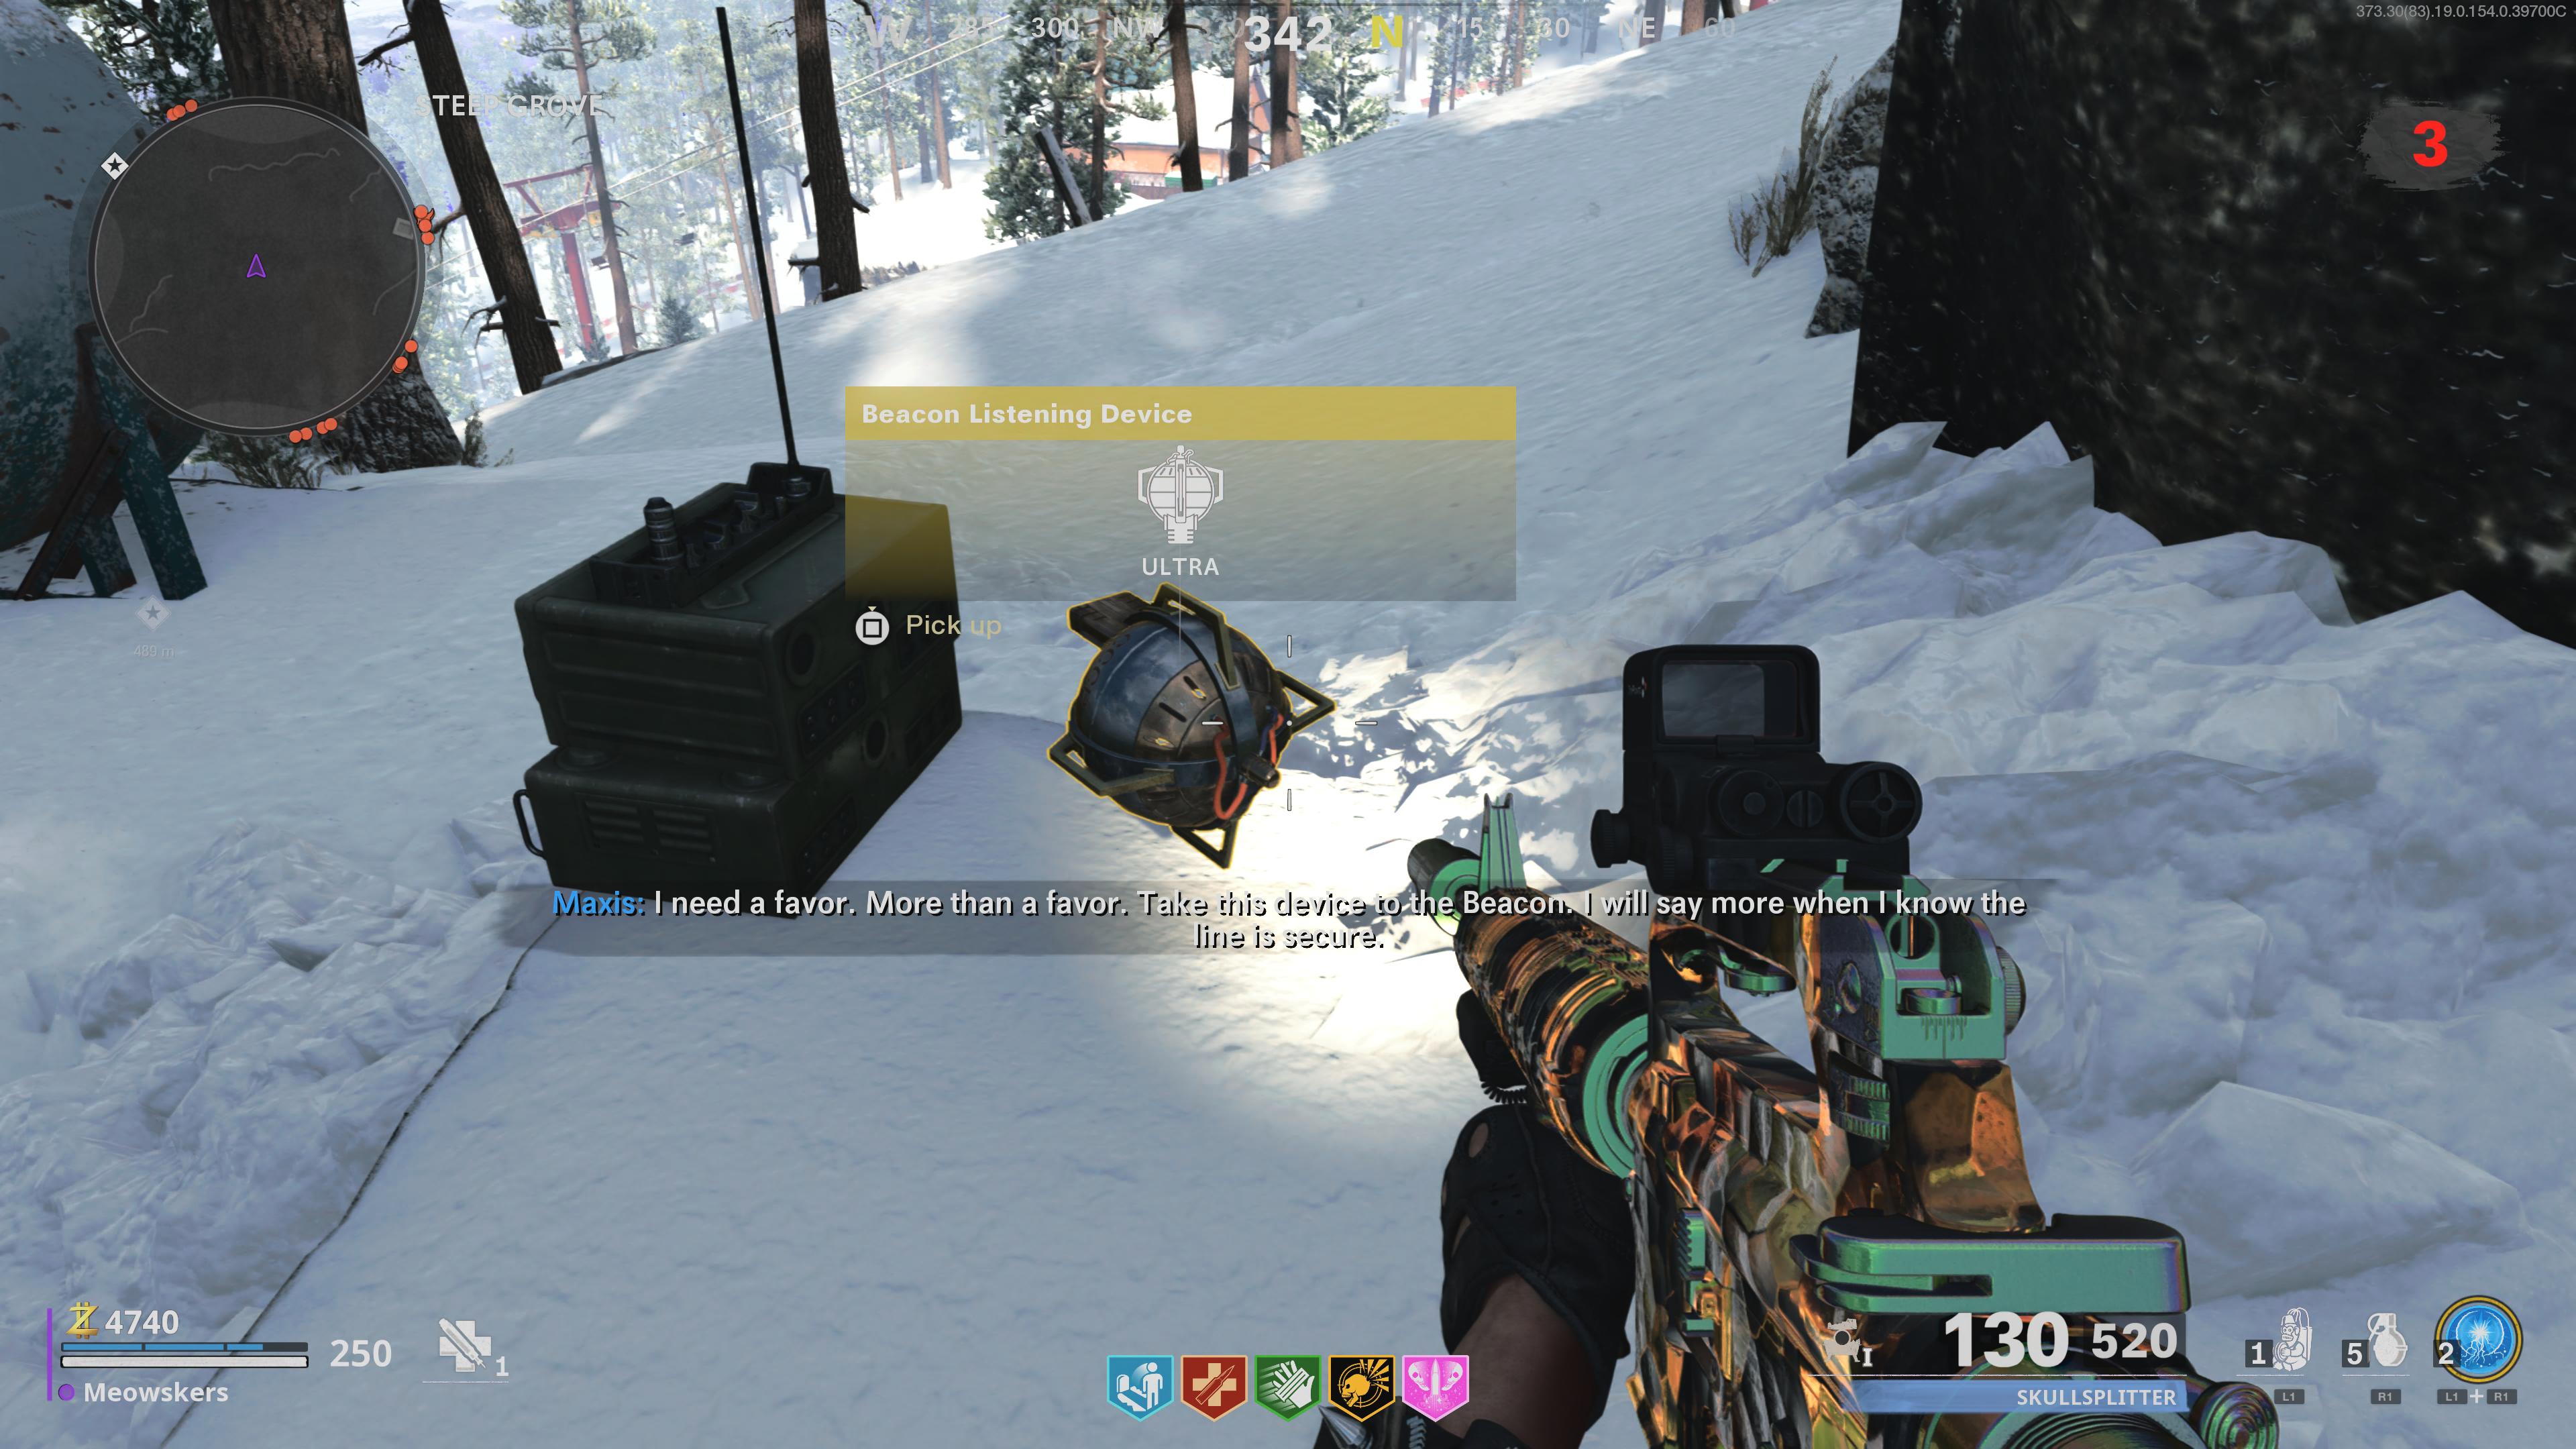
Once you’ve interacted with the first radio again, you’ll be able to hear the full message. Upon doing so, you’ll obtain the Beacon Listening Device, so pick it up and head to the beacon.
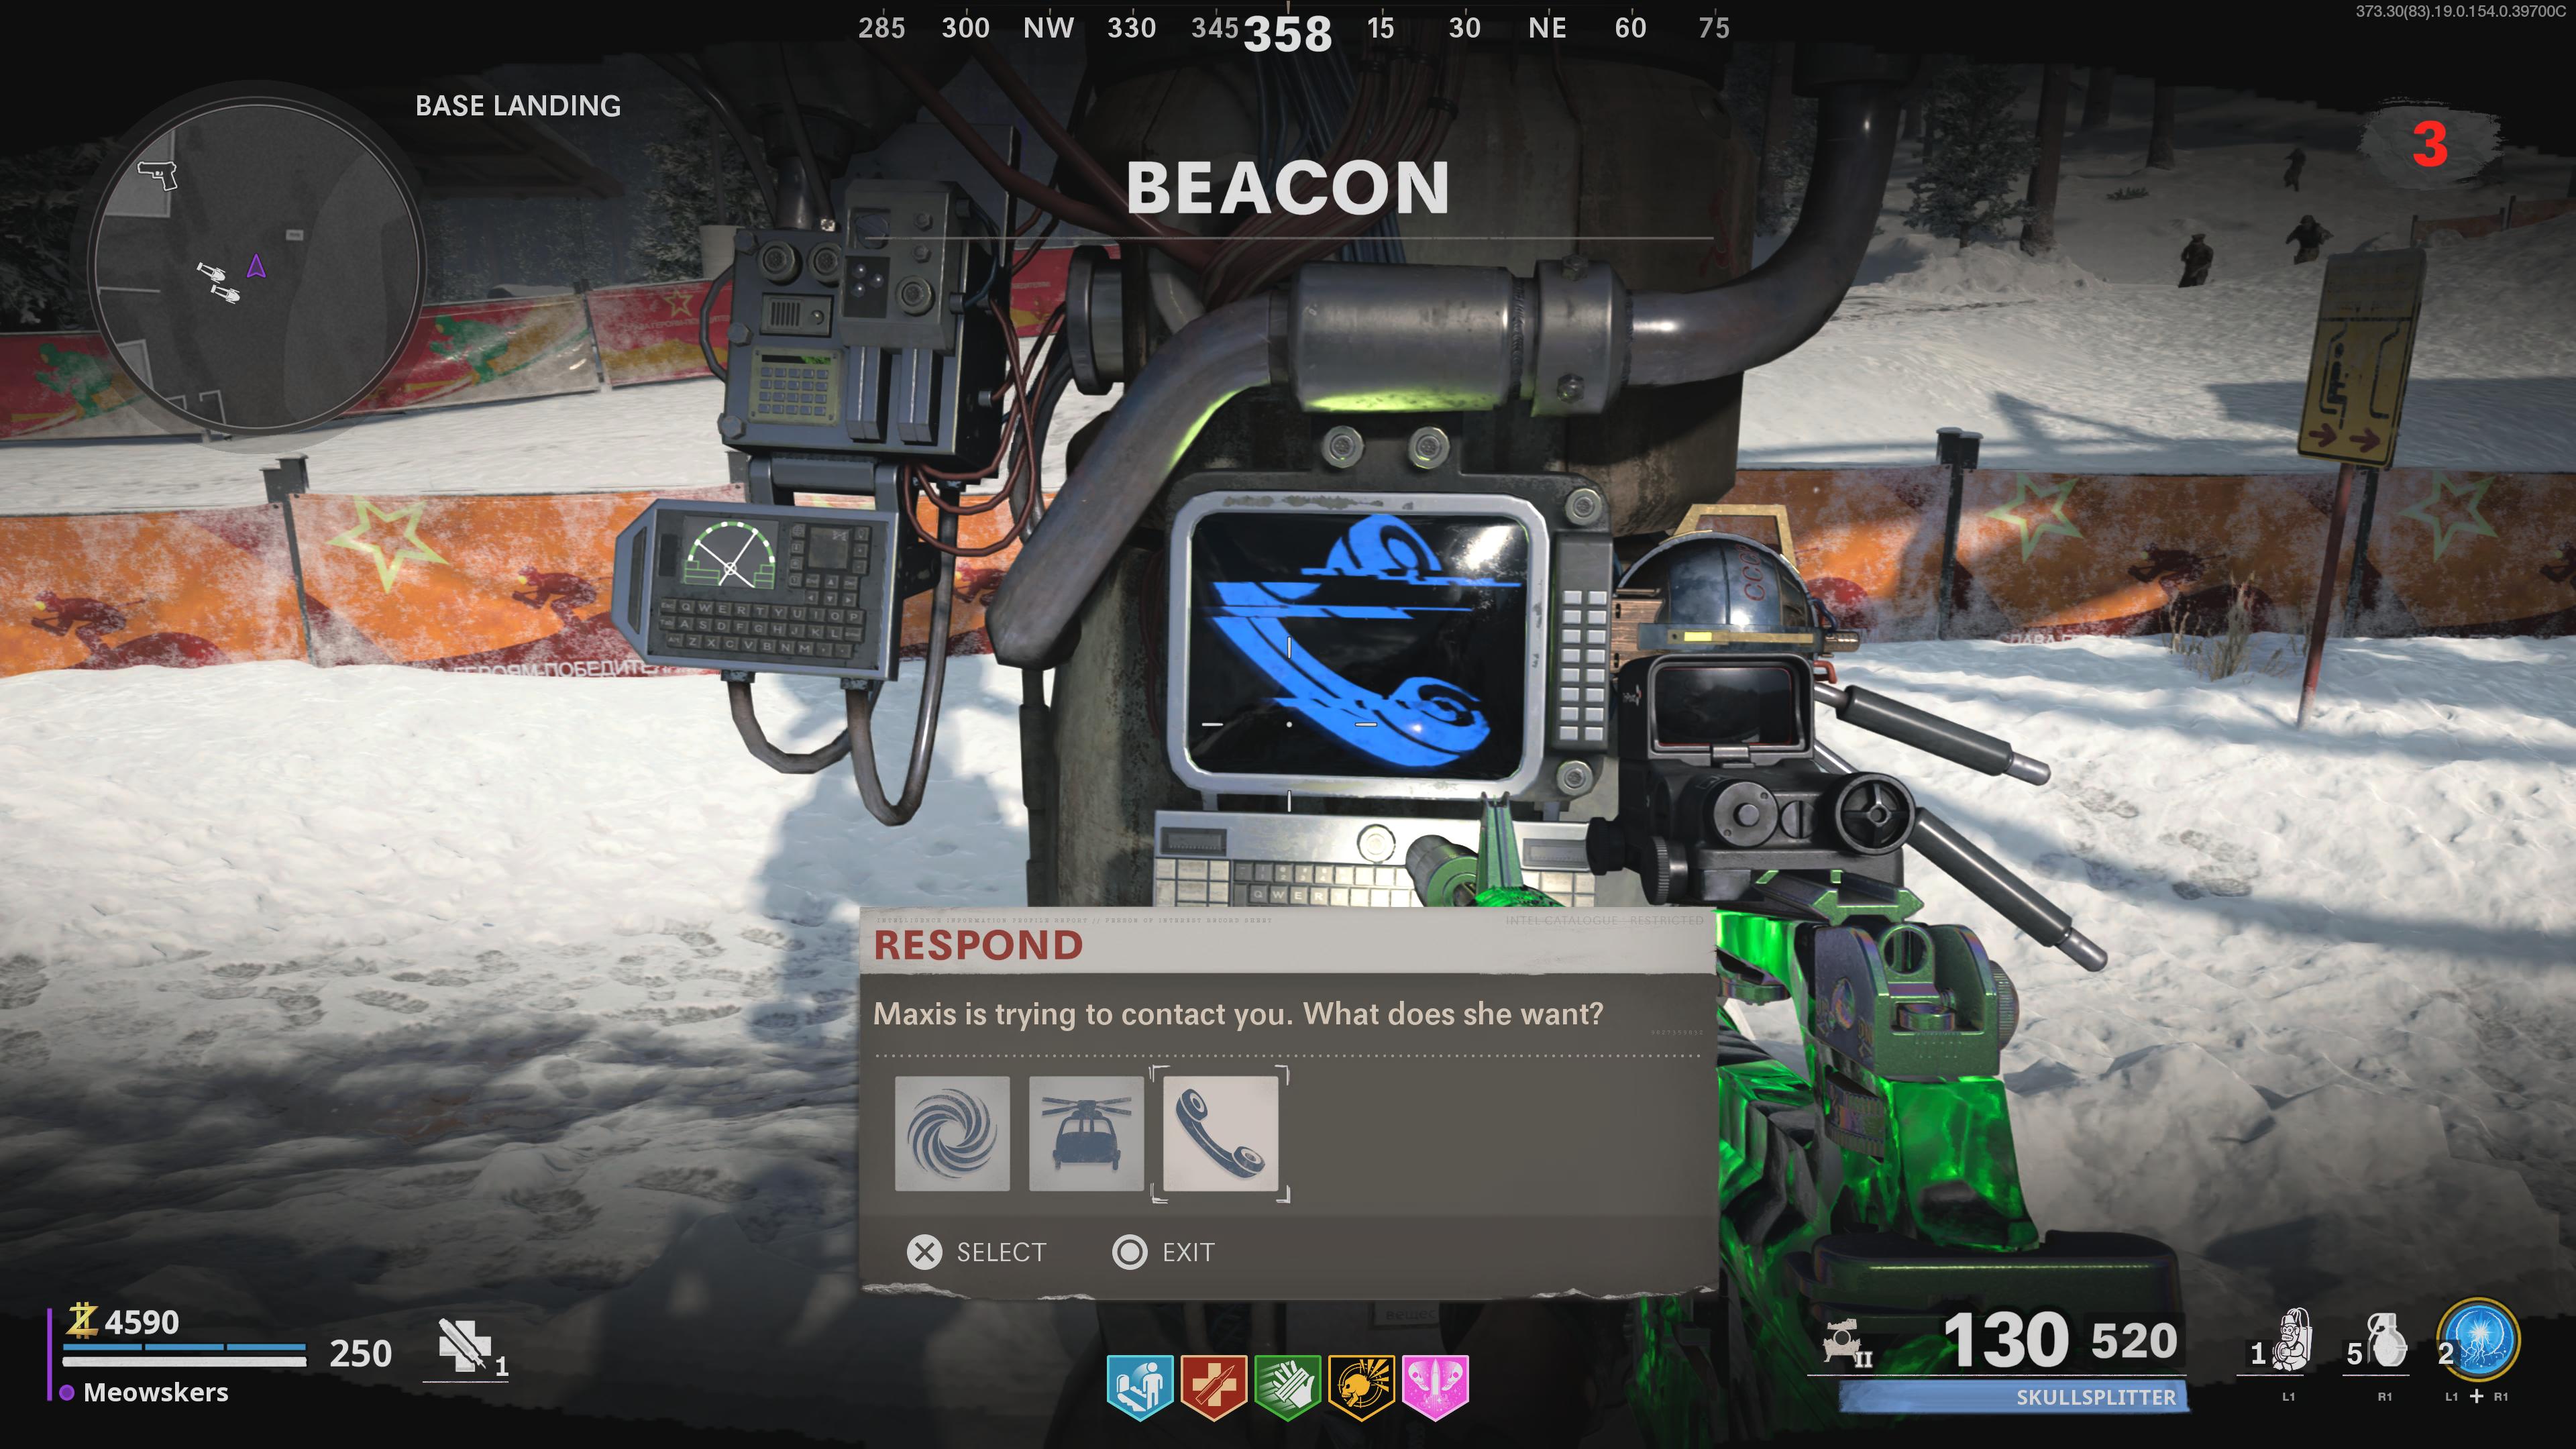
Here, you’ll see a new option that allows you to “Respond,” so select that to talk with Maxis. After you do, you’ll want to warp to the next area, which will take you to World Tier 4.
Step 5: Locate monkey to obtain Microfilm slides
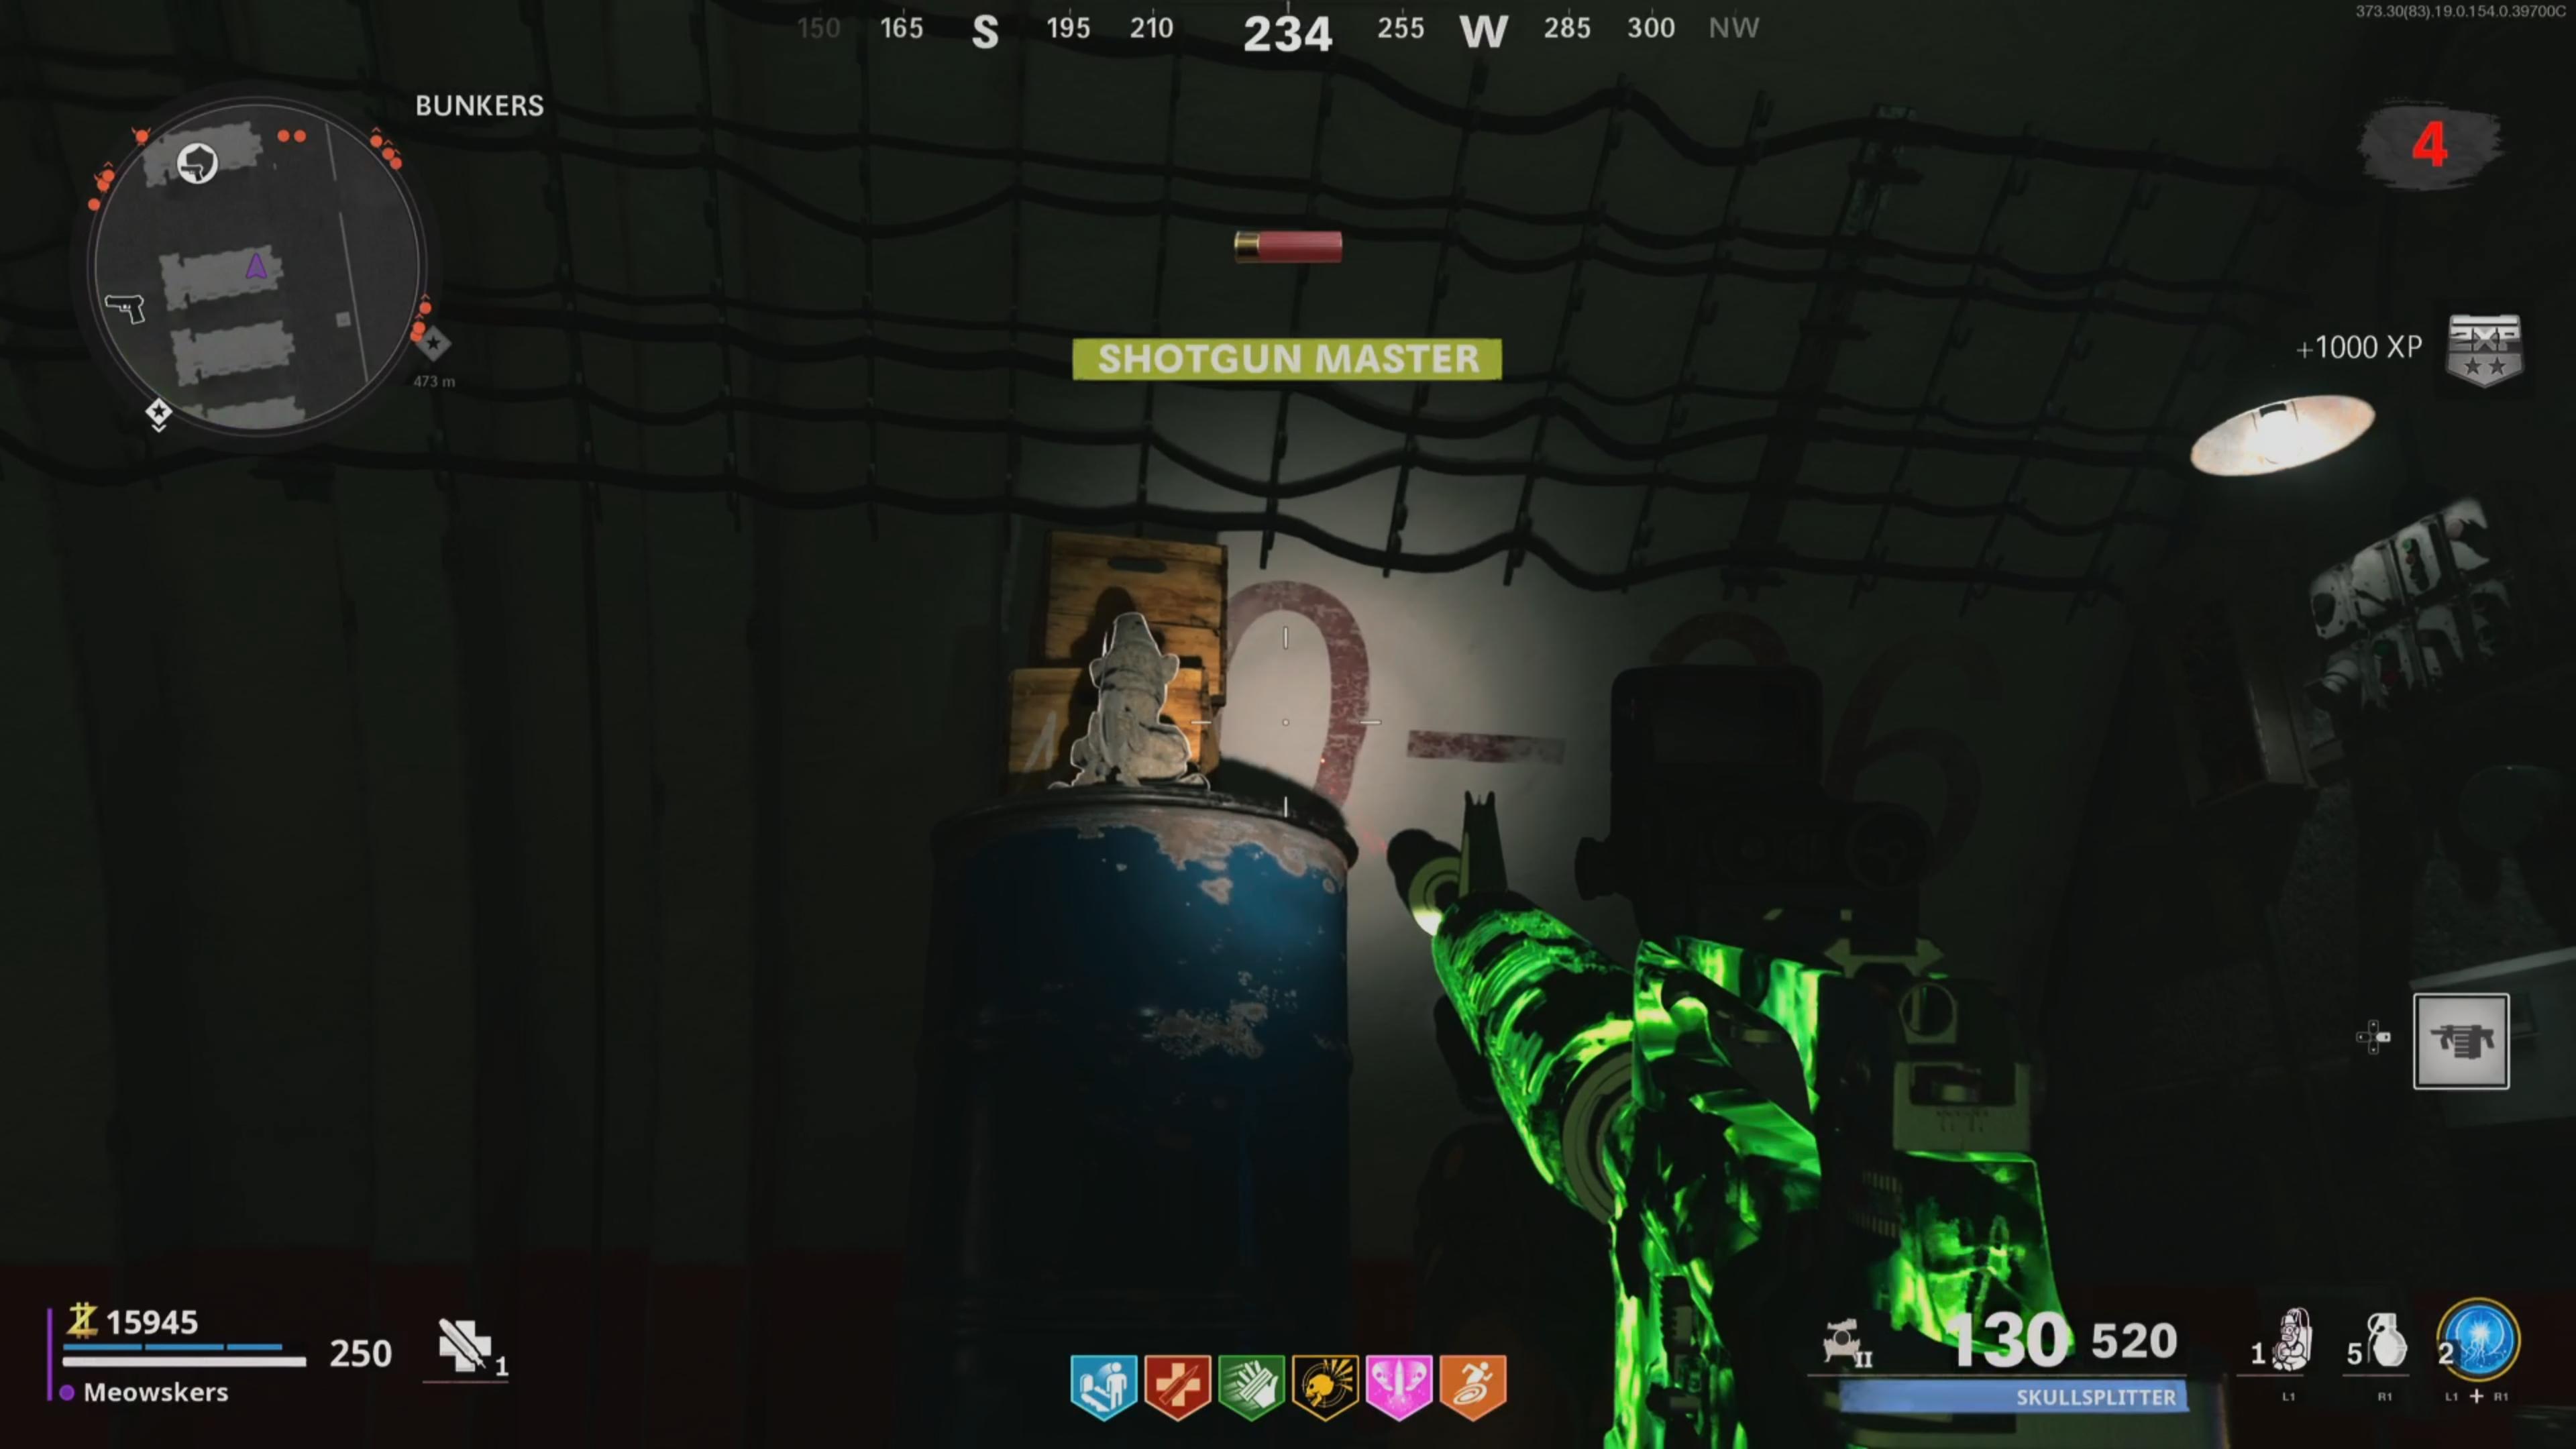
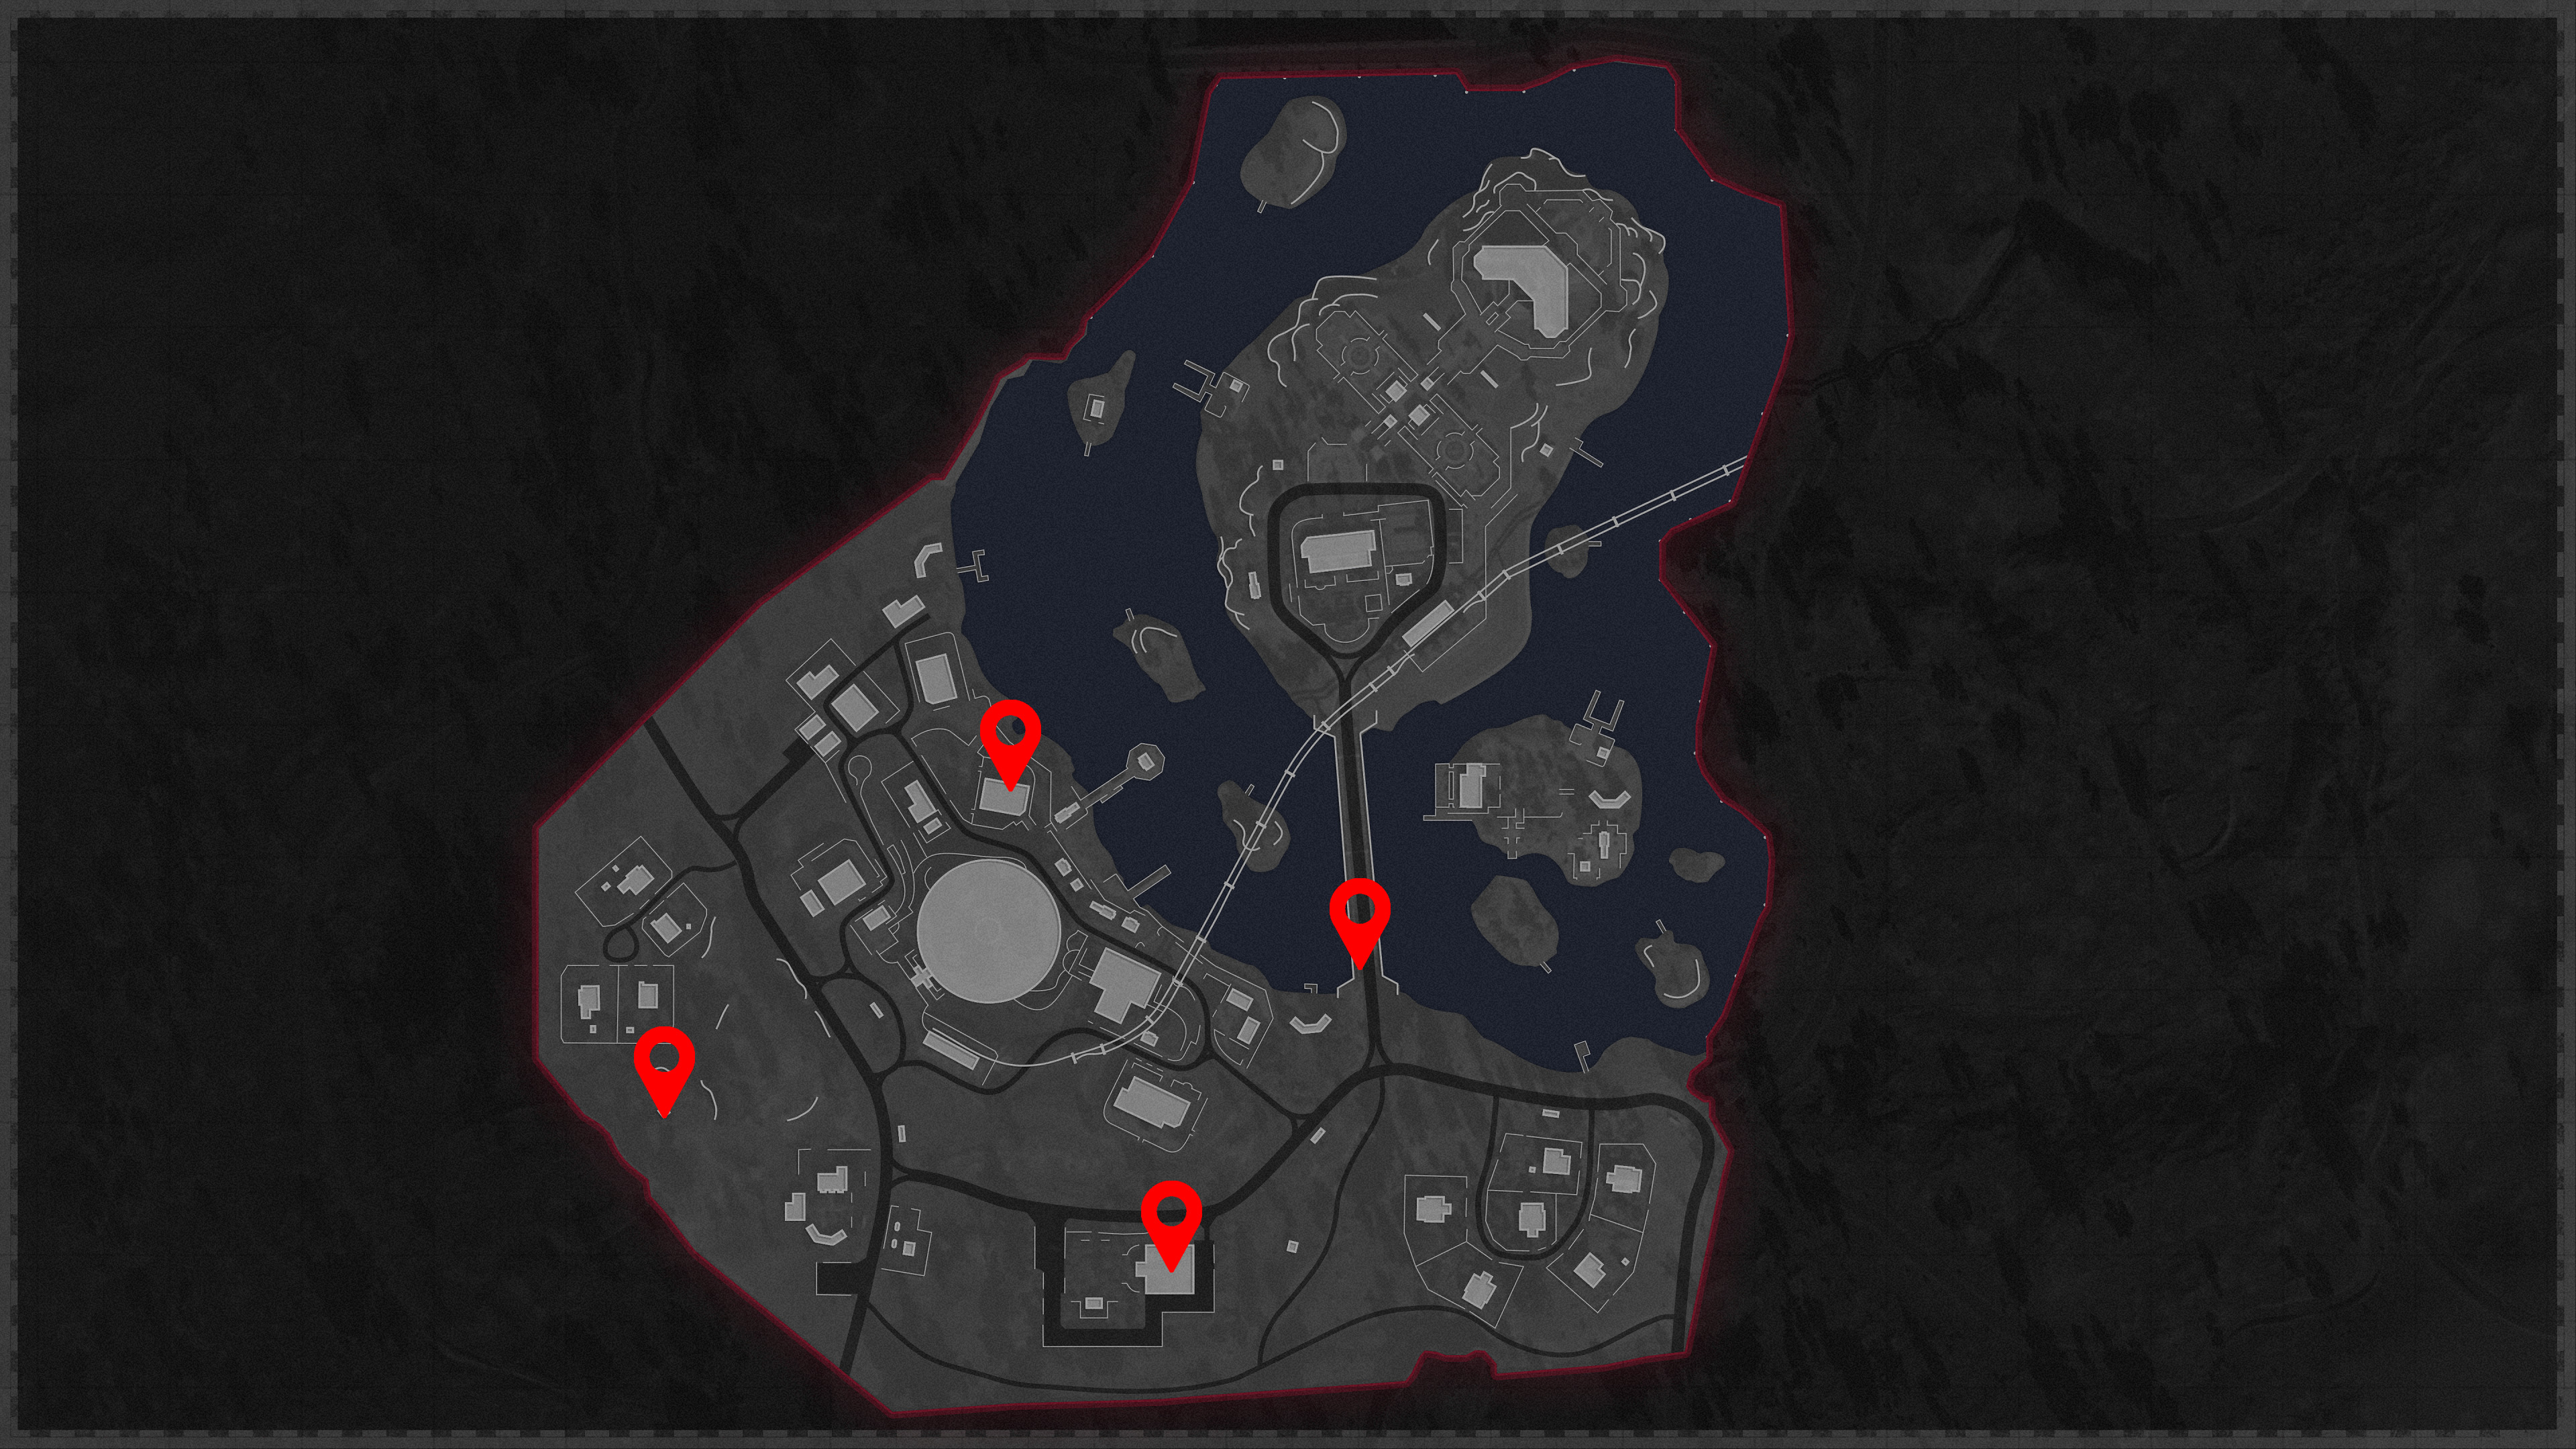
Much like the steps with the radios, the next Cold War Outbreak Easter Egg objective is to find and shoot a monkey that has four possible spawns across the five maps. In fact, four monkeys will spawn on each map, but the one you’re looking for has the letter “M” next to it. If it’s the correct one, it’ll drop the Microfilm Slides when shot. Below are the locations of the monkeys on each map:
Alpine monkeys
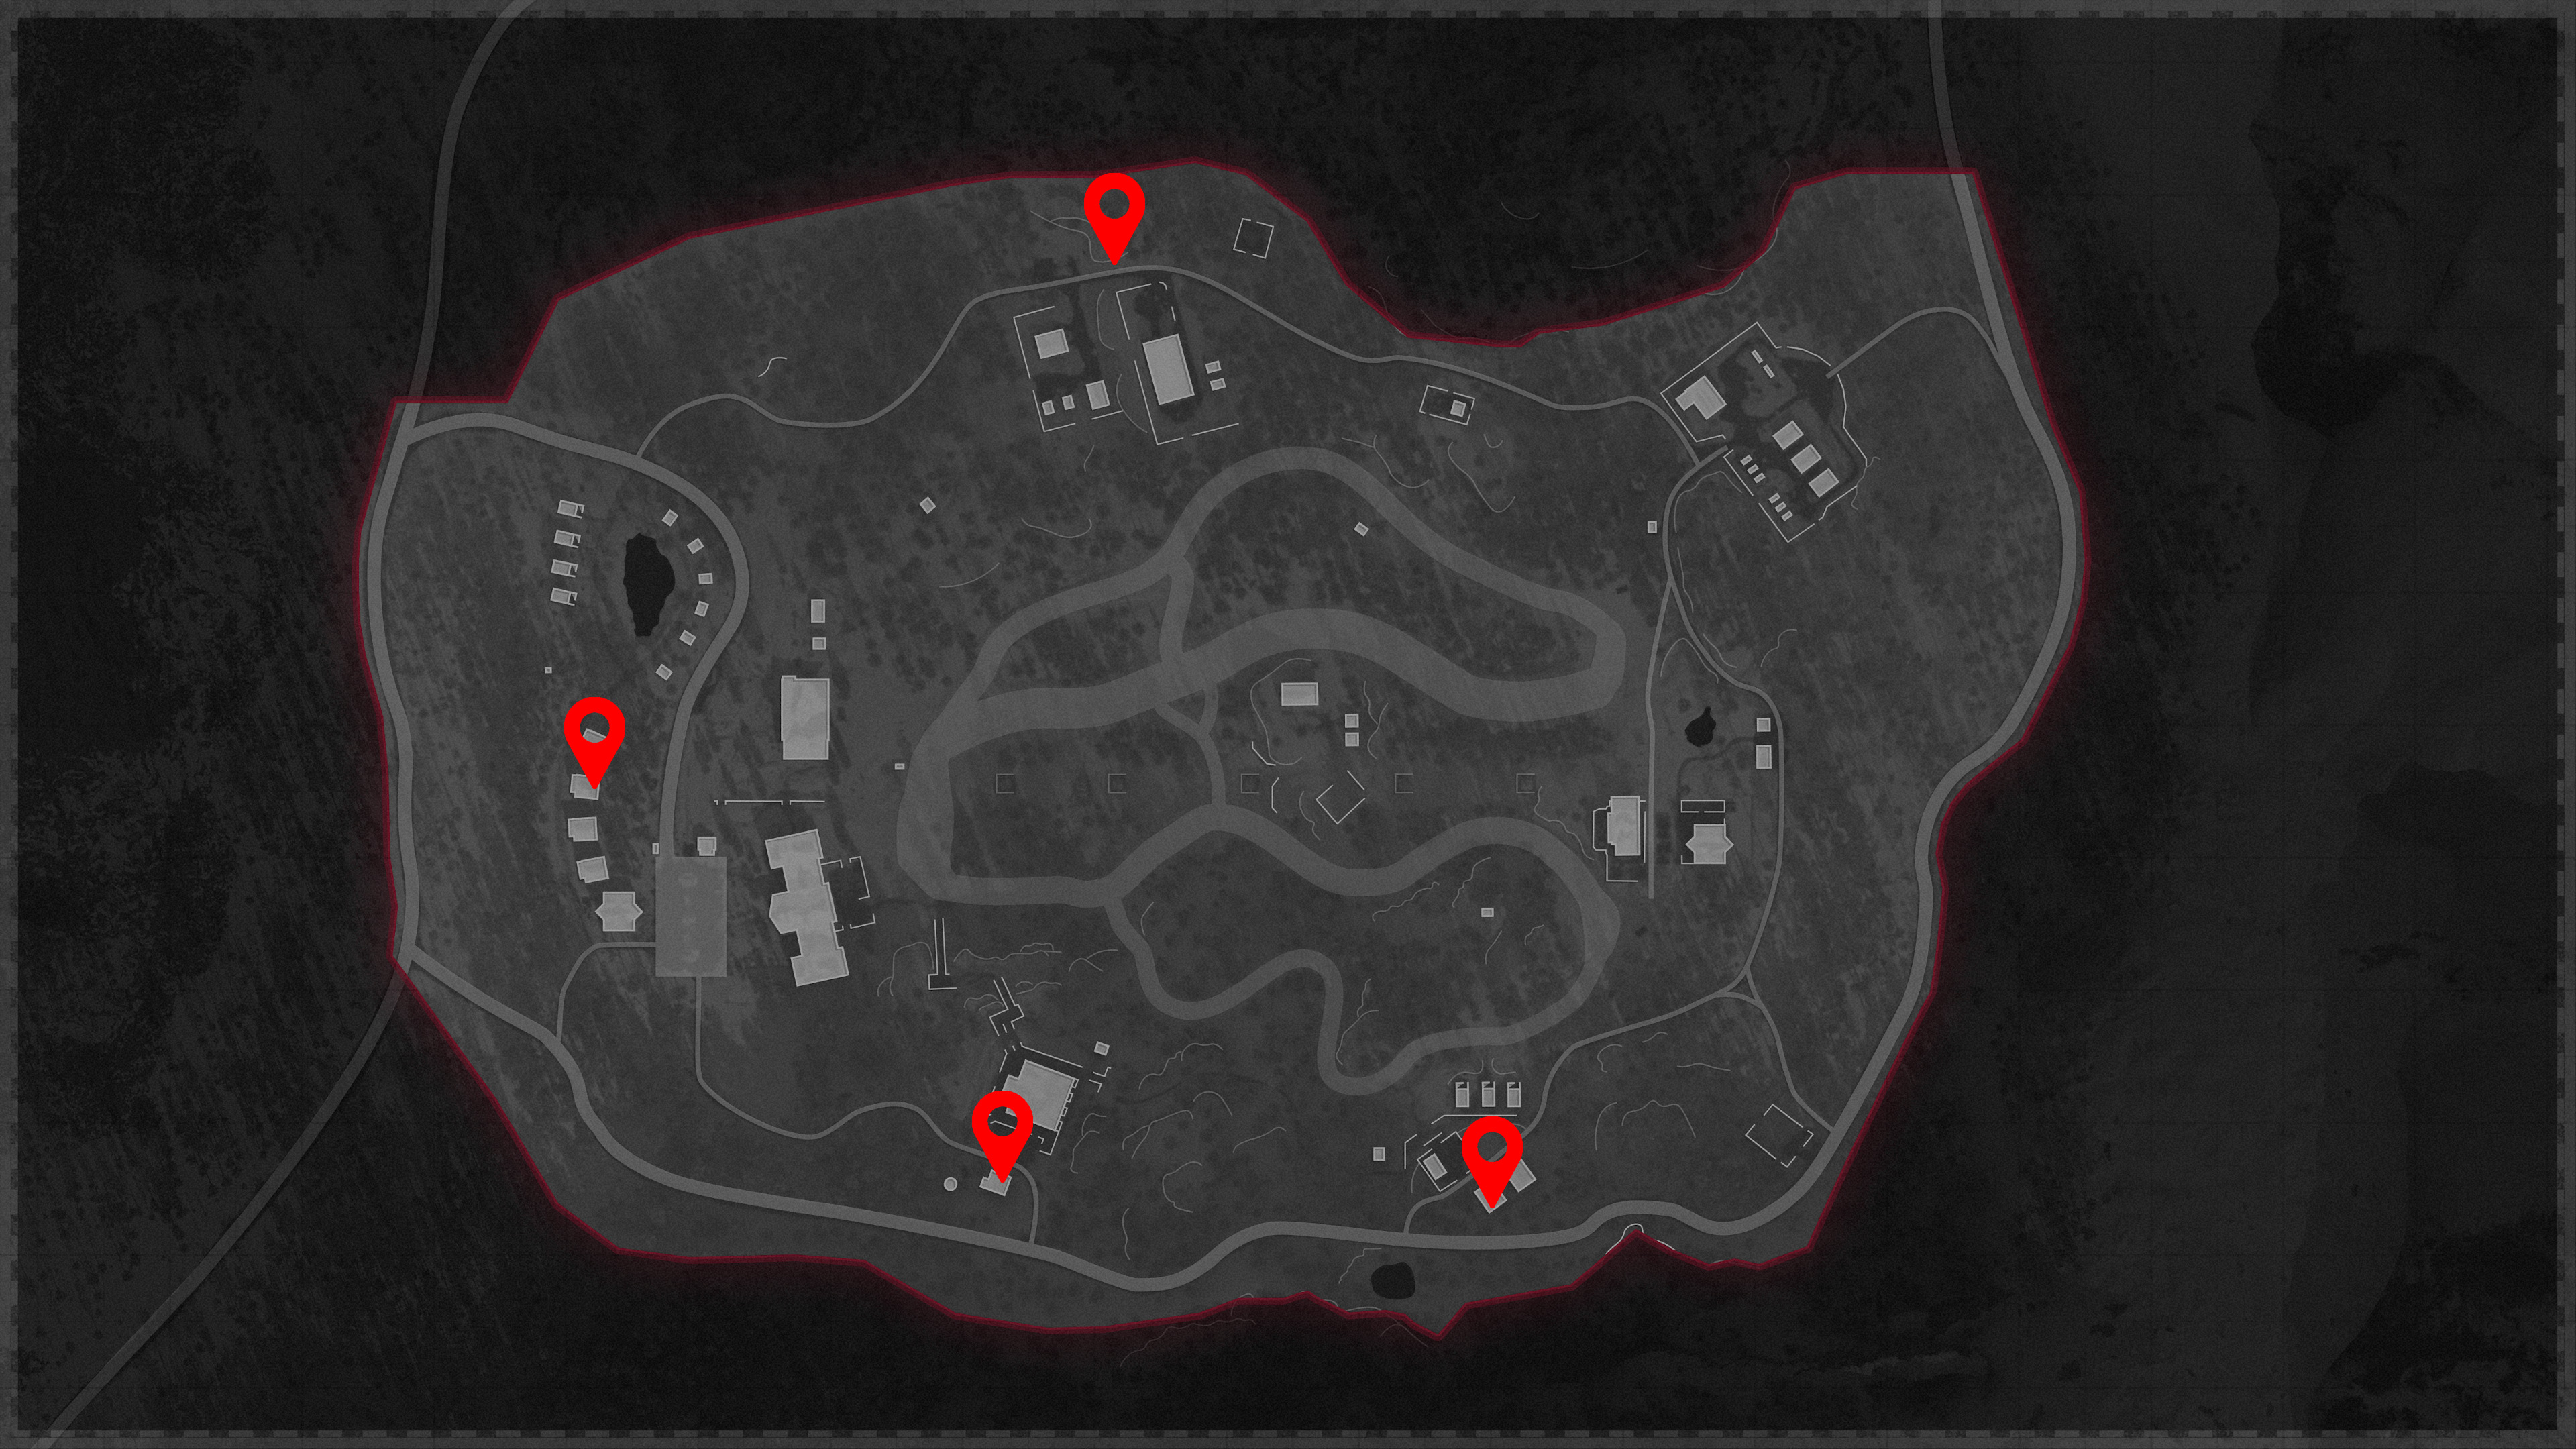
Duga monkeys
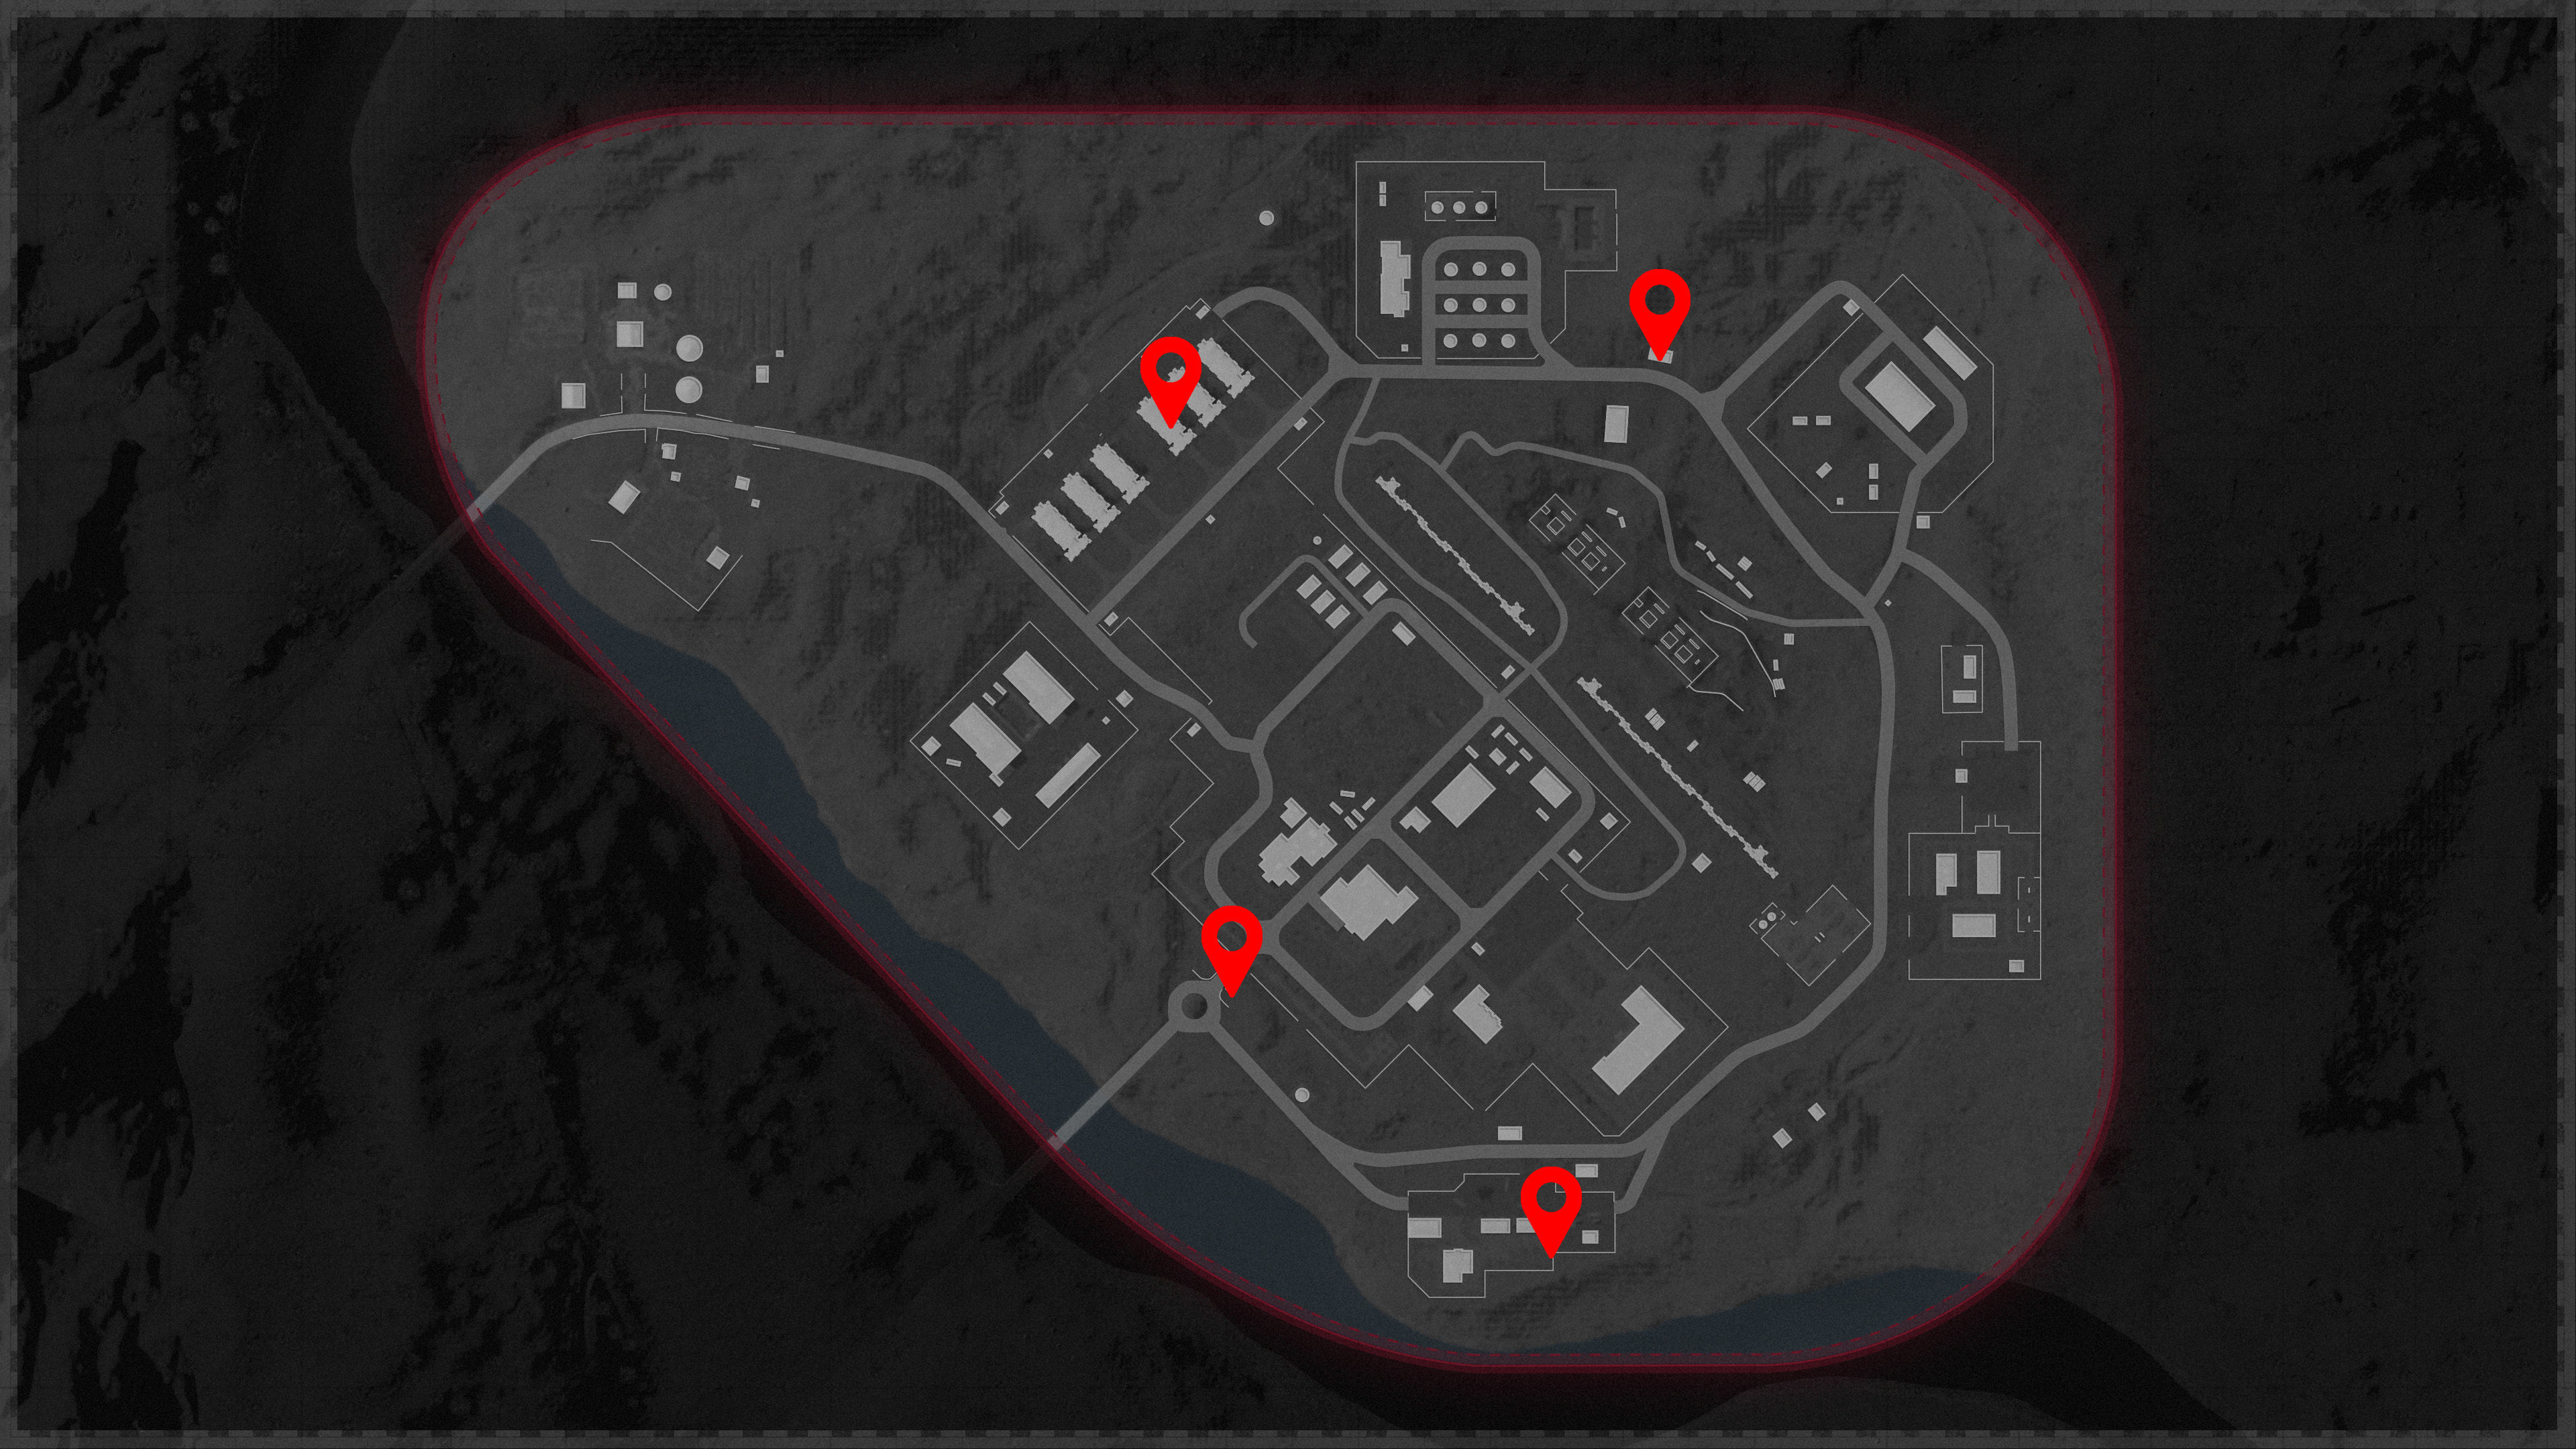
Golova monkeys
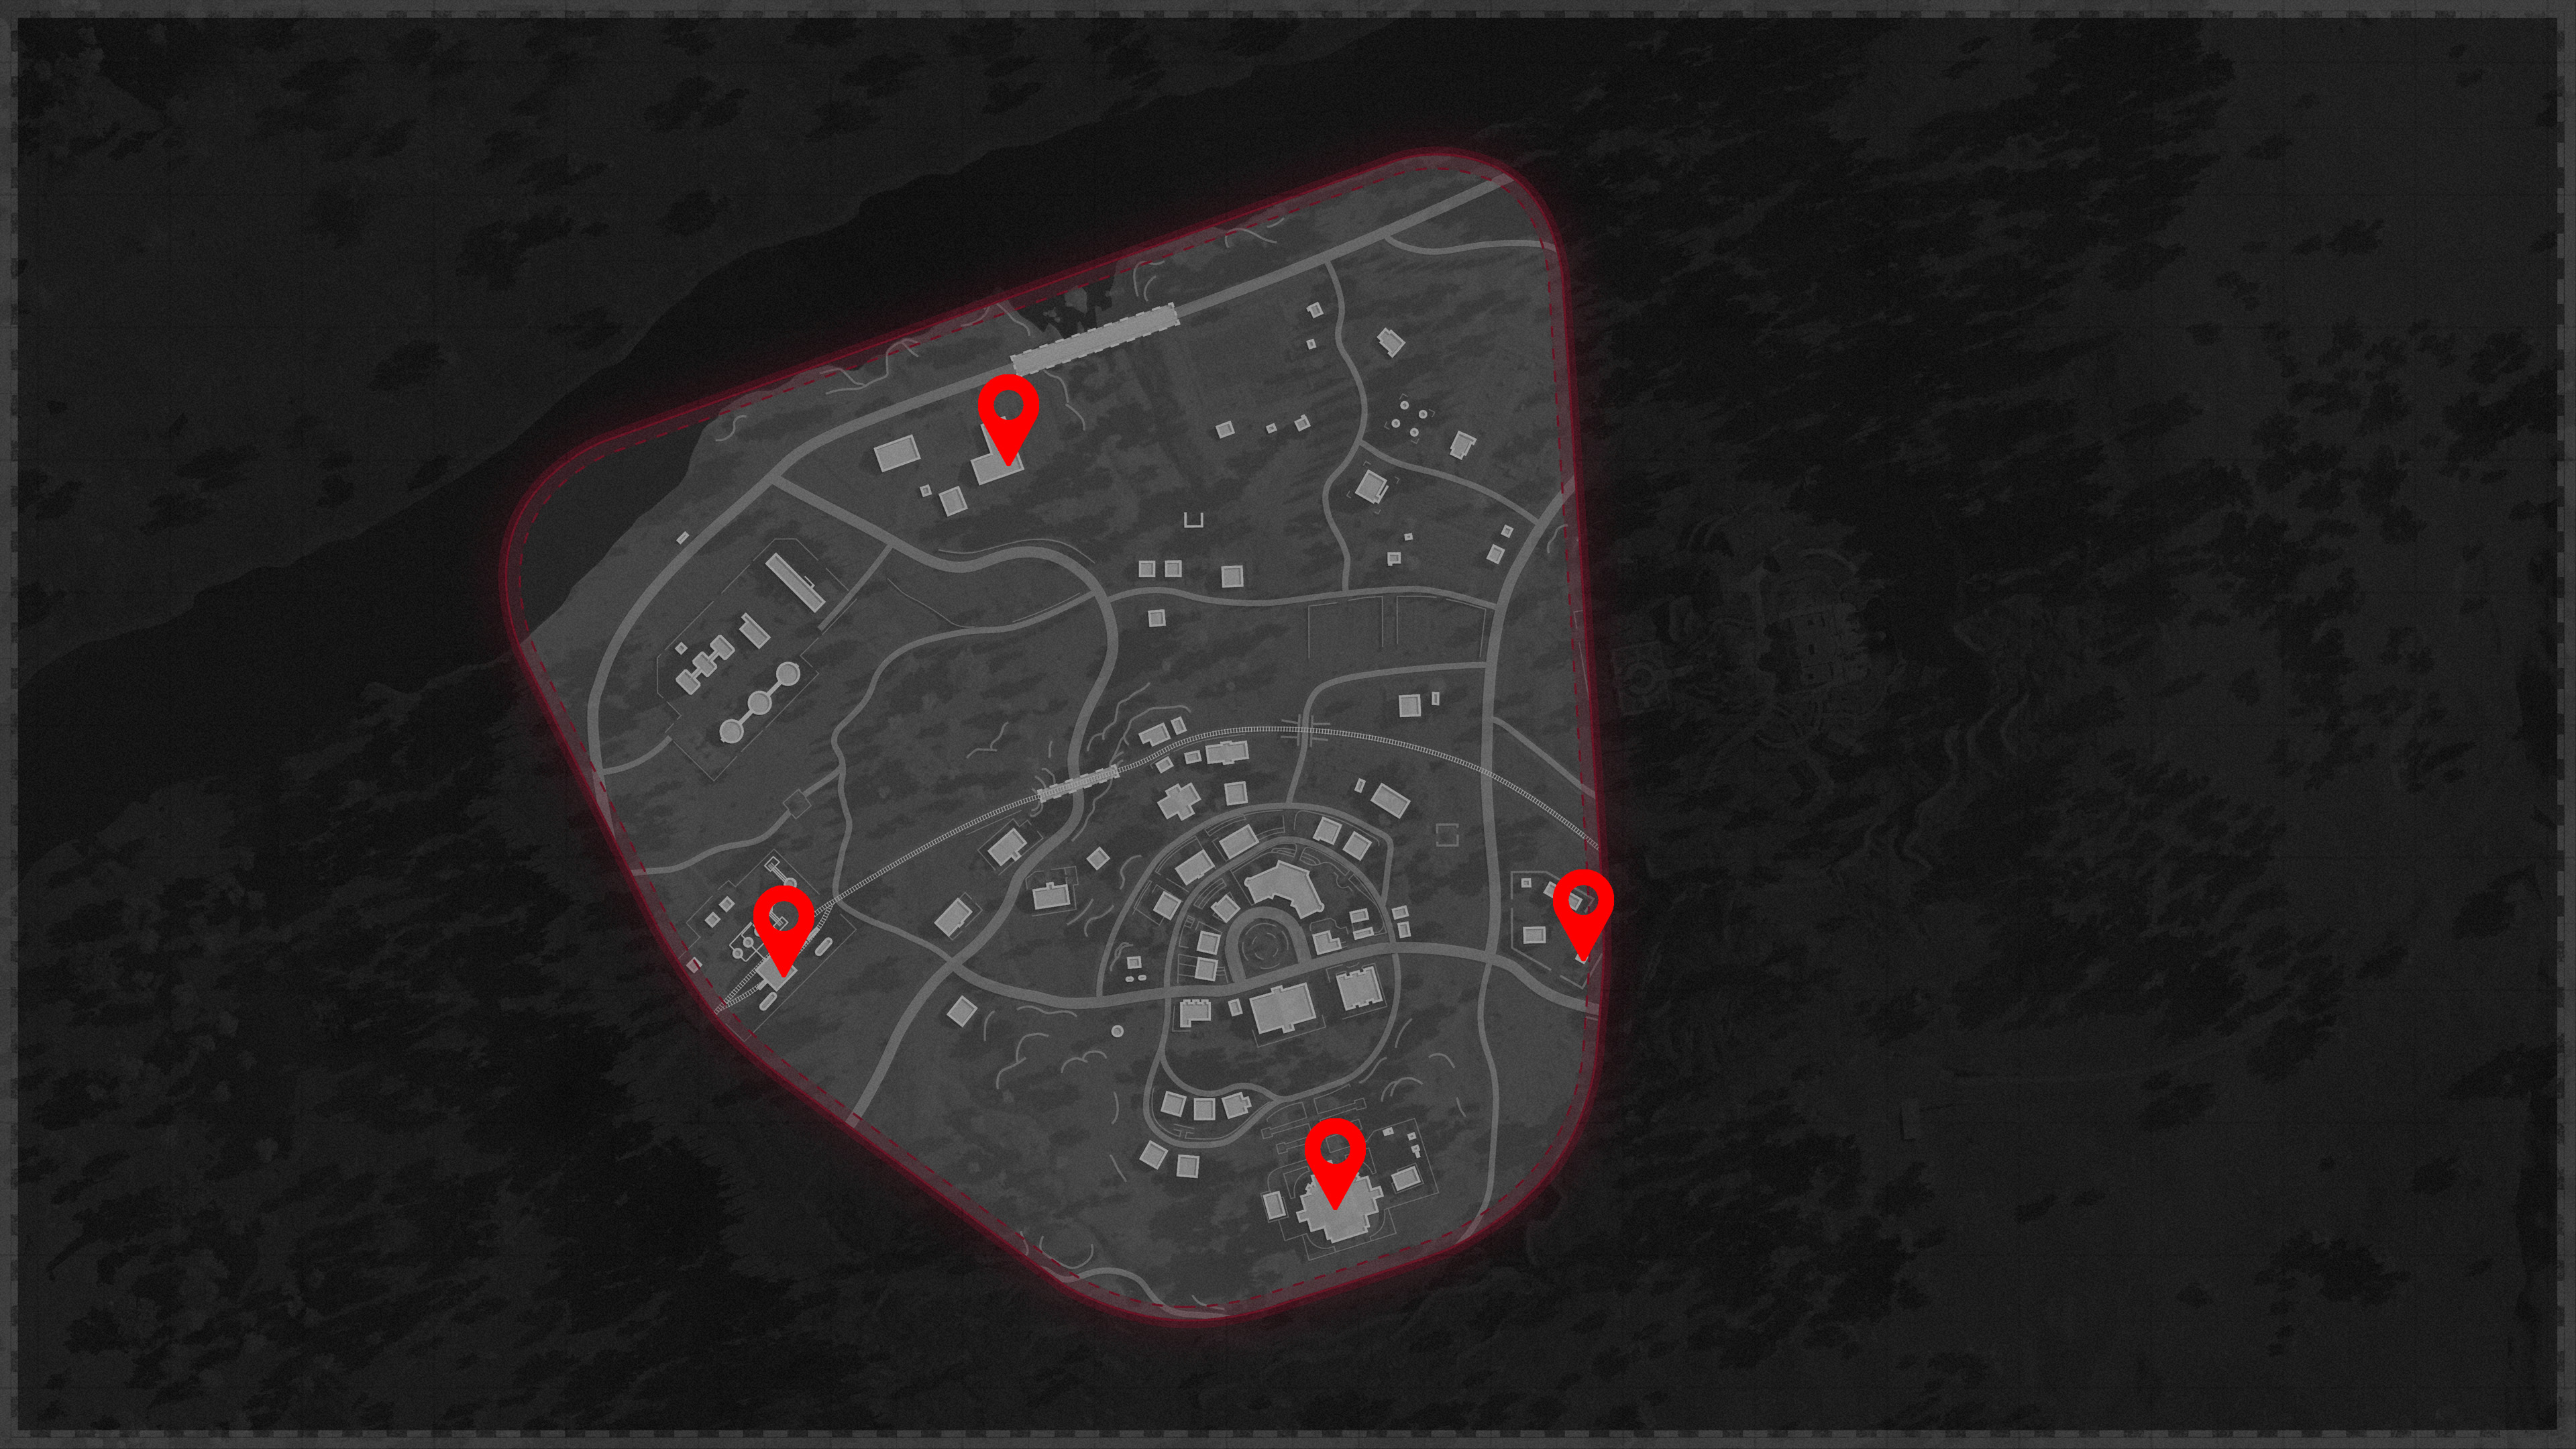
Ruka monkeys
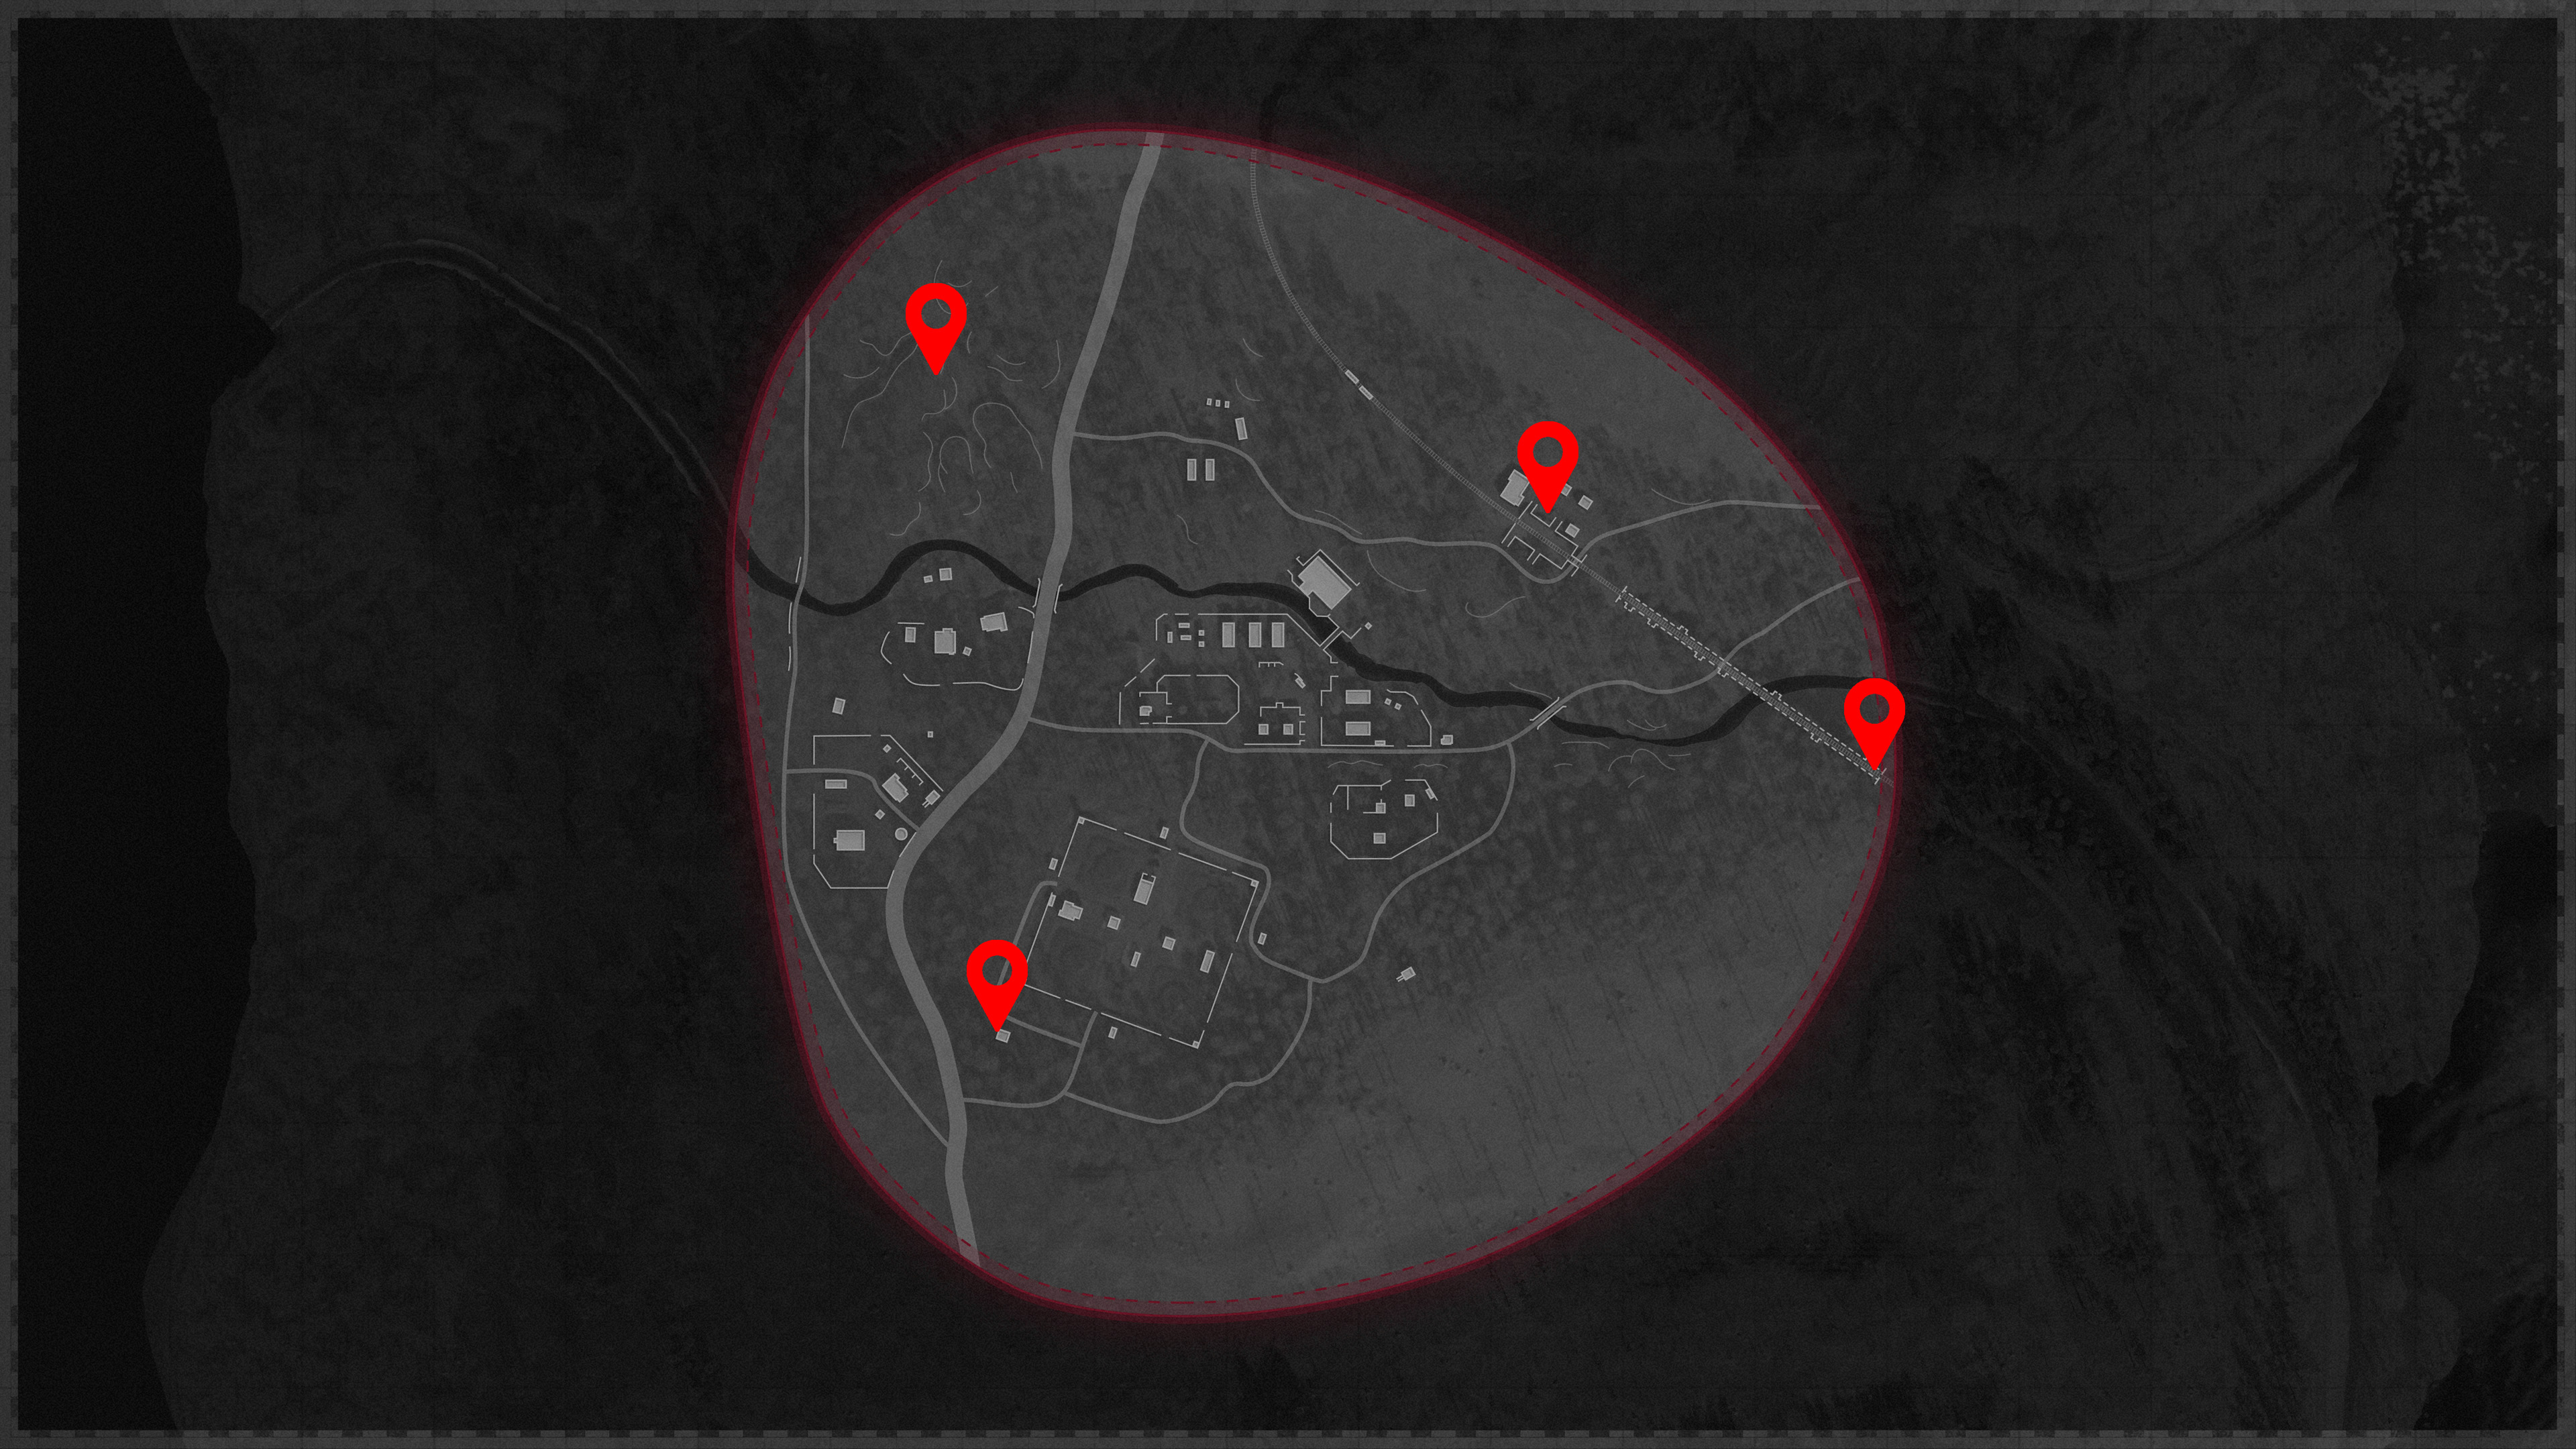
Sanatorium monkeys
Once you’ve obtained the Microfilm Slides, you need to take them to the projector on the map. Only four of the five maps have a projector – Ruka does not have one.
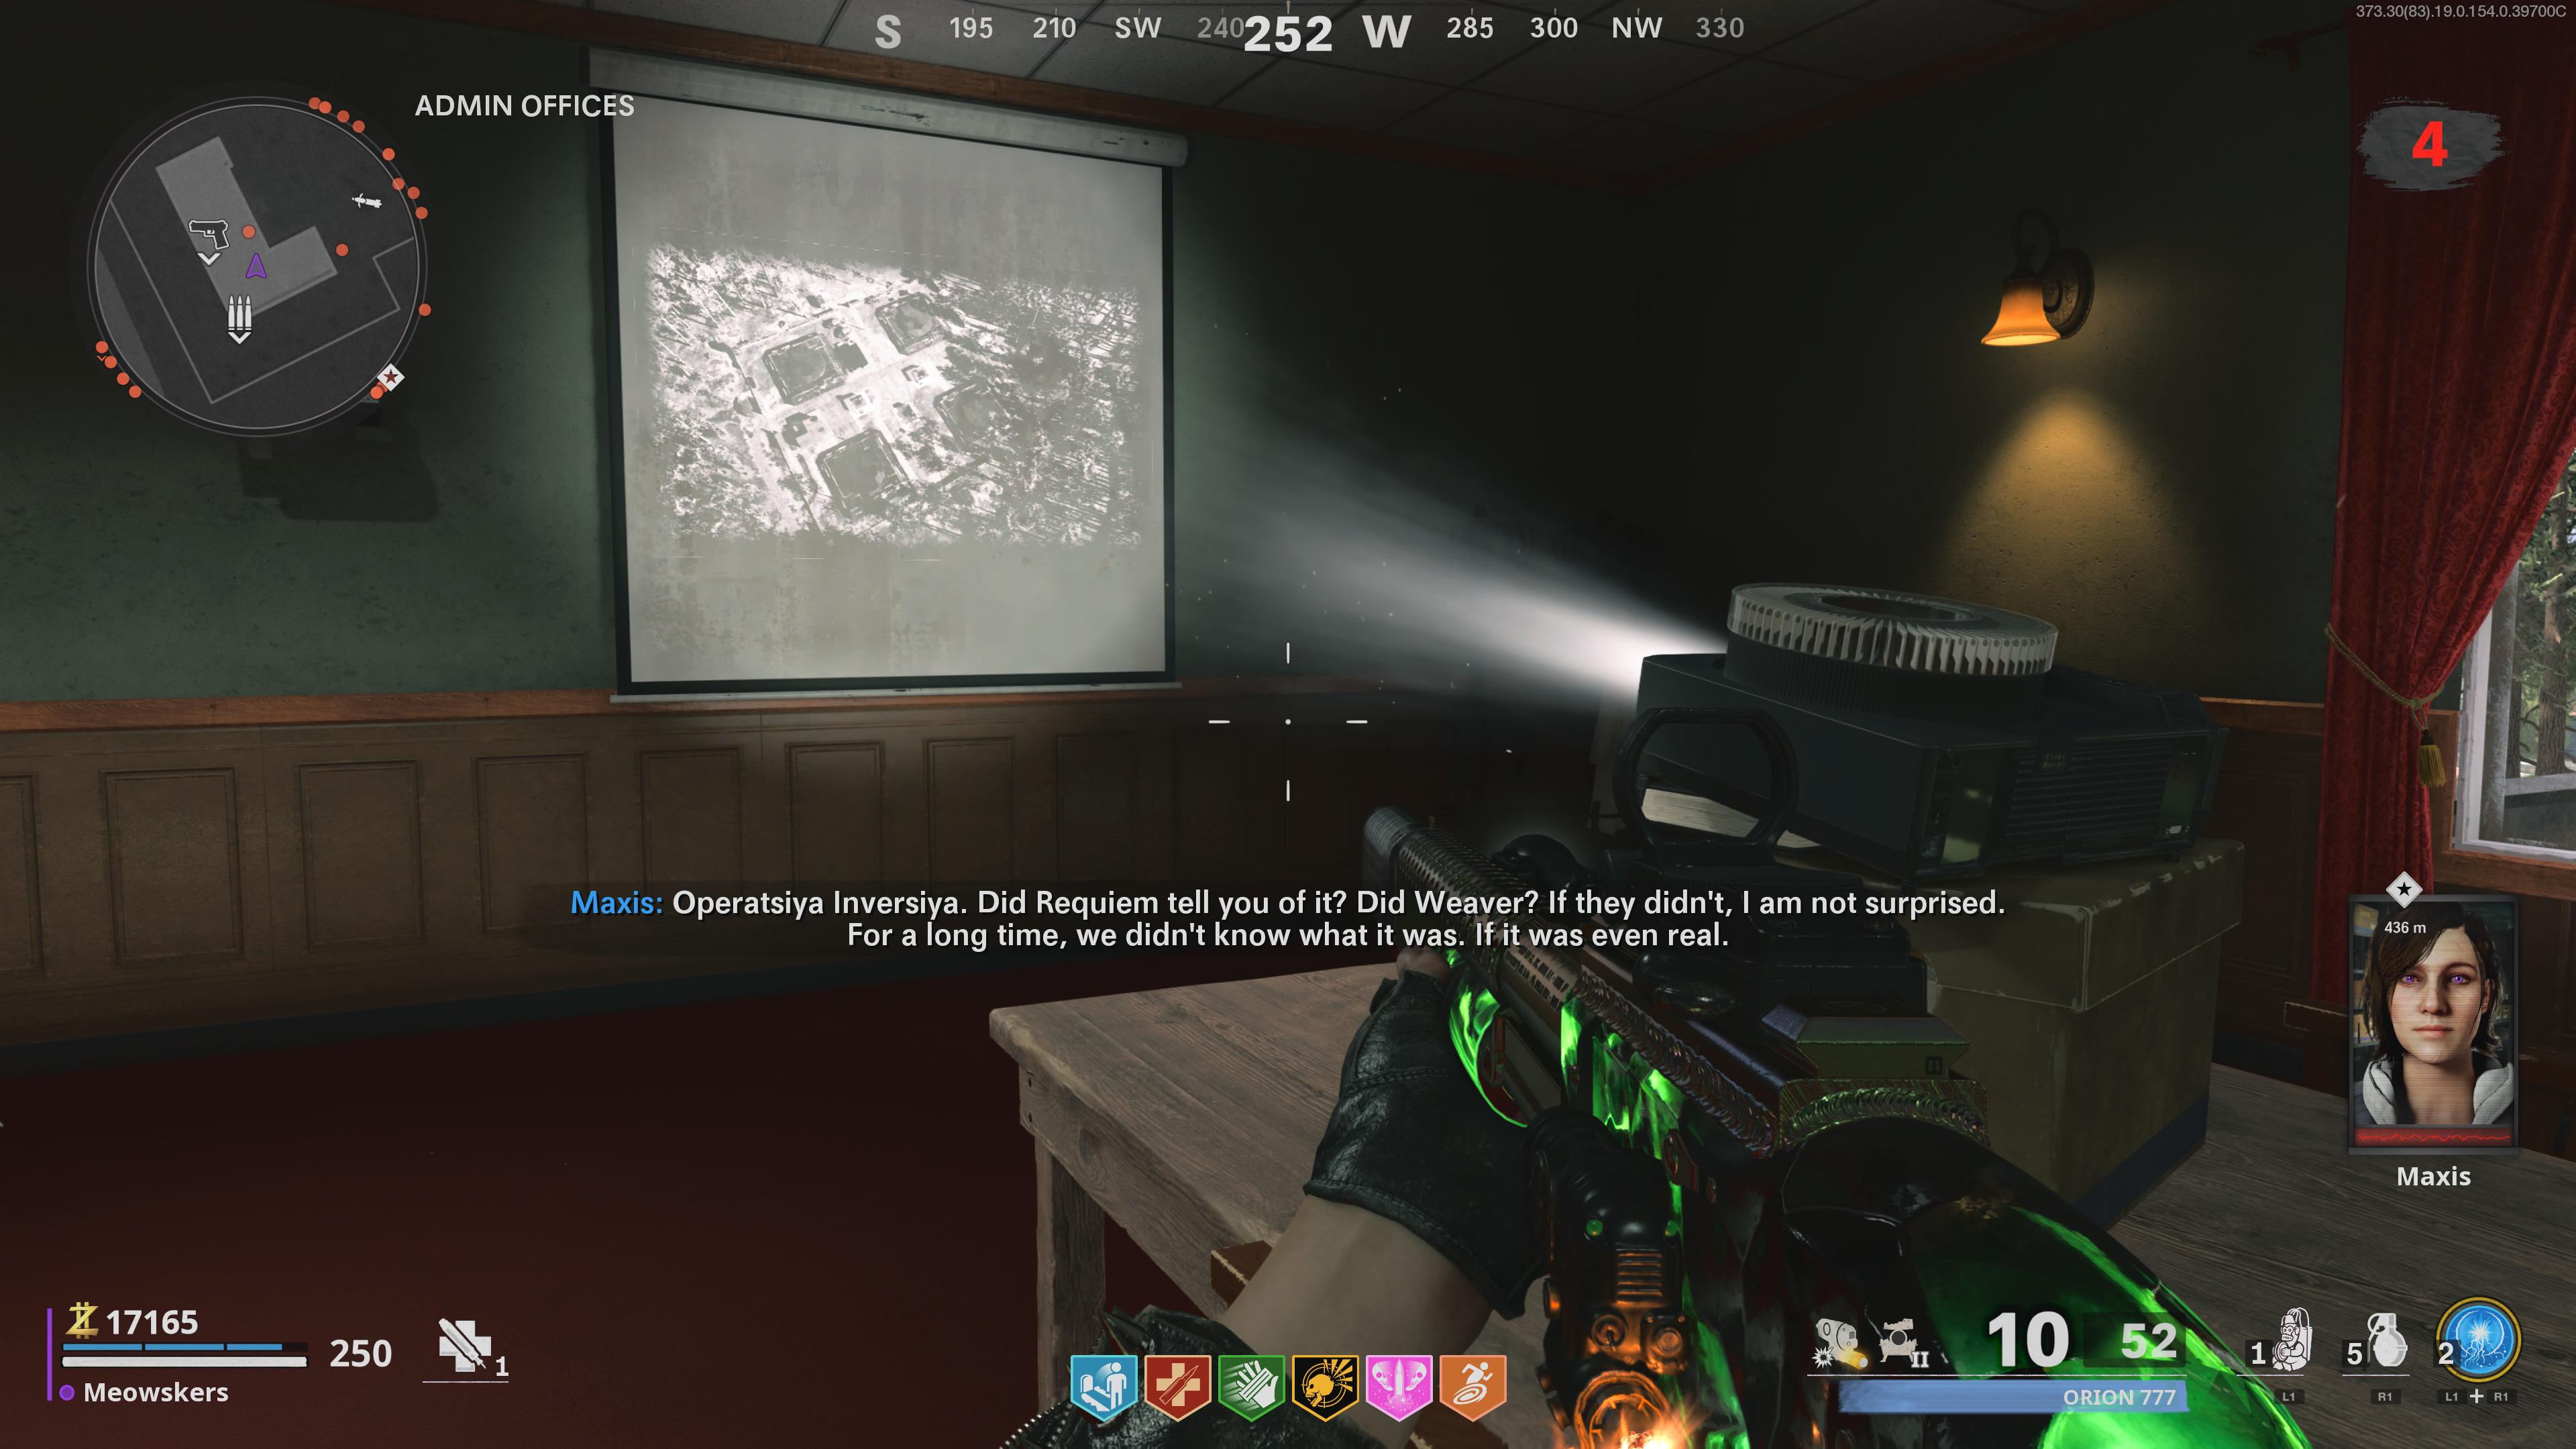
If you’re on Ruka, you’ll need to warp to a different map. Below is a list of the projector locations across each map:
Alpine projector
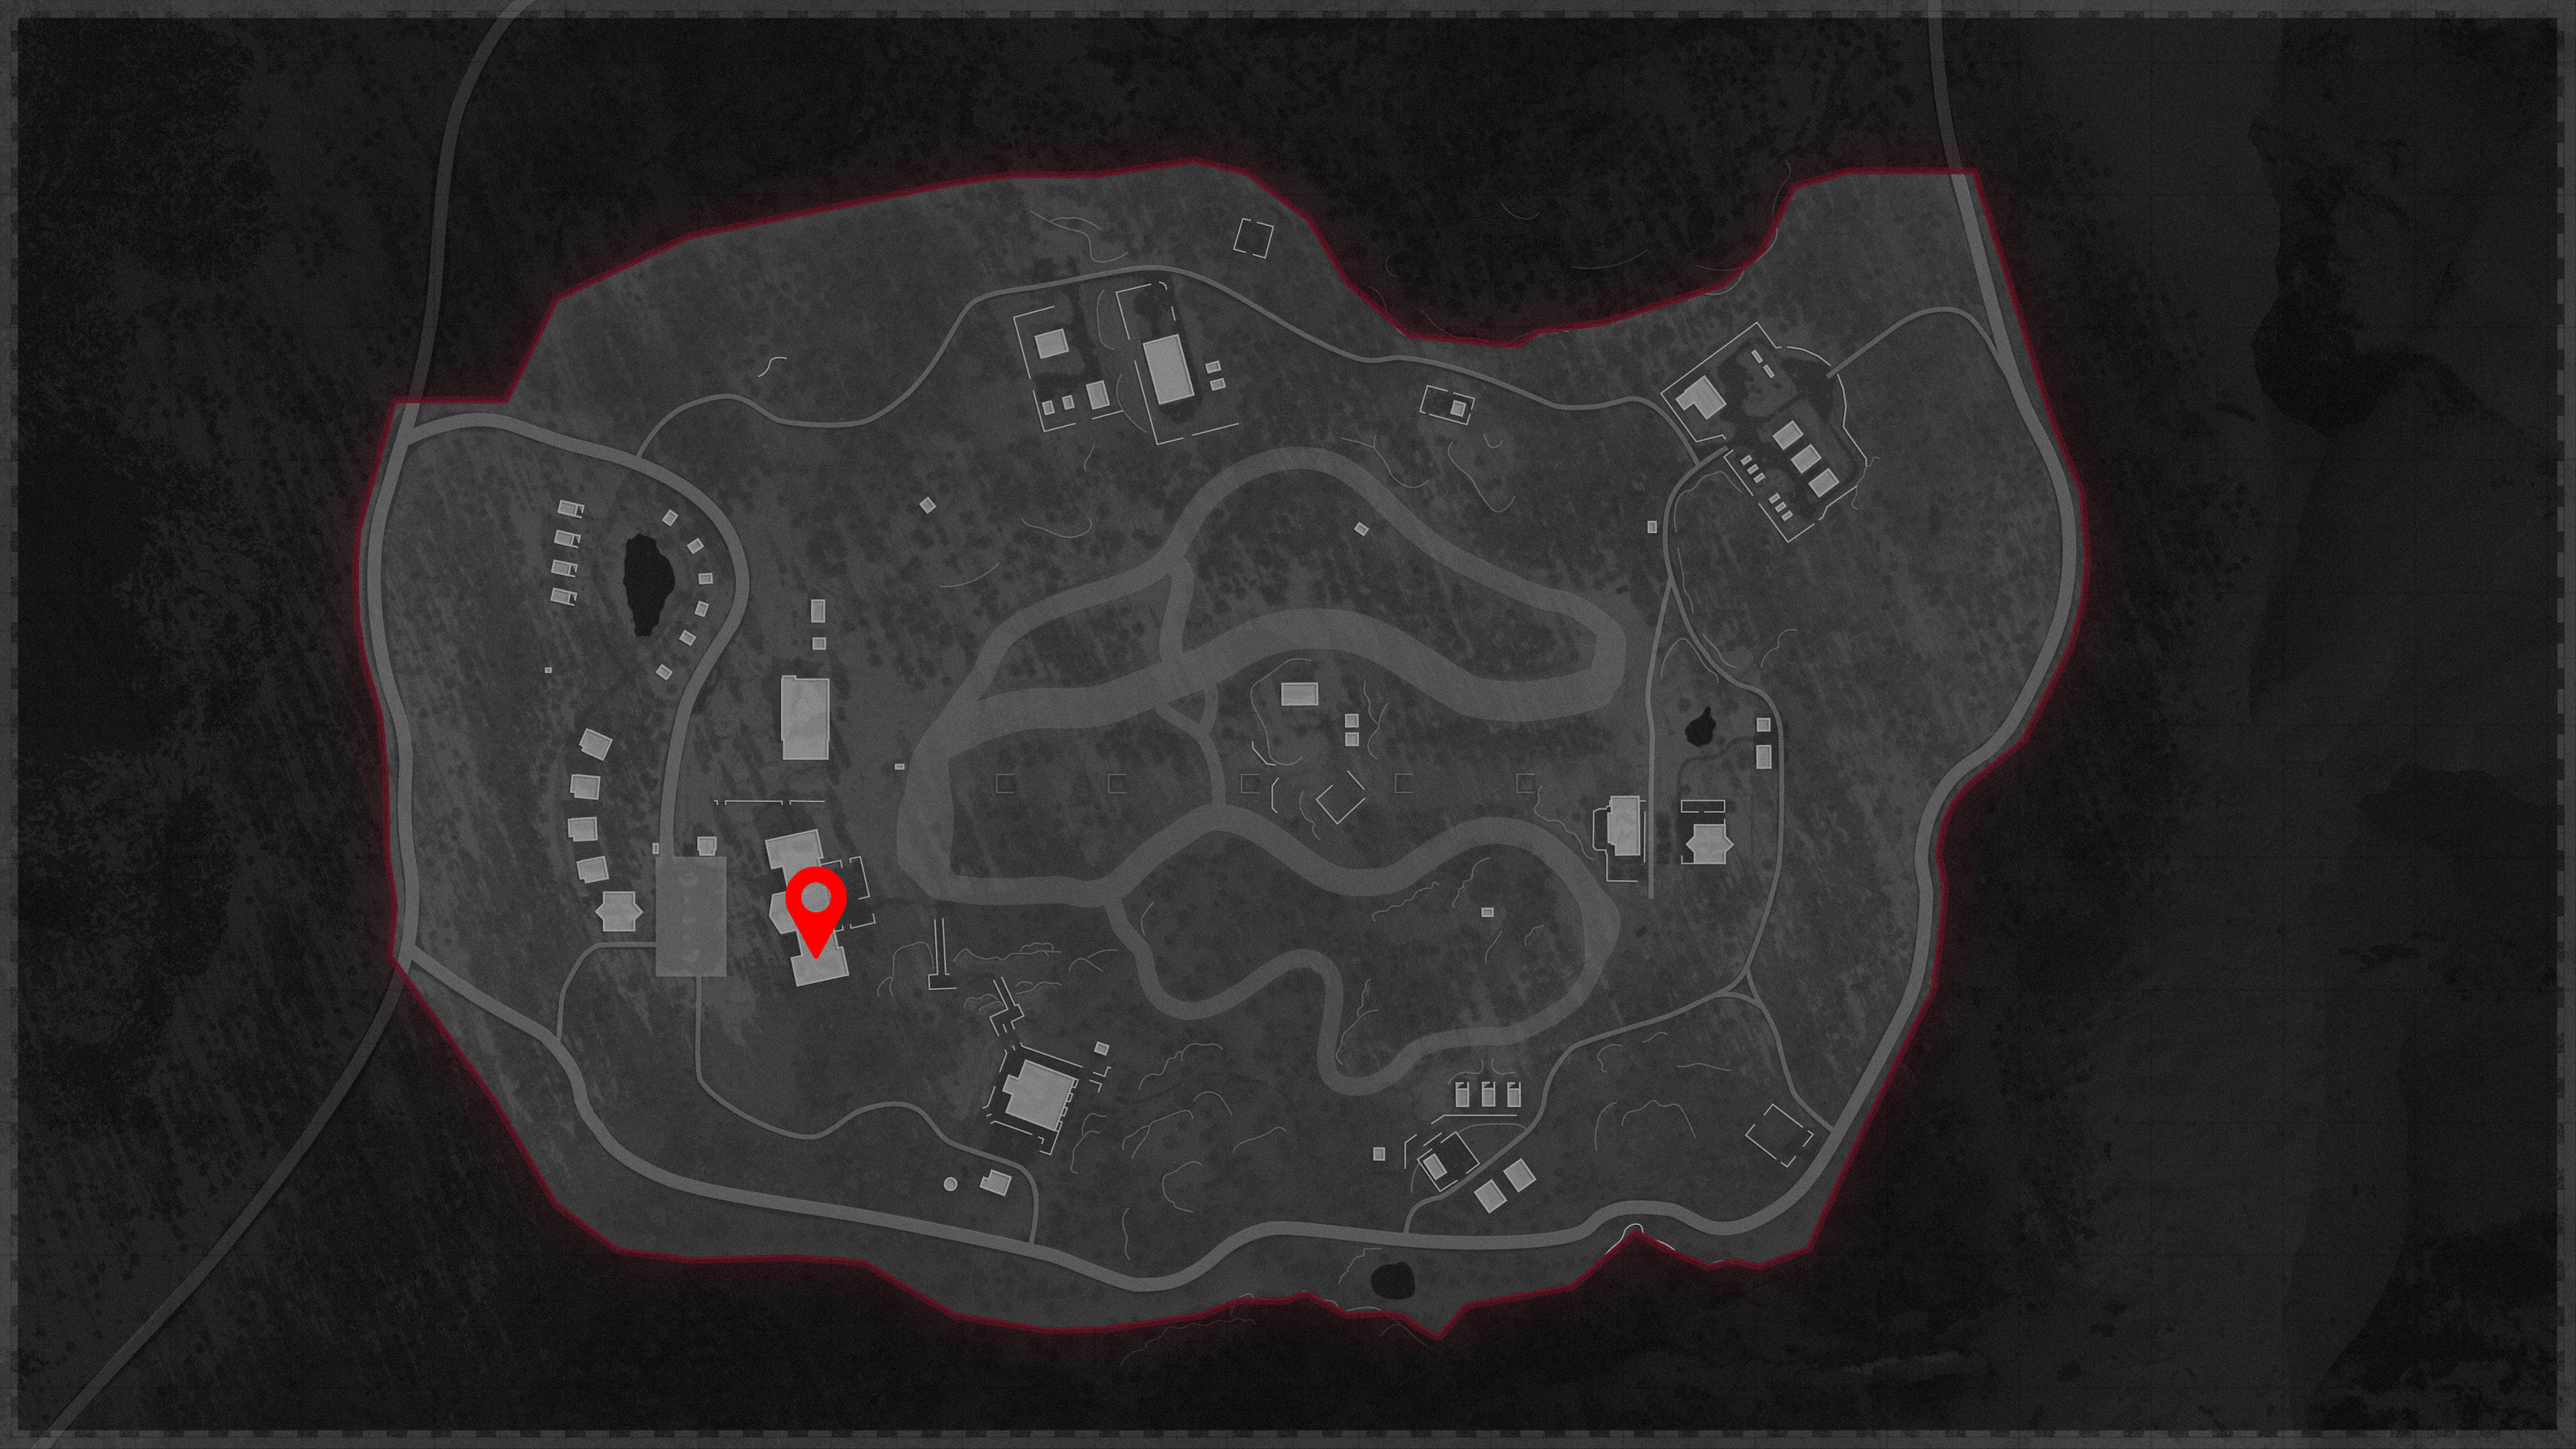
Duga projector
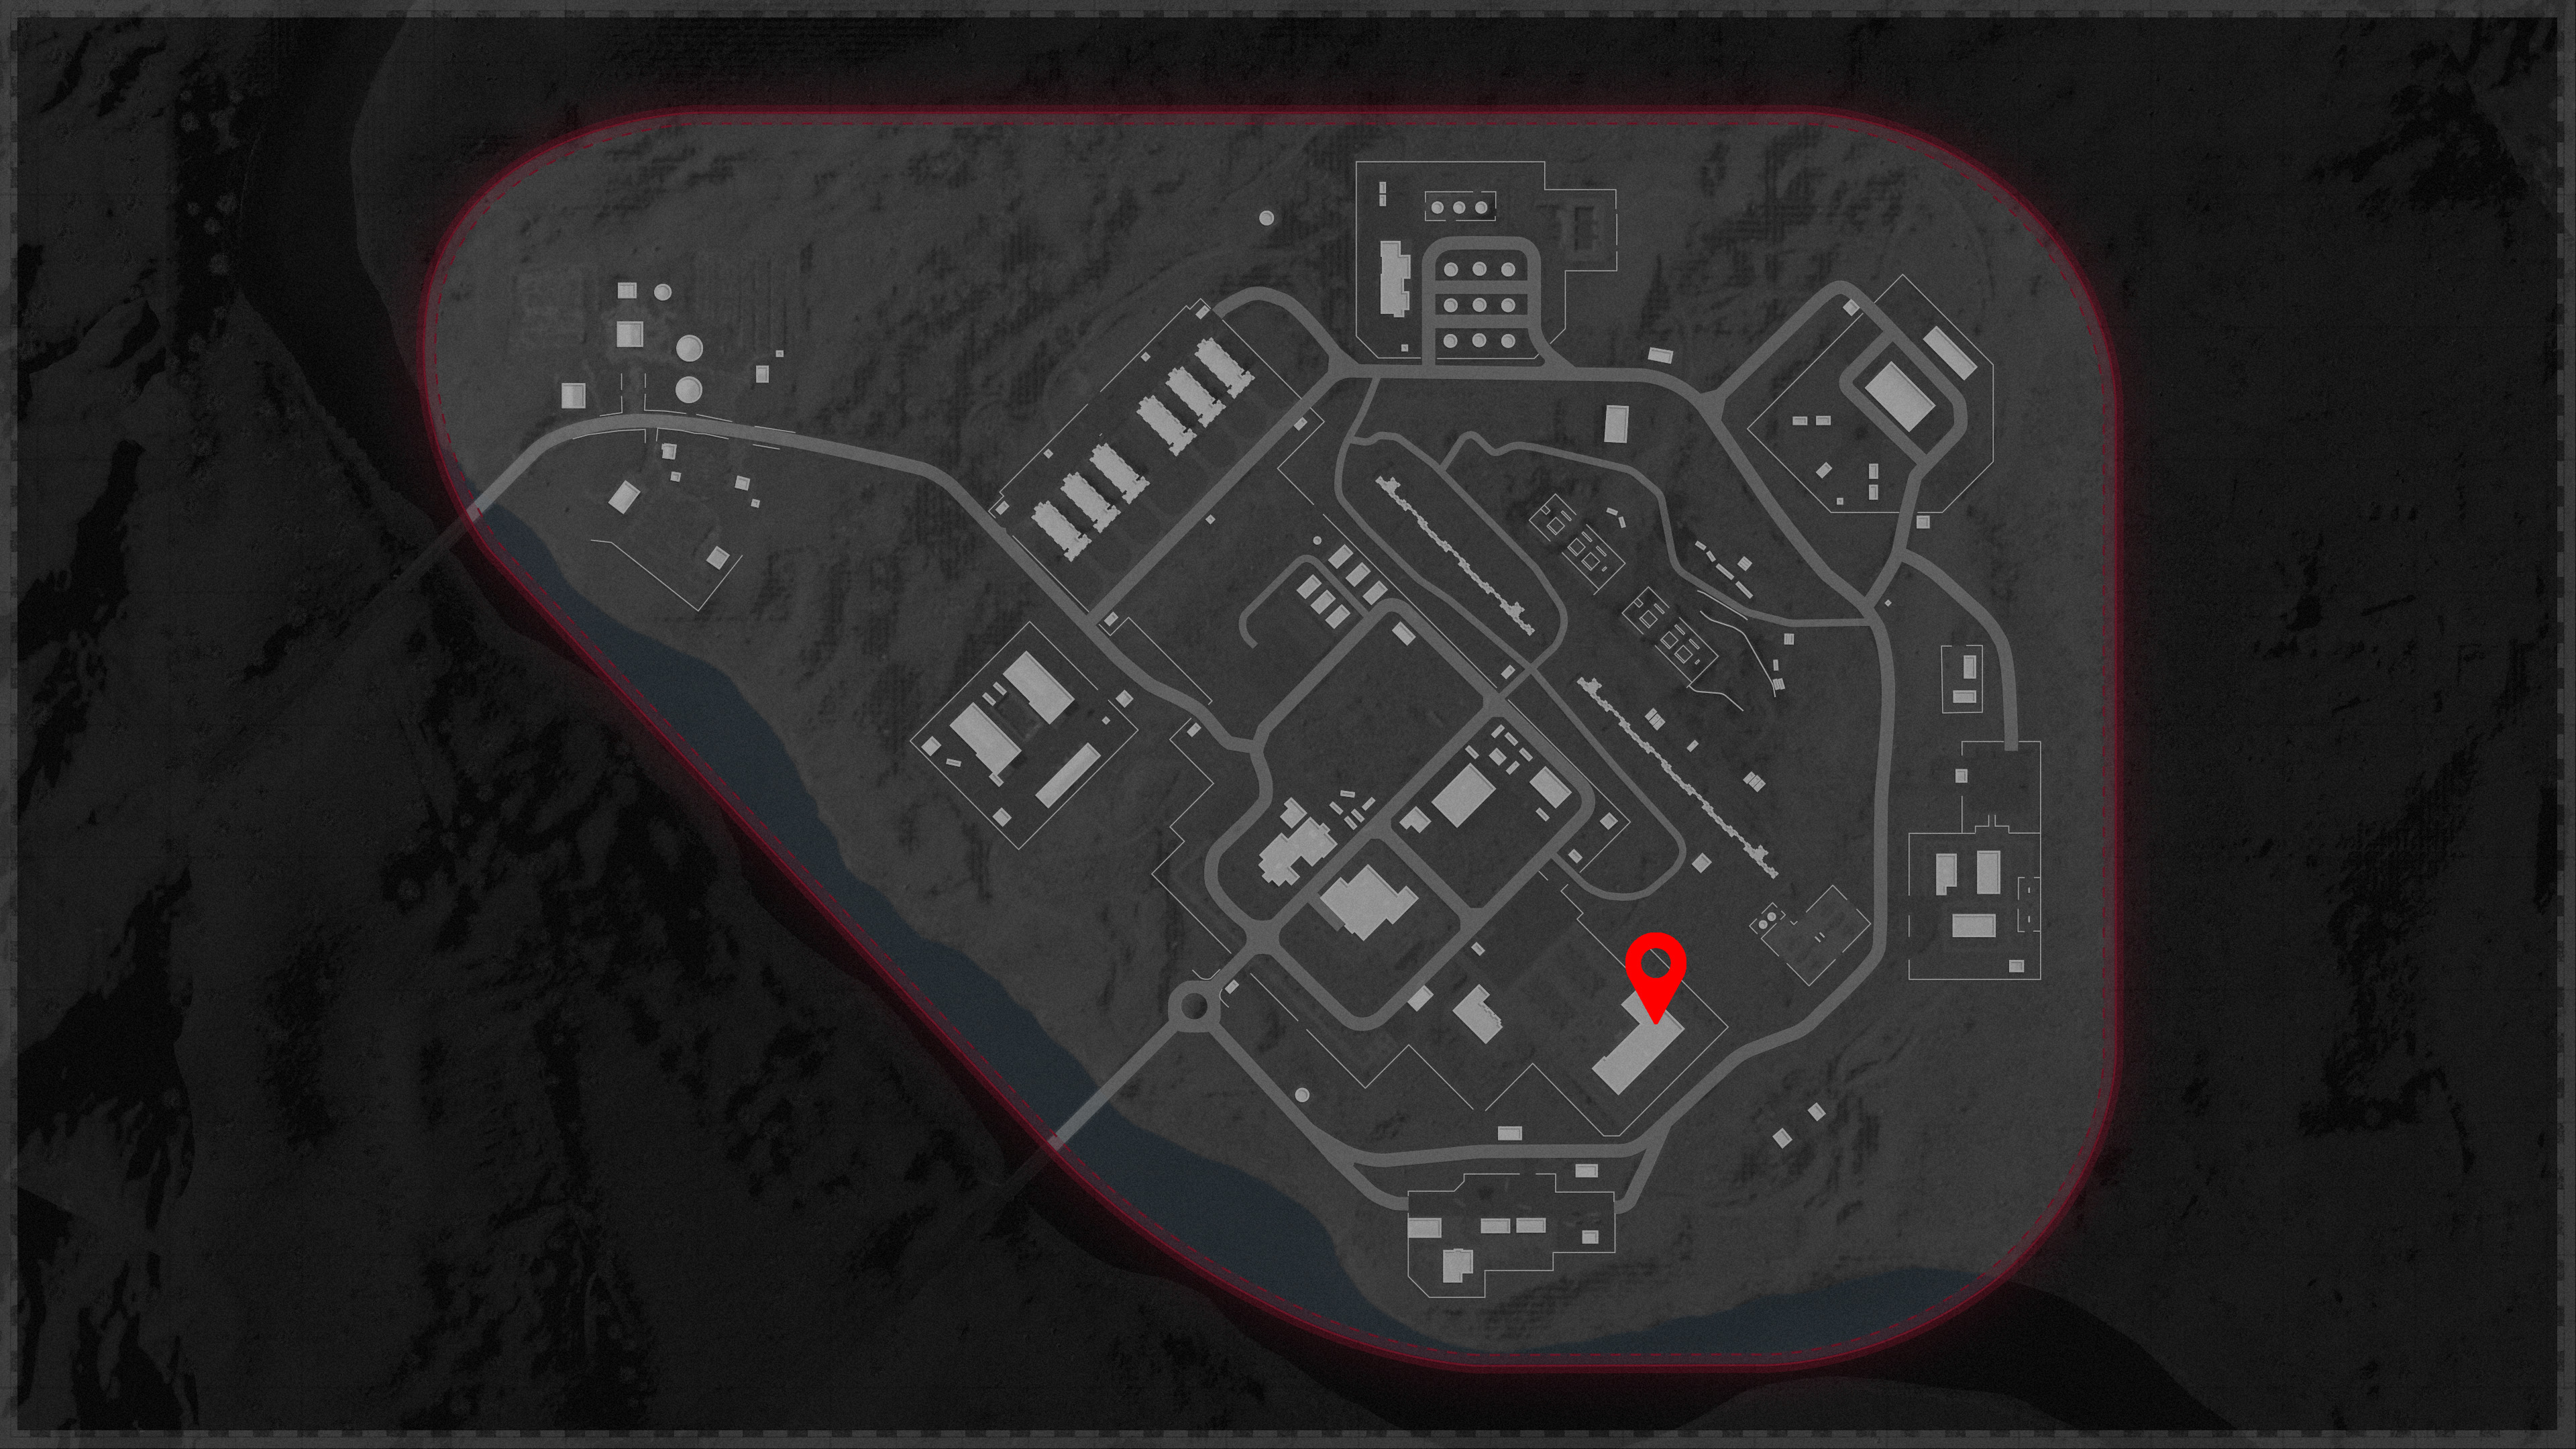
Golova projector
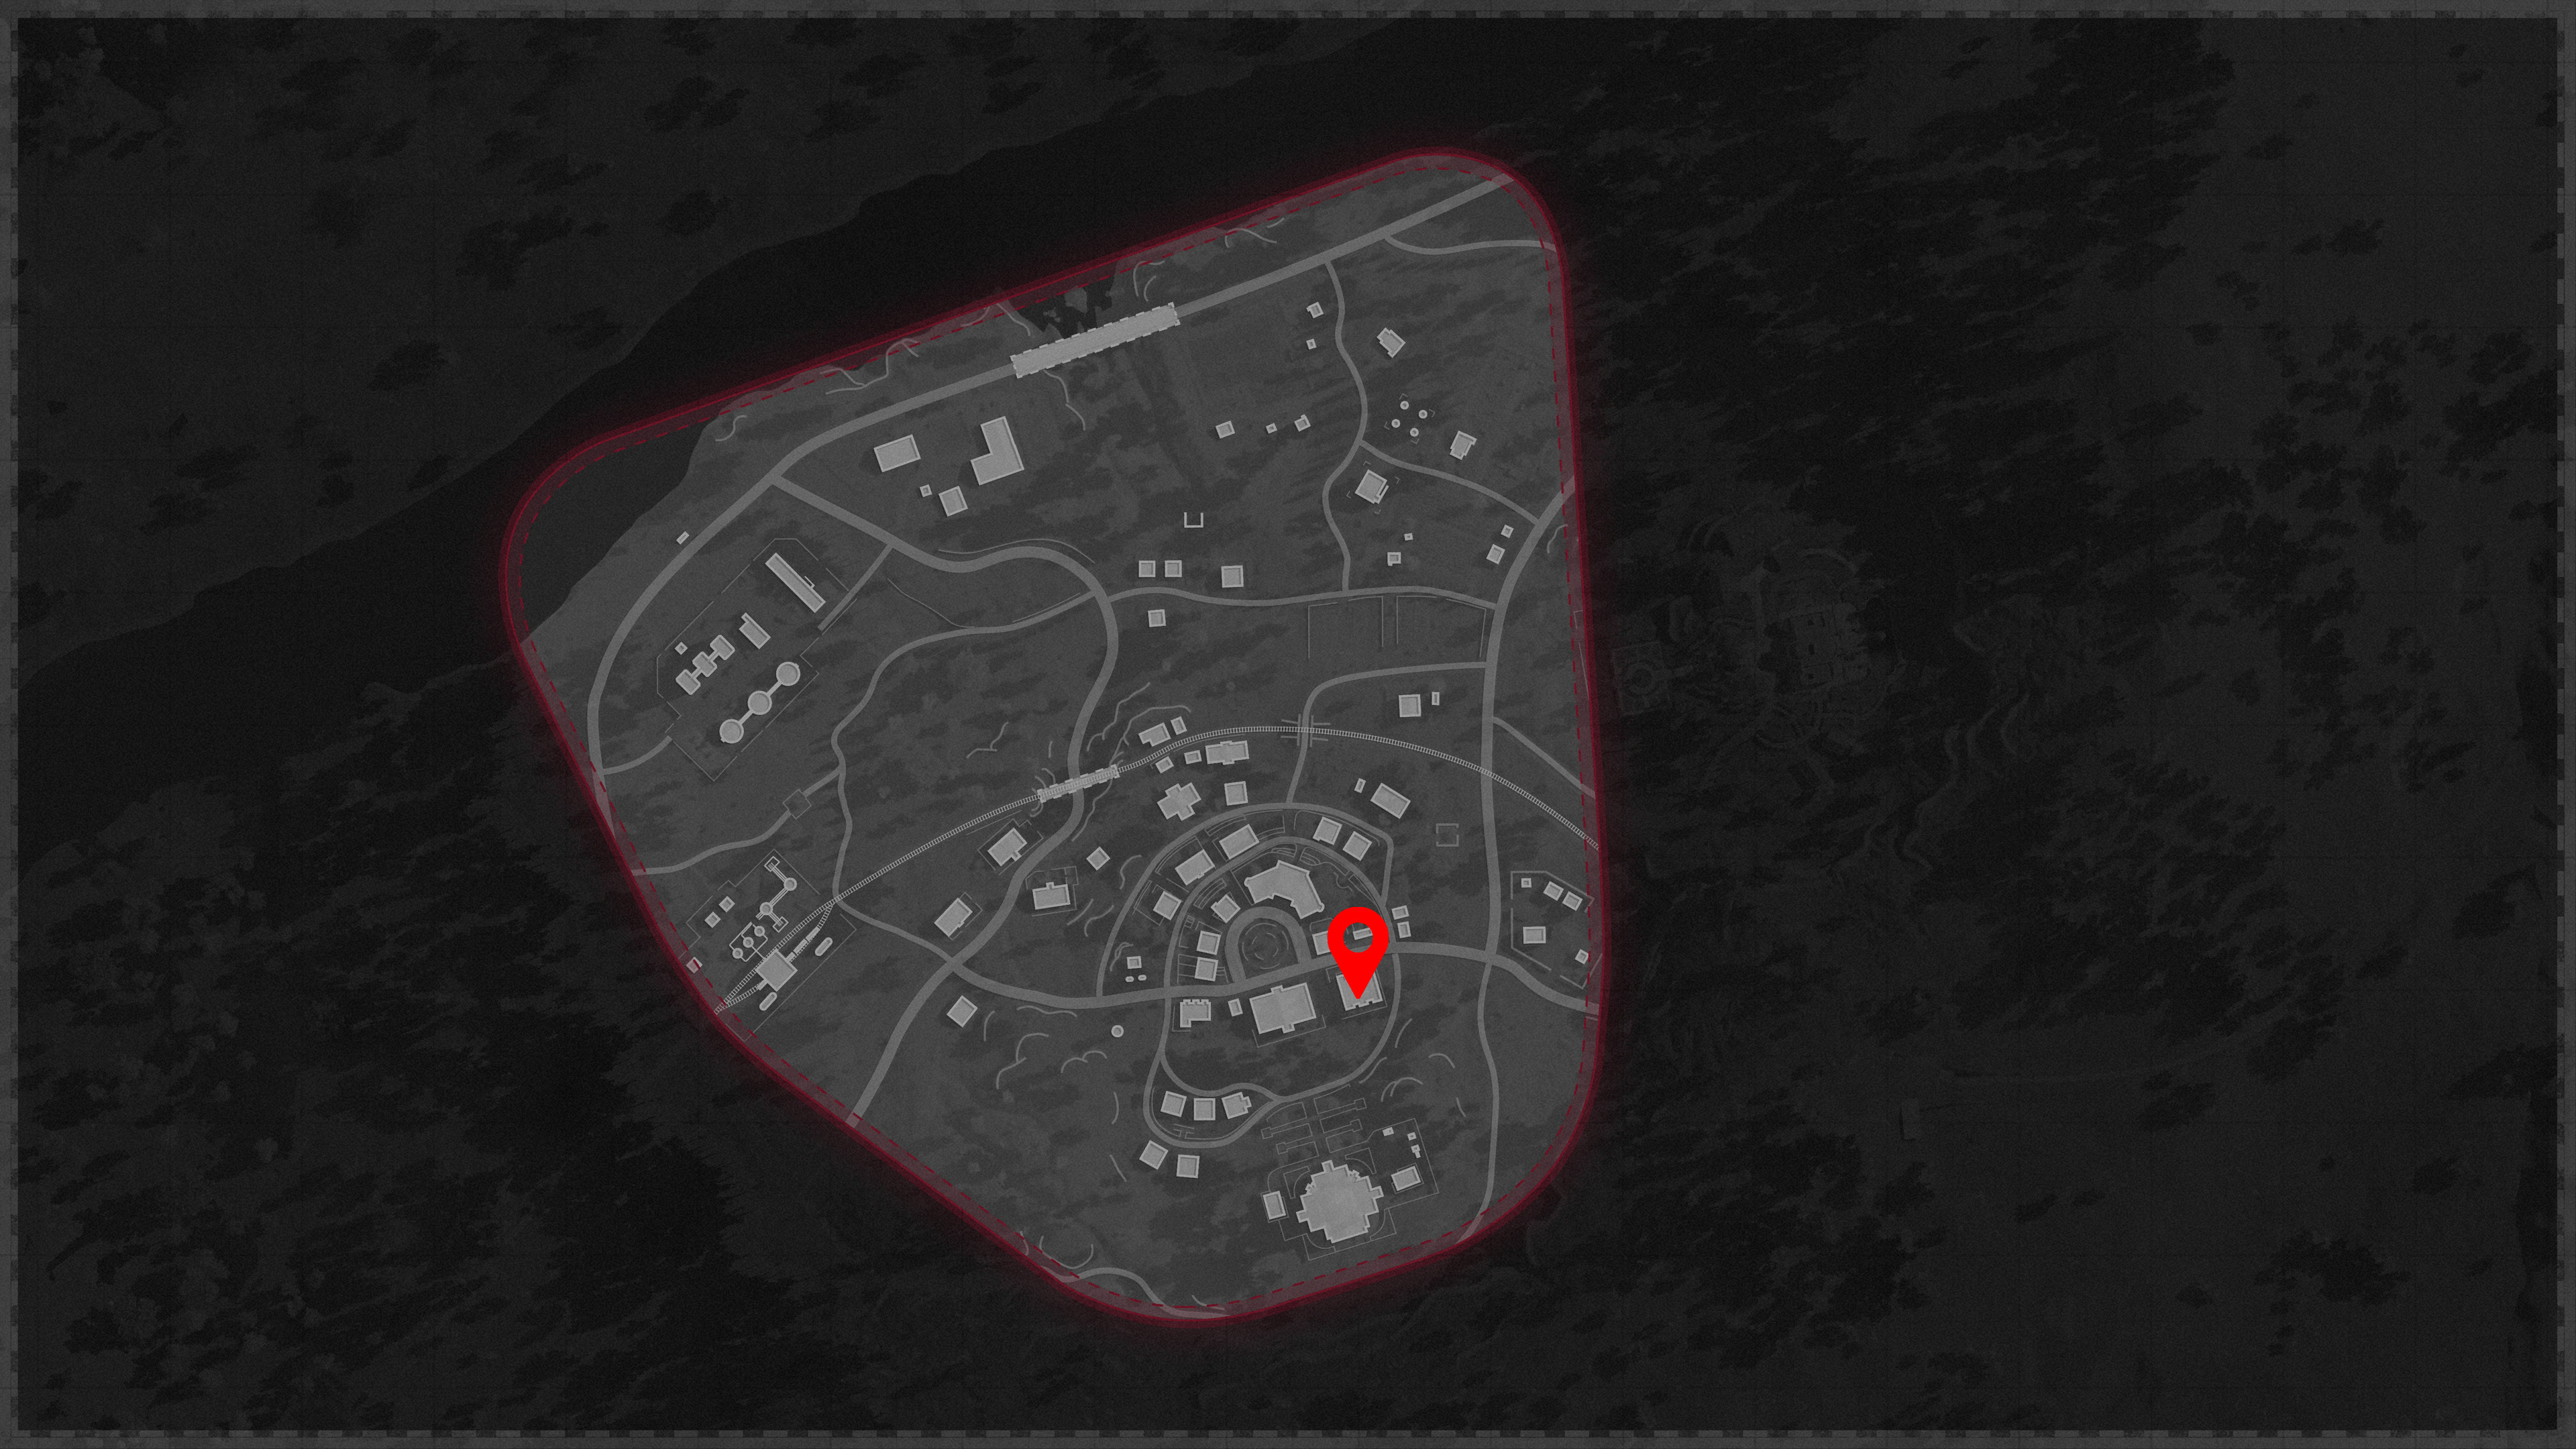
Sanatorium projector
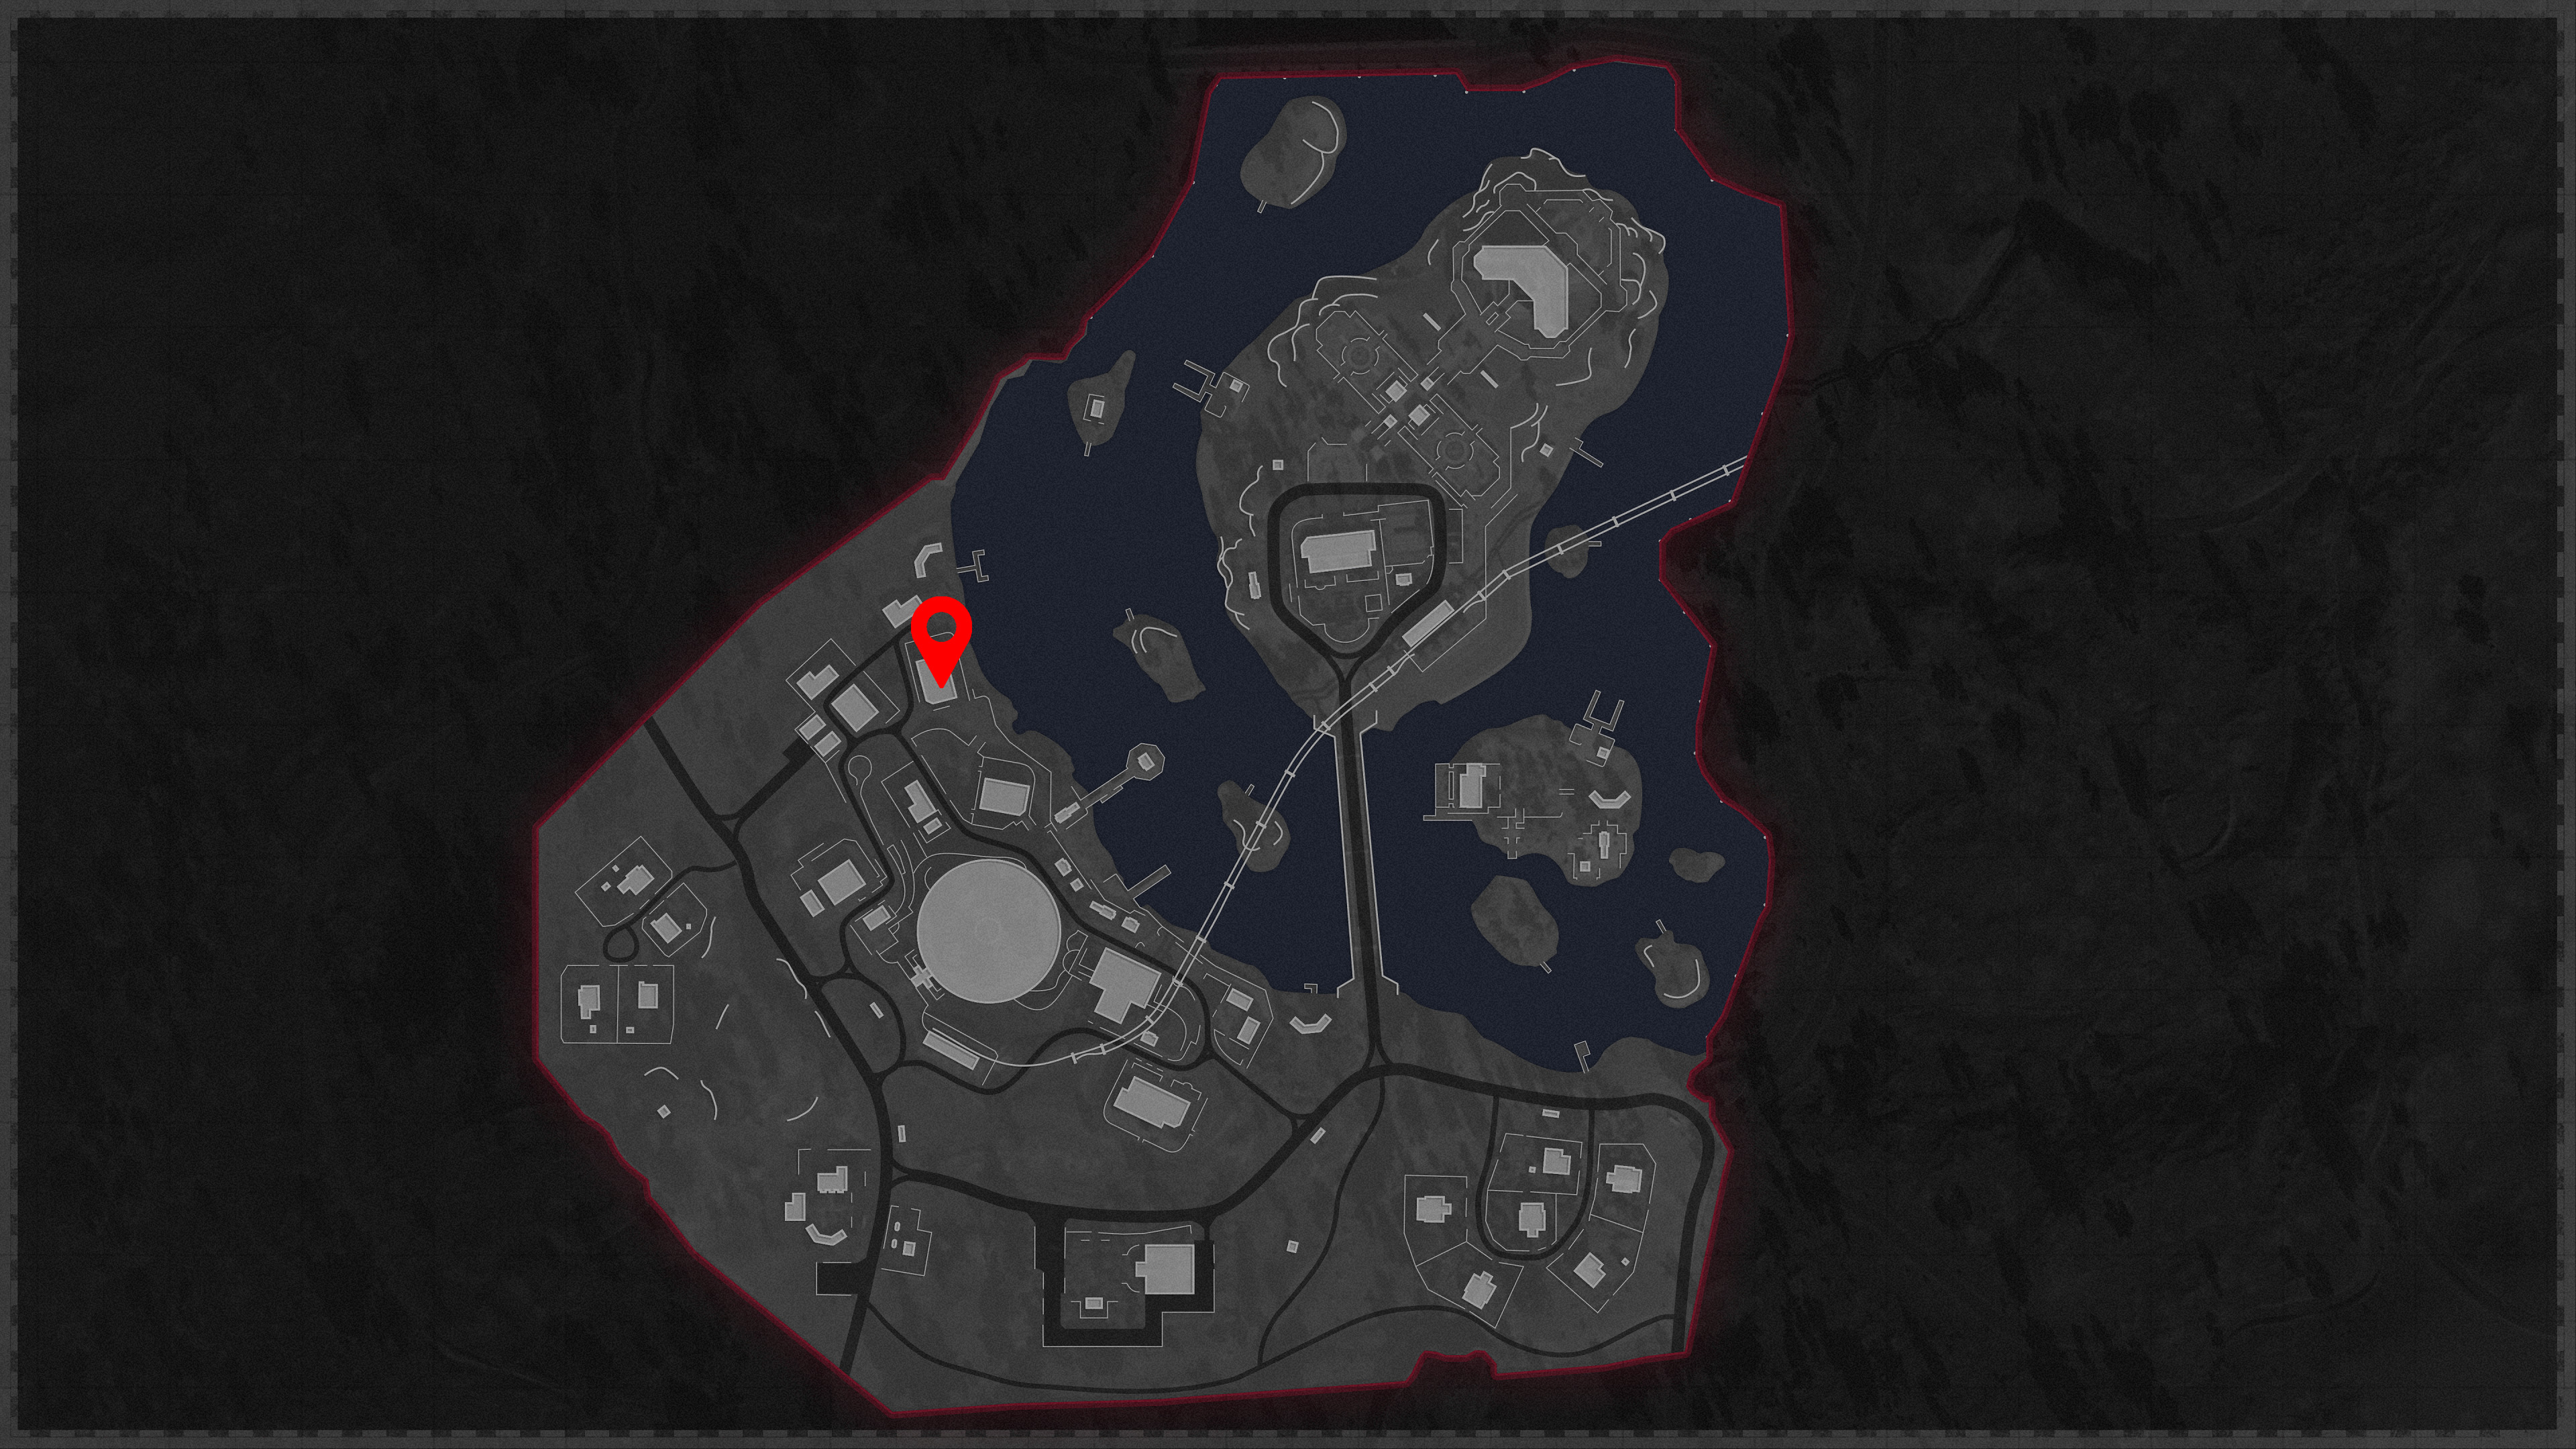
Interact with the projector three times to exhaust all dialogue options and then once you do, you’ll be prompted to head to the beacon to warp to the final area.
Step 6: Point of no return
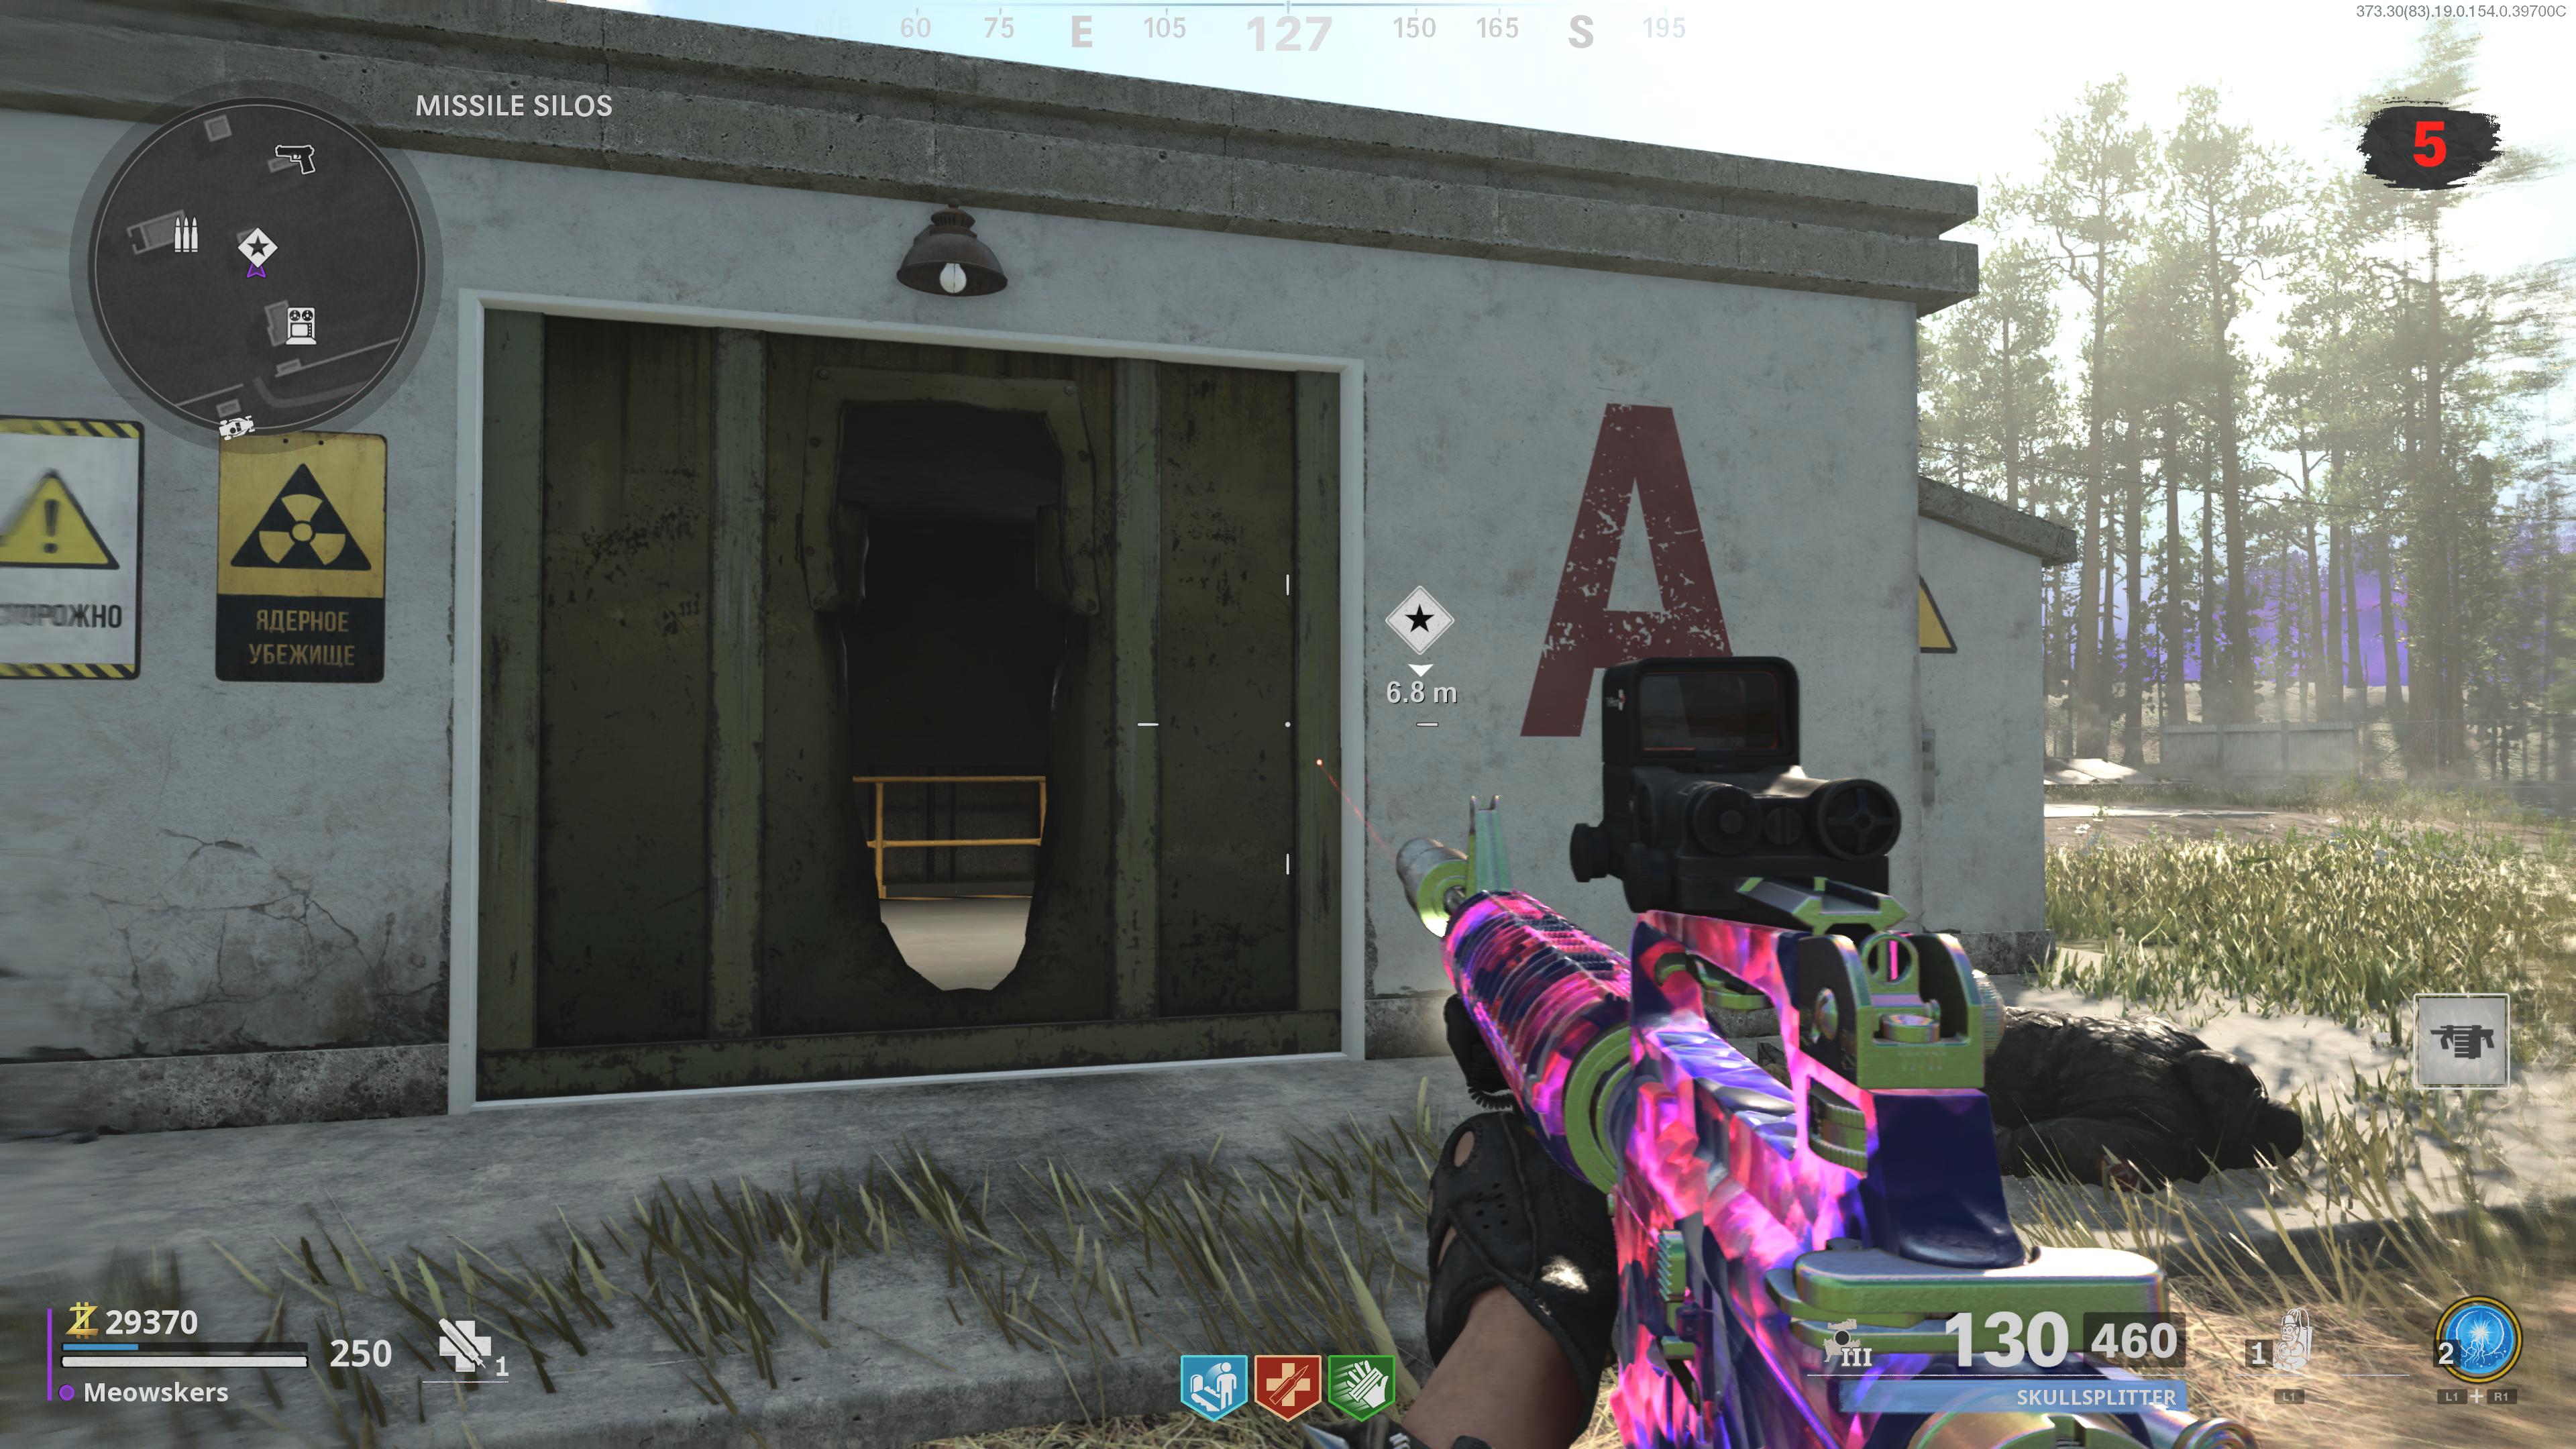
At this point, you’ll want to make sure you’ve got at least one fully upgraded weapon by using the Pack-a-Punch. Two is ideal. Initiating the next sequence is the point of no return, and will lead to the final sequence of the Cold War Outbreak Easter Egg. Finish any side missions to gather as many points as possible for upgrades. Once you’re ready, warp to Ruka via the beacon.
Upon arrival, you’ll have a new point of interest indicated on your map. This will lead to an elevator that will take you to the final area, so be prepared before heading down.
Step 7: Turn off lockdown sequence
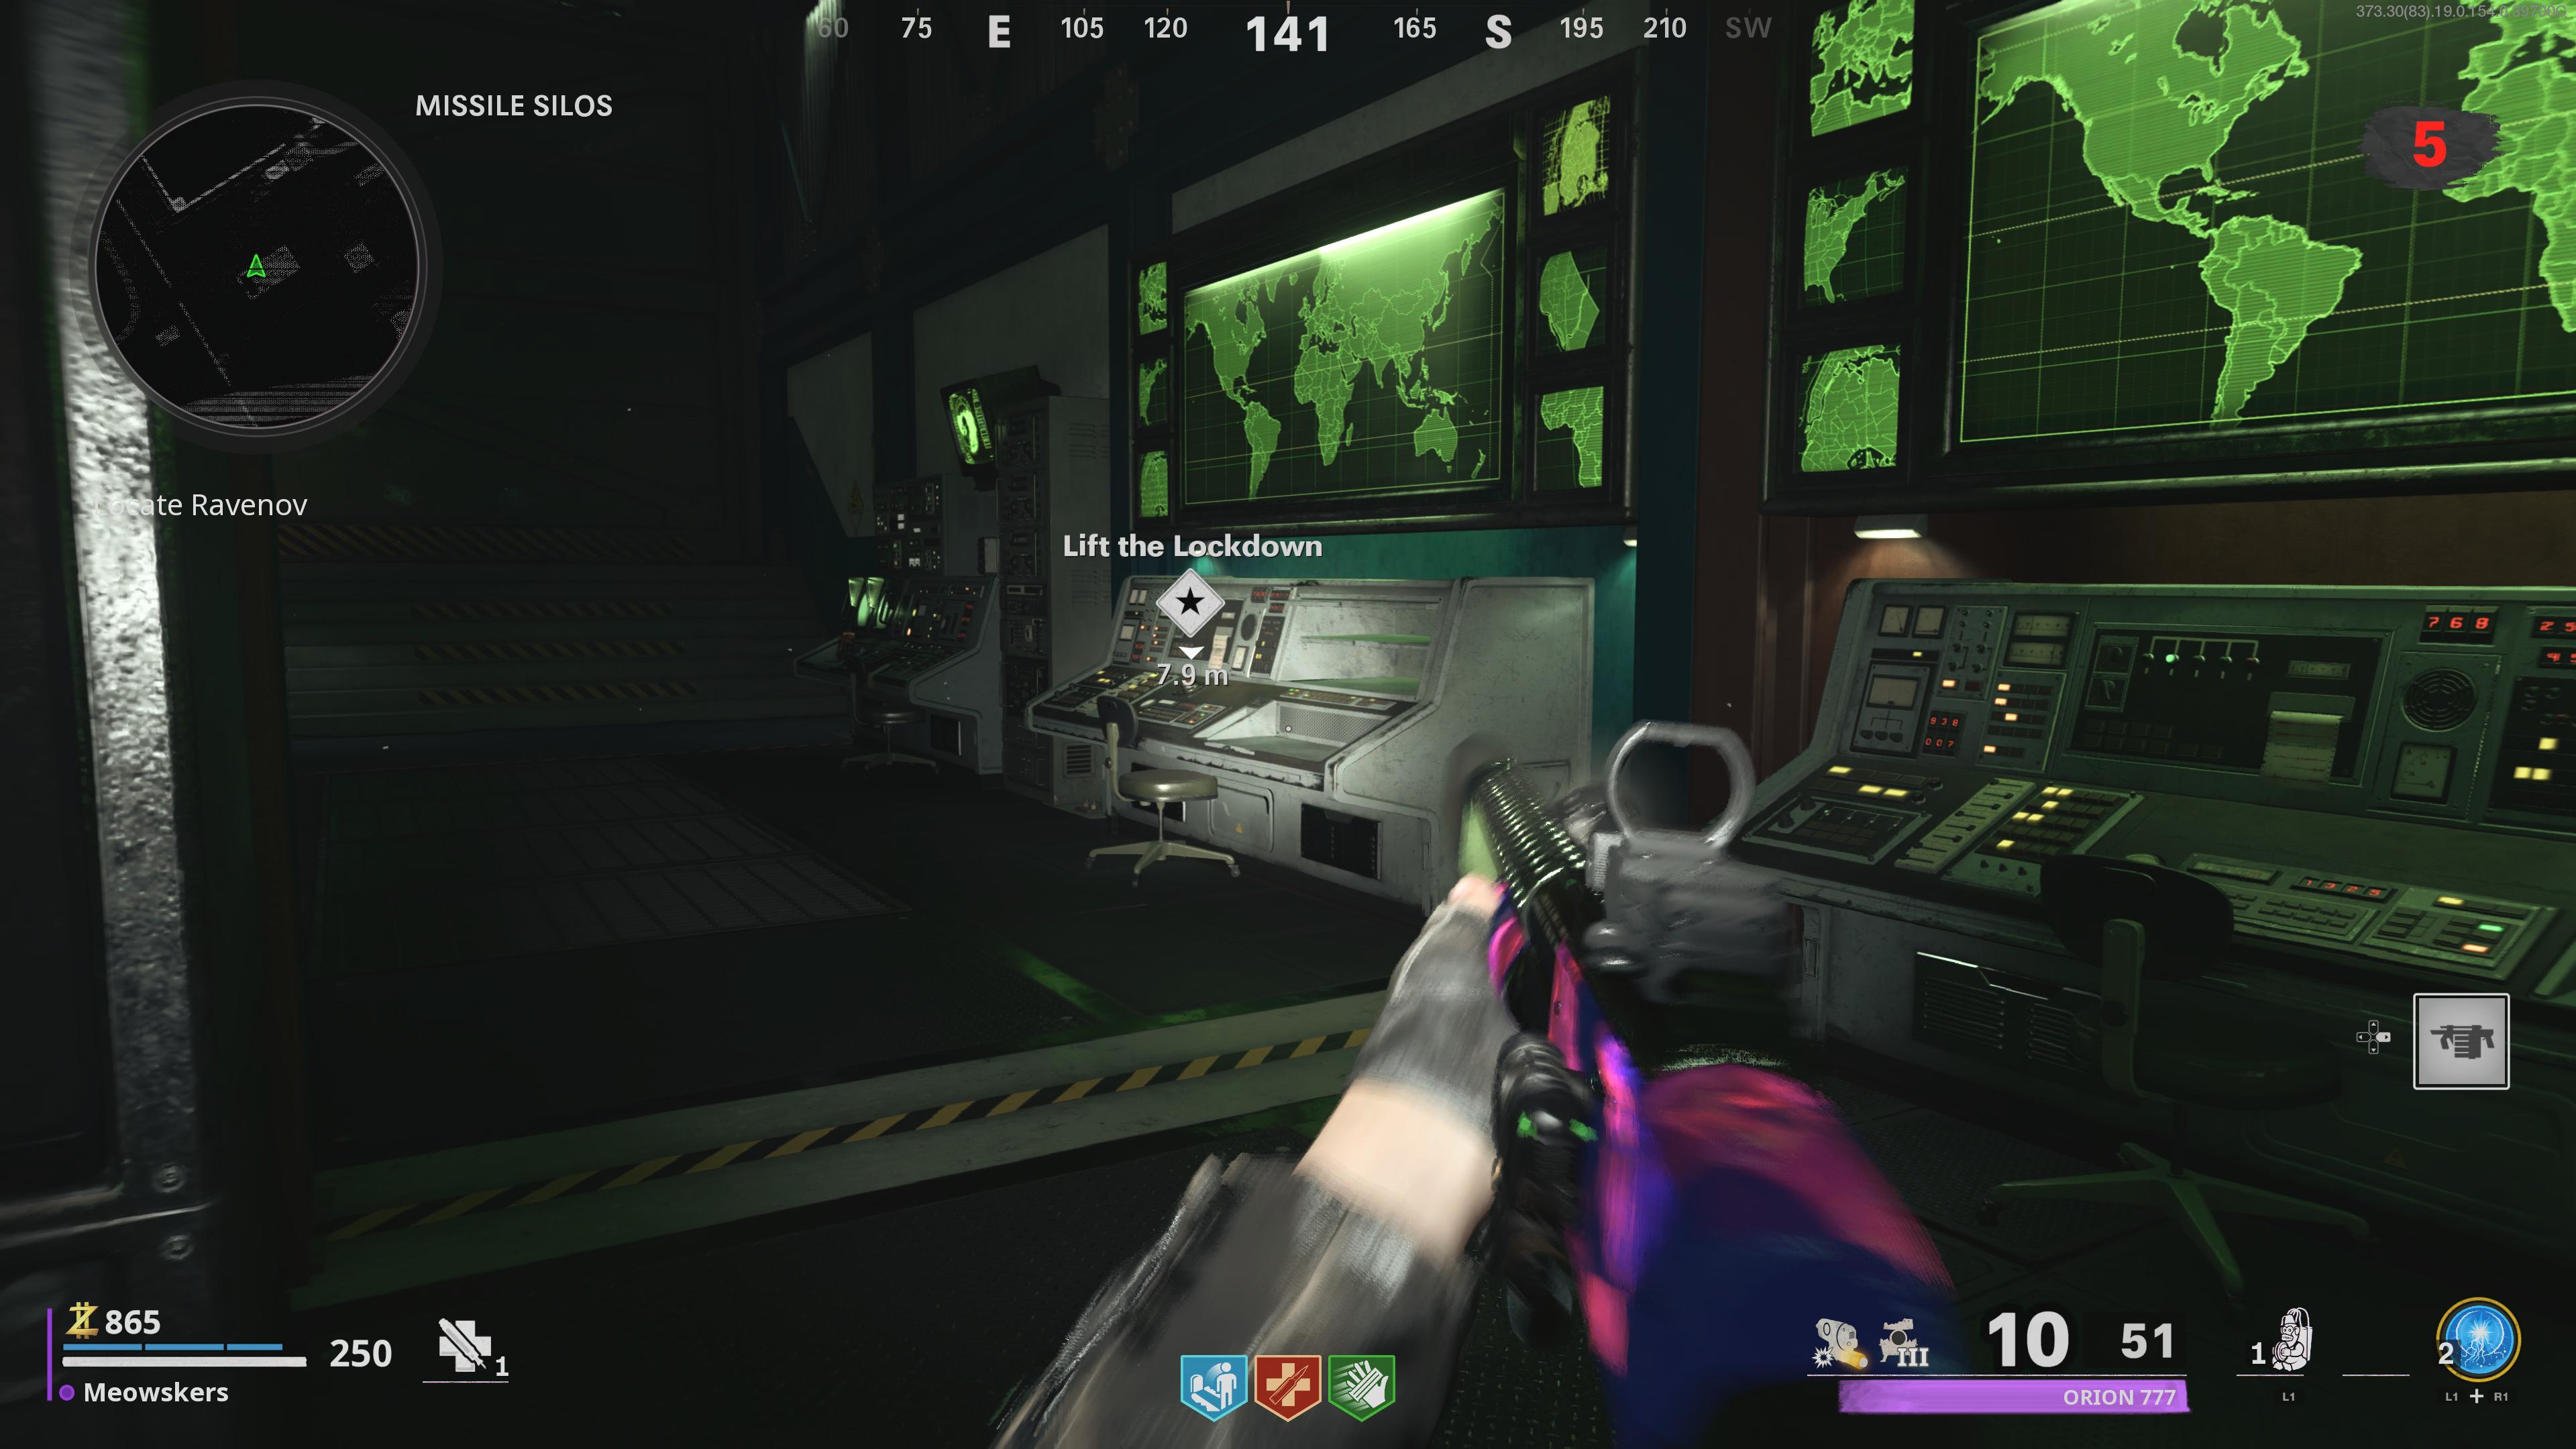
Now that you’re in, you pretty much only have one way to go for the Cold War Outbreak Easter Egg, and that’s through the D silo. Head this way, and then once you’re in the D silo, make your way all the way up the steps until you reach the top. Then make your way back to the central area and go into the A silo.
Head all the way down to the bottom of A, and then you’ll find a terminal you can interact with that says “Lift the lockdown.” Interact with it and you’ll get a cutscene, along with the ability to travel between the silos much easier.
Step 8: Collect three ICBM launch keys
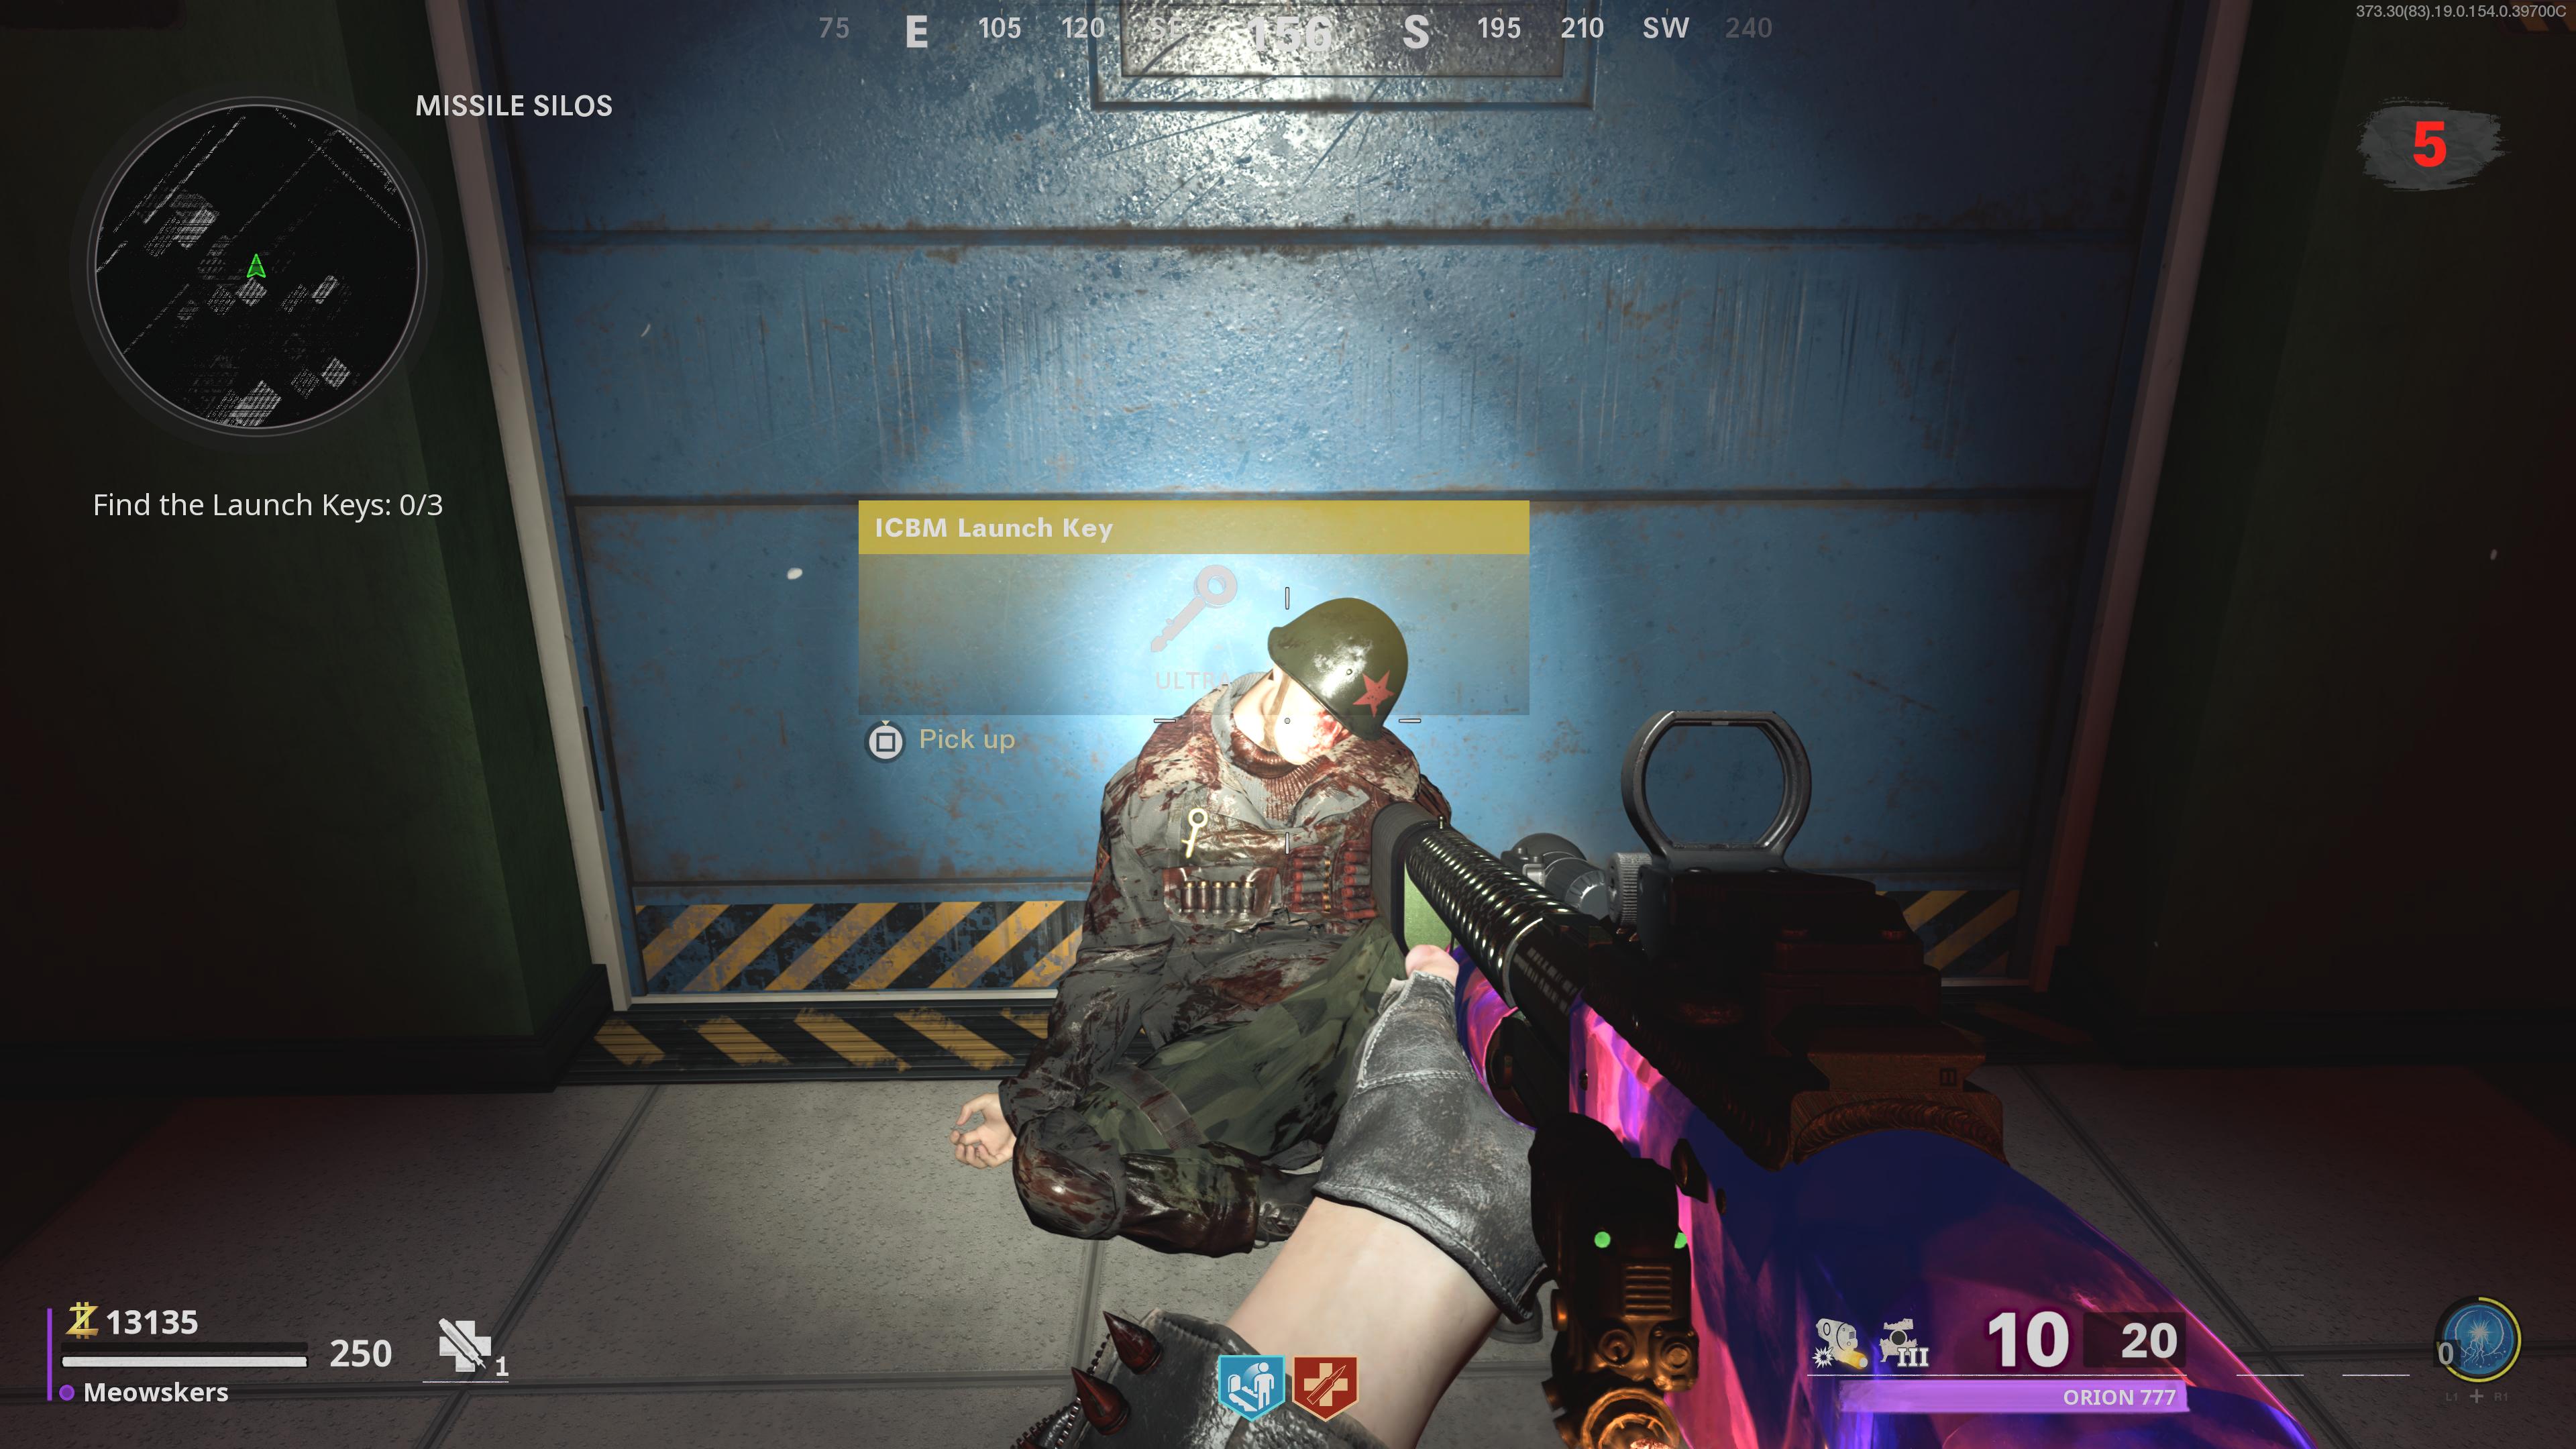
The next Cold War Outbreak Easter Egg step requires you to collect three ICBM launch keys, which are scattered around this area. Below are the locations of all three, along with the requirements for getting your hands on them. Do keep in mind, you can collect these in any order.
Launch key 1
For the first one, head down to the bottom of the A silo and look for a circular tunnel that has a red glow to it. At the end is an Essence Trap, so collect it and head back out to the main area of A. What you want to do is listen for the sound of an animal, which indicates the location of a vent that contains a monkey. The vents have a blue glow to them. These have various locations around the A silo, so keep your ears open for the correct sound.
What you need to do is get no closer than 20 meters of the vent and place down the Essence Trap. Make sure you don’t get too close because it’ll spook the monkey. After you place the trap, back up and the monkey will jump down. Then, quickly, “detonate” the trap to suck in the monkey to acquire the first key.
Launch key 2
This is the Cold War Outbreak Easter Egg launch key you can see in the image up there. From the main area in the center that leads to all the silos, look for a small hallway that dead ends with a downed soldier. Pick up the key from his body, which will spawn a special mimic, along with numerous others.
From here, run laps in the central area, using any means necessary to take them all out. We recommend using the Brain Rot ammo mod to take them out easier. Once the special mimic is down, pick up the key it drops.
Launch key 3
For the final Cold War Outbreak Easter Egg launch key, head to silo B and go down to the bottom floor. Look for a red canister called Aetherium Harvesting Unit and interact with it. Then, you’ll want to run around silo B while collecting purple crystals. These can be found along the walls, so shoot them and collect the crystals that drop. You need 20 in total. Once you’ve got 20, deposit them in the canister and wait for the short sequence to finish.
Afterwards, you can pick up the canister, so do that and make your way to silo D, where you’ll find a massive jellyfish creature. Stand next to the creature where you see Aetherium grass and use the canister’s burst feature by pressing the triggers (on console). If done correctly, you’ll be sucked into the jellyfish where you’ll find the last key. Grab it and then prepare for the launch sequence.
Step 9: Begin launch sequence
The Cold War Outbreak Easter Egg launch sequence is tricky because it seems to be random. What you need to do is visit silos A, B, and D in a certain order and interact with the terminals at each location. You’re looking for the large launch console that sits under the map of the world on the top floor of each silo. It looks the same across all three silos.
Unfortunately, the order seems to be random, so if you try a key in one of the consoles and it gives you an error, try another one. If you’ve picked the correct one, you’ll be given 45 seconds to reach the next silo to repeat the same steps. Many players have reported the order as A, D, and B as the correct order, but again, it seems to be random across the board. Either way, once you’ve gotten the correct order, you’ll be granted access to the boss arena.
To reach it, head to the main hub area in the center and climb the steps where you’ll come to a door that leads to the boss. As you can see if you’ve reached this point, there is a timer of around nine minutes to take down the boss. As if it needed to be even harder.
Step 10: Legion boss fight
This is it. The final boss for the Easter Egg. Let’s go through how it works so you know what to do. After you open the door, you’ll be taken outside to a large open area with a ton of enemies. Here, you’ll see the Legion boss appear in the air and it’ll begin attacking you.
The general idea for this fight is simple on paper, but tough to execute. What you need to do is shoot the boss in the chest, as indicated by a circular glow. Eventually it will go down and will spawn three floating orbs around it. To actually damage the boss, you need to destroy these floating orbs. Keep in mind, they only appear for a limited time, but if you don’t manage to destroy one, the damage you’ve dealt will save, so you can pick up after you’ve staggered the boss again.
When you destroy an orb, it will take off a third of the boss’ health. Rinse and repeat to completely take the boss down. The hard part is that you’ll constantly be chased by mimics and other special zombies while you attempt this, making it extremely tough if you’re by yourself.
Here is where we recommend utilizing your Frenzied Guard Field Upgrade to safely damage the boss. Frenzied Guard will essentially cause all the zombies to be attracted to the player who activates the ability. This means you can use that as a distraction to safely damage the boss.
Deploy the Field Upgrade, deal as much damage as you can, and then do your best to take out zombies to recharge your Frenzied Guard ability. If you’re playing solo, you’ll want to utilize the Ring of Fire Field Upgrade to deal damage instead. This gives you a temporary damage boost for the duration of the ability.
You can climb up on top of one of the small roofs to stay relatively safe from the zombies. They can still get up to you, but it will take them a little longer, so you can use that extra time to your advantage.
Just keep alternating with your Field Upgrades to effectively damage the boss with your team and you’ll have an easier time dealing damage. After the third orb is destroyed, the boss will go down for good.
Weekly digests, tales from the communities you love, and more
Joseph loves Nintendo and horror games. With the Nintendo Switch, he's ready to get spooky anytime, anywhere. He specializes in covering Call of Duty: Warzone and action RPGs like Dark Souls, so you can bet he's looking forward to Elden Ring, the brainchild of George RR Martin and Hidetaka Miyazaki. You can find Joseph's work at GamesRadar, Digital Trends, Inverse, and PLAY Magazine. When he's not writing about video games he can usually be found petting his cats and listening to some Progressive Metal. He thinks Meshuggah is tight.

