Call of Duty: Black Ops 2 multiplayer guide
Lock and loadout
The Pick 10 System Pt 2
Ranged Penetration
Primary: LMG
Attachment 1: Full Metal Jacket
Attachment 2: Fore Grip
Secondary: ---
Attachment 1: ---
Perk 1: Flak Jacket
Perk 2: Toughness
Perk 3: Tactical Mask
Lethal: Claymore/Betty
Tactical: Smoke Grenade x1
Wildcard 1: Perk 1 Greed: Hardline
Wildcard 2: ---
Wildcard 3: ---
The goal of this build is to emphasize the LMG’s ability to penetrate materials from a distance, allowing you to kill opponents while they think they’re safely hiding behind cover. Your emphasis isn’t going to be on providing frontrange combat capabilities; let the SMG and shotgun-wielders perform that task. Rather, you should be following your teammates from the rear, noting when they go down and opening up on the suspected location of their killers with your deep reserves of ammo, or simply letting loose with a stream of bullets when an enemy appears nearby on a UAV scan. The FMJ attachment will allow your bullets to pierce walls more easily, and the Fore Grip will let you lay down more fire with less recoil. Needless to say, this works best on maps like Cargo with a lot of thin cover for people to hide in.

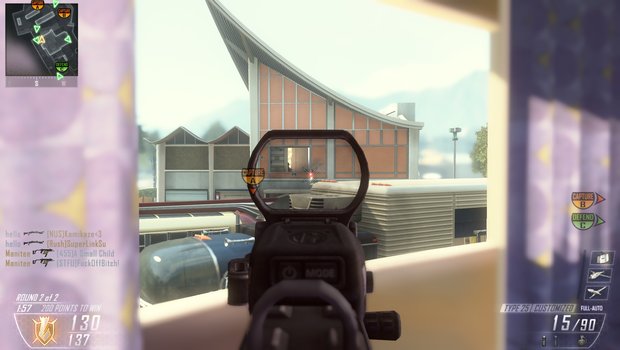
At this range, with an assault rifle, you won’t do a huge amount of penetration damage, but you’ll often do enough to kill your target nonetheless.
The goal here is to find enemy campers and take them down. Most of the sniper roosts and hiding spots in the game will feature light cover next to an open window or doorway. You can’t shoot enemies clean through cars, but your LMG will be able to penetrate most lighter cover, such as building walls, with relative ease. Knowing where enemies are will be easier if you take advantage of the information sources that your teammates provide, or if you find a nice little roost yourself and hunker down, looking out of a window. You can use your Claymore to guard your rear, or lay down smoke in a narrow passageway and start shooting directly into it if you suspect enemies are behind it. The Tactical Mask and Flak Jacket will allow you to ignore grenades almost entirely, letting you remain in position for the enemies that’ll follow them through the door.
Modifications: Modifying a build like this is fairly simple. If you find yourself dying more often than you’d like, eliminate the Perk 1 Greed wildcard and get rid of Hardline, since it’s only effectual if you stay alive long enough to get killstreaks. You can replace it with a third attachment for your LMG, perhaps a scope, or another perk that you like. If you don’t find the Claymores useful, switch to an offensive grenade. If you find it difficult to aim while moving, switch the Fore Grip for a Stock and hope that no one sneaks up on you.
Objective Assault
Primary: SMG (or Full-Auto Shotgun)
Attachment 1: Suppressor
Attachment 2: Choice of optics, preferably MMS
Secondary: ---
Attachment 1: ---
Perk 1: Flak Jacket
Perk 2: Toughness
Perk 3: Engineer
Lethal: Grenade
Tactical: Tactical Insertion
Wildcard 1: ---
Wildcard 2: ---
Wildcard 3: ---
The goal with this build is to put together a loadout with elements of survivability to get you towards an objective and let you sit there long enough to plant a bomb or control it. The specifics here will vary a bit based on game type, but this should serve you well for standard Demolitions rounds. Typically, many objectives are located in fairly small quarters, meaning that you’ll want to emphasize a close-quarters weapon, with SMGs offering a good mix of firepower and range, considering the cramped quarters we’re talking about. The suppressor will keep you off enemy minimaps while you make your approach.

Get close, get down, and watch for grenades.
Flak Jacket will protect you from grenades if you manage to start planting a charge and hear the tell-tale tinkling of a frag coming near you, and Engineer will allow you to spot enemy C4 and other booby traps through walls, which is important, because they have a tendency to sprout like weeds when an enemy knows you have to approach an objective. Setting up a Tactical Insertion will allow you to repeatedly spawn near the objective you have to assault.
Modifications: This is a build that’s intended to die, and die often, but the slight edge in survivability it affords should give you a slight edge when approaching objectives. Customize by switching in a shotgun or assault rifle, as you like, or perhaps by switching out Tactical Insertion for flashbangs on smaller maps.
Objective Defense
Primary: Assault Rifle
Attachment 1: Grenade Launcher
Attachment 2: Quickdraw Handle
Secondary: RPG (or SMAW)
Attachment 1: ---
Perk 1: Flak Jacket
Perk 2: Scavenger
Perk 3: Tactical Mask
Lethal: Claymore/Claymore
Tactical: ---
Wildcard 1: Danger Close
Wildcard 2: ---
Wildcard 3: ---
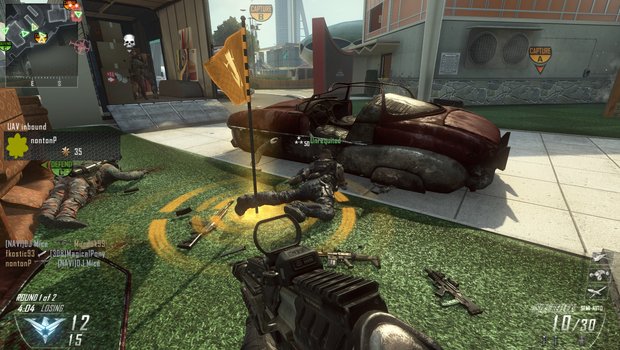
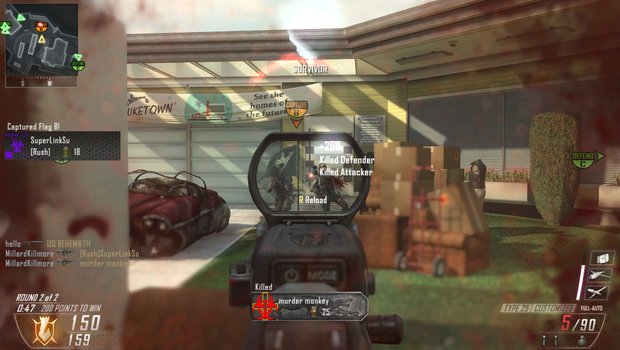
On the flip side of assaulting objectives comes the need to defend an objective from enemy forces. Objective-based gameplay tends to concentrate firefights in small areas of the map, and your goal here is to take advantage of that high foot traffic by laying down a couple of Claymores or Betties before flipping on your Grenade Launcher and waiting for the enemy to come to you. Most objectives have at least three discrete paths to reach them, so lay down your traps to cover two of them, then lie in wait near the third. If someone gets close enough to plant a bomb, quickly switch over to your RPG and aim it directly at the objective to take them out, using your rifle to kill anyone who resists damage with a Flak Jacket.

Attackers will expect defenders to be planted on an objective, so it can be handy to camp out somewhere close by, with an eye on the target.
Modifications: You can also use C4 rather than Claymores if you prefer to guard the objective itself. The standard tactic here is to lay C4 somewhere in the immediate vicinity of the objective, find a spot to hide, then wait for an enemy to approach the target. You’ll get a notification that they’re either assaulting it (in the case of flag-based modes) or planting a bomb, allowing you to pull the trigger and hopefully kill them from range.
Table of Contents
- General Tips
- Perks
- Scorestreaks Pt 1
- Scorestreaks Pt 2
- The Pick 10 System Pt 1
- The Pick 10 System Pt 2
Weekly digests, tales from the communities you love, and more


