


Ukrainian developer Frogwares are most famous for their Sherlock Holmes games, which has sold more than seven million copies worldwide. Open-world mystery The Sinking City is their most ambitious project yet, with its focus on lateral thought and puzzle solving. Far from the Victorian terraces of Baker Street, the East Coast city of Oakmont, Massachusetts is windy, wet, and grim. Detective Charles Reed secures passage there after having strange visions of a submerged city and a strange, tentacled creature. During the First World War he was in the Navy, and he’s still haunted by something unfathomable he saw while serving, something he can’t quite remember. But his own troubles aren’t the only case the detective ends up taking on. Playing as Reed, you have to track down evidence from all corners of the city, linking clues with your own deductions. Here are the scraps we managed to recover from our hands-on investigation with the first two cases of the game, which took us a good few hours’ detective work.

This feature first appeared in Official PlayStation Magazine. Get the latest PlayStation news on your doorstep early and for a better price! Subscribe to OPM here.
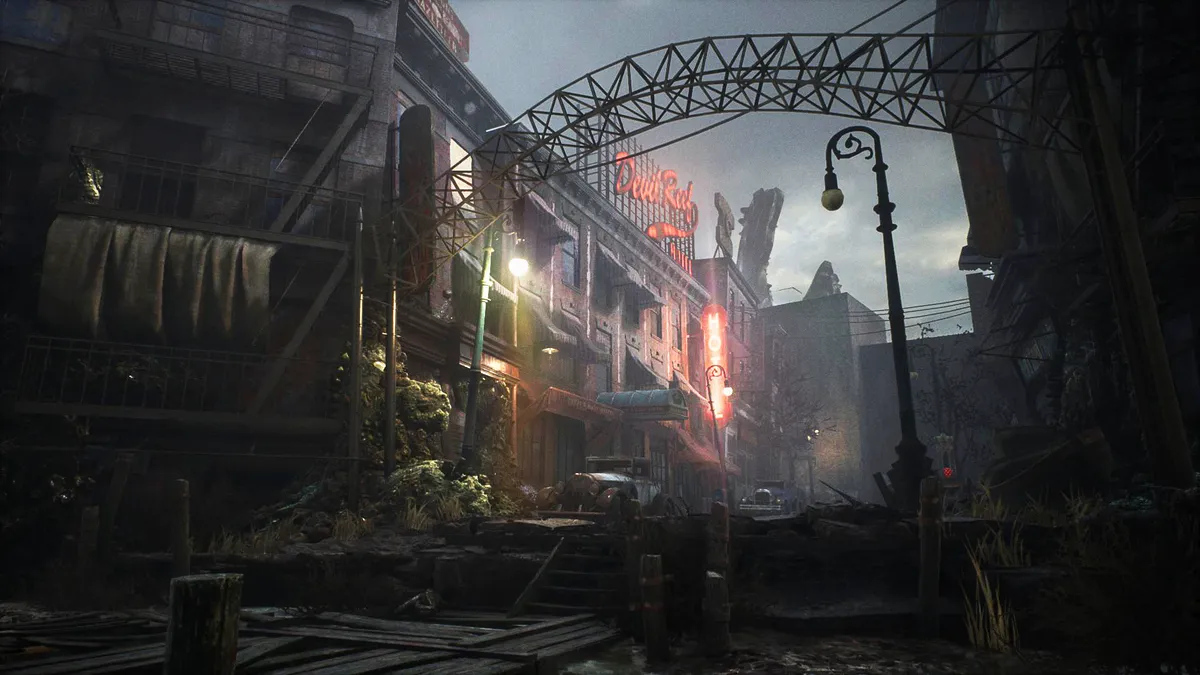
Entry #1: It’s Grim down south – Beginning our investigation at the port

We finally arrive in the harbour, in the city’s Grimhaven district. The Captain tells us in no uncertain terms to get off his boat, but not before we’ve grabbed our belongings, including a gun we’re sure we’ll have to use by the time we’re done with this city. A man by the name of Johannes Van Der Berg is waiting for us, our first point of contact. He points us towards Robert Throgmorton, head of one of the city’s grand families, who apparently can tell us more about these visions. Luckily he is down at the harbour on his own business anyway. He is easy to spot between the citizens who seem to be worshipping the sea, and the half-sunken piers – we overheard someone refer to him as a “crazy ape”. He certainly looks different – well-built and strong.
Throgmorton’s son went missing after a deep-sea expedition went sour, and he’s been told a local fisherman had found him washed up, and brought him home, but now he’s gone missing again – our first case in the game.

Entry #2: Dead and board – Down and out at a boarding house
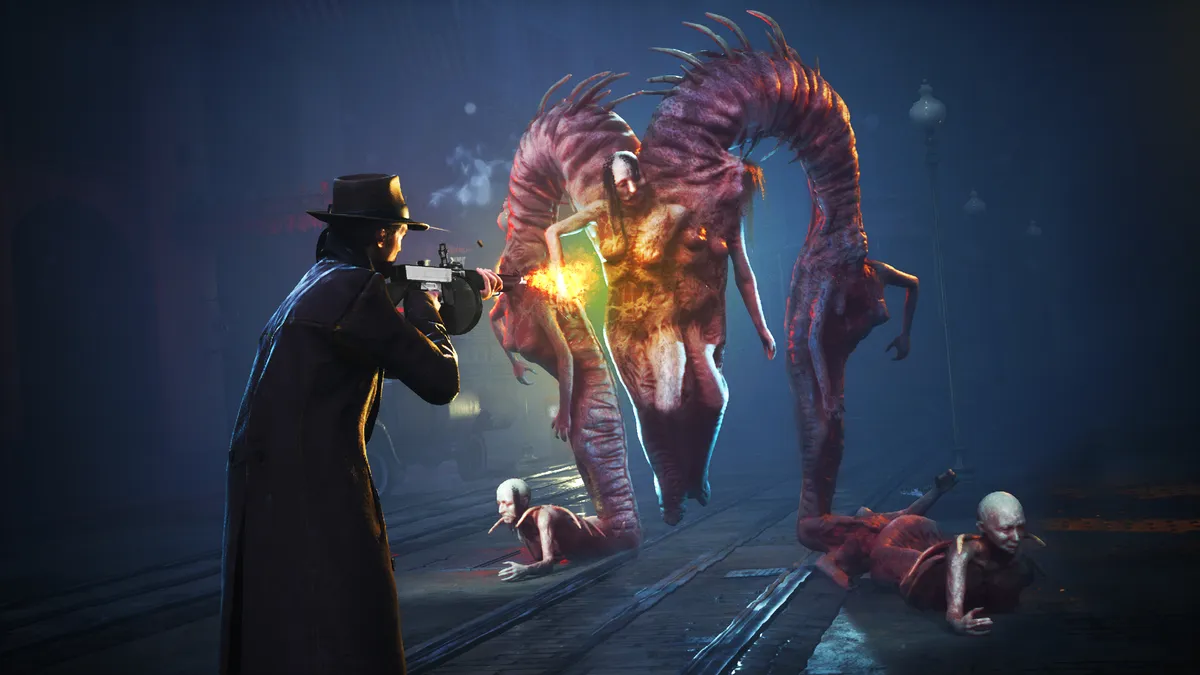
Many workers live crammed together in this rickety house. Upstairs a man named Will Hammond tells us what he knows. He says he was a railworker before the flood, and has become a fisherman, like many others, to make ends meet. Next to him is a body of another boarder, face bashed in. Seeing this, our Sanity gauge plummets – we see a man hanging lifeless before our eyes, and a humanoid creature stumbling towards us, before we manage to shake off the visions. Not only do we have to make sure Reed’s Health is maintained, we have to check he doesn’t become too disturbed too quickly, as shocks, monsters, and using supernatural detective powers drain Sanity, and it’s slow to recharge.
We continue to search for clues. Concentrating on a pocket watch we found (at the cost of more Sanity), we use our Mind’s Eye ability to glimpse the past. This place was indeed where Throgmorton’s son, Albert, lay – in our vision we see him floating above the bed, shocking another lodger. At a further cost to Sanity we use Retrocognition to piece together an altercation between the two. We have to find all the ghostly recreations of the past in the area, then pin down the order in which they took place. We see Albert’s fight with the lodger spill out of the building, crashing through the wall and into the harbour.
Entry #3: Body of evidence – Cold storage is never a good sign

“As we reach a padlocked cold storage area in the basement we get nervous.”
By continuing to use Mind’s Eye we follow echoes of the men’s shapes through the harbour, and track them to a warehouse. As we reach a padlocked cold storage area in the basement we get a little nervous. With no time for subtlety, we bash the lock open with the shovel from our rucksack using R1. Hanging there is Albert’s dead body, a gunshot wound through the head. Before we can examine it properly a strange, small, multi-handed creature leaps at us from around the corner. With our Sanity dropping perilously, we panic. With bullets a limited resource, we go back to hitting R1 to whack it until it lies still.
We’re told a little later that these things, Wylebeasts, have begun to infest parts of town since the flood, feeding on blood. Some areas of the city will be more dangerous than others, though they may hide secrets we’ll want to discover when we’re more kitted up. Going back to the body, it seems like the other lodger, Lewis, might have executed Albert as their fight escalated, as we find identifying letters near the body tying him to a speakeasy. Prohibition doesn’t seem to affect Oakmont. Wanting to be sure, we set out for the nearby bar.
Entry #4: Bar for the course – Every good ’tec loves a speakeasy


The Testament of Sherlock Holmes (PS3), 2012
A leap forward for the Sherlock Holmes series (going strong since 2002), Testament felt truly designed for consoles. An original story, Holmes has to wrangle his toughest case yet, one where he is the main suspect.
Sherlock Holmes: Crimes & Punishments (PS3, PS4), 2014
Holmes and Watson take on six cases that end up all tying into a larger plot. Often the cases feature moral dilemmas, and you have to weigh up how to end each morally grey case.
Sherlock Holmes: The Devil’s Daughter (PS4), 2016
Again a larger plot takes place over a few cases, this time centering around Holmes’ daughter. A bit more action-packed, it focuses on younger incarnations of Holmes and Watson.
"Got a spare bullet, fella? I ain’t eaten in days,” a beggar asks us outside the bar. Our confusion is put to rest inside when a fortune teller informs us the dollar is meaningless in this city. “Oakmonters deal in the practical,” she says. Fair enough. If we end up unsure where to go, she might be able to point us in the right direction – for a price. We lay it on thick with the bartender, who seems to be covering for Lewis. We’re taking no nonsense after finding that body and that beast. We need to be careful with our words, as what we choose to say will affect how helpful people are to our investigation.
Convinced, he leads us to Lewis. Lewis is an Innsmouther, a member of a migrant fish-like population from the ruins of the nearby city of Innsmouth. Throgmorton called them refugees when he told us about them, claimed they were stealing jobs. Lewis is skittish, and admits what happened but says he can’t remember any of it, that something came over him when he found Albert’s body floating. Given what we saw using Mind’s Eye, we can’t help believing him.
We have to choose whether to turn him into Throgmorton, well aware of his hate towards the Innsmouthers, or to let him off and cover up for him. Believing Lewis, and feeling like he might be of help to us later, we go for the latter. Throgmorton thanks me, believing his son’s killer to be dead, and tasks us with our second case: to find out what happened to his son’s doomed expedition to investigate the nearby seabed, where a deep crack seems to have appeared.
Entry #5: Rest in peace – A hotel, and more missions

As we leave the harbour we’re overcome by another strange vision, a giant beast sucking us up, slurping up the whole city. When we wake we’re in the Devil’s Reef Hotel. We find a message from another hotel guest pleading with us to track down some ancient tomes – when we nose around, we discover his room is that of an obsessive, but he seems to have vanished. We change clothes for something warmer (we’ll unlock more by completing cases, and via DLC), and make note of this book-hunt as a potential side-case (one of many, it seems), and gather evidence that will lead us to many corners of the city.
Before he sent us on our way, Throgmorton handed us what he knew about the case as distinct pieces of evidence, and we’re able to mark each clue where we want on the map. Using what he told us about the location of the Expedition Headquarters we find the street it’s on, mark it as a waypoint, and leave the hotel. The Sinking City is not a game that will ever simply hand you waypoints; you need to make your own deductions or sweet-talk the right people into marking your map for you (though you can at least fast travel from phone booths in each district).
Entry #6: Expedition impossible – Those Dagon cultists ruin everything!

Ah. The door to the Expedition Headquarters is bashed in. Clearly we weren’t the first person to think of coming here. Eels writhing in a nearby tank watch us as we pick over what documentation we can find, though the scraps on the floor prove nearly worthless. Activating Mind’s Eye we see ghostly crows pecking away at a wall. On further investigation, the wall seems to vanish, though before we can stop it our Mind’s Eye shows us more ghostly visions, this time of what appear to be cultists lugging papers down to the basement. A follower murmurs the name of the one they worship: “Dagon”. It gives us the shivers, and our Sanity plummets.
Downstairs we see another cultist – but not a vision this time, a real person with a gun. He shoots. He misses! We shoot, and we don’t. He drops to the floor. Again, the vision-crows lead us to where the papers were burnt and we find one remaining thing: a small scrap of an old newspaper advertisement recruiting for the doomed expedition.
Entry #7: Papers, please – Reed by name, read by nature

We need more information. Given the scrap we found, we reckon the Oakmont Chronicle will be a good place to start. (Again, this is something we choose to do, not something marked by some glowy waypoint. We’re told there are multiple ways to progress to the next step of the investigation.) A reporter at the paper has heard of us, and we give a quick interview, being careful which answers we choose to give. We tell her about Reed’s wartime service, and how the city’s draw for missing people across the US had led us here. We don’t mention we’re also trying to uncover the truth behind our own visions.
We search the paper’s archive – the key locations throughout the city all have their own files to check over. To get anything from archives like this we need to zero in with three facts we definitely know. In this case, we know the scrap we found was in the advertisement section, that it concerned the Grimhaven Bay district, and that it was from after the flood. With that, we find out the expedition’s organisers were recruiting at Pier 3 at the harbour. It’s an evolution of the Archive gameplay from Frogwares’ past Sherlock Holmes game, and one that seems to reward some proper detective thinking.
We quickly swing by the police station en route to the harbour, but Captain Caleb Lyons makes it clear we’re not welcomed by the force here.
Entry #8: Smell o’ sailor – A cargo of corpses at the harbour
Wylebeasts have infested Pier 3 but we manage to take them out. It turns out they were drawn here by the dead bodies that litter the walkway and the expedition ship, the Titania. You don’t need to be a detective to realise something went wrong. It seems the sailors were seized by a madness on their return and it was a massacre. We do learn that a lone survivor, Captain Sanders, escaped, albeit with a nasty axe wound to his shoulder.
Entry #9: Dock to doc – Tracking the captain to hospital

When you have a wound that bad, you’ve got no choice but to get it treated immediately. Opening our map, we mark that clue firmly over where we know the hospital to be. Because it just makes sense. Streets out that way are flooded, but luckily zippy little boats are on hand to take us safely across. If we spend too long swimming in that water, things will get at us and our health will slowly decrease.
On arrival at the hospital the doctor gives us a pill to help with our headaches but it just makes them worse. Our Sanity gauge plummets, and we see a vision so real it actually begins to attack us, whittling down our health, before it fades away. It turns out nobody named Captain Sanders has checked in, but knowing what we do about him we’re able to deduce which of the patients is him under a false name. He refuses to tell us much on the expedition other than that the scientists never returned from the depths, and those who went looking for them came back half-mad. At our insistence, he points us in the direction of an old factory where we can secure a diving suit, and tells us where to find his ship’s log in the hospital storage. It contains the co-ordinates to The Devil’s Teeth – the spot they dove from.
Entry #10: A deeper mystery – Continuing the search below the waves

“A strange, many-tentacled thing swims by just out of sight.”
Using the map and a boat, we find the half-sunken factory and secure a diving suit. Then we head back to the harbour to take another boat out to the diving site. (Good job Reed doesn’t suffer from seasickness, eh?) Knowing Reed dived in the Navy, we try to remain confident despite the warnings. We follow lanterns and flares along the ocean floor. A strange, many-tentacled thing swims by just out of sight, then more tentacle things emerge from the seafloor, trying to get at us. Once again our Sanity plunges, before we manage to take refuge in an underwater cave.
Entry #11: Finders, weepers – Idol curiosity leads to trouble

Within the cavern we find the survivors of the expedition, babbling nonsense. They’ve been trapped down here, their diving suits all cut up. At the back of the cave is a huge statue of a creature, and some sort of plinth. It’s clearly a place of worship. Professor Hammond, who led the expedition, appears to be missing.
Using our Retrocognition once again we cast back to find out what happened, picking the correct sequence of events to piece it all together. It appears that when an artefact was taken from the plinth, it gave the team some sort of infectious madness; then Professor Hammond and the artefact were seized by what looked like the same group that raided their headquarters. With the evidence we’ve collected piling up we turn to our Mind Palace, a menu where we can piece together matching pairs of clues (again, an evolution of a mechanic from the Sherlock Holmes games). Using this we manage to deduce that this is a similar madness to the one Albert suffered, and like it did with Lewis it affects those around the victims. That leaves us with a dilemma – do we save those trapped down here and risk them spreading a madness into Oakmont, or do we leave them to die?
It seems the main cases in the game will be filled with moral choices like this, which may have an affect on what happens to this sinking city of Oakmont further down the line. We vow to let the authorities know how the survivors can be rescued, and return to the surface to report to Throgmorton. Perhaps now he can point us in the right direction to find out more about these visions we’re suffering from. But something deeper and more sinister seems to be going on…
"We made maps of Oakmont developing through time.” – Frogwares CEO Wael Amr talks OPM through how the studio developed the titular Sinking City

