Super Mario Maker's toughest levels, from hard to near-impossible (we're still trying to finish them...)

So you think you're hot stuff at Mario games, huh? You cruised through challenging levels like Super Mario Bros.' 8-3, the airships in Super Mario Bros. 3, and Special World stages like Way Cool and Tubular in Super Mario World. Nicely done! But Super Mario Maker - now on Wii U and 3DS - continues to redefine what constitutes a 'hard' 2D Mario level. The creations made by the community don't have to be built with accessibility in mind; they can be as forgiving or cruel as their creators see fit. For level designer PangaeaPanga, it's all about making the kinds of courses that only the most accomplished Mario fans will have any hope of beating. If you're looking to push your Mario skills (and knowledge) to their limits, Panga's levels are just the thing. After talking to Panga about his philosophies for designing Super Mario Maker's hardest levels, I asked him to rank his own creations in terms of straight-up difficulty. Here are his picks, from 'easy only by comparison' to 'so tough I want to jump off a cliff', along with a bit of insight from the devilishly clever designer himself. If you're looking for a platforming challenge, you've found it.
10. Shells Suck
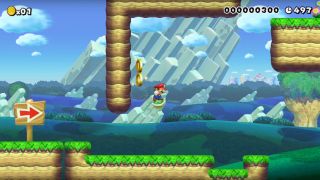
Course ID: 950E-0000-0016-BFC0
Consider this a crash course in what makes a difficult Mario level. Having the mechanical skills necessary to run and jump your way to the flag pole typically isn't enough - you also need to fine-tune your instincts for how to overcome any obstacle. Shells Suck is the perfect bite-sized stage for gauging your prowess to combine dextrous platforming and tricky puzzle-solving, with a pair of simple Koopa Troopas as your guides.
Panga says: "I literally made this level five minutes after getting the game. I didn't have any items unlocked, so I had to make do with what I had available. It's only two screens wide, but the execution is tough."
9. Shell Shock
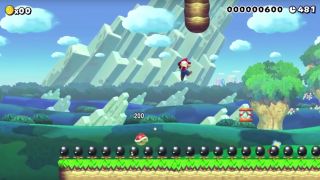
Course ID: DB46-0000-001C-1E0E
With Shells Suck under your belt (or blue overalls, as it were), you're probably feeling pretty good about yourself. But Shell Shock will be the first true test of your abilities. The themes are much the same - using Koopa shells to vault yourself to victory, and exploiting trampolines for additional air time - but the timings here are much more strict. It also requires that you master the miniscule gliding effect of the spin jump that's exclusive to the physics of New Super Mario Bros.
Panga says: "Took me less than five minutes to beat this. Pretty short level. Easy once you know the setup and what buttons to press at what time."
Sign up to the GamesRadar+ Newsletter
Weekly digests, tales from the communities you love, and more
8. Ultra Star
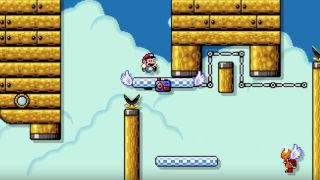
Course ID: EB4A-0000-0035-2D74
You know that nail-biting sensation in Mario games when you know you need to jump off a plummeting platform, but you're just not sure when? Prepare to experience that feeling over and over again in Ultra Star. Not only will you have to hop between a procession of floating platforms - you also need to keep an eye out for essential POW blocks that'll enable your progress. If nothing else, bopping a POW block and watching the nearby Munchers get obliterated is a nice way to relieve the stress this level will inevitably generate.
Panga says: "Tried my best to create a literal platform level. I really like the idea for this level, but the platforms just would not move fast enough to my liking. However, I also enjoyed being able to incorporate POW blocks as a mandatory item."
7. Skyzo
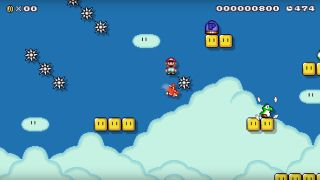
Course ID: 2731-0000-001A-E853
Panga's style of level design owes a lot to the Kaizo series of Super Mario World ROM hacks, and this level's name is a little nod to that inspiration. As you've probably come to expect by now, it's a ruthless series of jumps that require exact timing, with the added anxiety of a constantly ticking P-Block timer. It's also a nice primer for the invincibility properties of the spin jump that can only be utilized in the Super Mario World template.
Panga says: "Besides P-Break, this is my most known level. It has the highest number of clears (over 200), but still under a 0.10 percent completion rate. Very fun, upbeat, and you need to go fast."
6. No Mah Yoshi
Course ID: 7011-0000-0034-6480
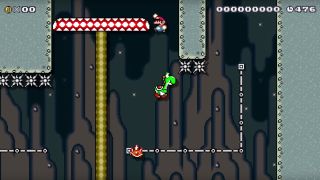
If you've got a soft spot for Mario's dinosaur pal, it'd be best if you look away now. You'll need to send a total of six Yoshis to their deaths if you want to conquer No Mah Yoshi, callously using them as springboards to propel Mario forward as his trusty green buddy falls into oblivion. Some of the challenge in this level are only possible in Super Mario Maker, which let Panga put wings on an unhatched Yoshi eggs, display multiple Yoshis onscreen, and design a particularly inspired bit where an egg has to take a ride in a Clown Copter.
Panga says: "One advantage of Super Mario Maker is being able to have two Yoshis at the same time, so I just abused this as much as possible. It is also notorious in hard hacks to use Yoshi as a sacrificial lamb."
5. Panga Express
Course ID: 78DC-0000-007E-6D2D
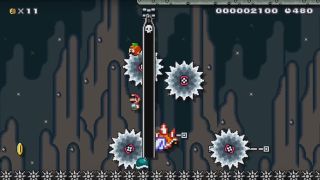
This is the dreaded auto-scrolling stage taken to its logical extreme. No sooner do you spawn into the level than a gargantuan Bullet Bill tower starts barreling toward you atop a whizzing Buzzy Beetle shell, forcing you to assess and leap about a deadly gauntlet at a breakneck pace. It's not a short trip, either: you'll need to memorize an increasingly complex series of obstacles through four separate thrill rides if you want to reach the finish line. Your eyes may have a tough time keeping up.
Panga says: "The idea was based off of a level from user MrCheeze_ called 'Minecraft Mayhem.' Surprisingly, this took me almost seven hours to make, but under an hour to beat. This was a lot of fun to create, though".
4. POW-a-Panga
Course ID: 30EE-0000-0075-0165
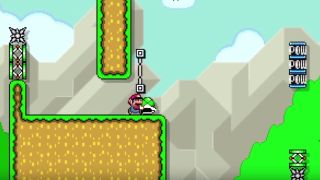
As you might've guessed from the name, this one's all about the POW block and its screen-shaking powers of mass destruction. If you haven't already become an expert at the art of making precision jumps while holding onto and/or kicking away objects, this level will get you there the hard way. This stage also makes great use of Thwomps to act as timed triggers for any blocks underneath, and the finale where a POW block takes a treadmill ride is a delightful design (even though it'll cruelly dropkick countless numbers of nearly successful runs).
Panga says: "Built off some of the elements seen in Ultra Star. Tried my best to abuse the different properties of the POW block. Ended up being a little harder than I anticipated."
3. Bomb Voyage
Course ID: 2A8F-0000-0049-9485
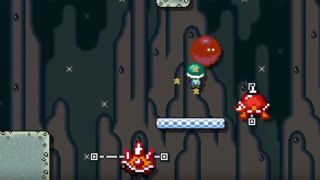
For many, Bomb Voyage is their first exposure to Panga's meticulous level designs, and the incredible skill required to finish them. It went viral thanks to an exhibition video from BananasaurusRex, the 2D platforming demigod best known for being the first to finish a solo Eggplant run in Spelunky. It utilizes the good ol' Bob-omb in inventive, terrifying, demanding ways, turning some parts of the stage into actual ticking time bombs. The part where Yoshi has to spit out a fireball to light a Bob-omb fuse is guaranteed to make you do a double-take.
Panga says: "This is another one of my more well-known levels. I liked this idea as well because of how Bob-ombs work in this game. I found it hard to incorporate more stuff considering how short the timer for the Bob-ombs are."
2. Propheller

Course ID: 79E7-0000-0040-4879
Power-ups that give Mario the ability to float, glide, and even fly are a beloved staple of the series. But even compared to the Tanooki Leaf or the Cape Feather, the Propeller Mushroom from New Super Mario Bros. offers a dizzying degree of precision midair control and, in turn, clever design possibility. Propheller forces you to use the power-up in unfamiliar ways: zipping skyward while crouching, purposely delaying your pick-up so the Mushroom can helicopter towards you, halting your ascent with a quick downward spiral, the works. It's enough to leave your head spinning, maybe even more than Mario's.
Panga says: "This level was more-or-less the first one [I made to be] ridiculously hard, instead of 'just plain hard'. Execution is crucial in this level, as well as actually keeping a power-up as long as possible."
1. P-Break
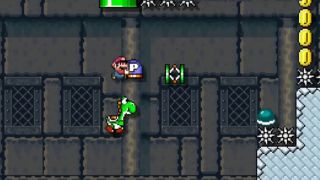
Course ID: 6059-0000-005E-4FB5
This is it: the hardest Super Mario Maker currently in existence. Looking at the 0.01 percent completion rate will either fill you with dread or inspire you to become one of the elite few who can honestly say they've beaten this incredibly demanding, fiendishly challenging level. The difficulty on display in P-Break is astronomical, and only possible in Super Mario Maker thanks to Mario's newfound ability to wear a Buzzy Beetle shell as a protective helmet. From start to finish, it's an unparalleled test of your reflexes, focus, and patience. If you're thinking about trying to beat it, I only have two words for you: Good luck.
Panga says: "Arguably the hardest level on Super Mario Maker as of now. Over a million attempts, and just under 20 clears. It took me five hours to make, and nine hours to beat. If your hand doesn't hurt when you're playing this, then you have a tough body (and mind)."
Lucas Sullivan is the former US Managing Editor of GamesRadar+. Lucas spent seven years working for GR, starting as an Associate Editor in 2012 before climbing the ranks. He left us in 2019 to pursue a career path on the other side of the fence, joining 2K Games as a Global Content Manager. Lucas doesn't get to write about games like Borderlands and Mafia anymore, but he does get to help make and market them.

Fallout 4's big next-gen patch isn't going over well, especially on PC: "I had very low expectations but this is MUCH less than I expected"

30 years after he created Hellboy, Mike Mignola is creating a whole new folklore-inspired universe

Destiny 2 is un-sunsetting every gun in the MMO with The Final Shape's massive Power changes – but Bungie says "we have no recovery mechanism" for deleted ones
Most Popular


