Pokemon Sword and Shield complete guide and walkthrough to become the Champion of Galar
All the Pokemon Sword and Shield guides you'll need for your playthrough
Route 3

Pokemon: Route 3 - Overworld
| Pokemon | Rarity |
|---|---|
| Corvisquire | Frequent |
| Gossifleur | Common |
| Growlithe (Shield) | Average |
| Rolycoly | Frequent |
| Stunky | Average |
| Trubbish | Rare |
| Tyrogue | Rare |
| Vulpix (Sword) | Average |
| Zigzagoon | Common |
Pokemon: Route 3 - Random Encounters
| Pokemon | Rarity |
|---|---|
| Klink | Average |
| Machop | Common |
| Mudbray | Average |
| Pancham | Common |
| Rookidee | Common |
| Sizzlipede | Extremely Rare |
Route 3: Items
| Item | Visible | Hidden |
|---|---|---|
| Big Mushroom | Row 0 - Cell 1 | Y |
| Burn Heal | Row 1 - Cell 1 | Y |
| Heal Ball x3 | Y | Row 2 - Cell 2 |
| Revive | Row 3 - Cell 1 | Y |
| Super Potion | Y | Row 4 - Cell 2 |
| TM37 Beat Up | Y | Row 5 - Cell 2 |
| TM54 Rock Blast | Y | Row 6 - Cell 2 |
| X Defense x2 | Row 7 - Cell 1 | Y |
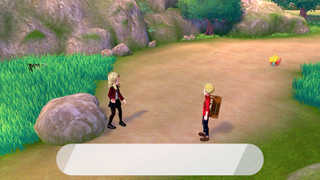
Enter Route 3 and you'll be greeted by a few trainers and a bunch more Pokemon to catch. Lass Rei is first up.
Lass Rei
| Pokemon | Level | Type |
|---|---|---|
| Vulpix | 12 | Fire |
After Lass Rei, there's Schoolgirl Hannah further down the path.
Schoolgirl Hannah
| Pokemon | Level | Type |
|---|---|---|
| Pancham | 13 | Fighting |
Finally, a little bit further down the path is Schoolboy Marvin.
Schoolboy Marvin
| Pokemon | Level | Type |
|---|---|---|
| Budew | 12 | Grass/Poison |
| Gossifleur | 12 | Grass |
Beat Marvin and head forward to find Sonia, who points out a building owned by the Director. Carry on down the route after Sonia leaves and there's an optional path to your left, but Schoolgirl Kayleigh stands in your way.
Schoolgirl Kayleigh
| Pokemon | Level | Type |
|---|---|---|
| Purrloin | 12 | Dark |
| Skwovet | 13 | Normal |
Walk along the path and you'll find a berry tree, followed by TM37 Beat Up right at the end. Head back and Postman Tad is patrolling the area.
Postman Tad
| Pokemon | Level | Type |
|---|---|---|
| Delibird | 14 | Ice/Flying |
Keep going and you'll find Becca with her Pokemon Camp, which you can enter and use if you wish. Further on is Schoolboy Peter before the entrance to the mine.
Schoolboy Peter
| Pokemon | Level | Type |
|---|---|---|
| Sizzlipede | 13 | Fire/Bug |
| Dottler | 14 | Bug/Psychic |
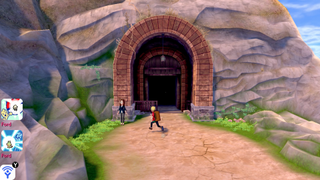
Walk up the hill to find the entrance to Galar Mine, with a friendly woman outside who will heal your Pokemon up to full health.
Galar Mine

Pokemon: Galar Mine - Overworld
| Pokemon | Rarity |
|---|---|
| Carkol | Frequent |
| Diglett | Average |
| Drilbur | Average |
| Roggenrola | Rare (Sword) / Common (Shield) |
| Timburr | Common (Sword) / Rare (Shield) |
| Woobat | Common |
Items: Galar Mine
| Item | Visible | Hidden |
|---|---|---|
| Ether | Row 0 - Cell 1 | Y |
| Great Ball x3 | Y | Row 1 - Cell 2 |
| Hard Stone | Row 2 - Cell 1 | Y |
| Heavy-Duty Boots | Y | Row 3 - Cell 2 |
| Revive | Row 4 - Cell 1 | Y |
| Revive | Row 5 - Cell 1 | Y |
| Stardust | Row 6 - Cell 1 | Y |
| Stardust | Row 7 - Cell 1 | Y |
| Star Piece | Row 8 - Cell 1 | Y |
| Super Potion x2 | Y | Row 9 - Cell 2 |
| TM26 Scary Face | Row 10 - Cell 1 | Row 10 - Cell 2 |
The mine is fairly straightforward, with a couple of items dotted around the place. The first trainer you'll come across is Worker Keith.
Worker Keith
| Pokemon | Level | Type |
|---|---|---|
| Roggenrola | 14 | Rock |
After defeating Worker Keith, head up the path that goes backwards and you'll find three Great Balls on a ledge. Keep going and leave through the exit onto the path above the entrance, where you'll find TM54 Rock Blast. Head back inside and further through the mine to find Worker Georgia.
Worker Georgia
| Pokemon | Level | Type |
|---|---|---|
| Timburr | 14 | Fighting |
| Timburr | 14 | Fighting |
| Timburr | 14 | Fighting |
Follow the path past Worker Georgia to the end and you'll find TM26 Scary Face. Turn around and the next trainer up is Worker Sandra. These workers aren't getting much work done...
Worker Sandra
| Pokemon | Level | Type |
|---|---|---|
| Diglett | 14 | Ground |
| Drillbur | 15 | Ground |
Finally, there's Worker Russel slightly further on, guarding an item. Defeat him to get a pair of Heavy-Duty Boots off the ground.
Worker Russel
| Pokemon | Level | Type |
|---|---|---|
| Rolycoly | 15 | Rock |
Proceed toward the end of the mine and you'll find Bede waiting for you, ready for a fight.
Bede
| Pokemon | Level | Type |
|---|---|---|
| Solosis | 13 | Psychic |
| Gothita | 15 | Psychic |
| Hatenna | 16 | Psychic |
Bede loves the Psychic-types. Take her on with your strongest Bug and/or Dark-types to stand the best chance, as it's unlikely you'll have found any Ghost-types yet. When you've defeated Bede, leave via the exit to reach Route 4.
Route 4

Pokemon: Route 4 - Overworld
| Pokemon | Rarity |
|---|---|
| Diglett | Frequent |
| Eevee | Extremely Rare (Sword) / Rare (Shield) |
| Electrike | Common |
| Meowth | Common |
| Pikachu | Rare (Sword) / Extremely Rare (Shield) |
| Pumpkaboo | Average (Average) / Rare (Small/Large) / Extremely Rare (Super) |
| Yamper | Common |
Pokemon: Route 4 - Random Encounters
| Pokemon | Rarity |
|---|---|
| Budew | Rare |
| Cutiefly | Rare |
| Ferroseed | Extremely Rare |
| Joltik | Average |
| Meowth | Common |
| Milcery | Common |
| Wooloo | Common |
Pokemon: Route 4 - Fishing:
| Pokemon | Rarity |
|---|---|
| Chewtle | Common |
| Goldeen | Average |
| Magikarp | Frequent |
Items: Route 4
| Item | Visible | Hidden |
|---|---|---|
| Cleanse Tag | Y | Row 0 - Cell 2 |
| Energy Powder | Row 1 - Cell 1 | Y |
| Energy Powder x2 | Row 2 - Cell 1 | Y |
| Energy Root | Row 3 - Cell 1 | Y |
| Ether | Row 4 - Cell 1 | Y |
| Nest Ball x3 | Y | Row 5 - Cell 2 |
| Paralyze Heal | Row 6 - Cell 1 | Y |
| Paralyze Heal | Row 7 - Cell 1 | Y |
| Rare Candy | Row 8 - Cell 1 | Y |
| Repel | Row 9 - Cell 1 | Y |
| Revival Herb | Row 10 - Cell 1 | Y |
| Sharp Beak | Y | Row 11 - Cell 2 |
| Silver Powder | Y | Row 12 - Cell 2 |
| TM07 Pin Missile | Y | Row 13 - Cell 2 |
| X Accuracy x2 | Row 14 - Cell 1 | Y |
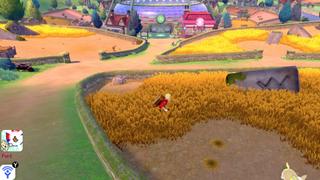
In the distance, you can see Turffield Stadium, but there's a bunch of fields, wild Pokemon, and trainers in your way. This area is quite open so you can tackle the fields in whichever order you please, but before that, make sure you check out Molly's camp on your left and the berry tree in front of you. First up is Pokemon Breeder Jaime.
Pokemon Breeder Jaime
| Pokemon | Level | Type |
|---|---|---|
| Meowth | 14 | Steel |
| Butterfree | 15 | Bug/Flying |
| Seedot | 14 | Grass |
Head into the field next to Pokemon Breeder Jaime and you'll find Poke Kid Shane, dressed up as a Pikachu. Guess what Pokemon he's got?
Poke Kid Shane
| Pokemon | Level | Type |
|---|---|---|
| Pikachu | 15 | Electric |
There's a bunch of wild Pokemon you can catch here, but the next trainer you'll find is Pokemon Breeder Bradley, on the path between two fields.
Pokemon Breeder Bradley
| Pokemon | Level | Type |
|---|---|---|
| Electrike | 15 | Electric |
| Lotad | 15 | Water/Grass |
After Bradley, Poke Kid Mia is in the next field, dressed as an Eevee.
Poke Kid Mia
| Pokemon | Level | Type |
|---|---|---|
| Eevee | 15 | Normal |
At the other end of the same field guarding TM07 Pin Missile is Poke Kid Rhys.
Poke Kid Rhys
| Pokemon | Level | Type |
|---|---|---|
| Joltik | 14 | Bug/Electric |
| Grubbin | 14 | Bug |
Finally, Poke Kid Sunny is in the field to the west.
Poke Kid Sunny
| Pokemon | Level | Type |
|---|---|---|
| Milcery | 15 | Fairy |
When you've done everything on Route 4, head down the path to Turffield.
Pokemon Sword and Shield walkthrough: Postwick and Route 1
Pokemon Sword and Shield walkthrough: Wedgehurst and Route 2
Pokemon Sword and Shield walkthrough: Wild Area and Motostoke
Pokemon Sword and Shield walkthrough: Route 3, Galar Mine, and Route 4
Pokemon Sword and Shield walkthrough: Turffield, Turffield Gym, and Route 5
Pokemon Sword and Shield walkthrough: Hulbury and Hulbury Gym
Pokemon Sword and Shield walkthrough: Galar Mine No.2 and Motostoke Gym
Pokemon Sword and Shield walkthrough: Hammerlocke and Route 6
Pokemon Sword and Shield walkthrough: Stow-on-Side and Stow-on-Side Gym
Pokemon Sword and Shield walkthrough: Glimwood Tangle
Pokemon Sword and Shield walkthrough: Ballonlea and Ballonlea Gym
Pokemon Sword and Shield walkthrough: Route 7 and Route 8
Pokemon Sword and Shield walkthrough: Circhester and Circhester Gym
Pokemon Sword and Shield walkthrough: Route 9
Pokemon Sword and Shield walkthrough: Spikemuth Gym
Pokemon Sword and Shield walkthrough: Hammerlocke Gym
Pokemon Sword and Shield walkthrough: Route 10 and Wyndon
Pokemon Sword and Shield walkthrough: Wyndon Gym and Rose Tower
Pokemon Sword and Shield walkthrough: Wyndon Gym Finals and Slumbering Weald
Pokemon Sword and Shield walkthrough: Energy Plant and Champion Battle
Pokemon Sword and Shield walkthrough: Zacian and Zamazenta
Pokemon Sword and Shield walkthrough: Post-game activities
Current page: Pokemon Sword and Shield walkthrough: Route 3, Galar Mine, and Route 4
Prev Page Pokemon Sword and Shield walkthrough: Wild Area and Motostoke Next Page Pokemon Sword and Shield walkthrough: Turffield, Turffield Gym, and Route 5Sign up to the GamesRadar+ Newsletter
Weekly digests, tales from the communities you love, and more
Give me a game and I will write every "how to" I possibly can or die trying. When I'm not knee-deep in a game to write guides on, you'll find me hurtling round the track in F1, flinging balls on my phone in Pokemon Go, pretending to know what I'm doing in Football Manager, or clicking on heads in Valorant.
- Sam LoveridgeGlobal Editor-in-Chief, GamesRadar+
- Leon HurleyManaging editor for guides

