Mass Effect 3 walkthrough
Let us take you through the entirety of Mass Effect 3
Chapter Three: Sur’Kesh
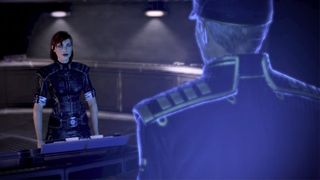
After leaving Menae with the new Primarch, you learn the Asari won’t be taking part in the war summit. Admiral Hackett then contacts you for an update on the situation. Once you’ve concluded that coversation, head out of the room to the War Terminal and speak with Primarch Victus. Head to the elevator, go down to the Crew Quarters, and go through the medical room to get to the AI core. Some of the crew is standing outside with fire extinguishers. Open the door to find EDI now inhabiting the body of Dr. Eva. After speaking with her, you can now elect to bring her along on missions as a member of your squad.

Take the time to talk with any and all crewmembers on the ship, and then check your private messages. New side missions will be available to you back at the Citadel. Use the Galaxy Map to set course for the Annos Basin. There you’ll find the Diplomatic Ships to pick up the other members for the war summit. Once you dock, you’ll meet with the Taurian, Krogan, and Salarian representatives in the Normandy’s conference room. Here you find that the Salarians have actually found a cure for the genophage, and the Krogan representative wants you to rescue the test subjects before he commits any help in the fight against the Reapers. You discover the cured Krogan females are being held in a secure facility on Sur’Kesh, and head there immediately to win the Krogan over to your cause.
Objective: Save the Krogan
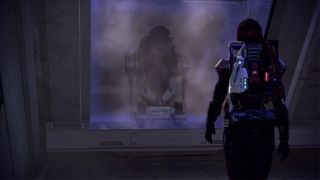
You arrive on Sur’Kesh to find the Salarians are holding the Krogan females in a secret science lab. After speaking with Padok Wiks, head towards the elevator. Once down in the lab, you learn that there is only one Krogan female left alive. The base comes under attack from Cerberus, and you’ve got to get her our alive. After the evacuation of the Krogan female begins, head back to the elevator to meet her up on the landing pad. You find that the elevator has a bomb in it. After it explodes, you’ve got to take the emergency exit on the other side of the room. There is an Assault Rifle Extended Barrel on one of the shelves on your left near the exit. Grab it, and then through the door and up the ladder.
Proceed through the next door, and you’ll see the Cerberus siege on the complex is well under way. Head around the corner, and move through the room on the right. Inside on a shelf on the right is a Shotgun Blade Attachment. Pick it up, and then move to the next room. You’ll encounter some Assault Troopers. Take them out, and then continue to the end of the platform. Head through the door on the right. You’ll see one of the captured animals escape taking a few Cerberus troopers out for you. Hop over the short wall on your left, leap over the gap, and pick up the Shotgun Spare Ammo on the other side. Hop over the short wall on your right, and then proceed up the stairs.
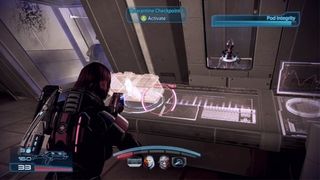
The Krogan’s escape pod has jammed, and can’t clear the checkpoint. You’ve got to take out the Cerberus forces before the pod’s integrity becomes compromised. Take out all the opposition, and then head down the hall to the very end. On the right you’ll find the Quarantine Checkpoint I control panel. Activate it so the Krogan can continue to the landing pad. After you activate the checkpoint, some Cerberus soldiers open fire from a shuttle. Take them out quickly, then exit through the hole they blew in the wall.
Keep moving around the corner until you come across another small detachment of Cerberus forces. Take them out. The room on the left has a Pistol High Caliber Barrel inside. Pick that up, and then continue on through the doorway at the end of the hall. Head up the steps, and turn right. A Cerberus Engineer drops a turret down at the end of the hall. Guide your squadmates to provide you with some cover fire, and head down the hall (sticking to the right), and into the room adjacent to where the turret was placed. Flanking the turret will allow you to take it out much easier. Eliminate the rest of the Cerberus forces, and then move to the locked door on your right. Stand still in the scanner until the Authenticating meter fills, and the door will unlock.
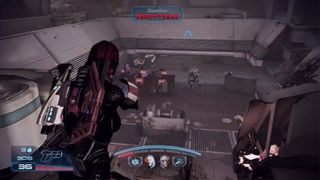
There’s a Medical Station on the wall on your left in the next hall. Pick up the supplies, and then proceed down the hallway and around the corner. There will be some ammo in the corner if you need it. Head through the next door, which will take you into a lab. Position your squadmates behind cover on the ground floor, and then head up the stairs on the right. This should enable you to pick off the Guardians with a little more ease since they’ll be focused on your squadmates on the ground. After you take out all Cerberus forces, head back down to the lab below to find Armax Arsenal Greaves. Go back upstairs, then head to the locked door on the left. Head through, and you’ll encounter more Cerberus forces as the pod has gotten stuck at another checkpoint.
Inside the room on the left you’ll find the Pistol Scope and the M-13 Raptor. Pick them up on your way through the hall. Take out the Assault Troopers. You’ll find the pod is actually jammed because the power was cut. Head down the hall and around the corner to find the Power Relay. There’s a Medical Station on the wall on your left if you need it. Go to the Power Relay and turn the power back on. Directly behind you in the corner you’ll find the Scorpion on the ground. Pick it up. When you head back to the pod’s terminal, a new set of Cerberus troops has arrived. You’ve got to take them all out before you can send the Krogan through Quarantine Checkpoint II.
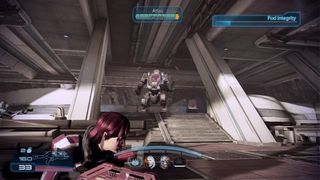
After you send the pod through the checkpoint, more Assault Troopers drop in. Take them all out. Directly to the right of where the Cerberus forces landed is a door. Proceed through, and leap across the gap and head up the ladder. The pod has one more stage to make it through before reaching the landing pad. Eliminate the initial wave of Cerberus forces in the area, and then activate Quarantine Checkpoint III. As soon as you do this, an Atlas mech drops in along with a few other Assault Troopers. You can pick off the Atlas driver if you have a sniper rifle, but otherwise you have to take down the whole mech. Once you’ve eliminated all the Cerberus forces, Cortez and the Krogan delegate arrive in the shuttle to escort you and the cured Krogan female off the planet.
Back on the Normandy, you speak with Admiral Hackett about the progress you’re making. He informs you the Alliance has begun building the Prothean device, now known as the Crucible. After speaking with everyone onboard, head back to the Galaxy Map, and set course for your next objective in Tuchanka.
Sign up to the GamesRadar+ Newsletter
Weekly digests, tales from the communities you love, and more

While New Vegas veterans lure players to their deaths, Fallout 76 players are instead helping the MMO's newbies take advantage of its enemy-melting Perk system

Persona veteran's new JRPG Metaphor: ReFantazio attempts to bridge real-time and turn-based combat in a move Final Fantasy has tried to make work for years, and it's out in October