Thieves' Hideout

The opening room puts you right by the boss door, but it'll be a while before you can do anything with it. Start this dungeon by making a left.
In the proceeding room, merge through the bars to the north to reach a chest containing a Purple Rupee. The orb in the middle of this room changes which set of bars is down. Place a Bomb and move left. When it detonates, you'll have access to the gargoyle statues to the southwest. Push one directly north of their starting space to place it atop a tile. You'll need to use your shield to avoid damage from the arrows here. Merge through the bars to strike the orb again; now you can push the second statue to the middle tile. Finally, merge through the bars where the chest was to step on the last tile yourself. Head through the finally opened door.
There's nothing in this room to do yet, so just move through the next door.
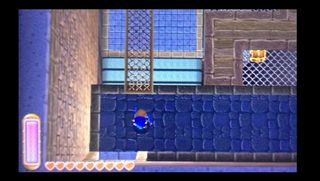
This room has a bunch of narrow walkways. Ignore them and drop to the right side of the pit. Open the chest on the grate you land on for a Purple Rupee. Drop off the grate and make your way south; be sure to smack the orb to change the direction of the conveyor belts. Exit through the south door.
In here are more conveyor belts and a walking bomb. Ride the conveyor belt east, then quickly merge and follow the wall to an orb. Smack it to change the conveyor belt direction again. Now drop down and daze a walking bomb. Toss it onto the conveyor belt to the southwest. When it detonates on the orb at the belt's end, the exit door will open.
Head straight through the next room, not bothering with the orb. It just activates a floor trap. In the next hall, take the first door north.
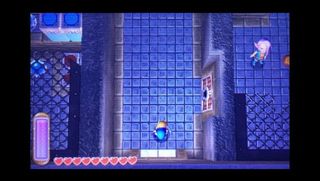
You'll spot the Thief Girl as soon as you enter. Move to the cell past hers and merge through the bars. The chest in here contains the Compass. Now merge through the bars into Thief Girl's cell. After a brief conversation, step onto the switch, then enter the cell it opens.
Use the walking bomb to blow the cracked wall at the northern end of the cell, then move left and follow the passageway. Use the red and blue orbs with their corresponding platforms to reach the top of the cells. Move north and drop through the hole in the ceiling to reach the small room to the north.
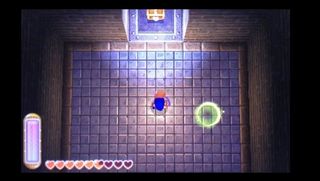
In this dark room are several one-eyed statues. Whip out your Lamp for a better view, then get to fighting. Clear the room to spawn a warp point and access a chest containing a Small Key.
Use the Small Key to open Thief Girl's cell. You now have a dungeon companion! Move to the northern end of the room. Have her stand on one switch; stand on the other. This opens the way out.

In the next hall, enemies will ambush you. Keep them at bay; if they grab Thief Girl, she returns to her cell. Fight through to open the exit door, then head downstairs.
Lead Thief Girl through the next hall. Split up at the first gap to merge and reach the switch, extending a bridge. At the second gap, merge through the bars then loop back to the gap. Merge and pop out from the wall into the resting board to create a bridge. Use Thief Girl to push the two switches and open the gate in the water, then hop in.
Follow the stream to a handle, then pull it to drain the water. Merge through the bars near the two switches to reach a chest holding a Silver Rupee. Lead Thief Girl across the red and blue platforms into the last stretch of the room. When enemies appear, leave her atop the red platform to make the fight less dangerous. When it's over, step onto the dual switches to reveal a hidden passageway. Open the large chest at its end for more Master Ore. Use the red platform to cross the grey ledge to the final platform down here. Merge and pop out on the eastern wall to knock down the last bridge. Grab Thief Girl and head upstairs.

Leave Thief Girl on the ground level switch up here. Head up the stairs and merge your way across the gap. Follow the walkway to the second switch, opening the door below. Drop down and take out the pair of enemies that appear, then head through the open door. Open the chest here for some Monster Guts, then exit through the southwest door.
You're back in the hallway before the cells. Head straight through to the room with the floor trap. When enemies appear, lead Thief Girl to the orb and slash it. The floor will open, dropping all the enemies away from you. Lead here through the next two rooms to return to the top floor.
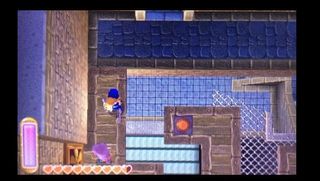
Leave Thief Girl standing by the fan. Merge and head south onto the walkway. Follow it and step on the switch to activate the fan and carry Thief Girl east. Hop into the stream to follow her. Repeat the process for the fan here, then cross the bridge out of here.
In the next room, step onto the two switches to spawn a shortcut portal and open the way to a chest. Open it for a Silver Rupee, then exit south. Take out the two enemies in the statue room, then head east into the opening room.
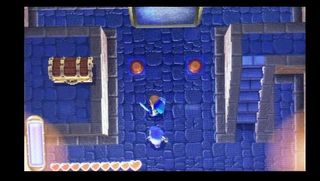
Cross the big walkway to the two switches. Pop through the doorway on the left for a chest with a Purple Rupee, then return.
Step on the dual switches to get the mirror above moving. Merge and ride it to the left ledge; open the large chest there for the Big Key. Now grab Thief Girl and head through the big door in the southeast corner of the room.
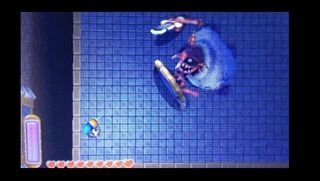
This boss is intimidating, but actually quite easy to beat. Start by merging into his shield; he'll lose track of you and become vulnerable. Deliver a few sword strikes, and he'll move away. Avoid his inky spit attack and sword strikes, then try to attack him. When he defends, merge into the shield again. After a few rounds, he'll ditch the shield and remain vulnerable. In this stage, he delivers two attacks: a straight slash and a spinning move. Both are heavily telegraphed, so attack and dodge as normal. After more damage, he'll send his head spinning around the room, spewing ink. The headless body will occasionally swipe its sword, but it's largely defenseless. Deliver a few more hits to end the battle.
