Want to make your own YouTube gaming series? Here's how it's done

Making a web series on YouTube is no easy task. It may look simple, but the successful ones that you actually see take a hell of a lot of work and skill. And it depends on the type of show too. Perhaps you’re a fan of a particular video game franchise and want to produce loads of video reviews on each entry? Maybe you want to delve into arcane pockets of video game history instead? Each type requires a different set of disciplines and knowledge and being able to compete is tough. However, I’ve I reached out to some successful YouTubers who make gaming videos for advice on how you too can create your own series of shows.
Buy the right equipment

First thing’s first: you’ll need to capture footage of the games you’ll be talking about, which is typically done through either emulation or on original hardware. Some emulators have built-in video output. Otherwise, you’ll have to use a screen capture program like Camtasia ($150) or the built-in screen recorder in QuickTime Player to grab the footage. Needless to say, this is processor and RAM intensive and can eat up a lot of hard-drive space. PushingUpRoses recommends emulation for older computer games: “I talk about a lot of games that are difficult to run on modern hardware, and sometimes I can't even get them running on their original hardware. I have a Windows 98 machine to play older games on, but it is frankly much easier to find a configured version on GOG.com, or to use a Virtual Machine if I already have the disks/discs.”
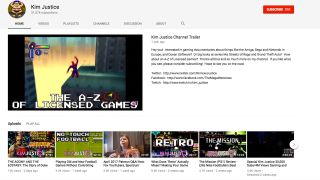
Capturing footage from the original console system is best done with a game capture device like the Elgato HD60s ($149). Game capture devices have built-in processing power to render and save off the raw footage. If you’re using a recent console, you can go HDMI into the game capture device, then go HDMI out to your computer. Older consoles require either modifications to have HDMI out or require a switcher device that takes RCA inputs in and outputs HDMI; the former gives better video quality than the latter. Kim Justice prefers playing on the original hardware: “I feel a lot closer to the game if I'm playing it on the original platform, and therefore it's easier to write about.” Jeremy Parish makes a good point about the expense of using modded game consoles to provide the best video and audio quality: “It has not been a cheap endeavor, but I do think the quality and authenticity make a big difference in presentation.”
For recording voice-over, you’ll want a good microphone. If you have your computer setup in a quiet room with little distractions, go with a condenser microphone like the Blue Yeti USB Microphone ($129). If you are in a noisier environment, go for a dynamic microphone like the Audio-Technica ATR2100-USB ($67). If you want footage of yourself on camera talking about the games as well, the 1080p Logitech HD Pro Webcam C920 ($61) is a good start.
Pick a game you know

Picking a game you can talk about at length is important. Whether you’re focusing on an individual title or a whole franchise or genre, you’ll need to know your topics so the viewer won’t get bored. Write out your script ahead of time, then read it out loud as you’re revising it a few times. Once your writing is up to snuff, record the final voiceover you plan to use.
Jeremy Parish feels mediocre games are the hardest to talk about: “In those cases, I try to dredge up some history or information about their developers, or on the genre, or basically anything I can think of to keep the video from being five minutes of, ‘Yep, this is a game that existed, alright.’" Kim Justice likes games that pique her interest: “It's whether there's something unique or otherwise interesting about it, whether it's a solid backstory or a weird premise. I like to give games a place in a world rather than just talking about why they work or don't work.”
Edit the hell out of your video

Great editing makes all the difference in the world between an boring gaming history video and a slick one. Cut away the gaps of silence, the “ums”, and the tangents that don’t get to the meat of your subject. When you think you’re done, take a day off, then come back and watch the video. You’ll find yourself noticing a few more mistakes with a pair of fresh eyes. Roll up your sleeves and edit the video a second time. Have an intro sequence that’s snappy. Don’t forget to include social media links at the end of the video and in the video description when you upload it to YouTube.
Sign up to the GamesRadar+ Newsletter
Weekly digests, tales from the communities you love, and more
Editing down the hours of game footage to a tight video that more or less matches up to your narration will take hours. PushingUpRoses notes it can take over 30 hours to make a video on a broad topic like ‘Why Are Video Game Sex Scenes So Bad?’ while DJ Slope spent over 60 hours making a video on ‘The Complete History of Grand Theft Auto’.
MAGIX Software’s Vegas tends to be the movie editing app of choice (ranges from $49 to $599 depending on what features you want). DJ Slope notes that “I think it's the limitations [of Vegas] that have helped create my unique style.” PushingUpRoses prefers Vegas for making it “very easy to edit efficiently and use transitions.” Jeremy Parish prefers Adobe Premiere Pro ($19/month) even though it’s “complex, counterintuitive, but powerful.”
The importance of good editing can’t be overstated. Kim Justice feels “if a video focuses on just one thing for too long then my interest tends to drift… and so I'm always keeping a video busy in the edit suite to keep people's interest up.” Jeremy Parish stresses the importance of cutting away to different games to reinforce the points you are making: “I also try whenever possible or necessary to cut in footage of supplemental material, be it footage of other games, screen captures of relevant information on the web, or even movies and commercials that have some significance to the discussion.”
To learn more about video editing techniques, a good place to start is this Video 101: Editing Basics video from the staff at Vimeo. It’s a bit cheesy, but it illustrates the basics in a clear, concise way. Once you’re done with that one, move go through the five videos in Learning Five Editing Basics in Premiere Pro from Adobe. Don’t worry, you don’t have to use Adobe Premiere Pro to catch onto the concepts at hand; all five video lessons on the page are well-made and on point.
Don't wait to do a second video

You finished your first video. Congratulations! It’s on YouTube for the world to see. You’ll want to let your followers on Twitter and Facebook know. You’re probably exhausted from all the hard work. Go and get yourself a snack of appropriate caloric content and get cracking on your next video. Persistence is the key to getting better. PushingUpRoses does a great job summarizing the process: “It can be tricky; making sure your voice over sounds natural and going from your voice to game footage smoothly takes practice. You can go from sounding like a 7th grade speech to a professional reading by just understanding the basics of knowing where to make cuts and when to use transitions.” Improving your mad gaming history video skills can take time. Kim Justice’s videos get several thousand reviews, but she admits she needed “a good couple of years of learning the ropes, doing reviews and finding out what worked and what didn't before moving on to the sort of videos I do now.”
The more videos you do, the better you’ll get. Maybe even start a Patreon to get some income when you start building more of an audience. With perseverance, patience, and skill, you too can make your own YouTube Gaming video. We can’t wait to see what you come up with and would love to know the best advice you're received from other YouTubers and Streamers, or learnt yourself, in the comments below.
Mat Bradley-Tschirgi is a former freelance journalist and longtime video game enthusiast, having contributed to outlets such as GamesRadar+ – lending his expertise and experience to help players better understand and get involved with the culture that surrounds gaming. Mat is currently a technical writer for Gala Games.
Most Popular


