Got a 3DS today (or last night)? Thinking of getting one? You're going to bloody love it. Having had ours for a couple of weeks now, we can practically guarantee it. But similarly, having had ours for a couple of weeks, we're also now thoroughly versed with every little subtlety, nuance, pitfall, problem and trick of using them.
There are a whole bunch of little details, niggles and solutionsand advanced usability doohickiesthat you won't come across straight away, but we've now thrashed out the whole lot. And as such, it would be morally incorrect of us not to pass on that knowledge to you, so that you can formthe same intimate friendship we now enjoy with out 3DSes immediately. From making the 3Dwork most effectively, to avoiding glitches, to just plain old streamlining the whole experience of using your 3DS, we've got it all. So click on and make life a lot easier (and more fun ) on yourself.
1. Enjoying 3D is about more than slider control
Don’t assume that the 3D effect is a one-size fits all scenario, for either players or games. Much like when analogue sticks first came in with the N64, implementation is very much open to developer interpretation at the moment. Some games look their best with the 3D slider cranked up to full, while others over-do it a bit and are more impressive with it a little lower.
And that’s without even taking into account each player’s personal tolerance to 3D. Justin, for instance, is more comfortable with a lower 3D setting by default, whereas I can play for hours with it at maximum.

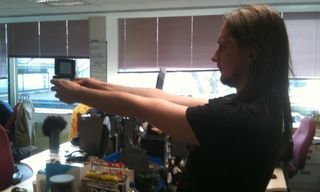
Above: Okay, this is going a bit far, but the principle is sound
And then there’s the fact that the slider isn’t the only thing that affects the strength of the 3D. The distance you hold the machine away from your face is a factor too. The 3D deepens further away, so use that as a more subtle way to tweak the effect. Basically, it’s all rather more organic and fluid than you probably expect, so don’t think you have to work out an initial calibration and stick to it.
2. Don't strain yourself
It’s tempting to try to focus your eyes to see the 3D more strongly at first, in a crazyattempt to 'pull' it out. Don’t. All you’ll do is make your eyes go a bit weird and possibly end up with some messy 3D effects.
Just relax your eyes on the screen, as you would with any handheld, then stop worrying about it. You’ll calibrate yourself in no time, and the 3D will be crisper and more effective. Then you can start looking into the different levels of depth and impressing the hell out of yourself.
3. Making augmented reality games work properly
This is vital. Those augmented reality games might look like devilry and witchcraft, but they’re not. They’re the work of a 3D camera and clever coding. And given that the camera’s recognition of the AR card is so instrumental to the whole process, it has to be able to see it clearly.

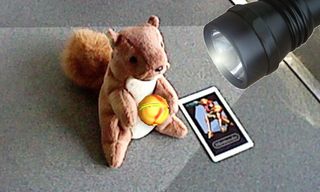
Above: Do you, like Justin, want to give a spherical bounty hunter to a squirrel? You'll need some proper lighting
Daylight or strong artifical light. That’s what you need for smooth AR gaming. Otherwise you’re looking at a stuttery, laggy experience that isn’t half as much fun as it should be.
4. Screw you, Friend Codes!
Yep, Nintendo's favourite atrocity against online gaming is no more. Well technically the 3DS does stillutilise Friend Codes, but you can completely avoid using them now. If you open up your friends list using the smiley face icon on the dashboard, you'll find the option to do a local friends search. Your 3DS will then pick up any 3DSes in range with WiFi enabled, and you can add them to your list without inputting but a single digit.
5. StreetPass rage, and how to avoid it
The StreetPass games are a deceptively brilliant addition. Although the idea of connecting to strangers’ Miis as you pass in the street initially sounds pointless, once you’ve shared a few pieces of the various collectable Nintendo jigsaws and smashed a few monsters in the StreetPass Quest RPG (using strangers you’ve levelled up through repeated meetings, rather brilliantly), you’ll find a damnably addictive sense of community forming. But we have found an issue.

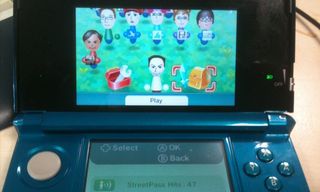
Above: That's quite the army you've amassed there, soldier. Don't leave a man behind
When you log into the StreetPass Plaza to catch up on your StreetPass hits, you have to make sure to use any Miis you’ve collected immediately. If you collect any more before entering either of the games, you’ll lose the ability to use the first set until you collect them again. And that will take at least another day.
It’s a really silly design oversight, and one that we hope Nintendo patches out soon. It’s caused more than a few screams of anguish during our GamesRadar/NGamer/GamesMaster morning StreetPass meet-ups. No-one wants to lose their high-level, four-manteam before a big boss fight just because a level-one randomer turned up late to the party.
6. Spend your (imaginary) money wisely
On a similar Street Pass note, you need to know what to spend your Play Coins on. Play Coins are the currency you collect by using the 3DS’ pedometer as you walk around, and they’re used to buy things in the StreetPass games. In the jigsaw collecting Puzzle Swap game they’ll buy you randomly-selected pieces (don’t be surprised if you get a few swapsies, like in the days of Panini sticker albums) and in StreetPass Quest they’ll hire you a freelance hero cat if you don’t have any StreetPass hits that day.

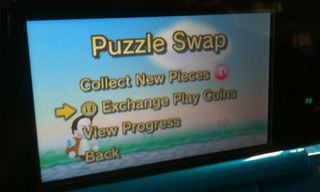
Above: Use them here. Nowhere else
The thing is, you should really prioritise the puzzle pieces. Particularly if you have regular StreetPass meetings with the same friends, buying extra pieces is the only way you can introduce any new content to the group and help each other through. And in StreetPass Quest, those cats are unfortunately completely bloody useless after the first few rooms. You can only ever hire basic level-one heroes, and later battles absolutely require levelled-up fighters, making mercenary moggies a total waste of money.
7. Making original DS games not crap
DS games, not to put too fine point on it, have a habit of looking like ass on the 3DS. Reason being that the original DS’ screen resolution was quite a bit smaller than the 3DS’, so blowing those games up makes them blurry like Vaseline contact lenses. Fortunately there’s a simple solution.
Just hold Select and Start when you boot up a DS game and it’ll load in its original resolution, with black borders around the display making up the screen space.

