Destiny: How to win in Crucible multiplayer, dominate the Iron Banner, and really triumph in the Age of Triumph
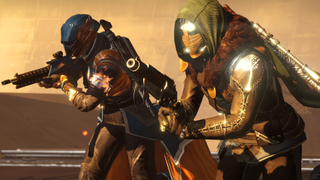
Multiplayer is the most intimidating part of any shooter. The merciless competition. The knowledge that however experienced you are, there will almost certainly be someone who knows the game better. That fact that each and every time you get shot up, it will be on the public forum of the internet, for all to see. I get why it isn’t for everyone. But in Destiny, even with a ton of other activities available to suit every taste and mood, there are good reasons to make the effort.
Aside from being brilliant and, by nature of being tied to the wider game’s RPG character development, one of the most unique PvP offerings around, the Crucible is a great source of loot and achievement. And heading into Destiny’s final stretch, before the sequel drops sometime this autumn, you’ll need to attack every leveling avenue available if you want to hit the level cap. I’ve already published a general Destiny Light leveling guide, but with the Crucible’s special (and highly profitable) Iron Banner event coming up more frequently than usual in year three, and Destiny PvP otherwise just being great fun once you get over the fear factor, I thought it was about time to pass on my wisdom in the hope of keeping the servers packed out right to the end. Read on, learn, and conquer.
Choose your guns carefully

Success in the Crucible starts before you enter the Crucible. Just as you use specific equipment for specific purposes in PvE missions, so too should you make a point of putting together a suitable weapon-set for multiplayer. Level advantages might be turned off outside the Iron Banner, but gear stats still really matter. Obviously your exact load-out will be a matter of personal preference, but there are a few overall principles you should observe.
First up, you want a good balance of functionality between your primary and special weapons, to make sure you have a tool for any eventuality. Tactical demands in the Crucible can change on a second-by-second basis as the map around you alters, and you need to cover all bases. I favour an accurate medium-range primary complimented by a powerful shotgun for close encounters, but however you set things up, you need to be able to deal with both extremes of proximity. Destiny’s stand-offs can and will play out at any range.
Secondly, you need to pay attention to your weapons’ stats. In general, your medium-to-long range weapons should be chosen a fast ‘time-to-kill’ rating in order to shut down open duels quickly. This is largely the product of a high Impact rating and a quick rate of fire, so keep an eye on those gauges when picking guns to test out. In terms of close-range fighting, the same principles apply, but the Range stat becomes more important as damage fall-off can make a huge difference in more intimate battles, particularly between shotguns. Ditto charge-speed on Fusion Rifles.
Keep your thumb on the weapon-swap button

If you’re switching to the appropriate weapon for an encounter as you run into it, you’re acting too late. The Crucible’s skirmishes are so quick to start that being reactive rather than pro-active is not going to do you any favours. Get into the habit of switching between your primary and secondary weapons as you move around the map, whether there’s any enemy in sight – or even on the radar – at all. As you move into a tighter corridor, go close-range. When you head back out into the open, switch back. Always be actively aware of your current effective kill-range, and make sure that you’re equipped with something with the ability to cover anyone who might come up in line-of-sight, however near or far.
Know your grenades. Know them well
In Destiny, grenades are a lot more than simple throwable damage. They all have very different effects and strategic purposes. You’ll explore this to a decent degree in PvP, but the faster, more aggressive, more demanding combat of the Crucible is where the various differences and strengths will really become apparent. Slow burn, area-of-effect grenades, for instance, such as the Warlocks’ Vortex Grenade, are made for clearing capture-points, locking down entry points, and blocking enemy players from accessing ammo crates. Others, like Hunter Skip Grenades, or Arcbolts, will seek out targets over close-to-medium range when thrown, allowing you to effectively attack from two angles at the same time, or ‘shoot’ around corners. Tripmines can be used to set traps for taunting enemy players into during tight stand-offs around sieges and door-breaches (more on that later).
The point is that Destiny’s grenades provide an entire layer of the tactical game all on their own. They’re not just an addition to gunplay, but rather a tool for fundamentally reshaping the focus and purpose of gunplay. It’s a symbiotic relationship, so learn your grenades’ powers and nuances, and use them in close, strageic partnership with your firearms.
Running away is okay

It might feel counter-productive to run away from a fight before you’ve scored a kill, but you can’t kill anyone if you’re dead and waiting to respawn. Destiny’s multiplayer combat flow isn’t like that of many other shooters, Halo and Doom aside. It’s not about getting quick, surprise kills and moving on. It’s about slightly more drawn-out, back-and-forth, tactical firefights, with a more intimate, close-to-medium range, conversational vibe. There are always many factors in play, from immediate architecture, to asymmetric load-outs, to how fast your shields are going to recharge and how well you can manage that timing amid the fray of battle. Thus, you’ll always need to juggle far more priorities in your head than a simple sense of all-out attack.
As such, backing away to rethink, or to regroup and retreat if a strategy goes wrong, should always be an option you’re considering. Even if just to reset your health and come back to a skirmish from a different angle, being strategically frugal and staying alive will always serve you better than quickly respawning and trying again. Destiny’s PvP is also a deeply co-operative game. Numbers advantages, co-op strategies, and multidirectional tactics make a huge difference. The longer you stay alive, the more use you can be to the team-mates around you, and the more they can help you in turn.
Optimise your shotgunning
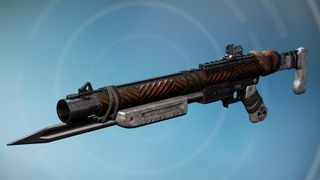
You don’t have to use shotties in the Crucible, but a lot of people do, so if you do take the path of buckshot, you’re going to need to know how to be competitive. Unsurprisingly, scoring kills with the close-range boomsticks is all about spacing. Thus, knowing how to manoeuvre into an advantageous position without getting killed on the way in is everything.
Basically, corners and walls are your friends. Auto rifles, pulse rifles, and fusion rifles can all deliver so much damage at medium-range that a semi-stealthy, point-to-point movement philosophy has to be the true way of the shotgunner. Use architecture, avoid open ground, flank wide around the opposition rather than tackling them dead-on whenever possible, and otherwise just carefully work your way closer to your target, as unseen as you can be.
If you can use distractions – such as grenades, or other team-members - to get nearer without being noticed, do so, and never expose yourself unless you’re sure you’ve got a high chance of scoring a fast, clean kill. If this isn’t possible, abort, and find a different approach or a different fight entirely. Trust me, you’ll score far more shotgun kills over the course of a match by being cautious than you will by running in and taking a front-facing, brute force approach. And always, always follow up a shotgun blast with an instant melee. It’s the greatest insurance policy there is, but you’d be amazed at how many shotgunners don’t use it.
And on the subject of Plays Shotgunner Do Not Use Enough, although risky, the ‘shottie-slide’ can be a life-saver if you do get caught out in the open at range. If you have an opponent with an auto or a pulse trying to whittle down your health, just sprint at the Guardian in question, hit crouch to slide when you get closer, and empty a shell into them on the way in. It’s a hail-Mary, but the element of surprise, and the speed with which you can close into one-shot-kill range, make it effective more times than you’d imagine.
Avoid making the first move at close-range
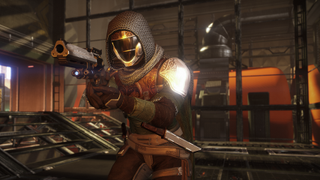
A broad philosophical point, this, but an important one. While long-range fights will see you wanting to get the jump on opponents and start laying down the damage as quickly as possible in order to score an early advantage in what can be a relatively drawn-out battle, the speed at which death can come in cramped conditions means that careful appraisal and self-preservation will see you through far better than dogged aggression.
There’s a certain dynamic you’ll see often in the Crucible, particularly around doorway clashes. Both sides will charge up to the door (but not through), guns will be fired, grenades will be thrown, then both sides will back off as shields rapidly deplete. Then they’ll go quiet for a second while they think about what to do next. Let me tell you something important about this phase. With equal forces on both sides of the doorway, whether full teams or solo players, the side the runs quickly back in to finish the job almost always loses.
If you run into a fight blind, you are not in control of the situation. If you hold back and let your opponent come to you, you are in control of the situation. You can move back, get into an advantageous position, prep grenade traps, and otherwise be the spider in the middle of the web. And make no mistake, your opponent will come to you if you stand your ground, about 80% of the time. With a potential target almost within kill-range, but just out of sight, the temptation is too much for most players to pass up. This is Destiny’s greatest mind-game, and it’s important that you win it.
Campers rarely prosper (unless they're careful)
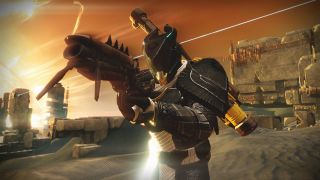
I’m not saying that there’s no place in the Crucible for snipers. There absolutely is. On the bigger maps they can be really effective. What isn’t effective, though, is the static, traditional approach to camping. The strategy of finding a distant hidey-hole, bunkering in, and waiting out your prey. In my experience, a very low percentage of the kills I suffer come from play like that. The lens-flare of a scoped sniper rifle is too apparent, and Destiny’s maps so open and well-balanced, that stationary snipers are inherently going to get spotted and taken down very quickly. Hell, a decent scout rifle can counter-snipe pretty easily once the supposedly stealthy shooter has been located, and without the flare disadvantage. And I’ve lost count of the number of times I’ve been sniped from afar, only to respawn and make an instant beeline to to the camper’s nest, find them still there, and deliver a swift shotgun punishment.
The trick, then, is to keep moving. Stay on the outside fringes of the map, with as open a view as possible, but don’t try to score more than about a kill or two from any one location before moving on. And get used to spotting your targets without scoping. The more briefly that thing is up, the better your chances of survival.
That said, an important general rule for everyone is…
Don’t run around too much
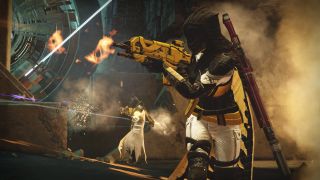
Destiny is a really kinetic game. It feels good just to move, run, and jump, before you get a single target in your sights. But you want to reign that stuff in. Destiny’s PvP isn’t a casual, run-and-gun affair. It’s a series of strategic stand-offs, in which environmental factors are key. If you keep charging into unknown situations, guns blazing, you’re likely to get instantly perforated by someone who’s holding back and more carefully assessing the situation.
You want to move carefully, dashing between flash-points (while remaining vigilant about potential incoming threats, of course), but then stopping to appraise and prepare from relatively secure cover as soon as the radar lights up. Taking those few extra seconds before going in, and maintaining a methodical, calm mindset during firefights, is absolutely the path to success in the Crucible. In fact, on certain maps you can actually do incredibly well by simply choosing a specific, defensible locality and micro-patrolling it for the duration. You’ll learn the nuanced ins and outs of Destiny’s maps very well this way, and ensure that the enemy is always making the first, risky move. That hierarchy of action is a very important part of the Crucible’s strategic game-flow.
And speaking of knowing the maps well…
Play a lot of Control. It’ll sharpen your map knowledge like nothing else

Control is the mode that Bungie uses to test new maps for balance before releasing them. There’s a reason for that. With three capture bases up for grabs, roughly strewn from one end of the map to the other, there’s no better test of whether an arena has a fair and viable set of routes between its key spaces. Thus, Control is an invaluable tool for any player wanting to learn Destiny’s map layouts.
Neatly compartmentalising otherwise abstract spaces into set skirmish points and connecting areas, Control makes the layout and purpose of each area of a map very clear, and also gives you a great idea of the flow between each, as well as the various pitfalls and escape routes along the way. If you want to build your map awareness fast (and you should, because it’s as important as anything), Control is where to do it. Play it, and Destiny’s multiplayer arenas will rapidly begin to feel like home.
Learn to read the radar
This sounds like an obvious tip, but in the Crucible, radar-reading is a much more nuanced skill than it is in other PvP shooters. Delivering information not with precise, dot-based pings but rather by illuminating more vague, broad-strokes segments of a dial – with increasingly intense colour based on the proximity of the target – there’s a fair bit of interpretation and abstraction required in order to make reliable sense of it.
The upside is that once you do get a feel for it – and really, the only way to do that is by paying serious attention over prolonged experience – the sudden positional jumps relayed by those distinct radar segments will start to deliver really stark and clear indications of enemy movement and intent. Get good at quickly cross referencing that positional information with the proximity data furnished by the radar’s colour – and then referencing it via what you know about the near and mid-range route options around you, by way of your now excellent map-knowledge – and you’ll find yourself able to predict, pre-empt, and counter-act every movement a nearby opponent might make.
I know it sounds complicated, and fully admit that there are a lot of things to keep track of here, but once you learn it all to the point of instinct, you’ll become borderline psychic, I promise. Honestly, having this stuff down is one of the most powerful tools you have in Destiny’s PvP.
Don’t jump unless it’s really worth it

I know it’s tempting. I know it feels great. I know there’s nothing more gratifying or cool than leaping thirty feet into the air to come down on some poor, unsuspecting sap with a downward-facing shotgun blast. But it usually doesn’t work. It will usually just get you killed. As all those winsome but misguided jetpackers in later Halo multiplayer offerings learned, spending too much time in the air just makes you a big, slow, wide-open target. There ain’t no cover in the sky. As such, most aerial displays in the Crucible will simply end with you tumbling to the ground, full of bullets and stinking of plasma.
But there is a smart way to use verticality in the Crucible. You just need to be sparing with it, and aware of the situational odds at any given time. You’ll need other team-members in play to run distraction. You’ll need pretty solid radar intel in order to estimate how many enemies are ahead, and how they’re laid out. And you’ll need a decent-sized bit of architecture to mask your presence until it’s time to strike. But if you can juggle all that, and leap in when you’re pretty damn sure the enemy is distracted with a ground fight on one (or ideally two) horizontal sides, you can ‘slice the pie’ straight through the middle by adding a third, vertical front to the fight. You’ll still be in a dangerous position, but if you can properly leverage the circumstances around, you can make a big difference.
Oh, and ridiculous as this sounds, if you’re on a daylit, outdoor map, know the sun’s position in the sky. If you can jump in with the sun at your back, you can dazzle your opponents and mask your movements wonderfully.
Oh, and one last point. For the love of all that just, virtuous, and holy...
Don’t use your Super in one-on-one confrontations
So many players do this, and there’s no excuse for it. It’s an act of nothing more than knee-jerk panic, and if you’re following the tips in this guide, that’s not a situation you should ever find yourself in. Supers exist in the Crucible for two reasons. They’re there to get you out of bad situations if you suddenly find yourself outnumbered and can’t get away, and they’re for racking up massive kill-counts during tactically sound multi-kill opportunities. Got a lot of enemy players pinned down in a quite tight area? Whole opposing team trying to rush-down your Control base through the same doorway? Have at it. Otherwise, don’t.
If you use your Super as a cheap, easy kill in a one-on-one, well, you’ve wasted it. And you’ll look lame, unprepared, and a bit cowardly at the same time. Because, well, you will be, really. Don’t do it. Just don’t.
Sign up to the GamesRadar+ Newsletter
Weekly digests, tales from the communities you love, and more

Almost every character to ever appear in X-Men comics is featured on this absolutely massive X-Men #700 variant cover

After 19 years, Seth MacFarlane says he has plans for another Family Guy movie - he just hasn't had time to make it

As Helldivers 2 players struggle with a brutal Major Order, dev says GM Joel secretly helps them out: "Short of handing you the win, there isn't a lot more we can do"
