The Pick 10 System Pt 1
When you first load up BLOPS2, you’ll be given a choice of five classes to fool around with, but upon gaining a few levels, you’ll quickly unlock the ability to edit your own loadouts. BLOPS2 uses a new system for class editing called Pick 10, in which you have 14 different slots for perks, wildcards, and gear, but are only able to fill 10 of them. It sounds restrictive, but it’s actually quite fluid, and will allow you to quickly choose between loadouts that are both fun for you to use and applicable for the map and gametype that you’re about to hop into.
A typical loadout at the beginning of the game will see you outfitted with a primary and secondary weapon, three perks, and grenades. As you play, you’ll be able to edit these classes to eliminate options that you don’t need and reinforce your primary style of play. If, for instance, you don’t wish to use grenades on a large, open map, you can simply remove them from your loadout and use those slots to pick up an extra perk. If you find yourself dying and respawning before you ever use your sidearm, you can axe it and grab more attachments for your primary weapon to allow you more lethality in the short time that you’re alive.
Choosing the right loadout for the right situation is key here. You have five different loadouts that you can edit and choose from in the game lobby, so you’ll want to ensure that you have one or two that are applicable for any game style and map, and then a few specialty loadouts for sniping, objective-based modes, or free-for-all games.
Here are some example loadouts that you can adapt to your own preferences, depending on the gametype, your own style of play, or the map.
All-Purpose Team Deathmatch
Primary: Assault Rifle
Attachment 1: Optics
Attachment 2: Quickdraw or Fore Grip
Secondary: FHJ-18 AA
Attachment 1: ---
Perk 1: Lightweight
Perk 2: Toughness
Perk 3: Dexterity
Lethal: Grenade
Tactical: Flashbang x2
Wildcard 1:
Wildcard 2:
Wildcard 3:
Team Deathmatch is far and away the most popular game type in Black Ops 2, and this is a relatively standard build that you can use to maximize your effectiveness fairly early on. All of the perks here are unlocked at the very beginning of the game, and are among the most generally effective perks for one of the most unpredictable game types. In TDM, you’re never quite sure whether you’re going to be charging headlong into multiple foes or defending against someone coming up the stairs towards your position, so emphasizing flexibility over situational perks is key.

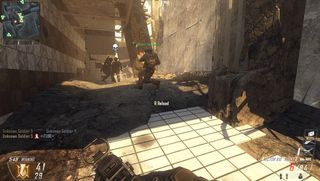
Stick with team members to more easily avenge the deaths of poor souls like this stabbing victim.
The build above is focused on getting you into the mix, emphasizing shooting enemies and chucking grenades over utilizing advanced perks and tactics. It’s an aggressive build, focusing on rushing forward to nab enemies with your gun and throwing grenades at suspected enemies, so that’s largely what you should do; there aren’t any defensive-minded perks to keep you alive, so focus on being in the mix and moving towards enemy lines rather than hanging back and sniping.
Modifications: As you unlock more perks, you’ll be able to adapt this basic build to your preferences. Smaller maps will benefit from an SMG; in larger zones, you might be better off with a grenade launcher or opting out of tactical equipment in favor of Danger Close and an extra grenade.
Stealth Movement
Primary: Full-auto Assault Rifle or SMG
Attachment 1: Suppressor
Attachment 2: Quickdraw Handle
Secondary: ---
Attachment 1: ---
Perk 1: Ghost
Perk 2: Cold Blooded
Perk 3: Dead Silence
Lethal: ---
Tactical: Flashbang x2
Wildcard 1: Perk 1 Greed: Lightweight
Wildcard 2: ---
Wildcard 3: ---
This is a pretty basic stealth build that will mask you from UAV scans with Ghost, prevent the vast majority of enemies from being able to hear you, and make it more likely that you can sprint across open ground without enemies taking shots at you, thanks to the name-removing properties of Cold Blooded. The suppressor will prevent your gunshots from giving you away on enemy minimaps, and the Quickdraw Handle will let you more quickly aim down the sites after you burst through a doorway or get caught unawares by an enemy. Use an SMG if you anticipate a lot of close-range combat, or an AR if you’re on a map where you might have to occasionally fire at more distant foes.

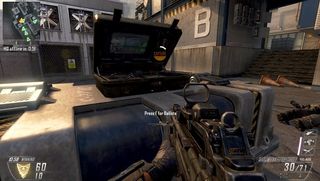
Ghost will also protect you from UAV detection while you plant bombs or attempt to defuse them.
You have plenty of options for modifications here, of course. If you haven’t unlocked Ghost, you may wish to switch it out for a Perk 2 Greed: Scavenger, since you won’t have a secondary weapon to switch to if you run out of ammo. You can switch off the Quickdraw for optics, if you like, or a Stock that’ll let you move more quickly while aiming. You can also switch out the flashbangs for your choice of Tactical or Lethal equipment. Your general goal here is to surprise your enemies by sneaking up on them, and that generally means that you’re going to be getting up close and personal. Modify your choices to emphasize that style of play.
Long-Range Sniping
Primary: Sniper Rifle of choice
Attachment 1: Optics
Attachment 2: Full Metal Jacket
Secondary: Pistol
Attachment 1: ---
Perk 1: Flak Jacket
Perk 2: Cold Blooded
Perk 3: Awareness
Lethal: Claymore/Betty x2
Tactical: ---
Wildcard 1: Danger Close
Wildcard 2: ---
Wildcard 3: ---
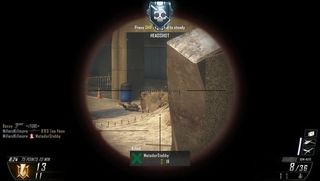
If you intend to be a sniper, you should commit to the role. When you spawn, you’ll want to make your way to the nearest roost or window and start focusing on the world in front of you. You’ll have to accept the fact that you’re often going to be killed when an enemy encounters you out in the open: sniper rifles are slow to aim and poor at hip-firing, leaving you something of a sitting duck. You’ll also acknowledge that you’ll wind up getting stabbed in the back fairly often while you’re aiming out a window, since your peripheral vision is mightily poor in these situations.

The beginning SVU-AS rifle, while fast to fire, does less damage than the others. You may want to wait until unlocking more advanced rifles to kit out a sniper build.
Likewise, many perks that focus on movement or use of equipment will be less important to a sniper than they would to other players: your entire goal is to kill distant enemies with a single round while moving as little as possible. Read the descriptions of the four sniper rifles you have available to you to figure out their kill zones. The baseline SVU-AS will often require multiple rounds to take down an enemy, while the more powerful bolt-action guns will be one-hit kills across a wide swath of their bodies. Use your Claymores or Betties to protect your back.
Modifications: If you haven’t unlocked Danger Close or Claymores, you can use Shock Charges as protection for your rear. Awareness is also a late-game unlock that you can flip in Extreme Conditioning for if needed; while you shouldn’t be sprinting a lot as a sniper, getting into position after respawning can be important. If you’re not big on firing through walls (it’s fun!), switch out your FMJ for a Ballistics CPU or Fast Mag attachment.
Table of Contents
- General Tips
- Perks
- Scorestreaks Pt 1
- Scorestreaks Pt 2
- The Pick 10 System Pt 1
- The Pick 10 System Pt 2
