Of the four game modes, Hunter is probably one of the better Deniable Ops modes simply because of how utterly ruthless it is. You will play through a number of maps, each with ten enemies in it and it’s your job to clear all of them. Dying sends you right back to the beginning and there’s no way to just “reset” to a checkpoint if you make a big mistake. Any of those mistakes will cause the enemies to radio for reinforcements, dropping ten more enemies onto the map, and they come from all sides, including previously cleared areas. There are other things that can cause them to radio for help, and that’s any sort of overly loud or revealing action on your part. A list of these can be found below:
• Exploding a Sticky Cam (but not using it as a distraction)
• Being clearly seen by an enemy for too long.
• Firing a weapon that is lacking a silencer.
• Using a Frag grenade, remote mine or otherwise setting off something highly explosive.
• Using a flash bang or EMP grenade and still being seen by the enemies.
• Being seen performing a melee kill.
• Enemy soldiers seeing his ally get killed.

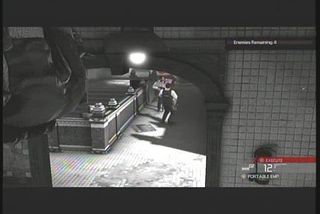
Above: Be sure to kill everyone in sight.
• Shooting at an enemy but missing. You can often shoot twice before he sets off an alarm. Reinforcements are a pain but they shouldn’t be a common sight either, so long as you’re careful to kill anyone who sees you fast enough that they can’t radio for backup. If no enemies actually see you kill their friends they will never call for backup; even when they find the bodies they’ll only ever call for help when they physically see the kill occur.
While Mark and Execute may be made of pure awesome, never use it if someone is going to survive your barrage of bullets. All it takes is one survivor that sees you kill their friends and they will call down deadly reinforcements. As a rule, you never want to try to kill someone if his friends can see what you’re doing. Just wait for another opening when it’s safer.
Also keep in mind that the enemies are randomized so learning layout is almost more important than the enemy locations. However the randomization isn’t totally random. It seems like there are a few “sets” of locations the enemies can be in, and the game randomly picks from those when the zone starts up. So if you learn all of the enemy locations for each spawn then you’ll blaze through the levels in short order.

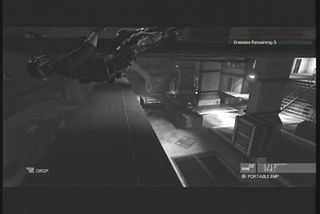
Above: Nobody up here but us birds.
The enemies, like most people, don’t often look up. Use this to your advantage by staying on pipes, ledges, railings and window sills as long as you can. They will only start looking up when they’re really paranoid (i.e. you’ve killed too many) or if they see you up there due to some error on your part. This lets you stay there, dropping down on enemies and then using Mark and Execute to kill groups. It works surprisingly often even when the enemies should realistically notice that bullets from up above just murdered all of their friends.
When choosing your load-out for missions keep it simple. The best stuff to bring into Hunter missions are also the basic things. A silenced pistol, preferably one with high accuracy, EMP Grenades and a Sticky Cam will serve you very well. You can use the camera to take out enemies directly, but it can lure them out of rooms, setting up a Mark and Execute or just a melee takedown. As your backup weapon, bring along a silenced automatic weapon if you have it or pick an assault rifle just in case.
It’s very important that you pay attention to the stage here since you’re going to need to use the environment to your advantage. Many enemies are in positions where it’s nearly impossible to sneak up on them… unless you see that pipe on the wall you can use to get behind them. Sometimes it’s possible to put out a light when the enemy walks away and use the darkness to get up on his side to take him out. Don’t just shoot the soldiers as you may miss and don’t just rush them, keep your eyes open and take advantage of everything.

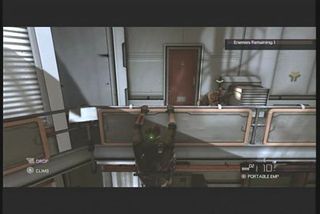
Above: Poor sucker.
• Your gun is good, but it’s not 100% reliable, only your melee attacks are. Try to sneak up on enemies when possible and knock them out instead of shooting.
On the other hand, doing things loud and dirty can sometimes be both fun and therapeutic. If you’ve unlocked the Scar Assault Rifle, you can mop up an area full of enemies in very short order. This works especially well if you can lure a bunch of them to a single location and then just cut them down one by one. Just remember that while it’s possible, your character still has the endurance of wet tissue paper. If you’re going to go all G.I. Joe on them, then make sure you’ve got good cover to hide behind.
• If you’re going to go this route make sure to improve your armor in the P.E.C. screen so you can survive more shots. Also be sure to increase the ammo capacity and the accuracy of your weapons. This will make your squishy self a bit tougher during gunfights.
When you’re working with another player it’s a really good idea to coordinate while in Hunter mode. This mode can be played mostly solo, using the other player to help you kill enemies faster. Make sure you’re paths don’t overlap though, otherwise you might run towards your partner when running from an enemy, or accidentally take a shot at someone only for your partner to kill him, alerting enemies to your presence.

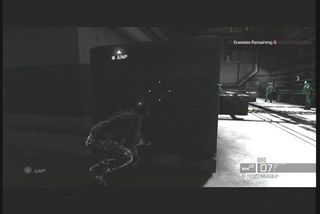
Above: Waiting for your partner to strike.
Try to designate an approach through the level for each player and stick to it. If one person takes the second floor while another clears the first floor, don’t “help” each other unless asked to do so. You will find that so long as you’re both doing the jobs assigned to you then the stages will pass incredibly fast and efficiently.
One complication to a two player game is reinforcements. If both of you should happen to be caught, then you’ll want to try to hunker down somewhere, possibly together. Watch both your front and back so that soldiers don’t sneak up on you. Give it some time so that the reinforcements spread throughout the level before splitting up again. One person should head backwards, going for the reinforcements in the previously cleared areas, while the other continues moving forward. This will get you back on track in very short order.
That’s really all there is to Hunter mode, the rest of it is learning how you’re going to handle each stage by yourself and with a partner.
