Rathalos
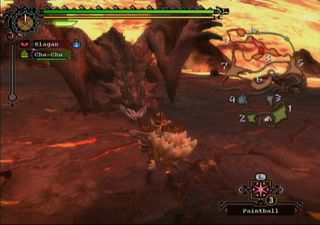
Type: Wyvern
Threat: 5
Weak Point: Head
Elemental Weakness:
Item Drop
From Body: Rathalos Scale, Rathalos Shell, Rathalos Webbing, Rath Marrow, Flame Sac, (High Rank Only) Inferno Sac, Rathalos Scale+, Rathalos Carapace, Rath Medulla
From Tail: Rathalos Tail, Rathalos Scale, Rathalos Plate, Rath Marrow, (High Rank Only) Rath Medulla, Rathalos Ruby, Rathalos Scale+
Quest Reward: Rathalos Webbing, Rathalos Tail, Rathalos Plate, Rath Marrow, Rathalos Shell, (High Rank Only) Rathalos Scale+, Rathalos Carapace, Rathalos Ruby, Rath Medulla
Special Reward: (Destroy Face) Rathalos Scale, Rathalos Plate, Rathalos Shell, (High Rank Only) Rathalos Carapace, Rathalos Ruby, Rathalos Scale+ (Destroy Wings) Rathalos Webbing, Wyvern Claw, Rath Talon, (High Rank Only) Rathalos Scale+, Rath Talon
Glitter Drop: Rathalos Plate, Wyvern Tear, Rathalos Scale
The male version of Rathian, Rathalos has a similar move set that is jacked up a bit in the danger department. Whereas Rathian used its fire attacks a bit more sparingly, Rathalos will be constantly popping out flame of some sort. Like Rathian it can also fly and hover. Rathalos will do this a lot more though, making it harder to hit at times if you're a melee fighter.
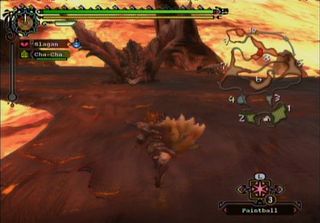
The key to Rathalos is to know when to attack and when to move. Whenever Rathian's off the ground, you need to be on the move. It will frequently take off into the sky, circling whatever area you're in and then swooping down when you least expect it to take a cheap shot. On the ground it will often charge you. These attacks aren't too hard to dodge but it you're not paying attention they'll clobber you. More dangerous is Rathalos’ fire attacks. While it will generally just shoot easy to dodge fireballs at you, it frequently employs a close range fire blast that will destroy you health bar. Literally, you can have your standard health bar nearly full and you'll faint from getting hit by this once. It's impossible to tell which one he’s going to use until he’s already in the process, so just treat each fire attack like it’s the worst case scenarior
Conversely, while you should take care to avoid its flame attacks, they also provide an opportunity to get at Rathalos. Rathalos can be hard to pin down. That said, it always stands perfectly still while performing a fire attack. A good way to get in some valuable headshots is, when you see flame forming at its mouth, head to the side of its neck behind its head. All of its flame attacks shoot directly forward, so you'll actually be behind their point of origin, leaving you safe and in a perfect position to crack its skull a few times. If you're using a hammer for instance, it's usually possible to get about two to three hits in before you need to flee. Even four or five isn't out of the question, though by that point you may be pushing your luck.
Barrioth
Type:
Threat:
Weak Point:
Elemental Weakness:
Item Drop
From Body: Barioth Shell, Frost Sac, Barioth Pelt, Amber Tusks, (High Rank Only) Barioth Carapace, Freezer Sac, Barioth Pelt+, Amber Tusks+
From Tail: Barioth Tail, Barioth Shell, Barioth Spike, (High Rank Only) Barioth Carapace, Wyvern Stone
Quest Reward: Amber Tusks, Barioth Claw, Frost Sac, Barioth Spike, Barioth Pelt, (High Rank Only) Amber Tusks+, Freezer Sac, Barioth Claw+, Barioth Pelt+, Wyvern Stone
Special Reward: (Destroy Tusks) Barioth Shell, Frost Sac, Amber Tusks, (High Rank Only) Freezer Sac, Barioth Carapace, Amber Tusks+, (Destroy Wings) Barioth Claw, Barioth Spike, Barioth Pelt, (High Rank Only) Barioth Claw+, Barioth Pelt+
Glitter Drop: Wyvern Tear, Frost Sac, Barrioth Spike
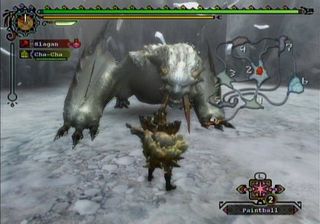
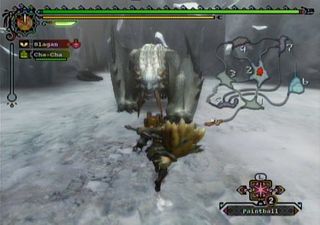
Barrioth is one mean you-know-what. He may not be as large, or as visually imposing as some of the other enemies in Monster Hunter Tri, but he is fast. And by fast, we don't mean have a second or two to get out of the way. We mean he leaps without warning from halfway across the screen and is on top of you in under a second. More than any other monster you'll face, Barrioth tests your twitch reflexes. There is often very little warning as to when the next blow will come, he'll just pounce and be there slashing at you with his claws.
This can mean some serious problems when you consider that many of the game's weapons slow you down severely. Even equipped with a sword and shield you'll be hard pressed to keep up. The best way to deal with this speed problem is just to react whenever Barrioth does anything. If Barrioth moves, assume it's coming to kill you. Get your hits in when you can, but never stay in one spot for too long. In terms of specific attacks to worry about, watch out for its ice blast attack. It will create a damaging whirlwind of cold and if you get hit directly you'll be encased in snow and unable to attack. You can count on Barrioth capitalizing on that.
Diablos
Type: Flying Wyvern
Threat: 5
Weak Point: Stomach
Elemental Weakness: Ice
Item Drop
From Body: Diablos Shell, Diablos Fang, Diablos Ridge, (High Rank Only) Diablos Carapace, Diablos Ridge+
From Tail: Diablos Shell, Diablos Tailcase, Diablos Marrow, (High Rank Only) Diablos Carapace, Diablos Marrow, Wyvern Stone
Quest Reward: Diablos Fang, Diablos Shell, Diablos Tailcase, Diablos Ridge, Diablos Marrow, (High Rank Only) Diablos Ridge+, Diablos Carapace, Wyvern Stone
Special Reward: (Destroy Both Horns) Twisted Horn, Majestic Horn, (High Rank Only) Stout Horn
Glitter Drops: Wyvern Tear, Diablos Ridge
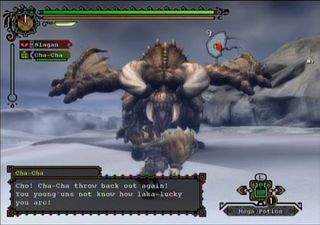
Diablos is a powerful creature if you don't know how to do deal with him. A lot of its attacks can be really hard to dodge and it has the annoying habit of burrowing underground, both for protection and to attack you from below. The best way to deal with these is simply to learn how to time your dodges. Granted, that kind of sucks, but them be the breaks. Okay, maybe not entirely. There are other things you can do to make this fight a bit easier.
For starters, go for the tail. Diablos' tail whips can make getting in close really difficult, and if you can manage to remove it from the equation the battle will become a lot easier. If possible, bring as many sonic bombs with you as you can. When Diablos burrows underground, use one and he'll be drawn back up and temporarily immobilized. This time should of course, be used to pound the jerk into oblivion. Aside from that, go for its stomach. Its head may look big and juicy but it is actually its least vulnerable point. Furthermore, when you're under its legs you can actually count yourself safe from some of its attacks.
Agnaktor
Type: Leviathan
Threat: 5
Weak Point: Chest
Elemental Weakness: Water
Item Drop
From Body: Agnaktor Shell, Agnaktor Hide, Agnaktor Claw, Agnaktor Scale, Firestone, (High Rank Only) Agnaktor Hide+, Agnaktor Claw+, Agnaktor Carapace, Firecell Stone
From Tail: Agnaktor Fin, Agnaktor Tail, Firestone, (High Rank Only) Agnaktor Fin+, Firecell Stone
Quest Reward: Agnaktor Hide, Agnaktor Claw, Agnaktor Scale, Agnaktor Fin, Firestone, (High Rank Only)Agnaktor Hide+, Agnaktor Claw+, Agnaktor Fin+, Firecell Stone, Wyvern Stone
Special Reward: (Destroy Face) Agnaktor Beak, Agnaktor Shell, Monster Bone L, (High Rank Only) Agnaktor Carapace, Wyvern Stone, (Destroy Claws) Agnaktor Scale, Agnaktor Claws, Firestone, (High Rank Only) Firecell Stone, (Destroy Shoulder) Agnaktor Scale, Agnaktor Hide, Firestone, (High Rank Only) Agnaktor Hide+, Firecell Stone, (Destroy Fin) Agnaktor Hide, Agnaktor Scale, Agnaktor Fin (High Rank Only) Agnaktor Fin+, Wyvern Stone
Glitter Drop: Agnaktor Scale, Wyvern Tear, Firestone
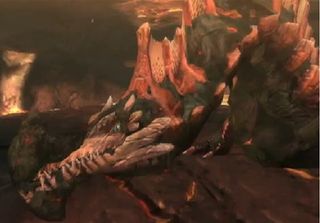
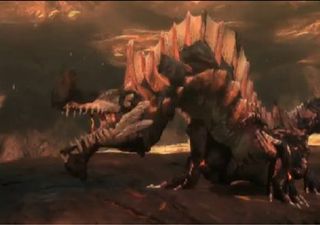
Agnaktor is a difficult but somewhat standard beast to bring down. Little of its move set is unique, so chances are you'll already know how to deal with a lot of what it can do. That said, there are some things to know before taking on Agnaktor. Foremost is the fact that much of Agnaktor's body is virtually impregnable when you first meet it. With the exception of its head and stomach its body is coated in hardened magma. There are ways to circumvent this. Every time Agnaktor touches lava, this coat will soften. Also, the extra armor can chipped away with time. Keep hammering at it and you'll expose more parts of its body to damage. Once you this armor, it cannot be replaced.
Beyond this the biggest thing to note is its flame beam attack. In addition to eating a chunk of your health it will set you on fire and continue to cause damage. The key to avoiding it is to no when its coming, which is pretty easy. Before performing this attack Agnaktor will click its fangs to create a spark. If you see this, head for the hills, figuratively speaking. Also, be sure to bring a supply of sonic bombs with you. Agnaktor likes to burrow in a manner similar to Diablos, and if you use a sonic bomb while it's in the process, it will leave Agnaktor stunned and vulnerable.
